EDA实验--流程控制语句
EDA交通灯实验程序verilog语言

CLK 同步时钟EN 使能信号LAMPA 0~3分别控制A方向的左拐、绿、黄和红灯LAMPB 0~3分别控制B方向的左拐、绿、黄和红灯ACOUNT 用于A方向的时间显示,驱动两个数码管BCOUNT 用于B方向的时间显示*/module traffic( CLK, EN, LAMPA, LAMPB, ACOUNT, BCOUNT );output[7:0] ACOUNT, BCOUNT;output[3:0] LAMPA, LAMPB;input CLK, EN;reg[3:0] LAMPA, LAMPB;reg[7:0] numa, numb; // 剩余时间reg tempa, tempb; // 切换状态reg[2:0] counta, countb; // 状态量reg[7:0] ared, ayellow, agreen, aleft, // 保持时间bred, byellow, bgreen, bleft;assign ACOUNT = numa;assign BCOUNT = numb;/**************** 设置灯的计数初值****************/ always @( EN )beginif( !EN )beginared <= 8'h55; ayellow <= 8'h5;agreen <= 8'h40; aleft <= 8'h15;bred <= 8'h65; byellow <= 8'h5;bgreen <= 8'h30; bleft <= 8'h15;endendalways @( posedge CLK )beginif( EN ) // 正常情况beginif( !tempa ) // 切换状态begintempa <= 1;case( counta ) // 控制亮灯的顺序0: begin numa<=agreen; LAMPA<=2; counta<=1; end1: begin numa<=ayellow; LAMPA<=4; counta<=2; end2: begin numa<=aleft; LAMPA<=1; counta<=3; end3: begin numa<=ayellow; LAMPA<=4; counta<=4; end4: begin numa<=ared; LAMPA<=8; counta<=0; enddefault: LAMPA <= 8; // 红灯亮endelse // 倒计时beginif( numa > 1 )if( numa[3:0] == 0 )beginnuma[3:0] <= 4'b1001;numa[7:4] <= numa[7:4] - 1;endelse numa[3:0] <= numa[3:0] - 1;if( numa == 2 ) tempa <= 0;endendelse // 返回初态beginLAMPA <= 4'b1000; counta <= 0; tempa <= 0;endendalways @( posedge CLK )beginif( EN )beginif( !tempb )begintempb <= 1;case( countb ) // 控制亮灯的顺序0: begin numb<=bred; LAMPB<=8; countb<=1; end1: begin numb<=bgreen; LAMPB<=2; countb<=2; end2: begin numb<=byellow; LAMPB<=4; countb<=3; end3: begin numb<=bleft; LAMPB<=1; countb<=4; end4: begin numb<=byellow; LAMPB<=4; countb<=0; enddefault: LAMPB <= 8;endcaseendelsebegin // 倒计时if( numb > 1 )if( numb[3:0] == 0 )beginnumb[3:0] <= 4'b1001;numb[7:4] <= numb[7:4] - 1;endelse numb[3:0] <= numb[3:0] - 1;if( numb == 2 ) tempb <= 0;endendelsebeginLAMPB <= 4'b1000; countb <= 0; tempb <= 0;endend。
eda设计流程详解

eda设计流程详解英文回答:EDA (Exploratory Data Analysis) is a crucial step in the data analysis process. It involves examining and visualizing the data to gain insights and identify patterns or relationships. EDA helps in understanding the data and making informed decisions before applying any statistical models or machine learning algorithms.The EDA process typically involves the following steps:1. Data collection: This step involves gathering the required data from various sources. It could be in the form of structured data from databases or unstructured data from text documents or web scraping.2. Data cleaning: In this step, the collected data is cleaned and preprocessed. This includes handling missing values, removing outliers, and transforming variables ifnecessary. Data cleaning ensures that the data is in a suitable format for analysis.3. Data visualization: Visualization is a powerful tool for understanding the data. It helps in identifying patterns, trends, and outliers. Various charts, graphs, and plots can be used to visualize the data, such as histograms, scatter plots, and box plots.For example, let's say I have collected data on the sales of a retail store. I can create a histogram to visualize the distribution of sales across different products. This can help me identify the most popular products and any potential outliers.4. Data exploration: This step involves exploring the data further by calculating summary statistics, such as mean, median, and standard deviation. It also includes identifying correlations between variables using techniques like correlation matrices or scatter plots.Continuing with the previous example, I can calculatethe average sales for each product category and compare them. This can help me identify any significant differences in sales between different categories.5. Hypothesis testing: In this step, statistical tests are performed to test hypotheses or assumptions about the data. This helps in making data-driven decisions and validating any patterns or relationships observed during the exploration phase.For instance, I can perform a t-test to determine if there is a significant difference in sales between two different time periods. This can help me understand if there has been any change in sales over time.6. Conclusion and insights: Finally, the EDA process concludes with summarizing the findings and drawing meaningful insights from the data. These insights can be used to guide further analysis or to make informed business decisions.中文回答:EDA(探索性数据分析)是数据分析过程中至关重要的一步。
EDA实验内容及要求

EDA 实验题目实验一 MAXPLUS II软件开发环境的使用实验目的1.熟悉MAXPLUSII软件开发环境。
2.掌握EDA开发工具中数字逻辑电路的设计流程和基本步骤。
3.熟练掌握图形编辑器的使用方法。
4.熟练掌握一个设计的编译综合环节、器件设定与管脚绑定环节以及波形仿真环节。
实验内容与要求1.在图形编辑器中采用LPM图元设计一个4-16译码器,以decoder16.gdf命名保存。
将器件设定为EPM7128LC84-6。
输入D、C、B、A绑定到10,11,12,13管脚,输出Y0….Y15按顺序绑定到60至75管脚。
进行波形仿真,验证功能正确。
分析节点A到节点y15的最短延时。
(5分)2.在图形编辑器中,采用基本门电路设计一个一位的全加器,以FADDER.gdf命名保存。
器件设定为EPM7128LC84-6。
输入Ain、Bin、Cin(进位输入)分别绑定到Pin21、22、23,输出So、Co分别绑定到Pin41、42。
进行波形仿真验证其功能正确。
分析输入节点到输出节点的最短时间。
(5分)实验二图形编辑器与波形仿真器的综合使用(2)实验目的1.进一步熟悉MAXPLUSII软件开发环境与数字逻辑电路的设计流程和基本步骤。
2.掌握图形编辑器中总线的绘制与节点命名的方法,学习文本编辑器的使用。
3.熟练掌握输入时序的设计与编辑,学会通过波形仿真工具修改设计错误的技巧。
实验内容与要求1.在图形编辑器中设计一个3位的十进制加法计数器,以xxxcnt3.gdf命名保存(‘xxx’为您的姓名拼音首字母)。
器件设定为EPM7128LC84-6。
要求能够从0计数到999。
从999归零时产生一个高电平的报警信号。
进行波形仿真,验证功能正确。
分析此电路的最高计数频率。
(5分)2.修改这个计数器的归零值,使其计数到119就归零,增加异步清零功能,加法计数/减法计数控制功能。
(3分)3.在文本编辑器中使用VHDL语言设计一个D触发器,具有反向输出端。
EAD课程-第5章VHDL顺序语句
y ( 2 TO 3 ) <= x ( 1 TO 2 ); --位置关联赋值,x的部分
位赋值y的部分位
EDA技术
8
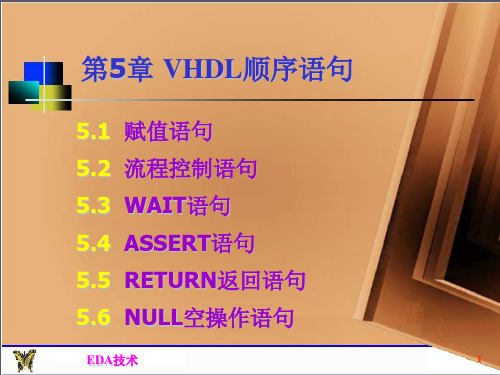
第5章 VHDL顺序语句
5.2 流程控制语句
流程控制语句通过条件控制来决定是否执行一 条或几条语句,或重复执行一条或几条语句,或跳 过一条或几条语句。
流程控制语句共有五种: ■ IF语句 ■ CASE语句
第5章 VHDL顺序语句
5.1 赋值语句 5.2 流程控制语句 5.3 WAIT语句 5.4 ASSERT语句 5.5 RETURN返回语句 5.6 NULL空操作语句
EDA技术
1
第5章 VHDL顺序语句
VHDL语言的描述语句
VHDL语言的描述语句主要用来描述系统的硬件 结构、行为功能及信号之间的逻辑关系。分为顺序 语句和并行语句两大类。 顺序语句是按照语句书写的前后顺序自上而下、 一条接一条地按顺序执行,用来定义进程、过程和 函数的行为。 并行语句又称并发语句,出现在结构体中,各 语句并行(同步)执行,与书写的顺序无关。 有些语句既可作为并行语句又可作为顺序语句, 如赋值语句、过程调用语句和断言语句。
若循环控制条件为“假”,则结束循环。
EDA技术
25
第5章 VHDL顺序语句
【例4.6.5】用WHILE_LOOP语句描述八位奇偶校验器。
ARCHITECTURE example5 OF loop2 IS BEGIN PROCESS ( X ) VARIABLE temp: STD_LOGIC; VARIABLE n: INTEGER; BEGIN temp :=‘0’; n := 0; WHILE n < 8 LOOP temp := temp XOR X( n ); n := n+1; END LOOP; Y<= temp; END PROCESS; END example5;
EDA实践安全操作规程

EDA实践安全操作规程
(一)启动计算机前,检查计算机电源、显示器和实验箱等外部设备是否连接妥当。
(二)计算机启动后,首先要仔细阅读注意事项,严格按规定步骤操作。
(三)使用计算机时,应熟悉操作系统、教学软件,做到操作准确。
(四)使用实验箱之前,应先检查实验箱电源是否连接,并熟悉实验箱各功能模块。
(五)在进行实验连线时,一定在实验箱无电的情况下进行,随时检查导线是否正确连接,是否存在短路现象,以免造成实验箱损坏。
(六)拔插导线时,应捏紧导线护套部,严禁拉拽导线线体。
(七)下载实验数据时,注意检查数据线是否正确连接,实验箱是否正确设置。
(八)在进行综合性设计时,注意按模块设计,严格区分顶层和底层模块,严禁模块间重名。
(九)实验结束后,先将实验箱断电,然后逐一拆除导线,在捆绑好后摆放到相应位置。
EDA实验quartus操作流程

EDA实验quartus操作流程3.1 应⽤QuartusⅡ完成LED的驱动⼀、实验⽬的通过实验,是同学们能够逐步了解、熟悉和掌握FPGA开发软件QuartusⅡ的使⽤⽅法及VHDL语⾔的编程⽅法。
⼆、实验内容SmartSOPC核⼼上有8个发光⼆极管LED1-LED8.在QuickSOPC核⼼板上LED1-LED8分别与FPGA芯⽚的第50、53-55、176和第47-49引脚相连。
本实验的内容是建⽴可⽤控制LED亮/灭的简单硬件电路,要求点亮SmartSOPC实验箱上的4个发光⼆极管(LED1、LED3、LED5和LED7)。
具体包括:(1)使⽤QuartusⅡ建⽴⼯程;(2)QuartusⅡ⼯程设计;(3)设置编译选项并编译硬件系统;(4)下载硬件设计到⽬标FPGA;(5)观察LED状态。
三、实验原理FPGA器件同单⽚机⼀样,为⽤户提供了许多灵活独⽴的输⼊/输出I/O⼝。
FPGA每个I/O⼝可以配置为输⼊、输出、双向I/O、集电极开路和三态门等各种组态。
做输出⼝时,FPGA的I/O⼝可以吸收最⼤为24mA的电流,可以直接驱动发光⼆极管LED等器件。
所以只要正确分配并锁定引脚后,在相应的引脚上输出低电平“0”,就可实现点亮该发光⼆极管的功能。
四、实验步奏1、使⽤QuartusⅡ建⽴⼯程(1)打开QuartusⅡ软件并建⽴⼯程①打开QuartusⅡ软件,软件界⾯如图1.1所⽰。
图 1.1②选择File—New project wizard来新建⼀项⼯程(注意是新建⼯程,不是New),如图1.2。
图1.2③任何⼀项设计都是⼀项⼯程,必须⾸先为此⼯程建⽴⼀个放置与此⼯程相关的所有⽂件的⽂件夹,此⽂件夹将被QuartusⅡ默认为⼯作库。
⼀般来说,不同的设计项⽬最好放在不同的⽂件夹中,⽽同⼀⼯程的所有⽂件都必须放在同⼀⽂件夹中。
不要将⽂件夹设在计算机已有的安装⽬录中,更不要将⼯程⽂件直接放在安装⽬录中。
简述eda的设计流程及步骤
简述eda的设计流程及步骤下载温馨提示:该文档是我店铺精心编制而成,希望大家下载以后,能够帮助大家解决实际的问题。
文档下载后可定制随意修改,请根据实际需要进行相应的调整和使用,谢谢!并且,本店铺为大家提供各种各样类型的实用资料,如教育随笔、日记赏析、句子摘抄、古诗大全、经典美文、话题作文、工作总结、词语解析、文案摘录、其他资料等等,如想了解不同资料格式和写法,敬请关注!Download tips: This document is carefully compiled by theeditor. I hope that after you download them,they can help yousolve practical problems. The document can be customized andmodified after downloading,please adjust and use it according toactual needs, thank you!In addition, our shop provides you with various types ofpractical materials,such as educational essays, diaryappreciation,sentence excerpts,ancient poems,classic articles,topic composition,work summary,word parsing,copy excerpts,other materials and so on,want to know different data formats andwriting methods,please pay attention!EDA(电子设计自动化)的设计流程通常包括以下步骤:1. 系统设计:确定设计目标和规格。
EDA技术实验操作步骤说明
Max+plus II 开发软件实验操作步骤说明:开发软件最好安装在C盘下,有些系统中将开发软件装在其他盘下不能正常工作。
1、新建设计文件夹:在Max+plus II安装路径下(即安装目录下)新建设计文件夹,用于存放设计文件,文件夹命名禁止使用中文。
2、打开软件:开始-》程序-》Max+plus II 10.2 baseline3、新建设计文件:(1)新建HDL输入文件file->new->text editor file(2)新建原理图输入文件file->new->graphic editor file4、输入设计源文件(1)文本文件中输入VHDL源程序:输入程序代码->保存文件到已建好的设计文件夹中注意:输入文本及符号时必须为英文输入状态注意:文件名必须与实体名(entity 后的标识符)一致,文件后缀为VHD(2)图形文件中输入电路设计原理图:(i)在原理图中调入库元件:在原理图输入界面下,单击右键,弹出菜单中选enter->symbol,弹出元件库对话框。
(ii)选择对应库(prim:基本逻辑元件库、mf:宏功能元件库、Mega_Lpm:参数可设置兆功能元件库)打开,选择所需库元件(注意输入输出信号需对应接输入输出引脚),点击ok放入原理图编辑区(iii)连接所有内部导线,双击输入输出引脚名,将所有输入输出端口信号命名(iv)保存文件到已建好的设计文件夹中注意:原理图输入文件名无特别要求,文件后缀为gdf5、将设计项目设置成工程文件(PROJECT):file->project->set project to current file6、选择目标器件:assign->device->选择与实验箱上下载板上同型号的器件。
实验箱上一般为acex1k系列中的ep1k30qc208-3 器件说明:如不作编程文件下载,此不可跳过7、调用编译器编译:Max+plus II->compiler->start说明:如编译有错误,则编译会终止并弹出编译出错信息提示说明:双击错误提示或单击提示后用locate在源文件中定位错误->修改错误->重新编译直到排除所有错误。
eda设计流程详解
eda设计流程详解英文回答:EDA (Exploratory Data Analysis) is a crucial step inthe data analysis process. It involves examining and analyzing data to gain insights, discover patterns, and identify outliers or missing values. In this answer, I will explain the EDA design process in detail.1. Data Collection: The first step in EDA is to collect the relevant data. This can be done through various sources such as surveys, experiments, or existing databases. For example, if I am analyzing customer satisfaction for a product, I might collect data through customer feedback surveys.2. Data Cleaning: Once the data is collected, it needsto be cleaned to ensure its quality and reliability. This involves removing any duplicates, correcting errors, handling missing values, and transforming data if necessary.For instance, if there are missing values in a dataset, I might choose to impute them with the mean or median values.3. Data Exploration: After cleaning the data, the next step is to explore it. This involves summarizing the data using descriptive statistics, visualizing the data through graphs or plots, and identifying any patterns or trends. For example, I might calculate the mean, median, and standard deviation of a numerical variable, and create a histogram or scatter plot to visualize the distribution.4. Feature Engineering: In this step, we create new features or modify existing ones to improve the performance of our models. This can include transforming variables, creating interaction terms, or encoding categorical variables. For instance, if I have a date variable, I might extract the day of the week or month as separate features.5. Statistical Analysis: EDA also involves conducting statistical tests to validate our findings or make inferences about the data. This can include hypothesis testing, correlation analysis, or regression analysis. Forexample, I might perform a t-test to compare the means of two groups or calculate the correlation coefficient between two variables.6. Outlier Detection: Identifying and handling outliers is an important part of EDA. Outliers can significantly impact our analysis and models, so it's crucial to detect and handle them appropriately. This can be done through various methods such as box plots, z-scores, or clustering algorithms. For instance, I might use a box plot toidentify any extreme values in a dataset.7. Data Visualization: Finally, EDA involves presenting our findings and insights through visualizations. This can include creating interactive dashboards, infographics, or reports. Visualizations help us communicate complex information in a more understandable and engaging way. For example, I might create a bar chart to compare the sales performance of different products.中文回答:EDA(探索性数据分析)是数据分析过程中至关重要的一步。
EDA实验程序
library ieee;
use ieee.std_logic_1164.all;
entity detector is
port(clk,d:in std_logic;
y:out std_logic);
end detector;
architecture one of detecto';
else
clk_10Hz<='1';
end if;
end if;
end process;
end behave;
BCD码译码器
library ieee;
ledag : out std_logic_vector(6 downto 0)
);
end deled;
architecture display of deled is
begin
process(d)
begin
case d is
begin
process(clk,rst)
begin
if rst='1' then current_state<=s0;
elsif clk'event and clk='1' then
current_state<=next_state;
when "1000"=> ledag <="1111111";
when "1001"=> ledag <="1101111";
when "1010"=> ledag <="1110111";
- 1、下载文档前请自行甄别文档内容的完整性,平台不提供额外的编辑、内容补充、找答案等附加服务。
- 2、"仅部分预览"的文档,不可在线预览部分如存在完整性等问题,可反馈申请退款(可完整预览的文档不适用该条件!)。
- 3、如文档侵犯您的权益,请联系客服反馈,我们会尽快为您处理(人工客服工作时间:9:00-18:30)。
实验二流程控制语句(if-else)验证试验一、实验目的:
熟悉Quartus软件的基本操作,掌握用Quartus软件验证VHDL语言。
二、实验内容:
给出的参考代码不是完整代码,根据实际情况补充完整代码,综合代码,自己设计仿真文件,来验证参考代码最后一个else的含义。
三、实验原理:
If-else可以允许在一个语句中出现多重条件,每一个“if”语句都必须有一个对应的“end if”语句。
“if”语句可嵌套使用,即在一个if语句中可再调用另一个“if”语句。
四、实验步骤:
1、在Quartus中输入如下程序:
library ieee;
use ieee.std_logic_1164.all;
entity lbz2 is
port(n : in std_logic;
m : in std_logic_vector(7 downto 0);
a : out std_logic_vector(2 downto 0);
d : out std_logic);
end;
architecture behavior of lbz2 is
begin
process(n,m)
begin
if n='1' then
if (m(7)='1') then
a<="111";d<='0';
elsif (m(6)='1') then
a<="110";d<='0';
elsif (m(5)='1') then a<="101";d<='0';
elsif (m(4)='1') then a<="100";d<='0';
elsif (m(3)='1') then a<="011";d<='0';
elsif (m(2)='1') then a<="010";d<='0';
elsif (m(1)='1')then a<="001";d<='0';
elsif (m(0)='1') then a<="000";d<='0';
else
a<="000";d<='1';
end if;
end if;
end process;
end;
调试程序如下图所示:
如图可以得出程序调试过程中午错误,所以根据调试程序生成如下综合电路图:。