IBM AIX6.1操作系统安装指导
IBM_P550_通过串口安装_AIX_6.1

IBM P550 通过串口安装AIX 6.1从兴电子开发二零一一年十二月目录1操作背景 (2)2注意事项 (2)3操作步骤 (2)1操作背景部分IBM小型机需要使用串口安装AIX系统。
2注意事项自检如果卡在CA00E1DC代码,可尝试接入IBM的键盘鼠标。
3操作步骤1.机器上电,然后连接串口线到笔记本,用系统自带终端建立串口连接。
具体串口设置如下2.建立串口连接后回车进入主菜单。
默认账号密码均为:admin。
选择System Power Control Menu,接着选择Power-On System,确认后P550自动启动进入硬件自检。
3.自检通过后会出现如下界面,按1,进入SMS菜单。
4.输入系统密码,默认admin5.进入SMS后,选择1,进入语言选择界面,可选择中文语言6.转换成中文界面后,选择5,进入引导选项7.选择18. 选择启动设备,DVD安装选择39.选择介质类型,不清楚可选610.光驱启动选111.以正常方式引导,选212、退出SMS菜单,服务器从光驱启动13.光盘启动,开始加载设备14、按1按Enter,这里不会有回显,按了1,屏幕上也不会有字符15、安装界面语言,选116、第一项是采用默认设置安装,一般选第2项,手动设置安装配置。
17.手动配置界面几个菜单分别为1)安装方式及位置2)设置系统语言环境3)配置安全选项4)软件包安装最后的0选项为开始安装选项第2.3选项一般采用默认设置,选择1进入安装方式及位置配置18.先选择安装方式,这里选1,全新安装19、选择安装位置,这里装到hdisk0,先选2,最后按0继续20、设置完安装位置后又回到[17]的界面,选4可以安装一些其它的软件21.如图形界面,JFS2支持等可以默认全选22、选择软件后回到[17]步菜单选0确认安装23、系统开始安装,中途需要换碟,最后系统会自动重启。
23、重启后进入终端设置界面,一般选vt10024.进入安装助手,可设置系统时间等,选择Tasks Completed –Exit to Login退出安装助手25.进入登陆界面,安装完成。
IBM小型机-AIX6.1系统安装教程
IBM⼩型机-AIX6.1系统安装教程AIX6.1系统安装教程由于⼯作原因,公司让我帮忙部署AIX⼩型机的系统,在各处找了很多教程,也请教了⼤佬协助(感谢⼤佬的帮助),下⾯以图⽂的形式总结了AIX 6.1系统的安装过程。
准备⼯作硬件准备:安装光盘,rj45转usb串⼝线(可以购买绿联转换线),笔记本,远程连接⼯具软件、串⼝驱动安装包环境准备:1、在笔记本安装串⼝驱动,安装成功后,在计算机管理(右键桌⾯计算机 -> 管理 ->设备管理器)中可以看到串⼝驱动设备。
2、将串⼝线的rj45⽹⼝插⼊⼩型机的”S1”⽹⼝上,如下图。
3、将串⼝线的usb⼝插⼊到笔记本中。
4、打开远程连接⼯具,新建连接;配置如下:终端:Serial端⼝:COM 5(在计算机管理看到的端⼝号)波特率:19200流控:RTS/CTS安装教程1、连接到IBM设备成功后(先插串⼝线再给设备插⼊电源),进⼊登录页⾯(如下图),输⼊账号密码;默认账号密码:admin admin2、登录成功后(如下图),输⼊1,点击Enter回车;3、下图中,输⼊1,点击Enter回车;4、下图中,输⼊6(power on),点击Enter回车;5、等待⼏秒后,出现提⽰(如下图),点击Enter;然后等待系统开机(会听到芜湖起飞的声⾳);系统开机后需要等待⼏分钟进⾏系统⾃检。
6、出现下图页⾯,在出现Speaker之前,按数字键5;(可以多点击⼏次)等待⼏分钟;注:这⾥很多⼈会因为没有在出现Speaker之前按数字键,会导致不会出现第七步骤,这⾥可以耐⼼点多尝试⼏次。
7、出现下图,表⽰服务器启动成功,按数字键2,然后Enter回车;等待⼏分钟;8、下图输⼊密码:admin,然后Enter回车;等待⼏分钟;9、下图按1,按Enter回车,等待1分钟左右;10、下图按1,按Enter回车,等待1分钟左右;11、下图按2,按Enter回车,等待1分钟左右;12、如下图,直接按Enter回车;13、下图按Enter回车,开始安装系统,需要等待2⼩时左右;14、出现下图,表⽰服务器正在安装系统中;15、系统安装结束后会⾃动重启,进⼊下图页⾯。
IBM_WAS_for_AIX_安装文档
1WebSphere Application Server for AIX安装部署本章主要介绍WebSphere Application Server( 简称WAS) 6.1 在AIX5.3上的安装过程。
1.1安装先决条件1.1.1操作系统要求WAS 6.1 for Aix 安装版适用于以下操作系统版本:⏹AIX V5.2 with Maintenance Level 3⏹AIX V5.3 with Maintenance Level 21.2IBM WebSphere Application Server安装指南1.2.1安装前准备软件将Was6.1安装软件以FTP的方式上传到AIX服务器上。
1.2.2启动安装程序通过esbwas用户以XWindows模式登录AIX服务器,进入安装目录下,执行命令:./install执行命令的输入,如下图所示:⏹安装程序启动后,显示界面如下图所示:⏹单击[Next]按钮,进入许可证协议界面:选中[accept]单选钮,单击[Next]按钮,进入系统需求检查界面,安装程序将检查aix版本是否支持所安装的was;此处提示所安装service packs 需要5300-04-01版本,系统aix版本已经升级到5300-06-07,所以忽略此提示,单击[Next]按钮⏹在本界面,选择是否安装was事例程序;单击[Next]按钮,进入指定安装目录界面:⏹在本界面,输入was安装的目录,建议将目录更改为/esbwas/WebSphere/AppServer目录,单击[Next]按钮⏹在本界面,指定在安装过程中创建概要文件的类型,这里我们选择创建[Application Server],单击[Next]按钮,进入后台管理安全设置界面⏹在本界面中,输入username以及所对应的密码等信息,这个用户名和密码是用来从后台登陆was服务器并对服务器进行管理时使用,单击[Next]按钮,进入安装信息汇总界面:认无误后,,单击[Next]按钮,进入安装程序复制界面⏹在本界面,系统开始安装,显示安装进度界面:⏹在安装完成后,显示界面如下:⏹单击[Finish]按钮,完成安装。
IBM_AIX5.3_6.1操作系统Initiator_软件安装和配置指导书

AIX 5.3/6.1操作系统Initiator软件安装和配置指导书1 安装环境:1.1 应用系统信息操作系统版本:IBM AIX 5.3(补丁级别:5300-02)内核版本:Initiator版本:AIX iSCSI SW (Ethernet SAN) Initiator for AIX 5.3.0.20操作系统版本:IBM AIX 6.1(补丁级别:6100-00-01-0748)内核版本:Initiator版本:AIX iSCSI SW (Ethernet SAN) Initiator for AIX 6.1.0.02 Initiator安装过程2.1 软件安装AIX 5.3/6.1 默认安装iscsi initiator软件。
如下命令确认系统是否安装相应软件包:AIX 5.3AIX 6.1也可执行下列命令查看,显示Available即为已安装iscsi软件。
说明:●如果系统没有安装iSCSI HBA卡,则软件iSCSI initiator对应为iscsi0,否则则往后递推:如果安装2块iSCSI HBA卡,则HBA对应为iscsi0和iscsi1,软件iSCSI initiator对应为iscsi2。
3 软件配置过程3.1 配置initiator名称(1) step1(进入配置界面)(2) step2(选择适配器)执行smit iscsi之后,会进入如下界面,选择“iSCSI Protocol Device”(3) step3(选择适配器)确定后会进入如下界面,选择“Change / Show Characteristics of an iSCSI Protocol Device”(4) step4(选择适配器)确定之后会进入如下界面,如果没有安装HBA卡的话iscsi software intiator应该对应为iscsi0。
本系统安装了2块iSCSI HBA卡(对应为iscsi0和iscsi1),所以iscsisoftware intiator对应变为iscsi2。
IBM_AIX6操作系统部署方案设计和安装配置指南

信息化标准体系文档AIX6.1操作系统部署方案设计和安装配置指南(V1.1)北京数据中心开放系统平台管理部2011-3修改记录人都无权复制或利用。
®Copy Right 2005 by China Construction Bank目录1前言 (7)1.1编写目的 (7)1.2预期读者 (7)2系统部署模式 (8)2.1单机模式 (8)2.2基于系统技术的HA方案; (8)2.2.1Active-Standby主备方式 (9)2.2.2Active-Active 互备方式 (9)2.2.3一备二模式 (9)2.2.4循环备份模式 (10)2.2.5Concurrent并行处理模式 (11)2.3基于软件技术的CLUSTER方案 (11)2.4基于网络硬件设备的负载均衡方案 (11)3应用部署建议 (12)4系统设计考虑的因素 (13)4.1用户 (13)4.2相关命名 (13)4.3存储/本地盘容量限制 (13)4.4系统网络 (14)4.5参数设置 (14)4.6软件安装 (14)4.7空间规划 (15)4.8安全加固 (15)4.9时钟同步 (16)5命名规范 (17)5.1资源分配原则 (17)5.1.1设备分档 (17)5.1.2资源调整 (17)5.2机器及机柜的编号规则 (17)5.2.1机柜的命名和编号规则 (17)5.3分区使用规范 (18)5.3.1分区的部署原则 (18)5.3.2分区资源的分配原则 (18)5.4主机命名原则 (20)5.5用户及用户组命名 (21)5.5.1目标 (21)5.5.2指导方针 (21)5.5.3用户组 (22)5.5.4用户 (23)5.5.5用户和组ID的分配情况 (24)5.6应用VG、LV和文件系统 (25)5.6.1应用vg (25)5.6.2应用lv的命名 (26)5.6.3LV条带化 (27)5.6.4应用文件系统的使用规范 (39)5.6.5patrol监控使用的文件系统 (40)5.7软件安装路径 (27)5.7.1数据库 (27)5.7.2中间件 (27)5.7.3应用系统 (28)5.8H ACMP命名 (28)5.8.1命名规则 (28)5.8.2配置举例 (28)6AIX设计规范 (30)6.1操作系统的内核 (30)6.2软件包安装规范 (30)6.2.1AIX系统需要安装的软件包 (30)6.2.2字符集安装要求 (31)6.3系统补丁的安装规范 (31)6.3.1操作系统 (31)6.3.2Adapter 微码 (32)6.4操作系统参数的设置 (32)6.4.1基本操作参数系统环境 (32)6.4.2VMM参数 (33)6.4.3IO参数 (35)6.4.4网络参数 (35)6.4.5Security参数 (36)6.4.6Hacmp相关参数 (36)6.5系统主要文件系统的使用方法 (37)6.5.1/tmp (38)6.5.2/var (38)6.5.3/usr (38)6.5.4/ (38)6.5.5/home (39)6.5.6AIX文件系统建议值 (39)6.6系统转储空间和交换区的设置 (40)6.6.1Dump设置 (40)6.6.2Pagingspace设置 (41)6.7用户权限设置 (41)6.7.1用户文件权限规范 (41)6.7.2用户资源限制 (41)6.8口令使用规范 (42)6.8.1口令设置规范 (42)6.8.2口令保存规范 (42)6.8.3用户口令限制 (43)6.8.4root用户口令使用规范 (43)6.9系统安全加固 (43)6.9.1系统安全加固的原则 (43)6.9.2AIX系统安全加固 (44)6.9.3 用户P ATH搜索路径 (44)6.10系统网络设置规范 (48)6.10.1IP地址申请 (48)6.10.2网卡速率的设置 (52)6.10.3网卡绑定的设置 (52)6.10.4系统静态路由的设置 (52)6.10.5网络端口的使用 (53)6.11系统监控 (53)6.12系统备份的相关规定 (54)6.13NFS的使用 (54)1前言1.1 编写目的为总结我中心开放系统建设的成果,加强开放系统平台建设工作的规范化管理,我们梳理了开放系统平台基础设施设计的相关文档,并进行了深化、细化,力求结合实际的设计、实施工作,对设计、实施起到规范、指导作用。
IBMAIX6.1上安装OpenSSH手记【转】

IBMAIX6.1上安装OpenSSH手记【转】环境:IBM AIX6.11、下载(可以直接从附件中下载):openssl IBM官方网站下载:https:///webapp/iwm/web/reg/download.do?source=aixbp&S_PKG=openssl&lang=en_US# openssh下载:/projects/openssh-aix以上两个软件包均为installp格式,只能在5.2/5.3/6.1上安装。
跟早期的aix版本(比如:4.3/5.1)的openssl为RPM格式不同。
2、安装步骤1)解压#cd /tmp/openssl#uncompress openssl.0.9.8.1103.tar.Z#tar xvf openssl.0.9.8.1103.tar#cd /tmp/openssh#gunzip openssh_5.2p1_aix61.tar.Z#tar xvf openssh_5.2p1_aix61.tar2)安装使用smitty install来安装。
(必须先安装openssl,然后再安装openssh)#cd /tmp/openssl#smitty install选择Install and Update Software->Install Software,出现操作界面。
注意下面的选项的就可以了。
INPUT device / directory for software [.] 输入当前目录.SOFTWARE to install [_all_latest] 按F4、/然后查找ssl匹配项,选中回车"ACCEPT new license agreements?" [yes] (Tab键)安装成功。
Command:OK(同样的方法安装ssh)安装完成后的sshd命令位于/usr/sbin目录,配置文件位于/etc/ssh目录。
AIX 6.1快速入门指南说明书
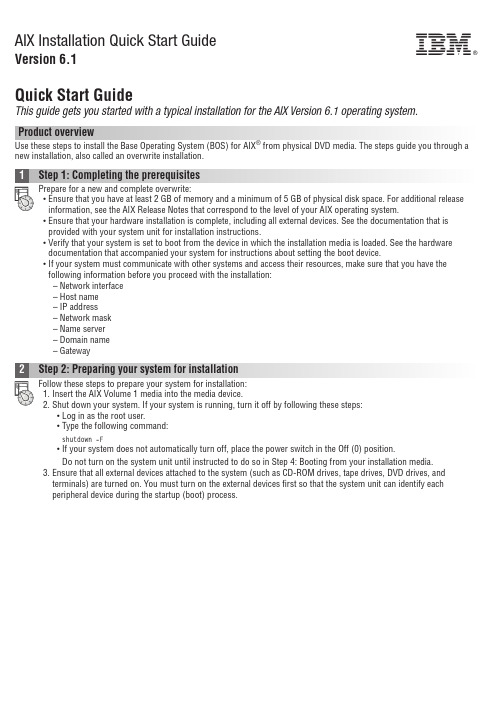
AIX Installation Quick Start GuideVersion 6.1Quick Start GuideThis guide gets you started with a typical installation for the AIX Version 6.1operating system.Product overviewUse these steps to install the Base Operating System (BOS)for AIX ®from physical DVD media.The steps guide you through a new installation,also called an overwrite installation.Prepare for a new and complete overwrite:v Ensure that you have at least 2GB of memory and a minimum of 5GB of physical disk space.For additional release information,see the AIX Release Notes that correspond to the level of your AIX operating system.v Ensure that your hardware installation is complete,including all external devices.See the documentation that is provided with your system unit for installation instructions.v Verify that your system is set to boot from the device in which the installation media is loaded.See the hardware documentation that accompanied your system for instructions about setting the boot device.v If your system must communicate with other systems and access their resources,make sure that you have the following information before you proceed with the installation:–Network interface–Host name–IP address–Network mask–Name server–Domain name–GatewayFollow these steps to prepare your system for installation:1.Insert the AIX Volume 1media into the media device.2.Shut down your system.If your system is running,turn it off by following these steps:v Log in as the root user.v Type the following command:shutdown -Fv If your system does not automatically turn off,place the power switch in the Off (0)position.Do not turn on the system unit until instructed to do so in Step 4:Booting from your installation media.3.Ensure that all external devices attached to the system (such as CD-ROM drives,tape drives,DVD drives,and terminals)are turned on.You must turn on the external devices first so that the system unit can identify each peripheral device during the startup (boot)process.If you have not set up your ASCII terminal,set the communications,keyboard,and display e the followingcriteria and your terminal reference documentation to set the communications,keyboard,and display options.The following settings are typical,but your terminal might have different option names and settings than these options: Communication Options:Options SettingsLine speed(baud rate)9600Word Length(bits per character)8Parity no(none)Number of stop bits1Interface RS-232C(or RS-422A)Line control IPRTSKeyboard and display options:Options SettingsScreen normalRow and Column24x80Scroll jumpAuto LF(line feed)offLine Wrap onForcing Insert line(or both)Tab fieldOperating Mode echoTurnaround Character CREnter returnReturn new lineNew Line CRSend pageInsert Character spaceFollow this procedure for booting from your installation media:1.Turn on the system unit power switch.2.When the system beeps twice,press5on your ASCII terminal.The word keyboard is shown when the beeps occur.3.If you have more than one console,each one might display a panel that directs you to press a key to identify yoursystem console.A different key is specified for each console that is displayed on this panel.If this panel opens,press the specified key only on the console that you want to use for the installation.(The system console is the keyboard and display device that is used for installation and system administration.)4.Select the language that you prefer to use during installation,and press Enter.1.Display the installation settings before you install the BOS,by typing2in the Choice field to select2Change/Show2.Verify the default installation settings from the Overwrite Installation and Settings panel.3.If the installation and system settings are correct,type0in the Choice field and press Enter.Confirm that theselections on the installation summary panel are correct,and press Enter to begin the BOS installation.The system automatically reboots after the system installation is complete.Go to Step9:Finishing the BOS installation.If your installation settings are not correct,or you want to change the installation settings,go to Step6.Changing the installation settings.To change the installation settings,complete the following steps:1.2.When the Change Method of Installation panel is displayed,type1New and Complete Overwrite Installation and pressEnter.When the Change Disk(s)Where You Want to Install panel is displayed,you can change the destination disk for the3.If the default settings shown are correct,type0in the Choice field and press Enter.To change the destination disk,complete the following steps:a.Type the number for each disk where you want to install the BOS in the Choice field and press Enter.Do not pressEnter a final time until you have finished selecting all disks.If you need to deselect a disk,type its number asecond time and press Enter.b.To finish selecting disks,type0in the Choice field and press Enter.The Installation and Settings panel is displayedwith the selected disks listed under System Settings.1.Type2(Primary Language Environment Settings)in the Choice field on the Installation and Settings panel.2.Select the appropriate set of cultural convention,language,and keyboard options.Most of the options are apredefined combination;however,you can define your own combination of options.3.To select a predefined Primary Language Environment,type the corresponding number in the Choice field and pressEnter.To configure your own Primary Language Environment,complete the following steps:a.Select More Choices.b.Page through the choices and select the Create Your Own Combination option.c.On the Set Primary Cultural Convention panel,type the corresponding number in the Choice field and press Enter.d.On the Set Primary Language panel,type the number in the Choice field that corresponds to your choice for theprimary language and press Enter.e.On the Set Keyboard panel,type the number in the Choice field that corresponds to the keyboard that is attachedto the system and press Enter.To verify your BOS installation settings:1.2.Press Enter to begin the BOS installation.installed.The system automatically reboots.The Installation Assistant guides you through the configuration tasks. Related informationFor more information,see the following resources:v For additional release information,see the AIX Release Notes that corresponds to your level of the AIX operatingsystem.v For late-breaking information,which might include information about the configuration process and installed software, see the readme files.v For more detailed installation notes,see the Installation and migration topic collection in the IBM®AIX6.1Information Center(/infocenter/aix/v6r1/index.jsp).AIX Version6.1Licensed Materials-Property of IBM.©Copyright IBM Corp.2012,ernment Users Restricted Rights-Use,duplication or disclosure restricted by GSA ADP Schedule Contract with IBM Corp.IBM,the IBM logo,and are trademarks or registered trademarks of International Business Machines Corp.,registered in many jurisdictions worldwide.Other product and service names might be trademarks of IBM or other companies.A current list of IBM trademarks is available on the web at“Copyright and trademark information”(/legal/copytrade.shtml).Document Number:SA23-2248-04Printed in USA。
IBM AIX 安装图解
IBM AIX 安装图解 一、准备工作 1、 检查显示器、键盘、鼠标十分雨主机正确连接。
【我这里是笔记本通过 console 连接主机的来安装的】 2、 把介质(操作系统光盘第一张)插入驱动器。
3、 打开外设及主机电源(先外设后主机) 二、AIX 系统的安装 1、 主机加点后,敲击键盘<F5>键,将从安装介质上引导; 2、 显示信息如下图,要求用户选择主控台。
键入[2]并回车, (注意:键入的”2”不回显)定义当前设备为主控台。
3、 屏幕上将不断显示一些信息,几分钟后出现画面,要求用户选择安装语言环境;如 下图: 键入[1]后回车,选择语言环境为 english。
4、 此后屏幕出现下图: 这是系统安装和维护的主菜单。
我们需要改变一些设置选项在进行基本操作系统的 安装: 5、 改变安装设置,在上面菜单中键入【2】并回车;如下图: 这是系统安装的默认设置,用户应根据需要进行改变。
与此同时,屏幕的右下角会出现如上的警告信息,此为提醒用户安装系统的后果将 破坏用户原有的硬盘上的数据。
6、 这里我们选择【3】对安装选项进行设置,因此键入【3】并回车,根据自己的环境 需求对其进行设置;如下图: 7、 安装选项设置完成后,键入【99】回到安装设置菜单;键入【0】开始安装;如下 图: 8、 确认安装概要,键入【1】后回车,开始安装;如下图: 9、 安装进程进行中;如下图: 10、安装光盘第 1 张安装完成,提示插入第 2 张安装光盘;如下图: 11、AIX 安装完毕;如下图: AIX 安装完成后系统自动重启,然后对其系统相关参数进行设置。
- 1、下载文档前请自行甄别文档内容的完整性,平台不提供额外的编辑、内容补充、找答案等附加服务。
- 2、"仅部分预览"的文档,不可在线预览部分如存在完整性等问题,可反馈申请退款(可完整预览的文档不适用该条件!)。
- 3、如文档侵犯您的权益,请联系客服反馈,我们会尽快为您处理(人工客服工作时间:9:00-18:30)。
AIX操作系统安装实施工艺指导(V1.1)修改记录目录1前言 (4)1.1编写目的 (4)1.2预期读者 (4)2硬件资源划分 (5)3AIX操作系统安装 (7)3.1通过光盘的全新安装 (7)3.1.1BOS基本的操作系统安装 (7)3.1.2安装扩展软件包 ........................................................................... 错误!未定义书签。
3.1.3打Fix packs补丁 (15)3.1.4验证软件安装 (16)3.1.5完成操作系统安装 (16)3.2通过MKSYSB磁带定制安装 (17)3.2.1设置启动顺序 (17)3.2.2选择install from a System Backup的安装方式 (20)3.2.3开始安装 (21)3.2.4安装完成后操作系统自动重启动 (22)4操作系统配置 (23)4.1设置主机名 (23)4.2配置IP地址 (24)4.3配置网络路由 (27)4.4设置系统时区及时间 (29)4.5参数设置 (31)4.6关闭不使用的系统服务 (32)4.7LVM管理 (33)1前言1.1编写目的1.2预期读者2硬件资源划分对于型号为p570、p590、p595的设备,需要划分分区或全分区使用时,需要考虑板卡冗余配置,因为如果rootvg的两块镜像磁盘连接在同一个SCSI背板上,背板或SCSI总线出故障时,rootvg镜像将失效,会影响整个系统运行。
为了避免硬件的单点故障,建议遵循以下原则进行板卡划分:1、rootvg的两块镜像硬盘,分布到不同背板的I/O插槽内2、光纤卡的两块HBA卡,分布到不同背板的I/O插槽内3、网卡的主、备卡,分布到不同背板的I/O插槽内p570,如下图,镜像的盘或卡应该分别纵向不同的Node上p59X,如下图,rootvg镜像的两块磁盘分别分布在P1、P2上,如红色填充的146G硬盘两块冗余的网卡5701、光纤卡280D,分布在P1/P2,如红色填充所示:3AIX操作系统安装本文档是针对AIX6.1操作系统编写的,介绍了两种安装方法,一种是通过光驱引导系统,执行通过光盘安装的全新安装方法;二是从磁带机引导系统执行通过mksysb备份带的恢复操作系统的安装方法。
3.1通过光盘全新安装3.1.1BOS基本的操作系统安装Step 1. 安装准备硬件需求Only Common Hardware Reference Platform (CHRP) machines are supported.To see if you have a CHRP machine, log into the machine as the root user, and run the following command:bootinfo –pPower7 服务器支持情况P780:∙AIX 6.1 with the 6100-04 Technology Level and Service Pack 3, or later∙AIX 6.1 with the 6100-03 Technology Level and Service Pack 5, or later, available June 25, 2010∙AIX 6.1 with the 6100-02 Technology Level and Service Pack 8, or later, available June 25, 2010P770:∙AIX 6.1 with the 6100-04 Technology Level and Service Pack 3, or later∙AIX 6.1 with the 6100-03 Technology Level and Service Pack 5, or later, available June 25, 2010∙AIX 6.1 with the 6100-02 Technology Level and Service Pack 8, or later, available June 25, 2010Power6 服务器支持情况P595:∙AIX 6.1 with the 6100-00 Technology Level and Service Pack 5, or later∙AIX 6.1 with the 6100-01 Technology Level, or laterP570:支持Power5 服务器支持情况支持Power4 服务器支持情况Required Levels of Hardware Management Console (HMC) and 微码版本主机微码版本要求Platform firmware version 3 or later.To determine your platform firmware level, type the following at the command prompt:lscfg -vp | grep -p PlatformThe last six digits of the ROM level represent the platform firmware date in the format YYMMDD.Firmware with dates between 020413 and 021024, or that has firmware level 2xYYMMDD, is considered Version 2.Firmware with dates between 021025 and 040602, or that has firmware level 3xYYMMDD, is considered Version 3。
HMC版本要求,HMC Release 3 Version 2.0 or later。
Step 2. 光盘启动1.放入操作系统介质光盘的第一张光盘到光驱中。
2.确认外围硬件设备连接好,已经加电, (such as CD-ROM drives, tape drives,DVD drives, and terminals) are turned on。
3.Power on 系统4.当系统 beeps twice, 按 F5 on the keyboard (or 5 on an ASCII terminal),系统会从默认的引导设备启动。
5.按F1 选择console(or 1 on an ASCII terminal) and press Enter。
6.按1选择安装语言为English。
7.选择第2项,修改安装设置,如下图Step 3. 安装选项设置1.In the Installation and Settings screen, verify the installationsettings are correct by checking the method of installation (new and complete overwrite), the disk or disks you want to install, the primary language environment settings, and the more options menu. If the default choices are correct, type 0 and press Enter to begin the BOS installation. The system automatically reboots after installation is complete. Go to step 4. Otherwise, go to sub-step 2.2.To change the System Settings, which includes the method ofinstallation and disk where you want to install, type 1 in the Choice field and press Enter.3.Type 1 for New and Complete Overwrite in the Choice field and pressEnter. The Change Disk(s) Where You Want to Install screen now displays.4.In the Change Disk(s) Where You Want to Install screen:a.Select hdisk0 by typing a 1 in the Choice field and press Enter.The disk will now be selected as indicated by >>>. To unselect thedestination disk, type the number again and press Enter.b.To finish selecting disks, type a 0 in the Choice field and pressEnter. The Installation and Settings screen displays with theselected disks listed under System Settings.5.Change the Primary Language Environment Settings to English (UnitedStates). Use the following steps to change the Cultural Convention, Language, and Keyboard to English.a.Type 2 in the Choice field on the Installation and Settings screento select the Primary Language Environment Settings option.b. Type the number corresponding to English (United States) as theCultural Convention in the Choice field and press Enter.b.Select the appropriate keyboard and language options.You do notneed to select the More Options selection, because you are usingthe default options in this scenario. For more information aboutthe installation options available in AIX 6.1 and greater, see BOSinstallation options.6.Verify that the selections are correct in the Overwrite InstallationSummary screen, as follows:Note: The default options change based on machine and console type.7.按回车键开始安装BOS操作系统. 安装完成后系统会自动重新启动。