easylabel软件使用说明书
easylabel 6多用户安装说明说明书

EASYLABEL® Multi-User Installation InstructionsIf you purchased the Multi-user license version of EASYLABEL 6, you should have received a DVD-ROM and a Multi-User WIBU-Key.WARNING: In order to use the EASYLABEL 6 Multi-User, clients MUST be running the Microsoft TCP/IP protocol. DO NOT attempt to install this software if the clients are using the Novell NetWare TCP/IP protocol. All computers used with the EASYLABEL Multi-User version (the WIBU-Key Server and all client machines) must have the Microsoft TCP/IP protocol installed and configured correctly. Microsoft TCP/IP is the protocol used by the license management software to communicate between the client machines and the WIBU-Key Server.The steps to install the EASYLABEL Multi-User software are as follows:NOTE: Do NOT install a USB Multi-User WIBU-Key until the AFTER the WIBU drivers are installed. Installing a USB WIBU-Key before the WIBU drivers are installed will cause the WIBU-Key to be added to Device Manager as an 'unsupported device' and the WIBU drivers will not be able to find the key.1.Select a computer that will be the WIBU-Key Server. This computer must berunning Windows XP or higher. Ensure the Date is correctly set on the potential server computer. In order to serve licenses to other computers on the network, the computer selected as the WIBU-Key Server must be running and have the WIBU-Key 'Network Server' application loaded. In general, you should select a computer that remains powered on.2.Install the WIBU-Key 'Network Server' application on the PC selected to bethe WIBU-Key Server. Run the WkRuntime.exe program from the 'WibuKey' folder on the DVD-ROM.3.Plug the Multi-User WIBU-Key into a parallel or USB port on the selectedcomputer. The WIBU-Key contains a code that defines the number of users allowed to run the EASYLABEL Multi-User application.4.Once the WIBU key server is installed it needs to be started whenever the PCis booted. A shortcut to the server is placed in the 'Start Up' program folder (Start/All Programs/Start Up), so you can reboot now, or you can start the server manually by selecting Start --> All Programs --> WIBU-KEY --> Network Server from the Start menu. Then right-click on the network server icon in the taskbar and choose “Start Server” from the context menu. The network server will then start automatically anytime the PC is booted.5.The next step is to install the client version of the EASYLABEL Multi-Usersoftware on the selected client computers. This can be installed on as many computers as needed, the WIBU-Key Server will make sure that the number of copies running does not exceed the licensed user count. If there are no more licenses available, the user will be notified, and EASYLABEL will notstart. For example, if you have a 5-user license, and EASYLABEL Multi-User is installed on 8 computers, only 5 of them can use the application at one time.If a user exits EASYLABEL Multi-User, then the license becomes available to another user.Additional Notes:•When a user starts the EASYLABEL Multi-User application, the WIBU-Key Server will "give" that copy a license to run. When the application exits, it "gives" the license back to the WIBU-Key Server. In the case where a client computer crashes, or the user powers off the computer without properly shutting down, the WIBU-Key Server recognizes this fact and will take back the license (after a timeout period, currently set to 5 minutes).•If for some reason, the WIBU-Key Server crashes, or the Multi-User key stops working; the client computers will recognize this and issue a warning message. There is a built in protection period (currently set to 7 days) where the clients will continue to run without contact with the WIBU-Key Server.This requires that the client computers not be shut down or powered off during the 7-day period. The message issued to the users indicates that they should contact their system administrator to correct the problem. If the problem is corrected and the WIBU-Key Server is restarted, then clients will continue to run normally. If for some reason, the WIBU-Key Server cannot be restarted within 7 days, then EASYLABEL will issue a warning and then exit (saving any work in the process). Again, once the problem is corrected and the WIBU-Key Server is restarted, all clients will operate normally and no more warnings will be issued.•The WIBU-Key 'Network Server' can be moved to another computer by simply stopping the application from running on the old computer and then installing it on the new computer.a.Remove the shortcut to the WIBU-Key Network Server applicationfrom the 'Start Up' program folder (Start/All Programs/Start Up) onthe 'old' computer if one is present.b.Right click on the network server icon in the taskbar and choose “StopServer”.c.To install the WIBU-Key Network Server application on the 'new'computer, simply follow the steps at the top of this document.d.Remember to move the Multi-User Key to the 'new' computer.•To uninstall the WIBU-Key drivers and the WIBU-Key 'Network Server' application, select Start -> Control Panel -> Programs -> Programs and Features”. Select the "WIBU-KEY Setup (WIBU-KEY Remove)" and then click the "Uninstall/Change" button.•If a Client is not able to find a license, select Start --> Control Panel --> Hardware. Double-click on the WIBU-Key Icon in Control Panel and then select the Network Tab.a.Verify that the value for WkLAN Port Address matches the value at theWIBU-Key Server. If it does not, change the "User Specific" dropdown to "Machine Specific" and enter the value the WIBU-Key Serverhas listed (the default is 22347). This port should be left open if thereis a firewall present such as the one included in Windows XP SP2.b.If you are crossing sub-nets verify with your network administratorthat UDP Packets can be passed on this port.c.There are 3 check boxes listed under 'WIBU-KEY Subsystems'. Theboxes marked "Local (Kernel)" and "WkLAN" should be checked.•If a Client periodically has problems getting a license or if it takes several attempts to get a license it is probably due to network latency. In these cases you should add the WIBU-Key Server to the WkLAN Server Search list.To do this select Start --> Control Panel --> Hardware. Double-click on the WIBU-Key Icon in Control Panel and then select the Network Tab. Under the WkLAN Server Search List at the bottom, try to browse to your server. If this fails to find your server, you may have to enter the server's Machine Name or Static IP Address in the lower entry and then click ADD to add it to your WkLAN Server Search List.•When printing on the WIBU-Key license server PC to the same parallel port the WIBU-Key is on it may be possible for clients (or the server) to report that they have trouble getting a license. This is usually caused by a significant, ongoing data flow out of the port such as when printing using $all or alphanumeric incrementation. It may be necessary in these cases to move the printer off the back of the WIBU-Key to another port. If this is not possible, a USB WIBU-Key should be used.。
亚威智能自动化仓库管理软件 V1.0 系统说明书

亚威智能自动化仓库管理软件V1.0系统说明书江苏亚威智能系统有限公司二零一九年三月地址:扬州市江都区黄海南路仙城工业园电话:*************联系人:黎兴宝电话:159****9124目录1简介 (3)1.1编写目的 (3)1.2项目背景 (3)1.3系统需求 (3)2安装说明 (5)2.1IIS的安装与Web配置 (5)2.1.1IIS的安装 (5)2.1.2WMS客户机网站的配置 (8)3系统操作说明 (11)3.1用户登录 (11)3.2系统主界面 (11)3.3功能模块操作说明 (12)3.3.1印绣出库模块 (12)3.3.2大货出库模块 (15)3.3.3报表管理模块 (15)3.3.4基础档案模块 (16)3.3.5报表中心 (21)3.3.6权限管理模块 (21)3.3.7系统管理模块 (24)1简介1.1编写目的为了让用户了解系统软件的架构和功能,指导用户安装、配置和使用系统,同时满足系统维护和二次开发的参考要求,特编写此系统说明书。
此说明书重在说明分析本系统软件具备的功能和操作说明。
1.2项目背景亚威智能自动化仓库管理软件是一款用于下达出库任务,查看出库动态,货位信息收集、料箱信息收集的专业应用软件。
主要是仓库自动化的管理,进而仓库的印绣出库,大货出库,报表管理,基础档案,权限管理,系统管理等环节的管理,主要包括了:下达出库任务状况、查看出库动态、货位信息收集、料箱信息收集等。
软件功能重在规范和管控,对管理环节权限管控,提供真实有效的数据,促进流程规范和再造,让企业做到了事先预防,管理者有更多精力放在经营决策上。
根据系统应用特点,需要采用B/S的架构体系,让系统应用具有高安全性和稳定性,同时系统维护成本低。
1.3系统需求以下为亚威智能设备管理与物联管控平台服务器端和客户端所需系统最低建议。
服务器端建议系统要求Windows2008Server及以上版本、SQL Server2005及以上系统环境IIS6.0及以上版本、.net Framework4.0屏幕分辨率1024x768像素或更高,刷新率75Hz内存30GB DDRCPU Inter(R)Xeon(R)CPU E5-2640v4@2.40GHz 2.40GHz(2处理器)硬盘146GB x4做Raid系统环境Windows7及以上版本、IE8及以上版本、.net Framework 4.0屏幕分辨率1024x768像素或更高,刷新率75Hz内存2GB DDRCPU Intel Pentium4 1.7GHz硬盘500GB2安装说明2.1IIS的安装与Web配置2.1.1IIS的安装(1)在"服务器管理器"中选择"添加角色"。
蔚蓝信息化系统及智能出入控制软件--使用说明

蔚蓝信息化系统及智能出入控制软件 V2.0使用说明常州蔚蓝智能科技有限公司目录第一章引言 (1)1.1 编写目的 (1)2.1 运行环境 (1)22.1硬件配置 (1)2.2.2软件配置 (1)2.2 系统流程 (1)2.2.1 软件流程 (2)第二章系统基础操作方式 (3)3.1 软件的安装及访问 (3)第三章系统功能操作 (4)4.1菜单系统 (4)4.2窗体结构介绍 (5)4.3常用工具按钮 (5)4.4常用命令按钮 (6)4.5销售管理子系统 (6)4.5.1景点售票 (6)4.5.2退票管理 (7)4.5.3网络取票 (8)4.6剧院管理子系统 (8)4.6.1演出座位设置 (9)4.6.2演出设置 (12)4.7销售管理子系统 (14)4.7.1项目销售图表 (14)4.7.2区域销售图表 (16)4.7.3售票员日结算 (17)4.7.4售票员月结算 (18)4.7.5区域销售统计 (18)4.7.6项目销售统计 (19)4.7.7历史结算查询 (19)4.8库存管理子系统 (20)4.8.1 库存管理 (20)4.8.2 盘点管理 (24)4.8.3 库存盘点 (25)4.9系统设置子系统 (25)4.9.1 系统监控 (26)4.9.2 项目设置 (26)4.9.3 票型价格管理 (27)4.9.4 门票分类设置 (28)4.9.5 区域信息设置 (29)4.9.6 打印模版设置 (29)4.9.7 用户管理 (30)4.9.8 系统参数设置 (31)4.9.10 支付方式设置 (33)4.9.11 操作日志查询 (34)第五章后记 (34)第一章引言1.1 编写目的本手册旨在指导操作人员完成各项操作,对于操作过程中遇到的各类问题提供一个可靠的依据,以减少由于操作失误所造成的不必要的麻烦。
本手册对于系统中的各类术语都做了定义和解释,对于系统中的各类使用都做了说明,使用户在使用过程中能够对整个系统的体系有比较清楚的了解。
杭州致格制版软件使用指南(已校对3.2版)

杭州致格制版软件使用手册(3.2版本)杭州致格智能控制技术有限公司2008.11本软件是与杭州致格的全电脑横机控制系统配套的制版软件,非常感谢您使用由杭州致格智能控制技术有限公司提供的全自动电脑横机制版软件,在安装和使用本软件之前建议您先仔细阅读本手册,以便您正确安装和使用本软件.本软件具有花型设计,数据处理功能,客户只需按照绘图的方式绘制所需要衣片图形,软件自动完成数据处理,产生电脑横机的微机控制数据信息.本软件操作简单,功能完善,可以有效的提高制版人员的制版效率.目录1.软件运行要求2.主要界面介绍3.文件说明4.工具选择区域介绍5.参数设置介绍6.颜色代码介绍7.索股功能说明8.使用者巨集说明9.自定义颜色说明10.提花使用说明11.沙嘴设置说明12.工作参数设置13.衣片衣领成型设计14.简单设计过程15.如何查看动作文件和花样文件16.模块功能的使用软件运行要求:操作系统: Windows 2000 / XP 简体中文版处理器: AMD 闪龙 3000+ 或 Intel 赛扬 3.0G 以上内存: 1G 或以上显示器: 17寸以上(推荐分辨率1280*1024)计算机应配有USB接口主要界面介绍:本软件主界面由绘图区,参数设置区,工具选择区,颜色选择区及其他一些信息提示区域组成.1.主界面的顶部是菜单栏,本软件中所有的操作功能都可以在菜单栏中找到.2.菜单栏之下是工具栏,提供了最基本的文件操作.3.菜单栏之下是信息提示区,包括花型规格,出针信息提示(与当前鼠标光标点下颜色对应),网格坐标(提示当前鼠标光标点位置),当前区域(提示当前操作的范围).4.中间最左侧是花型绘制区,所有的绘图工作在该区域中完成.5.中间最右侧是参数设置区域,与编织相关的参数(如密度,编织速度,使用的纱嘴等等).6.底部左侧是颜色选择区域,(本软件中每一种颜色代表一种出针信息,如"1"号色代表前编织,"3"号色表示四平针) 共256种颜色.7.底部右侧是工具选择区域,分为图形编辑和花型工具.(其中包括了"画笔","直线","矩形"等等操作工具).文件说明:花型经过编译编译后共产生*.BMP,*.INA,*.OPT,*.CNT,*.PAT,*.UWD,*.PXP,*.YSY,*.BTH,*.WOK等10个文件,其中*.CNT,*.PAT和*.WOK为数据编译后产生的文件.各个文件的作用含义如下:*.BMP文件:花型位图文件,本系统只支持256色的BMP位图位图文件.它保存了您所设计的花型图样.您也可以打开用其他软件(如系统自带的画图板等)绘制好的图形(格式必须为256色BMP格式).*.INA文件:提花,嵌花相关信息文件,其格式也是256色的BMP文件格式.其颜色没有特别含义.他记录了提花,嵌花或V领的相关信息.*.OPT文件:参数文件,它记录了编织物的相关参数(如密度,提花,沙嘴,速度,摇床等信息),此类参数以行为单位进行设置.*.CNT文件:动作信息文件,电脑横机最终根据该文件中的信息动作.该文件在数据经过编译后产生.*.PAT文件:花样信息文件,该文件记录了编织物的花样信息,该文件要配合*.CNT文件才有意义.该文件也是数据经过编译后产生.*.UWD文件:使用者信息文件,记录相关的使用者信息.*.YSY文件:纱嘴信息文件,该文件记录了各个纱嘴的初始位置信息,以及提花是用到的纱嘴组设置信息.*.WOK文件:编织参数信息文件,记录编织物的编织参数.以上文件中用户主要操作*.BMP,*.INA,*.OPT,*.YSY文件. *.CNT,*.PAT文件主要由计算机根据用户所操作的文件自动产生.当花型设计完成后用户只需要将*.CNT,*.PAT文件用U盘复制到电脑横机上即可.工具栏工具栏:从左到右依次为“新建工程”,“打开工程”,“保存工程”,“复制”,“剪切”,“粘贴”,“花型撤消”,“花型重复”,“参数撤消”,“参数重复”,“编译生成动作文件”,“查看动作文件”,“模拟线圈图”,“计数器”,“帮助文档”,“画图板”。
easylabel软件使用说明书

easylabel软件使用说明书摘要:一、引言二、软件安装与启动1.系统要求2.安装过程3.启动软件三、软件功能介绍1.标签设计2.标签打印3.数据管理四、使用说明1.创建新标签2.编辑标签内容3.保存和加载标签文件4.打印标签5.导入和导出数据五、常见问题及解决方案六、软件更新与技术支持正文:一、引言Easylabel 软件是一款专业的标签设计和管理工具,适用于各种行业和场景。
通过本软件,用户可以轻松地设计、打印和管理标签。
二、软件安装与启动1.系统要求本软件支持Windows 和Mac 操作系统,要求处理器速度为1GHz 以上,内存至少512MB。
建议使用更高配置的电脑以获得更好的性能。
2.安装过程下载软件安装包,运行安装程序,按照提示完成安装。
安装过程中,请务必关闭其他应用程序,以保证安装过程顺利进行。
3.启动软件安装完成后,双击桌面上的Easylabel 图标,启动软件。
首次启动时,可能需要进行一些设置和配置,请根据提示进行操作。
三、软件功能介绍1.标签设计用户可以根据自己的需求,设计各种类型的标签。
软件提供了丰富的图形、文本和布局选项,让标签设计变得更加简单。
2.标签打印设计好的标签可以直接通过软件进行打印。
支持多种打印机型号,满足不同用户的需求。
3.数据管理软件还可以用于管理标签数据,如产品信息、库存等。
用户可以方便地导入导出数据,实现数据的共享和传递。
四、使用说明1.创建新标签点击“新建标签”按钮,选择标签类型,设置标签尺寸和边距,开始设计标签。
2.编辑标签内容在标签上添加文本、图形、条形码等元素,双击编辑框中的内容,可以进行修改。
3.保存和加载标签文件设计好的标签可以保存为文件,以便日后使用。
也可以从已有的文件中加载标签,进行编辑和打印。
4.打印标签在打印标签前,请确保已正确设置打印机。
点击“打印”按钮,即可将标签打印出来。
5.导入和导出数据点击“数据管理”按钮,可以导入导出数据文件。
亿星软件操作流程

三、更换窗口
当想从一个模块窗口转换到主窗口或者其它窗口时:
1.关闭当前活动窗口,然后点击主窗口的其它模块则可以进入其它窗口;
4.价格有效期需要填写有效起止时间,如果开始时间不填写,则自动默认为报价单当天的日期;
5.在报价单样品报价样品信息界面,输入货号回车,即可以把该样品的资料自动读取到报价单,然后在单价里输入报价,同时也可以把客户的编号输入进去;
6.在输入报价样品是,也可以不用输入货号,而是把光标定在货号那个单元格,同时按下空格和回车键,然后进入可以选择报价样品的界面,选择以后点击确定即可;
10.需要注意的是,需要根据产品的包装方式的不同将代码描述填写在右编辑界面的“客户备注”处。
六、订单管理
1.点击主窗口的订单管理模块,进入订单管理窗口;
2.点击工具栏中的新增订单,进入新增订单窗口;
3.选择客户,会自动提取一些信息,查看是否需要修改,里面有些信息是可以下拉选择的;
4.在货号明细界面输入订单货号的操作同报价单中的一样,输入订单货号以后首先要填写“订单数量”,“订单箱数”会根据“订单数量”和“装箱率”自动算出,修改单价,也可以点击下面的导入按钮,可以从原来的报价单或者订单里选择产品;
(4)灯芯下拉选择,1#=3股;
(5)在图片的右下角放到该位置会显示(为样品指定相应的图片),点击找到相应的图片,点击打开即可以添加或者修改图片;
(6)在包装信息里,“标准包装”的信息指销售包装的包装方式,“零包—内—外”指的是装箱率,“零售包装重量”指单个销售包装的重量,“单重”指的是单个PC的蜡重,“产品尺寸”指的是单个PC的尺寸信息,“毛重”一般比“净重”多1kg,“CBM”的信息是指外箱的立方数,输入外箱的尺寸会自动计算,“20/40/40HQ/45”分别显示了可以装的外箱数和可以装的SKU数量;
EasyCal Calibration Software - 电子校准软件说明书
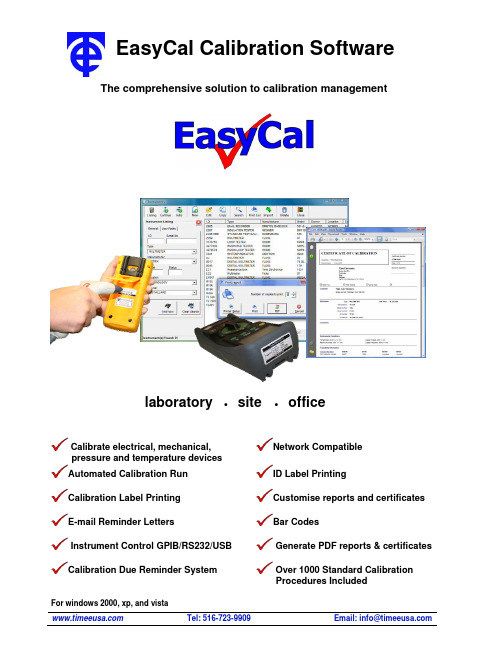
EasyCal Calibration SoftwareThe comprehensive solution to calibration managementlaboratory∙site ∙officeNetwork Compatible Calibrate electrical, mechanical,pressure and temperature devicesAutomated Calibration Run ID Label PrintingCalibration Label Printing Customise reports and certificates E-mail Reminder Letters Bar CodesInstrument Control GPIB/RS232/USB Generate PDF reports & certificatesCalibration Due Reminder System Over 1000 Standard CalibrationProcedures IncludedFor windows 2000, xp, and vistaIntroductionFor laboratory, office and site calibration work, EasyCal is the ideal solution.Automating the calibration process brings important benefits and provides increased speed of calibration and consistency of results. Calibration certificates and reports are produced easily to ISO 9001, ISO 17025, and UKAS quality standards. EasyCal also simplifies the administration process from reminder reports, through to despatch.EasyCal NetworkingWith networking capabilities a multi-user installation can be implemented.Office stations can keep track of job information, produce reminder reports and issue certificates.Laboratory stations perform the actual calibration, enter any ‘on going’ job information, create or edit test procedures and issue certificates.Management can over-see the complete operation. Keep track of calibration standards and instruments. Create and update uncertainty information. View and issue reports and certificates. Control user access and monitor job progress. Create, edit and sign off test procedures. With the ability to ‘simulate’ calibration runs procedures can be tested without the need for the calibrating instrument or unit under test.Site calibration is also controlled by EasyCal. The required information for a site job is transferred to a laptop or 5051 calibration system. Alternatively ‘calibration test forms’ can be produced for hand written entry. The data is imported to the central servers’ database or entered into EasyCal back at base.EasyCal FeaturesNetworking:For multi-station and site calibration workLicensing: Portable, only required for calibration runsInstrument Control: Control and communicate with any RS232/USB/GPIB instrumentTE Instrument Support: Time 5025, 5051, 5075. 5018, 5011 and moreGPIB Support: NI, Agilent, Measurement Computing, CECSecurity: Secure User Log In and Digital SignaturesCrystal Reports: Edit certificate and report templates. Create custom reports Uncertainty Management:Create uncertainty tables for Laboratory and SiteBuilt –in PDF engine: Produce PDF certificates and reports without 3rd party softwareData export: To CSV and HTML formats.Instruments, Customers, and JobsA comprehensive database of instruments and customers (or owner) allows the operator to access any information required. By clicking the search button on the toolbar it is possible to enter specific criteria to quickly find the instrument or customer. When adding details the user is aided by comprehensive drop-down lists, which automatically update when a new detail is added. When an instrument is booked in the job process starts. Specific information about the job is entered; such as ‘service required’, ‘service by’ and ‘accessories supplied’. A job sheet and label can be produced at this stage to accompany the instrument. As the job is put though the system these parameters can be updated for example ‘quote price’, ‘job status’ and ‘invoiced’.Instrument Recall and Reminder SystemInstruments which are due for calibration are listed on screen. From here reminder letters and lists can be printed or emailed directly to the customer or department.Calibrating Instruments, Standards and UncertaintiesTraceability information on calibrating instruments and standards is stored and maintained by EasyCal. Uncertainty tables for laboratory and site can be created for each calibrating instrument. These are then automatically processed and applied to certificates.Procedure Writing and EditingCreating and editing test procedures is made simple with intuitive, user-friendly windows. Editing test information can be done by replacing, adding, or copy/pasting. EasyCal keeps track of each time a procedure is edited.Standard ProceduresA standard calibration library comprising of over 1000 procedures covering a widevariety of instruments is included as standard. Procedure templates for multi-meters,clamp meters, decade boxes, insulation testers, and more can be used for creating anynew procedures as required.Conversion TablesConversion tables for thermocouples and RTDs are included; alternatively user-defined tables can be created. RS232 / GPIB CommandsFor more complex instrument control GPIB / RS232 commands can be sent on a test-by-test basis or run as a script.Procedure ReportsProcedure reports are available for approval and signing off.Procedure SimulationTo help with the development of procedures a test can be edited while a calibration run is being performed. Also the Calibration Run Simulator means a procedure can be tested without the need for controlling an instrument.Instrument CalibrationSelection of the instrument under test is quick and easy. With the use of a barcode scanner this selection becomes automatic.Calibration PromptsPicture prompts are shown to aid the user with instrument range selection and connection.Test ControlAt any stage during the calibration run a summary of the results for the tests completed is displayed. The operator is able to move forward or backward through the procedure as required. A summary printout is also available from Test Control.Graphical Test ScreenThe calibration run is made simple and efficient by a graphical user-interface, which increases speed of data entry. Instruments, which cannot be automatically calibrated, can still have the results data entered manually. The entered value is compared with the required value as specified in the procedure.End of Calibration RunAt the end of a calibration run the operator has the option to print a certificate and label. The ability to edit service information is also presented to the operator.Calibration Test FormsAlternatively ‘calibration test forms’ for hand written results are available. This data is then entered into EasyCal at a later date.CertificatesProduce Calibration Certificates & labels on demand. The user can keep a record of instrument history and servicing. Simple search facilities help find the required certificate.Customise CertificatesUsing Crystal Reports (optional) certificates formats can be easily customised, or design a new certificate layout.Import and Export ResultsData can be exchanged from one system to another user via the import and export features.Certificate data can be converted in spreadsheet, CSV and HTML formats.Example Reports and Certificates CertificatesJob Sheet and Labels。
easycart使用手册
目录前言 (3)后台页面--头部 (3)后台页面--中部 (3)“搜索框” (3)“添加产品”按钮 (4)“系统设置”菜单 (4)“基本设置”菜单 (5)“支付设置”菜单 (6)“配送方式”菜单 (7)“折扣管理”菜单 (8)“货币设置”菜单 (9)“邮件设置”菜单 (9)“广告管理”菜单 (10)“网站地图”菜单 (11)“优惠券”菜单 (11)“区域封锁”菜单 (12)“邮件订阅”菜单 (13)“自定义导航”菜单 (13)“发货地址”菜单 (14)“数据库备份”菜单 (14)“分类管理”菜单 (15)“添加分类”菜单 (15)“分类列表”菜单 (17)“品牌管理”菜单 (19)“虚拟分类”菜单 (20)“产品管理”菜单 (22)“添加产品”菜单 (22)“产品列表”菜单 (23)“产品类型”菜单 (23)“批量CSV”菜单 (24)“网站留言”菜单 (25)“批量修改”菜单 (25)“批量上传”菜单 (26)“批量处理”菜单 (27)“会员/订单管理”菜单 (27)“会员等级”菜单 (28)“会员列表”菜单 (28)“会员积分”菜单 (28)“订单列表”菜单 (29)“文章/下载管理”菜单 (29)“新增文章”菜单 (30)“文章列表”菜单 (30)“文章类别”菜单 (30)“权限维护”菜单 (31)“节点管理”菜单 (31)“角色管理”菜单 (32)“用户管理”菜单 (33)后台页面--底部 (34)前言本手册是针对后台拥护的全部功能进行描述的。
至于在后台进行了功能的操作了,但前端有没有显示的话,这是由填写模板的人决定的。
如果,填写模板的人把功能都填上了,则后台的操作是能被正确调用的。
否则,无。
以下是后台的主界面:后台页面--头部头部是链接到指定页面的快捷按钮。
是链接到首页的快捷按钮。
后台页面--中部“搜索框”左边最上边的是logo接着是搜索框,默认是按全局搜索的。
用户也可以根据下面的下拉框选择,按指定目录搜索、或者按某种条件搜索、等等。
- 1、下载文档前请自行甄别文档内容的完整性,平台不提供额外的编辑、内容补充、找答案等附加服务。
- 2、"仅部分预览"的文档,不可在线预览部分如存在完整性等问题,可反馈申请退款(可完整预览的文档不适用该条件!)。
- 3、如文档侵犯您的权益,请联系客服反馈,我们会尽快为您处理(人工客服工作时间:9:00-18:30)。
easylabel软件使用说明书
一、简介与安装
Easylabel是一款功能强大的标签编辑与打印软件,适用于各种场合,如办公、生产、仓储等。
本文将为您详细介绍如何使用这款软件,使其为您的工作带来便利。
首先,在官方网站或相关下载平台下载适用于您操作系统的Easylabel软件。
下载完成后,按照安装向导的提示完成安装。
二、界面与功能概述
Easylabel软件界面简洁明了,主要包括菜单栏、工具栏、标签编辑区和工作区。
软件具备丰富的功能,如字体设置、颜色选择、图片插入、条码生成等,满足您的各种标签制作需求。
三、具体操作步骤
1.打开Easylabel软件,新建一个项目或打开已有项目。
2.在菜单栏中选择“文件”,点击“新建”或“打开”,根据需求创建或编辑标签。
3.使用工具栏中的字体、颜色、形状等工具,编辑标签内容。
4.若需插入图片,可点击“插入”菜单,选择“图片”选项,上传或查找所需图片。
5.对于特殊需求的标签,如条码、二维码等,可使用“条码”或“二维码”工具生成。
6.调整标签布局,包括行列数、间距、边距等。
7.预览标签效果,确认无误后,点击“打印”菜单,选择合适的打印机进行打印。
四、实用技巧与建议
1.为了提高标签制作的效率,可以将常用模板保存为模板文件,后续直接调用。
2.针对不同场景,可设置不同的打印参数,如打印速度、打印浓度等。
3.如果您需要大批量打印标签,建议使用批量打印功能,提高打印效率。
五、常见问题及解决方案
1.问题:软件无法正常运行或出现崩溃现象。
解决方案:检查计算机操作系统是否符合软件要求,更新显卡驱动或重新安装软件。
2.问题:打印时出现乱码或空白标签。
解决方案:确认打印机驱动是否正确安装,检查标签纸张是否正确设置,调整打印参数。
六、总结与建议
Easylabel软件凭借其易用性和实用性,成为了许多用户的得力助手。
希望通过本文的介绍,您能够熟练掌握这款软件,为您的工作带来便利。
如果您在使用过程中遇到任何问题,欢迎随时查阅说明书或联系技术支持。