
灵图天行者9操作手册说明书
灵图天行者9功能介绍北京灵图软件技术有限公司【版权所有不得翻印】目录前言 (1)第一章软件安装(略) (3)第二章界面说明及GPS连接 (5)2.1界面说明 (5)2.2主菜单 (8)2.3GPS连接 (9)第三章查找 (10)3.1目标处理 (10)3.2家 (12)3.3收藏夹 (12)3.4名称搜索 (13)3.5周边设施 (14)3.6历史目的地 (14)3.7路书 (15)3.8单位 (16)3.9门址搜索 (16)3.10灵图编码 (17)3.11地址信箱 (18)3.12交叉路口 (19)3.13已保存路线 (20)第四章路线 (21)4.1目的地调整 (21)4.2路线详情 (22)4.3模拟导航 (22)4.4保存路线 (23)4.5取消路线 (23)4.6规划方式 (23)第五章旅游 (24)5.1景点介绍 (24)5.2区域搜索 (24)5.3距离搜索 (25)5.4名称搜索 (25)第六章设置 (26)6.1声音设置 (26)6.2显示设置 (26)6.3安全伴侣 (28)6.4路线设置 (28)第七章典型操作 (31)7.1如何快速进行导航 (31)7.2如何设置家和单位 (32)7.3如何查询GPS定位信息 (33)7.4如何下载路书导航 (33)7.5如何制作并上传路书 (33)7.6如何接收和发送位置信息 (34)常见问题解答(FAQ) (35)前言亲爱的用户,欢迎您使用北京灵图软件技术有限公司(以下称"灵图软件")自主开发的车载导航软件【灵图天行者9】。
请在使用本产品之前认真阅读配套的使用手册。
【灵图天行者9】是一套可以在掌上电脑上安装的自导航软件,它以大比例尺的城市导航地图为展示平台,根据您指定的起点、终点智能设计出最佳行车路线,并提供实时的语音提示导航功能。
【灵图天行者9】是您出行不可多得的好帮手。
◆版权声明【灵图天行者9】版权属于北京灵图软件技术有限公司所有。
任何组织和个人未经北京灵图软件技术有限公司许可与授权,不得擅自复制、更改该软件的内容及其产品包装。
本软件受版权法和国际条约的保护。
如未经授权而擅自复制或传播本程序(或其中任何部分),将受到严厉的刑事及民事制裁,并将在法律许可的范围内受到最大可能的起诉!版权所有,盗版必究!○c2009 北京灵图软件技术有限公司客服热线:4008-12-6666联系地址:北京海淀区上地九街9号数码科技广场北座二层邮编:100085◆最终用户许可协议重要须知请认真阅读:本《最终用户许可协议》(以下称《协议》)是您(个人或单一法人或单一非法人单位)与北京灵图软件技术有限公司(以下称灵图软件)之间有关本"软件产品"包括以下内容:以软盘、光盘或其它形式介质储存的计算机软件、数据、随附的说明书等印刷材料(含本《协议》)和包装(其他代理商、销售商等非北京灵图软件技术有限公司的下属单位自行印制的印刷材料和包装除外),并可能包括其它形式的相关材料。
您一旦安装、复制或以其它方式使用本"软件产品",即表示您同意接受本《协议》各项条款。
如果您不同意本《协议》的条款,则请不要安装或使用本"软件产品",同时请您将本"软件产品"退回给销售者。
软件产品许可协议:●本《协议》授予您以下权利:您可以在唯一的掌上电脑上安装使用本"软件产品",如果您需要更换其他设备,请致电北京灵图软件技术有限公司客服,会有专人为您提供服务。
●本《协议》对您有以下限制:未经北京灵图软件技术有限公司的书面许可,本"软件产品"的全部或部分不得被仿制、出借、租赁、网上传输、再发布等。
本"软件产品"是作为整体被授予许可协议,不得将各个部分分开在多台设备上使用。
严禁对本"软件产品"进行反向工程、反编译、反汇编或数据解密。
●本《协议》关于转让:您可以对您在本《软件协议》下的所有权利进行永久转让,条件是您不得保留任何副本,并在接受本《协议》的各项条款的前提下,将本"软件产品"全部转让给别人。
●著作权声明:本"软件产品"(包括但不限于本"软件产品"中所含的任何文字、音乐、录音、录像、图像、照片、动画和附加程序)、随附的说明书等印刷材料(其他代理商、销售商等非北京灵图软件技术有限公司的下属单位自行印制的材料除外)、及本"软件产品"的任何副本的著作权,均由北京灵图软件技术有限公司拥有(在本"软件产品"中另有著作权声明的除外)。
本"软件产品"受《中华人民共和国著作权法》、《计算机软件保护条例》及《知识产权国际公约》的保护。
因此,您必须将本"软件产品"与任何拥有著作权的作品同样对待,但下列情况除外:即您可只为备份或存档目的制作一份本"软件产品"的副本,条件是您只为备份或存档目的保留软件原件。
●其它知识产权声明:本"软件产品"中使用的人名、公司名和数据如果没有特别指明,均属虚构。
对于本软件产品所涉及的技术和产品,北京灵图软件技术有限公司拥有其专利、商标或其它产权(在本"软件产品"中另有著作权声明的除外),除非得到北京灵图软件技术有限公司的书面许可,本"软件产品"不授予这些专利、商标或其它知识产权的许可。
●注意:如果您没有遵守本《协议》的各项条件,北京灵图软件技术有限公司有权将本《协议》终止。
如发生此种情况,则您必须销毁本"软件产品"(包括更新版本)及其各部分的所有副本。
●本《协议》的生效和终止:本《协议》至您购买本"软件产品"之日起生效。
本《协议》至您销毁本"软件产品"的全部及其副本之日起终止。
●有限保证有限保证。
灵图软件保证如下:(a) "软件产品"自收货后九十(90) 日内基本符合随附书面材料所述的功能;和(b) 灵图软件提供的支持服务应基本与有关书面材料中所述相符和灵图软件支持工程师将尽商业所允许的范围内尽力解决任何问题。
在适用法律允许的范围内,凡与"软件产品"有关的默示保证(如有的话),以九十(90) 天为限。
客户所享有的补偿。
灵图软件及其供应商对您所应负的全部责任,以及您所享有的排他补偿以下列两者之一为限(以何种为准,由灵图软件全权决定):(a) 退还您已付的价款(如有),(b) 修正或更换不符合灵图软件有限保证的"软件产品",但您应将该"软件产品"连同您所持有的发票一同退还灵图软件。
如"软件产品"的失灵是由于因意外事故、滥用或错误应用所引起的,则本有限保证无效。
经更换的"软件产品"的保证期限为原保证期限的剩余期限或三十(30) 天(以较长者为准)。
●有限责任有限责任。
在适用法律所允许的最大范围内,灵图软件或其供应商在任何情况下绝不因使用或不能使用"软件产品"或因提供或未提供支持服务所发生的任何特殊的、意外的、非直接的或间接的损失(包括,但不限于营业利润损失、营业中断、商业信息的遗失或任何其它金钱上的损失)而承担赔偿责任,即使灵图软件事先被告知该损害发生的可能性。
不论任何情况,灵图软件在本《协议》任何条款下所承担的全部责任,以您就"软件产品"实际已付的价款或人民币50元为限,以两者之间较高额为准。
但是,如果您已经与灵图软件达成支持服务协议,灵图软件就支持服务的全部赔偿责任应以该协议条款为准。
本《协议》受中华人民共和国法律管辖。
如果您对本《协议》有什么问题,或您有事想同灵图软件联系,请写信给北京灵图软件技术有限公司。
本协议最终解释权归北京灵图软件技术有限公司所有。
第一章软件安装(略)如何退出【灵图天行者9】●点击菜单->退出系统。
进入“菜单”界面,点击按钮(如图1.3.1),如果您确定要退出程序,请点击“退出”,否则请点击“取消”。
温馨提示:【灵图天行者9】会记忆您当前的信息设置,在下次启动的时候,系统将恢复您上次退出时的状态。
第二章 界面说明及GPS 连接2.1 界面说明初始状态电源状态:表示:当前外接电源供电。
表示:当前内置电池供电。
地图缩放图2.1.1进入菜单 当前点详情 设当前点为目的地回到自车电源状态自车位置关键点看板地图方向GPS 状态G P S状态:表示GPS未连接(GPS状态图详见附录2)。
方位选择:表示地图方向为2D北向上;表示地图方向为2D车头向上;表示地图方向为3D车头向上。
比例尺:您可以在到范围的比例尺之间浏览地图。
地图缩放:和点击可放大和缩小地图比例尺。
回到自车:点击即可回到自车所在位置。
自车位置:表示您的车辆所在位置。
GPS未连接状态下,系统默认的起始点为您上次导航结束后记录的GPS点;GPS连接状态下,是您GPS定位点。
当前点详情:点击可查看当前地图中心点的详细信息,并进行设为目的地等相关操作。
关键点看板:点击此图标可以显示最近三个关键点的距离和方向,关键点中除了转向提示还加入了服务区和收费站提示。
实时交通:为您提供实时交通服务功能,接收到实时路况信息后,地图上将用不同颜色的线条标注道路通行情况。
导航状态地图方向GPS状态转向点距离规划路线标注当前点当前道路名称浏览地图图2.1.2温馨提示:点击“前方转向”按钮,可重复语音播报前方道路转向信息。
点击转向点距离、剩余时间、剩余距离的部分,可进入详细的剩余时间、剩余距离、当前时速和音量调节页面。
前方转向:表示进入下一个道路将要行驶的方向。
导航过程中点击此图标,可重复播报上一个语音提示。
前方道路名:表示前方即将驶入的道路名称以及距即将驶入道路的距离。
剩余距离:表示沿规划路线,自当前位置到达目的地的剩余距离。
剩余时间:表示预计到达目的地所需的剩余时间,也可切换显示当前时间。
规划路线:图中蓝色实线表示系统规划路线。
当前道路名:表示当前行驶的道路名称。
标注当前点:表示导航中您可以快速标注当前点位置,到达时间等,系统会自动将其保存到收藏夹中,请在导航后及时编辑。
浏览:点击进入地图浏览界面,可进行更多菜单操作。
2.2 主菜单【灵图天行者9】的“菜单”界面中有四个板块子菜单(如图 2.2.1):地图、查找、旅游、设置。
其主要功能如下:地图 返回地图界面 查找 查找目的地等旅游 旅游景点信息 设置 各类操作设置2.3 GPS 连接当您对GPS 进行首次连接时,请尽量在室外进行连接定位操作,避免其它原因阻碍信号接收,而延长GPS 连接时间。
X9 平板微型投影说明书

使用说明书重要声明非常感谢您购买天时MDI-X99平板平板电脑*微型投影。
我们衷心希望您能从中获得长久的享受卓越的使用体验。
祝愿您从该产品中获得最好的视听享受!本手册中包含的所有信息在出版时都是正确的。
但由于我们不断对产品进行更新,因此您的设备可能与本手册中所描述的内容略有差别。
在使用产品之前,请认真阅读本说明书。
当您开始使用该产品时,本公司认为您已经认真阅读了本说明书。
本产品在出厂前已经过严格质量测试,在使用过程中出现机身发热现象,属于正常情况,请您放心使用。
✠ 禁止自行拆卸产品,需要帮助请联系专业维修人员。
不要使用酒精、稀释剂或苯类来擦洗产品表面。
✠禁止用湿手操作产品及插拔电源,以防触电。
✠ 禁止将产品放置在潮湿或粉尘多的地方。
✠禁止将产品放置在高温的地方,为确保本机的散热性能与使用寿命,请尽量保持机身与空气的接触面积。
◆ 请使用随机配置的电源适配器,切勿接入其他供电设备,否则可能造成数据和硬件损坏等不可挽回的后果。
◆ 本产品为精密光电产品,切勿让本产品摔落或与硬物碰击。
◆ 产品在格式化内存或正在进行上传和下载时请不要突然断开连接,否则可能导致程序出错。
◆ 对于违规操作导致产品损环,本公司概不负责。
※本公司保留改进产品的权利,产品规格及设计如有变更,恕不另行通知!目录1、产品介绍 (5)2、产品参数 (6)1.1、光学参数 (6)1.2、软件参数 (7)3.投影机各部件名称 (9)4.使用与连接 (11)4.1、音频连接 (11)4.2 Mini USB接口连接 (12)4.3 USB接口连接.................. 错误!未定义书签。
4.4 TF卡接口. (12)4.5 HDMI接口 (16)5.按键说明 (13)6.桌面与壁纸设置 (15)6.1 桌面 (15)6.2 壁纸设置 (16)7.设置 (18)7.1wi-fi设置 (20)7.2系统设置 ......................... 错误!未定义书签。
AT9使用说明书.pdf
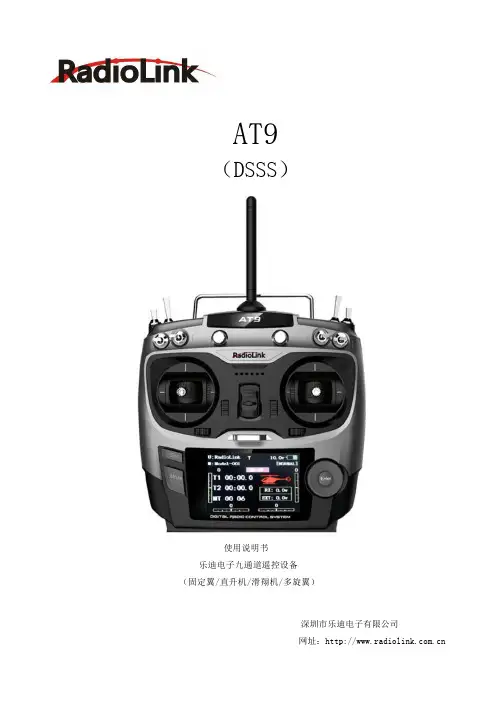
AT9
(DSSS)
使用说明书 乐迪电子圳市乐迪电子有限公司 网址:
简介
感谢您选择深圳市乐迪电子有限公司(RadioLink)生产的专业航模设备及周边产品。 乐迪 AT9 是迄今为止功能最完整的遥控设备,它可遥控直升机,固定翼,滑翔机,多旋翼四大类所有机型的飞行器, 通信系统采用抗干扰最强的 DSSS(直接序列扩频系统),功能强大但人性化的菜单设计对初学者与熟练者均适用。 为了您更好地使用我们的遥控设备并确保安全飞行,请您仔细阅读使用说明书。建议您在阅读本说明书的同时打开 遥控器和接收机,并将接收机连接舵机等相关设备,边阅读边操作。 如果您在使用过程中遇到任何问题可查阅说明书或致电我们的售后 0755-88361717,也可登录航模类论坛,如: htpp:// htpp:// htpp:// 更多的产品信息及最新程序下载,请登录:
售后服务条款
1,本条款仅适用于深圳市乐迪电子有限公司所生产的产品,乐迪通过其授权经销商销售的产品亦适用本条款。 2,乐迪产品自购买之日起,一周内经我司核实为质量问题,由乐迪承担返修产品的往返快递费,购买乐迪产品超 过一周到一年内经我司核实为质量问题,用户和乐迪各自承担寄出返修产品的快递费。 3,返修时需提供购买凭证和保修卡或网络平台交易记录。 4,乐迪产品自购买之日起七天内,在正常使用情况下出现质量问题,外观无损坏,凭保修卡及购机凭证在经销商 处协商可以免费更换同型号产品;经销商在收到更换产品时必须第一时间通知乐迪公司予以备案更换。 5,乐迪产品将由深圳市乐迪电子有限公司提供终身售后服务, 属于质量问题一年内免费保修;对于自购买之日起人 为损坏、改装、拆机及超过一年免费保修期的,用户必须支付往返邮费及维修成本费用。 收费标准: 人工费(20 元)+配件费用 6,为确保您的权益受到保护,并能及时有效的为您服务,请在购买乐迪产品时完整填写好保修卡及索要购机凭证。 用户享受本售后服务条款必须提供保修卡及购机凭证。 7,返修产品将于乐迪公司收到后 15 个工作日内寄回给顾客,并附上维修报告. 8,以上售后服务条款仅限于中国大陆销售的乐迪产品。 9,港澳台及海外客户的售后问题发至邮箱 after_service@,具体售后细则视情况而定。 本方案最终解释权归乐迪电子所有
SUUNTO表中文说明书

SUUNTO表中文说明书SUUNTO探险计算机使用手册ALTIMAX NAVITEC VECTOR X-LANDER欢迎您选择了SUUNTO探险计算机,在之后的使用中,事实会证明您的选择是正确的也是明智的。
在这本使用手册中您将得到产品保证卡。
无论在任何地点,任何时间,您均可得到您所需的服务支持。
祝您在使用时留下美好难忘的记忆。
服务支持SUUNTO CN 中国TEL/电话: 0086 10 68365520FAX/传真: 0086 10 62625900SUUNTO USA 美国TEL/电话:1(800)543-9124SUUNTO Canada 加拿大TEL/电话:1(800)776-7770WWW:SUUNTO Euroope 欧洲TEL/电话:+33 3 90 20 74 30FAX/传真: +33 3 90 20 74 40WWW:WWW。
Suuntoeurpe。
comSUUNTO Oyj 公司TEL/电话:+358 9 8524 050FAX/传真: +358 9 8524 0592WWW:WWW。
Suunto。
fi功能按键[MODE]按键这个按键位于探险计算机的右上方。
这是很重要的按键之一,按下[MODE]键,使用这可从一种功能模式转换至下一种功能模式。
(时间,海拔仪,气压计,罗盘)在子目录下按[MODE]键可返回主目录。
在调校时,按下[MODE]键,可立即退出此项功能的调校。
按下按键2秒钟背光照明会打开。
[+]按键这个按键位于探险计算机的右下方。
在调校时,按下[+]键,数据向上滚动变化。
在设定闹钟和存储器时,这个按键用来设定开始或停止。
(开或关)[—]按键这个按键位于探险计算机的左下方。
在调校时,按下[—]键,数据向下滚动变化。
在Navitec,Vector和X—Lander上是很好的快速转换键。
按下[—]键,在任何主要功能模式下可立即显示罗盘功能。
在显示不正常的罗盘功能或方位跟踪功能时会发出“滴滴”的警告声。
I-9 用户手册说明书
I-9 User Guide Online I-9 & E-VerifyProcessUpdated June 2023Table of ContentsOnline I-9 & E-Verify Process 2 I-9 Compliance 3 Section 1 – Employee Information 4 Accessing the System 11 New Hire Center 13 Section 2 – Employer Review 16 Photo Matching 22 Terminations 33 Special Circumstances 33Online I-9 and E-Verify ProcessAbout Electronic I-9s and E-Verify•Implemented to automate the process of documenting that each new employee is authorized to work in the United States•Complies with mandate from the Governor of Virginia to process all new hires and rehires through E-Verify•E-Verify allows employers to automatically determine eligibility of their employees to work in the United States•Online I-9 Management system is hosted by external vendor•Electronic I-9s are stored in a central database•Eliminates the need to complete a paper I-9 and submit to HRWhat is an I-9?• A form used to document verification of identity and employment eligibility of all employees (both citizen and non-citizen) hired to work in the United States after November 6, 1986•Required to comply with the Federal Immigration Reform and Control Act•Regulated by the U.S. Citizenship and Immigration Services (USCIS) division of Department of Homeland Securities (DHS)Some Penalties for Non-Compliance•Employers who violate the law may be subject to:o Civil fineso Criminal penalties (when there is a pattern or practice of violations)o Debarment from government contractso A court order requiring the payment of back pay to the individualdiscriminated againsto A court order requiring the employer to hire the individual discriminated against•More information is available at: /i-9-central/penaltiesI-9 ComplianceIs an I-9 Required?•Open Banner form PZII9HS for the employee•Does the employee have an E-Verify case number?o If NO, continue with I-9 processo If YES, open Banner form PWIEMPV•Review job start/end dates/last paid date•If there is a break in service or break in pay for more than one year, a new I-9 must be completed•For non-residents, the employment authorization documents could have changed - review carefully•Contact HR with questions if an I-9 is neededPWIEMPVTIPS: You can find the Last Paid Date on page PWIEMPVSection 1: Employee Information•Section 1 should be completed and signed by employee on or before the first day of work•Employee will receive two emails from **********************. One will have the link to the New Hire Center and the other will have the password to login. The password is only valid for the original login.*Please note, wage employees must have a job in Banner before they will be sent to the New Hire Center and receive these email*•Once logged in, employee will need to complete all forms in the New Hire Center before completing section 1 of the I9.Section 1:TIPS:•All fields are required EXCEPT:o Other Nameso Apt. Numbero Email Addresso Telephone Number•If the employee does not have a Middle Name, enter N/A•Foreign nationals without a Social Security number- check the “SSN Applied For”button below the Social Security number fieldTIPS:•Employee attests to citizenship•If number 4, An alien authorized to work until, is selected the new hire should indicate the “authorized to work until date” on the i9. The date should be listed on their form I-20, DS2019, or another form of work authorization.•If someone other than employee prepares section 1 on behalf of employee, thePreparer and/or Translator Certification must be completed•Click Continue to save•Review the data foraccuracy•Scroll to bottom of page•Employee signs the form by checking the attestation box•Employee’s initials must correspond to the name asit was keyed (not casesensitive)•If the employee hasmultiple first namesand/or last names, onlyenter the first, first nameinitial and the first, lastname initial•Click ContinueTIPS:•Print the receipt code page if section 2 will be completed by a remote completer. The remote completer will need the receipt number to pull up the I9.•New Hire will receive an email confirmation once Section 1 has been completed •Scroll to bottom of page to review acceptable documents to present for completingSection 2•Click continue to finish section 1TIPS:•List A document to prove identity and work authorization OR List B document to prove identity AND List C document to prove work authorization• A full list of acceptable documents can be found at https:///i-9-central/form-i-9-acceptable-documents•All documents must be original. Only exception is certified copy of birth certificate •All documents must be unexpired by the first day of work. For Foreign Nationals, Transfer Pending documents may not be used•Must present a document with a photo•Reminder – employee must present original documentation within three business days of starting workGetting access the I9 SystemFor employees needing access to the I9 system for processing purposes, departments need to complete the following steps:•Employer access only – for I9 access, complete the following steps:•Online Banner HR access request form on (https:///vt/prod/vtirm.irm_forms_main.entry) •Login and select Add/Change Administrative System Access•Enter employee’s ID and select Request additional access•Select Human Resources and check the Online I-9 option•Submit electronic form•Print copy for signature approval•Must be signed by employee AND dean, director, or department head•Send a signed copy to the HR Apps Team through the HR Dropbox (The dropbox link is located on )Completing Section 2 of the I9This section focuses on how to search for employees and complete section 2 of the I-9•Click on Login to New Hire CenterConsent to Information Release•Each time an I9 processor logs in, the Consent to Information Release screen will appear. Verify the VT Username and ID number, then click the SharebuttonNew Hire Center Welcome Screen•Click on Search Employee to verify all forms have been completed and Section 2 is ready to be completed•Enter First and Last Name, then press View•Verify Status says Document Complete - Waiting on Section 2 of I9•Click on the NameClick Complete I9•Verify the start date is the first day the employee began working. If the date listed is not the first day of physical work, please update this date.•Enter the VT ID. Do not include dashes•Visa type is not applicable to US Citizen•Select the document(s) presented by employee•Select documents from valid list of options provided in drop down list. The list provided will be based on the citizenship status indicated in Section 1•If employee is terminated before completing I-9, choose that option and continue•Click Continue to save•Examine documents and record verification information•Complete all fields provided•Click Continue to saveTIPS:•Fields may vary depending on documents presented•Click on Sample Document link to view valid examples of selected document type •Do not include dashes in Document number•If there is no Document number, include several zeros• Carefully review all information entered • Check the box stating you have read and agree with certification statement • Click Continue to saveE-Verify Status•Unique case number is assigned to I-9•I-9 verified against SSA and DHS databases•Receive initial status response within seconds•How to proceed depends on E-Verify status. One of the following messages will appear:o Employment authorized▪Employment authorized - with additional verification optional▪Employment authorized - with additional verification requested automaticallyo Photo matching requiredo Current I-9 is not eligible for verificationo SSA or DHS tentative non-confirmation; this status will be handled by the Central HR I9 Coordinators•Temporary initial responses, requiring more time or more steps include: o Initial verification not processed▪Review/Edit employee data (may indicate minor error/typo) o DHS verification in processo SSA or DHS continuanceo DHS referral to SSAo SSA/DHS case incomplete•I-9 wassuccessfullyadded•Next actiondepends onE-Verifyresponse•Always click“View CaseDetails” totakeappropriateaction•E-Verify has assigned a Case Number•Status at bottom of page shows Employment Authorized (If anything other than Employment Authorized or Manual Review is showing, please contact *********) •Case Resolved should be displayed at bottom of page•Logout or click Back to Compliance Center and proceed with another I-9Photo Matching•Required when employee presents any of the following eligibility documents: o U.S. Passport or Cardo I-551 Permanent Resident Card (green card)o I-766 Employment Authorization Document (EAD)•E-Verify requires I-9 administrators to match the photo provided with the one on file with the United States Citizenship and Immigration Services (USCIS)• A securely scanned copy of the photo document must be attached to the electronic I-9 as supporting documentation.•DO NOT ATTACH OTHER DOCUMENTS.Attaching Photos•Securely scan the image•Save the file with a name you will recognize•Attach the scanned image to the electronic I-9•Open the attached document to confirm legibility•Delete the file or encrypt it if retainedo Do not send any scanned documents to HRSECTION 2 – Uploading DocumentsTIPS:• Use List A to select US Passport or US Passport card, Permanent Resident Card, or Employment Authorization Document (EAD).• Attach both the front and back of the card. This can be attached as two separate documents• Click Continue to saveTIPS:• Examine the employee’s document(s) and record verification data • Enter Expiration Date (check box if there is not one)• Click Continue to saveTIPS:• Get started by uploading the image file• Select the Attach File link – Do not click on Upload I9. This will overwrite the currentI9 document in the fileTIPS:• Select document from list of valid options• Scroll to the bottom of the pageTIPS:• Select document from list of valid options• Be sure to use image files in one of the supported formats • Use the Choose File button to select from your computer • Click UploadTIPS:• An image of the attachment appears• Select Correct if this document does not have any errors • Select Incorrect if there are errors presentTIPS:• Notice theUploadStatus nowshows acheck mark• Press theFinishedbuttonTIPS:• E-Verify hascaught upand displaysthe PhotoMatchingstatus• Click viewcase detailsor scroll tothe bottom ofthe pageTIPS:• Verifylegibilityand closethe windowTIPS:• Click thePhotoMatchingbutton toproceed• Compare the photo shown to the photo on the ID cardSelect Yes:• If the photo on the document matches the photo on file• If there is no photograph in the database• Click Continue to proceedSelect No:• If the photo on the ID does not match the database• E-Verify response will be a Tentative Non-Confirmation• Notify *********• Click Continue to proceedSelect No Photo Displayed:• If not photo shows, click the No Photo Displayed button and click ContinueTIPS:• E-Verify has assigned a Case Number • Scroll to the bottom of the page• Make sure the case is closed• I-9 circumstances that may warrant terminationo Employee does not present documentation to complete Section 2 within three business days of the first day of worko Employee refuses to furnish a Social Security Number for E-Verify purposeso Employee elects not to contest a negative E-Verify finding• Complete Section 2 using the option at bottom of the Review and Verification page indicating that employee has terminatedSpecial Circumstances• SSN Applied For:o E-Verify requires employee’s social security number (SSN) on Section 1 in order to for the I9 to be Authorizedo Select the SSN Applied For option in the Employee Information and Verification section for someone who does not yet have a SSN. The I9 will bein a holding status until the SSN is providedo Employee MUST apply for an SSN and provide it to Payroll. Payroll will update the number in the I9 system and will submit to E-verify at that time• Receipts:o Employer may be required to accept a receipt in lieu of the List A, B, or C documento When receipt is presented, check the “Receipt” box next to the type of identification document on Section 2; a copy of the receipt should beattached to the I9Acceptable receipts an employee can present for identification• For Non-residents with a SSN - Always use the Non-everify location at beginning of semester!o Foreign nationals must be updated in the Federal SEVIS database before being processed in E-Verifyo If this is not done, submission to E-Verify needs to be delayed▪If individual’s “Applied for SSN” submission is automatically delayed▪If individual has an SSN, department must manually delay submission using the “non-E-Verify” locationo Complete Section 2 by entering the special non-E-Verify location, “000001”in the Location fieldo HR will follow up with the E-Verify process and updating the location data Directanyquestionsto:**********************。
D9中文说明书版本A

iPod/iPhone/iPad/micro usb 专用底座扬声器系统(本产品在非人为损坏的情况下保修一年)目录1. 产品特点....................................................................................12. 包装与技术....................................................................................222 2-1 包装配置................................................................................ 2-2 技术参数................................................................................3. 安装与接线................................................................................33-1 主机底部电池安装...........................................................33-2 遥控器电池安装...............................................................33-3 主机电源连接...................................................................43-4 音频线连接.......................................................................44. 主机示意图................................................................................ 4-1 按键及接口....................................................................... 4-2 三合一旋转底座...............................................................555. 遥控器示意图...........................................................................766. 功能操作及设置.......................................................................86-1 开关机设置.......................................................................86-2 播放模式选择...................................................................86-3 时间设置...........................................................................86-6 apple /android 充电及播放...........................................106-7 收音机(FM)调频..............................................................106-8 AUX 外接音频及蓝牙( )连接......................................116-10 睡眠(SLEEP)及时间记忆设置和USB 充电..............................6-4 闹钟 设置.....................................................................8 闹钟 设置.....................................................................9感谢选购并使用本公司产品。
Er9x简体中文用户手册
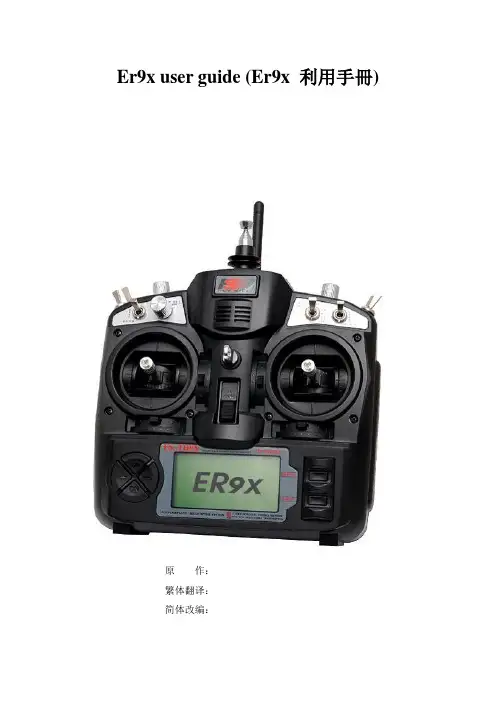
Er9x user guide (Er9x 利用手冊)原作:繁体翻译:简体改编:目录一、介绍(一)工作原理(二)命名标准(三)编辑键(四)阅读操作(五)编辑与贮存(六)快速选择模型(七)遥控器配置二、主屏幕(一)General View 一样画面(二)Statistics Screens 统计值屏幕三、系统设置(一)Radio Setup 系统设置(1/6)(二) PPM In PPM教练信号输入设置(2/6)(三)Version Info 版本信息(3/6)(四)Diagnostics 检测(4/6)(五)Analog Inputs and Battery Voltage Calibration 类比信号输入及电压校正(5/6)(六) Calibration 校正(6/6)四、模型设置(一)Model Select 模型选择(1/10)(二)Model Setup 模型设置(2/10)(三)Heli Setup 直升机设置(3/10)(四)Expo/Dr 行程与大小动(4/10)(五)Mixer 混控器(5/10)(六)Limits 限制器(6/10)(七)Curves 曲线(7/10)(八)Custom Switches 定制切换开关(8/10)(九)Safety Switches 平安切换(9/10)(十)Templates 样板(10/10)五、相关信息一、介紹IMAX/FLYSKY/TURNIGY/EURGLE 9x 是由中国生产的电脑化无线遥控器。
发射机上配置有128X64单色液晶显示屏,2组摇杆,3个旋钮,6个2段开关,1个3段开关和微调。
而那个遥控器的最大吸引力是价钱,同配置的类似遥控器价钱从180美元到1000美元以上。
可是那个遥控器只要60美元,您可能会问是什么吸引人,告知你:重点是软件程序,原版的程序不是专门好,有些小错误,奇怪的导航顺序,烦人的鸣叫声,实在不睬想。
但是,一些爱整的家伙想通了,那个遥控器只是是由摇杆、开关、微调和一个通用的主处置器组成。
Exos-9快速入门指南说明书
EXOS-9Quick Start Guidev:17.82THANK YOUWe’ve proudly resurrected the iconic Aiwa brand in the passionate pursuit of bringing people together around music. We do this with a simple formula, by creating amazing speakers that deliver the music you love, the way it was meant to be heard.We’re thrilled that you’ve chosen the Exos-9 to enhance your listening experience. Welcome to the Aiwa family.15SAFETY GUIDELINES• Read all instructions• Do not use this apparatus near water.• Clean only with a dry cloth. • D o not use near any heat sources such as radiators, heat registers, stoves, or other apparatus that produce heat. • U nplug this device during lightning storms or when unused for long periods of time.• T o completely disconnect the speaker from the AC mains, disconnect the power supply from the AC receptacle. WARNING: To reduce the risk of fi re or electrical shock, do not expose this device to rain or moisture.FCC StatementThis equipment has been tested and found to comply with the limits for a Class B digital device, pursuant to part 15 of the FCC Rules. These limits are designed to provide reasonable protection against harmful interference in a residential installation. This equipment generates,uses and can radiate radio frequency energy and if not installed and used in accordance with the instructions, may cause harmfulinterference to radio communications. However, there is no guarantee that interference will not occur in a particular installation. If this equipment does cause harmful interference to radio or television reception, which can be determined by turning the equipment off and on, the user is encouraged to try and correct the interference by one or more of the following measures.— Reorient or relocate the receiving antenna.— Increase the separation between the equipment and receiver.— Connect the equipment into an outlet on a circuit diff erent from that to which the receiver is connected.— Consult the dealer or an experienced radio/TV technician for help.FCC Radiation Exposure StatementThis device complies with FCC radiation exposure limits set forth for an uncontrolled environment and it also complies with Part 15 of the FCC RF Rules. This equipment must be installed and operated in accordance with provided instructions and the antenna(s) used for this transmitter must be installed to provide a separation distance of at least 20cm from all persons and must not be co-located or operating in conjunction with any other antenna or transmitter. End-users and installers must be provided with antenna installation instructions and consider removing the no-collocation statement.14CONTACT USFor more information about the warranty, and frequently asked questions, please visit CustomerService:************.comWebsite: ai w w w w /ai w @Ai w a_US@Ai wa_AudioBluetooth® and the Bluetooth® logo are registered trademarks of Bluetooth SIG, Inc.Changes or modifications not expressly approved by the party responsible for compliance could void the user’s authority to operate the equipment.Model identifi cation information:Aiwa Exos-9 XXXX-XXModel number: XXXX (X=blank, 0-9)Power source country code: XX (X=blank, A-Z)For example, Aiwa Exos-9 9001-US© 2017 Aiwa3GETTING STARTED - BATTERYSetting up your Exos-9 couldn’t be easier. First, install the battery pack.There is a small latch on the bottom of the unit that keeps the battery in place. When installing the battery, insert the tabs on the left fi rst, and push the battery in until the latch clicks. To remove the battery, pull the catch on the latch outward.4GETTING STARTED - PAIRINGConnect the power cord to the back of the Exos-9 and power on using the switch. The screen will illuminate. Now you’re ready to listen!The Exos-9 is always available to pair - in other words, there is no need for “pairing mode.” Just turn it on and search for it on your smartphone or other Bluetooth-capable device, or simply tap your phone to the NFC touch-point on top of the speaker.The Exos-9 will remember the last 8 devices paired, and willautomatically connect when in range and powered on.Note: The LINK button is only for connecting two Exos-9 speakers in mirror or stereo mode. Since it’s always in “pairing” mode, there is no need for an extra button just to connect to your device.13WIRELESSLY SYNC SPEAKERSTo wirelessly pair two speakers together to listen to your favorite tunes in mirror or stereo mode, simply press the LINK button onone Exos-9 and then press the LINK button on another Exos-9.Once the two speakers are paired, press the LINK button to cycle through the channel modes. Choose from (L)(R), (L), or (R).Control the audio through the master speaker (the one without the SATELLITE icon lit up) by using the onboard controls or the music source.For optimum pairing, units should be placed within 20 feet of each other with no objects blocking the signal between them. Avoid placing either unit near a router or any device that may cause interference.12CONTROLSPlay/PauseControls playback of audio onyour connected Bluetooth device.Does not aff ect playback throughthe auxiliary-in connection.LinkTwo Exos-9 speakers can bewirelessly connected. Press LINKon both speakers within a fewseconds to initiate the connection.EQ ControlsUse the left/right arrows to select anEQ band or EQ preset. Use the up/down arrows to increase/decreasethe gain when an EQ band is selected.5GETTING STARTED - PAIRINGMake sure Bluetooth is active on your connecting device.Search for nearby Bluetooth devices. The speaker will appearas “Aiwa Exos-9”, simply select to connect.If your device supports NFC pairing, touch it to the NFC iconin the circle on the top of the device, just to the right of thetouch screen.6GETTING STARTED - AUX-INAlmost anything headphones can plug into can play through the Exos-9. MP3 players, CD players, radios, computers, televisions, etc. can be connected with the included 3.5mm audio cable.The Exos-9 will automatically switch to auxiliary input when you connect a device.The screen will show “AUX IN” when this input is active. If it doesn’t switch to the correct input automatically, hold theplay/pause button on the speaker to switch inputs manually.11EQUALIZERThe Exos-9 has a 5-band graphicequalizer so you can adjust the sound to your personal taste or room acoustics.To adjust the equalizer, use the left and right arrows to select an EQ band. The currently selected band will blink. Press the up arrow to increase the gain on a given band, press the down arrow to decrease it.To select the EQ presets, Battery Save Mode, or to turn the EQ off , keep pressing the right arrow to make a selection.The Exos-9 has 4 built-in EQ presets to enhance your music. Preset 1 is for Rock, 2 is for Hip-Hop and Dance, 3 is for Jazz and 4 is for Classical. Try them out and see what sounds best to you -these are only suggestions.10USB PORTSThere are two USB ports on the Exos-9. The port labeled “USB Charge” can be used to charge your mobile device.The Exos-9 fi rmware can be updated using the micro-USB port labeled “Software Update.” Check the Aiwa website () for instructions and new fi rmware versions.USB CHARGESOFTWARE UPDATEPOWER90-130v ~20/40HzLINE IN BLUETOOTH LOCKTo lock the Bluetooth connection to a single device, hold down the RIGHT and LINK buttons. The speaker will remain connected until manually released or until the unit sleeps due to inactivity.7GETTING STARTED - PLACEMENTThe Exos-9 will go anywhere you want great sound, but if you’relooking for a more permanent spot to place the speaker, there are a couple things to keep in mind. Speakers with deep bass extension like the Exos-9 are affected by how close they are to the wall. Bass can be boosted if the back of the speaker is within a few feet of the wall, but if it’s too close to the wall the bass may be dulled. If you would like to improve bass response, try moving the speaker, or adjust the bass using the equalizer.8BATTERY LIFEThe Exos-9 battery lasts for approximately 10 hours playing at moderate volume. Battery life varies with volume and EQ settings. As with all speakers, battery life gets much shorter at very high volumes.To get more play time at very high volumes, use the Battery Save Mode EQ setting. It targets and reduces audio frequencies that use the most power, and can increase battery life by up to 100%.The display sceen and touchpad are designed to turn off after 15 seconds of activity to preserve battery life. Press any button or swipe your fi ngers across the touch pad to reactivate.9CHARGING / POWERThe battery will automatically charge as needed when the speaker is connected to AC power using the included power cord. The cord is a standard PC cord and easily replaceable. The battery level is shown on the display screen. You may continue to use the speaker on AC power while the battery is charging. You can swap a depleted battery with a spare or extended life battery.After 15 minutes of inactivity, the speaker will enter sleep mode to save power. While in sleep mode, it will not connect via Bluetooth or play audio. Connect via NFC or press one of the touch buttons on top of the speaker to wake it from sleep mode.USB CHARGESOFTWARE UPDATEPOWER110-240vLINE IN。
Q19说明书
Q19行车记录仪一、按键构成机器顶部有三个插孔。
从左至右分别是①HDMI高清视频输出口:用于输出视频数据,需要自备HDMI线材。
②RESET复位按键:用于复位机器,重置电力状态。
③梯形供电口:用于给机器供电。
本机器一共有有6个按键。
机器左侧有四个按键,从上至下,编号:①②③④机器右侧有两个按键,从上至下,编号:⑤⑥1、“菜单按键”(①号):在暂停录像的情况下,短按可以进入菜单2、“上翻按键”(②号):①可在菜单里进行上翻页;②在录像模式下可以开启或者关闭录音(麦克风图标)3、“下翻按键”(③号):①可在菜单里进行下翻页;②在录像模式下短按可锁定一段视频,视频长短和分段长短相同4、“模式按键”(④号):在暂停录像的情况下,短按可以在录像-拍照-回放间切换5、“开关按键”(⑤号):长按可开关机器,关机时会自动保存文件6、“确定按键”(⑥号):①暂停或开启录像;②作确定按键使用插好内存卡,开机之后会立即开始录像。
录像时,左上角会有红点闪烁。
正下方显示当前时间。
录像时短按“上翻按键”(②号),可开启或关闭录音。
按“确定按键”(⑥号),暂停录像后,机器右上角的指示灯停止闪烁,则是录像暂停。
此时可按菜单进入菜单,开始选项设置。
二、菜单选项设置大部分设置均不需要修改,仅需要设置好时间,机器就可以正常使用暂停录像后,按“菜单按键”(①号)即可进入菜单。
按“上下翻页”,可选择菜单目录,按“确定按键”(⑥号)可进入具体的选项设置。
菜单目录①:1、录像格式推荐设置最大清晰地1920*1080P(默认),清晰度高2、循环录影推荐设置时间1分钟,1分钟保存一段视频,自动循环。
注意!此选项若选择关闭,机器会持续录制,直到内存存满,提示卡满后,会停止录制。
3、日期水印将设置好的日期时间印制到视频文件内,推荐开启4、移动侦测监控专用,开启之后屏幕前面有东西动作就会录制,建议行车时关闭菜单目录②:1、重力感应推荐设置为中(默认),避免频繁锁定视频(灵敏高),或遇事故不锁定视频(灵敏低)2、文件类型修改回放模式下,查看的文件的类型3、声音设置内有①录音:开启或关闭机器录音功能;②按键音:开启或关闭机器的按键音;③音量:改变机器发出的音量大小。
Alpine 9英寸Restyle双层厚版说明书
Jeep Wrangleri209-WRAi209-WRASXM9” Restyle Installation ManualModel: WranglerModel Y ear: 2011-2017Design and specifications are subject to change without notice for improvement.The installation of this product requires specialized skills and experience. We recommend that you have theproduct installed by an Alpine authorized dealer. Before you use this product, be sure to carefully read this installation manual and the separate user's manualso that you can use the product correctly. Alpine Electronics bears no responsibility for problems that arise as a result of failure to follow the instructions in the manuals. This manual includes a number of symbols that are intended to help you use the product safely, to preventharm to you and others, and to protect against damage to property. These symbols and their meanings are listed below. Make sure you fully understand these symbols before you begin reading the main text.Explanations of Injury and Damage That May Result from Incorrect UseJeepModel Year Wrangler2011-2017* The specified vehicles have been tested and have met compatibility specs at the time of testing. Compatibility is not guaranteed if the manufacturer has made production changes to the listed vehicles above.Warning: Before you begin wiring, remove the ground wire from the negativeterminal of the battery. Failing to do so can lead to electric shock, injury or damage to equipment.Congratulations on purchasing the i209-WRA. This installation manual is designed to take you through thestep-by-step installation of the i209-WRA into a 2011 and 2017 Jeep Wrangler. Please familiarize yourself with the owners manual and if you still have additional questions please call 1-800-TECH-101.Types of PrecautionsStore screws and other small objects where small children cannot reach them. If one of these small objects is swallowed, consult with a doctor immediately.When replacing fuses, be sure to use fuses with the specified current rating. Failing to do so couldlead to an accident or fire.ForbiddenMandatory Before you begin wiring, remove the ground wire from the negative terminal of the battery. Failing to do so could lead to electric shock or injury.When making a hole in the vehicle body, be careful to avoid damaging pipes, the fuel tank, electrical wiring, and the like. This kind of damage could lead to an accident or fire.Bundle cords so that they don’t interfere with driving. Wrapping cords around the steering wheel, gearshift, brake pedal, or the like, could lead to an accident or damage equipment.Do not sandwich cords between the seat railing or allow them to touch protrusions. Resulting breaks or shorts could lead to electric shock or fire.Do not block vents or heat sinks. Doing so could lead to fire or damage equipment.The installation and wiring of this product requires specialized skills and experience. Have the product installed by an Alpine authorized dealer.Tools RequiredAccessory ListInstallation Kit Parts (G-KTX-i209-WRA)Accessory ListHead Unit Box Parts (i209)iDatalink Maestro Box Parts (ALP-MRR2/ALP-HRN-WRA2)Programming the iDatalink Maestro Module1INSTALL THE WEBLINK PLUG-INGo to:/plugin and follow the installation steps.Review the System Requirements before installing.If the plugin is already installed, the caution, “The plugin is alreadyinstalled” appears. Please skip to step 2.3 CONNECT YOUR MAESTRO MODULEUse your Maestro module to connect to your PC.5 PROGRAM YOUR MODULEFollow the programming steps for your vehicle.2REGISTER A WEBLINK ACCOUNTGo to:/register and complete the registration process.A confirmation email will be sent to you requiring validation.For existing customers, click log in.4 LOG INTO WEBLINKGo to:/login.Enter your username and password, then click OK.6 Once Programing is complete “FLASHINGCOMPLETED!” will be displayed.Proceed to the next page to complete installation.NOTE: If serial number is invalid, Call ADS at 1-866-427-2999 with the serial number.Component LocationsIMPORTANT: Follow the recommended component location shown below. Failure to do so, will result in poor GPS performance.GPS Antenna InstallationIMPORTANT: Follow the GPS antenna installation procedure shown below. Failure to do so will result in poor GPS performance.Factory Unit Disassembly ProcessDISCONNECT THE BATTERY BEFORE CONTINUING. FAILURE TO DO SO WILL DISABLE MANY FEATURES.1 Remove the rubber cover from the top centerstorage area and extract (1) 7mm screw.3Remove the window switch pod using a panelremoving tool and extract (1) 7mm screw.radio.2Remove the knee cover panel and extract (2) 7mm screws located to the right and left sides of thesteering wheel column.steering wheelcolumn.Left side of steering wheelcolumn.4Remove the dash panel.6Extract (2) 7 mm screws from the factory radio bracket and remove it.Installation Instructions2Remove the vents from the radio section on the OEM dash panel by pressing down on the lock tab and turning right. Mount vents on to the i209-WRA bezel.4Mount the microphone as illustrated and run the cable to the radio cavity.6Attach the Maestro to the main harness. *See page 13 for more details.1The factory dash panel needs to be trimmed to allow the new i209-WRA bezel to fit into place. Remove the highlighted area by cutting along the dashed line.3Use a cutting tool to trim the highlighted areashown below.below the driver side dash and run the extension to the radio cavity.Avoid any sharp edges or interfering with any safety equipment.Installation Instructions2Put monitor face down on a soft, scratch freesurface and attach Display Monitor Brackets using (4) 8mm screws (provided). Plug in the DisplayCable and Display Power Harness.4Attach the display and source unit with the 8mm screws (supplied) as shown below.Route the display cable and power harness from the display to the source unit andplug into the W. Remote and Display Out.6Route the key harness through the top-left side of the i209 source unit. Mount the i209 source unitusing (4) 7mm factory screws.DISCONNECT THE BATTERY BEFORE CONTINUING. FAILURE TO DO SO WILL DISABLE MANY FEATURES.1Attach the modified panel using the factory screws.3Apply Insulating pad by removing the paperbacking. See diagram below.5Route the USB extension cable to the glove box, connect the main harness and other adapters to the factory harness and secure them.To retain the factory USB port in uConnect systems,See page 11 for installation instructions.Connecting the uConnect USB port1Extract the (2) 7mm bolts.3Connect the 4pin OEM connector to the OEM USBadaptor (included).5Secure the uConnect module to the original location using the 7mm bolts.2Disconnect the 4pin OEM connector.4Use the USB extension to connect USB adaptor tothe radio USB input.Connecting A SiriusXm ModuleTo SXM OEMantenna attachedto OEM FMantennaMounting BracketsDISCONNECT THE BATTERY BEFORE CONTINUING. FAILURE TO DO SO WILL DISABLE MANY FEATURES.IMPORTANT: During the research and development of this product it was discovered that mounting tolerance may vary from the vehicle’s trim level to year built. We have added a 1mm tolerance to the mounting brackets to compensate for such variance in mounting tolerance. Use the guides below as reference if there are any required adjustments.Adjust the rear bracket as needed when the top or bottom is protruding or not flushed.Adjust the side brackets as needed when either side is protruding or not flushed.Exploded-View DiagramSwitch Pod (not included)Bezel Wiring Diagram8 Pin Harness 20 Pin Harness (Connect to i209D) 8 Pin Harnessi209-WRA Wiring Diagrami209-WRA With Optional HDMI Interface Wiring DiagramSet Up Guide1Turn the vehicle’s Ignition switch to ACC.2Turn ON the i209-WRA by pressing any key.3Select the user language and press OK.4With the vehicle parked, hold down the foot brake pedal, engage the parking brake, release the parking brake and finally engage the parking brake and release the foot brake.5If a camera is present, turn it ON in the system menu. (MENU/SETUP/SYSTEM/CAMERA/CAMERA SELECT) 6AUDIO MUTE ON REVERSE- By default, when the vehicle is shifted into reverse the AUDIO will MUTE. If this feature is not desired turn it off in the AUDIO MENU (MENU/SETUP/SOUND/MUTE WHILE BACKING UP)7When the KCX-630HD (HDMI SELECTOR) is present be sure to turn it ON in the SETUP MENU. (MENU/ SYSTEM/EXTERNAL ACCESSORIES/HDMI SELECTOR)8Set the DVD player. (MENU/SETUP/SOURCE/HDMI).9When the KAC-001 (External Accessory Control Module) is present be sure to turn it ON in the SETUP MENU.(MENU/SYSTEM/EXTERNAL ACCESSORIES/EXTERNAL ACCESSORY CTLR)10Vehicle information- Set the desired gauge information. (MENU/VEHICLE INFO/GAUGES/CAR SETTINGS) Troubleshooting GuideSymptom Possible Cause Remedy1iDatalink website saysserial number is invalid.Serial number may not be iniDatalink database.Call ADS at 1-866-427-2999 andverify.2Headunit will not turn on.Incorrect serial number was usedwhen flashing maestro.Flash Maestro with correct serialnumber.4 pin Maestro data cable isdisconnected or damaged.Check for proper connection ordisconnected pins.3Cannot enter SETTINGSMENU.Vehicle is in motion or parkingbrake is not engaged.With vehicle on (P)PARK, engagethe parking brake, release theparking brake and engage theparking brake a second time.4No output from RCA’s Maestro module is flashed foramplified system.Re-flash module for non-amplifiedsystem.5Android Auto not working Haven’t paired phone to BluetoothyetGo into Bluetooth settings onphone, find head unit, and pair.6iPhone is not recognizedwhen connected to theUSB cable.Loose or disconnected USB cable.Check the USB connection behindthe headunit.Non-compatible cableUse the cable supplied with theiPhoneDirty charging port on phone Clean charging port。
灵图9PC版破解安装详细教程
灵图9PC版破解安装详细教程灵图9PC版破解安装详细教程最近下载了灵图9PC版,安装测试了一下,找了很多论坛的安装破解文章,感觉写的都比较简单,不是专门好明白得,不适合初学者,俺学习了一下,用了一成天的时刻写了那个比较详细、适合初学者的教程!(或许是俺比较菜!嘿嘿!不要见笑啊!)免责声明:本教程内容来源于网络,本人只是进行了综合整理,仅供机油学习测试,请在测试后24小时内删除,若是喜爱请支持正版安装破解进程要依照以下步骤进行一、下载以下四个文件备用下载请到:(AVEN补充。
有懒的为下载注册的,能够直接到9楼看下载链接)一、灵图天行者9PC版官方安装文件。
2、灵图9PC版破解文件。
3、灵图天行者9PC版分辨率文件(选择下载适合自己本本分辨率的文件)4、附件二、安装进程破解进程一、.正常解紧缩"灵图天行者"安装,不要改变安装途径,安装后不要启动运行,直接删除生成的桌面快捷方式和程序菜单快捷方式。
2.复制破解文件到灵图天行者9的安装目录下同名文件夹内(C:\ProgramFiles\Lingtu\SmartGuider9)3.将“成立快捷方式到桌面,重命名“灵图天行者9”4.更改图标右键点击“灵图天行者9”→属性→更改图标→阅读→我的电脑→本地磁盘(C)→C:\Program Files\Lingtu\SmartGuider9\→确信5.将分辨率调整为1024X768运行。
(如果不设置成1024X768的分辨率,灵图9将不能运行)。
注:若是您的本本最低分辨率是1024X78或1280X800那么您就没必要进行以下操作,直接运行即可。
若是分辨率不适合,在进行分辨率的调整设置。
三、分辨率调整设置一、新建文件夹并重命名为“profile”。
2、将C:\Program Files\Lingtu\SmartGuider9\configfile目录下的用winrar 解压缩,释放分辨率配置文件到新建文件夹“profile”内。