二维扫描枪设置指南
优解YJ4600二维条码扫描枪失败扫描手机屏幕中条码的方法

优解YJ4600二维条码扫描枪
扫描手机屏幕中条码的方法
文章来源:扫描网
优解YJ4600二维条码扫描枪扫描手机屏幕中条码的方法是什么?条码扫描器除了可以扫描纸质的条码外,在允许的情况下可以通过一些设置来读取手机屏幕或其他LED显示屏中的条码。
大多数影像式二维码扫描枪都会带有这种功能,我们以优解YJ4600二维条码扫描枪为例,只需要在优解YJ4600扫描器快速入门指南中找到【固定扫描模式-手机】,扫描一下即可设置成功。
如果您不需要这种扫描模式了,您可以扫描一下【手动模式(默认)】条码即可取消这种设置。
不过需要注意的是,启用这一模式后,条码扫描器再扫描印刷条码的话,扫描速度可能就会稍有下降。
Honeywell(霍尼韦尔)1900条码扫描枪设置
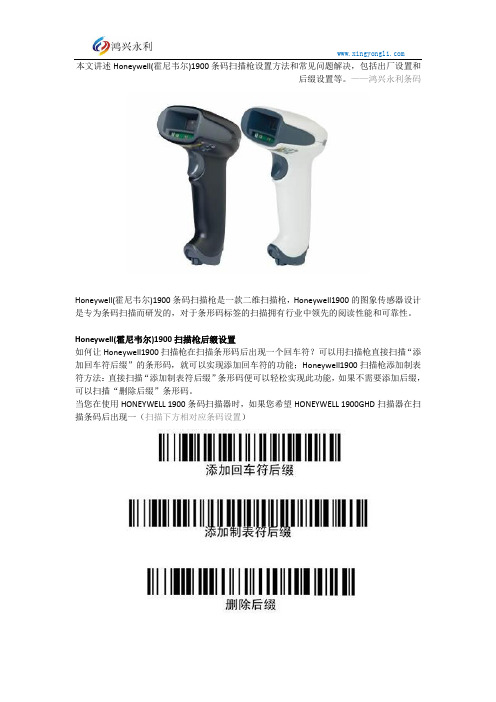
本文讲述Honeywell(霍尼韦尔)1900条码扫描枪设置方法和常见问题解决,包括出厂设置和后缀设置等。
——鸿兴永利条码Honeywell(霍尼韦尔)1900条码扫描枪是一款二维扫描枪,Honeywell1900的图象传感器设计是专为条码扫描而研发的,对于条形码标签的扫描拥有行业中领先的阅读性能和可靠性。
Honeywell(霍尼韦尔)1900扫描枪后缀设置如何让Honeywell1900扫描枪在扫描条形码后出现一个回车符?可以用扫描枪直接扫描“添加回车符后缀”的条形码,就可以实现添加回车符的功能;Honeywell1900扫描枪添加制表符方法:直接扫描“添加制表符后缀”条形码便可以轻松实现此功能,如果不需要添加后缀,可以扫描“删除后缀”条形码。
当您在使用HONEYWELL 1900条码扫描器时,如果您希望HONEYWELL 1900GHD扫描器在扫描条码后出现一(扫描下方相对应条码设置)在使用Honeywell1900扫描枪过程中,如果出现某些编程选项的错误,想通过恢复出厂设置来解决的话,就可以通过一下方法来解决:1.先用Honeywell1900扫描枪扫描“Remove Custom Defaults”条形码,2.扫描“Activate Defaults”条形码,这个时候Honeywell1900条码扫描器将恢复到最开始的设置也就是出厂设置。
(1)(2)Honeywell(霍尼韦尔)1900扫描枪常亮模式设置一般Honeywell1900扫描枪模式的设置有三种:1.自感应扫描模式;2.手动触发扫描模式;3.常亮扫描模式的设置。
一下是相对应的扫描模式的条形码设置,只需用扫描枪扫描对应条形码就能实现相应功能设置。
常亮扫描模式手动触发扫描模式自感应扫描模式1900扫描枪与程序兼容性问题:在使用中就会遇到各种看起来很是奇怪的状况。
比如:最典型的状况就是扫描条码的时候,条码扫码枪提示音正常,但是数据无法上传电脑;还有就是扫描条码提示音是短促的发闷的声音,这种也是较常见的状况。
2D 条码扫描仪使用手册说明书

USB、RS232、USB COM 21.6(W)×16(D)×12(H)mm DC 5 V 160mA 20mA
Environment Parameter
Working Temperature
Storage Temperature
Working Humidity
Ambient light
-20℃~+50℃ -40℃~+70℃ 5%~95%(no condensation) 0~100000LUX
QR Code 25mm-240mm (20mil 16 bytes)
Data Marix 50mm-90mm(10mil 20 bytes)
PDF 417 30mm-130mm (6.67mil 7 bytes)
Print Contrast ≥25%
Scan Angle
Corner 360°,Pitch angle ± 55°,
2D Barcode Scanner User Manual
2D Barcode Scanner User Manual
NOTE:
• For stability enhancement of scanner or otherproperties, Manufacturer may modify the software(including firmware) • A standard packing includes a user guide, a cable and a Scanner.
1、Make sure the power off。 2、Insert the RJ45 into the scanner。 3、Connect the RS232 to the host。 4、Plug the power adapter。 5、Power on the host. If connect right, it will prompt from beeper
无线2D条码扫描器全面用户手册(无线部分)V4.4说明书

Wireless2D Barcode ScannerFull Manual(Wireless Part)V4.4ContentVersion No (3)Factory Default Setting (3)Output Mode (3)Data Transfer Mode (3)Communication Mode (4)USB interface type (5)USB-HID Data type (5)Inventory Mode (5)Sound Set (6)Sleep Time Set (6)GS(group separator)characters conversion (8)Letter case conversion (8)Language Set (9)2.4G Pairing (12)Bluetooth HID Pairing (12)Show or Hide the Keyboard in IOS (12)Bluetooth HID Transfer Rate (12)Data Editor (13)Suffix Terminator character Setting (13)Hidden character Settings (14)Add prefix and suffix Settings (15)Hiding front character shortcut setting (17)Hiding back character shortcut setting (18)Data Code Table (19)ASCII Code Table (21)Add Ctrl、Shift、Alt、GUI function key (27)Version No.Version NumberFactory Default SettingRestore Factory DefaultNote:the asterisk(*)is the factory default.Output ModeUSB priority output(*)Note:When inserting USB cable,data only output by USB.Output at the same time Note:USB and2.4G or Bluetooth output at the same time(depending on the communication mode),in which2.4g or Bluetooth output is unsuccessful,alarm will be given.Data Transfer ModeImmediate ModeNote:The scanned data will be uploaded immediately,and the data will not be saved if the transmission fails.Inventory Mode Note:The scanned barcodes will be saved automatically,please scan setting codes if you need to view statistical data or upload data.Automatic storage modeNote:When the distance is beyond,the data will be saved automatically.please scan setting code‘upload all data’when you need to uploaded the saved data. Communication Mode2.4G Mode(*)Bluetooth HID Mode Note:Please scan‘Bluetooth HID pairing’setting code if you need to pair the scannerwith a new device.Bluetooth BLE ModePlease download or develop low-power Bluetooth BLE transmission software if you need to use this function.Bluetooth SPP ModePlease download or develop low-power Bluetooth SPP transmission software if you need to use this function.USB interface typeUSB-HID(*)USB-VCOMUSB-HID Data typeTransfer keyboard function keysSend ASCII Inventory ModeClear All Saved DataStatistical InformationUpload All DataSound SetMuteHigh(*)MediumLow Sleep Time SetNo SleepSleep Now10S30S1Min(*)2Min5Min10Min30MinNote:Keep pressing the button until you hear the first beep for about8seconds,release the button and the scanner will enter sleep.GS(group separator)characters conversionNone(*)GS converts to<GS>GS converts to|GS converts to]GS converts to^]Letter case conversionNormal Letter Case(*)All UppercaseAll LowercaseCase Inversion Language SetUSA(*)GermanFranceItalyCanadianSpainBrazilSwedenPortugalBelgiumTurkeyFTurkeyQItalian14NetherlandsPolandFinlandLatin AmericaSerbiaHungaryDenmarkNorwayJapan 2.4G Pairing2.4G PairingBluetooth HID PairingBluetooth HID PairingShow or Hide the Keyboard in IOSShow or hide the virtual keyboard under IOS systemBluetooth HID Transfer RateFastMedium(*)LowUltra-low speed Data EditorSuffix Terminator character SettingSuffix-NoneSuffix-Enter(*)Suffix-LineSuffix-TabSuffix-Enter&LineHidden character SettingsHide front characterHide back characterHide front characterSteps:(1)Scan the setting code"Hide front character"(2)Set the first few digits of the sequence to hide,and use two data codes to represent the decimal number XX(3)Set how many digits(including their own data)are hidden from the first few digits in the sequence,using two digitsData code represents decimal number YY(4)Finally scan the setting code"Saved and Finished Set".XX represents the number of digits from the top,that is,it is hidden from the number of characters in the top(including itself);YY represents how many digits are hidden,that is,how many digits are hidden in the futureFor example:the barcode content is:"ABCDEFGHIJKLMN",hide these characters DEFGH, Make the output bar code"ABCDIJKLMN".(1)Scan the setting code"Hide front character"(2)The position of the character‘E’is the4th bit,so"XX"is‘0’,‘4’,Look up the data code table and scan the data code table‘0’and‘4’in turn;(3)Hidden"DEFGH"means a total of5characters,so"YY"is‘0’,‘5’,Look up the data code table and scan the data code table‘0’and‘5’in turn;(4)Finally,scan the setting code"Saved and Finished Set".Remarks:Only operate(1)and(4),then you can clear the character settings before hiding or restore the factory.Hide back characterSteps:(1)Scan the setting code"Hide back character"(2)Set the last few digits of the countdown to be hidden(including its own data),represented by two data codesDecimal number XX(3)Set the number of digits to be hidden forward from the penultimate digit,and use two data codes to represent decimalSystem number YY(4)Finally scan the setting code"Saved and Finished Set".XX represents the penultimate digit,that is,hidden from the penultimate character(including itself);YY represents how many digits are hidden,that is,how many digits are hidden forwardFor example:the barcode content is:"ABCDEFGHIJKLMN",hide these characters DEFGH, Make the output bar code"ABCDIJKLMN".(1)Scan the setting code"Hide front character"(2)The position of the character‘H’is the7th bit,so"XX"is‘0’,‘7’,Look up the data code table and scan the data code table‘0’and‘7’in turn;(3)Hidden"DEFGH"means a total of5characters,so"YY"is‘0’,‘5’,Look up the data code table and scan the data code table‘0’and‘5’in turn;(4)Finally,scan the setting code"Saved and Finished Set".Remarks:Only operate(1)and(4),the character setting after clearing hidden or restoring to factory can also be cleared.Add prefix and suffix SettingsAdd Prefix settingAdd Suffix SettingSaved and Finished SetAdd Prefix SettingSteps:(1)Scan the setting code"Add Prefix setting"(2)Set the first few digits of the sequence to start inserting characters(including its own data), use two-digit"data code"Represents the decimal number XX(the first setting can be omitted,which is equivalent to setting"0","1"),Please check the corresponding data code table(3)Scan the content that needs to be added in turn,please find the ASCII code table(4)Finally scan the setting code"Saved and Finished Set".For example:the original barcode content is"ABCDEFGHIJKLMN";The content after adding the prefix is""ABCDE12345FGHIJKLMN"".1.Scan the setting code"Add prefix"2.In the original barcode,the prefix"12345"is added before the character‘F’,while the original The position of the code content‘F’is the6th character,so the data code"XX"is"0","6",search the data code table,and scan the barcode corresponding to the data code in turn. 3.The content added in the original bar code is"12345",a total of5characters.Find ASCII Code table,characters"1","2","3","4","5",corresponding to ASCII code in turn "31","32","33","34","35",and scan the corresponding barcode in turn4.Finally scan the setting code"Saved and Finished Set".Remarks:Only operate(1)and(4),you can also clear the content of adding prefix for clearing or restoring factory.Add Suffix SettingSteps:(1)Scan the setting code"Add Suffix Setting"(2)Set the penultimate digit to start inserting characters(including its own data),use two-digit "data code"Represents the decimal number XX(the last can be omitted to set the same as"0","1"), Please check the corresponding data code table(3)For the content that needs to be added for one scan,please find the ASCII code table(4)Finally scan the setting code"Saved and Finished Set".For example:the original barcode content is"ABCDEFGHIJKLMN";The content after adding the prefix is""ABCDE12345FGHIJKLMN"".1.Scan the setting code"Add Suffix Setting"2.In the original bar code,the suffix"12345"is added after the character‘E’,while the original bar codeThe position of the code content‘E’is the10th last character,so the data code"XX" For"1","0",look up the data code table,and scan the barcode corresponding to the data code in turn.3.The content added in the original bar code is"12345",a total of5characters.Find ASCII Code table,characters"1","2","3","4","5",corresponding to ASCII code in turn "31","32","33","34","35",and scan the corresponding barcode in turn4.Finally scan the setting code"Saved and Finished Set".Remarks:Only operate(1)and(4),you can also clear the contents of adding suffixes or restoring the factory.Hiding front character shortcut settingHide the first1bitHide the first2bitsHide the first3bitsHide the first4bitsHide the first5bitsHide the first6bitsHide the first7bitsHide the first8bits Hiding back character shortcut settingHide the back1bitHide the back2bitsHide the back3bitsHide the back4bitsHide the back5bitsHide the back6bitsHide the back7bitsHide the back8bits Data Code Table123456789ASCII Code TableNullSOH(start of headline)STX(start of text)ETXEOT ENQ ACKBEL BS HTLF VT FFCR SO SIDLE DC1DC2DC3DC4NAKSYN ETB CANEM SUB ESCFS GS RSUS SP!"#$%&'()*+,-./0123456789:;<=>?@A BC D EF G HI J KL M NO P QR S TU V WX Y Z[\]^-`a b cd e fg h ij k lm n op q rs t uv w xy z{|}~DEL Caps Lock F1F2F3F4F5F6F7F8F9F10F11F12PrintScreenScroll Lock Pause InsertHome PageUp DeletePageDown End RightArrowLeftArrow DownArrow UpArrowNum Lock(keypad)/(keypad)*(keypad)-(keypad)+(keypad)Enter(keypad)1(keypad)2(keypad)3(keypad)4(keypad)5(keypad)6(keypad)7(keypad)8(keypad)9(keypad)0(keypad).(keypad)Add Ctrl、Shift、Alt、GUI function keyNote:When there is a press,there must be a release.Press and release must be used in pairs Otherwise,there will be hot key issues such as data not uploading and computer lock screenL-Ctrl Press L-Shift Press L-Alt PressM-GUI Press R-Ctrl Press R-Shift PressR-Alt Press R-GUI PressL-Ctrl Release L-Shift Release L-Alt ReleaseL-GUI Release R-Ctrl Release R-Shift ReleaseR-Alt Release R-GUI Release。
扫描枪使用规范

扫描枪使用规范扫描线的链接问题:扫描枪都是即插即用,无需驱动和软件即可正常使用。
接口有分三种:USB口,键盘口,串口。
不同点在于:USB接口和键盘口的枪连接电脑后,扫描到的条码信息都可在任意的常用软件的输入窗口中直接显示;而串口的扫描枪只能在特定的窗口中输入,如附件中的通讯选项中的超级终端。
扫描枪连接到电脑上的时候都会有电源提示音,根据不同品牌和不同型号的扫描枪,提示音有不同。
扫描枪的使用规范:一维扫描枪:1.按下扫描键红色光线从枪口射出,需要用红色光线贯穿条码上的黑条。
根据条码的尺寸不同,扫描距离的远近也有不同。
一般是需要拉到条码宽度占据红光的三分之二为最佳。
另根据扫描枪的性能不同,该标准也有不同之处,但差距甚微。
2.扫描角度最理想为30—60度角。
该标准也根据标签纸的不同材质和扫描时的光线环境有些许不同。
一般国内常见扫描枪,多以45度角为最佳。
调整角度的同时也可适当的调整距离,已达到最佳扫描位置。
注:上述要求根据常见的一维激光扫描枪而定,另有一种红光扫描枪,于本标准有较大差异。
红光扫描枪扫描距离需要很近,且对于角度方面要求不高,一般距离在1-5CM不等,可根据实际情况调整到最佳位置。
二维扫描枪:二维扫描枪所射出的光线是呈区域型的,正中会有一个红色的十字形图案做定位。
四周有四个角确定范围大小。
扫描时应将红色十字最准二维码,大概居中即可,扫描角度以90度直角为最佳。
区域范围根据条码大小有不同,以条码占据区域的二分之一到三分之二为最佳。
另根据不同品牌不同型号的扫描枪,以上标准略有差异,同样,差异度不大,可适当调节以达到最佳扫描位置。
注意事项:因串口扫描枪比较少用,故此处着重说明USB口和键盘口扫描枪使用中的问题。
原理类似。
在您正常使用前需要做的检查工作有:硬件是否有损坏;配件是否齐全;接口是否是您所指定的。
如有发现问题,请尽快联系本商城的在线客服。
1.检查无误后,连接电脑相应的接口,听到电源提示音为正常,可以开始扫描工作。
123Scan2操作指南

Motorola 123Scan2简明操作指南V 1.01 | P a g e目录启动 (4)一创建新的配置文件 (5)1选择扫描枪与PC的连接方式 (5)2选择扫描枪型号 (6)3参数设置 (7)1)名称和注释 (7)2)数据线连接方式 (7)3)条码码制选择 (9)4)数据格式化设置 (10)4-1)创建新的规则 (12)4-2)将规则保存到数据库 (14)4-3)从数据库中添加规则 (14)5)通用设置 (15)6)打印选项 (16)7)加载和打印 (17)7-1)将配置文件保存到电脑 (18)7-2)打印出设置条码 (18)7-3)加载设置到连接的扫描枪 (19)二加载已有的配置文件 (20)三克隆或修改现已连接的扫描枪设置 (22)四升级扫描枪固件 (24)五查看扫描数据 (27)2 | P a g e六其他功能 (29)1打印蓝牙底座的配对条码 (29)2打印扫描枪和123Scan2的USB通讯条码 (29)3偏好设置 (30)4工具 (31)5帮助 (31)6手动检查更新 (31)7关于 (32)附件一:Action动作功能解析 (33)附件二:操作实例(用DS4208样机示例) (35)3 | P a g e123Scan2软件是Motorola出品的一款简单易用的基于PC的软件,可以快速,简便的对Motorola扫描枪进行用户化设置。
整个设置过程是向导式的,设置文件可以保存下来,或者直接加载到扫描枪,也可以直接打印出设置条码,扫描枪通过扫描就可以完成设置。
123Scan2还可以配合SMS等软件,生成定制的格式包文件。
利用123Scan2还可以对扫描枪固件升级。
注:123Scan2软件是一个非常有用的工具,其内部参数的含义与说明书相同,如果不太理解软件中某些参数的含义,可以直接在说明书中查找相应的参数,查看详细解释。
启动123Scan2在PC上安装好123Scan2之后,启动程序,如下界面:注:如果设置了“自动检查更新”,在联网状态下,会自动进行检测,若有更新,会弹出提示界面:可以选择马上Install,或者Cancel取消。
二维扫描枪 用户设置手册说明书
二维扫描枪用户设置手册2D Area Image Barcode ScannerUser’s ManualVer:2.3外观及功能/Appearance and function通讯接口/Communication interface:二维码扫描枪通过USB通讯。
/The communication interface of the reader is USB.读码/Reading:1、确保二维码扫描枪已经正确连接主机。
/To ensure that the reader has the right to connect the host2、按住触发键不放,照明灯和瞄准灯被激活,出现红色瞄准线和白色照明区域。
照明区域是用来照亮条码,瞄准线是用来定位,帮助您找到最佳识读位置。
将瞄准线大致对准条码。
Hold down the trigger button to activate the red line and the white light area.The lighting area is used to illuminate the barcode,the line of sight is used to locate,help you find the best reading distance.Keep red aiming line in the center of a bar code。
3、听到成功提示音响起,同时红色瞄准线和白色照明区域熄灭,则读码成功,二维码扫描枪将解码后的数据传输至主机。
/On a successful reading,there’ll be a beep sound,illumination&aiming patterns die out.The reader then transmits barcode message to the Host.注意:在识读过程中,对同一批次的条码,您会找到一段距离内读码成功率都很高。
NLS-NVH200B 无线式蓝牙二维条码扫描器用户手册说明书
NLS-NVH200B无线式蓝牙二维条码扫描器用户手册免责声明请您在使用本手册描述的产品前仔细阅读手册的所有内容,以保障产品的安全有效地使用。
阅读后请将本手册妥善保存以备下次使用时查询。
请勿自行拆卸终端或撕毁终端上的封标,否则福建新大陆自动识别技术有限公司不承担保修或更换终端的责任。
本手册中的图片仅供参考,如有个别图片与实际产品不符,请以实际产品为准。
对于本产品的改良更新,新大陆自动识别技术有限公司保留随时修改文档而不另行通知的权利。
本手册包含的所有信息受版权的保护,福建新大陆自动识别技术有限公司保留所有权利,未经书面许可,任何单位及个人不得以任何方式或理由对本文档全部或部分内容进行任何形式的摘抄、复制或与其它产品捆绑使用、销售。
本手册中描述的产品中可能包括福建新大陆自动识别技术有限公司或第三方享有版权的软件,除非获得相关权利人的许可,否则任何单位或者个人不能以任何形式对前述软件进行复制、分发、修改、摘录、反编译、反汇编、解密、反相工程、出租、转让、分许可以及其它侵犯软件版权的行为。
福建新大陆自动识别技术有限公司对本声明拥有最终解释权。
版本记录版本号版本描述发布日期V1.0.0 初始版本。
2018-10-11 V1.0.1第一章开机、休眠、关机、重启小节,休眠:手动识读模式下扫描器超过一定时间备注改为“1分钟以上”2019-01-31V1.0.2 1、第三章识读模式小节“预瞄准模式”修改为“瞄准模式”2、第三章解码中心区域小节增加中心区域解码功能4、第三章配对设置小节增加蓝牙HID键盘模式5、删除第五章“重传”小节6、修改第一章NVH200B无线扫描器外观的指示灯定义内容2019-03-13V1.0.3 1、第六章增加码制Code 49、Code 16K、GM Code、Code One、OCR-B并在“默认设置表”“AIM ID列表”、“Code ID 列表”与“条码序号对照表”增加以上五项2、第五章增加小节“连接主机”、“连接底座”、“无线连接模式”。