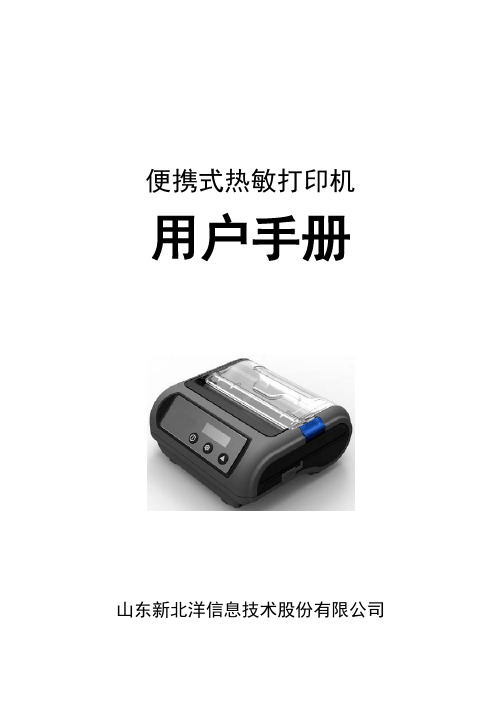
便携式热敏打印机
TP UP-PH便携式热敏微型打印机 说明书

简介
TP UP-PH 便携式热敏微型打印机具有如下特点: Ø 易装纸结构,提供了非常容易的换纸方式 Ø 可更换的集成可充电电池,提供了极好的便携性能 Ø IrDA 红外接口,提供了极容易的接口连接方法 Ø 内装标准一、二级汉字库,提供了快速美观的汉字打印方式 Ø 黑标检测装置,提供了预印刷票据定位打印的可能 TP UP-PH 适用于各种便携式仪器设备的配套打印输出,例如掌
说明 换行 设置字符打印方式 选择自定义字符集 定义用户自定义字符 打印曲线 设定点图命令 设置默认字符行间距
4
ESC 3 n ESC @ ESC J n ESC c 5 n ESC c 7 n ESC R n GS FF GS * n1 n2 [d]k GS / n GS h GS k GS w FS & FS . ENQ
入纸仓,架在纸支架上。然后从纸卷中拉出一段纸放在机头上。 (4) 将上盖放下,向下轻按上盖,直至恢复原卡位,纸端从上盖出
纸口露出,即安装好打印纸,如图 2-3(d)。
(a)
(b)
8
纸支架
(c)
(d)
图 2-3 打印机的装纸过程
2.4 接口选择
UP-PH 便携式打印机可选择使用 RS-232C 串行通讯接口或 IrDA 红外接口。
上电脑、PDA、手持 POS、抄表机、电子记事本、移动电话等各种具 有 RS-232 接口和红外接口的仪器设备。
3
第一章 性能与特点
1.1 打印性能
• 打印方法
: 行式直接热敏打印
• 打印纸宽 • 点密度
: 58 +0 mm
-1
: 8 点/mm
• 有效打印宽度 : 48mm
• 打印速度
: 30mm/s(电池充满时)
wewn便携式打印机使用教程
wewn便携式打印机使用教程具体操作是把wewn热敏打印机的并(串)口连接线接在电脑的后面主板的并口(串口)上,然后给wewn打印机接上电源线搞定。
1、确认机器开机有运转声音,如没有运转声,将wewn打印机耗材重新安装后,问题依旧,建议联系当地服务中心。
2,如运转正常,查看电脑端口,我的电脑(计算机)—右键—管理—设备管理器—通用串行总线控制器—USB PRINTING SUPPORT(USB wewn打印机支持),端口没有,换USB线换电脑端口或者更换计算机。
3,端口正常,删除USB PRINTING SUPPORT(USBwewn打印机支持)和wewn打印机和传真中wewn打印机图标,拔下USB 线,重启电脑,插上USB线打印。
(1)在执行“添加wewn打印机”的第三步时,选择“网络wewn 打印机”,点击“下一步”,用户可以在此处设置查找wewn打印机的方式。
(2)如果用户希望在工作组中查找wewn打印机,可以点击“下一步”,弹出“查找wewn打印机”对话框。
由于在局域网内部,可以选择“键入wewn打印机名,或者点击‘下一步’,浏览wewn 打印机”单选项。
(3)用户可以输入wewn打印机名称也可以点击“下一步”,弹出“浏览wewn打印机”对话框。
在这里,“共享wewn打印机”列表框中列出了域中的所有共享wewn打印机以及与wewn打印机连接的计算机。
如果局域网中有多台wewn打印机,用户可以在这里找到适合自己的wewn打印机。
(4)点击“下一步”按钮,在弹出的对话框中,用户可以设置是否将wewn打印机设置为默认wewn打印机。
(5)点击“下一步”按钮,在弹出的对话框中,显示了用户设置的网络wewn打印机的情况,点击“完成”后,就可以像使用本地wewn打印机一样地使用网络wewn打印机了。
微型打印机工作原理
微型打印机工作原理
微型打印机工作原理:
微型打印机通常使用热敏打印技术,其工作原理如下:
1. 打印头:打印头由一组微小的热敏头组成,每个热敏头都对应着一列,每列包含几十到几百个头。
这些热敏头能够在短时间内加热至高温状态,并随后迅速冷却。
2. 热敏纸:热敏纸上覆盖着一层特殊的涂层,这种涂层含有微小的荧光粉。
当热敏头加热时,荧光粉会发光,形成图案或文字。
3. 控制系统:微型打印机内部搭载着一个控制系统,控制着热敏头的加热和冷却过程。
通过控制每个热敏头的加热顺序和时间,可以实现打印出各种图案和文字。
4. 印墨:微型打印机使用的热敏纸不需要传统的墨盒,因为图案和文字的颜色是通过荧光粉的发光来实现的,因此不需要额外的印墨。
5. 电源:微型打印机通常使用电池作为电源供应,使得其可以随时随地进行打印操作。
整个打印过程中,控制系统指挥着热敏头加热荧光纸的特定位置,从而实现图案和文字的打印。
打印速度较快,并且操作简便。
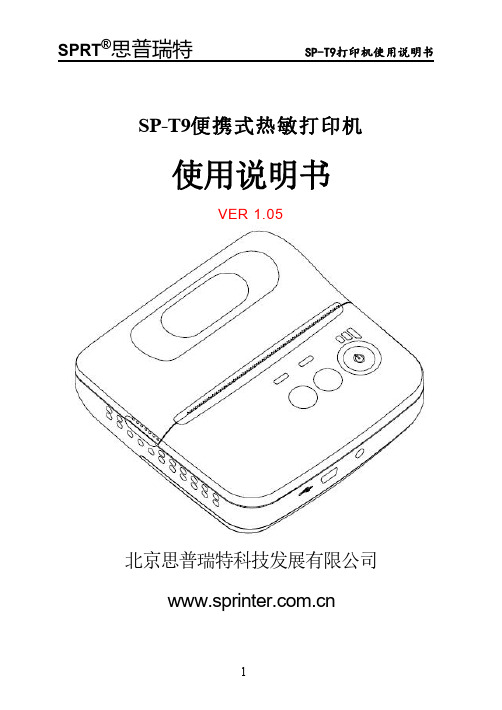
思普瑞特SP-T9便携式热敏打印机使用说明书
SP-T9便携式热敏打印机使用说明书VER1.05北京思普瑞特科技发展有限公司目录注意事项 (1)安全注意事项 (1)使用注意事项 (1)存放注意事项 (2)第一章打印机外观及型号 (3)1.1外观 (3)1.2型号 (3)第二章性能特点 (4)2.1打印性能 (4)2.2物理参数 (4)2.3环境参数 (5)2.4其他性能 (5)第三章使用方法 (6)3.1使用前的准备 (6)3.1.1电池安装 (6)3.1.2打印纸卷安装 (7)3.1.3其它 (8)3.2基本功能使用 (8)3.2.1开机 (8)3.2.2关机 (8)3.2.3走纸(手动进纸) (8)3.2.4自检测 (8)3.2.5十六进制打印 (9)3.2.6打印机参数设置 (9)3.2.7充电 (9)3.3打印机参数设置 (10)3.4打印机连接及打印 (10)3.4.1USB连接 (10)3.4.2蓝牙连接 (10)3.5指示灯及蜂鸣器说明 (11)第四章其他信息 (14)4.1指令编程手册 (14)4.2预印刷黑标说明 (14)附录 (16)注意事项在使用打印机之前,请仔细阅读本章内容!安全注意事项本打印机只能使用本公司提供的专用电池和电源适配器,否则可能引起产品损坏,电池漏液、起火甚至爆炸。
不要将电池投入火中,不要将电池短路、拆散或加热,否则可能导致电池漏液、起火甚至爆炸。
如果长时间不使用打印机,务必将电池从打印机中取出,否则可能导致电池漏液。
电池中的液体具有腐蚀性,如果操作不慎导致电池漏液并将液体粘到皮肤或衣物上,请立即用清水洗掉,如不慎进入眼睛内,请立即用大量清水彻底冲洗眼睛并去看医生。
打印时或刚打印结束时不要开启纸仓盖,用手或身体的任何部位接触打印机芯,以免过高的温度导致烫伤。
使用注意事项打印机不可浸入水中,也不要将其暴露在雨中,否则可能导致打印机损坏。
打印过程中不得打开纸仓盖,否则可能导致打印机工作不正常。
在使用USB接口打印时,在打印过程中不能将USB线拔下,否则可能导致打印数据不完整。
佳博58mb打印机说明书
佳博58mb打印机说明书一、产品概述佳博58MB打印机是一款高效节能的便携式热敏打印机,适用于商业、收银、餐饮等行业的小型打印需求。
该打印机具有出色的打印速度和打印质量,同时支持多种连接方式,方便用户进行打印操作。
二、产品特点1.高效节能:佳博58MB打印机采用先进的热敏打印技术,无需使用墨盒或碳带,只需要使用专用热敏纸,并且在打印过程中无需加热,大大减少了能源消耗。
2.快速打印:该打印机支持高速打印,最高可达XX毫米/秒,大大提高了打印效率,同时还能保证印刷的清晰度和准确性。
3.多种连接方式:佳博58MB打印机支持蓝牙、USB、串口等多种连接方式,用户可以根据需要选择最适合自己的连接方式。
4.打印质量稳定:该打印机采用优质的打印头和打印机芯,能够精确控制打印质量,确保每一张打印出来的文档都具有清晰、鲜明的效果。
5.便携式设计:佳博58MB打印机体积小巧轻便,便于携带,方便用户随时进行打印操作。
三、使用方法1.打开打印机:长按开关按钮,直到指示灯亮起。
2.连接设备:根据需求选择蓝牙、USB或者串口进行连接,确保连接成功后,指示灯亮起。
3.加载纸张:打开纸盖,将纸张平整地放入打印机的进纸槽中,并确保纸张正面朝下。
4.调节打印机设置:根据需要,使用打印机面板上的按键进行设置,如打印模式、字体大小等。
5.进行打印:将需要打印的内容发送到打印机,并按下打印键,打印机开始进行打印操作。
6.打印完成:在打印完成后,取出打印好的文档,确保纸张完整。
四、注意事项1.在使用打印机之前,请仔细阅读本说明书,并按照说明进行操作,以免发生错误。
2.在更换纸张时,请确保使用合适尺寸的热敏纸,否则可能会导致打印失效。
3.打印机工作时可能会有些许噪音和热量产生,属于正常现象,请放心使用。
4.请勿用湿手触摸打印机或插拔连接线,以免引起电器故障。
5.请勿将涂有化学品的纸张放入打印机,以免对打印机产生损坏。
6.请定期对打印机进行清洁和维护,确保打印质量。
新北洋 便携式热敏打印机 用户手册
便携式热敏打印机用户手册山东新北洋信息技术股份有限公司声明本手册内容未经同意内容不得随意更改,山东新北洋信息技术股份有限公司(以下简称新北洋)保留在技术、零部件、软件和硬件上改善产品的权利。
用户如果需要与产品有关的进一步信息,可以与新北洋或经销商联系。
本手册的任何章节没有新北洋的书面许可不得以任何形式、通过任何手段进行复制或传送。
版权本手册于2017年印制,版权属于新北洋。
中国印制。
1.0版本。
商标新北洋使用的注册商标是。
警告、注意警告必须遵守,以免伤害人体,损坏设备。
注意给出了打印机操作的重要信息及提示。
新北洋通过下列管理体系认证ISO9001 质量管理体系认证ISO14001环境管理体系认证OHSAS18001职业健康安全管理体系认证IECQ QC 080000有害物质过程管理体系认证联系方式地址:山东省威海市高技区火炬路169号保修、咨询电话:400-618-1368、800-860-1368 传真:+86—631—5656098QQ:4006181368网址:产品通过下列安全认证:安全须知在操作使用打印机之前,请仔细阅读下面的注意事项:1.安全警告警告:不要触摸打印机的撕纸刀。
警告:打印头为发热部件,打印过程中和打印刚结束,不要触摸打印头以及周边部件。
警告:不要触摸打印头表面和连接接插件,以免因静电损坏打印头。
2.注意事项1)打印机应远离水源并避免阳光、强光和热源的直射。
2)不要在高温,湿度大以及污染严重的地方使用和保存打印机。
3)避免将打印机放在有振动和冲击的地方。
4)如果打印机表面表面结露,在露水消除之前不要打开打印机的电源。
5)将打印机的充电器连接到一个适当的接地插座上。
避免与大型电机或其它能够导致电源电压波动的设备使用同一插座。
6)如果较长时间不使用打印机,请拿出打印机的电池。
7)避免水或导电的物质(例如:金属)进入打印机内部,一旦发生,应立即拿出电池。
8)打印机不得在无纸的状态下打印,否则将严重损害打印胶辊和热敏打印头。
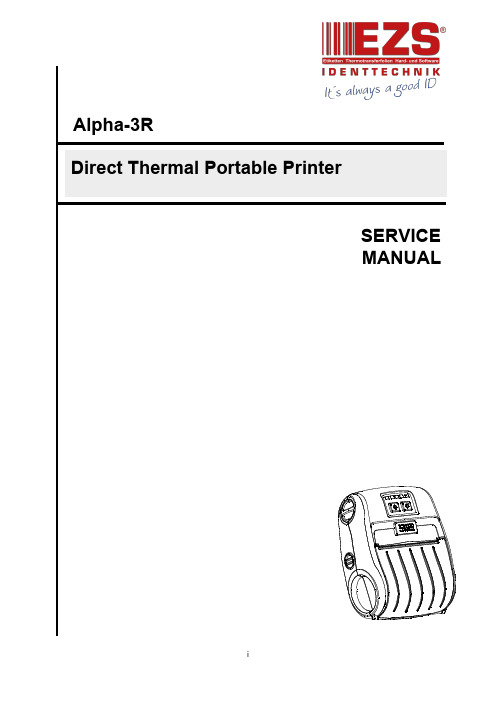
Alpha-3R 便携式热敏打印机维修手册说明书
SERVICE MANUALAlpha-3R Direct Thermal Portable PrinterContents1.FUNDAMENTAL OF THE SYSTEM (2)1.1Overview (2)2.ELECTRONICS (3)2.1Summary of Board Connectors (3)3.MECHANISM (7)3.1Replacing the Platen Roller (Including media cover) (7)3.2Replacing the Keys Control Board (9)3.3Replacing the Bluetooth Module (Option) (10)3.4Replacing the Media Holder Assembly (11)3.5Replacing the Main Board Assembly (13)3.6Replacing the Print Head Assembly (14)3.7Replacing the Stepping Motor (15)3.8Replacing the black mark sensor assembly (16)3.9Replacing the Wi-Fi Module (Option) (17)3.10 Replacing the Open Sensor (18)4.TROUBLESHOOTING (22)4.1Common Problems (22)5.Maintenance (24)Revise History (25)1. FUNDAMENTAL OF THE SYSTEM1.1 OverviewFront View1234561. LED indicator2. Feed button3. Power on/off button4. Media cover release button5. Media holder adjustment knob6. Media cover1. Tear edge2. Print head3. Media holder4. Platen5. Black mark sensor 214351. Li-ion battery2. Battery open clasp3. USB interface4. Power jack5. Interface cover324 152. ELECTRONICS2.1 Summary of Board ConnectorsMain board top1235 46789Connector Description1 LED & KEY board2 WiFi or Bluetooth module connectorPin Description1 3.3V2 BT/WiFi Reset3 BT RXD4 BT RTS5 BT TXD6 BT CTS7 WiFi wake up8 WiFi TCP9 BT/WiFi Switch10 GND3 Stepping motorPin Description1 OUT12 OUT23 OUT14 OUT24 Download F/W connectorPin Description1 3.3V2 GND3 RESET4 BMS5 NPCS06 MOSI7 MISO8 SPCK5 Head open sensorPin Description1 HEAD2 GND6 USB & RS 232 connector7 12V DC IN8 TPH connector9 Paper sensorPin Description1 3.3V2 BM_E3 BM_R4 3.3VMain board bottom1Connector Description1 Battery connector3. MECHANISM3.1 Replacing the Platen Roller (Including media cover)1. Remove two screws from the back of the printer and two screws from the front ofthe printer.2. Take the printer top cover off.3. Use a tool to remove the shaft. Remove/Replace the media cover. (including theplaten roller ass’y)4. Reassemble the parts in the reverse procedures.3.2 Replacing the Keys Control Board1. Refer to section 3.1 to remove the printer top cover.2. Remove two screws on the keys control board.3. Loosen the connector lock then disconnect the flat cable from the keys control board.Remove/Replace the keys control board.4. Reassemble the parts in the reverse procedures.3.3 Replacing the Bluetooth Module (Option)1. Refer to section 3.2 to remove the keys control board.2. Remove two screws on the Bluetooth control board.3. Disconnect the connector on the board.4. Reassemble the parts in the reverse procedures.3.4 Replacing the Media Holder Assembly1. Remove two screws and media holder adjustment knob.2. Take the interior mechanism from the printer bottom cover.3. Plug the media holder adjustment knob to rotate the media holder to the closest positionand remove a screw on the other side..4. Take the media holder assembly from the mechanism.5. Reassemble the parts in the reverse procedures.1. Refer to section 3.2 to section 3.4 to remove key control board, Bluetooth control board(option), and the media holder assembly.2. Remove two screws from the back of interior mechanism and disconnect all theconnectors on the main board assembly.3. Reassemble the parts in the reverse procedures.1. Refer to section 3.2 to section 3.5 to remove key control board, Bluetooth control board(option), the media holder assembly, and main board assembly.2. Use the long-nose pliers to remove two spring torsions on each side.3. Take the gear holder and the gear, and push the print head holder on the each side toremove the print head assembly.4. Reassemble the parts in the reverse procedures.Gear holder Gear3.7 Replacing the Stepping Motor1. Refer to section 3.4 and section 3.5 to remove media holder assembly and main boardassembly.2. Remove the gear holder and two gears.3. Remove two screws.4. Reassemble the parts in the reverse procedures.Gear holder Gears3.8 Replacing the black mark sensor assembly1. Refer to section 3.2 to section 3.5 to remove key control board, Bluetooth control board(option), the media holder assembly, and main board assembly.2. Remove a screw and replace the black mark sensor.3. Reassemble the parts in the reverse procedures. Black mark sensor assembly3.9 Replacing the Wi-Fi Module (Option)1. Refer to section 3.1 take the printer top cover off. Disconnect the Wi-Fi antennaconnector carefully.Wi-Fi antenna connector2. Refer to section3.2 to remove the keys control board.3. Remove one screw on the Wi-Fi control board. Please refer to above picture.4. Replace the WiFi control board.5. Reassemble the parts in the reverse procedures.Note:▪This is the new Wi-Fi module’s replacing instruction. It should work with the main board that is -30LF version. (or later version)▪If you replace the main board, please check the Wi-Fi signal band on configuration page for your using region. If any questions, please contact the Customer Service Department of yourpurchased reseller or distributor for assistance.US EUR3.10 Replacing the Open Sensor1. Please refer to section 3.1 take the printer top cover off and replace a new one withplaten roller.※Old media cover※New media cover(If the media cover is already the new one, it doesn’t need to replace the open sensor)2. Remove the screw on the open sensor.3. Unplug the old open sensor connector.4. Then, insert the new open sensor connector.5. Install the elastic panel on the open sensor.Note: the direction of elastic panel must be the same as illustrated6. Place the open sensor on the side of media cover switch.7. Lock the screw on the side of media cover switch.8. Fix the wire on the slot.9. Reassemble the parts in the reverse procedures.4. TROUBLESHOOTING4.1 Common ProblemsThe following guide lists the most common problems that may be encountered when operating this bar code printer. If the printer still does not function after all suggested solutions have been invoked, please contact the Customer Service Department of your purchased reseller or distributor for assistance.Problem Possible Cause Recovery ProcedurePower indicator does not illuminate * The battery is not properlyinstalled.* The battery is dead.* Reinstall the battery.* Switch the printer on.* Charge the battery.- The printer status fromDiagTool shows “HeadOpen”.* The printer carriage is open. * Please close the print carriage.- The printer status from DiagTool shows “Out of Paper”.. * Running out of media roll.* The media is installedincorrectly.* Black mark sensor is notcalibrated.* Supply a new media roll.* Please refer to the steps on section 3.4 toreinstall the media roll.* Calibrate the black mark sensor.- The printer status from DiagTool shows “Paper Jam”. * Black mark sensor is not setproperly.* Make sure media size is setproperly.* Media may be stuck insidethe printer mechanism.* Calibrate the black mark sensor.* Set media size correctly.Memory full ( FLASH / DRAM )* The space of FLASH/DRAMis full.* Delete unused files in the FLASH/DRAM.* The max. numbers of DRAM is 256 files.* The max. user addressable memoryspace of DRAM is 256KB.* The max. numbers of file of FLASH is 256files.* The max. user addressable memoryspace of FLASH is 2560KB.Poor Print Quality * Media is loaded incorrectly* Dust or adhesiveaccumulation on the printhead.* Print density is not setproperly.* Printhead element isdamaged.* Reload the supply.* Clean the print head.* Clean the platen roller.* Adjust the print density and print speed.* Run printer self-test and check the printhead test pattern if there is dot missing inthe pattern.* Change proper media roll.Missing printing on the left orright side of label* Wrong label size setup. * Set the correct label size.Gray line on the blank label * The print head is dirty.* The platen roller is dirty.* Clean the print head.* Clean the platen roller.Irregular printing * The printer is in Hex Dumpmode.* The RS-232 setting isincorrect.* Turn off and on the printer to skip thedump mode.* Re-set the Rs-232 setting.5. MaintenanceThis session presents the clean tools and methods to maintain your printer.1. Please use one of following material to clean the printer.⏹Cotton swab⏹Lint-free cloth⏹Vacuum / Blower brush⏹100% ethanol2. The cleaning process is described as following,Printer Part Method IntervalPrint Head 1. Always turn off the printer beforecleaning the print head.2. Allow the print head to cool for aminimum of one minute.3. Use a cotton swab and 100%ethanol to clean the print headsurface.Clean the print head when changing anew label rollPlaten Roller 1. Turn the power off.2. Rotate the platen roller and wipe itthoroughly with 100% ethanol anda cotton swab, or lint-free cloth.Clean the platen roller when changing anew label rollTear Bar/Peel Bar Use the lint-free cloth with 100%ethanol to wipe it.As neededSensor Compressed air or vacuum MonthlyExterior Wipe it with water-dampened cloth As neededInterior Brush or vacuum As neededNote:●Do not touch printer head by hand. If you touch it careless, please use ethanol to clean it.●Please use 100% Ethenol. DO NOT use medical alcohol, which may damage the printer head.●Regularly clean the print head and supply sensors once change a new ribbon to keep printerperformance and extend printer life.Revise HistoryDate Content Editor 2013/11/4 Modify some pictures for label model Camille2016/2/5Modify section 3.9 (replacing the Wi-Fi module) Camille2016/6/27 Add chapter 3.10 Replacing the Open Sensor KateCorporate Headquarters Li Ze Plant9F., No.95, Minquan Rd., Xindian Dist., No.35, Sec. 2, Ligong 1st Rd., Wujie Township,New Taipei City 23141, Taiwan (R.O.C.) Yilan County 26841, Taiwan (R.O.C.)TEL: +886-2-2218-6789 TEL: +886-3-990-6677FAX: +886-2-2218-5678 FAX: +886-3-990-5577Web site: E-mail:*****************************TSC Auto ID Technology Co., Ltd.****************************。
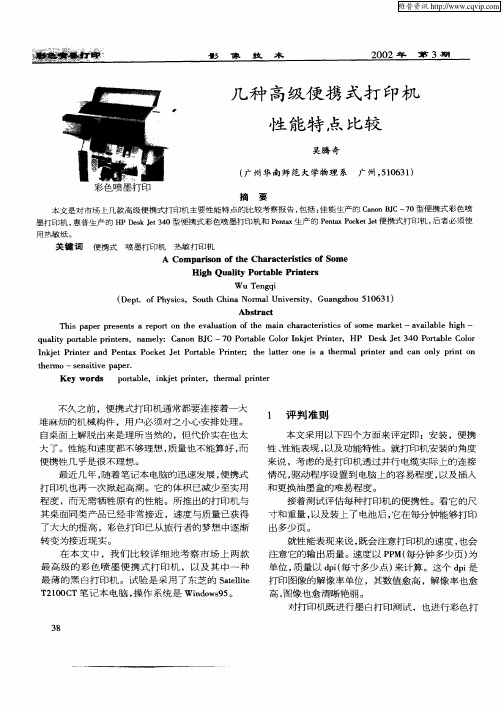
几种高级便携式打印机性能特点比较
3 8
维普资讯
20 0 2年
第 3期
影
像
塾
印 测 试 ,每 种 测 试 都 是 用 信 函 规 格 纸 张 所 作 的规 定
是 提 供 了 方 便 特 性 。随 机 带 来 的 软 件 很 有 用 ,它 的 C l dvsr 让 用 户 为 自 己 的 文 件 特 定 设 计 各 种 oo A ii 可 r o
大了 。性能 和速 度都 不够理 想 , 质量 也不能算好 , 而
便携性 几乎是很 不理想 。 最近 几 年 , 着 笔 记 本 电脑 的迅 速 发 展 , 携 式 随 便 打 印 机 也 再 一 次 掀 起 高 潮 。它 的 体 积 巳减 少 至 实 用
程 度 ,而无需 牺牲原有 的性能 。所推 出的打 印机与 其桌面 同类产品 已经 非常 接近 ,速度与质 量已获得
打 印 。在墨 白打 印测试方 面 ,打 印了有 8 纸的文 页 档, 平均每 页有 2 0 个字 符 , 00 内有几种采 用黑体字 的标题 ,以及一 些用斜体字 的 引语 。在 彩色打印 测 试方 面 ,所打印 的纸页包 含一个大 的图形 以及 几个
1 评 判 准 则
本文采 用以下四个方 面来评定 即 :安装 ,便携 性、 性能 表现 , 以及功能特 性 。就打 印机安 装的 角度
来 说 ,考 虑 的 是 打 印机 透 过 并 行 电缆 实 际 上 的 连 接 情况 , 动程 序设置到 电脑上的容 易程度 , 驱 以及 插 入 和 更换油墨 盒的难易程度 。
维普资讯
影
像
技
术
20 0 2年
- 1、下载文档前请自行甄别文档内容的完整性,平台不提供额外的编辑、内容补充、找答案等附加服务。
- 2、"仅部分预览"的文档,不可在线预览部分如存在完整性等问题,可反馈申请退款(可完整预览的文档不适用该条件!)。
- 3、如文档侵犯您的权益,请联系客服反馈,我们会尽快为您处理(人工客服工作时间:9:00-18:30)。
便携式热敏打印机开发手册(V1.0)一产品简介 (4)二通讯接口 (5)2.1红外:IR端口---------------------------------------------------------------------------------------------------- 52.1.1 原始红外(RAW-IR) (6)2.1.2 VIR (6)2.1.3 IRDA IrCOMM (6)2.2蓝牙(B LUETOOTH)接口 ----------------------------------------------------------------------------------- 72.2.1配对 (7)2.2.2 使用蓝牙接口打印 (7)2.3RS232端口 ------------------------------------------------------------------------------------------------------- 72.4:W I F I无线通讯(正在开发中)。
--------------------------------------------------------- 9三MPT-II打印机工具软件 --------------------------------------------------------- 错误!未定义书签。
四、打印控制指令 (9)4.1基本控制指令 ------------------------------------------------------------------------------------------------ 114.1.1 ESC @ (11)4.1.2 FF (12)4.1.3 LF (12)4.1.4 CR (12)4.1.5 ESC J n (13)4.1.6 ESC d n (13)4.1.7 HT (13)4.1.8 FS U nL nH (14)4.2字符参数设置命令 ------------------------------------------------------------------------------------------ 144.2.1 ESC ! n (14)4.2.2 GS ! n (15)4.2.3 ESC M n (16)4.2.4 ESC – n (17)4.2.5 ESC E n (17)4.2.6 ESC G n (18)4.2.5 ESC E n (18)4.2.6 ESC G n (19)4.3打印排版参数设置命令 ------------------------------------------------------------------------------------ 194.3.1 ESC $ nL nH (19)4.3.2 ESC D n1 n2...nk NULL (20)4.3.3 ESC 2 (21)4.3.4 ESC 3 n (21)4.3.5 ESC SP n (22)4.3.6 ESC a n (22)4.3.7 GS L nL nH (22)4.4图形/图象打印命令 ----------------------------------------------------------------------------------------- 234.4.1 ESC * m nL nH d1...dk .. (23)4.4.2 GS * x y d1...dk.. (28)4.4.3 GS / n (30)4.4.4 FS P n (30)4.5条码打印命令 ------------------------------------------------------------------------------------------------ 314.5.1 GS h n (31)4.5.2 GS w n (31)4.5.3 GS H n (32)4.5.4 GS f n (32)4.5.5 GS k (33)4.6曲线打印命令 ------------------------------------------------------------------------------------------------ 354.6.1 GS ‘ (35)4.6.2 GS “ (36)4.7自定义字符命令 --------------------------------------------------------------------------------------------- 384.7.1 ESC % n (38)4.7.2 ESC & y c1 c2 [x1 d1...d(y * x1)]...[xk d1...d(y * xk)] .. (38)4.7.3 ESC ? (40)4.8汉字命令------------------------------------------------------------------------------------------------------- 404.8.1 FS & (40)4.8.2 FS 2 c1 c2 d1...dk . (41)4.8.3 FS . (41)附录 (42)A打印字符集 ----------------------------------------------------------------------------------------------------- 42 B条码--------------------------------------------------------------------------------------------------------------- 43B.2 条码长度字符集表 (43)C.预印刷黑标说明------------------------------------------------------------------------------------------------ 44一产品简介MPT-II系列便携式热敏打印机是基于ARM平台,性能优越的支持红外、蓝牙、WIFI无线通讯技术的便携式票据、标签打印机。
可广泛使用在移动政务、警务、烟草、邮政、运输、物流等等行业。
MPT-II系列便携式微型热敏打印机包含三个型号,分别为MPT-II/IR、MPT-II/BL、MPT-II/WIFIMPT-II/IR:红外便携式打印机MPT-II/BL:蓝牙便携式打印机MPT-II/WIFI:WIFI便携式打印机二通讯接口MPT-II系列便携式打印机可用五种接口方式与主机进行数据传输,分别为IrDA (IrCOMM协议)、RAWIR(原始红外)、VIR蓝牙、RS232异步串行口。
其中蓝牙是无线数据通讯接口,IrDA为符合国际红外数据通讯协会制定的IrCOMM协议的数据传输方式、RAW-IR为符合国际红外数据通讯协会物理层规范的数据通讯方式、VIR为在RAW-IR基础上集成了VIR协议的数据通讯方式,。
RS232为有线异步串口。
MPT-II便携式微型打印机是能支持使用其中一种或几种数据通讯方式的主机设备,在开发前请先确认主机设备至少支持以上五种通讯方式中的一种。
2.1红外:IR端口红外数据通讯技术是红外数据协会(IrDA)开发并发展起来的一项用红外光作为通讯数据载体的一种无线数据通讯技术。
红外(IR)端口作为无线数据传输接口,因其功耗低、技术成熟、使用方便等等诸多原因现在为大多数便携式设备作为数据通讯的主要手段。
大部分的便携式设备都有红外(IR)端口,比如所有的WINCE掌上电脑、PALM掌上电脑、笔记本电脑,一部分手机、大部分便携式数据采集器,以及一小部分用于野外作业的测量仪器。
MPT—III 打印机在硬件上符合IrDA1.1物理层的规范。
由于红外(IR)端口是以红外光线作为数据载体,所以在数据发送设备和接收设备之间不能有障碍物,双方的红外端口要互相对准,并且距离不能太远。
所以MPT-II/IR打印机与其他符合标准IrDA物理层规范的主机设备通过红外(IR)端口连接时,要注意主机和MPT-II/IR打印机之间不能有障碍物,红外端口之间的夹角不能大于30°,距离不能超过0.5M。
MPT-II/IR可以使用原始红外(RAW-IR)与主机进行通讯,也可以选择采用Vir协议或IrCOMM协议(IrDA标准)与主机进行通讯。
当采用原始红外与主机进行通讯时,红外收发器只是简单地按照一定地编码规则将串口数据信号转为红外光信号或将光信号转为串口数据信号。
在这种用法下,红外端口被称为“原始红外(RAW-IR)”,当您使用原始红外(RAW -IR)时,无法跟IrDA兼容,因为在收发数据的过程中,软件并没有使用IrDA协议栈。
VIR是一种更安全可靠的红外数据通讯方式,即在原始红外的基础上增加了VIR协议。
如果用户主机不支持IrCOMM协议,推荐使用VIR协议。
相较于VIR协议,IrCOMM虽然也是基于原始红外硬件基础上的协议,但它是一种更通用的有国际红外数据通讯协会制定的红外数据传输协议。
IrCOMM是IrDA协议的一个子集,IrDA协议是在原始红外(RAW-IR)的硬件基础之上为了确保数据传输的稳定性、可靠性、易用性而由IrDA协会开发出的无线数据通讯协议,几乎所有支持IrDA协议栈的便携式设备(如WINCE、POCKET PC、PALM各种红外手机等等)都支持IrCOMM。
在这种模式下,如果驱动打印机的主机设备使用的是支持IrDA协议栈的操作系统(比如WINCE、PALM OS),那么对于开发者来说,IrCOMM端口就是一个由软件虚拟的串行端口,如果主机设备的操作系统没有IrDA协议栈,如果要实现IrCOMM模式数据传输,那么需要开发者自己编写IrDA 协议栈。
主机设备是否支持IrCOMM,请参阅主机设备的开发资料或向主机设备制造商咨询。
由于MPT-II/IR打印机中原始红外(RAW-IR)端口和VIR端口和IrCOMM端口使用同样的硬件资源,所以原始红外(RAW-IR)、VIR和IrCOMM不能同时使用,MPT-II/IR默认的红外模式为IrComm,如要更改当前红外(IR)端口的使用模式,需要专用的工具MPT-II_CONFIG修改设置如要了解详细的IrDA协议请参见IrDA协会官方网站(/)公布的技术资料2.1.1 原始红外(RAW-IR)原始红外(IR)端口由于是直接把红外(IR)收发器附加在RS232异步串口的输入输出端,所以红外收发器只是简单地将RS232异步串口数据信号按照一定的编码规则转为红外光信号或将光信号转为串口数据信号。