G华为单模CPEBs电子说明书和操作指南
ebs销售模块操作手册

ebs销售模块操作手册
EBS销售模块操作手册是一个详细的指南,用于指导用户如何使用EBS销
售模块。
该手册通常包含以下内容:
1. 简介:介绍EBS销售模块的目的、功能和特点。
2. 系统登录:介绍如何登录EBS销售模块,包括用户名、密码和登录流程。
3. 用户界面:介绍EBS销售模块的用户界面,包括菜单、工具栏、页面布
局等。
4. 基础操作:介绍EBS销售模块的基础操作,如创建销售订单、编辑销售
订单、保存销售订单等。
5. 进阶操作:介绍EBS销售模块的进阶操作,如设置销售区域、管理销售
渠道、管理客户信息等。
6. 报表分析:介绍如何生成和查看销售报表,以便用户对销售数据进行统计分析。
7. 系统设置:介绍如何配置EBS销售模块的系统参数,以满足企业的个性
化需求。
8. 常见问题与解决方案:提供常见问题的解决方法,帮助用户解决使用过程中遇到的问题。
9. 附录:提供EBS销售模块的快捷键、术语表等附加信息。
需要注意的是,不同版本的EBS销售模块操作手册可能会有所不同,具体内容需要根据实际情况进行编写。
同时,为了确保手册的准确性和完整性,需要定期对手册进行更新和维护。
EBS Multicomp - Studio Edition用户手册说明书

THANK YOU FOR PURCHASINGTHE EBS MULTICOMP - STUDIO EDITION PEDAL!EBS MultiComp is a high performance, analog compressor pedal with a choice between solid state, tube simulation and multi-band compression. With these impressive features the MultiComp makes a good sounding instrument sound even better.We hope you’ll enjoy using your EBS MultiComp pedal./The EBS TeamVisit for info on all EBS effects,amps and accessories.THE CONTROLSSet to ACTIVE position if you are playing an active instrument or if you have the pedal connected to an effects loop. If not, set this switch to PASSIVE.IT IS VERY IMPORTANT THAT THIS SWITCH IS SET CORRECTLY FOR PROPERLY FUNCTION.COMP/LIMIT controls the amount ofcompression, the ratio. The range is from1:1 (minimum) to 5:1(maximum position).GAIN controls the output gain of thecompressor. Compensate the output levelwith reference to bypass. You can also usethis control to boost your sound.compressor works when active.FOOT SWITCH Switches the pedal on or off.ACTIVE/PASSIVESwitch(next tooutputjack)POWER OPTIONSDC POWER ADAPTOR For environmental reasons,we recommend the use of a DC PowerSupply, such as the EBS AD-9+. The EBSMultiComp Studio Edition handles 9-12V DC, and require a 2.1 mm pin centernegative type of connector.BATTERY This pedal can run on battery (notincluded). To place a battery in the pedalfollow these steps.1) R emove the four screws holdingthe bottom plate.2) C arefully remove the bottom plate.3) Place a 9V alkaline type; 6LR61 inthe battery holder.4) G ently place back the bottom plate.Attach the four mounting screws usingmoderate tension.ADVANCED CONTROL OPTIONS (inside the box)ADJUSTING THRESHOLD LEVELS. The EBSMultiComp has the feature of fine-tuningthe compressor thresholds for both the highand low band compressors independently.The ranges can be set from "off", whichbypasses the desired band, up to a relativesensitivity of +6 dB from factory setting.These trimmers are set to 50% (12 o'clock)from factory.Make sure that the MultiComp operates inMULTIBAND mode when adjustingthe threshold levels.The trimmers are located on the printedcircuit board, and are easily accessible byremoving the bottom plate. When doingany adjustments, please use a plasticscrewdriver, and turn the trimmer gently.! If you are not 100% sure on how to do this, please consult your nearest service center. Excessive force may result in damage to the unit, and the warranty in that case will be void.SAMPLE SOUND SETTINGSThe following examples below show a few of the many sonic possibilities of the EBS MultiComp.STANDARD COMPRESSIONThe standard compression is achieved withthe mode switch set to Normal position.Use moderate setting for compression andcompensate for gain loss, or boost thesignal with Gain.MULTIBAND COMPRESSIONThis is a very useful setting for tightening upyour sound and obtaining maximumcompression. Use a fairly high setting forcompression and balance your sound withthe Gain control.TUBESIM MODEBased on the normal on-band compressor,this setting adds tube-alike harmonics toyour sound. Useful when you wish to addextra warmth to your sound, and worksvery well with other instruments than bassor guitar.TROUBLE SHOOTING GUIDEPlease consult the following checkpoints, before consulting one of the authorized EBS service centers.Checkpoint1) D oes the cable(s) work properly?2) Are the 1/4” plugs properly connected all the way in? 3) Are the Instrument cable attached to the Right (input) jack, and the Amp cable connected to the Left (output) jack?4) Does the pedal have a battery, and is the battery OK?5) Does the indicator LED light when pressing the foot switch alternatively?6) D oes the instrument work?7) Does the amplifier work and is the volume turned up?8) If you are using a DC adapter, Are you using an EBS AD-9?Action if answered NO- Replace cable(s).- Push the 1/4” plugs all the way in.- Reconnect input and output jacks.- Put a new battery inthe pedal.- Replace/put in battery, or use a DC power supply. - Check the instrument.- Turn up volume or check the amp at your nearest EBS service center.- Check the voltage and polarity of the adapter you are using.TECHNICAL SPECIFICATIONS EBS MULTICOMP Studio Edition Nominal Input Level -10 or -4 dBv Input Impedance 700 kohms Bandwidth +0/-3 dB 20 - 20k Hz Gain Range 0 - 15 dB Compressor Ratio min/max 1:1 - 5:1 Threshold (adjustable inside) -25 - +6 dB Attack Time (80%) <10 ms Release Time (80%) typ. 100 ms Dimensions Width 2.8" (70 mm)Height 4.5" (115 mm)Depth 1.4" (35 mm) Weight 400g (0.88 lb.) Power Requirements 9 - 12 V DC Regulated, 35 mA max. Protected against accidental over voltage up to 18 V.Specifications are subject to change without notice.If you did not find the answer in this manual, please contact**************************。
【精品文档】华为操作指导书word版本 (10页)

本文部分内容来自网络整理,本司不为其真实性负责,如有异议或侵权请及时联系,本司将立即删除!== 本文为word格式,下载后可方便编辑和修改! ==华为操作指导书篇一:LTE华为后台操作指导书RNC机房操作指导总结一. TD-LTE组网简介整个TD-LTE系统由3部分组成,核心网(EPC),接入网(eNodeB),用户设备(UE).EPC又分为三部分:MME 负责信令处理部分,S-GW 负责本地网络用户数据处理部分 P-GW 负责用户数据包与其他网络的处理。
接入网也称E-UTRAN,由eNodeB构成。
eNodeB与EPC之间的接口称为S1接口,eNodeB之间的接口称为X2接口,eNodeB与UE之间的接口称为Uu接口。
二. LTE网管客户端安装1、 LTE网管系统目前有两套,一套为M201X系统,另一套为新版OMC920系统,两套系统主要功能基本相同,但后者将TDS系统统一整合进来;2、 LTE网管的安装:系统的安装:M201X网管系统的安装,首先在IE地址栏中,输入IP地址http://10.211.176.80/cau/,然后下载安装,OMC920网管系统,则要输入IP地址http://10.212.96.45/cau/,然后下载安装;3、 OMC920系统网管安装成功后,需要将附件hosts文件复制到C:\WINDOWS\system32\drivers\etc目录下,替换系统自带的hosts文件,否则登录时会出现异常,M201X系统没有此类问题;后面操作因M201X与OMC920类似,故仅以OMC920网管系统为例说明;三. LTE网管客户端登录登陆网管OMC920客户端。
打开客户端后,显示的是“用户登陆”,需要填写,用户名,密码,当多个OMC920客户端登陆时,需点击服务器下拉菜单,增加网元信息。
成功登录后进入OMC920网管系统首页,内容包括各类维护操作的菜单栏、工具栏和一些快捷工具图示等;OMC维护系统包括MML命令、结果查询、监控和维护等主要功能,后面对这些具体功能进行详细介绍;四. LTE常用的操作4.1 eNodeB MML常用命令在网络规划和优化工作中,对单个eNodeB进行远端操作维护的情况较少,一般都可以在M201X下对eNodeB进行相关的操作。
ebs销售订单操作手册
ebs销售订单操作手册第一章:介绍销售订单是企业中常见的重要业务流程之一,通过销售订单,企业可以记录客户的需求,并相应地进行产品销售、库存管理等一系列操作。
EBS(企业资源计划系统)作为一种常用的企业管理软件,可以帮助企业高效地管理销售订单。
本操作手册将详细介绍如何在EBS系统中进行销售订单的操作。
第二章:EBS销售订单的创建1. 登录EBS系统在浏览器中输入EBS系统的网址,并输入正确的用户名和密码,登录到系统。
2. 进入销售订单模块在EBS系统的主界面中,找到销售订单模块入口,并点击进入。
3. 创建新的销售订单在销售订单界面,点击“新建订单”按钮,开始创建新的销售订单。
4. 填写销售订单信息按照系统提示,填写销售订单的相关信息,包括客户姓名、产品数量、价格等。
5. 选择产品在销售订单中选择需要销售的产品,并填写相应的数量。
6. 确认订单核对订单信息无误后,点击“确认订单”按钮,提交订单。
第三章:销售订单的查看与编辑1. 查看销售订单列表在EBS系统的销售订单模块中,可以查看已创建的销售订单列表,包括订单号、客户信息、订单状态等。
2. 编辑订单如果需要修改已创建的销售订单,可以选择相应的订单,并点击“编辑”按钮,在弹出的编辑界面进行修改。
3. 取消订单对于不需要继续进行的销售订单,可以选择相应的订单,并点击“取消”按钮进行取消操作。
第四章:销售订单的处理与跟踪1. 处理销售订单一旦收到客户提交的销售订单,EBS系统会自动将订单状态更新为“待处理”。
销售人员可以根据实际情况,进行产品备货、发货等操作。
2. 跟踪销售订单在销售订单列表中,可以实时查看订单状态的更新,包括待处理、已发货、已签收等。
销售人员可以根据订单状态进行后续的跟踪工作,确保订单按时完成。
第五章:销售订单的报表分析1. 导出销售订单报表EBS系统提供了丰富的报表功能,可以帮助企业进行销售订单的分析与统计。
在销售订单模块中,选择相应的时间范围和其他筛选条件,导出所需的销售订单报表。
EBS MicroBass 3用户手册说明书
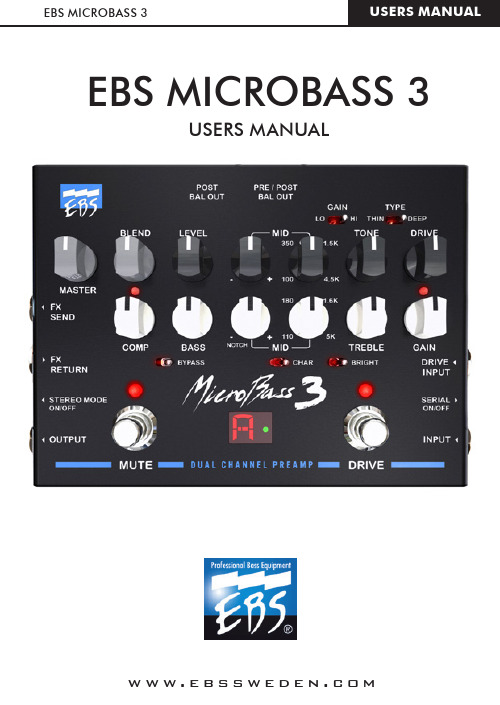
EBS MICROBASS 3USERS MANUALGAIN adjusts the input signal level for the EBS MicroBass 3. An optimum level is when the peak led starts flashing when playing hard on your instrument. A correctly set gain is vital for the signal processing to work properly.When active, bass andtreble are boosted while the midrange gain will be slightly dropped, known as a smiley EQ curve. This way the sound will be preshaped before the final adjustments using the other features of the preamp.BRIGHT is an advanced high pass filter that produces a bright high-treble timbre, without adding any noise. This switch gives a gain of 10 dB at 10kHz.12dB/oct slope phasecompensated bass filter with a wide gain range. in conjunction. Use the right control to pick a frequency. Use the left control to boost or cut the gain in the range of the chosen frequency. Note: When the left control is set to Notch , you can use the right control to find and erase a precise frequency that causes unwanted feedback (a common issue with upright basses in larger rooms).TREBLE is a shelving type filter controlling the higher mids and treble registers, giving presenceand ambiance to the sound.bypasses ALL filters in the clean channel and sets a flat frequency response.COMP. This control knob sets thecompression ratio, i.e. The signal strength DRIVE controls the amount of gain in the tube emulation stages (engines), and provides an extra gain all the way up to 40 dB. This control also compresses the sound when turning up level up to maximum, producing pure limitation. TYPE sets the drive tone character to THIN or DEEP (neutral in the between position). The deep position compensates for low-frequency loss at very high gain.GAIN selects between a low- and high-gain drive engine.MID is a peaking filter for the drive channel. The two knobs works in conjunction. Pick your frequency with the right control, and boost or cut with BLEND sets the mix level between the clean channel and drive channel when the drive channel is active. To jump between the and Drive channels, set this knob to the max position and set the Serial switch to Off .MUTE FOOT SWITCH . Mutes the balanced outputs and the master output.Fx Send is not affected by this function.The Mute switch also enables the built-in tuner for silent tuning.*DRIVE FOOT SWITCH - Engages the drive channel. The clean channel is always active, but if the BLEND control is turned all the way up, in parallel mode, this switch will make the sound jump from the clean channel to the drive channel when activated.the setting of this knob.LEVEL sets the output volume for CHANNEL CONTROLS, SWITCHES & OUTPUTSCONTINUED ON THE NEXT PAGE SPREAD >>* An internal switch can set the tuner to be active at all times.CLEAN CHANNEL = WHITE KNOBS DRIVE CHANNEL = BLACK KNOBS BOTH CHANNELS = GRAY KNOBSREFERENCE GUIDENote: The balanced outputs offers high-quality ’line box’ signals for connecting to PA mixing consoles or to studio or broadcast recording units, with high noise immunity. The output level controlled by the MASTER knob does not affect these outputs. ------------POST BAL OUT. Post EQ signal that is taken immediately before the Master knob (serve as the Left channel output when using FX Return in ’stereo mode’).PRE/POST BAL OUT. This output send various signals depending on which mode is selected:1) When the switch is in its’ outerposition the signal is taken before (PRE) any of the pedals the EQ.2) When the switch is engaged this output normally serves as post Clean channel EQ only -output. However, if the ’stereo mode’ for the FX return is activated at the same time, it will serve as the Right channel output, post EQ.GND LIFT. Eliminates ground noise and hum. When required, press the Gnd Lift switch to disconnect the ground from the balanced outputs.FX SEND & RETURN. EBS MicroBass3 is provided with an effects loop for use with external units such as box or rack effects. The loop puts the external effects after both channels EQs and the channel selector (Drive footswitch).STEREO MODE ON/OFF. By pushing this switch the return jack goes into TRS operation for stereo mode. When active, the Balanced Outputs will turn into Left and Right outputs rather than post/pre. The stereo effect will also be heard through the headphones output. For the stereo effect, use an external effect with stereo output last in line, and connect to the FX return using a Y-split cable, such as the EBS ICY-30.OUTPUT. This is the master output jack to be connected to another amp or power amplifier.DRIVE INPUT. This input is a direct input to the Drive channel in parallel mode and can be used to mix two sources, e.g. between two pickups on an instrument where applicable. Note: In conjunction with the Blend knob at max, and by choosing the LO gain engine (and modest or minimum Drive setting) it can serve as an input for a second instrument. Then you will use the drive channel to tweak the EQ individually for that instrument (not necessarily using any overdrive).SERIAL ON/OFF. This switch controls from where the Drive channel should take its’ signal. In default mode, parallel, the source is taken from the main input or the Drive Input when used. In serial mode, the source is taken from the output of the Clean channel, so the channels are connected in serial.INPUT - The main input is a low noise, high impedance instrument input.AUX IN. Auxiliary input to bemonitored only with headphones. This input has no level control and the volume should be adjusted by the source.PHONES. Connect your headphones here for silentpracticing. The volume from the MB3 is controlled by the MASTER knob where the Aux In needs to be adjusted from the signal source.DC INPUT. Connect the power supply here, only 9V DC, 1000 mA (supplied in package).A E HI J JKKJIHL LMNMNF GA/B B C CDDEFCClean Channel:Input Impedance: Parallel mode 1.5 Mohms // 44 pFSerial mode10 Mohms // 22 pF Gain:Gain Range min/max -oo/+30 dBGain Peak LED+10 dBvFrequency Response+0/-3 dB 20-20.000 Hz Character:Filter Type Shelving High/Low PassGain:Lo +6 dB @ 80 HzMid -2 dB @ 900 HzHi+********** Bright:Filter Type Shelving.Gain:+10 dB @ 10 kHzFilter Section:Bass Filter: Type 12 dB/oct. Shelving.Gain Range +/- 18 dB @ 60 HzMid Filter: Type Bandpass Filter.Freq Range50 - 5.000 Hz.Q - Boost 0.5 - 1.3.Q - Cut0.5 - >5.Gain Range+/- 12-15 dBTreble Filter: Type Shelving.Gain Range+/- 18 dB @ 8 kHz COMP/LIMIT: Comp Gain0 dBAttenuation max 24 dBCompression Ratio max 3:1Attack(80%) typ <10 msRelease(80%) typ 100 ms Drive Channel:Input Impedance: 1.8 Mohms // 22 pF Drive: Gain Range40 dBDrive Engines:Lo: Type2nd harmonics softHi: Type Symmetrical 2-stage with+18 dB gainType Switch: Thin/Normal/Deep Pre Drive EQFilter Section:Tone Filter: Type 6 dB/oct. Low Pass.Frequency Range700 - 20k HzMid Filter: Type Bandpass Filter.Frequency Range100 - 4.500 Hz.Q 1.2Gain Range+/- 15 dBCommon Features:Effects Loop:Loop Signal Level nominal -10 dBvGain Unity(1:1)Output Impedance<100 ohmsInput Impedance>200 kohms // 22 pF Phones Out: Recommended Imp.32 - 200 ohmsAux Input: Input Impedance20 kohmsNominal Level -10 dBvOutput:Output Impedance<1 kohmsSignal Level nominal 0 dBv Balanced Outputs:Output Level nominal -20dBvXLR Connections1-GND, 2-Hot, 3-ColdOptions Pre/Post EQ, L/R Ch.in stereo mode Auxiliary Info:Power Requirements Idle450mA @9V.Max750mA @9V(with headphones atmax output level) Dimensions (WxDxH): max168 x 124 x 53 mm /6.6” x 4.9” x 2.1”Weight: 660 g ( 1.5 lbs.)Specifications are subject to change without notice.TECHNICAL SPECIFICATIONS - MICRO BASS 3FOR MORE PEDALS, AMPS &ACCESSORIES, SCAN THE QR-CODE TO VISIT。
工点EBS管理操作说明书

工点EBS管理操作说明书一、系统登录1、打开浏览器,输入http://61.237.239.144/ictrcp/地址回车,进入如图1-1所示。
(图1-1)2、输入用户账户、用户密码、验证码回车或点击登录按钮,输入正确后进入主界面如图1-2所示,否则提示信息输入错误,请重新输入。
(图1-2)3、点击【项目基础信息】板块,进入项目管理子系统主界面如图1-3所示,主界面会显示出该用户负责的项目信息,用户可以对项目相关内容进行补充。
(图1-3)二、工点EBS功能介绍4、点击左侧菜单【工点EBS管理】,进入工点EBS管理主界面如图1-4所示,主界面包括项目、工区树形导航,工点信息列表,工点EBS 浏览界面显示工点EBS详细信息列表(图1-4)功能说明:【导出】:拥有权限的用户可导出工点EBS信息到XLS数据格式,以供保存和浏览。
【提示】:红色边框提示用户工程量或单价或计算合价不能为空,是必填项。
【编辑】:拥有权限的用户可以编辑工点EBS数据信息,如果在编辑过程中发现编辑错误,可以通过填写0清空本行数据。
5、点击编辑按钮进入如图1-5所示编辑主界面,主要包括:初始化EBS数据、导出、层次整理、计算合价、清空录入、刷新页面、更新子节点、墩复制以及返回浏览等功能操作。
(图1-5)【初始化EBS数据】:新建工点初次进入没有工点EBS数据,需点击初始化EBS数据按钮进入主界面如图1-6所示,EBS分类数据根据工点类型自动获取,EBS数据简版和完整版是通过项目基本信息的设置自动获取,如果是桥涵专业,用户需录入起止墩号,如图1-6、1-7、两种情况,需要录入起止墩号信息。
信息填写完整后,点击保存,会出现对话框入图1-9所示,其他类型如图1-8所示,不需要填写墩号,确定后系统自动获取EBS模板数据自动生成工点相关专业EBS数据信息如图1-10所示,数据处理完成后自动跳转编辑界面如图1-11所示,用户可根据实际情况录入工程量(录入规范参照附表一)、单价信息,自动计算合价以及父节点单价等。
EBS销售模块操作手册r12
EBS销售模块操作(标准)手册当前版本: 2.0建立日期:2008-2-10最后修改日期:2008-4-24目录目录 (2)文档说明 (3)登录 (5)销售订单创建 (7)选择责任 (7)进入销售订单 (7)录入订单头信息 (8)录入订单行信息 (10)登记订单 (11)销售订单发运 (13)订单发运 (13)订单发运确认 (15)销售订单状态查看 (18)销售订单状态查看 (18)物料搬运单 (20)处理物料搬运单 (20)销售发运事务处理 (23)销售发运事务处理 (23)销售退货 (26)建立销售退货单 (26)接收销售退货单 (29)销售订单异常处理 (31)销售订单为<登记>状态;交货状态为<准备发放>时取消 (31)销售订单为<登记>状态;交货状态为<已发放至仓库>时异常处理 (32)文档说明该文档将被用于以下几个方面:1.作为对IT、KEY USER、操作员工培训材料2.文档符号说明『按钮』;【输入框】;<多个页面>;“窗口抬头名称”;“输入内容”3.系统通用功能1)快捷键操作:a)CTRL+S 保存数据b)F4 退出当前窗口;CTRL+F4 关闭当前窗口的子窗口c)UP/DOWN 上/下一条记录d)PAGEUP/PAGEDOWN 上/下滚动滚动条e)CTRL+K 列出快捷键表2)带查找验证功能的【输入框】常规输入方法输入部分内容加%,以%作为通配符,然后按TAB键查找校验,如果只有一条符合要求的记录会直接显示,否则会弹出符合要求的值列表供选择;3)【输入框】旁的按钮使用点击该按钮直接弹出该输入栏位对应的值列表。
4)弹性域输入介绍显示表示弹性域内没有值;显示表示弹性域已经维护过信息5)日期格式及输入可以在网页登录后,页面右上角看到,点击『首选项』进入设置界面:,可以在该界面内完成设置【日期格式】,选择自己习惯的日期输入和显示格式。
obs-pfsfg-zh说明书
对象存储服务并行文件系统特性指南文档版本07发布日期2023-07-31版权所有 © 华为技术有限公司 2023。
保留一切权利。
非经本公司书面许可,任何单位和个人不得擅自摘抄、复制本文档内容的部分或全部,并不得以任何形式传播。
商标声明和其他华为商标均为华为技术有限公司的商标。
本文档提及的其他所有商标或注册商标,由各自的所有人拥有。
注意您购买的产品、服务或特性等应受华为公司商业合同和条款的约束,本文档中描述的全部或部分产品、服务或特性可能不在您的购买或使用范围之内。
除非合同另有约定,华为公司对本文档内容不做任何明示或暗示的声明或保证。
由于产品版本升级或其他原因,本文档内容会不定期进行更新。
除非另有约定,本文档仅作为使用指导,本文档中的所有陈述、信息和建议不构成任何明示或暗示的担保。
目录1 简介 (1)1.1 什么是并行文件系统 (1)1.2 应用场景 (1)1.3 约束限制 (2)1.4 使用方式 (2)1.5 计费标准 (3)1.6 特性介绍 (3)1.6.1 生命周期管理 (3)1.6.2 权限配置 (4)2 控制台方式 (6)2.1 创建并行文件系统 (6)3 API方式 (9)3.1 支持的API列表 (9)4 工具方式 (14)5 常见问题 (15)5.1 并行文件系统挂载后为何显示256T (15)A 修订记录 (16)1简介1.1 什么是并行文件系统1.2 应用场景1.3 约束限制1.4 使用方式1.5 计费标准1.6 特性介绍1.1 什么是并行文件系统并行文件系统(Parallel File System)是对象存储服务(Object Storage Service,OBS)提供的一种经过优化的高性能文件系统,提供毫秒级别访问时延,TB/s级别带宽和百万级别的IOPS,能够快速处理高性能计算(HPC)工作负载。
作为对象存储服务的子产品,并行文件系统支持用户按照标准的OBS接口读取数据。
华为 手机 说明书(5)
7 电池充电
1. 连接手机与充电器。 5
手机
充电器
2. 将充电器的电源插头插入电源插座。 3. 手机开始充电。屏幕显示充电动画效果。 4. 充电动画没有变化时表示充电已满,断开充电器与电源插座的
连接。 5. 断开充电器与手机的连接。
说明 随机附赠的充电线仅支持充电功能,不可用于数据传 输。
i
23 安全警告和注意事项 ................................................................ 12 ii
1 您的手机
听筒
左软键 拨号/通话键
方向键 数字键
键
屏幕
右软键 OK键 结束/挂机键
充电接口 #键
1
2 按键
按键
说明 z 拨打电话或接听电话。 z 待机状态下,进入“全部通话”。 z 长按此键,开机或关机。 z 在呼叫、通话、来电状态下,挂断电话。 z 非待机状态下,返回待机界面。 z 待机状态下,关闭背光。 z 待机状态下,进入“手机下载”。 z 菜单模式下,确认选择或者弹出菜单。
版权所有 © 华为技术有限公司 2009。
保留一切权利。
非经华为技术有限公司书面同意,任何单位和个人不得擅自摘抄、 复制本手册内容的部分或全部,并不得以任何形式传播。
本手册中描述的产品中,可能包含华为技术有限公司及其可能存 在的许可人享有版权的软件,除非获得相关权利人的许可,否则, 任何人不能以任何形式对前述软件进行复制、分发、修改、摘录、 反编译、反汇编、解密、反向工程、出租、转让、分许可以及其 他侵犯软件版权的行为,但是适用法禁止此类限制的除外。
,进入“全部通话”。找到 ,拨打电话。
华为5G CPE设置与Probe OMT上行灌包及下行测试指导书
5G CPE设置与Probe OMT上行灌包及下行测试指导书1 使用Probe连接CPE可以使用Probe连接CPE进行调测,使用Probe则可以同时观测NR和LTE的信息。
注意需要使用与版本配套的Probe才能保证所有观测项都可以正常显示。
1)菜单栏中选择Configuration → Device Management → Device Configure,出现设备配置界面2) 按下图设置添加一个新的设备,使用Probe连接时需要使用:192.168.1.13) 点击工具栏上的连接按钮连接CPE4)连接成功之后在左侧的导航栏中选择View → NR,可以选择对应的NR监测项进行查看,导航栏中选择View → LTE,可以选择对应的LTE监测项进行查看。
5)连接成功之后在Configuration->Test Plan设置测试计划➢Attach&Detach测试:验证NSA用户是否可正常接入LTE小区,且正常添加及释放5G NR小区Attach:UE通过RandomAccess流程接入5G小区,截止UE发送Msg3成功消息,标识UE成功接入5G小区。
➢Detach:CPE通过PowerOff进行Detach,L3信令只有一条UE发送DetachRequest,即表示成功去附着。
➢gNodeB DL UDP灌包:后台网管下行灌包测试, 评估5G DL吞吐率指标.➢CPE UL UDP灌包: 5G gNodeB SSV测试➢Ping测试:检查待测5G小区的Ping空口时延是否正常,目的IP:核心网服务器IP6)连接Probe后,点击菜单栏:Test→Start Record 可以记录LOG2 Probe查看5G上下行参数1)View → NR → Throughput界面下方可以看到上下行PDCP、RLC、MAC、PHY各层的流量:2)View → NR → Detail → UL MCS,可显示1秒内每个对应MCS阶数调度的次数和对应阶数上调度的RB总数。
- 1、下载文档前请自行甄别文档内容的完整性,平台不提供额外的编辑、内容补充、找答案等附加服务。
- 2、"仅部分预览"的文档,不可在线预览部分如存在完整性等问题,可反馈申请退款(可完整预览的文档不适用该条件!)。
- 3、如文档侵犯您的权益,请联系客服反馈,我们会尽快为您处理(人工客服工作时间:9:00-18:30)。
G华为单模C P E B s电子说明书和操作指南集团企业公司编码:(LL3698-KKI1269-TM2483-LUI12689-ITT289-
华为单模C P E-B593s操作指南一:面板介绍:
正常情况下:
CPE终端面板上电源指示灯、WIFI信号指示灯、TD-LTE信号指示灯均长亮,且显示为蓝灯。
故障判断:
电源指示灯不亮:请检查电源插头是否插好,CPE终端开关是否开启;WIFI指示灯不亮:请检查WIFI开关是否开启;
TD-LTE信号指示灯不亮:请重新开关CPE终端后是否恢复;
TD-LTE信号指示灯显示白灯:为该CPE终端仍在搜网中,请耐心等待;TD-LTE信号指示灯显示红灯:为该CPE终端搜索不到网络,请将该CPE 终端更换摆放位置试用。
二:CPE终端USIM卡槽和电源开关位置:
三:CPE终端WIFI开关和RESET键位置(RESET键:可恢复出厂设置):
四、背面样式:
CPE终端相当于一台路由器,可通过无线搜索终端发出的WIFI信号,也可直接通过网线直连CPE终端体验4G高速上网。
在机身背面有CPE终端WIFI的SSID、WIFI登陆密码。
五、修改密码:
1、网线直连电脑后,输入password:admin
2、选中WLAN(黄框选中部分),在操作界面中可修改SSID(红框选中部分)和登入密码(蓝框选中部分)
六、用户流量查询:
业务受理平台—MOD免费资源查询
附:网速测试(中国移动导航网站:)
一、在中国移动导航网站:中可以进行网速测试:
二、登入网速测试界面后,点击“开始”即可进行测速:
三、测试完成后,即可得出测试结果:
(目前TD-LTE速率一般在10M左右可视为正常网速,若用户对此不满,请做好用户解释工作。
)。