2020最新revit安装教程
Revit基础教程快速入门指南

Revit基础教程快速入门指南Revit是一款由美国Autodesk公司开发的建筑信息模型(BIM)软件,可以帮助建筑师、设计师和工程师在建筑项目的规划、设计和施工过程中进行协作和信息共享。
本文将为各位读者提供一个Revit基础教程的快速入门指南,帮助初学者快速上手使用Revit软件。
1. 软件下载和安装首先,你需要从Autodesk官方网站或其他可信来源下载Revit软件的安装程序。
安装程序下载完成后,双击运行并按照提示进行安装。
确保你的计算机符合软件的最低配置要求,并注意选择合适的安装选项。
2. 界面和视图启动Revit软件后,你将看到软件的主界面。
主界面由多个工具栏、菜单和视图组成。
你可以根据自己的需求和习惯,自定义界面的布局和工具栏的显示。
3. 创建项目在Revit中,你需要先创建一个项目来开始你的建模工作。
在主界面中,点击"新建项目",然后选择一个适合的模板,如建筑、结构或MEP(机电管道)模板。
4. 设置单位和坐标系在开始建模之前,你需要设置合适的单位和坐标系。
点击"项目设置",进入设置对话框,选择你所需的单位和坐标系。
确保设置正确的单位和坐标系,以便进行准确的建模和量化。
5. 创建建筑元素Revit中的建模是通过创建和编辑建筑元素来完成的。
你可以从工具栏上选择相应的工具,如墙体、地板、屋顶等,然后按照你的设计需求来绘制和编辑这些元素。
6. 添加参数和约束在建模过程中,你可以为建筑元素添加参数和约束来控制其属性和行为。
参数和约束可以使你的设计更加灵活和精确。
通过选择建筑元素,然后在属性面板中设置参数和约束的数值或条件。
7. 创建视图和视图模板Revit支持多种视图类型,如平面视图、立面视图、剖面视图等,可以帮助你更好地查看和审查设计。
你可以根据需要创建不同的视图,并使用视图模板来调整其显示和样式。
8. 添加注释和标记在设计过程中,你可能需要添加注释和标记来说明特定的细节和要求。
A360 Collaboration for Revit的基本设置、安装和使用教程说明书

AR15400Collaboration for Revit Plus A360 for Real-Time Project ManagementRon AllenAECOM BIM Manager/Revit Architecture & Design / Certified Revit ProfessionalMatthew AnderleAECOM, BIM Director (B+P Americas)Chris AquinoAutodesk, Technical Support Specialist - Co-SpeakerDescriptionThis class overviews basic setups, installation, and use of A360 Collaboration for Revit cloud service, and will examine how it has been used, advantages and disadvantages, things to consider for remote access and telecommuting, and how to push content to A360 cloud-based collaboration service. We will also touch on topics for organizational structures and project management in conjunction with A360 Collaboration for Revit cloud service andA360. This session features Collaboration for Revit and BIM 360 Glue. AIA ApprovedRegarding features in A360 and C4r- the "Published Date" for this document is 2016-10-28.Your AU Expert(s)Ron AllenRon Allen is an Arc IV/ BIM Manager with AECOM through the B+P (Buildings and Places) in the Greenwood/Denver Office.Ron's career has been constantly evolving and refining process and production with emerging technologies. Beginning with BASIC programming and electronics as a hobby in 1984, the pursuit of technology and its uses turned to formal study at Mississippi State University. At MSU he integrated several aspects of his education which included Computer science ( UNIX on VAX systems and SCI Indigo systems, programming ANSI C, PASCAL, COBOL), and Art which included Wave front 3D animation and modeling, Alias, Alias Up Front, Matador and video production, B&W Photography & music. The most prominent education was Architectural studies, it was then he began using Soft Desk (AutoCAD Architecture's predecessor) and AutoCAD. By 1998 he had Bachelors in Architecture with undeclared minors in Art and Computer Science.His professional career started in Architecture in 1998. In 2006 he started using Revit which changed everything. Since 2006 he has worked production and BIM management on several projects across many Architectural Business lines from interiors, through residential, production housing, commercial, low/mid/high rise, hospitality, medical, military, industrial, themed, and transit.In his current position at AECOM and an Arc IV/BIM Manager he is continuing the integration and exploration of new and useful technologies including Databases, LIDAR, UAVs, Photogrammetry, IOT, Electronics, VR, AR, Model manager, Model compare, the A360 Suite including Autodesk Navis, C4R, BIM 360 Glue, Docs.Matthew AnderleMatthew Anderle is the Building Information Modeling (BIM) director for the Buildings+Places business line of AECOM, with focus on the Americas. He is a BIM and technology evangelist with over 16 years of experience establishing global BIM workflows and standards around content, training, interoperability, and BIM consultation as a service. His experience spans over multiple market sectors with emphasis on large healthcare facilities, data centers, aviation, government projects, and residential. Anderle serves AECOM as a leader in the advanced and efficient implementation of BIM processes for a variety of project types. He manages and directs large project teams on interoffice BIM collaboration workflows, enabling continental offices to work as one entity.Chris AquinoChris is the Software Point of Contact for Revit and Collaboration for Revit in the Enterprise Support organization at Autodesk. He has been working on the Autodesk support team for 6 years. Before that Chris practiced architecture in the Boston area for 6 years working on everything from kitchen and bathroom renovations to urban planning and park design.What is C4R?Simply put collaboration for central files in the cloud. It is working without boundaries or borders or firewalls holding you back. C4R is hosted on Amazon WW# and EC3 servers on the east coast. It is very secure and has limited downtime, advance notice of outages for repairs and upgrades, is monitored 24/7, updated as needed with minimal interruptions and has failovers in place to limit outages. It meets security and encryption protocols for secure servers per the US Governments requirements for secure project, but will require approval and clearance on a project by project basis.How to install C4R and A360- and make sure your AutoDESK Accounts are setupBandwidthSince local models are created form the cloud, more bandwidth means faster download times. Minimum is 512k/s, however a realistic minimum is burst rates of 5MB up/down, 10-15MB up and down should provide a good experience with C4R. Once the initial download of a new central model is made, only changes in the model are sent across to the cloud.Version (C4R and Revit) and compatibilityJust as there are major and minor (also called 'dot' versions) of Revit there are also major and minor versions of C4R. Make sure you connect with your team and consultants to clarify which version you are running and that they match. Revit is NOT backwards compatible (with major versions i.e. 2016 to 2017) and differing versions of C4R have reportedly caused file corruptions of the central models on A360. The safest option is to maintain the same versions of Revit and C4r, Test upgrades on Revit and C4R prior to implementing changes, then implement them across the entire team at the same time.As of this documents published date, the first major version of the file uploaded to C4R determines the version for the project, if a major upgrade is desired; another project will need to be created. Development and studies are being undertaken to allow upgrading of projects inC4R to resolve the issue.A360 / Autodesk AccountsEach team member will need to have a Autodesk Account toconnect to the hub. This can be done by searching "CreateAutoDESK account" or go tohttps:///register There users who don'talready have an account (one account for all of Autodeskunified logins) will be able to create their own personalaccount for corporate use. This account should follow usersfrom company to company, and once created cannot bedeleted.Purchase C4R (BIM 360 Team)As of 2016- Collaboration For Revit (C4R) and Revit are available by subscription only. A quick search for "Collaboration For Revit" or the following link will take you to Autodesk's site: /products/collaboration-for-revit/subscribe where you can contact Autodesk to get your subscription started.Getting the plugin for connectivityOnce your subscription has started you can download the Plugins for C4R and Revit from Autodesk:https:///support/revit-products/downloads/caas/downloads/content/autodesk-a360-collaboration-for-revit.htmlSelect Download for your version of Revit:Save the file in a good location line …\DownloadsAutodesk\Revit\2017\C4R\Read the README and Once the download has completed Double click to run the EXE.Click Install.If prompted by the UAC, Allow to run - click YES.The plugin should install.Manual InstallIt may be necessary to 'download' the install and manually integrate it click the "Download All" button from the install image above. It will create an INSTALLS folder.Go to the folder and right click/apply the Autodesk_Revit_2017_SP2.msp (Patch) File.Right click and install the PACR.msi and the RCAO.MSI filesConsiderations for large organizations (Entitlements)Large organizations like AECOM use systems to track and monitor licenses. Because C4R is an A360 CLOUD Based utility, it may require additional entitlements to be 'turned on' for full activation. Check with your Autodesk Reseller or Autodesk Technical support to see if your organization requires entitlements to be turned on.Create a project in A360 to host the filesGo to https:/// (May be <MyComapny> from the initial HUB setup with Autodesk) and login.Breakdown of web page:1. Switch between A360, A360 Drive, and DesignGraph (at right)2. Search, Notifications, Help, and 'My Account' usedto switch hubs (below right)3. Project filters4. Create Project5. Current activity6. ProjectClick Create Project (Item #4) to beginYou can upload an icon to help distinguish your project. Then Create Project.Once the project is created:The icons to the far right of each project are for 7. Notifications 8. Pinning (to keep at the top of the list) and 9 is an archive/transfer button to move to another hub or archive the project on A360 which removes the project from the active lists and makes it inactive and inaccessible.Add membersBy clicking on the project which takes you to the project screen:1. Upload files direct to A360 (Note this does NOT create a central file butacts as FTP site) files can be uploaded as can folders, Assemblies andyou can transfer from Dropbox. (See at right)2. Create a new folder in the structure to organize files3. Layout of the files (view)4. Data tab (View shown)5. Calendar (Great for setting due dates and managing records of received files)6. Discussions on the project7. Details and Activity Tabs (Details tab shown), Activity shows STCs and changes on files8. Follow the project to get updates, Pin it to keep it on top9. Project Settings (Secret, Open, Etc.)10. Invite Project Members List (below) and Invitation Button (right)11. Files Area (Create WIKI page at right for notes, etc.)12. Edit members13. Autodesk Announcements & FeedbackModify Project settings (Access Account control)Adjust Project Typeto manage who canjoin and what non-admins can see onA360.Allow projectcontributors allowsinvites to peoplewho will have verylimited access (readand view files only)You must be anadmin to accessthis content.Hub admins have more access and privileges to modify and manage files, restrict access company wide.Next invite membersGo to #9 and click invite, usecommas and spaces to checkvalidity of email addresses andSEND INVITATIONS.Members receive this invitation:They may needentitlements turned onto access the hub (ifwithin your ownorganization)Manage the members you invited (Access control) As a regular user you can see roles of others in the project:1. Invite members (samefunction as previous page)2. Project members invitedto project (They mustaccept for each project onA360 prior to attempting toup/down load files on A360)3. Join request (If project isan open or not secretpeople can request to join aproject)4. User List5. User title from Profile6. User Company7. User Roles (See roles at right),8. Delete UserAs a team admin, Clicking over the project, roles can be modified by clicking Manage Roles:Roles can be upgraded to the level of the editor:Some restrictions can be applied to limit access:HIGH TRUST ENVIRONMENTBeyond the security control there are no other controls to prevent users from creating or deleting or moving files on C4R and A360. This is what is called a "High trust environment". Strides are being made every day to improve granularity and security functions within the project.Establish the structuring projectsConsider your projects size, complexity and team members for worksets and file structure. Allow for a system complex enough to manage additions you may need on the project.Federated models in C4RA federated model is a series of models by discipline, zone, content, campus, etc. organized so they work together. E.g.:1172-OFIC-07-00-S-STRUCT Building 1172, Office, Structural File1172-OFIC -08-03-A-ARCH Building 1172, Office, Architectural File, General Elements 1175-OFIC -07-00-S-STRUCT Building 1175, Office, Structural File1175-OFIC -08-03-A-ARCH Building 1175, Office, Architectural File, General ElementsTOPO Topography file (translation of CIVIL 3D topo/2d, pads) The first group is for building 1172 and the second group is for building 1175.For advanced examples of structured data using the NCS- see AU class AR15406, Revit: Your Drawing Management Marvel—Get a Grip on BIM Management Through the National CAD Standard.Once the structure has been established you can record all the team members' roles and files in the PXP (Project execution plan) and move to the next step.Use an established PXP and seeded models to share with consultants to get them started and what is involved in creating the seeded models.Creating a seed model (locally)A seed model contains the geo-location and survey point for the site. It can be acquiredthrough a civil drawing- so the topographic side and a Civil 3D (Or a 2D civil File) is agreat place to start. Once the coordinates have been set that model can be stripped and saved- as with the coordinates embedded in the file. This file should also containborders, annotations, etc. intended for use on the project. This established sharedcoordinates for linking.Distribute the seed model to consultants and they can add their own content.Pushing coordinates does not work in C4RAs of this document publish date - Coordinates can only be acquired from a linkedmodel. Showing the Base Point (under Visibility Graphics/Site/Project Base Point) andun-clipping it will allow you to locate it to a known reference point on the building, thenclip and move the base point again to align to a correctly located, linked and positioned by a reference point on a shared coordinate model. If a model appears pinned and won't un-pin, check the properties, it may be linked in using shared coordinates- this isdesirable.Uploading Files to C4R (Central files)To upload the file(s) go to the collaborate tab andenable Worksharing. If A360 is properly installedyou should see this in lieu of the regular Dialog:Select Collaborate on A360Click OKSelect the project to associate it with and adjust the name as neededClick InitiateThe project will upload to A360, the dialog at rightindicates it was uploaded, copied to local cache andall operations were successful.This creates a STATIC copy on the A360 Server atupload. Browsing to the A360 server you can see aCOPY of the uploaded file from C4R to A360.File operations for linking REVIT files only and opening files from C4R Starts wits the A360 Icon:Then browsing to theProjects which look likefolders in the filebrowser,Then selecting a file to open as if it were a normal file on the file server:As mentioned before the files thatshow in eh WEB interface are onA360, close to Docs, but they arenot the live files in the view at right.Files in the recent file history showan A360 icon in the bottom rightcorner of the icon:To update the files on A360 a publish must be performed Updating files on A360 from C4RIn the open Revit file there is a new toolgroup in collaborate called MangeModels.Clicking the Views for A360 and adding3D views, sections, elevations sheets tobe published, will add those to beuploaded to A360. It works with the savessets shared by the print dialog, exports,etc. available in Revit:Save you views as A360 views.To publish click "Manage A360Models" in the tab group. Andselect the project to manage:This brings up the files in the project:1. Quick hyper-link to the files on a3602. Files in the project3. Upload to A360 (Uploads view stated above)4. Actions menu for the files in C4R (Not A3605. Last updated by6. Last Save timeTo upload the views click #3 (Upload to A360) to push a publish. This ties into Glue as well for clashing, markups and tracking; Look into the power of Glue when you have a chance- it is impressive!For the Actions (#4)Renaming a link doesn't break links in other models!Relinquish brings up a dialog which forces elements to relinquish forusers who forgot or left the model open, or didn't relinquish on saveback to the model.View Versions brings up saves and comments.Delete removed the model from C4R. DO NOT rely on the 'savebefore delete function'. Save locally first then delete!Once uploaded to A360, the files can be downloaded from there, or saved as local copies. That is all you need to know to upload, open and manage.Limitations and things to watch out for on C4r, including security concerns, issues with shared coordinates and high-trust environmentsAs mentioned before, C4R is a high trust environment. Be careful who you invite and how much power they have in the project. Limit as needed an only give as many permissions as needed with care to the technology of the managing user.Anyone can force publish, delete, rename and reorganize files on C4R as of the date of publish. Save locally and sync to central, make backups as often as is necessary to document and protect your project.Happy Reviting!。
revit教程pdf
revit教程pdfRevit教程PDFRevit是一款用于建筑设计和构造的三维建模软件,由美国Autodesk公司开发。
它为建筑师、工程师和建筑专业人员提供了一个强大而全面的工具,用于设计、可视化和分析建筑项目。
Revit 通过综合模型来管理建筑项目的各个方面,包括结构、建筑、机电和管道等。
对于想要学习和掌握Revit软件的人来说,一份优质的Revit教程PDF是必不可少的。
这份Revit教程PDF将为初学者提供一个全面的入门指南。
无论您是建筑师、工程师还是想要掌握Revit软件的其他专业人士,本教程将帮助您了解Revit的基本概念和功能,并指导您如何使用该软件进行建模、设计和分析。
教程还将引导您逐步完成一个基本的建筑项目,从创建基本模型到添加材料和纹理,再到细化设计和制作施工图。
第一部分将介绍Revit的基本概念和用户界面。
您将了解Revit的工作区域、工具栏和菜单,以及如何导航和操作模型。
本教程还将向您展示如何创建项目、设置单位和所需的参数,以及如何导入和导出文件。
在第二部分,您将学习如何建立一个基本的建筑模型。
从创建基本墙体、地板和屋顶开始,您将学习如何使用Revit的绘图工具来创建准确的模型。
本教程还将教您如何添加门窗、楼梯和电梯等常见的建筑构件,并介绍如何使用Revit的视图功能来查看和审核模型。
在第三部分,您将学习如何添加材料和纹理,以使您的模型更具真实感。
通过使用Revit的材料库和纹理功能,您可以为建筑元素添加逼真的外观和质感。
本教程还将教您如何调整材料参数和光照效果,以达到想要的效果。
第四部分将引导您进一步细化设计和制作施工图。
您将学习如何创建标高、楼层和视图,并了解如何添加标注、尺寸和图表。
本教程还将介绍如何使用Revit的协同功能来与团队成员共享模型和项目数据,并探索进阶功能,如家具布局和照明分析。
最后一部分将提供一些附加资源和进一步学习的建议。
您将得到一份Revit的快速参考指南和常见问题解答,以及一些推荐的在线资源和论坛,供您进一步学习和探索。
revit安装教程

revit安装教程
以下是一个关于Revit安装的简易教程:
第一步:下载Revit安装程序
在Autodesk官方网站上下载最新的Revit安装程序。
选择与您的操作系统和计算机体系结构相匹配的版本。
第二步:双击运行安装程序
找到您下载的Revit安装程序,并双击运行它。
这将启动安装向导。
第三步:选择安装选项
在安装向导中,您将有选择安装选项的机会。
根据您的需要选择适当的选项,然后单击“下一步”继续。
第四步:接受许可协议
在安装向导的下一屏幕上,您将需要阅读并接受Autodesk的许可协议。
请仔细阅读条款,并选择“接受”以继续安装。
第五步:选择安装位置
您可以选择自定义的安装位置,或者使用默认的安装路径。
根据您的偏好进行选择,然后单击“下一步”继续。
第六步:准备安装
在下一屏幕上,安装程序将显示您的选择和安装设置的摘要。
查看摘要,确保一切都正确,然后单击“安装”开始安装过程。
第七步:等待安装完成
等待Revit安装程序完成安装过程。
这可能需要一些时间,取决于您的计算机的性能和所选择的安装选项。
第八步:启动Revit
安装完成后,您将看到一个安装完成的消息。
现在,您可以关闭安装程序,并在开始菜单或桌面上找到Revit的启动图标。
至此,您已成功安装Revit软件。
请记得根据您的许可证进行激活,并参考Autodesk提供的官方文档和教程,以更好地利用Revit的功能。
从零开始的Revit基础教程
从零开始的Revit基础教程Revit是建筑设计和施工行业中广泛使用的一款三维建模软件,它可以帮助建筑师和工程师进行建筑设计、结构设计和施工管理等工作。
对于没有任何Revit经验的人来说,从零开始学习Revit可能会感到有些困难。
本文将提供一个基础教程,从安装软件到创建建筑元素,帮助读者快速上手Revit。
第一步:安装和启动Revit在开始学习Revit之前,你需要安装Revit软件。
你可以从Autodesk 官方网站上下载免费试用版的Revit软件,并按照指示完成安装过程。
安装完成后,你可以打开Revit软件并开始学习。
第二步:了解Revit界面当你第一次打开Revit软件时,你会看到一个由各种工具栏、面板和视图组成的界面。
熟悉Revit界面的各个部分对于学习和使用Revit非常重要。
1. 菜单栏:包含了Revit软件的各种功能和设置。
你可以通过菜单栏来访问不同的命令和工具。
2. 工具栏:位于界面的顶部,包含了一些常用的工具和命令按钮。
你可以通过点击工具栏上的按钮来执行相应的操作。
3. 项目浏览器:位于界面的左侧,用于管理和浏览项目中的不同元素和视图。
你可以通过项目浏览器来快速切换视图和编辑元素。
4. 属性面板:位于界面的右侧,默认显示选中元素的属性。
你可以通过属性面板来修改元素的属性和参数。
5. 绘图区域:位于界面的中央,用于绘制和编辑建筑元素。
你可以在绘图区域中创建、修改和删除建筑元素。
第三步:创建建筑元素了解Revit界面后,我们可以开始创建一些基本的建筑元素,比如墙体、楼板和门窗等。
1. 创建墙体:在绘图区域中,点击“墙体”按钮,并在绘图区域中选择绘制墙体的起点和终点。
你还可以通过属性面板来修改墙体的高度和其他属性。
2. 创建楼板:点击“楼板”按钮,并在绘图区域中绘制楼板的轮廓。
你可以通过属性面板来修改楼板的厚度和其他属性。
3. 创建门窗:点击“门”或“窗户”按钮,并在绘图区域中选择门或窗户的位置。
01Revit软件界面介绍
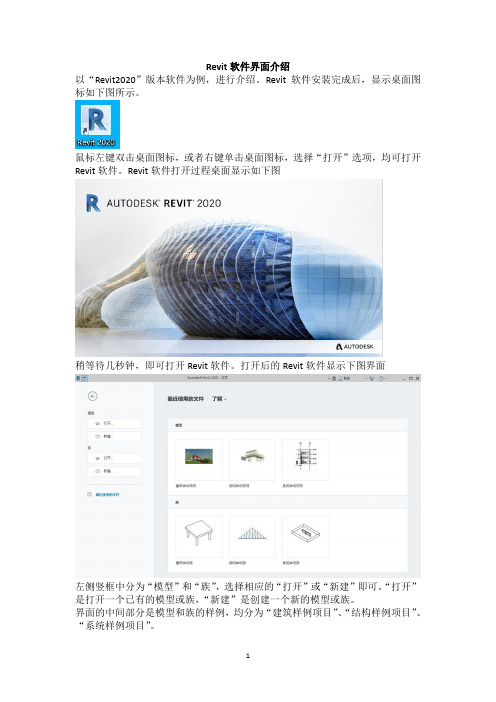
Revit软件界面介绍以“Revit2020”版本软件为例,进行介绍。
Revit软件安装完成后,显示桌面图标如下图所示。
鼠标左键双击桌面图标,或者右键单击桌面图标,选择“打开”选项,均可打开Revit软件。
Revit软件打开过程桌面显示如下图稍等待几秒钟,即可打开Revit软件。
打开后的Revit软件显示下图界面左侧竖框中分为“模型”和“族”,选择相应的“打开”或“新建”即可。
“打开”是打开一个已有的模型或族,“新建”是创建一个新的模型或族。
界面的中间部分是模型和族的样例,均分为“建筑样例项目”、“结构样例项目”、“系统样例项目”。
左上角的小图标是“主视图”,左击“主视图”或按键盘快捷键“Ctrl+D”即可打开主视图,如下图所示。
主视图中的区域均显示灰色,不可编辑,除菜单栏可以分别左击进行切换外。
主视图仅做认识软件界面使用,无实际用途。
再次左击“主视图”或按键盘快捷键“Ctrl+D”,即可返回初始界面。
我们可以任意选择一个样例项目,左击进行打开,来熟悉软件的操作界面。
这里我们通过新建模型的方式来介绍。
左击模型下面的“新建”,样板文件选择“建筑样板”,新建选择“项目”,左击“确定”。
如下图打开新的项目,界面显示如下界面中显示的内容有很多,不要太着急。
慢慢熟悉了就会很简单。
菜单栏中有“建筑”、“结构”、“钢”、“系统”、“插入”、“注释”等。
通过逐一选择,下面的工具栏会相应变换。
左侧为“项目浏览器”,右侧为“属性”。
中间部分为绘图区域。
对Revit软件界面有一个大概的直观认识就可以了,不必面面俱到。
具体的功能和操作方法,在建模实战中会一一提到。
学习讲究循序渐进。
好了,这一节内容到此就结束了。
我们下期再见!。
Revit教程1

• • • • •
有三种族: 可载入族可以载入到项目中,且根据族样板创建。可以确定族的属 性设置和族的图形化表示方法。 系统族包括墙、尺寸标注、天花板、屋顶、楼板和标高。他们不能 作为单个文件载入或创建。 内建族用于定义在项目的上下文中创建的自定义图元。如果您的项 目需要不希望重用的独特几何图形,或者您的项目需要的几何图形必 须与其他项目几何图形保持众多关系之一,请创建内建图元。 4、用户界面介绍
• • •
• •
• • •
二、Revit术语 1、项目 在Revit中,项目是单个设计信息数据库-建筑信息模型。项目文件包 含了建筑的所有设计信息(从几何图形到构造数据)。这些信息包括 用于设计模型的的构件、项目视图和设计图纸。通过使用单个项目文 件,Revit不仅可以轻松地修改设计,还可以使修改反映在所有关联区 域(平面视图、立面视图、剖面视图、明细表等)中。 2、标高 标高是无限水平平面,用作屋顶、楼板和天花板等以层为主体的图 元的参照。标高太多用于定义建筑内的垂直高度或楼层。可为每个已 知楼层或建筑的其他必须参照(如第二层、墙顶或基础底端)创建标 高。要放置标高,必须处于剖面或立面视图中。 3. 图元 在创建项目时,可以向设计中添加Revit参数化建筑图元。Revit按照 类别、族和类型进行分类。 族 族是某一类别中图元的类。族根据参数(属性)集的共用、使用 上的相同和图形表示的相似来对图元进行分组。一个族中不同图元的 部分或全部属性可能有不同的值,但是属性的设置(其名称与含义) 是相同的。
Revit教程
住宅产业化
• • • • • •
一、Revit简介 二、Revit用户界面及功能介绍 三、外墙板等族的绘制 四、外墙板等构件钢筋(族+项目)的绘制 五、叠合板桁架筋绘制(族+项目)的绘制 六、墙板等构件在Revit内定位
REVIT初学教程
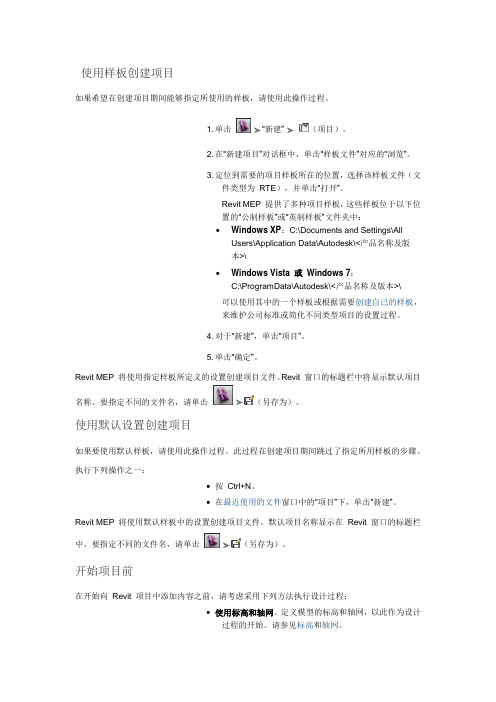
使用样板创建项目如果希望在创建项目期间能够指定所使用的样板,请使用此操作过程。
1. 单击“新建”(项目)。
2. 在“新建项目”对话框中,单击“样板文件”对应的“浏览”。
3. 定位到需要的项目样板所在的位置,选择该样板文件(文件类型为RTE),并单击“打开”。
Revit MEP 提供了多种项目样板,这些样板位于以下位置的“公制样板”或“英制样板”文件夹中:•Windows XP:C:\Documents and Settings\AllUsers\Application Data\Autodesk\<产品名称及版本>\•Windows Vista 或Windows 7:C:\ProgramData\Autodesk\<产品名称及版本>\可以使用其中的一个样板或根据需要创建自己的样板,来维护公司标准或简化不同类型项目的设置过程。
4. 对于“新建”,单击“项目”。
5. 单击“确定”。
Revit MEP 将使用指定样板所定义的设置创建项目文件。
Revit 窗口的标题栏中将显示默认项目名称。
要指定不同的文件名,请单击(另存为)。
使用默认设置创建项目如果要使用默认样板,请使用此操作过程。
此过程在创建项目期间跳过了指定所用样板的步骤。
执行下列操作之一:•按Ctrl+N。
•在最近使用的文件窗口中的“项目”下,单击“新建”。
Revit MEP 将使用默认样板中的设置创建项目文件。
默认项目名称显示在Revit 窗口的标题栏中。
要指定不同的文件名,请单击(另存为)。
开始项目前在开始向Revit 项目中添加内容之前,请考虑采用下列方法执行设计过程:•使用标高和轴网。
定义模型的标高和轴网,以此作为设计过程的开始。
请参见标高和轴网。
•导入数据。
如果使用其他CAD 程序(例如AutoCAD)开始设计过程,则可以导入现有数据。
Revit MEP 可以导入各种CAD 格式的数据,包括DWG、DXF、DGN和ACIS SAT 文件,以及SketchUp (SKP) 文件和行业基础类(IFC) 文件。
- 1、下载文档前请自行甄别文档内容的完整性,平台不提供额外的编辑、内容补充、找答案等附加服务。
- 2、"仅部分预览"的文档,不可在线预览部分如存在完整性等问题,可反馈申请退款(可完整预览的文档不适用该条件!)。
- 3、如文档侵犯您的权益,请联系客服反馈,我们会尽快为您处理(人工客服工作时间:9:00-18:30)。
Revit2014--2016安装教程
安装步骤
step1:运行安装首先进行解压,请注意,解压路径中不能有中文字符,否则安装将出错,默认C盘即可,解压完成运行安装程序进行软件安装。
打开安装文件,选择语言,然后接着安装;
注,2016安装的时候选简体中文就行。
step2:输入序列号()及产品密钥
2014产品密钥829F1
2015产品密钥829G1
2016产品密钥829H1
step3:选择安装路径(根据自己需要放置,不要有中文路径);
step4:等待安装过程。
(不要断网安装,否则不会安装样板);
确保自己选择的路径空间足够大,建议不小于50G,因为有时候下载族是会特别大,再考虑宽带的原因,可能会慢一些。
如果不想等待,就取消勾选。
step6:先选择关闭
step8:选择“我具有Autodesk提供的激活码”
成功后
*然后多点几次生成,不要用第一次生成的激活码(可能激活不成功的)
step10:将注册机计算出的激活码复制到激活面板中,即可完成软件的
激活。
step11:激活完成。