viber使用说明及教程
Acendo Vibe 会议通话声音条与摄像头的快速启动指南说明书

QUICK START GUIDEACV-5100 Acendo Vibe™ Conferencing Sound Bar with CameraOverviewThe ACV-5100 features a hinged Wall Mount Bracket, which allows easy installation aswell as access to the Connector Bay without having to dismount the unit. The WallMount Bracket features a cutout for cable routing and straps for cable management.Note : Do not lift the ACV-5100 by the camera or rest the unit on the camera.Credenza InstallationNote : To ensure highest possible sound quality, the rubber feet on the bottom panelmust remain in place for surface-mount installations.The ACV-5100 can sit on a hard, flat surface such as a credenza, tabletop or desk.When choosing a surface location, consider a space that will not interfere withworkspaces or other installed devices. Connect cables as necessary - see theConnections section for details.Wall Mount InstallationFor best aesthetic in wall mount installations, remove the rubber feet from the bottompanel: carefully peel each foot off of the bottom surface.Removing the Wall Mount Bracket1.Open the Wall Mount Bracket (held closed by internal magnets).2.Press and hold the Release Button to slide the Bracket out (over the button) todisengage the pins on the Bracket from the hinges on the unit (FIG.2).3.Lift the Wall Mount Bracket off of the hinges to remove (FIG.3):Wall Mount Considerations•Distance between conference table and display:The closer the table is to thewall-mounted display. the lower the display should be mounted. As a generalguide, the display should be mounted between 40” and 48” from the floor.•Avoid obstructing the camera view:If the display protrudes from the wall morethan the ACV-5100, then additional spacing between the display and theACV-5100 may be needed.•Position camera for full visibility: In small rooms, it may be necessary to manuallytilt the camera up to maximize visibility for all participants.Using the Bracket Mounting GuideThe Wall Mount Bracket features instructions etched on the inner surface that describehow to position the ACV-5100 beneath a wall-mounted display to avoid obstructing thecamera view (FIG.5):1.Remove the Bracket from the ACV-5100 (see FIG.7on page9).2.Turn the Bracket vertically and place against the wall, centered directly beneaththe wall-mounted display.3.Align the top of the Bracket (see Bottom of Display) with the bottom surface of thedisplay.e the top edge of the notch in the Bracket (see Top flat surface of Acendo Vibeto determine the closest placement for the ACV-5100 beneath the display. Markthe mounting surface.5.Align the top flat surface of the ACV-5100 with the mark made in step 4.6.Mount the Bracket using mounting screws and optional mounting spacers (seeFIG.6).Mounting the Wall Mount Bracket and Attaching the ACV-5100e the Wall Mount Bracket as a template to mark the locations for the fourmounting screws (not included). Use mounting screws and hardware appropriatefor the surface being utilized to secure the Bracket to the wall.Optionally, if not hiding them behind the drywall, place the four included WallMount Spacers between the Bracket and the wall to create a 5mm gap forrouting flat cables (see FIG.6).2.Attach the ACV-5100 to the Bracket by sliding the pins on the Bracket into thehinges on the rear of the main unit (see FIG.3):a. Position the ACV-5100 with the bottom panel facing the wall and align thehinges on the main unit with the pins on the Bracket.b. Carefully slide the pins into the hinges, until the Bracket snaps into place.Note: Press the Bracket into place so that the last pin depresses the ReleaseButton, allowing the pins to slide into the hinges (see FIG.3)c. With the ACV-5100 attached to the Bracket, rotate the unit up to its seatedposition. Note that the Bracket snaps shut and is held closed via internalmagnets.Note: Ensure that cables do not obstruct the complete closing of the unit. FIG. 1 ACV-5100 (FRONT/REAR VIEWS)MODELS AVAILABLE•ACV-5100GR, Grey (FG4151-00GR)•ACV-5100BL, Black (FG4151-00BL)INCLUDED ACCESSORIES•15V / 4A.Power Supply•Remote Control•6’ USB 2.0 Cable•5mm Wall Mount Spacers (4)•Lock-Down Screws(2)DIMENSIONS (HWD)•5" x 23 1/2" x 3 15/16" (76 mm x 590 mm x 100 mm)•Depth with optional wall mount spacers: 4 1/8” (105 mm)WEIGHT 6.45 lbs (2.93 kg)ACTIVE POWER REQUIREMENTS•~100-240V, 1.3A max•Only use the included power supplyREGULATORY COMPLIANCE FCC 47 CFR Part 15, Subpart C / Subpart B (emissions)EN 55024, EN 60950-1, IEC/EN/UL 60065:2014ENVIRONMENTAL•T emperature (Operating): 32° F to 113° F (0° C to 45° C)•T emperature (Storage): -4° F to 158° F (-20° C to 70° C)•Humidity (Operating): 5% to 85% RH non-condensingOPTIONAL ACCESSORIES•CBL-USB-FL2-16, USB 2.0 16ft Extension Cable (FG10-2220-16)•CBL-USB-FL2-33, USB 2.0 33ft Extension Cable (FG10-2220-33)•ACR-5100, Meeting Collaboration System (FG4051-00)FIG. 2 ACV-5100 BOTTOM VIEW - OPENING THE WALL MOUNT BRACKETFIG. 3 ACV-5100 BOTTOM VIEW - REMOVING THE BRACKETCameraFrontRearRubber feet (removable, x2)mounting holes (x4)Wall Mount BracketSide PanelKeypadCable Pass-ThruWall Mount BracketHinges/PinsRelease ButtonConnector BayWall Mount BracketPins (x4)Hinges (x4)Slide pins in to install Slide pins out to removeRelease ButtonFIG. 4 ACV-5100 WALL MOUNT CONSIDERATIONSFIG. 5 USING THE MOUNTING GUIDEFIG. 6 WALL MOUNTING THE ACV-510040-48” from floorDisplayMounting Bracket Mounting Guide(etched into surface)(top view)ACV-5100DisplayMount the Bracket to thewall via 4 mounting screwsAttach the ACV-5100 to theBracket via hinges & pinsbamounting screws(x4, not included)mounting spacers (x4, optional)Note: Use M4 or #8mounting screwsCable Pass-Thru© 2018 Harman. All rights reserved. Modero, AMX, AV FOR AN IT WORLD, HARMAN, and their respective logos are registered trademarks ofHARMAN. Oracle, Java and any other company or brand name referenced may be trademarks/registered trademarks of their respective companies.AMX does not assume responsibility for errors or omissions. AMX also reserves the right to alter specifications without prior notice at any time.The AMX Warranty and Return Policy and related documents can be viewed/downloaded at .3000 RESEARCH DRIVE, RICHARDSON, TX 75082 | 800.222.0193 | 469.624.8000 | +1.469.624.7400 | fax 469.624.7153AMX (UK) LTD, AMX by HARMAN - Unit C, Auster Road, Clifton Moor, York, YO30 4GD United Kingdom | +44 1904-343-100 | /eu/REV: ALast Revised: 1/19/20183.Connect cables as necessary (inside the Connector Bay - see FIG.2).4.Rotate the ACV-5100 into seated position. The Bracket is secured with magnets (FIG.7).ConnectionsAll connectors are located within the Connector Bay (rear panel).•For surface installations, place the unit face-down and open the Connector BayDoor to manage cables/connectors.•For wall-mounted installations, simply rotate the ACV-5100 unit down and awayfrom the wall to access the Connector Bay.There are two sets of connectors on the inner side panels of the Connector Bay. Each connector is labeled on the elastic cable straps. Run each cable through the cable pass-thru in the bracket/door and under the cable straps.Rotating the ACV-5100 Into the Seated PositionAfter connecting all cables, close the Bracket to return the ACV-5100 to its seated position. The Bracket is secured via internal magnets (FIG.7):Installing Lock-Down ScrewsThe ACV-5100 comes with two (flat-head) Lock-Down Screws that can be added after the ACV-5100 has been installed and connected. The Lock-Down Screws prevent the Bracket from being opened accidentally. With the Bracket/Connector Bay Doorclosed, install the Lock-Down Screws in the bottom panel (FIG.8):Note : The Lock Down screws are not to be used to mount the ACV-5100 unit to the wall.Side Panel KeypadAll controls and LEDs are on the left side panel of the ACV-5100 (FIG.9):Volume and Mute ControlsThe ACV-5100 features Sound by JBL, including a 10W/channel stereo amplifier,speakers, microphones, and DSP algorithms with AEC •Use the Volume Up/Down buttons on either the ACV-5100 side panel or on theremote control to adjust speaker volume.•Mute Speaker and Mute Microphoneenable/disable the speakers andmicrophone. Note that these buttons are lit on the ACV-5100 (and flash on the remote control) to indicate that the sound functions are muted.CameraThe ACV-5100 is equipped with a wide-angle camera for videoconferencing and supports a wide range of web conferencing applications via USB. To configure your USB device, such as a laptop, to work with the ACV-5100:1.Connect the ACV-5100 to a laptop/PC via e Source Select button on the the ACV-5100 (FIG.9) to select USB (if necessary).3.Select AMX Acendo Vibe as the camera.4.Select AMX Acendo Vibe as the microphone.5.Select USB AUDIO CODEC as the speakers.Note : To adjust the camera’s view, simply grasp the camera and rotate to the desired position.Remote ControlThe ACV-5100 includes a wireless remote control (FIG.10):Pairing the Remote Control to the Acendo Vibe1.Press and hold both the Source Select and Bluetooth Pairing buttons on theremote control for 5 seconds (see FIG.10). All LEDS on the remote control should start blinking or remain blinking (once per second).2.Press and hold both the Source Select and Bluetooth Pairing buttons on theACV-5100 (see FIG.9). After 3-5 seconds the LEDS on the remote control should stop flashing to indicate the remote control has paired.Note : If the remote control remains in pairing mode (all LEDS blinking) for longer than 60 seconds the remote control will go to sleep. Press any button on the remote control to wake it up and continue with step 2.Pairing the Acendo Vibe with a Bluetooth Source Device1.Press the Bluetooth Pairing button on the Acendo Vibe or the remote control to initiate pairing (see FIG.9).The Bluetooth button will flash on both the ACV-5100 and the remote control.Note : To exit pairing mode without pairing a device, press either Bluetooth button again for 5 seconds.2.On the source device, verify that Bluetooth pairing is enabled, and look for“Acendo Vibe ” (or custom discoverable name) as a found device. Select the Acendo Vibe device for pairing. The Bluetooth LED on the ACV-5100 side panel lights solid to indicate that the Bluetooth device is paired.If automatic switching is disabled, use the Source Select button on the ACV-5100 to select Bluetooth as the audio source (if necessary). At this point, the Bluetooth LED is lit solid , Bluetooth audio is sent to the ACV-5100 speakers, and microphone audio is sent to the paired Bluetooth device.Note : Once the ACV-5100 has paired to a device, it must either be "removed" or "forgotten" from your device’s Bluetooth pairing list before it can be paired again.Acendo Vibe Configuration ToolThe ACV-5100 is configured via the Acendo Vibe Configuration Tool software (available to download from AMX). In most cases the default settings should not require adjustment. For details, see the Acendo Vibe Instruction Manual , available to view or download from .Setup ModeIn order for the Acendo Vibe Configuration Tool to communicate with the ACV-5100,the unit must be in Setup Mode. To place the ACV-5100 in Setup Mode, press the Audio Source Select and Mic Mute buttons on the ACV-5100 simultaneously (see FIG.9) for 3seconds. All of the LEDs blink to indicate that the unit is in Setup Mode.Note : Press and hold the Audio Source Select and Mic Mute buttons for 3 seconds to exit Setup mode.Additional DocumentationFor instructions on configuring the Acendo Vibe, file transfers, firmware updates,programming and troubleshooting info, see the Acendo Vibe Instruction Manual ,available to view or download from .Refer to AMX University for online videos that demonstrate many of the installation steps described in this Quick Start Guide.DC POWER Connect the included 15V power supply to this barrel connector. Only use the power supply included with the ACV-5100.OPTICAL AUDIO Use this TOSLINK connector to receive Optical Stereo Input from an audio source device.AUX OUT Use this 1/8” mini-stereo connector to send analog stereo sound from the ACV-5100 to an auxiliary device.AUX IN Use this 1/8” mini-stereo connector to receive analog stereo sound from an analog audio source device.HDMI OUT (T ype A) Connect to an HDMI input on a display device.HDMI IN (T ype A) Connect to an HDMI output from a source device, such as a laptop or Acendo Core.USBUse the USB 2.0 Type-B port to connect a PC/laptop to the ACV-5100 as a source device. Acendo Vibe is plug-and-play with PC/laptop using standard UAC/UVC drivers. The USB connection is also used to configure the ACV-5100 via the Acendo Vibe Configuration T ool for settings and firmware updates.RS-2323-pin captive-wire connector provides serial communication with the Acendo Vibe. Refer to the Acendo Vibe Instruction Manual for serial command definitions.MOTION(future firmware update)3-pin captive-wire connector provides connectivity for an (optional) motion sensor (reserved for future implementation).•PWR (+5V 0.1A)•OCC •GroundThe logic of OCC is "High" for occupancy detected, and "Low" for vacancy.FIG. 7 ROTATING THE ACV-5100 INTO ITS SEATED POSITIONFIG. 8 ACV-5100 BOTTOM VIEW - LOCK DOWN SCREW LOCATIONSFIG. 9 ACV-5100 LEFT SIDE PANEL KEYPADRotate the ACV-5100 into seated position (Bracket is secured with magnets)frontopenclosedLock-Down ScrewsActive Audio SourceAudio Source Select (press to cycle throughthe source options)Mute SpeakerMute MicrophoneVolume Up/Down Bluetooth Pairing(indicates the current selection FIG. 10 ACENDO VIBE REMOTE CONTROLMute MicrophoneMute SpeakerEnd CallSource Select pushbutton (on back side)Volume Up/Down +-(rotate ring to adjust)Battery Compartment (bottom panel)Unlock & twist to openBluetooth Pairing(press to pair remote to user device)。
Logi Zone Vibe 100 设置指南说明书

5 English
CONNECT YOUR HEADPHONES Connect via BLUETOOTH®
1. Slide the switch to the bottom in the arrow’s direction for 2 seconds to initiate pairing.
1. Slide the switch in the arrow’s direction to the middle to power on the headphones.
2
2. Once powered on, the LED light will slightly turn white.
3. There will be a voice prompt that tells you the battery status.
Flip up or down the mic boom to mute or unmute.
L
"Mute on" "Mute off"
Voice notifications indicate when the microphone is on /
Apex Xavier 用户手册说明书
Apex Xavier 用户手册安全警示及使用注意事项简介 Brief产品清单产品规格 Specifications处理器模组 Processor接口 I/O供电 Power Supply结构 Mechanical环境 Environmental认证 Certification尺寸及安装 Install Dimension服务与支持技术支持保修接口说明及扩展安装方式接口说明正面接口左侧接口右侧接口EXPANSION PORT 接口信号定义EXPANSION PORT 接口信号定义GPIO接口定义背面接口IO转接线说明UART(TTL/232)连接线及引脚定义UART(232/422/485)连接线及引脚定义CAN连接线及引脚定义PPS连接线及引脚定义SYNC连接线及引脚定义功能按键扩展设备的安装方式M.2 B Key 4G支持清单功能介绍通用使用方法系统介绍烧写镜像开关机MIIVII SETTINGS的使用说明简介使用视频登陆功能说明系统状态系统设置系统升级账号管理日志导出功率模式设定IO使用方法GPIO接口配置方法UART接口配置方法GPS 对设备授时使用方法GPS支持型号连接方式授时功能配置检查授时是否成功故障排查1.查看GPS是否有输出2.查看GPS的pps信号是否有输出3.识别方法CAN口配置方法扩展设备配置方法扩展SSD硬盘使用无线设备配置方法WiFi配置方法4G模块配置方法同步功能使用说明同步功能介绍同步功能使用方法PPS同步模式Sync out 同步模式Sync in 同步模式同步误差测试方法通过示波器测量PPS脉冲间隔通过示波器测量Sync out脉冲间隔自行评估同步效果的方法同步sample code使用说明Sync out jitter测量Sync in jitter测量PPS jitter测量GMSL摄像头使用方法接口特性GMSL摄像头支持连线方式摄像头配置视频输出GMSL/GMSL2时间戳相关测试方法如何获取详细日志及日志说明?如何确认时间戳是否准确?如何确认时间戳精度?如何确认图像帧传输延迟是否稳定?确认摄像头图像帧传输延迟Apex Xavier IIApex Xavier和EVO TX2 GMSL2应用功能使用附录异常处理系统在线升级(OTA)的使用说明概述使用方式方法一(推荐):使用MIIVII SETTINGS进行版本升级和回退;方法二:使用命令行进行升级或者升级指定安装包使用命令行进行升级升级指定安装包Jetpack 4.4版本及以下镜像烧录Jetpack 4.5版本及以上镜像烧录1.功能介绍核心功能2.准备软件硬件2.1. 烧写主机准备2.2. 烧写软件环境准备2.3. 准备米文烧写工具和米文设备镜像2.3.1.刷机工具安装2.4. 准备硬件3.操作3.1. 硬件连接3.2软件使用3.2.1. 镜像烧写3.2.1.1在线模式镜像烧写3.2.1.2离线模式镜像烧写3.2.2. 镜像克隆附1. 烧写问题自检安全警示及使用注意事项请在使用本产品前仔细阅读本手册,未经授权的操作会导致错误或意外。
wave插件使用技巧
wave插件使⽤技巧Waves插件的使⽤技巧和诀窍使⾳轨具有冲击⼒——Renaissance Compressor(⽂艺复兴压缩器)或C1 Compressor(C1压缩器)尽管这个技巧更加适合于⿎⾳轨,但是其实任何类型的信号都能够使⽤(⼈声,吉他等等)。
将这条⾳轨复制到另⼀条⾳轨上。
在这条被复制的⾳轨上打开⽂艺复兴压缩器或C1压缩器,然后施加⾮常重的压缩:10︰1的压缩⽐,-30dB(分贝)的门限。
这些设置将使压缩器产⽣“泵”的效果。
将这条⾳轨和原始⾳轨相混合,直到你听见原始的未被压缩⾳轨如同被这条被复制的⾳轨添加上了“冲击⼒”⼀样。
将早期反射声和混响尾声混合起来——TrueVerb(真实的混响)和Renaissance Reverb(⽂艺复兴混响)既喜欢真实的混响所模拟出的空间的声⾳,但是同时⼜想得到⽂艺复兴混响所产⽣出来的平滑的混响尾声吗?想要两全其美吗?使⽤⼀个单独的插⼊通道,⾸先将真实的混响放到这个通道中,紧接着放⼊⽂艺复兴混响。
⾸先我们来设置真实的混响,所以现在先要将⽂艺复兴混响旁路。
加载⼀个你喜欢的预置或者创建⼀个你⾃⼰的设置。
点击位于底部右下⾓(Reverb字样的下⽅)的蓝⾊⽅块来关闭混响信号部分。
通过这种⽅法你可以不使⽤真实的混响的混响尾声部分⽽只使⽤直通信号和早反射信号。
现在,将⽂艺复兴混响退出旁路状态。
加载⼀个你喜欢的预置或者创建⼀个你⾃⼰的设置并将“Early ref.(早反射)”滑块向下拉⾄“Off(关闭)”状态。
现在,通过调整⽂艺复兴混响的Wet(湿)/dry(⼲)滑块,你就可以将真实的混响的早期反射声和⽂艺复兴混响的混响尾声混合起来使⽤。
声⾳效果创造者——Renaissance Bass(⽂艺复兴低⾳)和TrueVerb(真实的混响)⽂艺复兴低⾳是⼀个能够使各种各样的声⾳变得丰满起来的强⼤⼯具——从雷鸣声到射击声,隆隆声和照相机的闪光声。
在调整你的参数时,请确定频率不要太⾼(40-55赫兹对雷鸣声最为合适)。
Viber通话应用入门教程
Viber通话应用入门教程第一章背景介绍Viber是一款广受欢迎的免费通话和短信应用程序,它可在各种设备上运行,包括智能手机和电脑。
它提供高质量的语音和视频通话功能,并且支持多种多媒体消息传送方式。
本教程将介绍如何开始使用Viber应用程序。
第二章下载和安装1. 打开应用商店或官方网站要使用Viber应用程序,首先需要下载和安装它。
您可以打开您的应用商店(如App Store或Google Play)或官方网站,然后搜索并找到Viber应用程序。
2. 下载应用程序一旦找到了Viber应用程序,点击“下载”按钮以开始下载。
请确保您的设备已连接到互联网,并且有足够的存储空间来安装应用程序。
3. 安装应用程序安装过程可能需要一些时间,具体取决于您的设备和互联网连接速度。
完成安装后,您将在设备的应用程序列表或主屏幕上找到Viber的图标。
第三章创建和验证账号1. 打开Viber应用程序点击设备上的Viber图标以打开应用程序。
2. 创建账号在首次启动Viber应用程序时,您将被要求创建一个新账号。
要创建账号,您需要提供手机号码,并接受相关的服务条款和隐私政策。
3. 验证账号您将通过短信接收到一个验证码,输入该验证码以验证您的账号。
一旦验证成功,您的Viber账号将准备就绪,并可以开始使用。
第四章添加联系人1. 打开联系人列表在Viber的主界面上,您将找到一个“联系人”选项卡。
点击这个选项卡以打开联系人列表。
2. 查找联系人在联系人列表页面上,您可以通过点击右上角的“添加联系人”按钮来查找您想添加的联系人。
您可以按照姓名、手机号码或Viber ID来搜索。
3. 添加联系人找到您要添加的联系人后,点击“添加”按钮。
Viber将向对方发送一个邀请,请求对方接受您的联系请求。
第五章发起通话1. 打开联系人聊天在联系人列表中,选择您想要通话的联系人。
点击联系人的名称以打开与该联系人的聊天界面。
2. 选择通话类型在聊天界面的底部,您将找到一个电话图标。
VholdR 动作相机用户手册说明书

Wear Your VholdR Congratulations and welcome to the VholdR Community. We are committed to creating the easiest way to shoot and share action video.What’s in the Box:a VholdR Camerab VholdR Desktop Softwarec USB Cabled Batterye Helmet Mount w/ Leashf User Manualabd ceYou probably want to get started using your VholdR right away, so we’ll try and get you up and running quickly. Follow along as we help you record your first VholdR video, right out of the box.S /N O 120700 0 0 3 3rear doorrecordstoprecord switch192º rotating lensdual alignment lasersTRail™ mounting systempower indicatorserial number charging indicatorbattery slotmicroSD card slotUSBpower buttonmemory indicator67Getting to know your VholdR CameraGetting to know your VholdR Camera Part One: Getting to know your VholdR CameraS N O 1207000033charging indicatorUSB connectionYour VholdR battery will have some juice out of the box, but we recommend a freshcharge before recording your first adventure. VholdR is designed to charge directly from your computer via the included USB cable.Open VholdR’s back door and connect the USB cable.Connect the other end of the USB cable to your computer. USB input: 5V 500mANote: The VholdR will charge fastest while not powered on.VholdR’s charging indicator light (located inside the back door) will be red when the bat-tery is charging. The charging indicator light will turn green or turn-off once the VholdR is fully charged provided the VholdR is powered off while charging. The battery will take about 4 hours to full charge.Your VholdR uses a rechargeable Lithium-Ion, 3.7V , 900mAh battery. Do not use batteries other than those specifically designed for the VholdR. Use of any other battery may present a risk of fire or explosion.Note: A VholdR wall charger is available as an accessory at To open VholdR’s back door, place your thumb at the bottom of the door and gently push upwards.You will need to purchase a MicroSD memory card to use with your VholdR. High speed cards are recom-mended and remember that VholdR only supports up to a 2GB MicroSD card (non-HC format). Once you have the card, slide the MicroSD card into the card slot until you hear a gentle click.Note: VholdR only supports up to a 2GB MicroSD card (non-HC format)To insert the battery, align the plus sign (+) on thecamera with the plus sign (+) on the battery and insert the gold contacts first. Hold the battery tab away from the opening to allow enough space for the battery to slide into place. Slide the tab over the top of the battery and ensure it is resting in one of the grooves on top of the battery.Note: It is important that the battery clip is firmly engaged to secure the battery in place.Close the back door by aligning it slightly above the body of the camera and then sliding downward until it locks into place.S /N O 1207000033S /N O 1207000033charging indicatorUSB connection12312345489MicroSD Card & BatteryCharging the BatteryMicroSD Card & BatteryCharging the BatteryBefore you power up, make sure your VholdR is in the ‘Stop’ position by sliding the top record switch all the way back against the rear door.Note: Do not toggle the record switch or connect to a computer until the unit is fully booted. (Approximately 15 seconds).Press and hold the power button until the status lights on the back light up, then release. The front red power light will turn on.The rear two lights will stay amber for about 10seconds. Next, the lens lasers will turn on for about five seconds as the back two indicator lights turn off.CAUTION: DO NOT stare directly into the laser beams.Finally, the lasers will turn off and you will hear abeep. The VholdR is now fully booted and ready to record. The red power light will remain on to indicate the VholdR is on and ready to go.You can check the status of your VholdR camera by pressing and holding the power button for one second after the camera has finished booting.Battery Status Green light Yellow light Red light No lightsMemory card status Green light Yellow light Red light Flashing RedPower offMore than 66% fullBetween 33% and 66% fullLess than 33% - time to rechargeRecharge your VholdR or power up againMore than 66% free recording spaceBetween 33% and 66% free recording spaceLess than 33% - time to swap out cards or download Your memory card is full, you are missing a card, or your card has an error and needs to be formatted(see Tips & Troubleshooting to format your MicroSD Card)Press and hold rear button for 3 seconds or until all lights turn offrecordrearpress and hold until lightscome onfrontpush untillightscome ona, fcbbpress and holdfor (1) secondrearpress and hold until lights come onfrontpush until lights come ona, fcbbpress and hold for (1) seconda b cd e f1011Powering UpVholdR Camera StatusPowering UpVholdR Camera StatusNote: Press firmly and for best results let sit overnight to cure. attach and adjust camera according to your riding position (it’s no fun watching videos of the ground)attach and adjust camera according to your riding position(it’s no fun watching videos of the ground)12Mount, Align, and RecordAlignNow let’s align your VholdR. Remember, there is no screen so the lasers are designed to give you a visual level of what you will be shooting.The VholdR camera supports both PC and Mac, but the VholdR Desktop software is only PC compatible at this time.Minimum PC Requirements:Operating Systems: XP & VistaLanguage: EnglishBrowsers: IE 6.0, 7.0 & Firefox 1.0, 2.0, 3.0Windows Media Player 10Microsoft Dot Net 3.0Note: In order to properly install and activate your VholdR Desktop, your account needs to have ‘System Administrator’ privileges.Windows XP:Click the ‘Start’ button.Select ‘Control Panel’.Open ‘User Accounts’.Your login account should be labeled “Computer administrator”. Windows Vista:Click the ‘Start Menu’.Select ‘Control Panel’.Open ‘User Accounts’.Your login account should be labeled ‘Administrator’.Select ‘Turn User Account Control on or off’.Uncheck the ‘Use User Account Control (UAC) to help protect your computer’ checkbox and select OK.You will need to restart your computer. We love Macintosh and many of us at VholdR are lifetime Mac users, but we’re still working on VholdR Desktop for Mac so please be patient with us while we work on developing Mac software. To check our status on a Mac version please visit: /mac.In the meantime, the following directions are written just for you. Connect VholdR - When you connect VholdR, a new drive should appear on your desktop. It should appear as ‘untitled’ if you did not previously format your card with a name. Double click on the icon to open up the file menu of your VholdR. Drag the video clips to your desktop or new folder.Xvid Codec - In order to play your VholdR videos you will need an Xvid compatible player (QuickTime does not play native Xvid files) or to convert the VholdR videos to a QuickTime compatible file type.Player – VLC Media Player /vlc/Convert Files – FFmpegX /major4/To play a video with the VLC player, right click on video file and select the VLC player.Sharing to - We would love to see your videos on so go to , create an account, and then upload your videos one at a time.1 2 3 4 1 2 3 4 5 671 2 31617 VholdR Software Macintosh Part Three: VholdR Software Macintosh。
viber电脑版软件介绍
viber电脑版软件介绍viber电脑版是一款跨平台的网络电话和即时通讯软件,viber桌面版最大的亮点是会自动同步你手机上的所有联系人、短信与通话记录,所以你可以在viber桌面版和手机版上与朋友发短信的内容、通话记录等信息,在你的各个不同设备上都不会丢失。
当你通过电脑或者手机与他人通话,如果突然有事要出门,你还可以一键把通话转移到手机上继续进行谈话,非常的方便。
功能介绍1、手机端的viber在wifi、3g和gprs网络下,都能流畅清晰的通话;2、支持push推送通知机制,完全不需要启动软件或者后台保持在线,别人可以直接通过viber给你拨打电话或者发短信,手机会自动收到来电的推送通知并响铃提示,在你接听之后才会启动viber,整个使用体验就像普通的电话一样,*作非常方便;3、viber需要使用你的手机号进行注册(注册完全免费),然后它会读取你手机上原本的通讯录列表,如果发现你通讯录上的朋友已经有注册过viber的话,它就会自动地识别出来并标识出来。
软件特*1、没有*费用,在不同的国家通话也是免费的2、只需要所使用的环境中有一个互联网连接:3g或wi-fi均可。
3、无需用户名,密码或注册4、自动显示你的电话薄中装有viber的朋友或家人5、自带简体中文语言使用方法1、要viber电脑版能够顺利的在电脑上运行,首先你需要手机上装有viber并已登陆你的账号,因为需要通过手机版来接受激活码才能够顺利在pc端上运行viber软件。
一次完成安装与激活后,你的viber 联系人将自动同步到电脑上,准备好聊天了。
2、你不需要多viberforwindows做任何设置便可以开始使用了,不过这点是一定的:如果你没有安装麦克风的话,是不能正常使用通话功能的,且软件会提醒你经行麦克风设置。
3、viberpc版本也提供可视电话功能,不过目前这个功能还在beta测试版本当中,不过也值得尝试了。
4、另一个重要的功能便是免费的聊天和短信功能,viberpc版本当然也不会缺少,你可以和单人聊天,也可以群聊,使用方面与手机版没什么不同,而且聊天记录会自动进行同步。
一触挨网 emotionally intelligent robot音频配置手册说明书
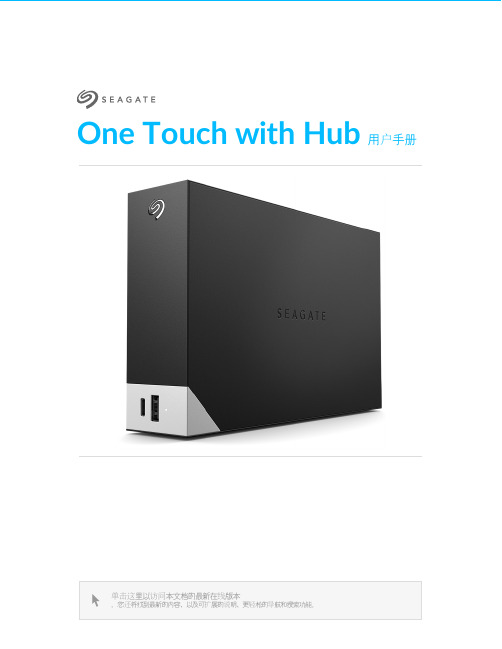
One Touch with Hub 用户手册单击这里以访问本文档的最新在线版本。
您还将找到最新的内容,以及可扩展的说明、更轻松的导航和搜索功能。
. . . . . . . . . . . . . . . . . . . . . . . . . . . . . . . . . . . . . . . . . . . . . . . . . . . . . . . . . . . . . . . . . . . . . . . . . . . . . . . . . . . . . . . .. . . . . . . . . . . . . . . . . . . . . . . . . . . . . . . . . . . . . . . . . . . . . . . . . . . . . . . . . . . . . . . . . . . . . . . . . . . . . . . . . . . . . . . . . . . . . . . . . . . . . . . . . . . . . . . . . . . . . . . . . .. . . . . . . . . . . . . . . . . . . . . . . . . . . . . . . . . . . . . . . . . . . . . . . . . . . . . . . . . . . . . . . . . . . . . . . . . . . . . . . . . . . . . . . . . . . . . . . . . . . . . . . . . . . . . . . . . . . . . . . . . .. . . . . . . . . . . . . . . . . . . . . . . . . . . . . . . . . . . . . . . . . . . . . . . . . . . . . . . . . . . . . . . . . . . . . . . . . . . . . . . . . . . . . . . . . . . . . . . . . . . . . . . . . . . . . . . . . . . . . . . . . .. . . . . . . . . . . . . . . . . . . . . . . . . . . . . . . . . . . . . . . . . . . . . . . . . . . . . . . . . . . . . . . . . . . . . . . . . . . . . . . . . . . . . . . . . . . . . . . . . . . . . . . . . . . . . . . . . . . . . . . . . . . . . . . . . . . . . . . . . . . . . . . . . . . . . . . . . . . . . . . . . . . . . . . . . . . . . . . . . . . . . . . . . . . . . . . . . . . . . . . . . . . . . . . . . . . . .. . . . . . . . . . . . . . . . . . . . . . . . . . . . . . . . . . . . . . . . . . . . . . . . . . . . . . . . . . . . . . . . . . . . . . . . . . . . . . . . . . . . . . . . . . . . . . . . . . . . . . . . . . . . . . . . . . . . . . . . . .. . . . . . . . . . . . . . . . . . . . . . . . . . . . . . . . . . . . . . . . . . . . . . . . . . . . . . . . . . . . . . . . . . . . . . . . . . . . . . . . . . . . . . . . . . . . . . . . . . . . . . . . . . . . . . . . . . . . . . . . . .. . . . . . . . . . . . . . . . . . . . . . . . . . . . . . . . . . . . . . . . . . . . . . . . . . . . . . . . . . . . . . . . . . . . . . . . . . . . . . . . . . . . . . . . . . . . . . . . . . . . . . . . . . . . . . . . . . . . . . . . . . . . . . . . . . . . . . . . . . . . . . . . . . . . . . . . . . . . . . . . . . . . . . . . . . . . . . . . . . . . . . . . . . . . . . . . . . . . . . . . . . . . . . . . . . . . .. . . . . . . . . . . . . . . . . . . . . . . . . . . . . . . . . . . . . . . . . . . . . . . . . . . . . . . . . . . . . . . . . . . . . . . . . . . . . . . . . . . . . . . . . . . . . . . . . . . . . . . . . . . . . . . . . . . . . . . . . .. . . . . . . . . . . . . . . . . . . . . . . . . . . . . . . . . . . . . . . . . . . . . . . . . . . . . . . . . . . . . . . . . . . . . . . . . . . . . . . . . . . . . . . . . . . . . . . . . . . . . . . . . . . . . . . . . . . . . . . . . .. . . . . . . . . . . . . . . . . . . . . . . . . . . . . . . . . . . . . . . . . . . . . . . . . . . . . . . . . . . . . . . . . . . . . . . . . . . . . . . . . . . . . . . . . . . . . . . . . . . . . . . . . . . . . . . . . . . . . . . . . . . . . . . . . . . . . . . . . . . . . . . . . . . . . . . . . . . . . . . . . . . . . . . . . . . . . . . . . . . . . . . . . . . . . . . . . . . . . . . . . . . . . . . . . . . . .. . . . . . . . . . . . . . . . . . . . . . . . . . . . . . . . . . . . . . . . . . . . . . . . . . . . . . . . . . . . . . . . . . . . . . . . . . . . . . . . . . . . . . . . . . . . . . . . . . . . . . . . . . . . . . . . . . . . . . . . . .. . . . . . . . . . . . . . . . . . . . . . . . . . . . . . . . . . . . . . . . . . . . . . . . . . . . . . . . . . . . . . . . . . . . . . . . . . . . . . . . . . . . . . . . . . . . . . . . . . . . . . . . . . . . . . . . . . . . . . . . . . . . . . . . . . . . . . . . . . . . . . . . . . . . . . . . . . . . . . . . . . . . . . . . . . . . . . . . . . . . . . . . . . . . . . . . . . . . . . . . . . . . . . . . . . . . .. . . . . . . . . . . . . . . . . . . . . . . . . . . . . . . . . . . . . . . . . . . . . . . . . . . . . . . . . . . . . . . . . . . . . . . . . . . . . . . . . . . . . . . . . . . . . . . . . . . . . . . . . . . . . . . . . . . . . . . . . .. . . . . . . . . . . . . . . . . . . . . . . . . . . . . . . . . . . . . . . . . . . . . . . . . . . . . . . . . . . . . . . . . . . . . . . . . . . . . . . . . . . . . . . . . . . Contents1欢迎使用包装内容最低系统需求视图2入门教程连接电源连接到电脑设置 One Touch with Hub 3使用 Toolkit 来启用安全功能等启用安全功能开始备份计划(仅限 Windows )设置镜像文件夹4格式化和分区(可选)选择文件系统格式格式化说明5从您的计算机安全移除设备Windows Mac 6常见问题. . . . . . . . . . . . . . . . . . . . . . . . . . . . . . . . . . . . . . . . . . . . . . . . . . . . . . . . . . . . . . . . . . . . . . . . . . . . . . . . . . . . . . . . . . . . . . . . . . . . . . . . . . . . . . . . . . 端口. . . . . . . . . . . . . . . . . . . . . . . . . . . . . . . . . . . . . . . . . . . . . . . . . . . . . . . . . . . . . . . . . . . . . . . . . . . . . . . . . . . . . . . . . . . . . . . . . . . . . . . . . . . . . . . . . . 操作系统. . . . . . . . . . . . . . . . . . . . . . . . . . . . . . . . . . . . . . . . . . . . . . . . . . . . . . . . . . . . . . . . . . . . . . . . . . . . . . . . . . . . . . . . . . . . . . . . . . . . . . . . . . . . . . . . . . 最低可用磁盘空间. . . . . . . . . . . . . . . . . . . . . . . . . . . . . . . . . . . . . . . . . . . . . . . . . . . . . . . . . . . . . . . . . . . . . . . . . . . . . . . . . . . . . . . . . . . . . . . . . . . . . . . . . . . . . . . . . . 正面. . . . . . . . . . . . . . . . . . . . . . . . . . . . . . . . . . . . . . . . . . . . . . . . . . . . . . . . . . . . . . . . . . . . . . . . . . . . . . . . . . . . . . . . . . . . . . . . . . . . . . . . . . . . . . . . . . 返回. . . . . . . . . . . . . . . . . . . . . . . . . . . . . . . . . . . . . . . . . . . . . . . . . . . . . . . . . . . . . . . . . . . . . . . . . . . . . . . . . . . . . . . . . . . . . . . . . . . . . . . . . . . . . . . . . . 在这里开始. . . . . . . . . . . . . . . . . . . . . . . . . . . . . . . . . . . . . . . . . . . . . . . . . . . . . . . . . . . . . . . . . . . . . . . . . . . . . . . . . . . . . . . . . . . . . . . . . . . . . . . . . . . . . . . . . . 注册您的设备. . . . . . . . . . . . . . . . . . . . . . . . . . . . . . . . . . . . . . . . . . . . . . . . . . . . . . . . . . . . . . . . . . . . . . . . . . . . . . . . . . . . . . . . . . . . . . . . . . . . . . . . . . . . . . . . . . 下载 Toolkit . . . . . . . . . . . . . . . . . . . . . . . . . . . . . . . . . . . . . . . . . . . . . . . . . . . . . . . . . . . . . . . . . . . . . . . . . . . . . . . . . . . . . . . . . . . . . . . . . . . . . . . . . . . . . . . . . . 安装 Toolkit . . . . . . . . . . . . . . . . . . . . . . . . . . . . . . . . . . . . . . . . . . . . . . . . . . . . . . . . . . . . . . . . . . . . . . . . . . . . . . . . . . . . . . . . . . . . . . . . . . . . . . . . . . . . . . . . . . 同时兼容 Windows 和 Mac . . . . . . . . . . . . . . . . . . . . . . . . . . . . . . . . . . . . . . . . . . . . . . . . . . . . . . . . . . . . . . . . . . . . . . . . . . . . . . . . . . . . . . . . . . . . . . . . . . . . . . . . . . . . . . . . . . 针对 Windows 优化性能. . . . . . . . . . . . . . . . . . . . . . . . . . . . . . . . . . . . . . . . . . . . . . . . . . . . . . . . . . . . . . . . . . . . . . . . . . . . . . . . . . . . . . . . . . . . . . . . . . . . . . . . . . . . . . . . . . 针对 macOS 优化性能. . . . . . . . . . . . . . . . . . . . . . . . . . . . . . . . . . . . . . . . . . . . . . . . . . . . . . . . . . . . . . . . . . . . . . . . . . . . . . . . . . . . . . . . . . . . . . . . . . . . . . . . . . . . . . . . . . 了解更多. . . . . . . . . . . . . . . . . . . . . . . . . . . . . . . . . . . . . . . . . . . . . . . . . . . . . . . . . . . . . . . . . . . . . . . . . . . . . . . . . . . . . . . . . . . . . . . . . . . . . . . . . . . . . . . . . . 通过 Finder 窗口退出. . . . . . . . . . . . . . . . . . . . . . . . . . . . . . . . . . . . . . . . . . . . . . . . . . . . . . . . . . . . . . . . . . . . . . . . . . . . . . . . . . . . . . . . . . . . . . . . . . . . . . . . . . . . . . . . . . 通过桌面退出444444445667888991111111112121212121313141414141415. . . . . . . . . . . . . . . . . . . . . . . . . . . . . . . . . . . . . . . . . . . . . . . . . . . . . . . . . . . . . . . . . . . . . . . . . . . . . . . . . . . . . . . . . . . . . . . . . . . . . . . . . . . . . . . . . . . . . . . . . . . . . . . . . . . . . . . . . . . . . . . . . . . . . . . . . . . . . . . . . . . . . . . . . . . . . . . . . . . . . . . . . . . . . . . . . . . . . . . . . . . . . . . . . . . . . . . . . . . . . . . . . . . . . . . . . . . . . .. . . . . . . . . . . . . . . . . . . . . . . . . . . . . . . . . . . . . . . . . . . . . . . . . . . . . . . . . . . . . . . . . . . . . . . . . . . . . . . . . . . . . . . . . . . . . . . . . . . . . . . . . . . . . . . . . . . . . . . . . .. . . . . . . . . . . . . . . . . . . . . . . . . . . . . . . . . . . . . . . . . . . . . . . . . . . . . . . . . . . . . . . . . . . . . . . . . . . . . . . . . . . . . . . . . . . . . . . . . . . . . . . . . . . . . . . . . . . . . . . . . . . . . . . . . . . . . . . . . . . . . . . . . . . . . . . . . . . . . . . . . . . . . . . . . . . . . . . . . . . . . . . . . . . . . . . . . . . . . . . . . . . . . . . . . . . . .. . . . . . . . . . . . . . . . . . . . . . . . . . . . . . . . . . . . . . . . . . . . . . . . . . . . . . . . . . . . . . . . . . . . . . . . . . . . . . . . . . . . . . . . . . . . . . . . . . . . . . . . . . . . . . . . . . . . . . . . . .全部用户Windows Mac 7Regulatory Compliance China RoHS Taiwan RoHS . . . . . . . . . . . . . . . . . . . . . . . . . . . . . . . . . . . . . . . . . . . . . . . . . . . . . . . . . . . . . . . . . . . . . . . . . . . . . . . . . . . . . . . . . . . . . . . . . . . . . . . . . . . . . . . . . . 问题:我的文件传输速度太慢. . . . . . . . . . . . . . . . . . . . . . . . . . . . . . . . . . . . . . . . . . . . . . . . . . . . . . . . . . . . . . . . . . . . . . . . . . . . . . . . . . . . . . . . . . . . . . . . . . . . . . . . . . . . . . . . . . 问题:我的计算机只有 USB-C 端口. . . . . . . . . . . . . . . . . . . . . . . . . . . . . . . . . . . . . . . . . . . . . . . . . . . . . . . . . . . . . . . . . . . . . . . . . . . . . . . . . . . . . . . . . . . . . . . . . . . . . . . . . . . . . . . . . . 问:我必须为我的 USB 设备使用 USB 集线器. . . . . . . . . . . . . . . . . . . . . . . . . . . . . . . . . . . . . . . . . . . . . . . . . . . . . . . . . . . . . . . . . . . . . . . . . . . . . . . . . . . . . . . . . . . . . . . . . . . . . . . . . . . . . . . . . . 问题:所提供的 USB 连接线太短. . . . . . . . . . . . . . . . . . . . . . . . . . . . . . . . . . . . . . . . . . . . . . . . . . . . . . . . . . . . . . . . . . . . . . . . . . . . . . . . . . . . . . . . . . . . . . . . . . . . . . . . . . . . . . . . . . 问题:我收到文件传输错误消息. . . . . . . . . . . . . . . . . . . . . . . . . . . . . . . . . . . . . . . . . . . . . . . . . . . . . . . . . . . . . . . . . . . . . . . . . . . . . . . . . . . . . . . . . . . . . . . . . . . . . . . . . . . . . . . . . . 问题:计算机上没有出现硬盘的图标. . . . . . . . . . . . . . . . . . . . . . . . . . . . . . . . . . . . . . . . . . . . . . . . . . . . . . . . . . . . . . . . . . . . . . . . . . . . . . . . . . . . . . . . . . . . . . . . . . . . . . . . . . . . . . . . . . 问题:硬盘的图标没有出现在我的桌面上15151515161616161717181818欢迎使用包装内容®Seagate One Touch with Hub电源适配器 (18W)USB 3.0 连接线(USB Micro-B 转 USB-A)快速入门指南最低系统需求端口可将 Seagate 设备连接到配备 USB-A 端口的计算机。
- 1、下载文档前请自行甄别文档内容的完整性,平台不提供额外的编辑、内容补充、找答案等附加服务。
- 2、"仅部分预览"的文档,不可在线预览部分如存在完整性等问题,可反馈申请退款(可完整预览的文档不适用该条件!)。
- 3、如文档侵犯您的权益,请联系客服反馈,我们会尽快为您处理(人工客服工作时间:9:00-18:30)。
如今智能手机越来越强大,移动互联网也越来越普及,于是手机上的免费网络电话应用越来越受欢迎,毕竟通过网络打电话不用算话费,更没有长途的巨额账单。
优点:
1.它类似QQ、Skype等等网络语音聊天工具,而无需它们繁琐的验证登录程序。
2.支持IOS和Android手机免费网络通话与发短信。
3.最大的亮点是即便只在移动的GPRS网络下,它依然能流畅清晰地通话!
4.它支持Push推送通知机制,你完全不必启动软件或后台保持在线,别人一样能通过Viber 拨打给你。
使用方法:
第一步:安装Viber软件到你的智能手机。
安装好后您的手机会有如下图标:
第二步:第一次运行程序后,会弹出如下图,同意并继续,点击“Continue”。
第三步:如下图:会提示你打开”设置”中的”通知”功能,这样等有其它人用Viber发短信或打电话给你时候就会提醒你,我们直接点击RETRY按钮即可,继续点击“设置”打开推送“通知”。
第四步:如下图:系统弹出一个窗口,大意是“Viber可以和你的通讯录同步并检测对方是否也使用Viber,以便将他们推荐给你,不用再邀请你的好友使用了Viber”。
直接点OK就可以了。
第五步,如下图,这里是输入您的手机号码,如我的,186********,不需要加其它,另外提醒下大家,如果不是在手机上使用Viber的话会提示通过您的手机号获取验证码确认,例如笔记本,平板。
第六步,如下图,输入完手机号后,稍等片刻,您会收到一条4位阿拉伯数字的认证码,输入认证码点击“Enter Viber”即可。
以上正确可跳过此步骤:(万一没收到认证码,请点击”NoCode”,几秒钟后,您会接到一个显示“未知电话号码”的电话,不用担心,是Viber的客服打过来的,它会用英文告知你的Viber Code,注意听就行了,都是比较简单的英文。
)
“
通过以上步骤,基本配置就已经完成,下面我们就能来体验Viber的免费语音功能。
第一步,如下图,在Viber程序内,注意您的联系人,如果后面带有紫色的Viber字样,那说明对方也安装了Viber;
您也可以直接点击上方“Viber”按钮显示所有Viber用户。
第二步,如下图,选择一个安装了Viber的联系人,点击”FreeCall”或’Free TextMessages”字样按钮你就能免费打电话或发短信给对方啦!操作和平常打收费电话一样。
第三,如果对方没有使用Viber,使用Keypad拨号的话,会提示使用普通模式打电话给对方。
点击”continue”,转入普通平常收费电话模式下拨打电话。
至此,Viber使用流程介绍完毕。
相信大家通过以上配置后至少可以用Viber免费打通我的电话。
小提示:
1.手机必须是在开启“GPRS或3G或无线”下才能正常打电话给对方。
2.本人是采用联通3G,A套餐——月租66,包50分钟国内语音电话,300M流量,240
条短信等。
按24小时开启3G,正常上网,上Q、微博等,不下载,一个月流量差不多够用。
3.3G的下载速度在200KB/s左右,2G会比较慢,在3G下测试语音通话是非常清晰的。
所
以大家如果想很好的实现Viber通话最好升级到3G卡。