林肯MKZ配置参数表
IMDS材料数据系统使用指南(10.0版本)

1.4 1.5 1.6 127 日 2013 年 4 月 23 日
2013 年 5 月 24 日 2013 年 6 月 27 日
2013 年 12 月 12 日 2014 年 3 月 17 日 2014 年 7 月 13 日 2015 年 2 月 27 日 2015 年 4 月 27 日 2015 年 6 月 10 日 2015 年 6 月 11 日 2015 年 7 月 10 日
第3页
目录
1 IMDS – 简介.............................................................................................................................................................................................................. 7 2 IMDS – 使用入门 ...................................................................................................................................................................................................... 8
IMDS 服务中心 欧洲 | 电话: +36 1778-9821 | 电子邮件: imds-helpdesk-english@ 中国 | 电话: + 86 27 8743-1668 | 电子邮件: imds-eds-helpdesk-china@
电梯门机变频说明书

RCF-1门机控制器操作手册软件版本4041德国威特电梯部件集团中国销售中心中国江苏省吴江市北厍厍星路18号215214电话+86 512 3220888 传真+86 512 3220044http://,E-Mail:selcom@保留更改的权利目录目录......................................................................................................................................................... (2)1 安全信息......................................................................................................................................................... . (4)1.1 安全事故预防规则....................................................................................................................................... .. (4)1.2 符合VDE 0105要求的合格员工 (4)1.3 对于擅自更改,取消一切质量保证 (4)2 安装前......................................................................................................................................................... (5)2.1 打开包装后....................................................................................................................................... .. (5)2.2 安全措施....................................................................................................................................... . (5)2.3 安装条件....................................................................................................................................... . (6)2.3.1 安装位置....................................................................................................................................... . (6)2.3.2 安装时的设备保护 (6)2.3.3 关于接线安全信息 (6)2.3.4 遵守EMC准则....................................................................................................................................... . (7)3 安装门机控制器......................................................................................................................................................... .. 73.1 安装指示....................................................................................................................................... . (7)3.2 安装门机控制器时的保护指示 (7)3.3 尺寸和必要安装孔....................................................................................................................................... .. (7)4 门机控制器的接线 (8)4.1 接线指导....................................................................................................................................... . (8)4.2 门机控制器端子描述 (10)4.3 接线图....................................................................................................................................... .. (11)5 准备工作......................................................................................................................................................... .. (12)6 控制板描述......................................................................................................................................................... (13)7 门机控制器的工作模式 (14)7.1 设置模式....................................................................................................................................... . (14)7.2 自学习模式....................................................................................................................................... .. (14)7.3 常用模式....................................................................................................................................... . (15)7.4 手动模式....................................................................................................................................... . (15)7.5 自动模式....................................................................................................................................... . (15)8 关门力监测......................................................................................................................................................... (16)9 门机控制器的参数 (16)9.1 设置和检查参数....................................................................................................................................... . (16)9. 2 总参数表..................................................................................................................................... (17)9.3 参数描述..................................................................................................................................... . (17)9.3.1 模式参数....................................................................................................................................... . (17)9.3.2 电机参数....................................................................................................................................... . (19)9.3.3 传动参数....................................................................................................................................... . (19)9.3.4 编码器参数....................................................................................................................................... .. (19)9.3.5 力矩参数....................................................................................................................................... . (19)9.3.6 关门力监测范围限定 (20)9.3.7 显示参数....................................................................................................................................... . (21)9.3.8 插入式直流制动参数 (22)9.3.9 总参数表(根据参数号排序) (23)9.4 门运行参数....................................................................................................................................... .. (23)9.4.1 门位置参数..................................................................................................................................... .. (23)9.4.2 力矩参数....................................................................................................................................... . (24)9.4.3. 门速度参数....................................................................................................................................... .. (25)10 SEPULS编码器 (26)10.1 安装编码器....................................................................................................................................... .. (26)10.2 编码器的接线....................................................................................................................................... (26)10.3 编码器功能控制....................................................................................................................................... . (26)10.4 检测编码器故障....................................................................................................................................... . (27)10.5 无编码器的紧急操作 (27)11 故障识别和故障排除 (27)12 电路板总图 (30)13 技术数据......................................................................................................................................................... .. (30)14 重要参数总结......................................................................................................................................................... . (31)1安全信息RCF1门机控制器只适用于轿厢门控制系统,安在轿厢顶部。
HP PageWide Pro MFP 577dw系列用户指南说明书

用户指南版权与许可©2016 版权所有HP Development Company, L.P.保留所有权利。
除非版权法允许,否则在未经HP 预先书面许可的情况下,严禁转载、改编或翻译本手册的内容。
本文档包含的信息如有更改,恕不另行通知。
HP 产品与服务的全部保修条款在此类产品和服务附带的保修声明中均已列明。
此处内容不代表任何额外保修。
HP 对此处任何技术性或编辑性的错误或遗漏概不负责。
Edition 2016 年2 月1 日商标声明Adobe®、Acrobat®和PostScript®是 Adobe Systems Incorporated 的商标。
Intel® Core™ 是Intel Corporation 在美国和其它国家/地区的商标。
Java™ 是Sun Microsystems, Inc. 在美国的商标。
Microsoft®、Windows®、Windows® XP 和Windows Vista® 是Microsoft Corporation 在美国的注册商标。
UNIX®是The Open Group 的注册商标。
能源之星和能源之星标记是美国环保署拥有的注册商标。
目录1产品基本信息 (1)产品功能 (2)环境功能 (2)辅助功能 (3)产品视图 (4)左前视图 (4)右前视图 (5)后视图 (5)墨盒门视图 (6)开机/关机 (7)打开产品电源 (7)管理电源 (7)关闭产品电源 (8)使用控制面板 (9)控制面板按钮 (9)控制面板主屏幕 (10)控制面板仪表板 (10)控制面板的应用程序文件夹 (11)控制面板快捷方式 (11)帮助功能 (12)打印机信息 (12)帮助动画 (13)安静模式 (14)从控制面板打开或关闭安静模式 (14)从EWS 打开或关闭安静模式 (14)2连接产品 (15)将产品接入计算机或网络 (16)使用USB 电缆连接产品 (16)将产品连接到网络 (16)支持的网络协议 (16)ZHCN iii使用有线网络连接产品 (17)使用无线网络(仅限无线型号)连接产品 (17)使用WiFi 设置向导将产品连接到无线网络 (18)使用WPS 将产品连接至无线网络 (18)手动将产品连接至无线网络 (19)使用Wi-Fi Direct 将计算机或设备连接至产品 (20)打开Wi-Fi Direct (20)从具有无线功能的移动设备打印 (20)从具有无线功能的计算机进行打印(Windows) (20)从具有无线功能的计算机进行打印(OS X) (20)为已接入网络的无线产品安装HP 打印机软件 (23)打开打印机软件(Windows) (24)管理网络设置 (25)查看或更改网络设置 (25)设置或更改产品密码 (25)在控制面板中手动配置TCP/IP 参数 (25)链路速度和双工设置 (26)3打印机管理和服务 (27)HP 嵌入式Web 服务器(EWS) (28)关于EWS (28)关于cookie (28)启动EWS (29)功能 (29)主页选项卡 (29)“扫描”选项卡 (30)“传真”选项卡 (31)“Web 服务”选项卡 (31)“网络”选项卡 (31)“工具”选项卡 (31)“设置”选项卡 (32)Web 服务 (33)何为Web 服务? (33)HP ePrint (33)打印应用程序 (33)设置Web 服务 (33)使用Web 服务 (34)HP ePrint (34)打印应用程序 (35)删除Web 服务 (35)iv ZHCNHP Web Jetadmin 软件 (37)产品安全功能 (38)安全声明 (38)防火墙 (38)安全性设置 (39)固件更新 (39)打印机软件(Windows) 中的HP Printer Assistant (40)打开HP Printer Assistant (40)功能 (40)Connected 选项卡。
黑翼飞行模拟器用户手册说明书

IntroductionThe Blackwing BW 635RG is an ultralight two-seater aeroplane designed for recreational flying and training purposes. It features a sleek and modern design, with a composite airframe and a low-wing configuration. The Blackwing has a cruising speed of up to 120 knots and a range of approximately 700 nautical miles, making it suitable for both short and long-distance flights. The cockpit is equipped with state-of-the-art avionics, including a glass cockpit display and an autopilot system. The Blackwing is also known for its superior handling and stability, making it a popular choice among flying enthusiasts and flight schools. The BW 635RG is powered by the venerable Rotax 915 iS engine.Development Credits:Mal Cartwright Product LeadRuss White3D Modelling, Interior and Exterior TexturingJack Lavigne IntegrationHarry Stringer AnimationPropAir Flight Model and SystemsJordan Gough ManualWith special thanks to our Beta Testers:Rob Abernathy John BurgessNick Cooper John DowMatt McGee Darryl WightmanTable of ContentsIntroduction (2)Development Credits: (2)With special thanks to our Beta Testers: (2)Table of Contents (3)Notes on Hardware (4)Overview (5)Aircraft Limitations (6)Airspeed Limitations (6)Engine Limitations (6)Operating Conditions (6)Fuel (7)Other Limitations (7)Emergency Procedures (8)Engine Failure on the Take-off Roll (8)Engine Failure after Take-off (8)Glide Performance (8)Emergency Landing (9)Spin Recovery (9)Normal Procedures (10)Before Starting Engine (10)Starting Engine (10)Before Taxiing (11)Taxiing (11)Engine Runup (11)Before Take-off (11)Take-Off (12)Initial Climb (12)Cruise Climb (12)Cruise (12)Landing (13)Balked Landing (13)After Landing (13)Securing Aircraft (14)Basic Performance (15)Stall Speeds (15)Take-Off Performance (15)Landing Performance (16)Systems Description (17)Instrument Panel Layout (17)Switch Logic and Electrical System (18)Master Switch (18)Fuel Pump Switch (19)LAND/TAXI Switch (19)Strobe/Nav Switch (19)Electrical System Diagram (20)Engine (21)Propeller (21)Fuel (21)Notes on HardwareDue to the unusual 3-position switches in this aircraft, conventional hardware 2position toggle switches (eg. strobe or nav light switches) cannot be translated tothe single 3-position switch which combine these.Additionally, as this aircraft utilises a single level power control (throttle), conventional throttle/prop/mixture hardware may interfere with the function of this system, and not work as intended. It is recommended to place your propeller and mixture levers in the IDLE position, and not move them while the engine is running.OverviewThe Orbx BW 635RG has been developed using official documentation and Computer Aided Design (CAD) resources from Blackwing Sweden. As a result, the aeroplane has been created through masterful modelling, texturing, systems integration, and flight model development.Figure 1 – Aircraft 3-viewAircraft DimensionsLength 6.6m Height 2.2m Wingspan8.4mWeightsBasic Empty Weight 375kg Maximum Take-off Weight 600kg Maximum Fuel Capacity (Litres)130LThe content in this manual and the operation of the BW 635RG in Microsoft Flight Simulator strictly must not be used as reference material in any form for operating the real aircraft.Aircraft LimitationsAirspeed LimitationsAirspeed Description Airspeed (KIAS) RemarksVne Never Exceed Speed 157 Must not exceed this speed in any operation.Va Manoeuvring Speed 109 If full or abrupt control deflection is made, the airframe may be overstressed.Vfe1 Max flap extended speed20 degrees90 Maximum speed for flaps 20°Vfe2 Max flap extended speed35-45 degrees 70 Maximum speed for flaps 35-45°Vlo Maximum landing gearoperating speed 70Do not extended or retract the landing gearabove this speed.Vle Maximum landing gear extended speed 90 Do not exceed this speed with the landing gearalready down.Vs0 Stall speed flaps/gearextended 38 Stall speed with gear down/flaps >0° and in level flight at MTOWVs1 Stall speed clean 49 Stall speed flaps retracted, gear up and in level flight at MTOWEngine LimitationsEngineEngine Manufacturer Rotax Engine Model Rotax 915 iSMaximum Power Take-off (Max 5 min.) 141 hp Continuous 135 hpMaximum RPM Take-off (Max 5 min.) 5800 Continuous 5500Critical Altitude 15000ft AMSL Maximum OperatingAltitude23000ft AMSL Operating ConditionsAerobatic manoeuvres, flight in IFR conditionsand flights in icing conditions are prohibited inthis aircraft.FuelFuel TanksLeft Right Litres US Gal Litres US GalTotal Fuel in Tank 67.5 17.8 62.5 16.5Unusable Fuel 2.5 0.7 2.5 0.7 Total Useable Fuel in Tanks 66.5 17.6 61.5 16.2Other LimitationsMaximum demonstrated crosswind for the BW 635RG is 20 knots.Emergency ProceduresNote: The following procedures have been modified to be suitable for simulation. It does not cover emergencies that are a) not simulated and b) not reasonable. Checklist items from the real procedures have been omitted and these procedures must not under any circumstances be used for training purposes.Engine Failure on the Take-off RollThrottle: IDLEIgnition: OFFFuel Pump: MAIN (DOWN POS)Brakes: APPLYWhen stopped: SECURE AIRCRAFTEngine Failure after Take-offNose: IMMEDIATELY LOWERAirspeed: 65 KNOTSLanding Area: DETERMINE WITHIN 30° OF NOSEFlaps: USE AS REQUIREDLanding Gear: USE DESCRETIONFuel Selector: OFFIgnition: OFFMaster Switch: OFFGlide PerformanceThe BW 635RG, the approximate performance for a glide is 65 KIAS which willgive approximately a 545ft/min rate of descent in the clean configuration.Glide performance will degrade significantly on extension of flaps and landinggear.Emergency LandingAirspeed: 65 KIASField: PICK BEST OPTIONLanding Gear: USE DISCRETION DEPENDING ON FIELD TYPEFlaps: AS REQUIREDFuel Selector: OFFIgnition: OFFFuel Pump: MAIN (down)Master Switch: OFF BEFORE LANDINGSpin RecoveryThrottle: IDLEControl Stick: AILERON NEUTRALRudder: FULL OPPOSITE TO DIRECTION OF ROTATIONControl Stick: POSITIVELY FORWARD OF NEUTRALRudder: NEUTRAL WHEN ROTATION STOPSControl Stick: SMOOTHLY PULL OUT OF DIVEWARNING:INTENTIONAL SPINS ARE NOT APPROVED INTHIS AIRCRAFT.Normal ProceduresNote: The pre-flight inspection portion of the normal procedures has been removed due to impracticality in the simulator.Before Starting EngineIgnition: OFFMaster Switch: OFF (down)Backup Battery: OFF/AUTO (down)Landing Gear Lever: DOWNCircuit Breakers: INCanopy CLOSED (CLICKING THE LATCHON THE INSIDE LEFT SIDEWALL.) Starting EngineParking Brake: HOLD TOE BRAKES AND ENGAGE PARKINGBRAKEMaster Switch: ENGINE START (middle position)Fuel Selector: SETFuel Gauge: CHECKFuel Pump: BOTH (up)Ignition: BOTHNav Lights: STROBE (middle position)Throttle: SET ½-1 INCH OPENIgnition: STARTOil Pressure: GREEN WITHIN 10 SECWarnings: NONEBefore TaxiingMaster Switch: NORMAL OPERATION (up)Altimeter: SETAvionics: SETParking Brake: DISENGAGETaxiingInstruments: CHECKED (COMPASS/HSI/BALL/ATT) Engine RunupParking Brake: ENGAGERPM: 2500 RPMFuel Pump: CYCLE, CHECK FUEL PRESSUREIdle: CHECK IDLE 1800 +/- 100 RPM Before Take-offCanopy: CLOSED AND LOCKEDFlaps: 1 STAGE (20°)Elevator Trim: SET FOR TAKE-OFFEngine Instruments: NORMALLanding Light: ON (up)Controls: FULL FREE AND CORRECT MOVEMENTParking Brake: DISENGAGETake-OffThrottle: FULLControls: NEUTRAL45 Knots: ROTATEAccelerate: NOSE ON HORIZON, ACCEL TO 80 KIASPositive Rate of Climb: GEAR UPLanding Light: OFF (down)Flaps: RETRACT ABOVE 500’ AGLInitial ClimbThrottle: MAX CONTINUOUS (5500 RPM)Airspeed: 90 KIASFuel Pump: MAIN (down) ABOVE 500’ AGL Cruise ClimbThrottle: MAX CONTINUOUS (5500 RPM)Airspeed: 130 KIASCruiseThrottle: 55-75% PowerAirspeed: 120-157 KIAS (<130 KIAS IN TURB)LandingFuel: QTY CHECKEDFuel Selector: FULLEST TANKFuel Pump: BOTH (up position)Airspeed: 90 KIASFlaps: EXTEND FLAP 1 <90 KIASDownwind Airspeed: 65 KIASLanding Gear: DOWN @ 65 KIAS; CHECK 3 GREENLanding Light: ON (up position)Base Leg: EXTEND FLAP 2 < 65 KIASFinal Approach Airspeed: 60 KIASBalked LandingThrottle: SMOOTHLY INCREASEAirspeed: 60 KIASTrim: COURSE TRIM TO RELIEVE PRESSUREFlaps: RETRACT TO POSITION 1 (20°)Gear: UPTrim: TRIM FOR CLIMBAfter LandingFlaps: RETRACTExterior Lights: AS REQ’DFuel Pump: MAIN (down)Securing AircraftParking Brake: ENGAGEDThrottle: IDLESwitches: ALL OFF EXCEPT ACL AND MASTERIgnition: OFFNav Lights: OFF (down)Master Switch: OFFBasic PerformanceStall SpeedsMTOW 600kg | CG 32% MAC | Power Idle | Level FlightFlap Position Stall Speed (KIAS) 0° 49 20° 44 35° 39 45°38Take-Off PerformanceMTOW | ISA CONDITIONS | SEA LEVEL | FLAPS 1 (20°) | MTOW (600kg)Cruise PerformanceRunway Surface Ground RollOver 50ft Obstacleft mft mPaved Runway328 100 656 200 Unpaved (Grass) Runway 361110689208Pressure Altitude Power (%) TAS Fuel Flow LPH MAP (inHg) Endurance(hr)Range (nm) 500055 161 19.7 30 5.8 941 65 170 23.3 34.1 4.9 827 7517826.937.44.1738Landing PerformanceMTOW | ISA CONDITIONS | FLAPS 2 (35°) | MTOW (600kg) | Speed 1.3 x VsoRunway Surface Ground Roll Over 50ft Obstacle ft m ft mPaved Runway 525 160 951 290 Unpaved (Grass) Runway 558 170 984 300Systems Description Instrument Panel LayoutSwitch Logic and Electrical SystemThe electrical switches in the BW 635RG are 3-position switches. These are generally known as “DOWN”, “MIDDLE” and “UP”. They are briefly explained below.Master SwitchThe MASTER switch functions in a unique way, with the following switch logic:1.When the MASTER switch is DOWN, all battery power is off. There will beno electrical power provided to the aircraft.•Note: The engine CANNOT be shut down when the master switch isoff. Electrical power must be present for the engine to turn off.2.When the MASTER switch is in the MIDDLE (Engine Start) position, limitedsystem functionality will be present. The backup battery will be activatedand power the following systems:•Primary Flight Display•Compass•AHRS (Attitude Heading Reference System)•Radio3.When the MASTER switch is UP (Normal Operation), full electrical supplywill be provided to the aircraft. The following systems will be powered on: •Note: the engine CANNOT be started with the MASTER switch in theUP position. If the engine won’t start, check the switch is in theMIDDLE position•Multi-Function Display•Transponder•Autopilot•Audio panel•STBY instruments•Pitot Heat•Main battery is disconnected from running engine. Alternatorprovides power.See Section NORMAL PROCEDURES for positioning of the MASTER switch.Fuel Pump SwitchThe Fuel Pump switch also has some advanced logic to it, due to two fuel pumpsbeing present, however, to put it simply, it operates in the following way:1.In the DOWN position, the main fuel pump is in use.2.In the MIDDLE position, the auxiliary fuel pump is in use.3.In the UP position, both fuel pumps will be on.LAND/TAXI SwitchThe LAND/TAXI switch powers the Taxi and Landing lights. It operates in the following logic:1.In the DOWN position, both lights will be OFF.2.In the MIDDLE position, the taxi light will switch on when the landinggear is extended.3.In the UP position, the Landing Light will switch on when the landinggear is extended.Strobe/Nav SwitchThe Strobe/Nav switch powers the Navigation (Red/Green) and Strobe (flashingwhite) lights. It operates in the following logic:1.In the DOWN position, both lights will be OFF.2.In the MIDDLE position, the STROBE light will be on.3.In the UP position, both the strobe and Nav lights will be on.Electrical System DiagramThe BW 635RG’s electrical system is modelled in the following way in Microsoft Flight Simulator.Because the starter system is connected to the BACKUP BUS, this means you cannot start the engine with the MASTER switch in the UP position, due to the BACKUP BUS being disconnected from the circuit once the MAIN BAT BUS is powered.Page 21 of 21User Guide v1.0 –RevisionEngineThe BW 635RG is powered by the Rotax 915iS. The Rotax 915iS is a four-stroke, four-cylinder, fuel-injected, turbocharged aircraft engine with a maximum power output of141 horsepower. The engine utilizes electronic fuel injection (EFI) technology toprovide precise fuel delivery and improved fuel efficiency. It also features a modernliquid-cooling system and a dual electronic ignition system for reliable performance.The Rotax 915iS engine has a maximum operating RPM of 5,200, with a recommended continuous operation range of 5,000 RPM or less.PropellerThe propeller is a 3-blade wood-composite design, which is hydraulically adjustable for operation at various pitch angles, controlled independently of the pilot. The propeller is linked to the engine through an electronically controlled governor, where RPM isadjusted in accordance with the position of the throttle control. This pitch curve cannot be adjusted in flight, however is designed to ensure maximum performance in allphases of flight.FuelBoth wings have fuel tanks, which are fed to the engine via electric fuel pumps. Fuelsystem information is fed via sensors to the Garmin avionics suite and can be viewedon the displays inside the cockpit.AIRPLANE WEIGHTSBasic Empty Weight……………………….…375 KgMaximum Takeoff Weight…………………..600 KgMaximum Fuel Weight………………………...95 Kg Maximum Landing Weight………………….600 Kg TANK USABLE FUEL LEFT WING TANK67.5 litres 17.8 US Gallons RIGHT WING TANK62.5 litres 16.5 US Gallons TOTAL 130 litres34.3 US GallonsFUEL CAPACITY AIRSPEEDS Never Exceed Speed ……….…………….173 KIAS Max Structural Cruising Speed…………..156 KIAS Maneuvering Speed MTOW……………….109 KIAS Initial Climb………………………………………80 KIASBest Angle Climb……………………………….75 KIASBest Rate of Climb……………………………..90 KIASMax Flap Ext 20°……………………..............90 KIASMax Flap Ext 35-45°……………………………70 KIASMax Landing Gear Operation……………….70 KIASMax Landing Gear Extended………………..90 KIASPlanned Cruise TAS………………………….130 KIASFinal Approach Speed………………………..60 KIAS POWERPLANT LIMITATIONSENGINE LIMITS (RPM)Take-off (5 Minutes)………....5800 RPM Max Continuous……………….5500 RPMALTITUDE LIMITSMaximum Operating Altitude………………23 000ftFor Microsoft Flight Simulator Use Only0-12023 Orbx Simulation Systems Pty. Ltd BW 635RG QUICK REFERENCESHEETIssued: 21 Apr 2023Revised: 21 Apr 20230-2PROCEDURESBEFORE STARTING ENGINEPreflight Inspection………………………….COMPLETECrew Briefing………………………………….COMPLETEIgnition…………………………………………………….OFFMaster Switch…………………………………………..OFFBackup Battery …..…………………………….OFF/AUTOLanding Gear Lever………………………………..DOWNCircuit Breakers…………………………………………..IN Canopy………………………………………………CLOSED STARTING ENGINEArea……………………………………………………..CLEARParking Brake……………….HOLD TOE BRAKES ANDENGAGEMaster Switch …..……………….ENGINE START (MID)Fuel Selector…………………………………………….SETFuel Pump………………………………………BOTH (UP)Ignition………………………………………………….BOTHExternal Lights……………………………………..AS REQThrottle ………………………..………..Τ12-1 INCH OPENIgnition………………………………………………….START AFTER START Oil Pressure.…………………………………………RISING Master Switch ……………………………..NORMAL (UP)Radios………………………………………………………SET Altimeter…………………………………………………..SET ATIS and Clearance…………………………..OBTAINEDBEFORE TAXIBrakes/Park Brake ………………………….DISENGAGEFlight Instruments……………………………..CHECKEDCompass…………………………………………CHECKED BEFORE TAKEOFFCanopy/Harnesses………………………………SECURE Flaps…………………………………….……1 STAGE (20°)Trim ..……………………………………SET FOR TAKEOFF Flight Instruments………………………………………SET Engine Instruments………………CHECKED NORMAL Avionics…………………………………………………….SET External Lights………………………………………AS REQ Flight Controls…………..FULL, FREE AND CORRECT Takeoff Safety Brief………………………….DELIVERED TAKEOFFBrakes/Park Brake………………………….DISENGAGEPower…………SMOOTHLY INCREASE TO MAXIMUM45 knots………………………………………………ROTATEAccelerate……….…NOSE ON HORIZON, TO 80 KTSPositive Rate of Climb………………………….GEAR UPLanding Light.……………………………….OFF (DOWN)Flaps ………………………..RETRACT ABOVE 500’ AGLMEMORY ITEMS 2023 Orbx Simulation Systems Pty. Ltd ENGINE RUN UP Parking Brake ……………………………………..ENGAGE Engine Instruments……………………………CHECKED Engine RPM…………………………………SET 2500 RPM Fuel Pump…………………………………………….CYCLE Idle …………………..…..CHECK IDLE 1800 ±100RPM Navigation Equipment …..…………………………….SETFor Microsoft Flight Simulator Use OnlyIssued: 21 Apr 2023Revised: 21 Apr 2023AFTER TAKEOFF Engine Instruments……………………..WITHIN LIMITS Climb Speed…………………………………………90 KIAS Fuel Pump………….MAIN (DOWN ) ABOVE 500’ AGL0-3CRUISEPower….……………………………………….SET 55-75%Airspeed…..……….120-157KTS (<130KTS IN TURB.)DESCENTAltimeter…………………………………………………..SETFuel Selector………………………………FULLEST TANKPower Lever………………….AS REQUIRED FOR RODApproach Brief………………………………PLETE BEFORE LANDINGBrakes……………………………………………………..OFFFuel ………….………………………………QTY CHECKEDFuel Selector………………………………FULLEST TANK Fuel Pump……….………………………………BOTH (UP)LANDINGDOWNWINDAirspeed….………………………………………….90 KIASFlaps….………………………………………STAGE 1 (20°)Airspeed………….………………………………….65 KIASLanding Gear…..…………………….DOWN @ 65 KIASCHECK 3 GREENLanding Light………………………………………ON (UP)BASEFlaps…………………………… STAGE 2 (35°) < 65 KIASFINALAirspeed………….………………………………….60 KIASTouchdown ……………………….MAIN WHEELS FIRSTStick………………………………………………FULL BACK Brakes…………………………………………………..APPLYAFTER LANDING Flaps………………………………………………..RETRACT Landing Lights…………………………………………..OFFFuel Pump….………………………………MAIN (DOWN)SHUTDOWNParking Brake ……………………………………..ENGAGE Throttle……………………………………………………IDLE Switches….………………………….OFF EXCL. MASTERIgnition..…………………………………………………..OFFLights….……………………………………….OFF (DOWN)Master Switch..……………………………..OFF (DOWN)MEMORY ITEMS 2023 Orbx Simulation Systems Pty. Ltd For Microsoft Flight Simulator Use OnlyPROCEDURESIssued: 21 Apr 2023Revised: 21 Apr 2023。
HP PageWide Pro MFP 477系列用户指南说明书

User GuideCopyright and License© 2016 Copyright HP Development Company, L.P.All rights reserved. Reproduction, adaptation, or translation of this material is prohibited without prior written permission of HP, except as allowed under copyright laws.The information contained in this document is subject to change without notice.The only warranties for HP products and services are set forth in the express warranty statements accompanying such products and services. Nothing herein should be construed as constituting an additional warranty. HP shall not be liable for technical or editorial errors or omissions contained herein.Edition 1, 2/2016Trademark CreditsAdobe®, Acrobat®, and PostScript® are trademarks of Adobe Systems Incorporated. Intel® Core™ is a trademark of Intel Corporation in the U.S. and other countries.Java™ is a US trademark of Sun Microsystems, Inc.Microsoft®, Windows®, Windows® XP, and Windows Vista® are U.S. registered trademarks of Microsoft Corporation.UNIX® is a registered trademark of The Open Group.ENERGY STAR and the ENERGY STAR mark are registered trademarks owned by the U.S. Environmental Protection Agency.Table of contents1 Product basics (1)Product features (2)Environmental features (3)Accessibility features (3)Product views (4)Front left view (4)Front right view (5)Back view (5)Cartridge door view (6)Power on and off (7)Turn the product on (7)Manage power (7)Turn the product off (8)Use the control panel (9)Control panel buttons (9)Control panel home screen (10)Control panel dashboard (11)Control panel application folders (11)Control panel shortcuts (12)Help features (12)Printer information (13)Help animations (13)Quiet Mode (14)To turn Quiet Mode on or off from the control panel (14)To turn Quiet Mode on or off from the EWS (14)2 Connect the product (15)Connect the product to a computer or a network (16)To connect the product using a USB cable (16)To connect the product to a network (17)Supported network protocols (17)Connect the product using a wired network (17)ENWW iiiConnect the product using a wireless network (wireless models only) (17)To connect the product to a wireless network using the Wireless SetupWizard (18)To connect the product to a wireless network using WPS (18)To connect the product to a wireless network manually (19)Use Wi-Fi Direct to connect a computer or device to the product (20)To turn on Wi-Fi Direct (20)To print from a wireless-capable mobile device (20)To print from a wireless-capable computer (Windows) (20)To print from a wireless-capable computer (OS X) (20)Install HP printer software for a wireless product already on the network (22)Open the printer software (Windows) (22)Manage network settings (22)View or change network settings (22)Set or change the product password (23)Manually configure TCP/IP parameters from the control panel (23)Link speed and duplex settings (23)3 Printer management and services (25)HP Embedded Web Server (26)About the EWS (26)About cookies (26)Open the EWS (27)Features (27)Home tab (27)Scan tab (28)Fax tab (29)Web Services tab (29)Network tab (29)Tools tab (29)Settings tab (30)Web Services (31)What are Web Services? (31)HP ePrint (31)Print apps (31)Set Up Web Services (31)Use Web Services (32)HP ePrint (32)Print apps (33)Remove Web Services (34)HP Web Jetadmin software (34)iv ENWWProduct security features (34)Security statements (35)Firewall (35)Security settings (36)Firmware updates (36)HP Printer Assistant in the printer software (Windows) (36)Open the HP Printer Assistant (36)Features (36)Connected tab (37)Print, Scan & Fax tab (37)Shop tab (37)Help tab (38)Tools tab (38)Estimated Levels tab (38)HP Utility (OS X) (38)AirPrint™ (OS X) (38)4 Paper and print media (39)Understand paper use (40)Supported media sizes (41)Supported paper and print media sizes (41)Supported envelope sizes (42)Supported card and label sizes (42)Supported photo media sizes (42)Supported paper types and tray capacity (43)Tray 1 (multipurpose) on left side of the product (43)Tray 2 (default tray) and Tray 3 (accessory tray) (44)Configure trays (44)Load media (45)Load Tray 1 (45)Load Tray 2 (46)Load optional Tray 3 (48)Load envelopes (49)Load letterhead or preprinted forms (51)Load the automatic document feeder (52)Load the scanner (53)Tips for selecting and using paper (55)5 Cartridges (56)HP PageWide cartridges (57)HP policy on non-HP cartridges (57)ENWW vManage cartridges (57)Store cartridges (58)Print with General Office mode (58)Print when a cartridge is at estimated end of life (58)Check the estimated cartridge levels (58)Order cartridges (59)Recycle cartridges (60)Replace cartridges (60)Tips for working with cartridges (62)6 Print (63)Print from a computer (64)To print from a computer (Windows) (64)To print from a computer (OS X) (65)To set up printing shortcuts (Windows) (66)To set up printing presets (OS X) (66)To adjust or manage colors (67)Choose a preset color theme for a print job (67)Adjust the color options for a print job manually (67)Match colors to your computer screen (68)Control access to color printing (69)Print from the control panel (69)Print using job storage (69)To enable job storage (69)Disable or enable job storage (Windows) (69)Disable or enable job storage (OS X) (69)To apply job storage to one or all print jobs (70)Apply job storage to one or all print jobs (Windows) (70)Apply job storage to one or all print jobs (OS X) (71)To print a job stored on the printer (71)To delete a job stored on the printer (71)Print from a USB device (72)Print with NFC (72)Print with HP ePrint (72)Print off site by sending an email with the HP ePrint app (32)Print from an on-site computer or mobile device (73)Print with AirPrint (OS X) (73)Tips for print success (74)Cartridge tips (74)Paper loading tips (74)vi ENWW7 Copy and scan (76)Copy (77)Copy settings (77)Adjust lightness or darkness for copies (77)Select a paper tray and paper size for copies (77)Reduce or enlarge a copy (77)Load and copy identification cards (78)Copy photos (79)Load and copy mixed-size originals (80)Copy on both sides automatically (80)Cancel a copy job (80)Scan (81)Scan to a USB drive (81)Scan to a computer (81)To set up scan to computer (81)Set up scanning to a computer (Windows) (82)Set up scanning to a computer (OS X) (82)To scan to a computer from the control panel (82)Scan to email (82)To set up scan to email (82)To scan a document or photo to email (83)Scan a document or photo to email from the control panel (83)Scan a document or photo to email from the printer software (83)To change account settings (83)Scan to a network folder (83)To set up scan to a network folder (84)Set up scan to a network folder in the EWS (84)Set up scan to a network folder in the HP Printer Assistant (84)To scan to a network folder (84)Scan to a network folder from the control panel (84)Scan to a network folder from the printer software (84)Scan to SharePoint (85)To set up scan to SharePoint (85)To scan to SharePoint (85)Scan using HP scanning software (85)Scan using other software (86)To scan from a TWAIN-compliant program (86)To scan from a WIA-compliant program (86)ENWW viiGuidelines for scanning documents as editable text (87)To scan a document to editable text (Windows) (88)To scan documents as editable text (OS X) (89)Tips for copy and scan success (90)8 Fax (91)Set up fax (92)Connect fax to a telephone line (92)Configure fax settings (92)To configure fax settings from the control panel (92)To configure fax settings using the HP Digital Fax Setup Wizard (Windows) (93)Set up HP Digital Fax (93)HP Digital Fax requirements (93)To set up HP Digital Fax (94)Set up HP Digital Fax (Windows) (94)Set up HP Digital Fax (OS X) (94)Set up HP Digital Fax in the EWS (94)To modify HP Digital Fax settings (94)Modify HP Digital Fax settings (Windows) (94)Modify HP Digital Fax settings (OS X) (94)Modify HP Digital Fax settings in the EWS (94)To turn off HP Digital Fax (95)Fax programs, systems, and software (95)Supported fax programs (95)Supported phone services - analog (95)Alternate phone services - digital (95)DSL (95)PBX (95)ISDN (96)VoIP (96)Set fax settings (96)Send-fax settings (96)Set pauses or flash hooks (96)Set a dialing prefix (97)Set tone-dialing or pulse-dialing (97)Set autoredial and the time between redials (97)Set the light/dark setting (98)Set the default resolution (98)Use cover-page templates (99)viii ENWWSet fax forwarding (99)Block or unblock fax numbers (100)Set the number of rings-to-answer (100)Set distinctive ring (101)Use autoreduction for incoming faxes (102)Set the fax sounds volume (102)Set stamp-received faxes (102)Send a fax (102)Send a fax from the control panel (103)Use speed dials and group-dial entries (103)Send a standard fax from the computer (103)Send a fax from the software (104)Send a fax using monitor dialing (105)Send a fax using printer memory (105)Receive a fax (106)Receive a fax manually (106)Fax memory (107)Reprint a fax (107)Delete faxes from memory (107)Use the phone book (107)Create and edit individual speed-dial entries (108)Create and edit group-dial entries (108)Delete speed-dial entries (108)Use reports (108)Print fax confirmation reports (109)Print fax error reports (110)Print and view the fax log (110)Clear the fax log (110)Print the details of the last fax transaction (111)Print a Caller ID Report (111)View the Call History (111)9 Solve problems (112)Problem-solving checklist (113)Check that the product power is on (113)Check the control panel for error messages (113)Test print functionality (113)Test copy functionality (114)Test the fax-sending functionality (114)Test the fax-receiving functionality (114)ENWW ixTry sending a print job from a computer (114)Test the plug-and-print USB functionality (114)Factors that affect product performance (114)Information pages (115)Factory-set defaults (116)Cleaning routines (116)Clean the printhead (117)Clean the scanner glass strip and platen (117)Clean the document feeder pick rollers and separation pad (118)Clean the touch screen (118)Jams and paper-feed issues (119)The product does not pick up paper (119)The product picks up multiple sheets of paper (119)Prevent paper jams (119)Clear jams (120)Jam locations (120)Clear jams from the document feeder (121)Clear jams in Tray 1 (multipurpose tray) (122)Clear jams in Tray 2 (122)Clear jams in optional Tray 3 (123)Clear jams in the left door (124)Clear jams in the output bin (125)Clear jams in the duplexer (126)Cartridge issues (127)Refilled or remanufactured cartridges (127)Interpret control panel messages for cartridges (127)Cartridge Depleted (127)Cartridge Low (128)Cartridge Very Low (128)Counterfeit or used [color] cartridge installed (128)Do not use SETUP cartridges (128)Genuine HP cartridge installed (128)Incompatible [color] (129)Incompatible cartridges (129)Install [color] cartridge (129)Non-HP cartridges installed (129)Printer Failure (130)Problem with Print System (130)Problem with Printer Preparation (130)Problem with SETUP cartridges (130)Use SETUP cartridges (130)x ENWWUsed [color] installed (131)Printing issues (131)The product does not print (131)The product prints slowly (132)Plug-and-print USB issues (132)The Memory Device Options menu does not open when you insert the USBaccessory (132)The file does not print from the USB storage device (132)The file that you want to print is not listed in the Memory Device Options menu (133)Improve print quality (133)Check for genuine HP cartridges (133)Use paper that meets HP specifications (133)Use the correct paper type setting in the printer driver (134)Change the paper type and size setting (Windows) (134)Change the paper type and size setting (OS X) (134)Use the printer driver that best meets your printing needs (134)Align the printhead (135)Print a print-quality report (135)Scan issues (135)Fax issues (136)Fax troubleshooting checklist (136)Change error correction and fax speed (137)Set the fax-error-correction mode (137)Change the fax speed (137)Fax logs and reports (137)Print individual fax reports (137)Set the fax error report (138)Fax error messages (138)Communication error. (138)Document feeder door is open. Canceled fax. (139)Fax is busy. Canceled send. (139)Fax is busy. Redial pending. (139)Fax receive error. (140)Fax Send error. (140)Fax storage is full. Canceling the fax receive. (141)Fax storage is full. Canceling the fax send. (141)No dial tone. (141)No fax answer. Canceled send. (142)No fax answer. Redial pending. (142)No fax detected. (142)Solve problems sending faxes (143)ENWW xiAn error message displays on the control panel (143)Document feeder paper jam (143)Scanner error (143)The control panel displays a Ready message with no attempt to send the fax. (143)The control panel displays the message "Receiving Page 1" and does not progressbeyond that message (144)Faxes can be received, but not sent (144)Unable to use fax functions from the control panel (144)Unable to use speed dials (144)Unable to use group dials (144)Receive a recorded error message from the phone company when trying to senda fax (145)Unable to send a fax when a phone is connected to the product (145)Solve problems receiving faxes (145)An error message displays on the control panel (145)The fax does not respond (145)Voice mail is available on the fax line (145)The product is connected to a DSL phone service (146)The product uses a fax over IP or VoIP phone service (146)Sender receives a busy signal (146)A handset is connected to the product (146)A phone line splitter is being used (146)Cannot send or receive a fax on a PBX line (146)Solve general fax problems (146)Faxes are sending slowly (146)Fax quality is poor (147)Fax cuts off or prints on two pages (147)Connectivity issues (147)Solve USB direct-connect problems (147)Solve network problems (148)Poor physical connection (148)The computer is using the incorrect IP address for the product (148)The computer is unable to communicate with the product (148)The product is using incorrect link and duplex settings for the network (149)New software programs might be causing compatibility problems (149)The computer or workstation might be set up incorrectly (149)The product is disabled, or other network settings are incorrect (149)Wireless network issues (149)Wireless connectivity checklist (149)The product does not print, and the computer has a third-party firewall installed (150)The wireless connection does not work after moving the wireless router or product (150)xii ENWWCannot connect more computers to the wireless product (150)The wireless product loses communication when connected to a VPN (151)The network does not appear in the wireless networks list (151)The wireless network is not functioning (151)Product software issues (Windows) (151)Product software issues (OS X) (153)The printer driver is not listed in the Print & Scan list (153)The product name does not appear in the product list in the Print & Scan list (153)The printer driver does not automatically set up the selected product in the Print & Scan list (153)A print job was not sent to the product that you wanted (153)When connected with a USB cable, the product does not appear in the Print & Scan list afterthe driver is selected. (153)You are using a generic printer driver when using a USB connection (154)10 Service and support (155)Customer support (156)HP limited warranty statement (157)UK, Ireland, and Malta (158)Austria, Belgium, Germany, and Luxemburg (158)Belgium, France, and Luxemburg (159)Italy (160)Spain (160)Denmark (161)Norway (161)Sweden (161)Portugal (162)Greece and Cyprus (162)Hungary (162)Czech Republic (163)Slovakia (163)Poland (163)Bulgaria (164)Romania (164)Belgium and the Netherlands (164)Finland (165)Slovenia (165)Croatia (165)Latvia (165)Lithuania (166)Estonia (166)Russia (166)ENWW xiiiAppendix A Technical information (167)Product specifications (168)Print specifications (168)Physical specifications (168)Power consumption and electrical specifications (168)Acoustic emission specifications (168)Environmental specifications (168)Environmental product stewardship program (170)Protecting the environment (171)Ozone production (171)Power consumption (171)European Union Commission Regulation 1275/2008 (171)Paper (171)HP PageWide printing supplies (171)Plastics (171)Electronic hardware recycling (172)Material restrictions (172)General battery information (172)Battery disposal in Taiwan (172)California Perchlorate Material Notice (172)EU Battery Directive (172)Battery notice for Brazil (173)Chemical substances (173)EPEAT (173)Disposal of waste equipment by users (173)Toxic and hazardous substance table (China) (174)Restriction on hazardous substances statement (Turkey) (174)Restriction on hazardous substances statement (Ukraine) (174)Restriction of hazardous substance statement (India) (174)China energy label for printer, fax, and copier (175)China SEPA Eco Label user information (175)Regulatory information (176)Regulatory notices (176)Regulatory model identification number (176)FCC statement (176)VCCI statement (Japan) (177)Power cord instructions (177)Power cord statement (Japan) (177)EMC statement (Korea) (177)Visual display workplaces statement for Germany (177)European Union Regulatory Notice (178)xiv ENWWEuropean Union Regulatory Notice (178)Wireless models only (178)Models with fax capability only (178)Additional statements for telecom (fax) products (179)New Zealand telecom statements (179)Additional FCC statement for telecom products (US) (179)Industry Canada CS-03 requirements (180)Notice to users of the Canadian telephone network (181)Australia wired fax statement (181)Notice to users of the German telephone network (181)Additional statements for wireless products (182)Exposure to radio frequency radiation (182)Notice to users in Brazil (182)Canadian statements (182)Japan statement (183)Notice to users in Korea (183)Taiwan statement (183)Mexico statement (183)Index (184)ENWW xvxvi ENWW1Product basics●Product features●Product views●Power on and off●Use the control panel●Quiet ModeENWW1Product featuresPageWide Pro MFP 477dnD3Q19A, D3Q19B, D3Q19C,D3Q19D Tray capacity (75 GSM or 20–lb Bond paper)●Tray 1: 50 sheets ●Tray 2: 500 sheets ●Optional Tray 3: 500 sheets ●Automatic Document Feeder(ADF): 50 sheets●Standard output bin: 300sheetsPrint ●Simplex speeds up to 40 pagesper minute (ppm) for both color and black with Professional quality●Duplex speeds up to 21 ppmfor both color and black with Professional quality●Up to 55 ppm in General Officemode●Walkup Plug-and-Print USBDevice port●Walkup printing of MS Officedocuments Copy ●Simplex speeds up to 40 ppm in black and color ●Single-pass, two-sided copying for speeds up to 26 ppm in black and color ●50-sheet ADF supports page sizes up to 356 mm (14.0 in) in length and 216 mm (8.5 in) in width Scan●Duplex speeds up to 26 ppm for both color and black ●Scan to walkup USB device, email address, network folder, or SharePoint site ●Glass supports page sizes up to 356 mm (14.0 in) in length and up to 216 mm (8.5 in) in width ●HP software enables scanning a document to a file that can be edited ●Compatible with TWAIN, WIA, and WS-Scan programs Fax●Fax to email address ornetwork folder●Fax from walkup control panelor from program on connected computer●Fax archive, fax log, junk-faxblocking, non-volatile fax memory, fax redirect featureConnectivity ●802.3 LAN (10/100) Ethernet port ●Host USB Type A and Type B ports (back)●USB 2.0 Device port (front)PageWide Pro MFP 477dw D3Q20A, D3Q20B, D3Q20C, D3Q20D Has the same features as the PageWide Pro MFP 477dn, and includes the following:●Embedded wireless capability ●802.11n 5GHz dual bandsupport●HP ePrint—send documents tothe product email address for printing●HP Wireless Direct support ●NFC-enabled (Near FieldCommunications); walkup printing from smart phones and tablets●Scan to smart phone 2Chapter 1 Product basics ENWWEnvironmental featuresFeature Environmental benefitDuplex printing Automatic duplex printing is available on all models of HP PageWide Pro MFP477dn/dw series. Duplex printing saves the environment and saves you money.Print multiple pages per sheet Save paper by printing two or more pages of a document side-by-side on onesheet of paper. Access this feature through the printer driver.Copies multiple pages per sheet Save paper by copying two pages of an original document side-by-side on onesheet of paper.Recycling Reduce waste by using recycled paper.Recycle cartridges by using the HP Planet Partners return process.Energy savings Sleep modes and timer options enable this product to quickly go into reducedpower states when not printing, thus saving energy. Accessibility featuresThe product includes several features that aid users with limited vision, hearing, dexterity or strength.●Online user guide that is compatible with text screen-readers.●Cartridges can be installed and removed using one hand.●All doors and covers can be opened using one hand.ENWW Product features3Product views●Front left view●Front right view●Back view●Cartridge door viewFront left viewLabel Description1USB device connection port2Cartridge door3Tray 1 extension4Tray 15Power button6Tray 2–main paper tray7Control panel8Scanner glass4Chapter 1 Product basics ENWWFront right viewLabel Description1Automatic document feeder (ADF) cover2Main output door3ADF paper guides4ADF loading area5ADF output bin6ADF output bin stop7Main output bin stop8Main output binBack viewLabel Description1Ethernet connection port2Fax connection ports3USB Type A and USB Type B ports4Power cord connectionENWW Product views5Label Description5Left door6DuplexerCartridge door viewLabel Description1Cartridge slots2Product serial number and product number3Cartridge part numbers6Chapter 1 Product basics ENWWPower on and offNOTICE:To prevent damage to the product, use only the power cord that is provided with the product.●Turn the product on●Manage power●Turn the product offTurn the product on1.Connect the power cord that is provided with the product to the connection port on the back of theproduct.2.Connect the power cord to a wall outlet with an adequate voltage rating.NOTE:Make sure that your power source is adequate for the product voltage rating. The product useseither 100-240 Vac or 200-240 Vac and 50/60 Hz.3.Press and release the power button on the front of the product.Manage powerHP PageWide Pro MFP 477dn/dw series printers include power-management features that can help reducepower consumption and save energy.●Sleep Mode puts the product in a reduced power-consumption state if it has been idle for a specificlength of time. You can set the length of time before the product enters Sleep Mode from the controlpanel.●Schedule On/Off enables you to turn the product on or off automatically at days and time that you setfrom the control panel. For example, you can set the product to turn off at 6 p.m. on Monday throughFriday.Set the Sleep Mode time1.Open the control panel dashboard (swipe the dashboard tab at the top of any screen downward, ortouch the dashboard area on the home screen).2.On the control panel dashboard, touch .ENWW Power on and off73.Touch Power Management, and then touch Sleep Mode.4.Select one of the time-interval options.The product switches into a reduced power-consumption state when it has been idle for the amount of timethat you select.Schedule the product to turn on or off1.Open the control panel dashboard (swipe the dashboard tab at the top of any screen downward, ortouch the dashboard area on the home screen).2.On the control panel dashboard, touch .3.Touch Power Management, and then touch Schedule Printer On/Off.4.Turn the Schedule On or Schedule Off option on.5.Select the Schedule On or Schedule Off options at the bottom of the screen, and then select the day andtime that you want to schedule.The product switches on or off at the time you select on the day you select.NOTE:The product cannot receive faxes when it is turned off. Faxes sent during a scheduled off interval willprint when the product is turned on.Turn the product offNOTICE:Do not turn off the product if a cartridge is missing. Damage to the product can result.▲Press and release the power button on the front of the product to turn off your HP PageWide Pro MFP 477dn/dw series printer.A warning message appears on the control panel if you attempt to turn the product off when one ormore cartridges are missing.NOTICE:To prevent print-quality problems, turn off the product by using the power button on the frontonly. Do not unplug the product, turn off the powerstrip, or use any other method.8Chapter 1 Product basics ENWWUse the control panel●Control panel buttons●Control panel home screen●Control panel dashboard●Control panel application folders●Control panel shortcuts●Help featuresNOTE:The small text on the control panel is not designed for prolonged viewing.Control panel buttonsButtons and indicator lights on the control panel of HP PageWide Pro MFP 477dn/dw series printers appear litwhen their function is available, and are darkened if their function is not available.1Home button.Touch to view the control panel home screen.2Wireless network indicator.Solid blue when the product is connected to a wireless network. Blinks when the product is searching for awireless connection. Off when the product is connected to a wired network or by a USB cable.3NFC (Near Field Communications) indicator.The product can be enabled for walkup printing from tablets and smart phones.4Back or Cancel button.Touch to return to the previous screen, or to cancel the current process.5Help button.Touch to view the Help menu options.ENWW Use the control panel9。
Dynon Avionics SkyView 自动 pilots 在飞行中调整指南说明书

2. Flight Test Preparation
2-1
Overview ..................................................................................................................................................................... 2-1 Disconnecting the Autopilot .......................................................................................................................................2-1 Accessing Autopilot Setup ..........................................................................................................................................2-1
SkyView Autopilot In-Flight Tuning Guide - Revision B
ii
Table of Contents
7. Roll Troubleshooting
4. Pitch Axis – IAS Hold Procedure
4-1
Overview ..................................................................................................................................................................... 4-1 Flowchart ....................................................................................................................................................................4-2
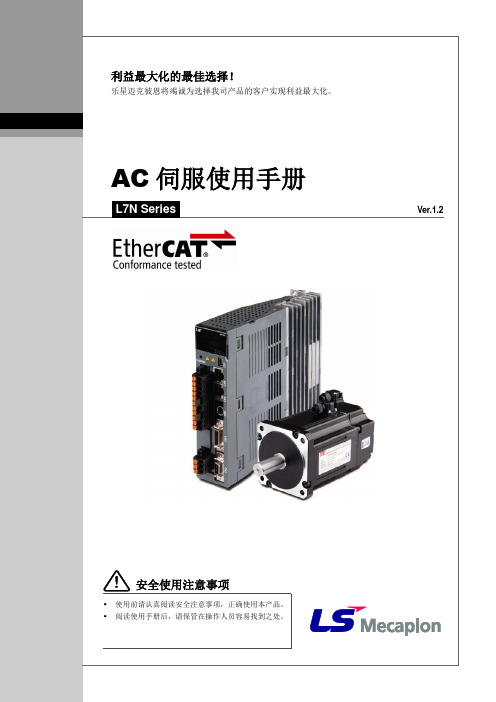
L7N使用手册中文
v
安全使用注意事项
接线注意事项
注意
▪ 伺服驱动器输入电源请使用 AC200-230[V]。 ▪ 确保伺服驱动器接地。 ▪ 请勿将常用电源直接,W 输出端。 ▪ 伺服驱动器的 U、V、W 输出端和伺服电机的电源输入端 U、V、W 直接接线,请勿在配线中间
1.2.1 伺服电机各部分名称............................................................................................................................ 1-3 1.2.2 伺服驱动器各部分名称 ........................................................................................................................ 1-4 1.3 连接器整体接线图............................................................................................................................................1-7
防止火灾注意事项
注意 ▪ 伺服驱动器、伺服电机、再生电阻请安装在阻燃物上。 ▪ 伺服驱动器发生故障时,请关闭电源。
iv
安全使用注意事项
安装注意事项
请在下列环境条件中保管及使用本产品。
环境 使用温度 保存温度 使用湿度 保存湿度
标高
安装间隔
其他
条件
伺服驱动器
伺服电机
0 ~ 50 ℃
Key Suite Acoustic 用户手册说明书

©2022 UVI. All rights reserved.All trademarks are the property of their respective owners.Table of ContentsIntroduction (4)InterfaceMAIN Page (5)EDIT Page (6)EFFECTS Page (8)Instruments (9)Preset List (13)Links (14)Credits and Thanks (15)Key Suite Acoustic The Essential Keys Collection The Essential Acoustic Keys Collection The result of over 20 years in making sample-based instruments, Key Suite Acoustic was designed to be your desert-island acoustic keyboard library. Enjoy a wealth of deeply-sampled and immaculately recorded instruments with a level of sound quality and control you’d only expect to find in a professional recording studio. From dynamic and powerful concert grand pianos to the charactered sounds of the celesta andharpsichord, there’s something special for every project - and with multiple mic signals, customizable envelopes, filters and a pro-grade effect chain to polish your sound, you may never reach for another acoustic key library again!Exceptional Instruments with Real Character Every physical instrument has its own sound and unique character, and that’s part of what makes this collection so special. Each instrument in Key Suite Acoustic was auditioned by our sound designers and chosen specifically for its exceptional tone and musicality, bringing new life to your music with characterful sounds rich in depth and detail.Deeply-Sampled with the Finest Equipment We’ve gone the distance to create the finest quality recordings and most reliable engine possible. Applying our 20+ years experience in the field you’ll hear the difference right away, from the knowledgeablechoices in microphones, placement, converters and processing, to the natural response from deep multisampling and precision editing, we’ve worked hard to ensure Key Suite Acoustic delivers ‘that’ sound right from the start.Professional Sound at Your FingertipsGreat instruments and recordings are only the beginning, with Key SuiteAcoustic we’ve created a library that delivers not only pristine soundbut a fast and flexible interface for sculpting it in any way you need. From adjusting individual microphone levels to a professional-grade effect rack with impulse response processor, multi-band EQ, digital delay, multimode modulation, and reverb, you’ll find the right sound for any situation, any arrangement, and any style, from classical to experimental and beyond.Included Instruments:- GRAND PIANOSModel D, F Grand, Japanese C7, Hybrid Custom, Baby Grand- UPRIGHT PIANOSGrand Upright, German Upright, Tender Upright, Tack Upright,Honky-Tonk Upright, The Compact- PLUCKED STRINGSHarpsichord, Clavichord, Spinet, Blanchet Cembalo- METALLOPHONECelesta, Keyboard Glockenspiel, Papageno Bells, J-Celeste, Dulcitone We’ve poured all of our experience and thousands of hours of workinto developing Key Suite Acoustic, giving you a deep and detailed collection of acoustic key instruments ready to simplify your workflow and enhance and accentuate your music for years to come.Minimum System Requirements• Latest version of UVI Workstation or Falcon• 12.6 GB of disk spaceFor more information on the installation process, please refer to the document:Introduction» Power - Filter On/Off» ModeMultimode filter can be set to low-pass (LP), band-pass (BP), or high-pass [HP]» FrequencyFilter cutoff frequency» ResonanceFilter resonance amountToneChanges tonal-color based on theadjacent samples5 Pitch» MonoSwitch between mono and poly modes» TimeSets the glide time» DepthSets the depth in semitones of pitchenvelope when in poly mode» S ympatheticAdjust volume of sympathetic resonancesound» PedalAdjust volume of pedal action soundNote: Available controls depends on theinstrument8 PolyphonySets the number of voices per layerNote: For users wishing to use less CPU,setting the release and sympatheticvolumes to zero will free up voicesAdjust the amount of drive» IN - Drive On/Off» LowAdjust level of low frequency range» Crossover Freq - Low/MidAdjust low and mid-band separationfrequency» MidAdjust level of middle frequency range » HighAdjust level of high frequency range » Crossover Freq - Mid/HighAdjust high and mid-band separation frequency» IN - Equalizer On/OffAdjust dry/wet mix amount» DistanceAdjust the distance of the mics from thespeaker cabinet» Horn VolumeAdjust the level of the horn speakers» Drum VolumeAdjust the level of the drum speaker» Power - Effect On/OffNote: Available controls depend on theeffect type» HPAdjust low frequency damping of thedelay effect» Power - Effect On/Off5 S parkverb» MixAdjust dry/wet mix amount» S izeAdjust the size of the reverb space» LowAdjust the low decay multiplier» DecayAdjust the decay time of the reverb» HighAdjust the high decay multiplier» Power - Effect On/OffThe Instruments GRAND PIANOSModel DThe renowned Steinway Concert Grand Model D, recorded in one of the finest studios in the world (Guillaume Tell in Paris) we utilized a number of microphones including the Neumann U67 to deliver a warm and majestic sound.F GrandAfter auditioning a number of models built by the most famous Italian piano manufacturer, we found a particular instrument and the perfect room to have a singularly beautiful response and musicality. One of our favorites.Japanese C7The elegant Yamaha C7 Concert Grand Piano. Having found a particularly charactered model we recorded it as-is to underscore the special nuances that make its voice unique. An excellent choice for the musician looking for a magnetic concert grand; we find it delivers the perfect tones for contemporary jazz, rock and pop.Hybrid CustomExclusive to UVI, this custom piano was built utilizing parts from Yamaha, Steinway and Bösendorfer to create a truly unique and powerful sound. Recorded with Royer, BK and Neumann mics.Baby GrandA 1930’s Erard Baby Grand captured on location to preserve its unique warmth and history. A rare and fascinating piano its tones bring the past to life, imparting a sense of mystery and longing.The Instruments UPRIGHT PIANOSGrand UprightA rare 100-year old Steinway Grand Upright, refurbished and recorded with a multi-mic configuration allowing for deep tonal control - an exquisite sound from a vintage gem.German UprightThe Seiler Upright Grand delivers an exacting and detailed sound yet retains the warmth and personal qualities you’d expect from an upright, a truly versatile instrument.Tender UprightRecorded on-location in South Africa, this Blüthner resounds with a tender tone and unique sound uncommon to grands, great for intimate pop and soft passages.Tack UprightAn antique upright with well-worn strings and the hammers prepared with brass tacks, this piano offers a warm and charactered tone with a slightly percussive quality.Honky-Tonk UprightThe classic spaghetti western saloon upright complete with natural detune, recorded with vintage mics and preamps for an authentic and charactered sound.The CompactThe Ostlind Compact is a small 5-octave piano, full of charm and a slight natural detune. If you’re looking for the piano sound of a secluded back-alley club look no further.The Instruments PLUCKED STRINGSHarpsichordProduced by our friends at AcousticSamples, this UVI-exclusive offers what may be the definitive virtual harpsichord, deeply sampled and expertly programmed for a wonderful sound.ClavichordThe ancestor of the clavinet, the Clavichord has a distinctly Baroque sound to it perfect for classical, a period-piece score or a haunting accompaniment.SpinetThe Spinet is a small, boutique piano. As such the tonal quality is narrow and the action is more audible. A charactered instrument with a distinct sound.Blanchet CembaloBuilt by Ferdinando Granziera in Milano, Italy the Blanchet Cembalo is a perfect reproduction of a Blanchet harpsichord, renowned instruments with a timeless quality.The Instruments METALLOPHONECelestaPerfect for classical, opera, and modern themes, this Celesta by Schiedmayer delivers a historic sound with brilliant charm and exacting detail.Keyboard GlockenspielA very rare Mustel keyboard glockenspiel, this particular instrument was built to specification for the Berlin Philharmonic Orchestra and can be heard in many of their recordings.Papageno BellsA reproduction of the original from 1750 using original parts, the Papageno Bells deliver a clear and brilliant sound used most famously by Mozart.J-CelesteThis 3-octave road-cased JenCo Celesta was close-miked in mono for a charming and charactered take on the classic celeste sound.DulcitoneDesigned in the 1860’s, the precursor to the Rhodes electric pianos produces sound by the striking of tuning forks with felted hammers - deeply-sampled and rich with detail.Preset ListGrand PianosBaby GrandBG Basic DryBG Basic HallBG Mellow DarkBG Modern BrightBG Phasor TintBG Radio FXBG RomanticBG Rotary WheelHybrid CustomHC Basic DryHC Basic HallHC Mellow DarkHC Modern BrightHC Phasor TintHC Radio FXHC RomanticHC Rotary WheelItalian F278IT Basic DryIT Basic HallIT Mellow DarkIT Modern BrightIT Phasor TintIT Radio FXIT RomanticIT Rotary WheelJapanese C7JPN Basic DryJPN Basic HallJPN Mellow DarkJPN Modern BrightJPN Phasor TintJPN Radio FXJPN RomanticJPN Rotary WheelModel DMD Basic DryMD Basic HallMD Mellow DarkMD Modern BrightMD Phasor TintMD Radio FXMD RomanticMD Rotary Wheel Upright PianosGerman UprightGER Basic DryGER Basic HallGER Mellow DarkGER Modern BrightGER Phasor TintGER Radio FXGER RomanticGER Rotary WheelGrand UprightGU Basic DryGU Basic HallGU Mellow DarkGU Modern BrightGU Phasor TintGU Radio FXGU RomanticGU Rotary WheelHonky-TonkHTK Basic DryHTK Basic HallHTK Mellow DarkHTK Modern BrightHTK Phasor TintHTK Radio FXHTK RomanticHTK Rotary WheelTenderTDR Basic DryTDR Basic HallTDR Mellow DarkTDR Modern BrightTDR Phasor TintTDR Radio FXTDR RomanticTDR Rotary WheelThe CompactTC Basic DryTC Basic HallTC Mellow DarkTC Modern BrightTC Phasor TintTC Radio FXTC RomanticTC Rotary WheelPlucked StringsBlancher CembaloBC Basic DryBC Basic HallBC Mellow DarkBC Modern BrightBC Phasor TintBC Radio FXBC RomanticBC Rotary WheelClavichordCC Basic DryCC Basic HallCC Mellow DarkCC Modern BrightCC Phasor TintCC Radio FXCC RomanticCC Rotary WheelSpinetSP Basic DrySP Basic HallSP Mellow DarkSP Modern BrightSP Phasor TintSP Radio FXSP RomanticSP Rotary WheelHarsichordHCD Basic DryHCD Basic HallHCD Mellow DarkHCD Modern BrightHCD Phasor TintHCD Radio FXHCD RomanticHCD Rotary WheelMetallophoneDulcitoneCelestaJ-CelesteKeyboard GlockenspielPapageno BellsLinksUVIHome . . . . . . . . . . . . . . . . . . . . . . . . . . . . . . . . . . . . . . . . . . /UVI Portal. . . . . . . . . . . . /uvi-portalSoundbank Installation Guide . . . . . . . . . . . . . . . . . . . . . . . . . . . . installing_uvi_soundbanks_en.pdf UVI Workstation User Guide . . . . . . . . . . . . . . . . . . . . . . . . . . . . . uviworkstation_user_guide_en.pdf Your Registered Product Serial Numbers and Download /my-productsFAQ . . . . . . . . . . . . . . . . . . . . . . . . . . . . . . . . . . . . . . . . . . . /faqTutorial and Demo Videos . . . . . . . . . . . . . . . . . . . . . . . . . . . . . . /Support . . . . . . . . . . . . . . . . . . . . . . . . . . . . . . . . . . . . . . . . . /contact-supportiLokHome . . . . . . . . . . . . . . . . . . . . . . . . . . . . . . . . . . . . . . . . . . /iLok License Manager . . . . . . . . . . . . . . . . . . . . . . . . . . . . . . . . /ilm.htmlFAQ . . . . . . . . . . . . . . . . . . . . . . . . . . . . . . . . . . . . . . . . . . . /supportfaqCredits and ThanksProduced by UVIRecording / Editing / Sound DesignAlain J EtchartKevin GuilhaumouThomas KowalskiGideon MurrayFloriane PalmkrantzKlaus P. RauschArnaud Sicard @ AcousticSamplesEmeric TschambserDamien ValletSoftware + ScriptingRémy MullerOlivier TristanGUI + DesignNathaniel ReevesDocumentsNathaniel ReevesKai TomitaSpecial ThanksLes Talents LyriquesAteliers Marc Ducornet - Paris。
- 1、下载文档前请自行甄别文档内容的完整性,平台不提供额外的编辑、内容补充、找答案等附加服务。
- 2、"仅部分预览"的文档,不可在线预览部分如存在完整性等问题,可反馈申请退款(可完整预览的文档不适用该条件!)。
- 3、如文档侵犯您的权益,请联系客服反馈,我们会尽快为您处理(人工客服工作时间:9:00-18:30)。
林肯MKZ配置参数表
*仅指座椅与乘客人体接触的主要部分的材料。
**该系统功能专为新车设计,解锁新风工作次数约为500次,驻车新风工作次数约为2000次。
林肯MKZ 配置参数表
林肯MKZ 车型尺寸
标准配置 /
选装配置(需额外收费) /
无此配置
迎宾感应林肯星标欢迎毯门把手点亮
迎宾感应林肯星标欢迎毯门把手点亮示宽灯动态点亮内饰气氛灯点亮
后排娱乐系统(中央扶手)-后排音响控制-AM /FM广播-外接音源输入 支持林肯之道APP
林肯互联带4G 车载Wi-Fi
热点尊享版尊享版MKZ
MKZ H 混合动力
尊雅版尊耀版尊雅版尊耀版
信息娱乐系统
尊悦版尊享版尊享版尊雅版尊耀版尊雅版尊耀版
人性化科技尊悦版智能无钥匙进入及一键启动系统林肯迎宾感应系统
发动机远程启动
BLIS 盲区监测系统带两侧来车预警技术尊享版尊享版尊雅版尊耀版尊雅版尊耀版
安全科技配置
尊悦版LDW 车道偏离警告系统 巡航控制
ACC 智能自适应巡航控制系统
(带自动跟车及行人防碰撞预警系统)
LKA 车道保持辅助系统
AdvanceTrac 电子稳定增强系统ABS 防抱死制动系统EBD 电子制动力分配EBA 电子制动辅助系统牵引力控制系统第三代SYNC 多媒体通讯娱乐互动系统
Revel 高级音响系统
(14个扬声器含低音炮)
声控启动导航系统
倒车影像系统SOS 碰撞后警示系统前驻车距离警示系统后驻车距离警示系统主动泊车及驶离辅助系统电子驻车制动HSA 坡道辅助起步系统
后座车门儿童锁
LATCH 儿童座椅扣(兼容ISOFIX )TPMS 胎压监测系统SecuriLock 被动防盗系统带防盗警报
车门密码开启系统Auto Hold 自动驻车系统 Personal Safety System 个人安全系统
(三点预紧式安全带、安全带张紧力限制、前排双级式安全气囊、正副驾驶座双安全气囊&膝部安全气囊、侧安全气囊、前后排安全气帘、前排座椅&碰撞程度监测)
注:林肯中国保有对本配置表信息的最终解释权,如有变更恕不另行通知所有配置请以实际车型为准
车身颜色
内饰搭配
抛光铝饰套装**深核桃木黑咖木尊耀版
尊享版***
*仅指座椅与乘客人体接触的主要部分的材料
**尊享版,尊雅版和尊耀版可选装
***尊悦版、尊享版均配备Soft Touch 高级皮革且无特殊打孔纹样
冰咖棕2苍穹灰
3烟熏红
(汽油版专享)
4
瀚金黑
6
狂想蓝5
铂钻白(珠光漆)
需额外收费
1轮毂
17”高级铝合金轮毂18”高级铝合金轮毂19”高级铝合金轮毂
卡布奇诺
Deepsoft 高级皮质座椅*
赤陶棕/曜岩黑
Deepsoft 高级皮质座椅*
曜岩黑
Deepsoft 高级皮质座椅*
3
6
1
尊耀版
3
6
1
尊享版***
尊雅版
1
6
尊悦版***尊享版***
尊雅版
1
6
4
尊悦版***尊享版***
尊雅版尊耀版
1
6
4
1
6
4
1
6
4
1
6
1
6
尊雅版尊耀版
1
6
轴距 2850mm
高147m。