
附录:AM900E切卡功能指南
NICE900门机一体化调试指导—速度开关控制

NICE900门机一体化调试指导—速度开关控制门机一体化产品是电梯门、冷库门、地铁门等门系统的驱动控制器,它集成了开关门逻辑控制与电机驱动控制,外部系统只需给出开关门指令,即可实现对整个门系统的控制。
该产品可以驱动交流异步电机与交流同步电机,并支持速度控制模式与距离控制两种模式,极大的提高了产品应用范围,使得该产品几乎可以满足绝大部分门系统的控制驱动需求。
控制回路端子定义:一、通讯端子:1、485+:MODBUS差分信号正端;485-:MODBUS差分信号负端;标准MODBUS通讯接口建议使用屏蔽双绞线。
2、CAN+:CAN总线差分信号正端;CAN-:CAN总线差分信号负端;CAN总线通信接口建议使用屏蔽双绞线。
二、数字输入:DI1~DI8:数字量信号输入1、光耦隔离输入2、输入电压范围:DC9V~30V3、输入阻抗:3.3K三、内部24V电源:+24V 外接24V1、作为无触点开关或码盘的电源使用2、最大输出电流200mA四、编码器输入:COM:24V电源公共端;与内部GND隔离。
PGA:编码器A相PGB:编码器B相PGZ:编码器Z信号支持集电极开路输出或推挽输出五、模拟输入:CZA1/ GND:称重模拟量输入;输入电压范围DC0V~10V。
六、外部24V电源:MP24:外部24V供电MCOM:外部电源公共端外部开关电源供电;供通讯和模拟量用。
七:继电器输出及屏蔽接地:TA1/TB1/TC1TA2/TB2/TC2TA3/TB3/TC3继电器输出1、 TA-TB:常闭;TA-TC:常开,2、触点容量:250VAC/3A DC30V/1A3、触点与控制回路绝缘电压等级: 2.5kVAC驱动回路端子定义L1、L2:单相电源输入端子;交流单相220V电源输入端子。
P、PB:制动电阻连接端子;控制器的制动电阻连接端子。
U、V、W:控制器输出驱动端子;连接三相电动机。
接地端子:接地端子操作与显示界面;按键功能PRG编程键:一级菜单的进入和退出,快捷参数删除ENTER确认键:逐级进入菜单画面、设定参数确认STOP/RES停止/复位:运行状态时,按此键可用于停止运行操作;故障报警状态时,可用来复位操作。
YAMAHA900效果器说明书

YAMAHA900效果器说明书2006-11-17SPX990数字式效果处理器有30多种基本效果模式,每个模式都有多种可调参数量,可以说调整十分繁琐复杂所以给大家发表调控技巧。
首先打开电源,系统正常后MEMORY键灯亮,两种选择1按动MEMORY选择PRESET或USER发光二极管指示,确定使用工厂预置程序或用户自定程序,然后转动DATAENTRY钮,在MEMORY显示屏上选择一个自己需要的程序号MEMORY上的式数不断闪动,显示屏上将出现程序名,以及RECALL和处理模式交替闪显,如果程序选择正确,则按屏所示YES下面的∧键确认,不正确则继续转动DATA ENTRY键选择,或NO下面的∨键退回到前一选择上,程序选择的另一种方式使用热键选择,即显示板下的∧,∨键的左边四个键,方法是:开机直接按这四个键则相应的屏所示程序即被调出。
屏的式数为U或P或跟一个两为数字,表示用户自定程序热键的预置程序(USER)或工厂预置程序(PYESET)及其程序号。
热键的预置方法是先用前一种方法选好所需的程序号,在MEMORY显示屏上的数字不闪动状态下,不要按YES下面的键,直接按屏下左边四个键的其中之一,所选程序即被置于被接键位上,而此键上的原预置程序则被冲掉。
效果器的程序编辑方式:按下ETID键使其上的灯燃亮,屏上显示出主菜单,:PAGEI EFFECT PARAMETER(效果参数设置),MAINFX(主效果器)PREFX为(前效果器)POSTFX(后效果器),主菜单上的MAINFX处理单元的可调参数,不同程序模式的预置内容也不同,虽然本机的程序预置有80个但其基本处理模式只有30几个,其可调参数及调整方法如下:一、混响(REVERB)混响模式在SPX990上的所处的程序号位置是8,10,14,其可调参数有:开关(ON/OFF)。
可控制处理通道的开关状态。
直混/平衡(BALANCE)。
用于调整效果声与直达声的响度比,可调范围0至100。
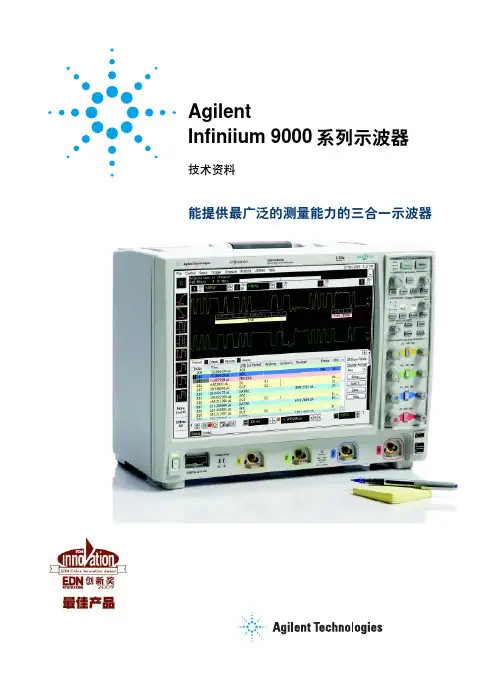
Agilent Infiniium 9000系列示波器 说明书
RS-232/UART 串行解码和触发(N5462B 或新购买示波器的选件 001)
使用该应用选项,您无需再去手动解码总线流量。该应用选项使用示波器或 逻辑通道捕获的数据, 可使您轻松查看RS-232或其他UART串行总线发送的信息。 实时显示按时间对齐的发送线和接收线的解码。此应用选项能够在 RS-232/ UART 条件下进行基于硬件的触发。 本应用选项可在所有型号上使用,可使用示波器通道或逻辑采集通道的任意
最大示波器 型号
DSO9064A MSO9064A DSO9104A MSO9104A DSO9254A MSO9254A DSO9404A MSO9404A
标配示波器 每通道存储器
10 Mpts/20 Mpts 10 Mpts/20 Mpts 10 Mpts/20 Mpts 10 Mpts/20 Mpts 10 Mpts/20 Mpts 10 Mpts/20 Mpts 10 Mpts/20 Mpts 10 Mpts/20 Mpts
拖放测量
测量很简单: 只要在测量条上拖拽 图标,然后在您想要测量的周期中释放 即可。 您可以在波形上执行五个测量, 或 是测量五个不同周期的波形。所有测量 结果都将以统计的形式显示在屏幕底部, 并对您正在测量的通道进行彩色编码。
4
它是一台三合一的仪器
2. 逻辑分析仪
MSO 型号添加了 16 个高速定时通道及标配的 128 Mpts 数字通道存储器, 使您能够在更长的时间周期内维持 2 GSa/s 的快速采样率。
您正在使用 Altera 或 Xilinx FPGA 进行设计吗? 请使用 FPGA 动态探头进行快速的内部 FPGA 测量。您正在使用 I2C、SPI、 RS-232、低速或全速 USB 总线吗? 请使用数 使用定时通道评测控制信号关系和高达 16 位的数据总线。使用符号更快地解释波形 字通道为这些总线进行采集和解码, 将模拟通道用于其他的 时间相关的信号的测量
边缘计算机 EC900 系列 用户手册说明书

边缘计算机EC900 系列用户手册(适用于 Debian10)Version1.3,2023 年 5月本手册中描述的软件是根据许可协议提供的,只能按照该协议的条款使用。
版权声明© 2023 映翰通网络保留所有权利。
商标InHand 标志是映翰通网络的注册商标。
本手册中的所有其他商标或注册商标属于其各自的制造商。
免责声明本公司保留对此手册更改的权利,产品后续相关变更时,恕不另行通知。
对于任何因安装、使用不当而导致的直接、间接、有意或无意的损坏及隐患概不负责。
目录1 导言 (1)2 硬件安装说明 (1)2.1介绍 (1)2.2 EC900面板 (2)2.3 EC900外部连接器 (3)2.3.1 以太网 (3)2.3.2 串口 (3)2.3.3 CAN (4)2.3.4 开关量输入接口(Digital Input) (5)2.3.5 开关量输出接口(Digital Output) (5)2.3.6 USB (6)2.3.7 LED (6)2.3.8 用户可编程按键 (9)2.3.9 直流输入 (9)2.3.10 SIM卡插槽 (10)2.3.11 MicroSD卡槽 (10)2.3.12 恢复出厂按键 (11)2.3.13 开关机按键 (11)2.3.14 天线接口 (12)2.3.15 拨码开关 (13)2.3.15 mSATA硬盘接口 (13)3 入门 (14)3.1连接到EC900 (15)通过SSH Console进行连接 (16)3.2用户账户管理 (18)切换到root用户 (18)创建和删除用户账户 (19)禁用默认的用户账户 (19)3.3网络设置 (20)配置以太网口 (20)设置一个静态IP地址 (20)设置一个动态IP地址 (20)3.4系统管理 (21)查询固件版本 (21)查看可用磁盘空间 (21)调整时间 (22)设置时区 (23)使用localtime文件 (24)关闭设备 (25)启动设备 (25)4 外设接口的高级配置 (25)4.1串口 (26)更改串口设置 (26)查看串口信息: (29)设置COM1串口的波特率: (29)设置COM2串口的波特率 (30)4.2 USB接口 (30)USB自动挂载 (30)micro SD卡自动挂载 (30)4.3 CAN总线接口 (33)配置连接CAN接口 (34)4.4 IO调试 (34)5 无线网络连接配置 (35)5.1 配置蜂窝网络 (35)使用nvram (35)5.2 GPS (39)5.3 配置Wi-Fi连接 (40)Wi-Fi的其他功能 (42)6 安全 (44)sudo机制 (45)防火墙 (45)7 系统恢复出厂设置及更新 (45)恢复出厂设置 (46)系统升级 (46)1 导言本用户手册适用于基于Arm架构的边缘计算机EC900,并涵盖整套适用于所有支持型号的说明。
APC Smart900的说明书

电压调低 电压调高
如果五只发光二极管全部点亮,表明输入的市电电压极高,应请电工 检查线路。
该发光二极管点亮时表明市电电压过高,不间断电源正在进行补偿。
该发光二极管点亮时表明市电电压过低,不间断电源正在进行补偿。
990-1049, 第 1 次修订 2000 年 12 月
2
电池供电
如果市电断电,不间断电源可利用自备电池向所连接的设备继续供电一段时间。依靠电池
灵敏度按钮旁边的发光二极管将点亮,显示灵敏度。按电压敏感 度(voltage sensitivity)按钮可降低灵敏度。可使用尖头物体(例 如笔)按下按钮。按下按钮一次,可将灵敏度设定为较低 (reduced)。再按一次,可将灵敏度设定为最低(low)。第三次 按下按钮可将灵敏度恢复设定为正常(normal)。改变灵敏度也 可通过软件进行。 指示灯最亮:不间断电源处于正常灵敏度。
电 池 电 量 不 足 2 分钟 的报警时间
市 电 断 电 的 报 延时5秒 警延时
关机延时
20 秒
同步开机延时 0 秒
5、7、10、12、 使用本功能可设定不间断电源在断
15、18、20分钟 电前多长时间发出电池电量不足的
报警。如果操作系统需要更长时间
不间断电源可检测市电电压的畸变(例如尖峰、波形缺失、相位 畸变和波形膨胀畸变)以及低档燃油发电机供电引起的电压畸 变。根据默认设定,不间断电源在检测到畸变后会切换至电池供 电状态,以保护所连接的设备。如果供电质量较差,不间断电源 可能会频繁切换至电池供电状态。如果负载在供电质量较差的条 件下也能正常操作,则可降低不间断电源的电压敏感度从而节约 电池电量,延长使用寿命。
如果市电未恢复供电,不间断电源会继续向所连接的设备供电,直至电池耗尽。在电池供 电时,不间断电源会每隔三十秒钟发出四声哔的报警声。不间断电源会在电池耗尽而关机 前约两分钟发出哔的报警声。如果所连接的是电脑,用户必须在不间断电源断电前手工保 存文件并关机,使用 PowerChutePlus 接口软件的用户则无此限制,该软件可在无人值守时 自动关机。 确定电池供电时间
三菱 M900 使用说明书概要

使用说明感谢您购买三菱M900(产品型号:VGH08A手机。
为正确使用您的手机,请仔细阅读本手册并将其妥善保管,以便日后查照之用。
三菱数源移动通信设备有限公司本公司保留改进和修改产品及其手册的权利,若涉及版本升级,恕不另行通知。
目录序言1安全注意事项------------------------------------------ 1安全密码-------------------------------------------------- 3 旧包装盒的处理-------------------------------------- 3使用指南 4快速入门7使用前准备---------------------------------------------- 7基本操作-------------------------------------------------- 7 实用工具9日程表------------------------------------------------------9 计算器------------------------------------------------------11 货币转换--------------------------------------------------12 闹钟----------------------------------------------------------12 红外口------------------------------------------------------13 短信息14阅读短信息----------------------------------------------14 移动短信息到SIM卡存储器-------------------14转发短信息----------------------------------------------14 打开/关闭信息接收提示音------------------14发送短信息前的准备------------------------------15发送短信息----------------------------------------------15编辑文本草稿------------------------------------------16签名----------------------------------------------------------16发送信箱和SIM卡存储器/发送信箱----16目录短信息草稿----------------------------------------------16状态报告--------------------------------------------------17语音信箱--------------------------------------------------17统计信息--------------------------------------------------17 彩信18阅读新收到的MMS--------------------------------18保存接收到的MMS内容-----------------------18编辑并发送MMS------------------------------------18发送MMS前的话机准备-----------------------21从发送信箱发送MMS----------------------------22编辑草稿箱中的MMS----------------------------22统计信息--------------------------------------------------22 电子信箱23 阅读新收到的电子邮件--------------------------23新建电子邮件------------------------------------------24邮件设置--------------------------------------------------24从发件箱发送邮件----------------------------------25修改草稿箱中的邮件------------------------------25统计信息--------------------------------------------------25 通话管理26 通话记录--------------------------------------------------26通话计时--------------------------------------------------26通话计费--------------------------------------------------27通话录音--------------------------------------------------28目录电话本29存储姓名和电话号码------------------------------29添加手机电话本卡片图标----------------------30将铃声/音乐/语音记事设为来电铃声----31编辑手机电话本和SIM卡电话本-----------31查看和拨打电话本中号码----------------------31分组浏览--------------------------------------------------32语音拨号--------------------------------------------------32电话本剩余空间--------------------------------------32建立卡片群组------------------------------------------32机主名片--------------------------------------------------33显示本机号码------------------------------------------33固定拨号(FDN-------------------------------------33导出…------------------------------------------------------34 照相机35 照相机主界面及其相关图标------------------35合上翻盖的状态下----------------------------------36打开翻盖的状态下----------------------------------39 录像42播放录像--------------------------------------------------42合上翻盖的状态下----------------------------------43打开翻盖的状态下----------------------------------46 休闲娱乐49图片----------------------------------------------------------49铃声----------------------------------------------------------51视频----------------------------------------------------------52目录音乐----------------------------------------------------------53语音记事--------------------------------------------------54相框----------------------------------------------------------55Java----------------------------------------------------------57其它----------------------------------------------------------57统计信息--------------------------------------------------58 Mini卡59 使用与保养----------------------------------------------59保存数据--------------------------------------------------59插入/拔出存储卡-------------------------------------59访问存储卡的内容----------------------------------60存储卡的格式化--------------------------------------60统计信息--------------------------------------------------60 日历61 增值服务61Wap 62存储连接设置------------------------------------------62连线进入网络------------------------------------------62终止在线连接------------------------------------------63连接设置的个性化----------------------------------63Wap选项高级设置----------------------------------65 设置66铃声----------------------------------------------------------66显示屏------------------------------------------------------67单键功能--------------------------------------------------68话机设置--------------------------------------------------68连接管理--------------------------------------------------70目录GSM业务-------------------------------------------------70保密功能--------------------------------------------------73存储卡------------------------------------------------------74 附录A 主菜单树图75 附录B 故障诊断76附录C 中文输入法77输入法综述----------------------------------------------77输入法说明----------------------------------------------77有关中文输入法的选项设置------------------81 附录D 配件指南83 附录E 座充使用说明84序言感谢您选择三菱M900!本手机具有先进的拍照、录像及MP3功能,人性化设计的友好界面、高清晰度大彩屏、64和弦铃音及强大的存储空间。
SIM900A模块用户手册
SIM900A模块⽤户⼿册User ManualYIXIN_SIM900A模块⽤户⼿册⾼性能 GSM/GPRS模块⽬录1.模块简介 (1)1.1 模块资源图 (1)1.2 模块硬件资源详解 (2)2.模块使⽤ (6)2.1 使⽤前准备 (6)2.2 AT指令简介 (7)2.3 拨打/接听电话 (10)2.3.1 拨打电话 (11)2.3.2 接听电话 (13)2.4 短信的读取和发送 (14)2.4.1 英⽂短信的读取 (15)2.4.2 英⽂短信的发送 (16)2.4.3 中英⽂短信的读取 (17)2.4.4 中英⽂短信的发送 (19)2.5 GPRS通信 (21)2.5.1 TCP连接 (24)2.5.2 UDP连接 (29)2.5.3 GPRS通信注意事项 (34)1.模块简介YIXIN_SIM900A_V8(V8是版本号,下⾯均以YIXIN_SIM900A表⽰该产品)是⼀款⾼性能⼯业级的GSM/GPRS模块(开发板)。
YIXIN_SIM900A模块采⽤SIMCOM 公司的⼯业级双频GSM/GPRS模块:SIM900A,⼯作频段双频:900/1800MHz,可以低功耗实现语⾳、短信、彩信、数据和传真信息的传输。
YIXIN_SIM900A模块⽀持RS232串⼝和TTL串⼝,TTL串⼝⽀持3.3V/5V系统,⽀持6V-18V的宽⼯作电压范围,⼯作温度为-40℃⾄+85℃。
1.1 模块资源图YIXIN_SIM900A模块(开发板)接⼝丰富,功能完善,尤其适⽤于需要语⾳/短信/GPRS数据服务的各种领域,其资源图如下图所⽰:1从上图可以看出,YIXIN_SIM900A模块(开发板)功能齐全、接⼝丰富,模块(开发板)尺⼨(不算天线部分)为83mm*53mm,并带有安装孔,⾮常⼩巧,可⽅便嵌⼊到各种产品设计中。
1.2 模块硬件资源详解1.2.1 SIM900A(GSM/GPRS)模块(U5)YIXIN_SIM900A所选择的GSM模块为SIMCOM公司的SIM900A模块,该模块采⽤SMT封装形式,其性能稳定,外观精巧,性价⽐⾼。
JWM90A 快速参考指南说明书
A M /F M T u n e r C o n t r o l sVOLUME: Rotateclockwise to increase or counter-clockwise to decrease theactive zone's volume.BACK: Press to exit PRESETS MENU.PRESETS MENU: Press to bring up PRESETS MENU. Press repeatedly to cycle through the stored channels. Press ENTER KNOB to recall stored channel.STATION STORE PRESETS:1. Press PRESET button to bring up PRESETS MENU.2. Press & Hold the ENTER KNOB store current station.NOTE: Up to 18 FM & 12 AM channels can be stored.FM MODE: Press to change the source to FM radio mode.AM MODE: Press to change the source to AM radio mode.AS/PS: Press to SCAN through currently stored presets.Press & Hold to STORE strongest broadcast stations in your area.TUNE/SEEK/TRACK: Press button to tune frequency higher. Press button to tune frequency lower. Press and hold to scan to next strongest station.B a s i c O p e r a t i o nRESET: Use a ball point pen or thin metal object to press the reset buttons.HDMI IN: Connect HDMI cable from device.POWER : Push to turn ON or OFF.VOLUME : Rotate the VOLUME KNOB clockwise toincrease or counter-clockwise todecrease the active zone's volume.BACK : Press to exit any menu.AUX IN: Insert 3.5mm cable from yourportable media device. AUDIO : Press to bring up AUDIO MENU options: BASS, TREBLE, BALANCE (left to right) & FADE(front to back). LOUDNESS (on/off), SUBWOOFER VOL, EQ: User, Flat, Pop, Classic, Rock.SETTINGS: Press to bring up SETTINGS MENU options: BLUETOOTH (ON/OFF), BEEP (ON/OFF), TUNING REGION,PRESET VOLUME, RCA OUTPUT andRESET. VOLUME KNOB will adjust each MENU option except for 'RESET'.ZONES: Press ZONES button to enter the ZONES MENU for multi-source switching orzone volume adjustment control. AM: Press to change the source to AM radio mode.FM: Press to change the source to FM radio mode.DISC: Press to change the source to Disc mode.AUX: Press to cycle through FRONT AUX, REAR AUX, COAXIAL, OPTICAL, HDMI ARC and HDMI IN mode. Press ENTER KNOB to select. Radio will auto-select after a couple seconds of inactivity.USB: Press to change the source to USB mode.BT: Press to change the source toBLUETOOTH mode. Press and Hold to activate Bluetooth Pairing.A p p C o n t r o lApp download and operation: jControl appcontrols all of theprimary functions of the JWM90A directly from your phone or table. It can bedownloaded from the App Store on iTunes for Apple devices, or the Google Play Store forAndroid devices, and found by searching for jControl.After downloading and installing the app, pair your device to the JWM90A as instructed in the Bluetooth Operation section in this guide. Once your device is paired, open the app and use asinstructed.(Device must bepaired to JWM90A before the app can be used).ForwardPlay/ Pause/ MuteMode MenuApp InfoMode MenuBack Power ZoneVolume and SettingsZ o n e s S e t t i n g s (m u l t i -s o u r c e )VOLUME/SOURCE: While in ZonesMenu, rotate to cycle through the active source modes or adjust the active zone's volume. Press ENTER knob to select.MULTI-SOURCE ZONES: If Zone A is in AM, FM, BT, FRONT AUX or REAR AUX mode, the multi-source function cannot be activated. Zone B and Zone C source mode will follow Zone A.If Zone A is in DISC, USB, COAXIAL, OPTICAL, HDMI IN or HDMI ARC mode, the following sources are selectable for Zone B: AM, FM, BT, FRONT AUX, REAR AUX as well as the current active Zone A source. Zone C source mode will follow Zone B.If Zone A and Zone B are both set to DISC, USB, COAXIAL, OPTICAL, HDMI IN, or HDMI ARC mode, the following sources are selectable for Zone C: AM, FM, BT, FRONT AUX, REAR AUX as well as the current active Zone A/B source.ZONES SETTINGS: Press to bring up the Zones menu. Press ZONES, , or repeatedly to cycle through the following settings :Zone A source mode selection, Zone A volume adjustment, Zone B source mode selection, Zone B volume adjustment, Zone C source mode selection, Zone C volume adjustmentMulti-source Zone TableZone A AM, FM, BT, FRONT AUX or REAR AUXDISC, USB, COAXIAL,OPTICAL, HDMI IN or HDMI ARCSame as Zone B (AM, FM, BT, FRONT AUX, REAR AUX)AM, FM, BT, FRONT AUX, REAR AUX, or same as Zone A AM, FM, BT, FRONTAUX, REAR AUX, or same as Zone A/BDISC, USB, COAXIAL,OPTICAL, HDMI IN or HDMI ARCSame as Zone ASame as Zone ASame as Zone A Zone BZone CThe ZONE indicator shows which zone is actively being displayed andcontrolled by the headunit.For owner’s manual, please visit /manuals-guides.QRG-JWM90A-1017R3©Copyright 2017 ASA,LLC C l o c k w i t h A l a r mBACK: Press to exit setting.CLOCK SET: Press to set clock time.Rotate the VOLUME KNOB to change the setting.Press the ENTER KNOB to change to minute adjustment.SLEEP MODE: Press to set sleep timer. Press repeatedly or rotate the VOLUME KNOB to cycle through (OFF, 15, 30, 45, 60 minutes).ALARM SET: Press to turn ALARM ON or OFF, press and hold to set alarm time. Rotate the VOLUME KNOB to adjust hour or minute. Press the ENTER KNOB to change to minute adjustment.DIMMER: Press to switch theDIMMER (on/off). Press & Hold tobring up brightness setting. Rotate the VOLUME KNOB to adjust thebrightness ( 0, 1, 2, 3, 4, 5, 6, 7, 8).B l u e t o o t h ® O p e r a t i o nBACK: Press to exit Paired Device list.VOLUME: Rotate the VOLUME KNOBclockwise to increase or counter-clockwise to decrease the active zone's volume.ANSWERING PHONE: BT audio will automatically pause when a call is answered.It will then resume once call has ended. In some cases, it may be necessary to press the play button to resume the BT audio.SETTINGS: Press to bring up SETTINGS MENU and press to navigate through menu options, until BT menu is reached Press ENTER to select DEVICE LIST or PAIR.PAIR DEVICE VIA BLUETOOTH: Make sure the device you intend to pair with is on and ready to pair.1.Press BT button to enter Bluetooth mode.2.Press & Hold BT button to start Bluetooth pairing process.The JWM90A will display “PAIRING” and will be available to pair for 120 seconds.3.In your device Bluetooth settings, select “JWM90A” to connect. Press BT button in Bluetooth mode to bring up Paired Device list.TUNE/SEEK/TRACK: Advance or reverse tracks on your device.: Press to PLAY or PAUSE current audio or video.U S B P l a y b a c kUSB: Connect a USB flash/thumb drive for audio playback and/or charging.PLAY/PAUSE: Press to PLAY or PAUSE current audio or video.TUNE/SEEK/TRACK: Press button to advance toNEXT TRACK. Press button to advance to PREVIOUS TRACK. Press & Hold additional times to step through x2, x4, x8, x20. Press PLAY (▶II) to resume.VOLUME: Rotate the VOLUME KNOB clockwise to increase or counter-clockwise to decrease the active zone's volume.Press the ENTER KNOB to bring upPLAYBACK MENU.BACK: Press to exit PLAYBACK MENU.INTRO SCAN: Press to play each track for 10 seconds insequential order, and again to toggle off and play current track.RANDOM: Press to play all tracks in random order. Press again for normal playback. REPEAT: Press consecutively to cycle through (Track, Folder , all) playback of tracks.USB: Press to change the source to USB mode.STOP: Press to stop playback.FOLDER UP: Press to go to next folder .FOLDER DOWN: Press to go to previous folder.C D /D V D P l a y e r C o n t r o l sVOLUME: Rotate theVOLUME KNOB clockwise to increase or counter-clockwise to decrease the active zone's volume.Press the ENTER KNOB to bring up PLAYBACK MENU.BACK: Press to exit PLAYBACK MENU.DISC: Press to change to the disc mode.EJECT: Press to eject the disc.TUNE/SEEK/TRACK: Press button to advance to NEXT TRACK or CHAPTER/TITLE. Press button to go back to PREVIOUS TRACK or CHAPTER/TITLE. Press and Hold to FAST FORWARD or REVERSE playback. Press & Hold additional times to step through x2, x4, x8, x20. Press PLAY ( ) to resume.: Press to PLAY or PAUSE current audio or video.INTRO SCAN: Press to play each track for 10 seconds in sequential order, and again to toggle off and play current track.(Not applicable for DVD )RANDOM: Press to play all tracks in random order. Press again for normal playback.(Not applicable for DVD )REPEAT: Press to cycle through repeat playback modes for various of discs.CD: repeat track, repeat all, repeat off.MP3: repeat track, repeat folder, repeat all, repeat off.DVD: repeat chapter, repeat title, repeat all, repeat off.STOP: Press to stop playback.FOLDER DOWN: Press to go to previous folder.(For mp3 disc only).FOLDER UP: Press to go to next folder. (For mp3 disc only).。
mazake操作面板操作面板功能键的介绍
操作面板功能键的介绍
1.1位置画面
功能:显示与机床运行状态和工件加工状态相关的各类信息。
备注:选择位置画面后,手动操作或自动运行要求的各类功能显示在菜单显示区。
1.1.1指令菜单项正常显示时的画面
1.1.2指令菜单项反衬显示时的画面
1.1.3显示画面描述
注 1 :数据项[2 0]预读行程和[2 2]下个指令,在以下指令块中不显示。
* 含有G28的程序段
* EOB(程序结束)程序段
MAZATROL程序运行时,当内部控制指令与上述命令相吻合时,不显示。
注 2 :因为相关刀尖路径自动插入,对于具有直径补偿的外角加工,有时程序中没有的指令也回显示出来。
1.2.机床显示面板图如下:
2.机床操作面板图如下
注:第一次回原点是指机床断电开机后机床回零那一次;第二次回原点是指第一次回零后的所有回原点的操作。
专业资料整理
完美WORD格式。
达纳特尔 TM 900 900M 系列测试设备操作手册说明书
Dynatel TM900/900M Series Test SetOperators ManualSeptember 199678–8093–0453–4 Revision DAdvanced Test Equipment Rentals 800-404-ATEC (2832)®E s t a b l i s h e d 1981SpecificationsSection 3Page 723.965/965M Subscriber Loop AnalyzerA.MeasurementsFunction Range Resolution Accuracy AC Voltage:0 to 75 VAC 0.1V 0.7V 75 to 250 VAC 1.0V 3%DC Voltage:0 to 100 VDC 0.1V 0.5V 100 to 350 VDC 1.0V 3%DC Current:0 to 100 mA DC 0.1 mA 0.3 mA (Zin = 430 ohms)Resistance 1:0 to 100 Mohms 100 ohms 1% @ 50 kohms @ 50 kohms Loss:–40 to +10 dBm 0.1 dB 0.2 dB(Zin = 600 ohms)200 to 5,000 Hz Noise Metallic 2:10 to 50 dBrnC 0.1 dB 0.5 dB0 to 10 dBrnC 0.3 dB 2.0 dB(Zin = 600 ohms)Noise to Ground:40 to 100 dBrnC 0.1 dB 0.5 dB (Zin = 600 ohms)Longitudinal Balance with Tone Option 3:62 to 51 dB 0.1 dB 2.0 dB 51 to 40 dB 0.1 dB 1.0 dB Opens 1:(normal mode)0 to 9.99 kft 10 ft @ 10 kft+1%10k ft to 100k ft 100 ft +1/–10%0 to 30000 m 3 m @ 500 m 1.5 m ±1%@ 500 m Tolerance to Leakage, Normal Mode: >15 kohm to ground / 190kohm to battery Opens 1:(special mode)0 to 999 ft 1 ft+1%1 kft to 10 kft 100 ft @ 10 kft +1/–10%0 to 30000 m 3 m @ 500 m 6m ±1%@ 500 m Tolerance to Leakage, Special Mode: >1200 ohms to ground / 18 kohms to battery Frequency Measurement:20 to 20,000 Hz 1 Hz 2 Hz (during Loss, single frequency only)SpecificationsSection 3Page 73Measurements continued...Function Range Resolution Accuracy Ground Resistance:0 to 500 ohms 1 Ohm 3 ohms Loop and C.O.Resistance:0 to 5000 ohms 1 Ohm +10% +50 ohms (read through the REG key assuming on-hook resistance is known)Caller I.D.Option:–4 dBm to –32 dBmNote:1Perform a self-calibration before taking the readings.2C-message specifications have an additional frequency-dependent tolerance. Refer to “IEEE Standard 743-1984.”The 965/965M far exceeds these tolerances. For most frequencies the total error is less than 0.7 dB.3The optional longitudinal balance function obtains a result in agreement with “IEEE STANDARD 455-1985 Standard Test Prodedure for Measuring Longitudinal Balance for Telephone Equipment Operating in the Voice Band” at the specified tolerance for power influence less than approximately 80 dBrnc. When power influence is above 80 dBrnc, the test set reverts to a hybrid of the IEEE method and the method of calculating longitudinal balance by taking the difference between power influence andnoise metallic.4The splits function does not have accuracy tolerances.B.Resistance Fault LocateNote: Accuracy is dependent on power influence noise; the resistance fault specifications are for low noise situations.Function Range Resolution Accuracy 1,2Fault Range:Up to 30 MohmsResistance to Fault:30 to 9 ohms 0.01 Ohm +0.1% RTS +0.01 Ohm (@ 70° no noise)10 to 99 ohms 0.01 Ohm +0.1% RTS+0.01 Ohm100 to 999 ohms 0.1 Ohm +0.2% RTS 1k to 7 kohms 1.0 Ohm +1.0% RTSResistance to Distance Conversion Resolution:3 1 ft to 1,000 ft 0.1 ft 1k ft to 10k ft 1.0 ft10k ft to 100k ft 10.0 ft1 to 99 m 0.1 m 100 to 999 m 1.0 m1000 to 30000 m10.0 m Temperature Sensor:0° to 140° F 1° F +2° F –18° to 60° C .5° C +1° C Noise Immunity:7VAC limit for all frequenciesSpecificationsSection 3Page 74Note:1See figures next page for accuracies. All resistance to faultmeasurement accuracies have an added factor of (2 x 10 -8) RF ohms.2Single pair hookup measurement accuracy is strictlydependent on whether the reference pair is exactly the same electrical length as the faulted pair. Accuracies are doubled for single pair hookup.3Accuracy depends on correct temperature setting as well as gauge accuracy of copper. The temperature can be read by the built-in sensor or can be operator-entered.2 –----1.5–----1 –----.5 –----0 – Accuracy in ohms for Various Fault ResistancesMaximum Error in ohms Resistance to Strap in ohms2102040420 Mohms10 Mohms<1 Mohm30 Mohms100400100020010510152025303540010002000300040005000600070008000900010000Maximum Error in Feet Accuracy for 24 Gauge for Various Fault Resistances Distance to strap in Feet30 Mohms20 Mohms10 Mohms< 1 MohmSpecificationsSection 3Page 75/(76 blank)C.OutputsTones Frequency Level Impedance Identification:577.5 Hz 6V PK to PK 100 ohms (Current limited to 6 mA)Precision Tones:404, 1004, 0 dBm + 0.2 dB 600 Ohm 2804 +1 Hz Harmonic distortion: <45 dB (up to 10th harmonic)User-Entered Tone:Frequency Resolution Frequency Amplitude Range Accuracy Accuracy 2 to 100 Hz +0.1%+1%+1dB100 to 1 kHz +1.0%+1%+1dB1 kHz to 10 kHz +3.0%+1%+1dB 10 kHz to 20 kHz +3.0%+1%+3dBHarmonic distortion: <45 dB (up to 10th harmonic)Dial Frequency Remarks DTMF:Standard 100 msec on 100 msec off meets CCITT Q.23 Standard for frequency and amplitude i.e. +1 Hz @ –10 dBm +1 dBDial Pulse:10 pulses 60 msec break per sec 40 msec make R–T600 msec between digits D.EnvironmentOperation StorageTemperature:0° to +140° F –40° to 165° F–18° to 60° C –40° to 74° CHumidity:0 to 100%0 to 100% (condensing) (condensing)Altitude:0 to 15,000 ft 0 to 40,000 ft 0 to 5000 m 0 to 12000 m Shock:Can withstand a drop onto a wood surface from a distance of four ft (1.25 m)E.DimensionsHeight 7.0 in/ 18 cmWidth 10.5 in/ 27 cmDepth 7.5 in/ 19 cmWeight 7.5 lbs/ 3.4 kg Cord length 5 ft/ 1.5 mF. Battery PowerThe operating time between battery change-out or charges depends on temperature of set and operation modes used.For non-rechargeable batteries typical operating time is about 200hours between battery change-out.For rechargeable batteries typical operating time is about 80 hours between charges.。