
捷豹II刻字机书说明书
1
z 1 把 M5 L-型六角扳手
z 4 个脚架活动轮
z 1 份脚架组装说明书
第一章 基本信息 1-1
3. 承纸系统
项目 1 套承纸滚筒盘(2 个) 1 套承纸滚筒(2 个) 1 套承纸滚筒挡块(4 个) 1 套承纸滚筒架(2 个) 1 把 M6 L-型六角扳手 1 份承纸系统说明书 1 把 M5 L-型六角扳手 1 套桌上型支架(2 个) 4 片脚垫 4 颗 M4 螺丝 12 颗 M6 螺丝 1 把 M4 L-型六角扳手
1-4
1.8 捷豹二代右视图(图 1-5)
捷豹二代用户手册
图 1-5
串口(RS232C) – 可用串口线连接刻字机与电脑 USB 接口 – 可用 USB 线连接刻字机与电脑 并口 – 可用并口线连接刻字机与电脑
第一章 基本信息 1-5
捷豹二代用户手册
第二章 刻字机安装和操作说明
2.1 警告
注意 1 z 在安装刻字机之前,务必使电源处于关闭状态。 z 请小心操作刻字机,防止任何损害。 注意 2 为刻字机安装选择一个合适的工作场所。 在安装刻字机前,选择一个合适的场所,该场所满足如下条件: z 从任何方向都能容易地操作该机器。 z 留有足够的空间来放置机器、附件和耗材。 z 保持工作区的稳定,防止震动。 z 工作区的温度保持在 10°C~35°C /50°F~95°F。 z 工作区的相对湿度保持在 25% ~75%。 z 防止灰尘和强气流损害机器。 z 避免机器被阳光直射和强光照射。 注意 3 连接电源 检查电源线的插头是否与墙插座匹配,如果不匹配,请与供货商联系。 z 把插头(公端)插入接地的插座。 z 把电源线的另一端(母端)插入刻字机的交流电源接口。
O (正确)
从底部托起
X (错误)
抠住凹陷处
¾ 使用前不要拆下塑料刀座套或震动刀座,以防止笔刀脱落。 ¾ 在操作中不要碰触任何移动中的部件(比如笔车),同时要注意防止衣物或头发被卡住。 ¾ 确认电源线始终处于接地状态。 ¾ 使用随机附赠电源线,不要卷曲电源线以防止打结。 ¾ 不要把电源线连接在其它电器正在使用的电源电路分支或延伸电路上,此操作不当,并且会产
1-1 1-1 1-2 1-3 1-3 1-4 1-4 1-5
2-1 2-1 2-4 2-6 2-8 2-8 2-10 2-11 2-12 2-13 2-14 2-14
3-1 3-2 3-4 3-6
4-1 4-2 4-2 4-2
5-1 5-2 5-2
目录
第六章
故障排除 6.1 非操作性问题 6.2 操作性问题 6.3 刻字机电脑连接问题 6.4 软件问题 6.5 切割品质问题 6.6 输出比例校正方法
压纸轮放下
重要信息
I
刀片规格
关于切割用的刀片和绘图用笔的常用术语:
补正值(OFFSET)是指刀尖到刀片中心线的距离。
捷豹二代用户手册
刀片
刀尖
刀片伸出长度
补正值
中心线
刀片伸出长度
介质厚度 (t 1)
底纸厚度 (t 2)
刀片伸出长度 = t 1 + ( t 2 / 2 ),但您可以把它调整到超过刀座顶部 0.3~0.5 毫米。
‧JII-61 ‧JII-101S ‧JII-132S
适用材质宽度: 50 毫米(1.97 英寸)~ 770 毫米(30.3 英寸) 适用材质宽度: 50 毫米(1.97 英寸)~ 1270 毫米(50 英寸) 适用材质宽度: 50 毫米(1.97 英寸)~ 1594 毫米(62.7 英寸)
1.2 包装说明
132S/101S
V V V V V
4.附件包 z 1 张使用者光盘 z 1 根 AC 电源线 z 1 根 RS-232C 串口线 z 1 根 USB 线 z 1 套刀座组(内装刀片,安装于主机笔车上) z 1 片安全刀 z 1 卷切割垫 z 1 把镊子 z 1 张保修卡
1.3 产品特性
以下是捷豹二代刻字机主要特性: ‧ 三种传输接口,更加方便使用; ‧ 最重可达 600g 的刀压; ‧ 最快可达 1530 毫米(60 英寸)/秒的切割速度; ‧ 10 米精准跑纸功能; ‧ 界面友好的多种语言控制面板; ‧ 精巧的置物栏;
在安装本机器前,请小心拆包,并请对照以下部件列表检查您所收到的部件。如果发现在运送的过程
中丢失任何部件,请告知您的销售商。
标准配件
数量
1.刻字机主体
1
2. 脚架装置(此部分针对 JII-101S/132S)(JII-61 选配)
z 1 个 H 型脚架
z 2 个直立脚架
z 1 个脚架横梁
z 4 片脚架塞环 z 24 颗 M6 螺丝
1.7 捷豹二代左视图(图 1-4)
捷豹二代用户手册
承纸滚筒挡块 – 使介质被走纸滚筒拉 动时保持介质不偏移
承纸滚筒架 – 支撑承纸滚筒
直立脚架 – 支撑刻字机
图 1-4
第一章 基本信息
电源开关 – 开时转换到[I]、关时转换到[O] 保险丝 – 3 Amp AC 电源插座 – 用于插入 AC 电源线
2.2 脚架及承纸系统安装步骤(适合 JII-101S/132S)
第一步 请检查附件盒中的附件:
z 1 把 M6 L-型六角扳手 z 1 把 M5 L-型六角扳手 z 24 颗 M6 型螺丝 z 4 片脚架塞环 z 4 个脚架活动轮 z 1 份脚架组装说明书
第二章 刻字机安装和操作说明 2-1
捷豹二代用户手册
配蓝帽,60°角,补正值:0.25 毫米
26500060G
黑刀
刀片锋利,补正值小,可切割小字符和高精度图形。 配黑帽,补正值:0.175 毫米
刀片规格
II
捷豹二代用户手册
第一章 基本信息
1.1 介绍
捷豹二代系列刻字机为刻绘电子影像或在单张及整卷介质上实现切割而设计。 本手册包括捷豹二代系列以下型号刻字机:
生过热。 ¾ 防止儿童接触本机器。 ¾ 务必确保压纸轮位于走纸滚筒之上(可对照导轨上的“白色标记” )。
重要信息
I
捷豹二代用户手册
警告 : 不可同时按下顶端压纸轮臂并拨上底部释放臂,如下图所示。
O (正确)
X (错误)
压下顶端压纸轮臂
压下
压纸轮抬起 拨上底部释放臂
卡位臂
注意: 若遇错误操作导致顶端压纸轮臂与底部释 放臂夹到一起,请在压下顶部压纸轮臂时, 用小镊子拔出卡位臂,让卡位臂处于外端, 再如图将释放臂释放。
第二章 刻字机安装和操作说明
承纸滚筒 图 2-3-4
2-5
步骤六 最后如图 2-3-5 状态安装完毕。
捷豹二代用户手册
图 2-3-5
2.4 刀片安装
图 2-9 为刀座说明。通过控制圆销可以把刀片从刀座取出或插入刀座。请注意不要用手指去接触刀 刃。
深度调节旋扭
圆销
外环
步骤一
图 2-9
把刀片插入刀头中,手指不要踫刀尖(图 2-10)。
第二章
刻字机安装和操作说明
2.1 警告 2.2 脚架及承纸系统安装步骤(适合 JII-101S/132S) 2.3 桌上型刻字机承纸滚筒架安装步骤(适合 JII-61) 2.4 刀片安装 2.5 装载介质
2.5.1 装载单张介质 2.5.2 装载整卷介质 2.6 跑纸性能 2.7 调整刀压和补正值 2.8 重刀压应用的参数调整方法 2.9 如何刻 3 毫米小字 2.10 如何切割长条图
M6 型螺丝
M6 型螺丝
承纸滚筒架 桌上型支撑架
图 2-3-2
步骤四 侧面放下机器,把承纸滚筒架放在机器的底部, 然后把 M6 型螺丝插入承纸滚筒架的螺孔中,用 M6L-型六角扳手拧紧它们(图 2-3-3)。
图 2-3-3
步骤五 把承纸滚筒放入承纸滚筒架的孔中 (图 2-3-4)。
承纸滚筒架
螺丝孔 M6 螺丝
第二步 z 从纸箱中移出刻字机主机和附件。 z 请将直立脚架垂直放在 H 型脚架上,并按照步骤进行组装(图 2-1 & 2-2)。
Z 脚架横梁
Y直立脚架
X
H 型腳架
图 2-1
图 2-2
第三步 然后, 把Y和X组合起来。把四颗螺丝插入 H 型脚架的螺孔中。依照图 2-2,拧紧它们。 第四步 把脚架横梁竖直放于Y位置并且放进螺丝,如图 2-3 拧紧它们。最后把它们组合成如图 2-4。
第三章
控制面板 3.1 液晶(LCD)面板 3.2 设置菜单—捷豹二代处于联机模式 3.3 设置菜单—捷豹二代处于脱机模式 3.4 菜单选项的描述
第四章
连接刻字机 4.1 USB 接口 4.2 并行接口 4.3 RS-232 串行接口 4.4 数据传输
第五章
保养和简单维护 5.1 清洁刻字机 5.2 清洁走纸滚筒 5.3 清洁压纸轮
附录 A 规格表 B 捷豹机器有毒和危险物品表
捷豹二代用户手册
6-1 6-1 6-2 6-3 6-4 6-5
A-I A-II
目录
重要信息
捷豹二代用户手册
感谢您选购本公司的捷豹系列产品,使用之前请确保已经阅读安全警告及以下使用说明。
!
Caution
安全警告!
¾ 在移动本机器时,出于安全考虑,请从底部牢牢地托住它,不要抠住两边凹陷处。
Y 直立脚架 Z 脚架横梁
螺丝
图 2-3
第二章 刻字机安装和操作说明
X H 型脚架
图 2-4
2-2
第五步 搬来主机,把螺丝放入主机底部的螺孔中,然后拧紧它们,如图 2-5。
捷豹二代用户手册
螺丝
图 2-5
第六步 把承纸滚筒架上的螺丝放入脚架的螺孔中,然后拧紧,如图 2-6。通过螺丝插入的不同位置,确定 承纸滚筒架的位置。
刀片规格
II
激光刻字机软件说明书

激光刻字机软件使用说明南京凯旋光电科技有限公司第一章概述1.1 EzCad2国际版软件简介1.1.1 软件简介EzCad2.0国际版软件流畅运行所需计算机硬件环境:EzCad2.0国际版软件是在EzCad2.0软件上进行的一次重大升级,软件完全支持Unicode,所以基本上能支持所有国家的语言。
EzCad2.0国际版软件只能运行在Microsoft Windows XP和VISTA操作系统上。
本手册之后的全部说明均默认为Microsoft Windows XP操作系统。
EzCad2国际版软件安装非常简单,用户只需要把安装光盘中的EzCad2.0国际版目录直接拷贝到硬盘中,然后去除所有文件及文件夹的只读属性即可。
双击目录下的EzCad2.exe文件即可运行EzCad2.0国际版程序。
如果没有正确安装软件加密狗,则软件启动时会提示用户“系统无法找到加密狗,将进入演示模式”,在演示模式下用户只能对软件进行评估而无法进行加工和存储文件。
1.1.2 软件功能本软件具有以下主要功能:●自由设计所要加工的图形图案●支持TrueType字体,单线字体(JSF),SHX字体,点阵字体(DMF),一维条形码和二维条形码。
●灵活的变量文本处理,加工过程中实时改变文字,可以直接动态读写文本文件和Excel文件。
可以通过串口直接读取文本数据。
可以通过网口直接读取文本数据。
还有自动分割文本功能,可以适应复杂的加工情况。
●强大的节点编辑功能和图形编辑功能,可进行曲线焊接,裁剪和求交运算●支持多达256支笔(图层),可以为不同对象设置不同的加工参数●兼容常用图像格式(bmp,jpg,gif,tga,png,tif等)●兼容常用的矢量图形(ai,dxf,dst,plt等)●常用的图像处理功能(灰度转换,黑白图转换,网点处理等),可以进行256级灰度图片加工●强大的填充功能,支持环形填充●多种控制对象,用户可以自由控制系统与外部设备交互●直接支持SPI的G3版光纤激光器和最新IPG_YLP光纤激光器●支持动态聚焦(3轴加工系统)●开放的多语言支持功能,可以轻松支持世界各国语言1.1.3 界面说明●启动界面开始运行程序时,显示启动界面(图1-1),程序在后台进行初始化操作。
激光雕刻机(刻章机)说明书
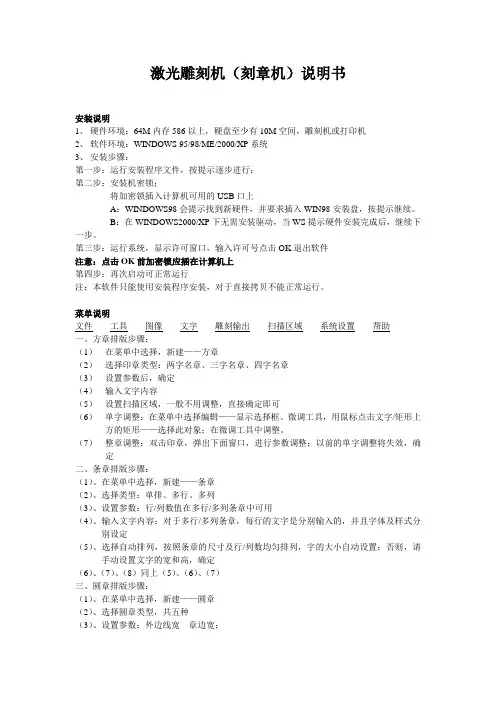
激光雕刻机(刻章机)说明书安装说明1、硬件环境:64M内存586以上,硬盘至少有10M空间,雕刻机或打印机2、软件环境:WINDOWS 95/98/ME/2000/XP系统3、安装步骤:第一步:运行安装程序文件,按提示逐步进行;第二步:安装机密锁;将加密锁插入计算机可用的USB口上A:WINDOWS98会提示找到新硬件,并要求插入WIN98安装盘,按提示继续。
B:在WINDOWS2000/XP下无需安装驱动,当WS提示硬件安装完成后,继续下一步。
第三步:运行系统,显示许可窗口,输入许可号点击OK退出软件注意:点击OK前加密锁应插在计算机上第四步:再次启动可正常运行注:本软件只能使用安装程序安装,对于直接拷贝不能正常运行。
菜单说明文件工具图像文字雕刻输出扫描区域系统设置帮助一、方章排版步骤:(1)在菜单中选择,新建——方章(2)选择印章类型:两字名章、三字名章、四字名章(3)设置参数后,确定(4)输入文字内容(5)设置扫描区域,一般不用调整,直接确定即可(6)单字调整:在菜单中选择编辑——显示选择框、微调工具,用鼠标点击文字/矩形上方的矩形——选择此对象;在微调工具中调整。
(7)整章调整:双击印章,弹出下面窗口,进行参数调整;以前的单字调整将失效,确定二、条章排版步骤:(1)、在菜单中选择,新建——条章(2)、选择类型:单排、多行、多列(3)、设置参数:行/列数值在多行/多列条章中可用(4)、输入文字内容:对于多行/多列条章,每行的文字是分别输入的,并且字体及样式分别设定(5)、选择自动排列,按照条章的尺寸及行/列数均匀排列,字的大小自动设置;否则,请手动设置文字的宽和高,确定(6)、(7)、(8)同上(5)、(6)、(7)三、圆章排版步骤:(1)、在菜单中选择,新建——圆章(2)、选择圆章类型,共五种(3)、设置参数:外边线宽---章边宽;内边线宽:内章边宽;边线距:文字与章边的距离;夹角:文字分布的角度;添加、删除:把文字分成几段分别设置字体和样式;(4)、修改文字内容,点击所要修改的文字,然后在“文字内容”后修改。
刻字机使用说明书

Vicsign HW系列说明书1.安全注意事项 (2)1.1确保安全的使用方法 (2)1.2标志符号说明 (2)2.标准配件 (6)3.安装 (7)3.2腿架安装示意图 (7)3.3机器的安装使用 (7)3.4电源连接 (8)3.5串口RS232线和USB线的连接。
(8)3.6USB线连接 (8)3.7SD卡(Secure Digital Memory Card)使用 (11)3.8介质的安装 (12)3.9刀具的安装及调试 (14)3.10绘图笔的安装 (15)4.产品的基本设置和操作 (16)4.1脱机/联机 (16)4.2介质的移动和跑车移动 (16)4.3速度和压力调试。
(17)4.4暂停功能 (17)4.5原点定位 (17)4.6介质测试条调试 (18)4.7红点定位轮廓切割功能 (18)4.8刻绘功能 (21)5.Flexi软件 (22)5.1FlexiStarter软件的操作 (22)5.2Flexi8.6参数 (24)1.安全注意事项以确保操作员能正确地使用刻字机,从而防止刻字机的损坏。
请遵守带有以下标志的指示说明。
1.1确保安全的使用方法1.2标志符号说明操作不当会导致人员受伤。
操作不当会导致机器的受损。
操作不当会导致人员受伤或其他物体损伤。
符号表示使用者需高度重视及注三角形内的图样表明应注意的情况,左图表示“小心触电”符号表示必须禁止的举动,圆圈内的图样标明所禁止的动作。
左图表示“不得拆卸”警告注意不可使用不符合额定电压的电源。
使用不符合规定的电源可导致火灾或电击。
如机器冒烟,发出异味,杂音等异常情况,请切勿使用此种状况下用会造成火灾或电击严禁带电拔电源插头带电拔插会损坏机器确保机器接地如不接地,会导致电击或者机械故障。
不可对机器拆卸、修理或整改。
这样做可导致火灾或电击,造成人员受伤警告机内不可渗入液体,掉入金属物件等。
这些物体会导致火灾不可用手指触摸刀尖。
此举会导致手指受伤。
Focusrite Scarlett 2i2 用户指南说明书

User Guide Version 2TABLE OF CONTENTSOVERVIEW . . . . . . . . . . . . . . . . . . . . . . . . . . . . . . . . . . . . . . . . . . . . . . . . . . . . . . . . . . . . . . . . . . . . .3 Introduction (3)Features (3)Box Contents (4)System requirements (4)GETTING STARTED . . . . . . . . . . . . . . . . . . . . . . . . . . . . . . . . . . . . . . . . . . . . . . . . . . . . . . . . . . . . .5 Quick Start Tool (5)Mac users only: (5)Windows only: (7)All users: (9)Manual Registration (9)Audio Setup in your DAW (10)Examples of Usage (12)Connecting a microphone or instrument (12)Using Direct Monitoring (13)Connecting Scarlett 2i2 to loudspeakers (14)HARDWARE FEATURES . . . . . . . . . . . . . . . . . . . . . . . . . . . . . . . . . . . . . . . . . . . . . . . . . . . . . . . . .15 Front Panel (15)Back Panel (16)SPECIFICATIONS . . . . . . . . . . . . . . . . . . . . . . . . . . . . . . . . . . . . . . . . . . . . . . . . . . . . . . . . . . . . . .17 Performance Specifications (17)Physical and Electrical Characteristics . . . . . . . . . . . . . . . . . . . . . . . . . . . . . . . . . . . . . . . . . .18 TROUBLESHOOTING . . . . . . . . . . . . . . . . . . . . . . . . . . . . . . . . . . . . . . . . . . . . . . . . . . . . . . . . . . .19 COPYRIGHT AND LEGAL NOTICES . . . . . . . . . . . . . . . . . . . . . . . . . . . . . . . . . . . . . . . . . . . . . . . .192OVERVIEWIntroductionThank you for purchasing this Third Generation Scarlett 2i2, one of the family of Focusrite professional computer audio interfaces incorporating high quality Focusrite analogue preamps. You now have a simple and compact solution for routing high quality audio to and from your computer and you will also be able to download some exciting new software plug-ins once you’ve registered the product.In developing the Third Generation series of Scarlett interfaces, we have made further improvements to both performance and features. Audio specifications have been upgraded throughout the unit to give you greater dynamic range and even lower noise and distortion; additionally, the mic preamp now accepts higher input levels.An important enhancement is the inclusion of Focusrite’s AIR function. Individually selectable on each channel, AIR subtly modifies the preamp’s frequency response to model the sonic characteristics of our classic transformer-based ISA microphone preamps. When recording with good quality microphones, you will notice an enhanced clarity and definition in the important mid to high frequency range, just where it is most needed for vocals and many acoustic instruments.We have also enhanced the Direct Monitor feature found on previous Scarletts: now you can monitor as you record in either mono or stereo, with zero latency. Third Generation Scarlett interfaces are class compliant on macOS: this means they are plug-and-play, so no need to install a driver if you are a Mac user.This User Guide provides a detailed explanation of the hardware to help you achieve a thorough understanding of the product’s operational features. We recommend both users who are new to computer-based recording, as well as more experienced users, take the time to read through the User Guide so you are fully aware of all the possibilities the Scarlett 2i2 and accompanying software has to offer. If the main User Guide sections do not provide the information you need, be sure to consult , which contains a comprehensive collection of answers to common technical support queries.FeaturesThe Scarlett 2i2 hardware interface provides the means for connecting microphones, musical instruments or line level audio signals to a computer running macOS or Windows. The signals at the physical inputs can be routed to your audio recording software / digital audio workstation (referred to throughout this user guide as the “DAW”) at up to 24-bit, 192 kHz resolution; similarly, the DAW’s monitor or recorded output will appear at the unit’s physical outputs.The physical outputs can be connected to an amplifier and speakers, powered monitors, headphones, analogue mixer or any other analogue audio equipment you wish to use.3Box ContentsAlong with your Scarlett 2i2 you should find:• USB cable, Type ‘A’ to Type ‘C’• Getting Started Information (printed inside the box lid)• Important Safety InformationSystem requirementsThe easiest way to check your computer’s operating system (OS) is compatible with your Scarlett is to use our Help Centre’s compatibility articles:/hc/categories/200693655As new OS versions become available over time, you can continue to check for further compatibility information by searching our Help Centre at .45GETTING STARTEDWith the Third Generation, Scarlett interfaces introduce a new, faster way of getting up and running, using the Scarlett Quick Start tool. All you need to do is connect your Scarlett 2i2 to your computer . Once connected, you will see the device is recognised by your PC or Mac and the Quick Start tool will guide you through the process from there.IMPORTANT : The Scarlett 2i2 has a single USB 2.0 Type C port (on the rear panel): connect itto your computer using the USB cable provided. Note that Scarlett 2i2 is a USB 2.0 device, and thus the USB connection requires a USB 2.0+ compliant port on your computer .The Scarlett 2i2 does not need a separate power supply; It gets its power from your computer via the USB connection. However, we recommend when using a laptop, the laptop is powered using its AC adaptor, as otherwise the battery will drain faster than when powering from thelaptop alone.Your computer will initially treat your Scarlett as a Mass Storage Device (MSD), and during its first connection, the Scarlett will be in “Easy Start mode”.Quick Start ToolWe have tried to make registering your Scarlett 2i2 as simple as possible. The steps are designed to be self explanatory, but we have described each step below, so you can see how they should appear on either a PC or a Mac.Mac users only:On connecting your Scarlett 2i2 to your Mac, a Scarlett icon will appear on the desktop:Double-click on the “Click Here to Get Started.url” icon. This will redirect you to the Focusrite website,where we recommend you register your device:Click on “Let’s get you started”, and you’ll see a form which will be partly prefilled for you automatically. When you submit the form, you’ll see options to go straight to the downloads to get the software for your Scarlett, or to follow a step by step setup guide based on how you want to use your Scarlett. Once you have installed the Focusrite Control software to set up and configure your interface, the Scarlett will be switched out of Easy Start mode so it no longer appears as a Mass Storage Device when connected to your computer.Your OS should switch the computer’s default audio inputs and outputs to the Scarlett. To verify this, go to System Preferences > Sound, and ensure the input and output are set to Scarlett 2i2.For detailed setup options on a Mac, open Applications > Utilities > Audio MIDI Setup.67(Note that the drive letter may be something other than F:, depending other devices connected to Double-click on the pop-up message to open the dialogue box shown below:Double-click on “Open folder to view files”: this will open an Explorer window:Click on “Let’s get you started”, and you’ll see a form which will be partly prefilled for you automatically. When you submit the form, you’ll see options to go straight to the downloads to get the software for your Scarlett, or to follow a step by step setup guide based on how you want to use your Scarlett. Once you have installed the Focusrite Control software to set up and configure your interface, the Scarlett will be switched out of Easy Start mode so it no longer appears as a Mass Storage Device when connected to your computer.Your OS should switch the computer’s default audio inputs and outputs to be the Scarlett. To verify this, right click on the Sound icon on the taskbar and select Sound Settings, and set the Scarlett as the Input and Output Device.8All users:Note that a second file - “More Info & FAQs” - is also available during the initial set-up process. This file contains some additional information about the Focusrite Quick Start tool which you may find helpful if you have any issues with the procedure.Once registered, you will have immediate access to the following resources:• Focusrite Control (Mac and Windows versions available) - see NOTE below• Multi-language User GuidesYou can find the licence codes and links for the optional bundled software in your Focusrite account. To find out what bundled software is included with Scarlett 3rd generation, please visit our website:/scarlettNOTE: Installing Focusrite Control will also install the correct driver for your device. Focusrite Control is available to download at any time, even without registering: see “Manual Registration” below. Manual RegistrationIf you decide to register your Scarlet at a later date you can do so at:/registerYou will need to enter the Serial Number manually: this number can be found on the base of the interface itself, and also on the barcode label on the side of the box.We recommend you download and install our Focusrite Control application, as this will disable Easy Start mode and unlock the full potential of the interface. Initially, when in Easy Start mode, the interface will function at sample rates up to 48 kHz. Once Focusrite Control is installed on your computer, you can work at sample rates up to 192 kHz.If you decide not to download and install Focusrite Control immediately, it can be downloaded at any time from:/support/downloadsTo force your Scarlett out of Easy Start mode without first registering it, connect it to your computer and press and hold the 48V button for five seconds. This will ensure your Scarlett has full functionality. Please bear in mind that should you wish to register your Scarlett after taking this action, you will need to so manually, as explained above.910Guide, but both applications include a full set of Help files. Instructions are also available at Preferences * Typical names. Terminology may differ between DAWsOnce the Scarlett 2i2 is set as the preferred Audio Device* in your DAW, Inputs 1 & 2 and Outputs 1 & 2 will appear in your DAW’s Audio I/O preferences. Depending on your DAW, you may need to enable certain inputs or outputs before use.The two screenshots below show Inputs 1 & 2 and Outputs 1 & 2 enabled Input and Output Config in Ableton Live Lite’s Audio Preferences.* Typical names. Terminology may differ between DAWs.Examples of UsageThe Scarlett 2i2 is an excellent choice for several different recording and monitoring applications. Some typical configurations are shown below.Connecting a microphone or instrumentThis setup shows the most typical configuration for recording with DAW software on your Mac or PC. You might record guitar through Input 1 and vocals through Input 2 into your DAW, while monitoring the playback from the DAW via headphones (or speakers).The front panel input sockets are “Combo” type, which accept either an XLR male connector or a ¼”(6.35 mm) jack plug.The full gain range of the microphone preamplifier is only available to a mic connected via the XLR contacts. If your microphone has an XLR plug on the end of the cable, you can simply plug it in. If it is a “condenser” microphone, you will need to turn on the 48 volt phantom power for it to work. Most modern microphones of other types, e.g., dynamic or ribbon, will not be damaged by the inadvertent application of phantom power, but note some older mics may be; if you have any doubt, please check the specification of your mic to ensure it is safe to use.If your mic has a jack plug on the end of the cable, it will require an adaptor to make it usable with the XLR part of the Combo connector. Inserting the jack plug will configure the preamp with reduced gain, which is likely to be insufficient for the mic (see below). Mics intended for use with computer sound cards may also require a much lower phantom power voltage, so an adaptor specific to the mic type should be obtained in this case.The Scarlett 2i2 has no “Mic/line” switch – the Focusrite preamp stage is automatically configured for a microphone when you plug an XLR into the input, and for a line or instrument when you connect a jack plug. Set the INST switch ON (‘INST’ illuminates red) if you are connecting musical instrument, e.g., a guitar in the example, using an ordinary 2-pole (TS) guitar jack. Set the INST switch to OFF if you are connecting a line level source such as a keyboard, synthesiser or the balanced output of an external audio mixer via a 3-pole (TRS) jack. Note the Combo connector accepts both TRS and TS types of jack plug.Using Direct MonitoringYou will frequently hear the term “latency” used in connection with digital audio systems. In the case of the simple DAW recording application described above, latency will be the time it takes for your input signals to pass through your computer and audio software. Latency can be a problem for a performer who wishes to record while monitoring their input signals.The Scarlett 2i2 is fitted with a “Direct Monitoring” option, which overcomes this problem. Setting the front panel DIRECT MONITOR control to either MONO or STEREO will route your input signals directly to the Scarlett 2i2’s headphone and main monitor outputs. This enables you to hear yourself with zero latency – i.e., in “real time” – along with the computer playback. The input signals to your computer are not affected in any way by this setting.In MONO mode, Inputs 1 and 2 are routed equally to the two outputs (both the rear panel outputs and headphones) so they both appear in the centre of the stereo image. This is useful when you are recording two separate instruments or an instrument and a vocal, where there is no need for the two signals to be specifically located in the stereo image. Further examples would be an acoustic and an electric guitar, a bass which is both mic’d and DI’d or two separate mics differently positioned on a guitar amplifier.In STEREO mode, Input 1 is routed to the left output channel and Input 2 to the right. Use this mode if you are recording something inherently stereo in nature. Monitoring in stereo will give you a more accurate impression of the sound stage. Examples are any situation where two microphones are being used to deliberately capture a stereo image such as a pair of overhead drum mics, a single stereo mic recording an orchestra or other ensemble, or the stereo outputs of an electronic source such as a piano, synthesiser or FX unit.When using Direct Monitoring, ensure your DAW software is not set to route its input (what you are currently recording) to its output. If it is, you will hear yourself “twice”, with one signal audibly delayed as an echo.Monitoring with DIRECT MONITOR set to OFF can be useful when using an FX plug-in to your DAW to create a stereo effect which contributes to the live performance. In this way, you will be able to hear exactly what is being recorded, complete with the FX. However, some latency may result, the amount depending on the DAW’s buffer size and processing power of the computer.Connecting Scarlett 2i2 to loudspeakersYou can use the ¼” jack outputs on the rear panel to connect monitor speakers. Active monitors have internal amplifiers with a volume control, and can be connected directly. Passive loudspeakers require a separate amplifier; the rear panel outputs should be connected to the amplifier’s inputs.The line outputs are 3-pole (TRS) ¼” (6.35 mm) jack sockets, and are electronically balanced. Typical consumer (Hi-Fi) amplifiers and small active monitors have unbalanced inputs, either on phono (RCA) sockets, or a 3.5 mm TRS jack plug to connect to a computer. In either case, use a suitable connecting cable with jack plugs at one end.Professional power amplifiers will generally have balanced inputs; we highly recommend using balanced cables to connect these to the outputs of the Scarlett 2i2.NOTE: You run the risk of creating an audio feedback loop if loudspeakers are active when you are monitoring a microphone! We recommend you always turn off (or turn down) monitoring loudspeakers while recording, and use headphones when overdubbing.HARDWARE FEATURESFront Panel1. Inputs 1 & 2 – “Combo” input sockets - connect microphones, instruments (e.g., guitar), orline level signals here. Combo sockets accept both XLR and ¼” (6.35 mm) jacks. Microphones connect using XLR plugs: instruments and line level signals should be connected via ¼” (6.35 mm) jack plugs of either TS or TRS type. The preamp gain is appropriate for microphones when an XLR plug is inserted, and for higher level signals when a jack plug is inserted. Do not connect anything other than a microphone - e.g., the output of a sound module or FX unit - via an XLR plug, as the signal level will overload the preamp, resulting in distortion; , if phantom power is enabled, you may damage your equipment.2. GAIN 1 and GAIN 2 – adjusts the preamp gain for signals on inputs 1 and 2 respectively. Thegain controls have tri-colour LED ‘rings’ to confirm signal level: green indicates an input level of at least -24 dBFS (i.e., ‘signal present’), the ring turns amber at -6 dBFS to indicate the signal is close to clipping, and finally to red at 0 dBFS (digital clipping).3. 48V – phantom power switch for mic inputs - enables 48 V phantom power at XLR contacts ofboth Combo connectors.4. INST – Line/Instrument level switches for each input which alter gain and input impedance tosuit either instrument or line level signals. ‘INST’ illuminates red when Instrument mode is selected. You can also enable INST from Focusrite Control.5. AIR – two switches enabling AIR mode for each input. AIR modifies the frequency response ofthe input stage to model the classic, transformer-based Focusrite ISA microphone preamps.‘AIR’ illuminates yellow when the mode is selected. Note that AIR may also be selected from Focusrite Control.6. MONITOR – main monitor output level control - sets the output level at the main (rear panel)outputs LEFT and RIGHT.7. USB LED – a green LED illuminates when the Scarlett is connected and recognised byyour computer.8. DIRECT MONITOR – this switch routes the inputs directly to the outputs with three differentsettings: OFF, MONO and STEREO. When set to OFF, monitoring of input sources is via the DAW; in MONO or STEREO, monitoring is taken directly from the preamp inputs so is free of any latency. The symbols or illuminate green to indicate selection of mono and stereo modes respectively. When Direct Monitor is on, the signal is combined with software playback.9. Headphone level – adjusts the output level at the front panel stereo headphone output.10. Headphone socket – ¼” TRS output jack. If your headphones have a ¼” TRSjack plug, connect them directly; if they have a 3.5 mm TRS “mini jack”, use a TRS ¼”-to-3.5 mm jack adaptor. Note that headphones fitted with 4-pole TRRS plugs will not operate correctly.Back Panel11. K (Kensington security lock) – secure your Scarlett 2i2 to a suitable structure if desired.12. USB 2.0 port – Type C connector; connect to your computer with cable supplied.13. LINE OUTPUTS: LEFT and RIGHT – 2 x ¼” (6.35 mm) TRS jack sockets; +10 dBu output level(variable), electronically balanced. Either ¼” TRS (balanced connection) or TS (unbalanced connection) jack plugs can be used.SPECIFICATIONSPerformance SpecificationsAll performance figures measured in accordance with the provisions of AES17, as applicable.Physical and Electrical CharacteristicsTROUBLESHOOTINGFor all troubleshooting queries, please visit the Focusrite Help Centre at .COPYRIGHT AND LEGAL NOTICESFull Terms and Conditions of the Warranty can be found at /warranty.Focusrite is a registered trade mark and Scarlett 2i2 is a trade mark of Focusrite Audio Engineering Limited.All other trade marks and trade names are the property of their respective owners.2021 © Focusrite Audio Engineering Limited. All rights reserved.。
刻章机使用说明书

最新2.0cm镜片、12mm透镜高强度聚焦,激光刻章机行业的先驱者,功率更大,主板最新6.0专业升级版,,工业级电子元件性能更加稳定。
相信品牌力量.相信磨石实力!以诚信天下,以质量生存!我们的服务宗旨和承诺!磨石出品!必是精品!激光雕刻机之特长1:范围广泛:二氧化碳激光几乎可对任何非金属材料进行雕刻切割。
并且价格低廉!2:安全可靠:采用非接触式加工,不会对材料造成机械挤压或机械应力。
没有刀痕,不伤害加工件的表面;不会使材料变形。
3:精确细致:加工精度可达到0.015mm。
4:节约环保:光束和光斑直径小,一般小于0.5mm;切割加工节省材料,安全卫生。
5:效果一致:保证同一批次的加工效果完全一致。
6:高速快捷:可立即根据电脑输出的图样进行高速雕刻和切割。
7:成本低廉:不受加工数量的限制,对于小批量加工服务,激光加工更加便宜.产品信息:激光管功率:40瓦特(一级成都CO2激光器,可连续工作1440个小时)电源电压:AC220V封闭式高压包电源雕刻主板:磨石主板(目前市场最稳定的主板)绘图仪:耐磨·防腐蚀设计整机重量:23千克机器尺寸:80厘米X50厘米X23厘米最大雕刻幅:250X160最大刻章面积:197*75定位精度:0.005毫米雕刻精度:0.15毫米整机功耗:200瓦特排烟设计:后排风采用软件:磨石雕刻软件全新夹具:平台精美的外观,精密的机械组装,速度与精度的保障,解决其它机器刻小字难的问题,精度更高,速度更快。
又新增切割、雕刻图片、照片等多种功能。
雕刻速度是原来刻章机的2倍以上。
精心设计雕刻更深的激光头,让您的工作更简单更快捷。
高效率软件排版,包含民族文字、仿伪、随心设计等先进功能,更节省您的排版时间,提高工作效率。
四、机器配置和全新防滑构造第一章雕刻机简介第一节雕刻机结构与附件激光印章机主要组成部分:主要包括氧化碳激光器、激光电源、反光原件、聚焦原件、操作面板、夹具、数控系统和排气、水冷系统等。
Jaguar技术手册

1 概述Jaguar为本公司最新推出的高档称重显示仪,它可以满足你目前在称重控制方面的需要,同时它具有非常灵活的扩展升级性能,使你能在称重控制领域一直保持领先地位。
1.1 Jaguar主要特点易安装性:全球电源系统-Jaguar的电源为开关电源,适应全球的需要。
用户无需拨动开关和定购特殊型号.安装简单-面板式Jaguar仪表只需在控制柜上开一个矩形口就可以将仪表固定在控制柜上。
通用式Jaguar仪表使用电缆夹,可以快速连接电缆线同时达到密封效果。
防尘式Jaguar仪表可以安装在墙或柱上(安装支架在附件中)。
可拆装式连接头-所有外部线束连接都使用端子式连接头。
连接快速方便。
易于使用:显示器-使用两行荧光显示器,亮度大,字母提示清楚明了.键盘-20个轻触薄膜键盘,可以输入字母或数字。
功能键可以实现多种功能.键盘面板采用耐用树酯材料,抗物理和化学损伤.灵活性: PC结构-Jaguar的设计采用PC式结构,并且使用成熟的计算机硬件和软件。
Jaguar采用与DOS兼容的多任务操作系统。
模块化插卡式结构-摒弃了传统仪表的线束连接方式,使用模块化插卡式结构,安装和维修都很方便.标准网络-Jaguar内部集成网络控制软件,可以进入局域(LAN)网络系统与网络中的其它设备进行数据交换和共享网络资源。
Jaguar使用ARCnet和IPX/SPX 标准工业网络通讯协议。
Jaguar同时支持JagWAREDOS,WindowsAPI和WindowsDDE软件。
盲显终端-没有显示器和键盘的Jaguar终端称盲显终端。
网络中的任何一台带显示器和键盘的Jaguar仪表都可对接人网络的盲显终端进行操作。
参数设置-模块化树形结构参数设定程序,方便用户寻找设定模块和设定参数。
每个模块可单独设置缺省参数,方便快捷。
输入/输出-多个输入/输出点,每个点都可编程。
多个串行口,串行口输出格式可编程.支持DigiTOL®数字接线盒和UltraRes™秤台-Jaguar支持使用标准或增强DigiTOL®数字接线盒的多传感器秤。
猎豹KM512说明书1205最终版(1)
1序言 (3)1.1设备描述 (3)1.1.1设备的预期目的 (3)1.1.2该设备可用介质 (3)1.1.3该设备可用油墨 (3)1.1.4该设备适配喷头 (3)1.1.5设备适配图像处理软件 (3)1.1.6设备型号分类 (3)1.1.7设备用非保修配件 (4)1.1.8质保时效 (4)1.1.9非质保项目 (4)1.1.10包装要求 (4)1.1.11操作人员要求 (4)1.1.12使用环境 (4)1.2安全预防措施与警示 (5)1.3猎豹牌喷绘机各机型外观 (6)1.4本说明书适用机型 (7)2设备系统组成及功能 (9)2.1系统组成 (9)2.2系统功能 (9)2.2.1机械系统 (9)2.2.1.1介质运动系统 (9)2.2.1.2喷车运动系统 (9)2.2.2电气系统 (10)2.2.2.1电气控制原理框图 (10)2.2.2.2配电箱内配置位置图 (10)2.2.2.3加热系统 (11)2.2.3供墨系统 (13)2.2.4控制系统 (15)2.2.4.1计算机配置要求 (15)2.2.4.2喷头排列顺序 (15)2.2.4.3组成控制系统的主要电路板注解图及相互间连接线 (15)2.2.4.4设备操作开关说明 (19)2.2.5维护系统 (21)3设备操作说明 (23)3.1设备操作顺序总述 (23)3.2操作顺序分述 (23)3.2.1电气操作 (23)3.2.2安装喷绘介质 (24)3.2.3安装喷头 (24)3.2.4检测电路板 (25)3.2.5检测光栅定位系统 (25)北京恒泽基业科技有限公司保密文件LEOPARD-XP-KM–PCI-DC PAGE 13.2.6供墨 (25)3.2.7喷绘 (26)3.2.8喷绘结束 (26)4喷绘系统软件所需图像文件的制作和处理 (27)5RIP软件(PHOTOPRINT )的使用说明 (30)5.1PHOTOPRINT软件的安装步骤 (30)5.2设定打印机 (30)5.3添加ICC校色文件 (31)5.4设置打印作业 (32)5.5发送作业 (37)5.6控制软件和PHOTOPRINT软件的关联 (37)5.7PHOTOPRINT软件的应用注意事项 (38)6喷绘系统软件的使用说明 (39)6.1本喷绘系统软件可实现的功能 (39)6.2喷绘软件的安装 (39)6.2.1控制软件的安装 (39)6.2.2PCI卡驱动程序的安装 (39)6.3控制软件的应用 (40)6.3.1选择打印配置文件 (40)6.3.2主界面 (41)6.3.3主菜主功能介绍 (41)6.3.4快捷键 (43)6.3.5默认参数栏、快捷图标 (43)6.3.6打印模式 (45)6.3.7喷头排列 (47)6.3.8自动吸墨小车摆动 (48)6.3.9状态栏 (48)6.4光纤的安装方法 (49)7设备日常维护和保养 (50)7.1工作环境要求 (50)7.2操作与维护要求 (50)7.2.1常规维护 (50)7.2.2喷头维护 (52)7.2.2.1喷头保养的重要性 (52)7.2.2.2喷头维护保养策略 (52)7.2.2.3喷头维护保养方式 (52)7.2.3喷绘机机械系统的维护 (54)8设备常见故障及排除 (54)9附件:KONICA 喷头简介 (60)9.1如何处理喷头 (60)9.2喷头部件描述 (62)9.3墨水的内部流动 (62)北京恒泽基业科技有限公司保密文件LEOPARD-XP-KM–PCI-DC PAGE 21序言1.1设备描述北京恒泽基业公司生产的猎豹(LEOPARD)牌大型宽幅数码喷绘机是由电脑控制的自动化、数字化的彩色图像输出设备。
通用雕刻机使用说明书
操作说明书目录1.雕刻机控制软件(ncstudio)安装设置说明 (2)2.精雕软件与诺诚转换软件 (7)3.材料固定与加工 (8)4.雕刻各种材料对刀具的选择 (13)5.雕刻机控制系统注意事项 (14)6.精雕软件做各种路径对刀具的选择 (15)7.雕刻机各种刀具的雕刻速度 (16)8.雕刻机常见故障与维护 (18)一、NC控制PCI卡(维宏卡)的安装:1.在配件箱里可以看到PCI卡、数据连接线PCI卡的安装,安装位置如下图所示2.软件安装。
(1)插入随机光盘,在光盘中找到Ncstudio安装包,双击解压。
(2)在解压后的文件夹中找到,双击运行,安装软件。
(3)安装驱动。
安装完成后,不必重启计算机。
我的电脑右键→选择属性→系统属性里面选择硬件→选择设备管理器。
鼠标右击,选择扫描检测硬件改动(A)弹出新硬件向导搜索到PCI卡→默认点击下一步→自动安装PCI卡驱动→安装完成→NC可以正常使用!3.雕刻机机床参数设置(1)厂商参数参数设置。
打开软件,点击系统参数→厂商参数输入口令NCSTUDIO.,进入参数设置界面。
根据您的机器来设置,如下来填写对应项!!!对刀块厚度()mm;固定对刀块坐标X()Y()电机参数:Z轴最大速度(1000)毫米/分钟(2)加工参数设置,点击系统参数→加工参数。
进入加工参数设置界面勾选以下三项适合您机器的速度为:其余参数为默认设置即可!注:参数修改完成以后一定要点击应用!设置完成后机器通电后便可以移动了(注意Z轴要在安全高度,四周无障碍物,避免碰撞!)!二、精雕软件与诺诚转换器1.精雕软件:解压光盘中的这个文件,然后打开文件夹,把发送到桌面就可以直接使用了。
无需安装。
2.诺诚转换器(维宏软件无法兼容精雕的ENG格式路径,所以要用这个转换软件转换成nc代码,然后导入维宏软件,进行加工。
)解压光盘中的这个文件,然后打开文件夹,把发送到桌面就可以直接使用了。
无需安装。
三、材料固定与加工。
激光雕刻机使用说明书讲解
前言感谢您购买正天数控激光雕刻机,该设备是光、机、电一体化的高科技产品。
为了您能更好的使用及维护该设备,请仔细阅读说明书,并按照说明书的步骤操作。
本手册详尽介绍了设备的特点、结构、安装调试、操作流程及日常维护保养与安全注意事项等方面的知识。
选用本公司配套ACE软件的用户,请在“软件使用手册”中查看软件的使用方法及具体参数。
使用时如有解决不了的故障,请与本公司当地售后服务中心联系,我们时刻为您贴心服务。
重要声明!因使用不当或不遵守操作规程引起的任何损失,公司概不负责。
本手册最终解释权归北京开天科技有限公司所有,公司保留修改本手册中一切资料、数据、技术细节等的权利。
北京正天恒业数控技术有限公司2012.01.06安全注意事项★在操作设备之前,用户务必认真阅读本操作手册,严格遵守操作规程。
★激光加工可能存在风险,用户应慎重考虑被加工对象是否适合激光作业。
★加工对象及排放物应符合当地的法律、法规要求。
★本设备使用四类激光器(强激光辐射,该激光辐射可能会引起以下事故:①点燃周边的易燃物;②激光加工过程中,因加工对象的不同可能会产生其它的辐射及有毒、有害气体;③激光辐射的直接照射会引起人体伤害。
因此,设备使用场所必须配备消防器材,严禁在工作台及设备周围堆放易燃、易爆物品,同时务必保持通风良好。
★设备所处环境应干燥,无污染、无震动、无强电、强磁等干扰和影响。
工作环境温度10-35℃,工作环境湿度5-95%(无凝水。
★设备工作电压:AC220V,50HZ。
当电网电压不稳或不匹配时,禁止开机。
★雕刻机及其相关联的其它设备都必须安全接地,方可开机操作。
★设备在开机状态下,必须有专人值守,如出现异常状况应立即切断所有电源,并积极采取相应措施;人员离开前必须切断所有电源,严禁擅自离开。
★严禁在设备中放置任何不相干的全反射或漫反射物体,以防激光反射到人体或易燃物品上。
★设备应远离对电磁干扰敏感之电气设备,可能对其产生电磁干扰。
刻字机操作说明
流 程 图
刻字机机构分解说明
升降刻字机 防错系统 气动夹钳 气动夹钳
扫描枪 扫描枪及前推机构 (可以更改为电机 滑台稳定性字系统
扫条码2 刻字机
压紧机构
压紧机构
扫条码1
刻字机运动机构
操作说明
动作说明: 1.产品放入工装内,启动双按钮开关: 2.安全门关闭,夹紧机构固定产品,扫条码1动作,读取信息, (NOK解锁防错系统重新校正)OK刻字机动作: 3. 刻字机完成动作,扫条码2接收信号,读取刻好的二维码作比对, ( NOK解锁防错系统重新校正)OK夹紧机构松开,安全门打开:取 下刻字OK产品: 4.产品放入工装内依上操作方法
刻字机方案
• 注: • 刻字使用点刻, 需要隔音。 • 扫描枪能够扫描净化器整个端面,并识别端面上的 二维码。 • 刻字完成后,设备自动扫描刻好的二维码,如果无 法识别,机器报警。 • 工装的表面安装固定螺栓均采用不锈刚螺栓紧固。 • 工件工作状态的中心高度为900~1000mm。 • 设备需要有钥匙方便工厂管理。 • 设备需要有安全失效端子盒。