配置交换机端口镜像
交换机端口镜像原理及配置

gei_3/3连接镜像PC
交换机(config)# interface gei_1/1 交换机(config-gei_1/1)# monitor session 1 source direction rx 交换机(config)# interface gei_1/2 交换机(config-gei_1/2)# monitor session 1 source 交换机(config)# interface gei_3/3 交换机(config-gei_3/3)# monitor session 1 destination
交换机端口镜像原理及配置
什么是端口镜像?
被镜像端口
监控端口
PC-A
PC-B
将交换机或路由器上一个或多个端口(被镜像端口)的数据复制到一个指定的目 的端口(监控端口)上,通过镜像可以在监控端口上获取这些被镜像端口的数据, 以便进行网络流量分析、错误诊断等。
端口镜像配置 创建一个会话 交换机(config)# monitor session <session-number> 向会话条目添加源端口 交换机(config-gei_1/x)# monitor session <session-number> source [direction {both|cpurx|cup-tx|tx|rx}] 向会话条目添加目的端口 交换机(config-gei_1/x)# monitor session <session-number> destination 查看端口镜像信息 交换机(config)# show monitor session {all|<session-number>}
华为交换机如何配置端口镜像

华为交换机如何配置端口镜像
摘要:
配置任何一种镜像功能,都需要先将物理端口配置成观察端口。
配置观察端口分单个配置和批量配置两种方式。
批量配置的观察端口相当于加入了一个观察端口组,在配置镜像端口时,镜像端口会绑定整个观察端口组。
因此批量配置一般在1:N镜像时使用,主要是为了配置方便。
配置单个观察端口
1、本地观察端口,即观察端口与监控设备直连
2、二层远程观察端口,即观察端口通过二层网络向监控设备转发镜像报文
3、三层远程观察端口,即观察端口通过三层网络向监控设备转发镜像报文(仅S7700/S9700/S12700支持)
4、配置批量观察端口(V200R005及后续版本支持)
4.1本地观察端口,即观察端口与监控设备直连
4.2二层远程观察端口,即观察端口通过二层网络向监控设备转发镜像报文
4.3三层远程观察端口不支持批量配置。
华为交换机做镜像端口以及删除的方法

华为交换机做镜像端口以及删除的方法交换机工作于OSI参考模型的第二层,即数据链路层。
交换机内部的CPU会在每个端口成功连接时,通过将MAC地址和端口对应,形成一张MAC表。
华为交换机有端口镜像为了方便观察或者监控端口流量。
该怎么配置端口镜像以及删除端口镜像呢?下面我们就来看看详细的教程。
方法步骤1、配置端口对端口镜像。
将镜像端口GE0/0/2入方向的报文(即接收到的报文)复制到观察端口GE0/0/1上,GE0/0/1与监控设备直连。
2、一个端口对应多个镜像口。
将镜像端口GE0/0/4入方向的报文(即接收到的报文)复制到观察端口GE0/0/1~GE0/0/3上,GE0/0/1~GE0/0/3与监控设备直连。
3、对于一个端口对应多个镜像端口我们也可以这样配置,不过需要版本支持。
4、多个镜像端口对应一个端口。
将镜像端口GE0/0/1~GE0/0/3入方向的报文(即接收到的报文)复制到观察端口GE0/0/10上,GE0/0/10与监控设备直连。
5、删除端口镜像。
在镜像端口下执行命令undo port-mirroring,删除观察端口与镜像端口的绑定关系,恢复镜像端口为普通端口。
6、在系统视图下执行命令undo observe-port,删除观察端口。
补充:交换机基本使用方法作为基本核心交换机使用,连接多个有线设备使用:网络结构如下图,基本连接参考上面的【方法/步骤1:基本连接方式】作为网络隔离使用:对于一些功能好的交换机,可以通过模式选择开关选择网络隔离模式,实现网络隔离的作用,可以只允许普通端口和UPlink端口通讯,普通端口之间是相互隔离不可以通讯的除了作为核心交换机(中心交换机)使用,还可以作为扩展交换机(接入交换机)来扩展网络放在路由器上方,扩展网络供应商的网络线路(用于一条线路多个IP的网络),连接之后不同的路由器用不同的IP连接至公网相关阅读:交换机硬件故障常见问题电源故障:由于外部供电不稳定,或者电源线路老化或者雷击等原因导致电源损坏或者风扇停止,从而不能正常工作。
交换机端口镜像配置大全【汇集22个各种品牌交换机】

交换机端⼝镜像配置⼤全【汇集22个各种品牌交换机】1、思科(CISCO)交换机1.1配置镜像(SPAN)端⼝Switch(config)# monitor session 1 source interface fastethernet 4/10Switch(config)# monitor session 1 filter vlan 57Switch(config)# monitor session 1 destination interface fastethernet 4/15如果想释放该SPAN 任务,输⼊如下命令:Switch(config)# no monitor session 1以下语句显⽰如何检验SPAN 任务的配置结果:Switch# show monitor session 2在配置镜像端⼝(SPAN)过程中,还应考虑到数据流量过⼤时,设备的处理速度及端⼝数据缓存的⼤⼩,要尽量减少被监控数据包的丢失。
1.2 Catalyst 2550/2950/3550/3560/3560-E/3570-E旧交换机系统命令:Switch(config)# int fa0/1Switch(config-if)# port monitor fastEthernet0/2新交换机系统命令:Switch> show interfacesSwitch> enablePassword: ciscoSwitch# configure terminalSwitch(config)# monitor session 1 source interface fastethernet 0/17Switch(config)# monitor session 1 destination interface fastethernet 0/2Switch(config)# endSwitch# show monitor session 1 --查看镜像Switch# no monitor session 1 --清空镜像Switch# show running-config --查看运⾏配置Switch# copy running-config startup-config --保存到配置⽂件如果⽤ display mirror 命令看到ingress:disabled,说明划分了VLAN,源数据中包含了⽬的端⼝所在的VLAN。
交换机端口镜像配置
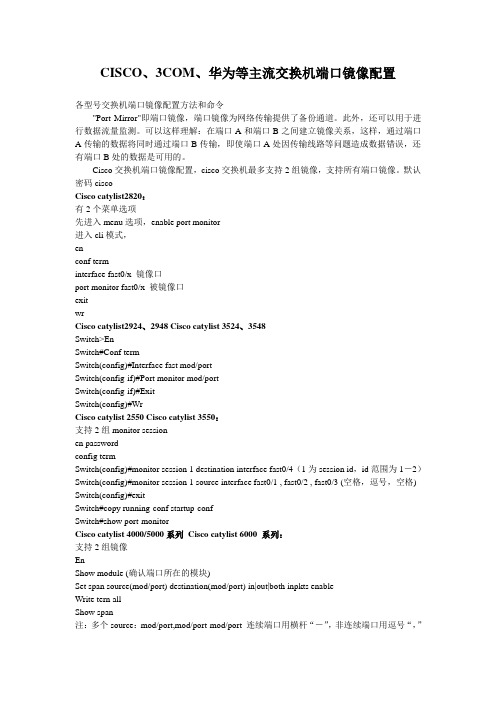
CISCO、3COM、华为等主流交换机端口镜像配置各型号交换机端口镜像配置方法和命令"Port Mirror"即端口镜像,端口镜像为网络传输提供了备份通道。
此外,还可以用于进行数据流量监测。
可以这样理解:在端口A和端口B之间建立镜像关系,这样,通过端口A传输的数据将同时通过端口B传输,即使端口A处因传输线路等问题造成数据错误,还有端口B处的数据是可用的。
Cisco交换机端口镜像配置,cisco交换机最多支持2组镜像,支持所有端口镜像。
默认密码ciscoCisco catylist2820:有2个菜单选项先进入menu选项,enable port monitor进入cli模式,enconf terminterface fast0/x 镜像口port monitor fast0/x 被镜像口exitwrCisco catylist2924、2948 Cisco catylist 3524、3548Switch>EnSwitch#Conf termSwitch(config)#Interface fast mod/portSwitch(config-if)#Port monitor mod/portSwitch(config-if)#ExitSwitch(config)#WrCisco catylist 2550 Cisco catylist 3550:支持2组monitor sessionen passwordconfig termSwitch(config)#monitor session 1 destination interface fast0/4(1为session id,id范围为1-2)Switch(config)#monitor session 1 source interface fast0/1 , fast0/2 , fast0/3 (空格,逗号,空格) Switch(config)#exitSwitch#copy running-conf startup-confSwitch#show port-monitorCisco catylist 4000/5000系列Cisco catylist 6000 系列:支持2组镜像EnShow module (确认端口所在的模块)Set span source(mod/port) destination(mod/port) in|out|both inpkts enableWrite tern allShow span注:多个source:mod/port,mod/port-mod/port 连续端口用横杆“-”,非连续端口用逗号“,”set span enable 允许镜像set span disable 禁止镜像set span source destination in|out|both inpkts enable create (create用于建立第二组镜像) Huawei(华为)s2403h端口监听配置:enconf termmonitor ethernet source_mod/port to ethernet source_mod/port obser ethernet dest_mod/portexitwriteshow monitor-port(注:不可以将非连续端口作为souce,如果镜像单个端口,则不用to,直接到obs ether。
多种交换机端口镜像配置

cisco 3550 镜像配置命令cisco 3550 emi在配置模式进行配置monitor session 1 source interface Fa0/15monitor session 1 destination interface Fa0/1415端口是源端口(接外网的端口),14端口是监视端口(安装互联网管理系统的电脑接在该端口。
华为交换机端口镜像配置[转帖]『端口镜像的数据流程』基于端口的镜像是把被镜像端口的进出数据报文完全拷贝一份到镜像端口,这样来进行流量观测或者故障定位。
【3026等交换机镜像】S2008/S2016/S2026/S2403H/S3026等交换机支持的都是基于端口的镜像,有两种方法:方法一1. 配置镜像(观测)端口[SwitchA]monitor-port e0/82. 配置被镜像端口[SwitchA]port mirror Ethernet 0/1 to Ethernet 0/2方法二1. 可以一次性定义镜像和被镜像端口[SwitchA]port mirror Ethernet 0/1 to Ethernet 0/2 observing-port Ethernet 0/8 【8016交换机端口镜像配置】1. 假设8016交换机镜像端口为E1/0/15,被镜像端口为E1/0/0,设置端口1/0/15为端口镜像的观测端口。
[SwitchA] port monitor ethernet 1/0/152. 设置端口1/0/0为被镜像端口,对其输入输出数据都进行镜像。
[SwitchA] port mirroring ethernet 1/0/0 both ethernet 1/0/15也可以通过两个不同的端口,对输入和输出的数据分别镜像1. 设置E1/0/15和E2/0/0为镜像(观测)端口[SwitchA] port monitor ethernet 1/0/152. 设置端口1/0/0为被镜像端口,分别使用E1/0/15和E2/0/0对输入和输出数据进行镜像。
华为交换机端口镜像配置
华为交换机端口镜像配置华为交换机端口镜像配置S3000的操作手册上有,如果没有手册的朋友,请看下面#配置镜像端口monitor-port { interface_type interface_num | interface_name }#配置被镜像端口port mirror { interface_type interface_ num | interface_name } [ to { inter face_type interface_ num | interface_name } ] #你也可以用下面命令,同上面两条的功能port mirror interface_list1 observing-port { interface_type interface_ num | interface_name }如果看不懂,请看下面的3.1.1 display mirror【命令】display mirror【视图】所有视图【参数】无【描述】display mirror命令用来显示镜像端口内容。
相关配置可参考命令monitor-port,port mirror。
【举例】# 显示镜像端口内容。
[Quidway] display mirrorInformation about monitor port(s)The observing port : Ethernet0/1The monitored ports:Ethernet0/2 Ethernet0/3 Ethernet0/4 Ethernet0/5 Ethernet0/6表3-1 端口镜像显示信息描述表域名描述The observing port 镜像端口The monitored ports 被镜像端口列表3.1.2 monitor-port【命令】monitor-port { interface_type interface_num | interface_name }undo monitor-port { interface_type interface_num | interface_name }【视图】系统视图【参数】interface_name:指定镜像端口名,表示方式为interface_name= interface_type interfac e_num。
H3C交换机配置端口镜像
要求:将端口23的数据被端口10监控的到,也就是说23口是被镜像,端口10是镜像端口!配置步骤:1:登录到交换机(这里我们采用telnet 方式)2:输入密码3:显示现实系统信息<SWname> sys # SWname 为交换机名称下同password: 输入密码Enter system view, return to user view with Ctrl+Z.[SWname]monitor-port g0/10 #设置镜像端口即监控端口10 为交换机端口编号[SWname]mirroring-port g0/23 #设置被镜像端口即被监控端口23 为交换机端口编号,如果需要多个连续的端口的命令式mirroring-port g0/3 to mirroring-portg0/22 即为被监控端口为编号3-22口,可自行掌握,取消取出被监控端口的方法为undo mirroring-port g0/XXX[SWname]dis mir # 显示所有端口镜像信息Monitor-port:GigabitEthernet0/10Mirroring-port:GigabitEthernet0/23[SWname]q # 推出端口镜像设置[SWname]save # 将配置后的信息保存This will save the configuration in the EEPROM memoryAre you sure?[Y/N]y #提示确认是否要保存输入Y 或者是NNow saving current configuration to EEPROM memoryPlease wait for a while...Current configuration saved to EEPROM memory successfully #保存完毕以上部分注释:红色部分为用户输入,蓝色部分为注释,黑色为交换机显示内容.以上是标准命令及步骤!希望可以帮助到你!下面我粘贴我的实际操作过程,将除了1,2,9,10,23,24 之外的端口全部镜像到端口10上面![H3C_S5024P]syspassword:Enter system view, return to user view with Ctrl+Z.[H3C_S5024P]monitor-port g0/10Succeed! the monitor port has been specified to be Trunk port and the pvid changed.[H3C_S5024P]mirroring-port g0/3 to g0/8[H3C_S5024P]dis mirMonitor-port:GigabitEthernet0/10Mirroring-port:GigabitEthernet0/3 GigabitEthernet0/4 GigabitEthernet0/5GigabitEthernet0/6 GigabitEthernet0/7 GigabitEthernet0/8[H3C_S5024P]mirroring-port g0/11 to g0/22[H3C_S5024P]dis mirMonitor-port:GigabitEthernet0/10Mirroring-port:GigabitEthernet0/3 GigabitEthernet0/4 GigabitEthernet0/5GigabitEthernet0/6 GigabitEthernet0/7 GigabitEthernet0/8GigabitEthernet0/11 GigabitEthernet0/12 GigabitEthernet0/13 GigabitEthernet0/14 GigabitEthernet0/15 GigabitEthernet0/16 GigabitEthernet0/17 GigabitEthernet0/18 GigabitEthernet0/19 GigabitEthernet0/20 GigabitEthernet0/21 GigabitEthernet0/22[H3C_S5024P]q<H3C_S5024P>saveThis will save the configuration in the EEPROM memoryAre you sure?[Y/N]yNow saving current configuration to EEPROM memoryPlease wait for a while...Current configuration saved to EEPROM memory successfully。
- 1、下载文档前请自行甄别文档内容的完整性,平台不提供额外的编辑、内容补充、找答案等附加服务。
- 2、"仅部分预览"的文档,不可在线预览部分如存在完整性等问题,可反馈申请退款(可完整预览的文档不适用该条件!)。
- 3、如文档侵犯您的权益,请联系客服反馈,我们会尽快为您处理(人工客服工作时间:9:00-18:30)。
配置交换机端口镜像
交换机端口镜像
交换机的端口镜像功能,是指可以将一个端口的流量自动复制到另一端口,供网络管理员在判断网络问题时对端口流量和内容进行实时分析。
通过交换机的镜像端口,这些流量就可以被一个特殊的设备监控,对发现和修理故障有很大的帮助。
交换机可以有专为镜像目的而设计的端口,许多交换机产品还提供了将任何一个端口配置成镜像端口的功能,某些交换机甚至支持同时有多对多的端口镜像。
为了能使用网络分析仪或入侵检测系统IDS直接监控网络流量,所连接的交换机必须支持端口镜像。
端口镜像(Port Mirroring)可以让用户将所有的流量从一个特定的端口复制到一个镜像端口。
如果您的交换机提供端口镜像功能,则允许管理人员自行设置一个监视管理端口来监视被监视端口的数据。
监视到的数据可以通过PC上安装的网络分析软件来查看,通过对数据的分析就可以实时查看被监视端口的情况。
如图所示的网络拓扑,某企业网络管理员发现网络中有异常流量,需要对网络流量进行手动分析,为了提高网络的安全,需要管理员进行手工分析的异常流量,需要将流量镜像到管理员PC,然后抓取数据包,实现网络的安全防范功能。
F0/3
图2-4 配置交换机端口镜像
【实验设备】
交换机 1台PC机3台
【实验原理】
交换机的端口镜像特性可以允许管理员对网络中的特定流量进行镜像分析。
即在交换机上,对特定流量进行复制并发送到指定端口。
【实验步骤】
第一步:定义需要镜像的特定流量
Switch#configure
Switch(config)#monitor session 1 source interface fastEthernet 0/1 both
第二步:配置镜像流量的流出端口
Switch(config)#monitor session 1 destination interface fastEthernet 0/2
第三步:验证测试
将PC1接入F0/1接口,PC2接入F0/2接口,PC1与PC2之间可以互相ping通。
第四步:验证测试
将PC3接入到F0/3接口,且设置其IP地址为192.168.1.3,并使用抓包软件进行抓包。
在PC1上ping PC2的IP地址。
由于PC1到PC2的流量被交换机镜像到了F0/3端口,所以PC3上使用抓包软件可以抓到PC1到PC2的网络流量,如图2-4-1所示。
图2-4-1 验证测试
【参考配置】
Switch#show running-config
Building configuration...
Current configuration : 611 bytes
!
version 1.0
!
hostname Switch
!
interface vlan 1
no shutdown
!
monitor session 1 destination interface fastEthernet 0/2
monitor session 1 source interface fastEthernet 0/1 both
end。