悬浮床使用指导手册
悬浮床

医药气动悬浮床原理医用气动颗粒悬浮床是一种新型医用病床,应用于医疗许多领域。
它的外形象个大浴缸,缸内放的不是水,而是很细的颗粒,形成颗粒床。
当经过过滤的压缩空气向上流经细颗粒时,颗粒会象水一样流动,能够产生相当大的浮力,足以使病人漂浮在流动的颗粒之上。
由于这种床靠气动和颗粒使病人悬浮起来,所以称为气动颗粒悬浮床。
当病人漂浮在流动的颗粒上时,人体与颗粒的接触面积是相当大的,而单位接触面积上的压力却很小,这样就会增加人体皮肤受压部位的血液流量,改善皮肤表面和组织的营养,加快皮肤和组织的生长愈合。
由于颗粒流态化产生的压力低于毛细血管的闭合压,受伤的皮肤表面和组织减少了压力,就会减少病人的疼痛,使病人感觉舒适。
经过过滤后温度适宜的空气通入床体颗粒料内,使得床体内温度可调,能够改善病人的治疗和恢复环境,特别适合于烧伤病人的液体复苏,以及烧伤病人创面水分的及时散失,形成干痂,减少创面的液体渗出,同时也为创面提供了干爽的环境,抑制细菌生长,减少创面细菌的繁殖,使病人不生褥疮,而且还能治疗褥疮。
优点(1)减小皮肤表面的压强,透气性好,不生褥疮,减少病人的疼痛;(2)提高皮肤表面的温度,增加皮肤表面的血液循环,有利于伤口愈合;(3)造成一个温度可控的小气候,减少病人新陈代谢的损失,防止细菌生长;(4)限制病人分解代谢产物对伤口的感染,减少抗生素的用量。
使用悬浮床与普通床的对比(1)降低了日常治疗费用约50%;(2)缩短住院治疗时间约27%;(3)降低护理工作量约46%;(4)减少药物及换洗敷料用药约56%;(5)减轻病人心理上种种不利负担。
应用范围烧伤、重症监护、外伤、皮肤科、瘫痪、外科整形矫形、肿瘤、康复老年病学、强化治疗。
本产品在北京两家三级甲等医院长达一年时间的临床,结果如下:临床试验效果分析:1、本次临床试验试验组和对照组的入选病例无年龄及性别的统计学差异,本次试验所有病例均完成随访并纳入统计,试验组和对照组脱落率均为0%,无统计学差异;2、本次临床试验试验组和对照组的治疗有效率均为100%,两组之间无统计学差别;试验组和对照组在创面愈合时间方面无统计学差异(P=0.230>0.05);3、试验组和对照组的不良事件发生率为0%,无统计学差别,受试产品具有和已上市产品相同的安全性;4、本次试验严格遵循试验方案,评价标准、统计方法合理,试验结果可靠,试验十分成功。
钢结构悬浮床的制作方法
钢结构悬浮床的制作方法
1、首先,购买钢结构悬浮床所需的材料,包括悬浮床的支撑架、支撑架的螺栓、支撑架的支撑棒、支撑棒的支撑架、支撑棒的支撑垫、支撑垫的螺栓、支撑垫的支撑棒、床板、床板的螺栓、床板的支撑棒等。
2、准备工具:电钻、砂纸、水平仪、钳子、扳手等。
3、准备钢结构悬浮床的支撑架,并将支撑架的支撑棒安装在支撑架上,然后将支撑棒的支撑垫安装在支撑棒上,并用螺栓固定。
4、将支撑垫的支撑棒安装在支撑垫上,并用螺栓固定,然后将床板安装在支撑棒上,并用螺栓固定。
5、最后,使用水平仪检查悬浮床的水平度,调整支撑架的高度,确保悬浮床的水平度,安装完成。
RF 浮动床控制阀安装、维护、使用手册说明书
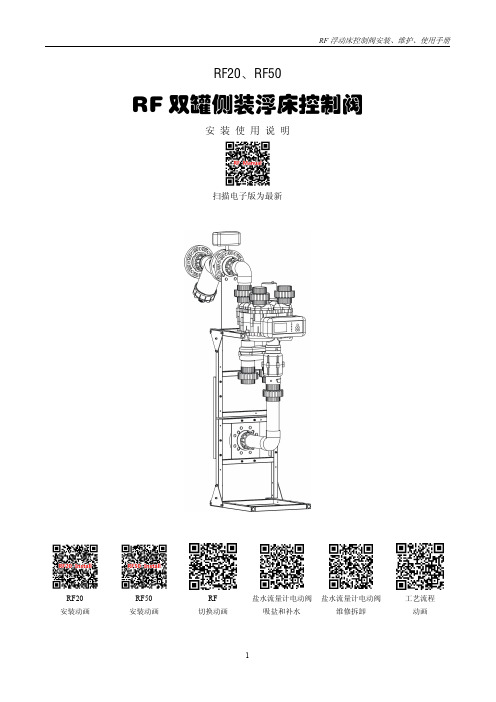
RF20、RF50RF 双罐侧装浮床控制阀安装使用说明扫描电子版为最新RF20安装动画RF50安装动画RF 切换动画盐水流量计电动阀吸盐和补水盐水流量计电动阀维修拆卸工艺流程动画一、控制器操作使用说明(1)RF控制器工位显示说明(2)RF控制器设定界面”和“”、在时间模式“示之间进行切换。
、多路阀切换到下一工位。
、屏幕出现参数设定界面,确认和退出G、:数字加二、安装1、内部管道安装:图1:RF20控制阀设备内部管道安装图2:RF50控制阀设备内部管道安装图3:RF控制器连线图图4:RF20控制阀软水器平面布局图5:RF20控制阀进出水、排污、供电系统设置和安装图6:RF50控制阀进出水、排污、供电系统设置和安装2、设备自动启停水箱液位控制A、控制器直接输出:当收到水箱上水位闭合信号时控制器控制进水电磁阀或电动阀关闭,控制器显示“水位已满”。
此输出为+12V有源信号,不能接入高压回路图7:RF20/RF50控制器输出液位控制图8:单节点浮球开关B、单接点水位开关、给水泵的联动控制图9:RF20外接单接点液位开关、给水泵联动接线图图10:RF50(进水电动阀)内部输出单接点软化水箱液位开关、给水泵接线盒C、附加继电器实现双接点水位开关、给水泵的联动控制RF软水器的水位控制为一个12V的有源接点,需要外界一个无源接点来控制,该接点闭合时,控制器停止工作,当水位开关采用上水位(常闭NC)下水位(常开NO)位的浮球开关时,需要一个小型继电器(如正泰HH54P/220VAC)进行转换。
图11:RF20/RF50内部输出双接点水位开关、给水泵联动接线图图12:双接点浮球开关3、设备安装注意事项1、进水安装过滤器,以免杂质进入电磁阀、多路阀、布水器。
2、应保证出水压力恒定,出水管道不安装阀门,软化水箱不安装浮球阀。
3、进水压力始终不低于设备高度,设备由地面水池水泵供水,进水管道安装止回阀,防止水泵停止设备水倒流。
悬浮物测定仪安全操作及保养规程

悬浮物测定仪安全操作及保养规程为确保悬浮物测定仪的正常运行,保障操作人员的人身安全,需要严格遵守以下安全操作规程:安装1.安放地点应平整、稳固,并具有良好的通风条件。
2.需要将悬浮物测定仪安装在室内环境,避免遭受强光照射和强风吹拂。
3.悬浮物测定仪与电源应该保持适当的距离,以防止其他机械、设备或电源设备的电磁干扰。
操作1.熟练掌握悬浮物测定仪的相关使用方法,并遵循操作手册的规定进行操作。
2.严禁在悬浮物测定仪操作过程中离开操作区域,特别是禁止在操作过程中前往其他区域或离开使用区域。
3.在保证安全的前提下,必须按照规章制度要求使用标准耳塞和眼罩。
保养1.定期检查悬浮物测定仪存在的问题或损坏,并及时清理器件表面清尘,确保其处于干净整洁状态。
2.在不适用悬浮物测定仪时,应切断电源,并妥善保管其相关备件及相关零配件。
3.定期更换悬浮物测定仪的原部、耗材及消耗品,并确保所更换的零部件符合同等质量标准。
注意事项1.在悬浮物测定仪使用完毕后,应关闭电源开关,并确认仪器处于关闭状态。
2.严禁将悬浮物测定仪用于违法操作或非法用途,并责任意料。
3.使用过程中查看操作手册并按照学习规程进行使用。
总结悬浮物测定仪是一种高精度、精密的实验设备,使用过程中需要严格按照使用规程进行操作,以确保操作人员的安全和设备的运行效果。
除此之外,定期的保养和维护也是确保设备长时间、高效运行的重要保障。
为了保证仪器使用效果,我们应该长期关注生产线的相关性检测,只有这样,才能够达到我们使用仪器的预期效果。
气浮设备操作规程

气浮设备操作规程一、概述气浮设备是一种常用于水处理系统中的设备,通过利用气泡的浮力来分离悬浮物质,提高水质。
为了确保气浮设备的正常运行和安全性,制定本操作规程。
二、设备操作要求1. 操作人员应具备相关的操作技能和知识,了解气浮设备的结构和工作原理;2. 在操作前应检查设备是否正常运行,如有异常应及时报修;3. 操作人员应穿戴好个人防护装备,包括安全帽、防滑鞋、防护眼镜等;4. 操作人员应按照设备操作流程进行操作,不得随意更改设备参数;5. 在操作过程中,应注意设备周围的安全环境,确保设备周围无杂物和障碍物。
三、设备操作流程1. 开机准备a. 检查设备电源是否正常,确认电源开关处于关闭状态;b. 检查设备的水源和气源是否正常供应,如有异常应及时处理;c. 检查设备的控制面板是否正常,确认各指示灯、按钮、开关等是否正常。
2. 设备启动a. 打开设备电源开关,确认设备电源正常供应;b. 打开水源和气源开关,确保水源和气源正常供应;c. 按照操作手册调整设备参数,如气泡大小、浮力等;d. 启动设备,观察设备运行是否正常,如有异常应及时停机检修。
3. 操作过程a. 根据实际情况调整设备参数,以达到最佳处理效果;b. 定期检查设备的水质和气泡效果,如发现异常应及时调整;c. 定期清理设备内部的污泥和杂物,保持设备的清洁和畅通;d. 注意设备的运行状态,如发现异常声音、异味等应及时处理。
4. 停机操作a. 停止水源和气源供应;b. 关闭设备电源开关;c. 清理设备周围的杂物和污泥;d. 记录设备的运行情况和处理效果。
四、设备维护要求1. 定期检查设备的电气系统,确保电气设备正常运行;2. 定期检查设备的水泵、气泵等机械设备,如有异常应及时维修;3. 定期清洗设备内部的滤网、气泡发生器等部件,保持设备的正常运行;4. 定期更换设备的易损件,如密封圈、橡胶管等;5. 定期进行设备的保养和润滑,延长设备的使用寿命。
悬浮床使用指导手册

目录一.工作原理二.适应症三.禁忌症四.操作步骤五.注意事项六.终末处理一.工作原理分为沙粒悬浮床和空气搏动悬浮床.沙粒悬浮床内装入了600公斤由硅和陶瓷合成的细沙。
每粒沙直径只有50-150微米,细微得用肉眼看不见。
陶瓷粉、硅胶和碳酸钙粉等组成的特殊颗粒释放出的钠离子可使舱内的PH值维持在9-10左右,提供碱性环境,以减少细菌污染)充满流动舱,当经过过滤、加热后的压缩空气进入流动舱后,使微颗粒产生管状的自下而上的单一方向气泡流动效果,从而达到悬浮、按摩病人的作用,并吸附病人的渗出液。
吸附后的微颗粒,由于重力的原因而沉降到舱底。
如此循环反复,不但保证了特殊颗粒的流动,而且从根本上阻止了细菌的繁殖和交叉感染,从而有效地保证在工作状态下,局部的消毒环境。
该床还分别带有干燥功能,可以及时烘干伤员伤口的渗出液,避免感染和长褥疮。
悬浮床的应用大大缓解了烧伤病人的痛苦,也使创面愈合时间大大缩短。
二.适应症1.大面积烧伤2.躯干后侧或臀部烧伤3.背/腰/臀慢性溃疡或压疮4.手术后不宜搬动的病人5.危重或者瘫痪患者6.创伤后拌有骨折或脱位三.禁忌症1.体重超过150公斤2.伴脊柱瘫痪的患者四.操作步骤1.启动悬浮床预热,至设定的温度(一般为30~36℃之间)2.床体上铺设床单及烫单,以免渗液渗透3.患者仰卧于悬浮床上,如有会阴部或者双上下肢烫者,应伸展四肢,呈”大”字型.4.头面部肿胀者调节靠背垫,视情况调节高度五.注意事项1.由于悬浮床的构造特别,浮动的床面使患者本已存在的恐惧和疑虑心理加剧,使患者的心理更加脆弱,此时作为医务人员要理解病人的痛苦,要有高度的责任心和耐心向患者介绍该床的构造和治疗作用,并讲明此床本身是具有保暖作用的。
2. 床温的监测密切观察操作屏上的温度,如床温高于所设定的温度,需检查制冷系统运行是否正常及排水管道有无排水散热的现象;如床温低于设定的温度,需观察产热系统是否运行正常,排水是否停止。
磨浮设备安全操作规程
磨浮设备安全操作规程一、前言磨浮设备是一种用于浮选工序的设备,广泛应用于矿山、冶金、化工等行业。
为了保障生产过程的安全性和人员的身体健康,制定了以下磨浮设备安全操作规程。
二、设备操作前的准备工作1. 设备检查:操作人员在每次使用设备前,应对设备进行全面检查,主要检查设备的电气设施是否完好稳定,机械部件是否正常运转,密封装置是否严密等。
2. 设备放置:操作人员在选择设备摆放位置时,应确保设备周围无阻碍物,便于操作和维修。
3. 仪表检查:操作人员应对设备的仪表进行检查,确保其正常工作。
三、设备的安全操作1. 操作顺序:在操作设备之前,需要按照确定的操作顺序,确保每个步骤的顺利进行。
2. 人员佩戴:操作人员在操作设备时,必须佩戴符合安全规定的个人防护装备,包括安全帽、防护眼镜、防护服等。
3. 设备开启:在操作设备之前,应按照操作规程将设备开启。
4. 操作注意事项:(1) 严禁将人体部位伸入设备内部或机械运转部位,在设备运转过程中要保持一定距离。
(2) 禁止将易燃易爆物品靠近设备及其电气线路,以免引发火灾事故。
(3) 禁止在设备运转过程中操作中断器、开关等电气设备。
(4) 禁止擅自调整设备的参数,如需调整,须得到相关人员的指导和同意。
5. 设备关闭:操作人员在操作完毕后,应按照操作规程将设备关闭。
6. 设备保养:定期对设备进行保养和维修,确保设备的正常运行和安全性。
四、应急措施1. 火灾事故:如发生火灾事故,应立即按规定方式通知消防部门,并按照应急预案进行安全疏散。
2. 气体泄漏事故:如发生气体泄漏事故,应立即通知相关部门,迅速疏散人员,并戴上呼吸器进行自救。
3. 电气事故:如发生电气事故,应立即切断电源,并通知维修人员进行处理。
4. 人员伤害事故:如发生人员伤害事故,应立即进行急救,并通知相关部门进行处理。
五、操作人员的安全常识1. 操作人员应严格按照操作规程进行操作。
2. 操作人员应定期参加相关的安全培训,提高安全意识和技能。
悬浮床支持椅说明书
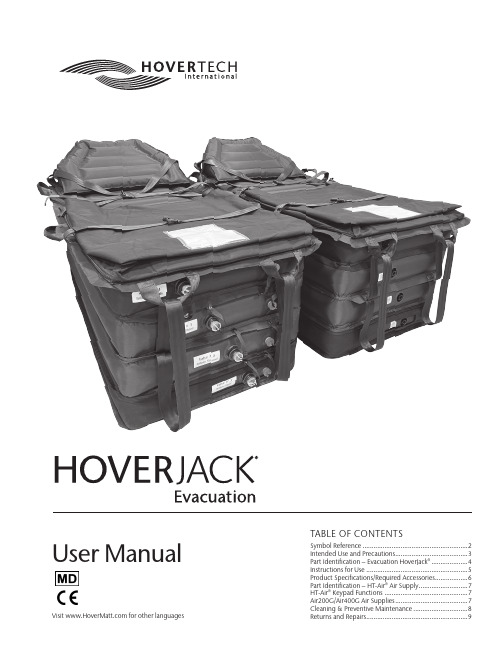
TABLE OF CONTENTSSymbol Reference ..........................................................2Intended Use and Precautions ........................................3Part Identification – Evacuation HoverJack® ....................4Instructions for Use ........................................................5Product Specifications/Required Accessories ..................6Part Identification – HT-Air® Air Supply ...........................7HT-Air® Keypad Functions ..............................................7Air200G/Air400G Air Supplies ........................................7Cleaning & Preventive Maintenance ..............................8User ManualSymbol ReferenceCE MARKING OF CONFORMITYUK MARKING OF CONFORMITYAUTHORIZED REPRESENTATIVEUK RESPONSIBLE PERSON SWITZERLAND AUTHORIZEDREPRESENTATIVECAUTION / WARNINGMANUAL CLEANINGIMPORTERDISPOSAL FASTEN PATIENT SAFETY STRAPFOOT ENDKEEP DRYLATEX FREEMANUFACTURERDATE OF MANUFACTUREMEDICAL DEVICEMODEL NUMBERSERIAL NUMBERDO NOT LAUNDERUNIQUE DEVICE IDENTIFIERPATIENT WEIGHT LIMITIntended Use and PrecautionsINTENDED USEThe Evacuation HoverJack® Device is used to transport patients up or down stairs in the event of an emergency. The Evacuation HoverJack can also be used to lift a patient in supine position from the floor to bed or stretcher height, utilizing the HoverTech Air Supply to inflate each of the four chambers.INDICATIONS• Patients unable to assist in their own vertical lift or evacuation, such as after a fall or in an emergency situation.• Patients whose weight or girth poses a potential health risk for the caregivers responsible for lifting or moving said patients.• CPR compatible when fully inflated.CONTRAINDICATIONS• Patients who are experiencing thoracic, cervical or lumbar fractures that are deemed unstable should not use the Evacuation HoverJack unless a clinical decision has been made by your facility.INTENDED CARE SETTINGS• Hospitals, long term or extended care facilities.PRECAUTIONS• Make sure patient safety straps are secured before moving. Do not secure before inflation.• Move the Evacuation HoverJack using the transport straps and/or the transport handles located along the top perimeter.• Never use patient safety straps to pull the Evacuation HoverJack, as they may tear.• When moving a patient on the inflated Evacuation HoverJack, use caution and move slowly.• Additional caregivers are recommended when moving or evacuating a patient over 350 lbs./159 kg. • Never attempt to move a patient on an uninflated Evacuation HoverJack.• Never leave a patient unattended on an inflated device.• Use this product only for its intended purpose as described in this manual.• Only use attachments and/or accessories that are authorized by HoverTech International.WARNING/CAUTION• Always use a minimum of two caregivers while inflating/transporting the Evacuation HoverJack.• A minimum of three caregivers is required for stairwell evacuation.• One caregiver should remain on the side of the patient duringinflation with the second caregiver managing inflation. If available, a third caregiver should attend to the other side of the patient.• Reference product-specific user manuals for additional operating instructions.PRECAUTIONS– HOVERTECH INTERNATIONAL AIR SUPPLY• Not for use in the presence of flammable anesthetics or in a hyperbaric chamber or oxygen tent.• Route the power cord in a manner to ensure freedom from hazard. • Avoid blocking the air intakes of the HoverTech International Air Supply.Avoid electric shock. Do not open HoverTech International Air Supply.DECLARATION OF CONFORMITYThis product conforms to the requirements of Medical Devices Regulation (2017/745).SEPARATE INFLATE/DEFLATE VALVES.[Mfg before 6/2023]Note: Two versions of Evacuation HoverJack® Air Patient LiftUNIVERSAL VALVES.[Mfg after 6/2023]Part Identification - Evacuation HoverJack® [Manufactured before 6/2023]Evacuation HoverJack® Instructions for Use as an Air Patient Lift1. Place Evacuation HoverJack® on the floor next to the patient, makingsure the chamber with Valve #4 is on the top and the chamber with Valve #1 is against the floor.2. Make certain that all four red-capped deflation valves are cappedtightly or Universal Valves are closed BEFORE INFLATING.3. Log roll patient onto the deflated Evacuation HoverJack, and positionpatient with feet at the valve end where indicated. Alternatively, the patient can be placed on top of the Evacuation HoverJack using theHoverMatt® Air Transfer System (see HoverMatt manual for instructions).If the HoverMatt is used, make certain that the HoverMatt and patient are properly centered on the Evacuation HoverJack. Always deflate the HoverMatt prior to inflating the Evacuation HoverJack.4. Always use a minimum of two caregivers while using the EvacuationHoverJack during inflation/transport.5. One caregiver should remain on the side of the patient duringinflation with the second caregiver managing inflation. If available, a third caregiver should attend to the other side of the patient.6. Plug the HoverTech International Air Supply power cord into anelectrical outlet.7. Caregiver at foot end turns on HoverTech International Air Supply toinitiate air flow.8. To begin inflation hold hose against valve #1 of Evacuation HoverJack(valve closest to the floor).9. When fully inflated, remove hose. Chamber remains inflated.10. Secure patient safety straps.11. Using the same process: move to valve #2, valve #3 and valve #4in exact succession, or until Evacuation HoverJack reaches desiredheight.12. Turn off HoverTech International Air Supply, and attach valve caps, ifdesired and applicable.13. Move Evacuation HoverJack to desired location.14. If transferring from the Evacuation HoverJack onto an adjacent surface,unbuckle patient safety straps.15. If it is necessary to lower patient, slowly open the uppermost valve.When chamber is fully deflated, move in succession downwards to fully deflate. Depress center button for slower deflation.CHAMBERS MUST BE FULLY INFLATED TO ENSURE STABILITY.DO NOT RELEASE MULTIPLE CHAMBERS AT ONCE WHENLOWERING A PATIENT.Evacuation HoverJack® Instructions for Use as an Evacuation Device1. To inflate, follow steps 1-11 of instructions for use as an air patient lift.2. Unzip foot pouch and position Evacuation HoverJack as close aspossible to adjacent surface.3. Transfer patient from bed or stretcher onto Evacuation HoverJack.4. Ensure that the patient’s body is centered, and zip foot pouch.5. If necessary, inflate the head-end wedge.6. Using the buckles, secure safety straps over the patient and adjustuntil taut.7. Using foot end transport straps and handles located around theperimeter of the Evacuation HoverJack, pull patient to the neareststairwell, and position the Evacuation HoverJack so the patient can be taken down the stairs feet first.8. Before descending the stairs, chambers 3 and 4 must be fullydeflated. To release air, slowly open valve #4. When chamber #4 is fully deflated, repeat the process for chamber #3. DO NOT RELEASE MULTIPLE CHAMBERS AT ONCE. 9. Retighten patient safety straps after deflating chamber #3 and #4 toensure patient is secure.10. Caregiver at head end will control evacuation using head endtransport straps. Caregiver at head end should be physically stronger.11. While 2 caregivers hold the head end transport straps and handles,the footend caregiver will begin to pull the patient down the stairs with the foot end transport strap. The Teflon-infused bottom material will allow the Evacuation HoverJack to slide down each flight. Ifnecessary, the footend caregiver can use their thigh to brace theEvacuation HoverJack and slow the descent. Once at ground level, move the patient to safety.ENSURE THAT PATIENT REMAINS CENTERED ON THEEVACUATION HOVERJACK, AND THAT THEIR HEAD DOESNOT SLUMP FORWARD AND RESTRICT BREATHING DURINGEVACUATION.A MINIMUM OF THREE CAREGIVERS (TWO AT HEADEND ANDONE AT FOOTEND) SHOULD BE USED TO EVACUATE PATIENTDOWN STAIRS).Product Specifications/Required AccessoriesMaterial:Topside Material: Nylon oxford Underside Material: Teflon®Construction:RF-WeldedWidth:32” (81cm)Length:72” (183 cm)Height:30” (76 cm) Inflated [each chamber 7 1/2” (19 cm)] Model #: HJ32EVWeight limit: 1200 lbs (544 kg) for vertical lift.Weight limit: 700 lbs (318 kg) for stairwell evacuation. REQUIRED ACCESSORY:Model #: HTAIR1200 (North American Version) – 120V~, 60 Hz, 10A Model #: HTAIR2300 (European Version) – 230V~, 50 Hz, 6AModel #: HTAIR1000 (Japanese Version) – 100V~, 50/60 Hz, 12.5A Model #: HTAIR2356 (Korean Version) – 230V~, 50/60 Hz, 6AModel #: Air200G (800 W) (North American Version) – 120V~, 60 Hz, 10A Model #: Air400G (1100 W) (North American Version) – 120V~, 60 Hz, 10APart Identification – HT-Air® Air SupplyAir Filter CoverHose NozzleHoseHose Release ButtonControl Panel LabelCarrying Handle/Attachment HookPower Cord StrapPower Cord (US/UK/Euro)WARNING: T he HT-Air is not compatible with DC power supplies.The HT-Air is not for use with the HoverJack Battery Cart.HT-Air® Keypad FunctionsTransfer Speed HighAdjustable/ Pressure SettingTransfer Speed LowStandby (Amber LED)Power IndicationAdjustable SpeedIndication(Green Flashing LED)Green LEDsADJUSTABLE: For use with HoverTech air-assisted positioning devices. There are four different settings. Each press of thebutton increases the air pressure and rate of inflation. The Green Flashing LED will indicate the inflation speed by the number of flashes (i.e. two flashes equals the second inflation speed). All of the settings in the ADJUSTABLE range are substantially lower than the HoverMatt and HoverJack settings. The ADJUSTABLE function is not to be used for transferring.The ADJUSTABLE setting is a safety feature that can be used to ensure the patient is centered on HoverTech air-assisted devices and to gradually accustom a patient who is timid or in pain to both the sound and functionality of the inflated devices. STANDBY: Used to stop inflation/air flow (Amber LED indicates STANDBY mode).HOVERMATT 28/34: For use with 28" & 34" HoverMatts and HoverSlings.HOVERMATT 39/50 & HOVERJACK: For use with 39" & 50" HoverMatts and HoverSlings and 32" & 39" HoverJacks.Air200G/Air400G Air SuppliesIf using HoverTech’s Air200G or Air400G Air Supplies, press the grey button on the top of the canister to initiate air flow. Press the button again to stop air flow.Cleaning & MaintenanceEVACUATION HOVERJACK CLEANING INSTRUCTIONSIn between patient use, the Evacuation HoverJack should be wiped down with a cleaning solution used by your hospital for medical equipment disinfection. A 10:1 bleach solution (10 parts water: one part bleach) or disinfectant wipes can also be used. NOTE: Cleaning with bleach solution may discolor fabric.First remove any visible soil, then clean the area according to the cleaning product manufacturer’s recommended dwell time and level of saturation. A gentle scrub brush can also be used on the affected area, if necessary, to help penetrate the Evacuation HoverJack material.Do not launder the Evacuation HoverJack.PREVENTIVE MAINTENANCE INSTRUCTIONSThe Evacuation HoverJack should be periodically inspected to ensure the following:• All patient safety straps are attached.• Transfer handles are all attached.• All buckles and zippers are intact and operational.• There are no punctures or tears.Evacuation HoverJack with separate inflate/deflate valves:• Inflate valves are all self-sealing with no evident leakage. • All deflate valves are equipped with a red cap.• The red caps are intact.Evacuation HoverJack with Universal Valves:Universal valves open fully and close tightly.AIR SUPPLY CLEANING AND MAINTENANCESee air supply manual for reference.NOTE: CHECK YOUR LOCAL/STATE/FEDERAL/INTERNATIONAL GUIDELINES BEFORE DISPOSAL.Transportation and StorageThis product does not require any special storage conditionsReturns and RepairsAll products being returned to HoverTech International (HTI) must have a Returned Goods Authorization (RGA) number issued by the company. Please call (800) 471-2776 and ask for a member of the RGA Team who will issue you an RGA number. Any product returned without an RGA number will cause a delay in the repair time.Returned products should be sent to:HoverTech International Attn: RGA # ___________ 4482 Innovation Way Allentown, PA 18109For European companies, send returned products to:Attn: RGA #____________ Kista Science TowerSE-164 51 Kista, SwedenEtac Ltd.Unit 60, Hartlebury Trading Estate, Hartlebury, Kidderminster, Worcestershire, DY10 4JB +44 121 561 2222Promefa AGKasernenstrasse 3AHartlebury, Kidderminster, 8184 Bachenbülach, CH +41 44 872 97 79CEpartner4U, ESDOORNLAAN 13, 3951DB MAARN, THE In case an adverse event in relation to the device, incidents should be reported to our authorized representative. Our authorized representative willforward information to the manufacturer.HoverTech International 4482 Innovation Way Allentown, PA 18109 ******************These products comply with the standards applicable for Class 1 products in the Medical Device Regulation(EU) 2017/745 on medical devices.For product warranties, visit our website: https:///standard-product-warranty/4482 Innovation Way Allentown, PA 18109 800.471.2776Fax 610.694.9601 ******************。
- 1、下载文档前请自行甄别文档内容的完整性,平台不提供额外的编辑、内容补充、找答案等附加服务。
- 2、"仅部分预览"的文档,不可在线预览部分如存在完整性等问题,可反馈申请退款(可完整预览的文档不适用该条件!)。
- 3、如文档侵犯您的权益,请联系客服反馈,我们会尽快为您处理(人工客服工作时间:9:00-18:30)。
目录
一.工作原理
二.适应症
三.禁忌症
四.操作步骤
五.注意事项
六.终末处理
一.工作原理
分为沙粒悬浮床和空气搏动悬浮床.沙粒悬浮床内装入了600公斤由硅和陶瓷合成的细沙。
每粒沙直径只有50-150微米,细微得用肉眼看不见。
陶瓷粉、硅胶和碳酸钙粉等组成的特殊颗粒释放出的钠离子可使舱内的PH值维持在9-10左右,提供碱性环境,以减少细菌污染)充满流动舱,当经过过滤、加热后的压缩空气进入流动舱后,使微颗粒产生管状的自下而上的单一方向气泡流动效果,从而达到悬浮、按摩病人的作用,并吸附病人的渗出液。
吸附后的微颗粒,由于重力的原因而沉降到舱底。
如此循环反复,不但保证了特殊颗粒的流动,而且从根本上阻止了细菌的繁殖和交叉感染,从而有效地保证在工作状态下,局部的消毒环境。
该床还分别带有干燥功能,可以及时烘干伤员伤口的渗出液,避免感染和长褥疮。
悬浮床的应用大大缓解了烧伤病人的痛苦,也使创面愈合时间大大缩短。
二.适应症
1.大面积烧伤
2.躯干后侧或臀部烧伤
3.背/腰/臀慢性溃疡或压疮
4.手术后不宜搬动的病人
5.危重或者瘫痪患者
6.创伤后拌有骨折或脱位
三.禁忌症
1.体重超过150公斤
2.伴脊柱瘫痪的患者
四.操作步骤
1.启动悬浮床预热,至设定的温度(一般为30~36℃之间)
2.床体上铺设床单及烫单,以免渗液渗透
3.患者仰卧于悬浮床上,如有会阴部或者双上下肢烫者,应伸展四肢,呈”大”字型.
4.头面部肿胀者调节靠背垫,视情况调节高度
五.注意事项
1.由于悬浮床的构造特别,浮动的床面使患者本已存在的恐惧和疑虑心理加剧,使患者的心理更加脆弱,此时作为医务人员要理解病人的痛苦,要有高度的责任心和耐心向患者介绍该床的构造和治疗作用,并讲明此床本身是具有保暖作用的。
2. 床温的监测密切观察操作屏上的温度,如床温高于所设定的温度,需检查制冷系统运行是否正常及排水管道有无排水散热的现象;如床温低于设定的温度,需观察产热系统是否运行正常,排水是否停止。
3. 预防患者出现高渗性脱水悬浮床内持续干热气流使机体水分蒸发丢失增加,据估算可比正常水分丢失多2倍,从而使患者出现高渗性脱水。
卧悬浮床的患者,需鼓励多饮水,定期监测电解质,准确记录出入量,并根据其结果调整补液种类及补液量。
4. 病情观察密切观察患者的神志、精神状态、末梢循环及生命体征的变化,每小时监测1次生命体征的变化。
输液速度根据尿量及时调整,尿液一般维持在50~100ml/h。
气管切开者做好气道湿化,保持呼吸道通畅,防止肺部感染。
5.床温超过标定温度时会自动报警,此时须停机,可用空调或电扇以降低室温。
待床温降低后再重新启动。
六.终末处理
患者使用后用速消净对床单元进行全面的消毒;将滤单拆下用消毒液浸泡。
在悬浮状态下由两人配合提起格筛,弃去结晶颗粒。
每6个月清除1次筛网中的沙粒或异物、结晶等。