Lenovo Yoga 3 14使用说明书
联想 ThinkBook 13s 14s IML 系列 用户指南

Lenovo ThinkBook13s14s IML系列用户指南用前必读使用本文档及其支持的产品之前,请务必先阅读和了解以下信息:•第27页附录A“重要安全信息”•《安全与保修指南》•《设置指南》第一版(2019年10月)©Copyright Lenovo2019.有限权利声明:如果数据或软件依照美国总务署(GSA)合同提供,其使用、复制或公开受编号为GS-35F-05925的合同的条款的约束。
目录关于本文档 (iii)第1章了解计算机 (1)前视图 (1)底座视图 (2)左视图 (3)右视图 (4)底视图 (5)功能部件和规格 (6)USB传输速率声明 (7)运行环境 (7)第2章开始使用您的计算机 (9)Windows10入门 (9)Windows帐户 (9)Windows用户界面 (11)Lenovo Vantage和联想电脑管家 (12)连接到网络 (12)连接到Wi-Fi网络 (12)与计算机交互 (13)键盘热键 (13)第3章了解您的计算机 (15)管理电源 (15)检查电池状态 (15)为电池充电 (15)检查电池温度 (15)设置电源按钮行为 (15)更改或创建电源计划 (15)设置性能模式 (16)更改UEFI/BIOS Setup Utility中的设置..16 UEFI/BIOS Setup Utility是什么 (16)打开UEFI/BIOS Setup Utility (16)更改启动顺序 (16)更改Hotkey Mode (16)启用或禁用Always-on(持续供电) (17)在UEFI/BIOS Setup Utility中设置密码..17密码类型 (17)设置管理员密码 (17)更改或删除管理员密码 (18)设置用户密码 (18)启用开机密码 (18)设置硬盘密码 (18)更改或删除硬盘密码 (19)重置或还原Windows (19)Windows10恢复选项 (19)Windows系统还原 (20)重置Windows (20)创建恢复驱动器 (20)使用恢复驱动器还原或重置Windows (21)第4章帮助和支持 (23)常见问题 (23)自助资源 (23)致电Lenovo (25)联系Lenovo之前 (25)Lenovo客户支持中心 (25)购买附加服务 (26)附录A重要安全信息 (27)附录B辅助功能和人体工程学信息 (37)附录C合规性信息 (41)附录D声明和商标 (55)©Copyright Lenovo2019iii Lenovo ThinkBook13s14s IML系列用户指南关于本文档•本文档中插图的外观可能与您的产品不同。
联想 ThinkPad X1 Yoga 3rd 用户指南
使用多点触控式屏幕 . . . . . . . . . . . 18 使用特殊键 . . . . . . . . . . . . . . . 20 使用 ThinkPad 指针设备 . . . . . . . . . 22
ThinkPad 指针设备概述 . . . . . . . . . 22 使用 TrackPoint 指针设备 . . . . . . . . 23 使用轨迹板 . . . . . . . . . . . . . . 24 使用轨迹板触摸手势 . . . . . . . . . . 25 定制 ThinkPad 指针设备 . . . . . . . . 25 更换指点杆上的小红帽 . . . . . . . . . 26 电源管理 . . . . . . . . . . . . . . . . 26 使用交流电源适配器 . . . . . . . . . . 26 使用电池 . . . . . . . . . . . . . . . 27 管理电池电量 . . . . . . . . . . . . . 28 节能模式 . . . . . . . . . . . . . . . 28 有线以太网连接 . . . . . . . . . . . . . 28 无线连接 . . . . . . . . . . . . . . . . 29 使用无线局域网连接 . . . . . . . . . . 29 使用无线广域网连接 . . . . . . . . . . 29 使用蓝牙连接 . . . . . . . . . . . . . 30 使用 NFC 设备. . . . . . . . . . . . . 30 使用飞行模式 . . . . . . . . . . . . . 31 使用音频功能部件 . . . . . . . . . . . . 31 使用摄像头 . . . . . . . . . . . . . . . 32 使用外接显示器 . . . . . . . . . . . . . 33 携带计算机旅行 . . . . . . . . . . . . . 34
联想电脑使用说明书
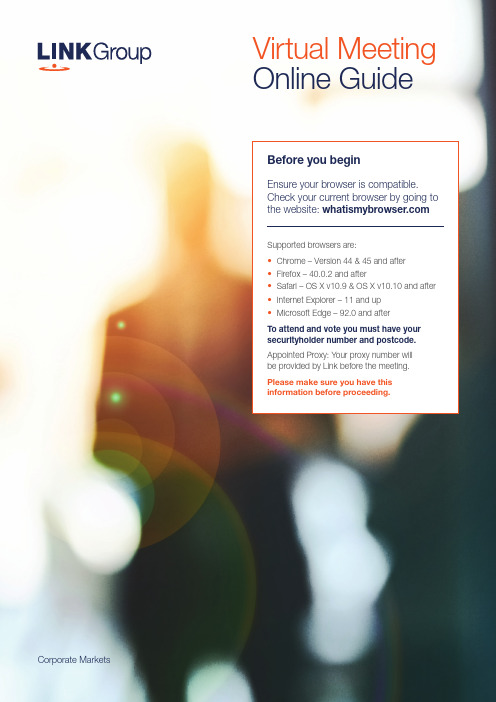
Corporate MarketsBefore you beginEnsure your browser is compatible. Check your current browser by going to the website: Supported browsers are:To attend and vote you must have your securityholder number and postcode.Appointed Proxy: Your proxy number will be provided by Link before the meeting.Please make sure you have this information before proceeding.Virtual Meeting Online Guide•Chrome – Version 44 & 45 and after •Firefox – 40.0.2 and after•Safari – OS X v10.9 & OS X v10.10 and after •Internet Explorer – 11 and up •Microsoft Edge – 92.0 and afterVirtual Meeting Online GuideStep 1Open your web browser and go to https://meetings.link Step 2Log in to the portal using your full name, mobile number, email address, and participant type.Please read and accept the terms and conditions clicking on the blue ‘Register and Watch button.On the left – a live webcast of the MeetingFull VotesTo submit a full vote on a resolution ensure you are in the‘Full Vote’ tab. Place your vote by clicking on the ‘For’, ‘Against’,or ‘Abstain’ voting buttons.Partial VotesTo submit a partial vote on a resolution ensure you are in the‘Partial Vote’ tab. You can enter the number of votes (for any or all)resolution/s. The total amount of votes that you are entitled to vote forwill be listed under each resolution. When you enter the numberof votes it will automatically tally how many votes you have left.Note: If you are submitting a partial vote and do not use all of your entitled votes, theun-voted portion will be submitted as No Instruction and therefore will not be counted.Once you have finished voting on the resolutions scroll down tothe bottom of the box and click on the ‘Submit Vote’ or‘Submit Partial Vote’ button.Note: You can close your voting card without submitting your vote at any time while voting remains open. Any votes you have already made will be saved for the next time you open up the voting card. The voting card will appear on the bottom left corner of the webpage. The message ‘Not yet submitted’ will appear at the bottom of the page.You can edit your voting card at any point while voting is open by clicking on ‘Edit Card’. This will reopen the voting card with any previous votes made.At the conclusion of the Meeting a red bar with a countdown timer will appear at the top of the Webcast and Slide windows advising the remaining voting time. Please make any changes and submit your voting cards.Once voting has been closed all submitted voting cards cannot be changed.2.How to ask a questionNote: Only verified S ecurityholders , Proxyholders and Company Representatives are eligible to ask questions.If you have yet to obtain a voting card, you will prompted to enter your securityholder number or proxy details before you can ask a question. To ask a question, click on the ‘Ask a Question’ button either at the top or bottom of the webpage.The ‘Ask a Question’ box will then pop up withtwo sections for completion.In the ‘Regarding’ section click on the drop down arrow and select the category/resolution for your question.Click in the ‘Question’ section and type your question and click on ‘Submit’.A ‘View Questions’ box will appear where you can view your questions at any point. Only you can see the questions you have asked.The Chairman will provide shareholders with areasonable opportunity to ask relevant questions or make relevant comments as each item of business is considered. Please note that where similarquestions are received from different shareholders, the Chairman will provide a single response, in orderto streamline the conduct of the AGM.3.DownloadsView relevant documentation in the Downloads section.4.Voting closingVoting will end 5 minutes after the close of the Meeting.At the conclusion of the Meeting a red bar with acountdown timer will appear at the top of the Webcast and Slide screens advising the remaining voting time. If you have not submitted your vote, you should do so now.Virtual Meeting Online Guidecontinued5. Optional questions and comments phone linea)Land line or mobile phoneb)The name and securityholder number of your holding/s c) T o obtain your unique PIN , please contact Link Market Services on 1800 990 363 (inside Australia) or +61 1800 990 363 (outsideAustralia) by Wednesday , 21 September 2022Joining the Meeting via PhoneStep 1From your land line or mobile device, call 1800 941 125 (inside Australia) or +61 2 9189 8865 (outside Australia)Step 2You will be greeted with a welcome message and provided with instructions on how to participate in the Meeting. Please listen to the instructions carefully.At the end of the welcome message you will be asked to provide your PIN by the moderator. This will verify you as a securityholder and allow you to ask a question or make a comment on the resolutions at the Meeting. Step 3Once the moderator has verified your details you will be placed into a waiting room where you will hear music playing.Step 4At the commencement of the Meeting, you will beadmitted to the Meeting where you will be able to listen to proceedings.Contact usAustraliaT +61 1800 990 363Asking a q uestion or making a commentStep 1When the Chairman calls for questions or comments on each item of business , press *1 on your keypad for the item of business that your questions or comments relates to. I f at any time you no longer wish to ask a question or make a comment, you can lower your hand by pressing *2 on your keypad.Step 2When it is time to ask your question or make your comment, the moderator will introduce you to the meeting. Your line will be unmuted and you will beprompted to speak. If you have also joined the Meeting online, please mute your laptop, desktop, tablet or mobile device before you speak to avoid technical difficulties for you and other shareholders .Step 3Your line will be muted once your question or comment has been asked / responded toWhat you will needFor shareholders or proxyholders who wish to ask their question or make their comment orally rather than via the online AGM platform, a questions and comments phone line will be available during the AGM。
联想 Yoga Pro 14c 2021 用户指南

用户指南Yoga Pro14c2021用前必读使用本文档及其支持的产品之前,请务必先阅读和了解以下信息:•第35页附录A“重要安全信息”•《安全与保修指南》•《设置指南》第一版(2020年9月)©Copyright Lenovo2020.有限权利声明:如果数据或软件依照美国总务署(GSA)合同提供,其使用、复制或公开受编号为GS-35F-05925的合同的条款的约束。
目录关于本指南 (iii)第1章了解计算机 (1)前视图 (1)底座视图 (2)左视图 (3)右视图 (4)底视图 (5)功能部件和规格 (6)USB传输速率声明 (7)运行环境 (7)第2章开始使用您的计算机 (9)Windows10入门 (9)Windows帐户 (9)Windows桌面 (11)Windows更新 (12)Lenovo Vantage和联想电脑管家 (12)连接到网络 (12)连接到有线网络 (12)连接到Wi-Fi网络 (12)Novo按钮菜单 (13)打开Novo按钮菜单 (13)Yoga模式 (13)打开屏幕旋转锁定 (15)使用Windows触摸键盘 (15)打开或关闭平板电脑模式 (16)与计算机交互 (16)键盘热键 (16)使用多点触控式屏幕 (17)Lenovo Integrated Pen (18)第3章了解您的计算机 (23)管理电源 (23)检查电池状态 (23)为电池充电 (23)检查电池温度 (23)设置电源按钮行为 (23)更改或创建电源计划 (23)设置性能模式.............24更改UEFI/BIOS Setup Utility中的设置..24 UEFI/BIOS Setup Utility是什么.. (24)打开UEFI/BIOS Setup Utility (24)更改启动顺序 (24)更改热键模式 (24)启用或禁用Always-on (24)在UEFI/BIOS Setup Utility中设置密码..25密码类型 (25)设置管理员密码 (25)更改或删除管理员密码 (25)设置用户密码 (26)启用开机密码 (26)设置硬盘密码 (26)更改或删除硬盘密码 (27)重置或还原Windows (27)Windows10恢复选项 (27)Windows系统还原 (27)重置Windows (28)创建恢复驱动器 (28)使用恢复驱动器还原或重置Windows (29)第4章帮助和支持 (31)常见问题 (31)自助资源 (31)CRU是什么? (32)适用于您产品型号的CRU (32)致电Lenovo (33)联系Lenovo之前 (33)Lenovo客户支持中心 (33)购买附加服务 (34)附录A重要安全信息 (35)附录B辅助功能和人体工程学信息 (45)附录C合规性信息 (49)附录D声明和商标 (63)©Copyright Lenovo2020iii用户指南关于本指南•本指南适用于下面列出的Lenovo产品型号。
联想ThinkPad笔记本说明书

笔记本产品执行标准GB/T 9813.2-2016T14 Gen 2 / T15 Gen 2 P14s Gen 2 / P15s Gen 2* 适用于特定型号* Lenovo USB-C to VGA Adapter* Lenovo USB-C to DisplayPort Adapter* Lenovo HDMI to VGA Adapter仅限 Intel 型号* 适用于特定型号智能读卡器HDMI™USB 3.2USB 3.2Thunderbolt™ 4) Intel:AMD:(NFC1Nano SIM* 适用于特定型号智能读卡器HDMIUSB 3.2USB 3.2Thunderbolt™ 4)(NFCNano SIMCommercial VantageCommercial Vantage设置、智能助手、更新、WiFi 安全、支持和保修智能冷却通过 Windows 电池滑块调整 Lenovo 智能冷却,尽可能做到电池寿命、计算机性能和风扇速度的良好平衡。
USB 传输速率请阅读《用户指南》中的 USB 传输速率声明。
要访问《用户指南》,请访问https://。
安全信息塑料袋声明危险:塑料袋具有危险性。
请将塑料袋放在婴儿和儿童接触不到的位置,以避免窒息危险。
常规电池声明(适用于特定型号)危险:Lenovo 提供的用于产品的电池已经过兼容性测试,并应该仅用核准的部件进行更换。
非Lenovo 指定的电池或经过拆卸或改装的电池不在保修范围之内。
电池使用不当或错误操作可能导致电池过热、漏液或爆炸。
为避免可能造成的伤害,请注意以下几点:请勿打开、拆开或维修任何电池。
请勿挤压或刺穿电池。
请勿使电池短路、接触水或其他液体。
使电池远离儿童。
使电池远离火源。
如果电池损坏,或发现从电池中流出异物或电池引线上堆积异物,请停止使用电池。
请在室温下存放可充电电池或含有可充电电池的产品,并将电池电量充至大约 30% 到 50%。
联想_笔记本按键说明

电脑上的快捷键使用Ctrl+S 保存Ctrl+W 关闭程序Ctrl+N 新建Ctrl+O 打开Ctrl+Z 撤销Ctrl+F 查找Ctrl+X 剪切Ctrl+C 复制Ctrl+V 粘贴Ctrl+A 全选Ctrl+[ 缩小文字Ctrl+] 放大文字Ctrl+B 粗体Ctrl+I 斜体Ctrl+U 下划线Ctrl+Shift 输入法切换Ctrl+空格中英文切换Ctrl+回车QQ号中发送信息Ctrl+Home 光标快速移到文件头Ctrl+End 光标快速移到文件尾Ctrl+Esc 显示开始菜单Ctrl+Shift+< 快速缩小文字Ctrl+Shift+> 快速放大文字Ctrl+F5 在IE中强行刷新Ctrl+拖动文件复制文件Ctrl+Backspace 启动\关闭输入法拖动文件时按住Ctrl+Shift 创建快捷方式Alt+空格+C 关闭窗口Alt+空格+N 最小化当前窗口Alt+空格+R 恢复最小化窗口Alt+空格+X 最大化当前窗口Alt+空格+M 移动窗口Alt+空格+S 改变窗口大小Alt+Tab 两个程序交换Alt+255 QQ号中输入无名人Alt+F 打开文件菜单Alt+V 打开视图菜单Alt+E 打开编辑菜单Alt+I 打开插入菜单Alt+O 打开格式菜单Alt+T 打开工具菜单Alt+A 打开表格菜单Alt+W 打开窗口菜单Alt+H 打开帮助菜单Alt+回车查看文件属性Alt+双击文件查看文件属性Alt+X 关闭C语言Shift快捷键Shift+空格半\全角切换Shift + Delete 永久删除所选项,而不将它放到“回收站”中。
拖动某一项时按CTRL 复制所选项。
拖动某一项时按CTRL + SHIFT 创建所选项目的快捷键。
WORD全套快捷键小技巧CTRL+O 打开CTRL+P 打印CTRL+A 全选CTRL+[/] 对文字进行大小设置(在选中目标情况下)CTRL+D 字体设置(在选中目标情况下)CTRL+G/H 查找/替换;CTRL+N 全文删除;CTRL+M 左边距(在选中目标情况下);CTRL+U 绘制下划线(在选中目标情况下);CTRL+B 加粗文字(在选中目标情况下);CTRL+I 倾斜文字(在选中目标情况下);CTRL+Q 两边对齐(无首行缩进),(在选中目标情况下)或将光标放置目标文字的段尾,亦可操作CTRL+J 两端对齐(操作同上)CTRL+E 居中(操作同上)CTRL+R 右对齐(操作同上)CTRL+K 插入超链接CTRL+T/Y 可进行首行缩进(将光标移到需做此操作的段尾,或将此段选中进行操作Ctrl+A(或Ctrl+小键盘上数字5):选中全文。
联想 ThinkPad neo 14 系列用户指南

ThinkPad neo 14 系列 用户指南用前必读在参考此资料使用相关产品之前,请务必阅读并了解以下信息:• 《设置指南》• 《常规安全与合规性声明》第二版 (8 月 2023 年)© Copyright Lenovo 2022, 2023.有限权利声明:如果数据或软件依照美国总务署(GSA)合同提供,则其使用、复制或披露将受到 GS-35F-05925 号合同 的约束。
Contents了解您的 Lenovo 笔记本. . . . . . . . . i iiChapter 1. 认识您的计算机. . . . . . . . 1前视图. . . . . . . . . . . . . . . . . . . 1侧视图. . . . . . . . . . . . . . . . . . . 3后视图. . . . . . . . . . . . . . . . . . . 5功能部件和规格. . . . . . . . . . . . . . . . 6 USB 规格. . . . . . . . . . . . . . . . 6Chapter 2. 开始使用您的计算机. . . . . 9访问网络. . . . . . . . . . . . . . . . . . 9连接到 Wi-Fi 网络. . . . . . . . . . . . . 9开启飞行模式. . . . . . . . . . . . . . . 9与计算机交互. . . . . . . . . . . . . . . . . 9使用键盘快捷键. . . . . . . . . . . . . 10使用 TrackPoint 指针设备. . . . . . . . . 11使用轨迹板. . . . . . . . . . . . . . . 12连接到外接显示屏. . . . . . . . . . . . 13Chapter 3. 探索您的计算机. . . . . . . 15 Lenovo 应用程序. . . . . . . . . . . . . . 15 Lenovo Commercial Vantage 或联想电脑管家. . . . . . . . . . . . . . . . . . 15智能会议助手(适用于特定型号). . . . . . 16联想视觉(适用于特定型号). . . . . . . . 17智能功能(适用于特定型号). . . . . . . . . 18颜色校准(适用于特定型号). . . . . . . . . 21智能冷却. . . . . . . . . . . . . . . . . 21管理电源. . . . . . . . . . . . . . . . . 22检查电池状态. . . . . . . . . . . . . . 22为计算机充电. . . . . . . . . . . . . . 22更改电源设置. . . . . . . . . . . . . . 23传输数据. . . . . . . . . . . . . . . . . 24设置蓝牙连接. . . . . . . . . . . . . . 24附件. . . . . . . . . . . . . . . . . . . 24购买附件. . . . . . . . . . . . . . . . 24Chapter 4. 保护计算机和信息安全. . . 25锁定计算机. . . . . . . . . . . . . . . . . 25使用指纹登录(适用于特定型号). . . . . . . . 25使用面部 ID 登录(适用于特定型号). . . . . . 25断电数据保护(适用于特定型号). . . . . . . . 26 UEFI BIOS 密码. . . . . . . . . . . . . . . 26密码类型. . . . . . . . . . . . . . . . 26设置、更改和删除密码. . . . . . . . . . 27Chapter 5. 配置高级设置. . . . . . . . 29 UEFI BIOS. . . . . . . . . . . . . . . . . 29进入 UEFI BIOS 菜单. . . . . . . . . . . 29 UEFI BIOS 界面导航. . . . . . . . . . . 29设置系统日期和时间. . . . . . . . . . . 29更改启动顺序. . . . . . . . . . . . . . 29查看 UEFI BIOS 事件日志. . . . . . . . . 29将系统重置为出厂默认设置. . . . . . . . 30更新 UEFI BIOS. . . . . . . . . . . . . 31在线快速身份认证(FIDO). . . . . . . . . . 31安装 Windows 操作系统和驱动程序. . . . . . . 32Chapter 6. 帮助和支持. . . . . . . . . 33常见问题. . . . . . . . . . . . . . . . . 33错误消息. . . . . . . . . . . . . . . . . 34蜂鸣声错误. . . . . . . . . . . . . . . . . 35自助资源. . . . . . . . . . . . . . . . . 36 Windows 标签. . . . . . . . . . . . . . . 37致电 Lenovo. . . . . . . . . . . . . . . . 37联系 Lenovo 之前. . . . . . . . . . . . 37 Lenovo 客户支持中心. . . . . . . . . . . 38购买附加服务. . . . . . . . . . . . . . . . 39Appendix A. 合规性信息. . . . . . . . 41 Appendix B. 声明和商标. . . . . . . . 45© Copyright Lenovo 2022, 2023iii ThinkPad neo 14 系列用户指南了解您的 Lenovo 笔记本感谢您选择 Lenovo® 笔记本电脑!我们致力于为您提供最佳解决方案。
联想笔记本按键说明

电脑上的快捷键使用Ctrl+S 保存Ctrl+W 关闭程序Ctrl+N 新建Ctrl+O 打开Ctrl+Z 撤销Ctrl+F 查找Ctrl+X 剪切Ctrl+C 复制Ctrl+V 粘贴Ctrl+A 全选Ctrl+[ 缩小文字Ctrl+] 放大文字Ctrl+B 粗体Ctrl+I 斜体Ctrl+U 下划线Ctrl+Shift 输入法切换Ctrl+空格中英文切换Ctrl+回车QQ号中发送信息Ctrl+Home 光标快速移到文件头Ctrl+End 光标快速移到文件尾Ctrl+Esc 显示开始菜单Ctrl+Shift+< 快速缩小文字Ctrl+Shift+> 快速放大文字Ctrl+F5 在IE中强行刷新Ctrl+拖动文件复制文件Ctrl+Backspace 启动\关闭输入法拖动文件时按住Ctrl+Shift 创建快捷方式Alt+空格+C 关闭窗口Alt+空格+N 最小化当前窗口Alt+空格+R 恢复最小化窗口Alt+空格+X 最大化当前窗口Alt+空格+M 移动窗口Alt+空格+S 改变窗口大小Alt+Tab 两个程序交换Alt+255 QQ号中输入无名人Alt+F 打开文件菜单Alt+V 打开视图菜单Alt+E 打开编辑菜单Alt+I 打开插入菜单Alt+O 打开格式菜单Alt+T 打开工具菜单Alt+A 打开表格菜单Alt+W 打开窗口菜单Alt+H 打开帮助菜单Alt+回车查看文件属性Alt+双击文件查看文件属性Alt+X 关闭C语言Shift快捷键Shift+空格半\全角切换Shift + Delete 永久删除所选项,而不将它放到“回收站”中。
拖动某一项时按CTRL 复制所选项。
拖动某一项时按CTRL + SHIFT 创建所选项目的快捷键。
WORD全套快捷键小技巧CTRL+O 打开CTRL+P 打印CTRL+A 全选CTRL+[/] 对文字进行大小设置(在选中目标情况下)CTRL+D 字体设置(在选中目标情况下)CTRL+G/H 查找/替换;CTRL+N 全文删除;CTRL+M 左边距(在选中目标情况下);CTRL+U 绘制下划线(在选中目标情况下);CTRL+B 加粗文字(在选中目标情况下);CTRL+I 倾斜文字(在选中目标情况下);CTRL+Q 两边对齐(无首行缩进),(在选中目标情况下)或将光标放置目标文字的段尾,亦可操作CTRL+J 两端对齐(操作同上)CTRL+E 居中(操作同上)CTRL+R 右对齐(操作同上)CTRL+K 插入超链接CTRL+T/Y 可进行首行缩进(将光标移到需做此操作的段尾,或将此段选中进行操作Ctrl+A(或Ctrl+小键盘上数字5):选中全文。
- 1、下载文档前请自行甄别文档内容的完整性,平台不提供额外的编辑、内容补充、找答案等附加服务。
- 2、"仅部分预览"的文档,不可在线预览部分如存在完整性等问题,可反馈申请退款(可完整预览的文档不适用该条件!)。
- 3、如文档侵犯您的权益,请联系客服反馈,我们会尽快为您处理(人工客服工作时间:9:00-18:30)。
d 记忆卡插槽
将记忆卡 (未提供)插入此处。
注释:详细信息,请参见第 10 页的 “使用记忆卡 (未提供)”。
8
第 1 章 认识您的计算机 连接 USB 设备
将 USB 设备的 USB 插头 (A 类)插入电脑上的 USB 接口,即可将此设备连 接至电脑。
首次将某一 USB 设备插入计算机上的特定 USB 端口时, Windows 将自动为 该设备安装驱动程序。安装驱动程序之后,将不再需要执行任何其他步骤即可 断开或连接该设备。
b b
a
b
以下内容描述了每组功能键的功能。
Fn + Esc:
屏幕阅读模式。
Fn + H43; End:
激活中断功能。
Fn + PgUp:
启用 / 禁用滚动锁定。
Fn + PgDn:
激活系统请求键。
Fn + 空格键 (仅限特定机型): 打开 / 禁用键盘背光灯。
4
第 1 章 认识您的计算机 摆放显示屏
注释: • 每次仅在插槽中插入一张记忆卡。 • 本读卡器不支持 SDIO 设备 (如 SDIO 蓝牙通讯卡等)。
⏽佼ᦤ冫˖ ᙼৃҹ䱣ᯊ䆓䯂㘨ᛇᅬᮍ㔥キ˄/˅ҹ㦋ᕫᖿ᥋ ⱘ㔥㒰ᬃᣕ᳡ࡵ ⚍ߏĀ偅ࡼϟ䕑ϧऎā✊ৢ䕧ܹᙼⱘЏᴎ㓪োᴎൟˈेৃᶹ䆶ᴎ఼ⱘ䜡㕂ǃ ֱׂⳌᑨⱘ偅ࡼᑣֵᙃ˗ ⚍ߏĀ㓈ׂ㔥⚍ā✊ৢ䗝ᢽᙼ᠔ⱘජᏖϢᙼⱘѻકˈेৃᶹ䆶ᔧഄⱘ᳡ࡵ㔥 ⚍ֵᙃҹ֓Ѣᙼ䗕ׂ䅵ㅫᴎ 䇶䇶 ϔ⠜˄2014ᑈ12᳜˅ © ⠜ᴗ᠔᳝ 㘨ᛇ 2014DŽ
a bc
d
a 交流电源适配器 插孔
b USB 3.0 端口
连接交流电源适配器。 连接 USB 设备。
注释:当电池电量大于 20% 时,带 电。
标记的 USB 端口支持关机状态下为外接 USB 设备充
c 组合音频插孔
连接头戴式耳机 (带话筒)。
注释: • 组合音频插孔不支持传统麦克风。 • 因行业标准不同,连接第三方头戴式耳机或第三方头戴式耳机 (带话筒)时,可能不支
坏显示屏。
1
第 1 章 认识您的计算机
a 内置摄像头 (仅限特定型号)
b 多点触控屏 c Windows 按钮
d 内置麦克风
使用此摄像头进行视频交流。
带 LED 背光的液晶显示屏提供了清晰明亮的图形显示。该 显示屏支持多点触控功能。 按此按钮可: 在当前视图和开始屏幕之间切换。 - 或者 将计算机从睡眠模式唤醒。 捕获声音,可用于视频会议、配音或录音。
注释:如果 USB 设备使用电源线,请先将该设备连接至电源,然后再连接至计算机。否则, 系统可能会无法识别该设备。
9
第 1 章 认识您的计算机
使用记忆卡 (未提供) 本计算机支持下列类型的记忆卡: • Secure Digital (SD) 卡 • Secure Digital High Capacity (SDHC) 卡 • SD eXtended Capacity (SDXC) 卡 • MultiMediaCard (MMC)
e 无线局域网天线 连接至无线局域网适配器以发送和接收无线信号。
f 触控板
触控板起传统鼠标的作用。
触控板:屏幕上的光标会以指尖在触控板上划过的相同方 向运动。 触控板按钮:左 / 右侧按钮的功能与传统鼠标的左 / 右键 相同。
注释:您可以通过按 F6 (
) 启用 / 禁用触控板。
2
使用键盘 热键 按特定的热键可立即进入相应的系统设置。
第 1 章 认识您的计算机
: 设为静音 / 取消静音。 : 降低音量。
: 调高音量。
: 关闭当前活动的窗口。
:
刷新桌面或当前活动的 窗口。
: 启用 / 禁用触控板。
: 启用 / 禁用飞行模式。
:
显示所有当前活动的应用 程序。
:
打开 / 关闭 LCD 显示屏 的背光灯。
:
在计算机和外接设备之间 切换显示。
Lenovo Yoga 3 14
Փ⫼䇈ᯢк
⊼䞞 • Փ⫼ᴀѻકПࠡˈ䇋ܜ䯙䇏lj㘨ᛇᅝܼঞ䗮⫼ֵᙃᣛफNJDŽ • ᴀᣛफЁⱘᶤѯ䇈ᯢ؛䆒ᙼ᠔Փ⫼ⱘᰃ Windows® 8.1DŽབᵰᙼՓ⫼ⱘᰃ݊
ᅗ Windows ᪡㋏㒳ˈᶤѯ᪡ৃ㛑Ӯ᳝ϡৠDŽབᵰᙼՓ⫼ⱘᰃ݊ᅗ᪡ ㋏㒳ˈ߭ᶤѯ᪡ৃ㛑ϡ䗖ড়ᙼDŽ • 䇈ᯢкᦣ䗄ⱘᰃ᭄ᴎൟⱘ䗮⫼ࡳ㛑DŽᙼⱘ䅵ㅫᴎৃ㛑≵᳝݊Ёᶤѯ ࡳ㛑ˈ㗙䇈ᯢкЁ≵᳝ҟ㒡ᙼⱘ䅵ㅫᴎϞⱘᶤѯࡳ㛑DŽ • ᴀ䇈ᯢкЁⱘᦦৃ㛑Ϣᅲ䰙ѻકϡৠDŽ䇋ҹᅲ⠽ЎޚDŽ
显示屏可以打开到任何角度,最大可打开到 360 度。
笔记本式
适用于需要键盘和鼠标操作的任务 (如创建文档、撰写电子邮件等)。 5
第 1 章 认识您的计算机 立式
适用于几乎或完全不需要触控操作的任务 (如查看照片或播放视频)。 平板电脑式
适用于需要频繁触摸屏幕的任务 (如网上冲浪、玩游戏等)。 6
帐篷式
i
第 1 章 认识您的计算机 正视图 ------------------------------------------------------------------------------------------------------------
a e
b
c d
f
注释:虚线区域表示外部不可见的部件。 注意: • 合上显示屏时,请注意不要在显示屏和键盘之间遗留下钢笔或任何其他物件,否则可能会损
第 3 章 联想一键恢复系统 ....................................................................... 27 第 4 章 故障排除 ..................................................................................... 28
第 2 章 开始使用 Windows 8.1 ............................................................... 15 首次配置操作系统......................................................................................................15 操作系统界面..............................................................................................................15 超级按钮......................................................................................................................16 使计算机进入睡眠状态或关机..................................................................................18 触摸屏操作..................................................................................................................21 连接至无线网络..........................................................................................................25 帮助和支持..................................................................................................................26
: 降低显示屏亮度。
: 提高显示屏亮度。
注释:如果您将 BIOS 设置程序中的 Hotkey Mode (热键模式)从 Enabled (启用)更改为 Disabled (禁用),您需要同时按 Fn 键和相应的热键。
3
第 1 章 认识您的计算机
功能键组合
使用功能键,可以立即改变操作功能。若要使用此功能,按住 Fn a ;然后 按住其中一个功能键 b。
目录
第 1 章 认识您的计算机............................................................................. 1 正视图............................................................................................................................ 1 左视图............................................................................................................................ 8 右视图..........................................................................................................................11 底视图..........................................................................................................................14