POS 可编程键盘
TA61-2 POS键盘用户指南说明书
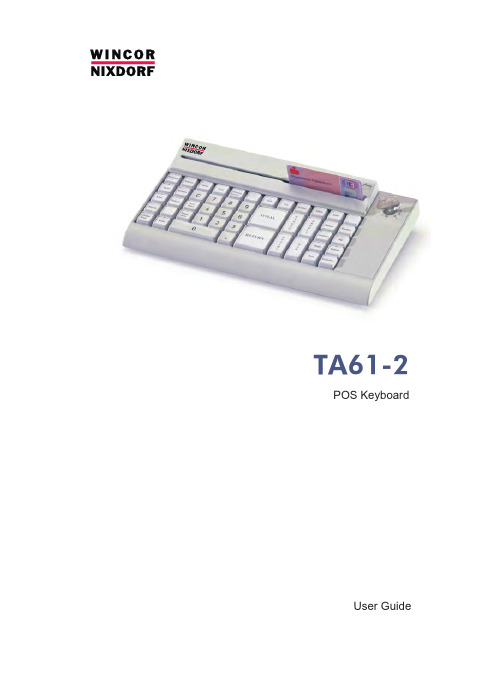
TA61-2 POS KeyboardUser GuideWe would like to know your opinion on this publication.Please send us a copy of this page if you have any constructive criticism.We would like to thank you in advance for your comments. With kind regards.Your opinion:Wincor Nixdorf International GmbHDokumentation RD PD1Rohrdamm 7Haus 16D-13629 BerlinE-Mail:***************************************Order No. 01750170065APublished by Wincor Nixdorf International GmbH D-33094 PaderbornOrder No. 01750170065ATA61-2POS KeyboardUser GuideEdition February 2009All brand and pro d uct na m es men t io n ed in this do c u m ent are tra d e m arks of their re s pec t i v e owners.Co p y r ight© Win c or Nix d orf In t er n a t io n al Gm bH, 2009The re p ro d uc t i o n, trans m is s i o n or use of this do c u m ent or its con t ents is not per m it t ed wit h out ex p ress aut h o r i t y.Of f en d ers will be li a b l e for da m a g es.All rights, in c lu d ing rights crea t ed by pa t ent grant or re g i s tra t i o n of a uti l i t y mo d el or de s ign, are re s er v ed.De l i v ery sub j ect to avai l a b i l i t y;tech n i c al mo d i f i c a t ions pos s i b le.ContentsManufacturer’s De c la r a t i o n and Ap p ro v al (1)Ge n e r al Aut h o r i z a t i o n (1)FCC-Class A De c la r a t i o n (1)User In f or m a t i o n (1)Sa f e t y In s truc t ions (2)Clea n ing In s truc t ions (2)War r an t y (2)About this Ma n u a l (3)Sco p e of Supp l y (3)Moun t ing Keys (5)Ex c han g ing the Keys and Key La b els (5)In s er t ing Key La b els (6)In s er t ing Key Caps (7)The TA61-2 Key b o a rd (8)Ge n e r al (8)Key p ad (9)Key Switch (10)Swi p e c ard Rea d er (op t io n al) (11)Using the Swi p e c ard Rea d er (11)Clea n ing In s truc t ions (11)Con n ec t i o n Me t hod (11)Re l ea s ing the Ca b le Con n ec t i o n (12)2 Self-Test (1)Ap p en d ix (13)Tech n i c al Data (13)Key b o a rd Lay o ut (14)GENERAL AUTHORIZATION Manufacturer’s Declaration and Approval General AuthorizationThis de v i c e com p lies with the re q ui r e m ents of the di r ec t i -ve 2004/108/EC with re g ard to “Elec t ro m ag n e t ic Com p a t i -bi l i t y” and 2006/95/EC "Low Vol t a g e Di r ec t i v e".The r e f o r e, you will find the CE mark on the de v i c e or pa c ka g ing.FCC-Class A DeclarationThis equipment has been tested and found to comply with the limits for aClass A digital device, pursuant to part 15 of the FCC Rules. These limitsare designed to provide reasonable protection against harmful interferencewhen the equipment is operated in a commercial environment. Thisequipment generates, uses, and can radiate radio frequency energy and, ifnot installed and used in accordance with the instruction manual, may cause harmful interference to radio communications.Operation of this equipment in a residential area is likely to cause harmfulinterference in which case the user will be required to correct theinterference at his own expense. Modifications not authorized by themanufacturer may void users authority to operate this device.This class A digital apparatus complies with Canadian ICES-003.Cet appareil numerique de la classe A est conforme à la norme NMB-003du Canada.User InformationRe p air work on the de v i c es should only be car r ied out by aut h o r i z ed andspe c i a l l y trai n ed per s on n el. Im p ro p er re p airs will lead to the loss of anygua r an t ee and lia b i l i t y claims.1SAFETY INSTRUCTIONSSafety InstructionsNote the following safety information:n Lay all ca b les and supp l y li n es so that no b o d y can tre a d on them or trip over them.n Data ca b les should be neit h er con n ec t ed nor re m o v ed du r ing thun d ers -torms.n Pro t ect the de v i c e from dust, moi s tu r e and heat.n Take care to en s u r e that no fo r eign ob j ects (e.g. pa p er clips) or li q uids can get into the in s i d e of the de v i c e, as this could cau s e elec t ri c al shocksor short circuits.n Pla c e the key b o a rd on a non-slip sur f a c e.Cleaning InstructionsThe keyboard should be cleaned with a germicide from time to time. Makesure no moisture penetrates the spaces between keys. Before cleaning inbetween the keys on the keyboard with a brush, loosen and remove the key caps using the key removing device. Do not allow dust to get in through theopen keyboard mechanics.WarrantyWincor Nixdorf guarantees generally a warranty engagement for 12 monthsbeginning with the date of delivery. This warranty engagement covers allthose damages which occur despite a normal use of the product.Damages because ofn im p ro p er or in s uf f i c ient main t en a n c e,n im p ro p er use of the pro d uct or un a ut h o r i z ed mo d i f i c a t ions of the pro d uct, n ina d e q ua t e lo c a t i o n or sur r oun d ingswill not be covered by the warranty.2For further information of the stipulation look at your contract.All parts of the product which are subject to wear and tear are not included in the warranty engagement.Please order spare parts at the Wincor Nixdorf customer service.About this ManualThis ma n u a l in f orms you about ever y thing you might need to know for the in s tal l a t i o n (soft w a r e and hard w a r e), the ope r a t i o n and the main t en a n c e of your TA61-2.Some parts of this book re q ui r e fa m i l ia r i t y and ex p er i en c e in wor k ing with ope r a t ing sys t ems and in s tal l a t i o n and con f i g u r a t i o n procedures.No t es in the ma n u a l are mar k ed by this sym b ol.This sym b ol is used for war n ings.Scope of SupplyThe product includes one TA61 keyboard, one User Guide and one accessories kit containing the following:1 * triple “0" key cap 1 * double “0" key cap 1 * single “00" key cap 2 * quadruple key caps 6 * double key caps Transparent platesBlank sheets for labeling 1 key cap remover 1 set of keysThe set of keys contains:Key REG for key position 1Key MGR for key positions 1 and 2Key X for key positions 1, 2 and 3Key Z for key positions 1, 2, 3 and 43ABOUT THIS MANUALSCOPE OF SUPPLYThe following items can be ordered optionally:Accessories kit 1: 20 dummy keys (1 x 1)Accessories kit 2: 6 double key caps2 quadruple key capsAccessories kit 3: 12 single key capsDepending on your order, the keyboard may have a swipecard reader.If damage has occurred during shipping or if the package contents do not match the delivery note, promptly notify your Wincor Nixdorf sales outlet. 4Mounting KeysExchanging the Keys and Key LabelsYou can remove each of the key capsusing the key removal device enclosed,pulling the key upwards.Place the key removal device on theselected key until you hear a click.Now remove this key from the keyboardby pulling upwards.EXCHANGING THE KEYS AND KEY LABELSIf the key that has been removed has anumber or character on it, you canchange the lettering as follows:Using a thin object (e.g. paper-clip etc.),press upwards against the plastic coverthrough the opening on the underside ofthe key. Please refer to the next chapterfor instructions on how to insert the newlabel.Inserting Key LabelsBelow, you will find instructions on how to insert the key labels. Each key should be labelled individually.You can use the empty labels delivered with the system to do so.Place the written label on the key cap. Insert the transparent key cover with the mat and concave side upwards until it clicks into place in the key cap .INSERTING KEY LABELSb el for keysp a r ent key co v er withc a v e side upThe labels are replaced as follows:n Re m o v e the key cap from the key b o a rd (see re m o v ing the key cap) and pull the trans p a r ent key cap up w ards.n The trans p a r ent key co v er is then re l ea s ed and the la b el can be re m o -ved.n Re p la c e the la b el and fit the trans p a r ent key co v er (with the mat and con -ca v e side fa c ing up w ards) back into the key cap un t il it engages.Inserting Key CapsInsert the key cap in the keyboard and press firmly into place.When inserting double or triple keys,please ensure that the actuating cylinder is on the left. The quadruple key caps are corresponding - with the actuating cylinder arranged on the upper left.Ensure while putting on the key capsthat all white cam of the rocker plate arein the planned bulge of the keyboard(see arrows below).If you hear a click, the key caps areinserted correctly.INSERTING KEY CAPSc kerQua d ru p le key cap with scis sorsGENERALThe TA61-2 KeyboardGeneralThe TA61-2 keyboard has a keypad with maximum 60 usable keys. Except for the numeric keys (0 to 9), the C key and the 0.00 key, the key layout isflexible, i.e. any two contiguous keys can be replaced by a double key andany four keys can be replaced by a quadruple key, either horizontally orvertically.The TA61-2 keyboard is equipped with a key switch with 6 switch positions and is available with or without a swipecard reader.A power-up reset and an automatic self-test are performed each time thePOS terminal is switched on. Following these self-tests, the keyboard isready for operation. The keyboard receives its power from the POS system.KEYPADIn the TA61-2 keypad, two keys can be replaced by a double key and four keys to form a quadruple key, either horizontally or vertically. Only one key code is generated by each double or quadruple key. Different key codes can be set for the multiple keys by rotating the key caps. These caps have a actuating cylinder that is shifted when the cap is rotated, resulting in different key codes.Key caps can be changed on the spot using the key cap remover included in the scope of supply. When using the key caps for multiple keys, note the position of the pin on the underside, making sure that the desired code is set.Key SwitchThe TA6-2 keyboard is equipped with a key switch with 6 switch positions.Switch position 0 is the basic position; switch positions 1-4 are provided for customer-specific applications. In positions 0 and 1, the key can be removed.The sixth switch position, which is designated on the lock by T, is intended for use by Field Engineering. From switch position 0, the key provided can be turned to position T only. This key is not included in the scope of supply.The key switch has only one closure, i.e. there is only one set of keys for all keylocks that includes the above-mentioned key variants for the various switch positions.Note: For a better differentiation with the TA61 and the TA61-1, the TA61-2has a grey key switch and a different key design!KEY SWITCHKeys for the TA61 and TA61-1.These keys donot match with theTA61-2 and vice versa!Swipecard Reader (optional)The TA 61-2 is equipped with a swipecard reader (SCR) which enables all tracks of the swipecard reader to be read simultaneously when the card is swiped through once.Using the Swi p e c ard Rea d erPull the magnetic card through the slot of the swipecard reader evenly and quickly as far as it will go from right to left. Make sure that the magnetic stripe is horizontally facing the keys.Note the following precautions when handling magnetic cards:n Ne v er al l ow mag n e t ic cards to come into con t act with li q uids.n Ne v er bend or fold mag n e t ic cards.n Ne v er ex p o s e mag n e t ic cards to a mag n e t ic field.Insert the magnetic card in the special slot provided on the reader from the right-hand side only; inserting the card at another location could damage the read heads.Clea n ing In s truc t ionsIn order to ensure that the quality of reading results is maintained, clean the swipecard reader at least once a week. To do this, use the special cleaning card that can be ordered from Wincor Nixdorf.Connection MethodThe connector for the keyboard is a standard 6-pin mini-DIN connector.The cable is 1 meter long. This cablecan be extended an additional 2 metersby means of a standard cable that canbe ordered optionally.SWIPECARD READER (OPTIONAL)SELF-TESTRe l ea s ing the Ca b le Con n ec t i o nNever remove a cable from a connector socket by simply pulling on thecable. Always remove the cable by the connector housing. Please follow the instructions below when removing cables:n Switch off your POS sys t em.The mini-DIN connectors are left plugged in until unlocked.Using your thumb, pull gently on plastikconnector housing, removing theSelf-TestA self-test of the keyboard is performed each time the POS terminal isswitched on. During this test, the interface to the system is disabled. Thesystem is informed of the successful completion of the test.TECHNICAL DATA AppendixTechnical DataKeyboard LayoutKEYBOARD LAYOUTLa b el l ed key, sing l e (fit t ed at the fac t o r y)Key with ins c rip t i o n (nu m e r ic key p ad)Free l y as s ig n a b le。
可编程键盘用户手册

可编程键盘用户手册版本3.2I.程序安装运行Setup.exe文件来安装程序。
系统默认的安装文件夹是“C:\Program Files\Matrix Maker Chinese\Programmable Keyboard”。
II.驱动程序设置这部分只适用于Windows 2000/XP操作系统。
系统默认的驱动文件夹是“C:\Program Files\Matrix Maker Chinese\ KB Driver”。
在默认文件夹中有详细的指令路径,请参照“POSKB_DRV_SETUP.pdf”文件。
III.键盘的编程软件执行文件的默认路径是:“C:\ Program Files\Matrix Maker\Programmable Keyboard Chinese\MatrixMakerChinese.exe”1.选择键盘当运行程序时会出现以下对话框:选择你所想编程的产品类型和国家代码,然后按“确定”键确定。
国家代码就是键盘出厂时的语言设置,带磁卡阅读器的产品都需要进行设置,对于客户的使用语言的不同,设置不同的国家代码。
如果在此设置了国家代码后,则后续在设置“键盘设置”时,国家代码中就可以不用设置国家代码了。
本手册接下来的说明都是基于S78A产品,当然其他产品也适用。
2.编辑键码拖动鼠标,使鼠标指在键盘的某一个按钮上,当按钮颜色变成灰黑色时就可以对此按钮编程了。
在可编程的按键上点击鼠标左键,会弹出一个滑行菜单。
这时可以用“扫描码”的方式给按键赋值。
给一个按键赋值后,你还可以点击滑行菜单条中“清除”来清除已赋的码值,点击“层次索引”来指定这个按键的键层。
i.扫描码在这种方式下,你能用任意扫描码给一个按键赋值在以上对话框的“键盘”画面上显示了最常用的键码,并在“特别编码”区域列出了一些特殊码。
从“键盘”画面上选择一个键或双击“特别编码”区域的某一项,则将其键码添加到“键码排列”目录中。
通过以上操作可以把8个码写入某一个键里面。
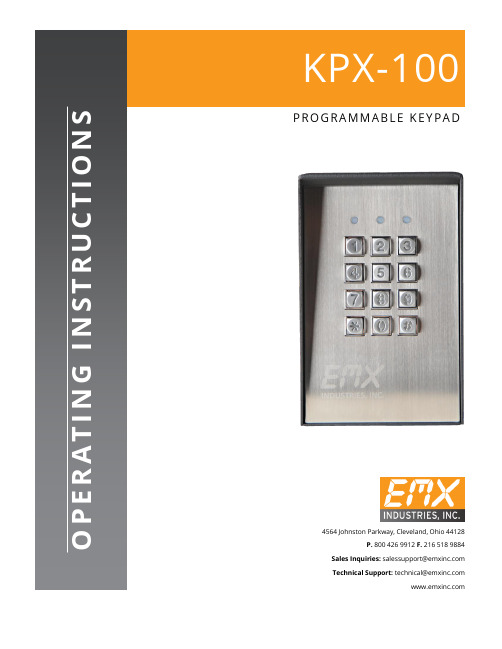
KPX 100可编程密码键盘指南说明书
∙∙∙∙D.A.P. Reset seePage 5∙∙∙∙∙∙∙∙∙????#*This must be done after DAP resetRecord the new code0 0 0 0*Set system into programming mode with factory set master code.8 9 0 0 8 9 0 1 # #Set system to single user mode, clear all previous data & refreshes system Set system to multi user mode, clear all previous data & refreshes system4 0 4 1 4 2 1 to 999# # # Output 1 in momentary mode from 1 to 999 seconds Output 1 in Start / Stop Mode (toggle) Output 1 in Start / Stop Mode (toggle) with accelerated code5 0 5 1 5 21 to 999 # # #Output 2 in momentary mode from 1 to 999 seconds Output 2 in Start / Stop Mode (toggle) Output 2 in Start / Stop Mode (toggle) with accelerated code0 2# # #4 digits, fixed 4 digits, fixed 4 digits, fixedPersonal Master Code & Super User CodeUser Code 1 for output 1 with Duress Code function User code 2 for output 21 Personal Master Code & Super User Code # 100 User codes in Group 1 for output 1 with Duress Code function0 1 2 00 to 99 0 to 94 to 8 digits4 to 8 digits 4 to 8 digits10 User Codes in Group 2 for output 2##i)ii)7 0 7 1 7 27 6 5 to 1000 # # ##After 10 successive false codes, keypad will lock for 30 secondsAfter 10 successive false codes, the Duress output switches to groundSelectable from 5 to 10 successive false codes, the keypad locks for 15 minutes. The keypad can be reset to release lock with the Master Code at any time during the locking period. Removal of all above security settings8 0 8 0 # #1 0Door Forced Open Alarm is Activated Door Forced Open Alarm is Disabled8 11 #1 second notification beep is given to notify the person outside to open the door when output relay is activated with a user code or egressbutton. Good for the locking device that gives no sound when it activates, such as magnetic lock. 8 1 0 #Notification beep disabled and replaced by 2 short successful code entry beeps for valid user codes.8 2 1 #Auto Entry Mode is selected. Key that followsthe user code is not required in code entry. The usercodes must be set in the same digit length as theMaster Code in Auto Entry mode and the code can be 4-8 digits82#Manual Entry Mode is selected. Key that followsthe user code is required in code entry. The user codescan be 4-8 digits and are not required to be the samelength as the Master Code.##8 3 8 3 1 0# #Tones are active on key pressTones are off. Use for silent environment requirements9 9# #No Propped Open AlarmTime from 1 to 999 seconds until door propped open activates alarm0 1 to 999*Keypad exits programming mode and returns to normal operationMASTER CODE*8 9 0 0#MASTER CODE*891#*MASTER CODE*LOCATION 1#OPTIONLOCATION n#OPTION n*0 0 0 0 * ----------- 8 9 0 0 # -----------0 3 2 8 9 1 8 3 2 1 # # --- --- 2 6 8 5 4 # ---4 0 1#Output 1 has been set to momentary mode with 1 second duration5 1 # ------------------- O utput 2 has been set to Start / Stop (toggle) mode7 21 0# ---------* ----------------------------*#8321685 4------------------ Output 1 activates for 1 secondOutput 2 Starts or Stops (toggle mode)#83 2 1 --------- Output 1 activates for 1 second 8 3 2 1--------- Output 2 Starts or Stops (toggle mode)# # 1 2 0 3 2 1--------- Duress output activates (output switches to (-) ground) & Output 1activates for 1 second8 3 #8 3 2 1--------- --------- Output 1 starts Output 1 stops3 2 8 9---------Lockout is reset and keypad resumes normal operation#0 0 0 0 --------- System is set to programming mode using factory set Master User Code * 8 9 0 1 --------- System is set to Multi-User Mode *8 (see note (a) below#0 3 2 8 -------- 3289 has been stored as the new Personal Master Code & Super User Code# 9 1 8 3 2 -------- 8321 has been stored as 1st user code in Group 1 with duresscode function# 1 0 11 3 32 --------33221 has been stored as 3rd user code in Group 1 withduress code function# 2 0 3 1 2 6 8 -------- 6854 has been stored as 1st user code in Group 2# 5 1 4 2 5 4 3 -------- 54321 has been stored as 2nduser code in Group 2#2 2 1 4 ---------------------------- Output 1 is set to Momentary Mode with 1 second duration#0 1 5 --------------------------------- Output 2 is set to Toggle Mode#1 7 ------------------------- Keypad is set to lock for 15 minutes after 10 successive falsecodes# 21 0* -----------------------------------##8 3 2 1 # ----------------------------------- Output 1 activates for 1 second1 12 1 # ------------------------------- Output 1 activates for 1 second3 3 3 2 2 # ------------------------------- Output 1 activates for 1 second1#6 8 5 4 # ----------------------------------- Output 2 Starts or Stops (toggle mode)5 4 3 2 Output 2 Starts or Stops (toggle mode)1#-------------------- 1 1 1 2 --------11223 has been stored as 2nd user code in Group 1 withduress code function# 2 0 2 3#------------------------------- 0 3 2 1 # --- Duress output activates (switches to ground) & Output 1 activates for 1 second3 1 2 2 # ---D uress output activates 9 switches to ground) & Output 1 activates for 1 second 3 5 3 2 2 # ---D uress output activates 9 switches to ground) & Output 1 activates for 1 second 18 3 #8 3 2 1 -------------------- ------------- Output 1 starts Output 1 StartsOutput 1 Stops1 1Output 1 Starts1 12 2---------Output 1 Stops3###3 2 8 9 # ------------------------------- Output 1 activates for 1 second 1 3 2 8 9# ------------------------------- Output 2 Starts or Stops (toggle mode)23 2 8 9 --------- Lockout is reset and keypad resumes normal operation#* *3 2 8 9 --------- Keypad is now in Programming Mode#1 0 5 #2 3 #*∙∙∙∙∙∙∙∙∙∙∙∙(B) DOOR SENSa) Door Auto Relock – the system willimmediately re-lock the door after a validaccess has been gained to prevent “tailgate”entry.b) Door Forced-open alarm – The keypad willgenerate an instant alarm if the door isforced to open. Enable the function withProgram Option 801c) Door Propped Open Alarm – The keypadwill generate an alarm if the door is leftopen longer than the pre-set time. Enablethe function with Program Option 9 withduration of 1 to 999 seconds.With the help of a normally closed door d) Inter-lock Control – When the door is open Position sensor (usually a magnetic door the inter-lock output of the keypad will give switch) o n the door to set up the following a (-) command to de-activate the other functions. keypad in an inter-lock system.∙∙∙∙。
可编程键盘使用方法

可编程键盘使用方法一、可编程键盘简介可编程键盘是一种能够通过软件自定义按键功能的键盘。
它通常具有额外的按键或功能键,可以根据用户的喜好和需求进行编程,以执行特定的任务或操作。
可编程键盘通常用于游戏、办公、绘图等领域,可以提高用户的效率和操作速度。
二、可编程键盘的优势1. 自定义按键功能:可编程键盘允许用户自定义每个按键的功能,包括按键组合、宏命令、多媒体控制等。
用户可以根据自己的使用习惯和需求,将常用功能分配到不同的按键上,从而提高操作效率和速度。
2. 增强游戏体验:可编程键盘在游戏中具有很大的优势。
用户可以将常用的技能或操作分配到不同的按键上,从而减少按键时间和提高操作速度。
此外,可编程键盘还支持宏命令功能,用户可以将一系列复杂的按键操作录制成宏命令,并在需要时一键执行,从而提高操作效率和游戏性能。
3. 提高办公效率:可编程键盘在办公中也有很多用处。
用户可以将常用的办公软件或功能分配到不同的按键上,从而减少鼠标操作和提高工作效率。
此外,可编程键盘还支持多媒体控制功能,用户可以一键控制音乐播放、音量调节等操作,从而提高办公效率和舒适度。
4. 满足绘图需求:可编程键盘在绘图中也发挥着重要作用。
用户可以将常用的绘图软件功能分配到不同的按键上,从而减少鼠标操作和提高绘图效率。
此外,可编程键盘还支持压感功能,用户可以根据笔压的轻重控制线条的粗细和颜色,从而提高绘图精度和表现力。
三、可编程键盘的使用方法1. 连接键盘:将可编程键盘连接到电脑,通常通过USB接口连接。
2. 安装驱动程序:在电脑上安装可编程键盘的驱动程序,以便键盘能够正常工作。
3. 配置软件:打开可编程键盘的配置软件,该软件通常随键盘附带,也可以从键盘制造商的网站下载。
4. 自定义按键功能:在配置软件中,用户可以自定义每个按键的功能。
常见的自定义方式包括:按键组合:将多个按键组合在一起执行某个操作。
宏命令:将一系列复杂的按键操作录制成宏命令,并在需要时一键执行。
可编程键盘使用方法

可编程键盘使用方法当使用可编程键盘时,有许多方法和技巧可以帮助您更高效地利用它的功能。
以下是50条关于可编程键盘使用方法并展开详细描述:1. 定义自定义快捷键:使用可编程键盘的软件,您可以定义自己的快捷键,例如触发特定应用程序或执行特定功能。
2. 创建宏:通过可编程键盘软件,您可以创建宏,以便一键执行复杂的操作序列,例如输入一段代码、执行一系列操作或者发送一封预定义的电子邮件。
3. 分层编程:一些可编程键盘支持分层编程,即在不同的层次设置不同的功能,可以根据需要进行切换,从而提高按键的多功能性。
4. 键位调整:通过可编程键盘软件,您可以重新映射键位,使得您习惯的键位布局可以在不同键盘上使用。
5. 多设备切换:如果您使用多台电脑或设备,一些可编程键盘可以支持快速切换不同设备,方便您在不同工作环境间进行移动。
6. 文本扩展:通过可编程键盘软件,您可以定义文本缩写和扩展,方便您快速输入常用的短语和段落。
7. 游戏模式:一些可编程键盘有专门的游戏模式,可以通过一键切换来禁用Windows 键或其他会干扰游戏操作的按键。
8. 设置多重触发:一些高级的可编程键盘支持多重触发,即在一个键上设置多种功能,通过单击、双击、长按或其他方式进行不同的响应。
9. 配置LED灯光效果:一些可编程键盘配备了LED灯,可以通过软件对其进行配置,达到个性化的灯光效果。
10. 自定义屏幕显示:一些可编程键盘上配备了OLED屏幕,您可以自定义显示内容,实时显示信息,如CPU温度、系统负载等。
11. 设备管理:在使用多个可编程键盘时,一些软件可以帮助您管理多个设备的配置和设置。
12. 定义特定应用程序的功能:针对特定的软件应用程序,您可以通过可编程键盘软件为其定义特定的快捷功能,提高工作效率。
13. 脚本编程:通过可编程键盘软件支持脚本编程,您可以更加强大地定制键盘功能,并且支持更多复杂的操作。
14. 切换不同的配置文件:对于不同的工作场景,您可以在可编程键盘软件中创建不同的配置文件,并进行快速切换,以应对不同的工作需求。
【精品】唯拓可编程键盘KB102技术参数说明

唯拓可编程键盘KB102技术参数说明:一、102个标准按键,包括20个可编程按键,使用Fn键进行标准键与可编程键的切换。
二、采用高强度薄膜,使用寿命达到1000万次。
三、特别设计20个为可编程按键,并采用EPROM保存数据,无需电池,数据保存时间不少于100年。
四、无需任何驱动,编程完毕后适用于任何操作系统。
五、提供“True status lock”功能,能在可编程按键上编辑任一个标准键盘按键,包括:Num lock、Caps lock、Shift、Ctrl、Alt、Esc、F1、A、B等。
六、编程按键可以任意设定各种功能组合键,每个键最多可编程24个字符。
七、提供延时码功能。
设备使用:一、将KB102可编程键盘的键盘线穿过POS主机的前方键盘口,与主机后面的PS/2接口对接。
二、将软件盘中的键盘编程程序拷贝到硬盘中,这样运行起来会快一些。
如果没有驱动程序,可以到唯拓科技()网站下栽。
三、现在就可以开始使用KB102可编程键盘了。
开始编写按键:一、软件编程界面与功能:使用安装程序,运行“开始→程序→唯拓科技可编程键盘KB102→唯拓科技KB102”进入可编程键盘编程图形界面(如图):菜单说明:文件:打开、保存键盘可编程设置文件(*.dat)打开文件:打开可编程设置文件(*.dat)保存文件:保存可编程设置文件(*.dat)按键测试:进入按键测试状态,在此状态下,如果你的键盘按键正常,每按一个键盘按键,在软件界面中间的按键模拟区相应的按键会显示红色,表示正常。
如果没显示红色,那键盘有问题。
停止测试:停止键盘测试,进入到键盘编程模式。
在键盘编程模式下,在按键模拟区上用鼠标右键点击相应的可编程按键,在弹出菜单有四项子菜单,选择其中一种模式,弹出相应模式的编程设定界面。
按键编程:如果你已对每个按键编程设置完成,或是通过文件菜单打开了可编程设置文件,那么你可以点击菜单“按键编程”,稍等一会,windows系统会对你的键盘进行编写设置。
POS收银键盘图_NEW

划价单
抵用券
营业员
套餐价
赠送 /预 付卡
在收银界面 在收银界面 在收银界面
使用
使用
使用
在收银界 收银界面/销
在收银界面 在收银界面
使用
使用
在收银界面 使用
在收银界面 销货付款界 在收银界面
使用
面使用 使用
面使用
货付款界面 使用
Ctrl_U
批量 改量
收银界面
305
201
积分 换 处方
购
登记
收银界面 收银界面
F9
保存
F11
F12
新增行/ 删除行 / 挂单 取回
单据界面/ 单据界面/收 收银界面 银界面
Ctrl_T Ctrl_H Ctrl_X Ctrl_S Ctrl_L Ctrl_B Ctrl_O Ctrl_K Ctrl_Y Ctrl_F Ctrl_I Ctrl_M
退货
会员
小票 查询
审核
锁屏
手工 补单
赠送
941
远程 审方
收银界面
931
补货
收银界面
F6
重复 购买
付款界面
304
积分 查询
收银界面
802
开钱箱
收银界面
ESC
F1
F2
F3
F4
F5
F6
F7
F8
返回/退 出
加总
从收银录入 所有界面 界面进入付
款界面
定位 取消 单品 数量 单品 打折
单品 改价
针对最后行
针对最后行 针对最后行
(当前行) 针对任意行 (当前行) (当前行)
撤单
在收银界面 使用
Wintec WIN6000 电子收款机 用户说明书
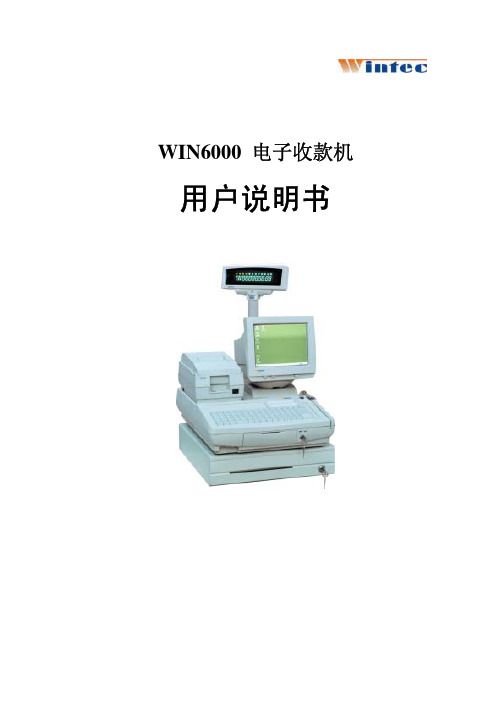
WIN6000 电子收款机用户说明书重要提示首先感谢您选用我们的产品。
在开箱使用该产品前,请仔细阅读本说明书,否则有可能引起设备的人为故障。
设备加电前,请检查电源是否符合本产品的电压要求,电源接地是否良好,只有在确认外部电源正常时,方可对本设备加电开机。
本说明书是WIN6000标准配置的说明,如果您选用了可选配置,部分内容可能未能包括在本说明书,请到公司的网站()阅读。
目录第一章、安装指南 (1)1. 应用范围及特点 (1)2. POS机的组成 (2)3.使用环境 (4)4.开箱检查 (4)5.系统安装 (4)第二章、系统测试 (5)1.系统设置 (5)2.系统自检 (5)第三章、键盘编程参考 (5)1、运行KB80.exe (5)2、键盘设置软件操作 (6)3、磁卡功能设置 (7)4、出厂时键盘键位设定 (8)第四章软件系统安装 (9)1、安装DOS系统驱动 (9)2、Windows ME/2000/98/95/NT 系统安装 (9)第四章: 输入输出系统(BIOS)的使用 (10)基本输入/输出系统(BIOS)功能键 (10)基本输入/输出系统(BIOS)的使用 (11)第五章: 故障分析 (11)硬件问题 (11)第一章、安装指南1. 应用范围及特点WIN6000系列POS收款机采用了开放式的系统,灵活的组件结构和标准的外设接口使该产品更适合于大中型商业企业、酒店、宾馆等。
各主要部件均采用标准化产品,因而产品质量可靠,便于系统升级,部件维护方便简单。
合理的性价比以及安全的结构设计使该机与同类产品相比具有更强的竞争力。
★WIN6000系列POS机主机配置:! 专用POS主板! 主频在500M以上的CPU! 64M内存(可扩至512M)! 100M外频总线控制! 10/100M以太网卡! 20G以上硬盘! 80键可编程POS键盘(可选2/3轨MSR)! 5位置键盘控制锁! 丰富的外部接口(I/O):# 六个RS232串行口(2个带+5V/+12V))和一个并行口# 一个钱箱口# 一个网线口,10/100(BASE-T)# 一个PS/2键盘口和一个PS/2鼠标口# 一个VGA口# 四个USB接口# 音频输入输出口可选存储设备:$ 一个1.44M 软驱$ CD-ROM$ 支持USB FLASH DISK$ 支持DOM外设$ 9”VGA操作员显示器$ VFD、LCD客户显示器$ 9针打印机或行式热敏打印机$ 钢制钱箱1可支持的操作系统:---DOS--WINDOWS XP/2000/ME/98/95/NT2. POS机的组成POS机由主机,POS键盘(可选磁卡阅读器),打印机,操作员显示器,顾客显示器等组成。
- 1、下载文档前请自行甄别文档内容的完整性,平台不提供额外的编辑、内容补充、找答案等附加服务。
- 2、"仅部分预览"的文档,不可在线预览部分如存在完整性等问题,可反馈申请退款(可完整预览的文档不适用该条件!)。
- 3、如文档侵犯您的权益,请联系客服反馈,我们会尽快为您处理(人工客服工作时间:9:00-18:30)。
POS 可编程键盘用户手册中科英泰科技有限公司目录1、目录 -------------------------------------------------------- 12、特性 -------------------------------------------------------- 13、DOS编程 ---------------------------------------------------- 2命令功能键说明 ---------------------------------------------- 2 ASCⅡ码编程模式 --------------------------------------------- 2 扫描码编辑模式 ---------------------------------------------- 2 特殊功能键编程---------------------------------------------- 3 键盘参数配置------------------------------------------------ 34、WINDOWS 编程 ------------------------------------------------ 4程序复制---------------------------------------------------- 5 驱动程序安装------------------------------------------------ 10 键盘编程---------------------------------------------------- 145、实例说明---------------------------------------------------- 23DOS 模式 ---------------------------------------------------- 23 WINDOWS 模式 ------------------------------------------------ 246、如何将定义好的键盘编码复制到另一个键盘---------------------- 26从已编程好的POS键盘中直接读出------------------------------ 26 DOS 模式 ------------------------------------------------ 26 WINDOWS 模式 -------------------------------------------- 26 从已保存好的定义文件中读出---------------------------------- 27 DOS 模式 ------------------------------------------------ 27 WINDOWS 模式 -------------------------------------------- 277、注意事项 ---------------------------------------------------- 27特性编程所有的键,包括副盘区,Shift,Ctrl,Alt,Esc,F1,L-Win,Power等。
不需电池,数据保存不少于100年。
不需专用编程工具。
每个键最多可编程255个字符。
提供键盘嵌入功能,在接标准键盘与不接标准键盘的情况下都能正常作用。
提供多层键功能。
提供延时码功能,最多能延时255秒。
提供“True status lock”功能,能将可编程键盘的任一键编程等效于标准键盘的Num Lock,Caps Lock,Scroll Lock键。
电气特性工作电压: +5V/DC±10%工作电流: <100mA电气接口: AT, PS/2机械特性键帽总行程: 4-0.4mm键帽预行程: 2±0.6mm键帽最大压力: 60±20cN机械接口: PS/2其他特性储存温度: -40゜C 到+60゜C工作温度:0゜C 到+50゜C工作湿度: 20% 到 90%1. DOS编 程1.1 命令功能键说明:ALT+L:从一个磁盘交付读取键的定义;ALT+S: 将键的定义写到一个磁盘文件;ALT+G:更改键盘的参数;ALT+X:退出;ALT+W:将键的定义写到一个磁盘主体中;ALT+A:进入ASCⅡ编辑模具;ALT+N:进入扫描码编辑模式;ALT+P:进入特殊键编辑模式;ALT+R:从键盘中读出键的定义信息;ALT+W:将键的定义信息写到键盘中。
1.2 ASCⅡ码编程模式1.2.1运行DOS编程软件,计算机屏幕将出现POS键盘编程工具的图型界面。
1.2.2用方向键将光标移动到需编辑的键位码上,该键位码出现闪动,表示该键为当前编辑键,同时,信息框将显示该键的内容。
1.2.3按ALT+A进入ASCⅡ码编辑模式。
1.2.4键入所需的字符串,按ALT+A退出ASCⅡ编辑模式,每个键最多可编程255个字符,所有码的字符数总和不超过3457个。
1.2.5按ALT+W将编程的数据写到POS键盘的存储器中。
1.2.6按ALT+X退出。
1.3 扫描码编辑模式:POS可编码键盘支持特殊控制与功能键,如:Shift,Ctrl,Alt,F1至F12,方向键等,定义这些键需用扫描码编辑模式。
1.3.1启动编程软件。
1.3.2将光标移动到需编程的键位编码上,按ALT+N进入扫描码编辑模式,如图3所示。
在扫描码模式下每个字母、数字、字符都带有( )号。
定义控制键与功能键时,先按一下Esc键,接着按下该控制键或功能键。
例如,若要定义Insert键需按一下Esc键,再按一下Insert;若要定义Esc键需按两下Esc键。
1.3.3如果定义了ALT,Ctrl或Shift键,则必须定义其断开码,例如:定义一个键为Alt D的步骤如下:1) 按下 ALT+N 键进入扫描码编辑模式;2) 按顺序按下 Esc键、Alt键 和D键;3) 按顺序按下 Esc 键、F键、Esc键、Alt键(Alt的断开码);4) 编辑框将显示“ALT (D) OFO ALT”。
1.4 特殊功能键编程:1.4.1定义一个特殊的延时符:在ASCⅡ编辑模式(或扫描码编辑模式)中,按一下ALT+D将产生一个1S的延时符 π(D1S)。
1.4.2多层键的定义:在ASCⅡ编辑模式(或扫描码编辑模式)中输完一层数据后,按一下ALT+E将产生一个层的分隔符T(SE/),接着定义下一层的数据。
在一个键中可最多定义15层,并且总字符不得超过255个。
要实现在不同层之间的切换,需要定义一个层切换键。
选一个未定义的键作为层切换键,按ALT+P进入特殊编辑模式。
按一下ALT+M将定义该键为第1层切换键,每按一下ALT+M将增加一层,按一下退格键将减一层。
一个键最高可定义为第15层的切换层。
注意:层切换键层值可以相加,如同时按下第1层和第2层的切换键就相等效于按下一个第3层的切换键。
1.4.3定义Caps Lock、Num Lock、Scroll Lock键:按ALT+P进入特殊编辑模式,如图4所示。
按ALT+C产生Caps Lock键,按ALT+U产生Num Lock键,按ALT+O产生Scroll Lock键。
1.5 键盘参数配置1.5.1键盘参数能控制的几个状态:是否有按键声Beep enable:YES有按键声,NO没有按键声;是否发断开码Send break_code:YES发断开码,NO不发断开码;未定义键是否发按键声Beep(nop key):YES未定义键发按键声(Beep enable为YES 有效),NO未定义键不发按键声;磁卡是否发控制码Send format_code:YES发控制码,NO不发控制码;发完磁卡信息后是否发回车符Send[Enter]: YES发回车符,NO不发回车符;发三轨起始符Track3 SS[ ;+ ]: ;起始符为“;”, + 起始符为“+”;第一轨是否使能Track1 enable:YES第一轨开启,NO第一轨关闭;第二轨是否使能Track2 enable:YES第二轨开启,NO第二轨关闭;第三轨是否使能Track3 enable:YES第三轨开启,NO第三轨关闭。
1.5.2按ALT+G进入参数配置框。
按上下方向键移动到要改变的参数上,按Space键可更改参数,按Esc键退出参数配置状态。
2. WINDOWS编 程2.1程序复制首先从CD-R(光盘)中运行安装程序Setup.exe,出现如下界面:这时,按下 [Next] 进入下一步,如下:这时,选择你所要的安装目录,并记住,以备稍后安装驱动程序时使用!按下[Next]进入下一步:这时,选择好要安装在何菜单下后,按下[Next]进入下一步:按下[Next]继续进入下一步:现在,正在复制文件到你的系统中。
稍候,出现如下界面:这时,程序已成功复制到你的主机上,按下[Finish]完成程序复制。
2.2驱动程序安装注意:WINDOWS 9X 系统不需安装此驱动程序。
打开“控制面板”找到“设备管理器”打开如下:这时,选择好“键盘”下原安装好的键盘驱动程序,然后打开它的“属性”,如下:这时,按下[更新驱动程序]进入下一步:按下[下一步]:这时,选择“显示已知设备驱动程序的列表,从中选择特定驱动程序”,然后按下[下一步]:这时,按下[从磁盘安装],如下:这时,请输入你刚才所安装的目录,或选择[浏览]找到你刚才所选择的安装目录下的“kbfilter.inf”,然后出现如下界面:这时,按下[确定]继续:这时,不要管系统的提示,按下[是]继续:按下[下一步]:这时,请继续按下[仍然继续]开始安装驱动程序,直到出现如下界面:这时,表明驱动程序安装成功,按下[完成],然后重新启动你的计算机,便可以开始使用可编程键盘了!2.3键盘编程2.3.1启动WinPKB.exe软件,你将看到编程图形主界面,这时你将可以按你所要的选项分别操作.其主要选项如下:[New]:此选项是重新选择键盘类型,如果你要更换键盘的类型,请按下该键;[Open]:如果你已保存有键盘定义的数据,你可以从这里将它们装入到本程序中;[Save]:当你定义完程序界面上各按键的数据后,可按此键进行保存;[Save As]:选择不相同的文件名保存键盘定义的数据;[Read]:按下该键,将从你的可编程键上读取数据;[Update]:按下该键,将把你程序界面上的数据写入你的可编程键盘中;2.3.2 在编程图形主界面中,你将看到程序界面上的键位排列与你使用的POS键盘一一对应,当我们把鼠标移动到相应的按键上,将在状态栏上显示按键上已定义的数据,如果尚未定义,将无显示,这时,我们可以在相应的键位码上单击鼠标左键,将出现如图1的界面。