Autodesk vault 软件使用说明
Autodesk Vault 备份与恢复指南说明书
Backup and Restorewith 3rd Party ApplicationsContentsIntroduction (1)Backup Software Capabilities (1)Backing up a Single Autodesk® Vault Site (1)Backup Process (1)Restore Process (1)Backing up a Full Replication Publisher (2)Back Up the Service Master Key: (2)Backup Process for the Publisher (3)Backup Process for the Subscriber (3)Restore Process for the Publisher (4)Restore Process for the Subscriber (4)IntroductionThis guide demonstrates how to use a 3rd party solution to backup and restore Autodesk® Vault.Backup Software CapabilitiesThe software used for backup should have the following capabilities:• A SQL server backup agent for backing up and restoring the databases.• Ability to restore the SQL Master and MSDB databases.• Ability to verify the backed up database or file.• Ability to work within a replicated SQL server environment.• Ability to send e-mail alerts to administrators in the event of a backup failure. (This is a suggestion, not a requirement).• Ability to back up and restore the databases and file store with security settings.Backing up a Single Autodesk Vault SiteBackup ProcessFor a successful backup, the following must be backed up:1. All vault databases: KnowledgeVaultMaster, vaults and libraries.2. All vault file stores. The file store folder is found at:C:\ProgramData\Autodesk\VaultServer\Filestore on Windows 7, Windows 8,Windows 2008 Server and Windows 2012 Server.Note: Each vault could have a unique file store location. You can find the location by selecting each vault in the Vault server Con-sole.Configure your backup software to back up the databases first then backup the file store immediately afterwards. This sequence will help keep the database information consistent with the files being backed up.Optional: You may want to backup the Connectivity.ADMSConsole.exe.config and web.config files. These files store unique settings that may not be stored in the vault databases. The files can be found in the following locations:Connectivity.ADMSConsole.exe.config - <install path>\ADMS [Edition] 20XXWeb.config - <install path>\ ADMS [Edition] 20XX\Server\Web\ServicesRestore ProcessA restore should be perform on a computer with the same name as the original computer.For a successful restore, perform the following:1. Install the Autodesk Vault server software.2. Install of the hot fixes and/or services packs that were installed on the original server.3. Restore the databases.4. Restore the file stores in there original file store location.Note: The KnowledgeVaultMaster database must be restored whenever you perform a restore of a vault. It is not recommended to restore a vault database without restoring the KnowledgeVaultMaster that was backed up with it on the same date.Post Recover Steps:1. Once all databases and the file stores have been restored, start the ADMS Console to verify all databases can be seen. If anydatabases need to be migrated, a migration dialog will appear and you should migrate the database.2. With the ADMS Console closed, open a command prompt window.3. Navigate to <installdir>\Autodesk\ADMS [Edition] 20XX\ADMS Console directory.4. At the prompt type: Connectivity.ADMSConsole.exe -VUusername -VPpassword -OvalidatefilestoreThis command runs a validation on the file store and databases This will validate all of the files in the database against the files in the file store. If any files are missing, a dialog will appear with a list of missing files. This list will also be written to the ADMS server log. To see if the command is still running, open the Windows Task Manager and look for Connectivity.ADMSConsole.exe in the Processes tab.5. If any files are missing, you can look at previous recovery points and restore the necessary files.Note: If the single site is a remote file replication site only, you can use the same back up instructions above skipping the steps that involve backing up and restoring the databases. When you install the server software, install using the remote SQL option and point to the existing SQL server.Backing up a Full Replication PublisherIn a full replication configuration it is important to back up the publisher’s vault databases as well as two of the Microsoft® SQL system databases. This section explains everything needed to perform a proper backup on the Publisher server.Replication Configuration:It is recommended that you use the following configuration to make it easier to restore a replicated environment.1. An Active Directory user account should be used for all replication credentials.2. All servers participating in the replication configuration should be in the same domain or in trusted domains.3. Run the Microsoft SQL Service under a domain user account.4. Create a script to back up the SQL Service Master Key.Back Up the Service Master Key:The service master key is the root of the encryption hierarchy in SQL Server. It should be backed up and stored in a secure, off-site location. Creating this backup should be one of the first administrative actions performed on the server.BACKUP SERVICE MASTER KEY (Transact-SQL)• Exports the service master key.Transact-SQL Syntax Conventions• BACKUP SERVICE MASTER KEY TO FILE = path_to_file ENCRYPTION BY PASSWORD = passwordArguments• FILE = path_to_fileSpecifies the complete path, including file name, to the file to which the service master key will be exported. This may be a local path or a UNC path to a network location• PASSWORD = passwordIs the password used to encrypt the service master key in the backup file. This password is subject to complexity checks. For more information, see Password Policy.Remarks• The service master key should be backed up and stored in a secure, off-site location. Creating this backup should be one of the first administrative actions performed on the server.Permissions• Requires CONTROL SERVER permission on the server.ExamplesIn the following example, the service master key is backed up to a file.• BACKUP SERVICE MASTER KEY TO FILE = ‘c:\temp_backups\keys\service_master_key’ ENCRYPTION BY PASSWORD = ‘3dH85Hhk003GHk2597gheij4’;The service master key should be backed up on a regular basis. You will need to create a Windows Task scheduled on a regular basis to accomplish this.Backup Process for the PublisherFor a successful back up, the following will need to be backed up:1. All vault databases. Knowledgevaultmaster, vaults and libraries.2. The distribution database named AutodeskReplication.3. The SQL Master and MSDB databases.4. All vault file stores. The file store folder is found at:C:\ProgramData\Autodesk\VaultServer\FilestoreNote: Each vault could have a unique file store location. You can find the location by selecting each vault in the Vault server Con-sole.5. The SQL Master Key.6. The folder where the SQL replication snap shots are located.Optional: You may want to backup the Connectivity.ADMSConsole.exe.config and web.config files. These files store unique settings that may not be stored in the vault databases. The files can be found in the following locations:Connectivity.ADMSConsole.exe.config - <install path>\ADMS [Edition] 20XX\ADMS ConsoleWeb.config - <install path>\ ADMS [Edition] 20XX\Server\Web\ServicesBackup Process for the SubscriberFor a successful back up, the following will need to be backed up:1. All vault databases. Knowledgevaultmaster, vaults and libraries.2. The SQL Master and MSDB databases.3. All vault file stores. The file store folder is found at C:\ProgramData\Autodesk\VaultServer\Filestore by default.4. The SQL Master Key.Optional: You may want to backup the Connectivity.ADMSConsole.exe.config and web.config files. These files store unique settings that may not be stored in the vault databases. The files can be found in the following locations:Connectivity.ADMSConsole.exe.config - <install path>\ADMS [Edition] 20XX\ADMS ConsoleWeb.config - <install path>\ ADMS [Edition] 20XX\Server\Web\ServicesNote: Each site should backup there file store folders regularly. This is very important if you are not replicating the entire file store to a single backup location.applied to the original computer.1. Restore the SQL MSDB and Master databases.2. Restore the AutodeskReplication, KnowledgeVaultMaster and each vault and library database.3. Restore the file stores in there original file store location.Note: The KnowledgeVaultMaster database must be restored whenever you perform a restore of a vault. It is not recommended to restore a vault database without restoring the KnowledgeVaultMaster that was backed up with it on the same date.4. Create the shared folder for the SQL replication snapshots. Apply all user security on the folder and share it.5. Restore the files and sub-folders for the SQL replication snapshots folder.Post Recover Steps:1. Once all databases and the file stores have been restored, start the ADMS Console to verify all databases can be seen. If anydatabases need to be migrated, a migration dialog will appear and you should migrate the database.2. With the ADMS Console closed, open a command prompt window.3. Navigate to <installdir>\Autodesk\ADMS 20XX\ADMS Console directory.4. At the prompt type: Connectivity.ADMSConsole.exe -VUusername -VPpassword -OvalidatefilestoreThis command runs a validation on the file store and databases. This will validate all of the files recorded in the database against the files in the file store. If any files are missing, a dialog will appear with a list of missing files. This list will also be written to in the server’s console log. To see if the command is still running, open the Windows Task Manager and look for Connectivity.ADMS-Console.exe in the Processes tab.5. If any files are missing, you can look at previous backup and restore the necessary files.applied to the original computer.1. Restore the SQL MSDB and Master databases.2. Restore the KnowledgeVaultMaster and each vault and library database.3. Restore the file stores in there original file store location.Note: The KnowledgeVaultMaster database must be restored whenever you perform a restore of a vault. It is not recommended to restore a vault database without restoring the KnowledgeVaultMaster that was backed up with it on the same date.Post Recover Steps:1. Once all databases and the file stores have been restored, start the ADMS Console to verify all databases can be seen. If anydatabases need to be migrated, a migration dialog will appear and you should migrate the database.2. With the ADMS Console closed, open a command prompt window.3. Navigate to <installdir>\Autodesk\ADMS 20XX\ADMS Console directory.4. At the prompt type: Connectivity.ADMSConsole.exe -VUusername -VPpassword -OvalidatefilestoreThis command runs a validation on the file store and databases. This will validate all of the files recorded in the database against the files in the file store. If any files are missing, a dialog will appear with a list of missing files. This list will also be written to in the server’s console log. To see if the command is still running, open the Windows Task Manager and look for Connectivity.ADMS-Console.exe in the Processes tab.5. If any files are missing, you can look at previous backup and restore the necessary files.Important Things to Know:It is very important to restore within the default 14 day retention period. If you are restoring a subscriber, the backup used for the restore process must not be older than 14 days. If you do not have a backup within the 14 day retention period, you must delete the subscriber’s workgroup in the ADMS Console on the publisher and recreate it. If you are restoring the publisher, the backup used for the restore process must not be older than 14 days from the last synchronization date of all subscribers.Autodesk and Autodesk Vault are registered trademarks or trademarks of Autodesk, Inc., and/or its subsidiaries and/or affiliates in the USA and/or other countries. Microsoft is either trademarks or registered trademarks of Microsoft Corporation in the United States and/or other countries. All other trademarks are the property of their respective owners. All other brand names, product names, or trademarks belong to their respective holders. Autodesk reserves the right to alter product and services offerings, and specifications and pricing at any time without notice, and is not responsible for typographical or graphical errors that may appear in this document. © 2014 Autodesk, Inc. All rights reserved.。
Autodesk Vault API学习与应用指南说明书

HOW TO INSTALL? VDF binaries are provided as part of the SDK installation!
Creating and Manipulating Vault Objects With PowerShell
WHERE TO FIND THE INSTALLED SDK BINARIES
Note: for older SDK installations, you may find the files installed to your Program Files (x86) directory.
Installing Visual Studio
o Note, for older year versions, the licensing binary is named as clmloader.dll
For PowerShell, we can copy this binary to C:\Windows\System32\WindowsPowerShell\v1.0, which is where the PowerShell executable lives.
Getting Started
1. Creating a new PowerShell project in Visual Studio 2. Loading the Vault Web Services Assembly 3. Connecting to a Vault with PowerShell 4. Calling Vault Web Services
FRAMEWORK (HANDY HELPERS)
Autodesk Vault SQL Cluster 配置指南说明书
Autodesk®VaultSQL Cluster Configuration for Autodesk Vault ServerContents Introduction (3)Purpose (3)Example (3)Configuring SQL Failover Cluster Instances (4)Add a SQL Server Node (12)Installing Autodesk Vault (16)Verify Failover Failover (17)IntroductionThis document is a guideline on how to configure Microsoft SQL Server as a cluster to work with Autodesk Vault server. This document does not cover best practices for SQL Server or the cluster configuration. Autodesk recommends consulting with Microsoft’s documentation for configuration and best practice details.PurposeAutodesk Vault functions in a SQL failover cluster configuration in which it is unaware of the cluster and does not requirereconfiguration of Vault if and when a failover occurs. This is known as the AlwaysOn Failover Cluster Instances (FCI). Moreinformation about this configuration can be found at AlwaysOn Failover Cluster Instances . Before configuring this feature, Windows Server must be configured for Windows Server Failover Clustering (WSFC). This document does not cover this configuration; please refer to Microsoft’s documentation.ExampleThis document illustrates the following configuration.Domain Controller SQL Server(SQL1)SQLVault Server dk SQL Server(SQL2)SQLCluster StorageConfiguring SQL Failover Cluster InstancesOnce the Windows is configured as a Windows failover cluster for SQL, it is time to install the Microsoft SQL Server software.1. Insert the SQL Server installation media in the first SQL Server (SQL1), and from the root folder, double-click Setup.exe.2. The Installation Wizard starts the SQL Server Installation Center. To create a new cluster installation of SQL Server, click NewSQL Server failover cluster installation on the installation page.3. The System Configuration Checker runs a discovery operation on your computer. To continue, Click OK.4. To continue, click Next.5. On the Setup Support Files page, click Install to install the Setup support files.6. The System Configuration Checker verifies the system state of your computer before Setup continues. After the check iscomplete, click Next to continue.7. On the Product key page, indicate whether you are installing a free edition of SQL Server, or whether you have a PID key for aproduction version of the product.8. On the License Terms page, read the license agreement, and then select the checkbox to accept the license terms andconditions. Click Next to continue.9. On the Feature Selection page, select the following components for the installation. Click Next to continue.10. On the Instance Configuration page, type a name in the SQL Server Network Name field. This name is used to identify theSQL Server failover cluster. Select the Named Instance and type AutodeskVault in the Named Instance field. Click Next.11. Use the Cluster Resource Group page to specify the cluster resource group name where SQL Server virtual server resourceswill be located. Click Next to continue.12. On the Cluster Disk Selection page, select the shared cluster disk resource for your SQL Server failover cluster. The clusterdisk is where the SQL Server data will be located. More than one disk can be specified.Click Next to continue.13. On the Cluster Network Configuration page, specify the network resources for your failover cluster instance:Network Settings — Specify the IP type and IP address for your failover cluster instance.Click Next to continue.14. On the Server Configuration — Service Accounts page, specify login accounts for SQL Server services. If more informationon configuring service accounts - see Server Configuration - Service Accounts. Click Next to continue.15. On the Database Engine Configuration page on the Server Configuration tab, select Mixed Mode and type the password thatwill be used for the system administrator (SA) account.16. On the Data Directories tab, specify the location of the database files. Click Next to continue.17. Continue through the remaining pages to complete the installation.Add a SQL Server Node1. Insert the SQL Server installation media in the first SQL Server (SQL1), and from the root folder, double-click Setup.exe.2. On the Cluster Node Configuration page, select the Cluster Network to join. Click Next to continue.3. On the Cluster Network Configuration page, specify the network resources for your failover cluster instance:Network Settings — Specify the IP type and IP address for your failover cluster instance.Click Next to continue.4. On the Server Configuration — Service Accounts page, specify login accounts for SQL Server services. If more informationon configuring service accounts - see Server Configuration - Service Accounts. Click Next to continue.5. Continue to click Next to complete the installation.Installing Autodesk Vault1. On a separate server on the network, insert the Vault Server and run the Setup.exe.2. On the Server Configuration page, configure the installation for a remote SQL server and enter the SQL Server Network Nameof the Cluster.3. When using a remote SQL instance, a shared network folder is required as a transition area between the SQL instance andthe Autodesk Data Management Server. The shared network folder can be located on the same computer as the SQLinstance or a different computer and must be accessible by both the data management server and SQL. The spacerequirement for the shared folder is equal to the total of all database files. Choose a location with sufficient space andperformance. Enter the UNC path to the shared network folder or click Browse to locate the shared folder on the network.Note: Both the user account under which the Autodesk Vault Server is running as well as the user account under which the SQL instance is operating need read/write access to the shared network folder.4. Complete the installation and start the Vault Server console to create a vault.Verify Failover1. Launch the Failover Cluster Manager and select the Roles node.2. Right-click on the Roles node and click Move -> Select Node…3. Select the SQL2 server or second node and wait for the failover to complete.4. Launch the Vault Server console and verify that Vault is still functioning correctly.Autodesk [and other products] are registered trademarks or trademarks of Autodesk, Inc., and/or its subsidiaries and/or affiliates in the USA and/or other countries. All other brand names, product names, or trademarks belong to their respective holders. Autodesk reserves the right to alter product and services offerings, and specifications and pricing at any time without notice, and is not responsible for typographical or graphical errors that may appear in this document. © 2016 Autodesk, Inc. All rights reserved.。
Autodesk Vault Data Standard教程简介与Read Me说明书
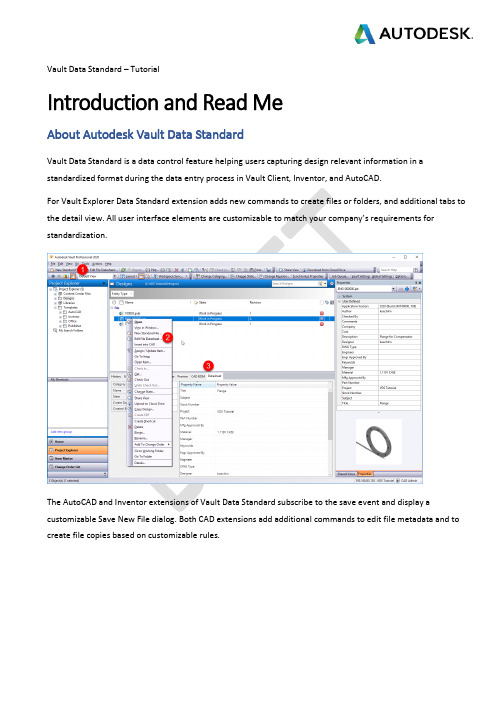
Vault Data Standard – TutorialIntroduction and Read MeAbout Autodesk Vault Data StandardVault Data Standard is a data control feature helping users capturing design relevant information in a standardized format during the data entry process in Vault Client, Inventor, and AutoCAD.For Vault Explorer Data Standard extension adds new commands to create files or folders, and additional tabs to the detail view. All user interface elements are customiz able to match your company’s requirements for standardization.The AutoCAD and Inventor extensions of Vault Data Standard subscribe to the save event and display a customizable Save New File dialog. Both CAD extensions add additional commands to edit file metadata and to create file copies based on customizable rules.We use the acronym VDS to shorten the full name V ault D ata S tandard in all episodes of this tutorial collection. About this TutorialThis course targets Vault key users and Vault Administrators getting started with Data Standard customization. VDS offers several options to customize the behavior by enabling options in Vault Behavior Configuration, e.g., Vault Numbering for Projects. Other customizations require editing of VDS configuration files, like Dialog definitions or PowerShell scripts reflecting the business rules and user guidance handling file’s metadata.Advanced customizations, like dialog extensions by additional user controls or tabs, require more skills in creating Dialogs (Windows Presentation Foundation) and in writing PowerShell scripts using direct Vault API (Application Programming Interface) calls. This Tutorial does not cover any advanced topics. However, the transition from Chapters 10 onwards to more in-depth scripting relates to each student’s ambitions and interest in learning programming concepts.VDS Tutorial - System Requirements•Autodesk Vault Workgroup or Professional 2020.2 or newer, Client and Server in the English language. For non-English Server environments note the additional step preparing the tutorial environment in chapter 1 •VDS Installation 2020.2 or newer, Default Configuration, en-US. Follow these steps to install the extension: Install Vault Data Standard•XML Editor. We recommend using an XML Editor rather than a text editor to edit the VDS configuration files following the Tutorial’s exercises. Select any XML Editor of your preference. This tutorialdocumentation used the Microsoft Visual Studio Code Editor.•PowerShell Editor. Windows 10 operating system includes a PowerShell ISE to edit and format PowerShell script files. Other editors like Visual Studio Code with PowerShell Extension are suitable as well.Setup your Environment1.SoftwareInstructor and Students – Client Machine:-AutoCAD or AutoCAD Mechanical, release 2020 or newer-Inventor Professional, release 2020 or newer-Vault Workgroup or Vault Professional, release and update 2020.2 or newerAll client’s installa tions are in English; Chapter 08 requires an additional Language Packs installed for each client; the documentation uses German language packs for all clients in this chapter.Instructor and Students need to have access to a Vault Server:-Autodesk Vault Server Workgroup or Professional, release 2020 or newer, English2.New Vault –VDS TutorialOn ADMS create a new Vault of the name VDS Tutorial while using the Manufacturing Configuration as shown below:This Tutorial requires an English Vault configuration. In case your ADMS server is localized (the pulldown list displays localized configuration names), navigate to the subfolder en-US to select the English configurationtemplate:3.Training FilesDownload, extract, and import all training files required to follow the practical exercises of this Tutorial.The download is available in the attachment section of the AKN Articlehttps:///community/article/3021211.Create the folder C:\VDS Tutorial\2.Open the Zip-Archive and extract each subfolder as follows:a.Extract all subfolders and files of ..\Vault Files\ to C:\VDS Tutorial\:b.Extract all subfolders, files, and Zip-Archives of ..\VDS Configuration Files\ to a location of yourchoice – but use a different location than C:\VDS Tutorial\.3.Allow adding CAD files to Vault Explorer for the Vault VDS Tutorial (The training files include templatefiles for Inventor and AutoCAD):4.Drag & Drop the extracted Training files to the root folder:5.Re-enable the option Disable Check-in of Design Files:6.Set Working Folder Options as shown below:7.To better compare screenshots of the documentation with your environment, we recommend enablingthe client option (Tools -> Options) Show working folder location:4.Configure AutoCAD/AutoCAD MechanicalStudents will create new drawings during exercises consuming the templates added before; configure AutoCAD Template Options to use these:For AutoCAD:For AutoCAD Mechanical:You may also use the AutoCAD templates in AutoCAD Mechanical; the title block definition is different. AutoCAD templates use MText fields mapped to file properties, whereas Mechanical drawings apply title blocks with block attributes. Chapter 04 – Save New and Edit Files in AutoCAD talks you through the decision criteria more in detail.5.Configure InventorInventor by opening the project file Designs.ipj from Vault while refusing the check-out option:With the project file enabled, Inventor is all set to follow the exercises for Inventor starting in Chapter 05.6.Configuration Files – Setup EditorWe recommend using the same Editor as shown in Videos and Exercise images for editing xml, ps1, xaml, and text files.Download and install Visual Code from https:///. After installation, add the PowerShell extension within the Editor:First Insights on Data Standard Configuration FilesGet a sneak peek on the VDS client configuration files. The configuration for all VDS client applications Vault Explorer, Inventor Vault, and AutoCAD Vault install into all users’ Program Data files. The path relates to the Vault version installed; the tutorial documentation uses Vault 2020, for later versions update the version number in the path, respectively.C:\ProgramData\Autodesk\Vault 2020\Extensions\DataStandardAccess all folders and files using VS Code Editor:Instead of editing the default configuration files in the Autodesk VDS default folders, you should copy the file before to the *.Custom folder structure and edit there. Data Standard extensions read all available configuration files during the start-up of the application and will prefer custom files as they exist.Note – Multi-language support definitions are stored in the subfolders named according to the locale/language code. Autodesk default and customized configuration use these in common. Your company configuration backup needs to include all language definitions and client language packs applied plus the *.Custom\*.* configuration files as a minimum.See also Help: Data Standard Configuration。
vault的基本使用方法

vault的基本使用方法Vault是一个用于安全地存储和访问敏感数据的开源工具,旨在为应用程序和基础设施提供一种统一的方式来管理访问凭据和机密信息。
以下是关于Vault基本使用方法的详细说明。
一、安装Vault二、初始化Vault初始化Vault是开始使用它的第一步。
运行以下命令以初始化Vault:```$ vault operator init```该命令将生成一个包含五个初始解密密钥的初始化密钥集。
保存好这些密钥是非常重要的,因为它们将在以后的步骤中用于解密Vault的主密钥。
同时,Vault还生成并显示一个根令牌。
根令牌是最高权限的令牌,因此需要妥善保管以防止未经授权的访问。
三、解封VaultVault在初始化后处于封锁状态,需要进行解封才能正常使用。
运行以下命令以解封Vault:```$ vault operator unseal```根据初始化密钥集中的其中三个解密密钥来解封Vault。
Vault保持解封状态的时间是有限的,当过了一定时间后,Vault将会自动重新封锁。
因此,您还需要定期运行解封命令来保持Vault的可用状态。
四、登录并创建访问令牌使用根令牌登录Vault,然后创建一个用于访问Vault资源的令牌。
运行以下命令以登录Vault:```$ vault login <root_token>```其中,<root_token>是Vault初始化时生成的根令牌。
登录成功后,您将获得一个临时令牌,该令牌在一定的时间后会自动过期。
运行以下命令以创建一个访问令牌:```$ vault token create```创建成功后,您将获得一个新的令牌,该令牌将用于访问Vault的资源。
五、创建和读取机密Vault的一个主要功能是存储和管理敏感数据,例如API密钥、数据库凭据等。
您可以使用Vault的KV(键值)存储引擎来创建和读取机密。
首先,需要启用一个KV存储引擎:```$ vault secrets enable -path=kv kv```然后,可以使用以下命令将机密存储到Vault中:```$ vault kv put kv/my-secret username="admin"password="secretpassword"```在上述命令中,kv/my-secret是存储机密的路径,username和password是要存储的键值对。
Autodesk Vault配置(第一部分)说明书
MFG219615 –Autodesk Vault Configuration Part 1 Chris BennerCAD Supervisor –Powell Fabrication & Manufacturing, LLC Mark LancasterProduct Support Specialist–Synergis Engineering Design SolutionsClass DescriptionNow that you have purchased one of the Vault products, you need to get the environment set up for you and your users. This class will look at what to do once the Vault Server has been installed. We will discuss topics such as creating users and groups, setting up permissions and security, establishing projects and working folders, and getting your CAD content into the Vault itself.Key Learning Objectives•Learn how to create users and groups within Vault•Learn how to establish user and folder permissions to protect your data •Learn how to set up projects and establish working folders•Learn how to move locally stored CAD data to the VaultAbout Me: Chris Benner▪CAD Supervisor @ Powell Fabrication & Manufacturing, LLC. St. Louis, MI USA▪20 Plus years CAD experience, 10 years with Inventor▪Autodesk Expert Elite▪Dad, husband. Fan of American football, music, craft beer, good scotch and an occasional cigar, semi professional photographer.Home:About Powell Fabrication & Manufacturing, LLC▪Board drafting –Yes I’m old▪20+ yr MFG/CAD world▪15+ yr 3D CAD▪CAD/Doc Mgmt Admin About Me: Mark Lancaster▪Autodesk Partner/Synergis EDS ▪Quakertown PA ▪MFG/Vault Products▪Installation▪Licensing/Subscription Support▪Autodesk▪Expert Elite▪Certified Inventor Professional▪I&L and Inventor Forum▪Lean MFGCongratulations!Now That I Have Vault,… WhatDo I Do With It?•We Are Assuming It Has Been Installed•Our Presentation Centers on Vault Professional•We Will Start with Roles & Permissions, Users & Groups •Time is Short for this material so, if time permits we will then: o Run Through the Config Options –Sooo Many Optionso Talk About Adding Data to the VaultVault Settings & ConfigurationLaying the foundation for your Vault AKA: Roles, Users, Groups, and PermissionsA poor (Vault) foundation may perhaps lead to this over time.RolesWhat are Roles?•Assigned –Vault user or group of users •Pre-defined•Function ability•Lowest form of security•Useful →Vault Basic•Mandatory/Entry pointPre-defined RolesVault AdministratorPre-defined RoleDocument Editor (level 2)Pre-defined RolePermitted Functionswithin VaultOverlapping AbilitiesDocument Editor (Level 1)Defined functionsDocument Editor (Level 2)Level 1 + highlighted functionsUser assigned both roles?Lowest role is winnerHighlighted functions no longer permittedAdditional Info•Global vault setting•Vault level•Vault Pro 2018 –New vault admin roles •Vault Pro 2019 –Custom role •SpreadsheetRoles & PermissionsVault Workgroup/Pro only•Role Based Permissionso1st level permissions•ACL and State Permissionso2nd/3rd level permissions•Balancing point•Why it’s importantRoles & PermissionsVault Workgroup/Pro only•User/Administrator roleo Access to all vault functions•ACL Permissions appliedo Per vaulted fileo Deny modify/delete access I’m the VaultAdmin I can do anything I like within VaultWell I’m the Engineering Manager and I don’t want you to modify or delete our Area 51 CAD filesVault User Accounts/User ManagementVault Users Accounts•Entry point•Static Vault Accounto Vault Admin & Guest provided •Active Directory Domain Accounto Vault Pro Only•Global Setting•Special Accounts As a group we’re so happy & excited about our Vault andhow it’sconfiguredVault Administrator -Static•Administrator →Account name•Blank password →Change it •Disable?•Designate 2 Vault Admins•Separate user/admin account•IT Group/Train•DON’T LOCK OUT ADMINGuest -Static•Guest →Account name •Blank password•Disabled•Not a fanWARNINGBefore jumping in and creating any Vault Accounts and Groups make sure you have a plan in how this will be accomplished. Once a Vault Account or Group is created it is unableto be removed.Modifying, disabling or promoting/demoting isonly permittedStatic Account -Creation•ADMS Console/Vault Client•Vault Administrator•Mandatory Field•Need Role/Vault Access•Enable/Disable•Vault Admin/User managedStatic Account -Creation•Active Directory Account•Credentials/Windows Log in•Account Update•Managed →Active DirectoryActive Directory Domain Account Vault Professional Only•Vault Admin/Importso ADMS/Vault Cliento Involve IT support•Exist? Link?•Define →Vault AdministratorActive Directory Domain Account Vault Professional OnlyStatic vs Active Directory Domain Account Vault Professional Only Active Directory Domain Account (imported)Domain Server Name Domain Account Name Static Vault AccountVault Groups/Group ManagementVault Groups•An Extension for Users •Optional•Useful/Same Configuration •Static Group•Active Directory Domaino Vault Pro Only•Global Setting (YES/NO)Vault Group -Creation •ADMS Console/Vault Client•Vault Administrator•Group to Group assignment•Vault Admin managedVault Group -CreationActive DirectoryDomain Group•Active Directory Group –IT/Network/Permissions •Import →Vault Admin•Defined (in Vault) →Vault Admin•Managed →IT/Network•Exist? Link?•Auto-Create Account•Manual update•Not a fanMixing Roles, User’s, Groups & AccessVDB1VDB2Vault ServerRolesGroup AVault User Group B Group CVault Permissions (Vault Workgroup/Pro)Permissions –Why its ImportantVault User Doc EditorLVL 2Access to delete files across Vault ConditionalVAULT BASIC ONLY Conditional delete means there’s no relationship exist atthis timePermissions –Why its ImportantVault User Doc EditorLVL 2Access to delete files across Vault ConditionalVAULT WORKGROUP/PROPermissions –3 LevelsLifecycle State PermissionHighest Level of PermissionAccess Control List (ACL) PermissionObject Based SecuritySecondary Level of PermissionRole or Role Based PermissionLowest Form of PermissionPermissions –Role BasedProvide access (light switch) to perform certainfunctions within VaultPermissions –ACLVAULT WORKGROUP/PROControl access that’s granted by the assigned vault rolePermissions –Lifecycle StatePer Lifecycle State, Restrict access that’s granted by the Role/ACLPermissionWIP In ReviewVAULT WORKGROUP/PROPermissions –Access Control List (Vault Workgroup/Pro)ACL PermissionsVAULT WORKGROUP/PRO •Per Vault•Vault Administratoro Security Administrator (2018)•RMC Folder/File/Details/Security •READ/MODIFY/DELETE •Allow: Grant access•Deny: Deny access•Blank/None: Nether Grant/DenyACL PermissionsVAULT WORKGROUP/PRO •Start @ Vault Root •Propagate permissions•Don’t forget Admino Cloaking to resolve •Override if neededo Lower structureo@ file level•Don’t swing for the fences •Remove later onLowest Permission WinsUser is assigned Doc Editor LVL 1Role doesn’tallow files tobe deletedACL Permissiongranted todelete filesRolelimitationstill winsACL PermissionVault PermissionsPermissions –Effective AccessVAULT WORKGROUP/PRO•Vault 2016/2017 Release •Folder or File Level•What’s really happening •Obj Based, State, Effective •One time checkACL Permission –Effective Access。
Vault 基本设置和应用
如果企业里,已经有域账号,则可直接导入使用,而且导入的账号和域账号之间保持关联。这样可 以避免维护额外的账户,登陆的时候也非常方便。
小技巧
在导入账号的时候,可以选择“Location”, 选择群组导入,也可以 输入显示名(名+姓, 如Kelvin Hao), 通过 Check Name,找到预账号。 导入的预账号如果不需要了可以删除( demote) 对于非预账号,目前可以编辑,但不能删除
Web Client
Vault web client是通过IE浏览器登陆Vault进行文件搜索,查 看,打印等操作的一个模块。这个功能只有在Vault Collaboration 和Vault Professional中有。默认情况下, Web Client只能在局域网中使用,只要应用对象需要查看图纸 的是车间人员,施工人员等。
如何访问Vault
基本知识
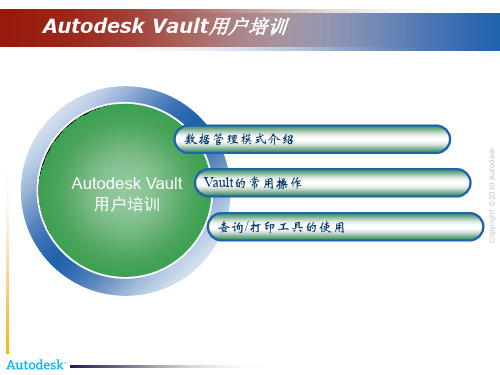
数ቤተ መጻሕፍቲ ባይዱ管理模式介绍
在客户端,可以利用已有账号登陆Vault. 但在登陆前要确保Vault 服务器和客户断都已经正确安 装,而且License已经配置好。 对于Vault Professional 2011, License和AutoCAD的网络版license管理方式相同。既购 买多少个license, 则并发数就有多少个。 独立的Vault客户端,和应用程序中的add-in都会消耗license, 但Web client则不消耗 license.
Autodesk Vault服务器
命令菜单
数据管理模式介绍
数据库概要
快速入门 数据仓库
库文件
日志
站点信息
资源信息
Autodesk Vault服务器
利用Vault服务器可以进行的常用操作 :
Vault基本设置和应用
Autodesk Vault客户端
命令菜单 工具面板 浏览树 我的工作
列表
快捷键 工作面板
选项卡 预览面板
状态信息
数据管理模式介绍
主面板
属性面板
客户端的种类
数据管理模式介绍
客户端 Autodesk Vault Vault 插件
Web Client
描述
主要优势
Autodesk Vault 是一个用于查看、搜索Vault中文件和数据, 独立应用程序,功能丰
小技巧
1,如果已经导入域账号,则选中 “ windows authentication, 则系统会自动填 写账号和密码
11,选
如何访问Vault
数据管理模式介绍
基本知识
如果企业里,已经有域账号,则可直接导入使用,而且导入的账号和域账号之间保持关联。这样可 以避免维护额外的账户,登陆的时候也非常方便。
小技巧
在导入账号的时候,可以选择“Location”, 选择群组导入,也可以 输入显示名(名+姓, 如Kelvin Hao), 通过 Check Name,找到预账号。
以及对Vault进行管理和设置的独立的应用程序。需要安装后才 富,性能稳健,和
能使用。
Outlook界面非常像,
因而交互性好,易学易
用。
Vault 插件是将Vault的功能和其他的应用软件紧密集成的组件。 和设计软件和办公软件
利用它们可以登陆或者登出Vault, 将文件检入或者检出Vault, 紧密集成,使设计人员
独立的Vault客户端,和应用程序中的add-in都会消耗license, 但Web client则不消耗 license.
1
2
- 1、下载文档前请自行甄别文档内容的完整性,平台不提供额外的编辑、内容补充、找答案等附加服务。
- 2、"仅部分预览"的文档,不可在线预览部分如存在完整性等问题,可反馈申请退款(可完整预览的文档不适用该条件!)。
- 3、如文档侵犯您的权益,请联系客服反馈,我们会尽快为您处理(人工客服工作时间:9:00-18:30)。
Autodesk vault 软件为提高BIM深化设计室设计文件管理效率,故引入autodesk vault管理软件。
该软件能够通过集中地存储所有工程设计数据和相关文档,节省整理文件所需的时间,避免成本高昂的错误,更加高效地发布和修改设计。
Autodesk Vault 包含丰富的功能,其主要功能可以用以下简图表示:二、软件使用1、vault 版本Autodesk Vault 有四种版本,每个版本均已扩展以符合您的特定业务需求。
1.1 Autodesk Vault Basic :Vault Basic 在一个中心位置安全地存储和管理数据,可帮助团队快速创建、共享和重用数字原型设计信息。
用户可以对Vault 中的文件执行基本的版本控制操作,并可以快速打包文件以便共享。
1.2 Autodesk Vault Workgroup :Vault Workgroup 通过在一个中心位置安全地组织、管理和跟踪数据,从而帮助团队创建和共享设计及工程信息。
这种易管理性可以启用工作组对数据访问和安全性的控制,并能简化各种准则下基于团队的设计。
用户通过Vault Workgroup 可以快速管理其设计以及实时跟踪所做的更改,因此他们无需付出额外的劳动就提高了生产率。
此外,Vault Workgroup 可直接在设计应用程序中实现生命周期和版本控制过程,这样不仅可以缩短周期时间,还能提高工程数据的质量。
1.3 Autodesk Vault Collaboration :Vault Collaboration 不仅具备了Autodesk Vault Workgroup 的所有功能,还新增了高级工具集,为管理员提供了管理大型工作组时所需的可扩展性。
用户可以使用包含的Web Client 与下游数据客户共享工程设计数据,并通过发布到Microsoft® SharePoint® 可扩展多个站点功能(使公司能够在分布式工作组之间同步设计数据)向扩大后的企业显示设计相关的信息,使数字模型的可抵达范围扩展到整个项目团队。
1.4 Autodesk Vault Professional :Vault Professional 可以安全地存储和管理工程信息、设计数据和文档- 缩短了从设计到构建以及生产的流程。
它包括多个站点工具,以将位置分散的工作组关联在一起,从而帮助整个设计团队协同作业并共享项目信息。
V ault Professional 可充分利用高级功能,它会为设计部门提供跟踪变更单、管理明细表(BOM 表)以及通过集成到专业企业系统来升级早期版本的Collaboration 所需的工具。
此外,它还支持多CAD 环境,这说明使用非Autodesk 设计产品的Vault 客户端在其整个生命周期内都可以汇总和管理设计数据。
2、软件安装和应用2.1软件安装2.1.1 Vault是对硬盘要求比较高的软件,不属于CPU密集软件,所以多CPU的运算速率等性能要求不高,2.1.2 Server端最好装在Winodws 2008 R2 服务器上,兼容性好。
2.2软件使用2.2.1服务器端2.2.1.1项目数据库创建创建流程:右击“V ault”-----”创建”-----输入项目名称-----选择项目库数据存储位置。
2.2.1.2用户创建1、用户创建流程:工具----管理-----用户----新建用户,用户信息表如右图所示。
2、针对以项目为组的设计,“角色”不用添加。
在“组”中选择本用户所参与的项目名称。
3、勾选“启用用户”,然后单击“确定”。
2.2.1.3用户组创建1、用户组创建流程:工具----管理-----组----新建组,组信息表如右图所示。
2、“角色”选择,针对普通建模人员,选择“文档编辑者(第2级)”即可。
3、“vault”项选择以上所创建的项目数据库。
4、组成员通过“添加”按钮将该项目参与建模的人员添加即可,然后点击“确定”。
2.2.2客户端2.2.2.1客户端登陆1、“身份验证”选择vault账户。
2、“用户名”、“密码”即为服务器端创建的“用户名”和“密码”。
3、“服务器”选择软件服务器端所装在的服务器的名称。
4、“vault”选项选择本次建模所用的数据库名称。
2.2.2.1工作文件夹(本地)工作文件夹是从服务器上下载文件到本地存储的位置,建议设置在C盘以外的磁盘。
设置流程:文件----设置工作文件夹-----选择文件夹----确定2.2.2.2 分类文件的文件夹创建创建流程:右击“Vault Explorer”,单击“新建文件夹”,输入文件夹名称。
最终一个项目的数据库文件夹如右图所示。
2.2.2.3设计文件的检入和检出检入流程:右击“策划文件”,单击“检入”,从弹出的对话框中先择文件,单击“确定”。
检出流程:法一、右击“策划文件”,单击“获取/检出”,从弹出的对话框中勾选需要检出的文件,单击“确定”。
法二、单击“策划文件”,在右边的区域直接点选需要检出的文件。
(如果需要某个文件的早期版本,可以从下面对话框中选择对应版本,如下图所示。
(该表中包含文件版本、创建人、检入日期、注释,便于对不同版本的信息进行跟踪)2.3 目前遇到的问题由于目前使用的是Autodesk Vault Basic 版本,不支持dwg文件和revit文件,如下图所示:鉴于以上两类文件是建模过程中核心文件,故需要将软件升级为Autodesk Vault Professional,以便于项目文件的管理。
附录:一Autodesk Vault Basic 2013 状态图标图标描述和所需操作如果未显示图标,则表示文件已存在于Vault 中,但是在计算机上没有该文件的本地副本。
用户可以快速识别哪些文件对Vault 来说是新文件。
使用“获取最新版本”来检索文件的副本。
文件位于Vault 中并可以检出。
工作文件夹中的版本与Vault 中的版本相同。
也称为“最新版本”。
文件位于Vault 中,并可以被检出,但是本地版本比Vault 中最新版本还要新。
通常,这意味着本地文件已被更改,而未检出。
如果要保存这些更改,请使用“不获取本地副本”选项检出文件。
文件位于Vault 中并且可以被检出,但本地副本已过时。
从Vault 中获取最新版本。
文件已检出,但计算机上并没有该文件的本地副本。
这可能在以下情况下出现:尚未设置工作文件夹、以前曾在未获取本地副本的情况下检出文件或者将文件检出到非工作文件夹的位置。
使用“获取最新版本”来检索文件的副本。
文件已检出,并且本地版本与Vault 中的版本相同,也称为“最新版本”。
文件已检出,并且本地副本比Vault 中的最新版本还要新。
这通常意味着在文件检出后对文件进行了更改,但是没有将其重新检入。
文件已检出,并且本地副本早于Vault 中的最新版本。
通常,这意味着启动的Vault的版本早于最新版本,并在将其检出后升级至最新版本。
文件由其他用户检出,而本计算机上没有该文件的本地副本。
使用“获取最新版本”来检索文件的副本。
文件由其他用户检出,并且本地副本与Vault 中的副本相同。
也称为“最新版本”。
如果其他用户未将更改重新检入Vault,通常会出现这种情况。
文件由其他用户检出,但是本地副本比Vault 中的最新版本还要新。
如果其他用户已将更改检入Vault,但仍使文件保持为检出状态,通常就会发生这种情况。
文件由其他用户检出,但是本地副本早于Vault 中的最新版本。
文件具有附件。
请展开树以查看附着的文件。
文件不在Vault 中。
Vault 中的库文件夹。
库文件夹是专门指定的,表示该文件夹中的文件在其他部件环境中使用时不打算进行编辑。
库文件夹中的文件具有两个明显特征。
∙它们不能被其他文件夹共享。
∙它们通常在共享的公用网络位置上存储和引用。
附件二有关Autodesk Vault 中可用角色的详细信息管理员始终对所有文件夹具有所有权限,并对服务器具有管理权限,包括ERP 权限和作业服务器权限。
资源中心管理员具有资源中心中的所有权限,且具有服务器上的库管理权限(在服务器控制台内)。
这些权限包括创建库、删除库、导入库、导出库和库的碎片整理。
此角色不适用于Civil 3D 用户。
资源中心编辑者具有资源中心中的所有权限,但没有服务器上的任何管理权限(在服务器控制台内)。
此角色不适用于Civil 3D 用户。
文档用户(Autodesk VaultWorkgroup、Collaboration 和Professional)仅具有对文件和文件夹的只读权限,包括作业服务器队列。
文档编辑者第1 级(Autodesk Vault Workgroup、Collaboration 和Professional)Vault 中基本文件添加和编辑权限,还可以添加或删除文件和文件夹的用户定义特性,但是不能删除文件和文件夹。
没有服务器上的管理权限。
文档编辑者第2 级(Autodesk Vault Workgroup、Collaboration 和Professional)Vault 中的所有权限,还可以添加或删除文件和文件夹的用户定义特性,但不具有服务器的管理权限。
文档管理者级别1(AutodeskVault Workgroup、Collaboration 和Professional)具有更改类别、生命周期和修订指定以及编辑用户定义特性的权限。
文档管理者级别2(Autodesk Vault Workgroup、Collaboration 和Professional)具有Autodesk Vault 内的所有文件、文件夹和自定义对象行为的管理权限,包括添加、删除和编辑用户定义特性的权限。
该角色不能创建行为定义。
自定义对象用户(AutodeskVault Professional)仅限自定义对象的只读权限。
自定义对象编辑者(第1 级)(Autodesk Vault Professional) Vault 中基本自定义对象的添加和编辑权限,以及添加/删除自定义对象的用户定义特性的权限。
无法删除自定义对象。
不具有服务器上的管理权限。
自定义对象编辑者(第2 级)(Autodesk Vault Professional) Vault 中的所有权限,还可以添加/删除自定义对象的用户定义特性。
不具有服务器上的管理权限。
自定义对象管理者(第1 级)(Autodesk Vault具有更改类别、生命周期和修订指定以及编辑用户定义特性的权限。
Professional)自定义对象管理者(第2 级)(Autodesk Vault Professional) 具有Autodesk Vault 内的所有文件行为管理权限,包括添加、删除和编辑用户定义特性的权限。