
AOC 12579V显示器,25英寸新宠
AOC 12579V显示器,25英寸新宠
近两年来,显示器不仅分辨率越来越高,显示器比例也在变化。
而现在,显示器尺寸也在悄然变化着。
近期,AOC 就推出了一款25英寸新尺寸显示器――12579V。
其实,早在2012年初的时候,LG就推出首款25英寸的显示器――D2542 P。
那么这款AOC12579V又有哪些独特之处呢?
从打开包装看到12579V的第一眼,似乎就有一种似曾相识的感觉,它的外形设计很像我们前几期评测过的那款护眼显示器――E2476VW6。
不同的是12579V采用了时下流行的超窄边框和超薄机身设计,纯白色的外观看上去也更清新、时尚,带有文艺范儿。
12579V的底座采用了普通的底座,不支持升降、旋转等功能。
而如果你想要更换显示器支架的话,那么很抱歉,12579V同样不支持,因为它没有搭配VESA孔位。
在接口方面,12579V搭配的VGA和DVI 接口略显小气,不算丰富,仅能满足日常家用。
12579V的OSD设置在了显示器的中下方靠右方的位置,采用的是实体按键,在OSD菜单中可以对显示器进行常规的亮度、对比度以及其他色彩方面的调节。
其实要问25英寸的显示器与24英寸或是27英寸的显示器有什么不同,从使用体验来看,这款25英寸的12579V
在显示方面与24英寸显示器差不多。
因为25英寸的显示器与24英寸的显示器在点距上没有太大差别,25英寸的点距为0.288mm,24英寸的点距为0.276mm,两者的差别并不大。
但对比27英寸还是比较明显,除开大小不说,在1080p分辨率下,显示效果方面还是25英寸的显示器更胜一筹。
I2579V采用的是IPS面板,分辨率依然为1920×1080。
从仪器的测试来看,12579V的成绩达到了一个中等水平。
其平均亮度为231.32cd/m2,与标称的250cd/m2。
虽然有一些差距,但好在相差不大。
在色域方面,74%的NTSC色域覆盖面积刚好超过及格线水平,算是中等水准。
就显示效果来看,满足家用、办公等需求是完全没有问题的。
AOC 12579V目前网上报价1200元左右,对于这个价格来说还算厚道,同类产品中并不算贵。
现在很多普通24英寸的显示器均在1200~1500元之间,可见12579V还是有很大的竞争优势。
如果你觉得27英寸太大,23英寸左右又略小的话,那么这款25英寸的12579V我想会让你满意的。
AOC显示器基本型号及全参数

显示器尺寸对应的最佳分辨率AOC V24t详细参数切换到传统表格版基本参数显示参数面板控制接口其它显示器附件保修信息基本参数∙产品定位:娱乐影音∙屏幕尺寸:23.6英寸∙屏幕比例:16:9(宽屏)∙最大分辨率:1920x1080 ∙最佳分辨率:1920x1080∙高清标准:1080p(全高清)∙面板类型:TN∙背光类型:CCFL背光∙动态对比度:60000:1∙黑白响应时间:5ms显示参数∙点距:0.2715mm∙亮度:300cd/㎡∙可视面积:521.28×293.22mm ∙可视角度:170/160°∙显示颜色:16.7M∙扫描频率:水平:30-80KHz 垂直:55-75Hz∙带宽:148.5MHz面板控制∙控制方式:按键∙语言菜单:英文,德语,法语,意大利语,西班牙语,俄语,葡萄牙语,土耳其语,简体中文接口∙视频接口:D-Sub(VGA),HDMI,色差,S端子,复合信号CVBS ∙其它接口:TV,音频输出外观设计∙机身颜色:黑色烤漆,银色底座∙外观设计:超薄设计,最薄处2.5cm∙产品尺寸:595.4×483.54×220.13mm(包含底座)668×565×117mm(包装)∙产品重量:5.5kg(净重)7.5kg(毛重)∙底座功能:倾斜∙音箱:内置音箱(2×2.5W)∙壁挂:100×100mm其它∙电视功能:支持电视功能∙HDCP:支持HDCP∙电源性能:90~240V交流, 50/60Hz External Adapter ∙消耗功率:最大:60W待机:1W∙安规认证:CCC, CB, CE, GOST,EPA∙其它性能:仰角:-3-10度∙其它特点:Eco Mode 5种亮度情景模式获得EPEAT金奖∙上市时间:2009年06月显示器附件∙包装清单:显示器主机x1 底座x1电源线x1信号线x1保修卡x1电子光盘说明书x1保修信息∙保修政策:全国联保,享受三包服务∙质保时间:3年∙质保备注:整机1月内包换,2年免费上门,3年免费全保∙客服电话:400-887-8007∙电话备注:8:00-22:00∙详细内容:在中国大陆(不包括香港、澳门特别政区)购买并在大陆地区使用的显示器,出现保修范围内的硬件故障时,凭显示器保修证正本和购机发票到“冠捷国内维修站一览表”中的任何一个维修站均可享受1个月包换,2年在规定的城市地区免费上门维修服务,3年免费保修(包含CRT及LCD面板)的123保修服务。
AOC U27U2DP 液晶显示器 用户手册说明书
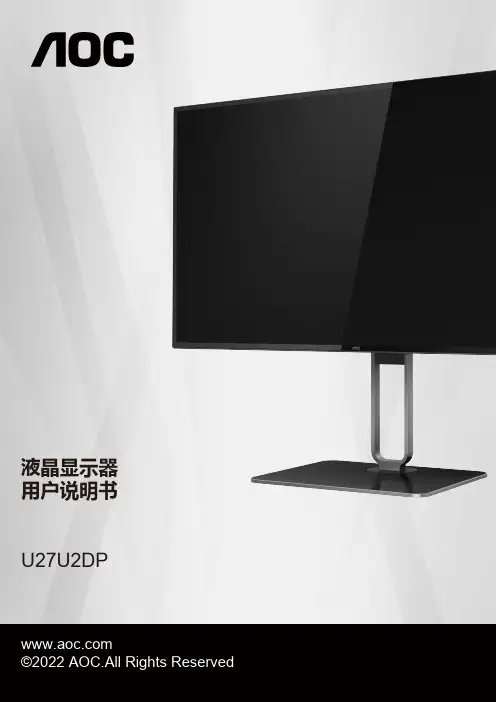
液晶显示器用户说明书U27U2DP安全 (1)标志惯例 (1)电源 (2)安装 (3)清洁 (4)其它 (5)设置 (6)物品清单 (6)安装支架和底座 (7)调整视角 (8)连接显示器 (9)DisplayPort多流传输(MST)模式 (11)HDR (12)KVM (13)调节显示器 (14)热键 (14)OSD设定 (15)Luminance(明亮度) (16)Color Setup(颜色设置) (17)Picture Boost(窗口增亮) (18)OSD Setup(OSD设置) (19)PIP Setting(PIP设定) (20)Game Setting(游戏设置) (21)Extra(其它) (22)Exit(退出) (23)LED指示灯 (24)故障排除 (25)规格 (26)主要规格 (26)预设显示模式 (28)引脚分配 (29)即插即用 (30)安全标志惯例以下小节描述此文档中使用的标志惯例。
注释、注意和警告在本指南中,文本块可能带有图标并且以粗体或斜体打印。
这些文本块是注释、注意和警告,如下所示:注释:注意事项指示帮助你更好地使用你的计算机系统的重要信息。
注意:“注意”表示潜在的硬件损坏或数据丢失,并告诉您如何避免出现问题。
警告:“警告”表示存在潜在的人身伤害,并告诉您如何避免伤害的发生。
某些警告可能采用其它格式,也可能不带有图标。
在这种情况下,由相关的管制机构提供专门的警告表示方法。
显示器应使用铭牌上标示的电源规格。
如果您不能确定家里电源规格,请咨询供应商或当地电力公司。
显示器配备三项接地插头,一个插头具有第三个(接地)引脚。
这个引脚会只嵌入作为安全装置的接地电源插座。
如果插座不适合三线插头,那么请让电工安装正确的插座,或者使用转接器使得仪器安全接地。
请不要使接地插头的安全目的失效。
在雷雨天气或者当长期不用时请拔掉电源插头。
这可以保护显示器不会因为电压剧烈变化而遭到损坏。
AOC-S25G6-M2S 用户手册说明书

USER'S MANUALRevision 1.0AOC-S25G6-M2SThe information in this user’s manual has been carefully reviewed and is believed to be accurate. The manufacturer assumes no responsibility for any inaccuracies that may be contained in this document, and makes no commitment to update or to keep current the information in this manual, or to notify any person or organization of the updates. Please Note: For the most up-to-date version of this manual, please see our website at .Super Micro Computer, Inc. ("Supermicro") reserves the right to make changes to the product described in this manual at any time and without notice. This product, including software and documentation, is the property of Supermicro and/ or its licensors, and is supplied only under a license. Any use or reproduction of this product is not allowed, except as expressly permitted by the terms of said license.IN NO EVENT WILL Super Micro Computer, Inc. BE LIABLE FOR DIRECT, INDIRECT, SPECIAL, INCIDENTAL, SPECULATIVE OR CONSEQUENTIAL DAMAGES ARISING FROM THE USE OR INABILITY TO USE THIS PRODUCT OR DOCUMENTATION, EVEN IF ADVISED OF THE POSSIBILITY OF SUCH DAMAGES. IN PARTICULAR, SUPER MICRO COMPUTER, INC. SHALL NOT HAVE LIABILITY FOR ANY HARDWARE, SOFTWARE, OR DATA STORED OR USED WITH THE PRODUCT, INCLUDING THE COSTS OF REPAIRING, REPLACING, INTEGRATING, INSTALLING OR RECOVERING SUCH HARDWARE, SOFTWARE, OR DATA.Any disputes arising between manufacturer and customer shall be governed by the laws of Santa Clara County in the State of California, USA. The State of California, County of Santa Clara shall be the exclusive venue for the resolution of any such disputes. Supermicro's total liability for all claims will not exceed the price paid for the hardware product. FCC Statement: This equipment has been tested and found to comply with the limits for a Class A digital device pursuant to Part 15 of the FCC Rules. These limits are designed to provide reasonable protection against harmful interference when the equipment is operated in industrial environment. This equipment generates, uses, and can radiate radio frequency energy and, if not installed and used in accordance with the manufacturer’s instruction manual, may cause harmful interference with radio communications. Operation of this equipment in a residential area is likely to cause harmful interference, in which case you will be required to correct the interference at your own expense.California Best Management Practices Regulations for Perchlorate Materials: This Perchlorate warning applies only to products containing CR (Manganese Dioxide) Lithium coin cells. “Perchlorate Material-special handling may apply. See /hazardouswaste/perchlorate”.The products sold by Supermicro are not intended for and will not be used in life support systems, medical equipment, nuclear facilities or systems, aircraft, aircraft devices, aircraft/emergency communication devices or other critical systems whose failure to perform be reasonably expected to result in significant injury or loss of life or catastrophic property damage. Accordingly, Supermicro disclaims any and all liability, and should buyer use or sell such products for use in such ultra-hazardous applications, it does so entirely at its own risk. Furthermore, buyer agrees to fully indemnify, defend and hold Supermicro harmless for and against any and all claims, demands, actions, litigation, and proceedings of any kind arising out of or related to such ultra-hazardous use or sale.Manual Revision 1.0Release Date: April 19, 2023Unless you request and receive written permission from Super Micro Computer, Inc., you may not copy any part of this document. Information in this document is subject to change without notice. Other products and companies referred to herein are trademarks or registered trademarks ofW their respective companies or mark holders.Copyright © 2023 by Super Micro Computer, Inc.All rights reserved.Printed in the United States of AmericaPrefacePrefaceAbout This ManualThis user's guide is written for system integrators, IT professionals, and knowledgeable end users. It provides information for the installation and use of the AOC-S25G6-M2S add-on card. About This Add-On CardThe Supermicro® AOC-S25G6-M2S add-on card provides a PCIe Gen 4 Ethernet solution based on the low-power consumption NVIDIA® ConnectX-6 Lx controller with advanced feature enhancements, including VXLAN, NVGRE, and RDMA. It is a feature-rich adapter that offers unparalleled performance and functionality to your cloud service, telecommunication applications, and enterprise data-center deployments. Supermicro systems with integrated asset management features are the most versatile 25GbE solution in the market. To order, contact your distributor as this product is only available through Supermicro.An Important Note to the UserAll graphic images and layout drawings shown in this user's guide are based upon the latest PCB revision available at the time of publishing of this user's guide. The add-on card you have received may or may not look exactly the same as the graphics shown in this user's guide. An Important Note to the UserA receipt or copy of your invoice marked with the date of purchase is required before anywarranty service will be rendered. You can obtain service by calling your vendor for a Returned Merchandise Authorization (RMA) number. When returning to the manufacturer, the RMA number should be prominently displayed on the outside of the shipping carton and mailed prepaid or hand-carried. Shipping and handling charges will be applied for all orders that must be mailed when service is complete. For faster service, RMA authorizations may be requested online (/support/rma/).This warranty only covers normal consumer use and does not cover damages incurred in shipping or from failure due to the alteration, misuse, abuse or improper maintenance of products.During the warranty period, contact your distributor first for any product problems.Note: Additional information given to differentiate various models or to provide in-formation for proper system setup.Super AOC-S25G6-M2S User's ManualConventions Used in the ManualSpecial attention should be given to the following symbols for proper installation and to preventdamage done to the components or injury.Warning! Indicates high voltage may be encountered while performing a procedure.Warning! Indicates important information given to prevent equipment/property damageor personal injury.Important: Important information given to ensure proper system installation or to relay safety precautions.Important LinksFor your system to work properly, please follow the links below to download all necessary drivers/utilities and the user’s manual for your server.• Supermicro product manuals: /support/manuals/• Product drivers and utilities: ftp://• Product safety info: /about/policies/safety_information.cfm • If you have any questions, please contact our support team at: ********************** This manual may be periodically updated without notice. Please check the Supermicro website for possible updates to the manual revision level.Preface Naming ConventionSuper AOC-S25G6-M2S User's ManualContacting SupermicroHeadquartersAddress:Super Micro Computer, Inc.980 Rock Ave.San Jose, CA 95131 U.S.A.Tel:+1 (408) 503-8000Fax:+1 (408) 503-8008Email:************************(GeneralInformation)************************(SalesInquiries)***********************************(Gov.SalesInquiries)**********************(TechnicalSupport)******************(RMASupport)************************(Webmaster)Website:EuropeAddress:Super Micro Computer B.V.Het Sterrenbeeld 28, 5215 ML's-Hertogenbosch, The NetherlandsTel:+31 (0) 73-6400390Fax:+31 (0) 73-6416525Email:***************************(SalesInquiries)Support_Europe@supermicro (Technical Support)RMA_Europe@supermicro (RMA Support)Website:www.supermicro.nlAsia-PacificAddress:Super Micro Computer, Inc.3F, No. 150, Jian 1st Rd.Zhonghe Dist., New Taipei City 235Taiwan (R.O.C)Tel:+886-(2) 8226-3990Fax:+886-(2) 8226-3992PrefaceAsia-PacificEmail:*************************.tw(SalesInquiries)**********************.tw(TechnicalSupport)******************.tw(RMASupport)Website:Super AOC-S25G6-M2S User's ManualTable of ContentsChapter 1 Introduction1.1 Overview (9)1.2 Key Features (9)Chapter 2 Hardware Components2.1 Add-On Card Image and Layout (12)2.2 Major Components (14)2.3 Ports (15)2.4 SFP28 Ethernet Connections (16)2.5 NC-SI Header (17)2.6 Jumpers (18)Chapter 3 Installation3.1 Major Components (19)3.2 Before Installation (20)3.3 Installing the Add-on Card (20)3.4 Installing Drivers for Windows (21)3.5 Installing Drivers (NVIDIA® ConnectX-6 Lx) (22)Chapter 1: IntroductionChapter 1Introduction1.1 OverviewCongratulations on purchasing your add-on card from an acknowledged leader in the industry.Supermicro products are designed with the utmost attention to detail to provide you the highest standards in quality and performance.1.2 Key FeaturesThe key features of this add-on card include the following.• NVIDIA ConnectX-6 Lx 25GbE controller• Support for 25GbE and 10GbE Speed• Dual SFP28 connectors• RDMA over Converged Ethernet• VXLAN, NVGRE, and Geneve• Asset Management Features with thermal sensor• Network Controller Sideband Interface (NC-SI) for Remote ManagementGeneral• NVIDIA ConnectX-6 Lx 25GbE controller• Dual SFP28 portsStorage Accelerations• NVMe over Fabric offloads for target• Storage protocols: iSER, NFSoRDMA,• SMB Direct, NVMe-oF, and moreSuper AOC-S25G6-M2S User's ManualRDMA over Converged Ethernet• RoCE v1/v2• Zero-Touch RoCE: no ECN, no PFC• RoCE over overlay networks• IPsec over RoCE• Selective repeat• GPUDirect®• Dynamically Connected Transport (DCT)• Burst buffer offloadManagement and Control• Network Controller Sideband Interface (NC-SI)• NC-SI, MCTP over SMBus, and MCTP over PCIe – Baseboard Management Controller interface• PLDM for Monitor and Control DSP0248• PLDM for Firmware Update DSP026Remote Boot• Remote boot over Ethernet• Remote boot over iSCSI• UEFI support for x86 and ARM servers• PXE bootStandards• IEEE 802.3ae 10 Gigabit Ethernet• IEEE 802.3by 25G supporting all FEC modes• IEEE 802.3ad, 802.1AX Link AggregationChapter 1: Introduction• IEEE 802.3az Energy Efficient Ethernet (supports only “Fast-Wake” mode)• IEEE 802.3ap based auto-negotiation and KR startup• IEEE 802.1Q, 802.1P VLAN tags and priority• IEEE 802.1Qaz (ETS)• IEEE 802.1Qbb (PFC)• IEEE 802.1Qbg• IEEE 1588v2• IEEE 1149.1 and IEEE 1149.6 JTAG• PCI-E 3.0 and 4.0Power Consumptions• Maximum power consumption: 15WOperating Conditions• Storage temperature: -40°C to 70°C (-40°F to 158°F)• Storage humidity: 90% non-condensing relative humidity at 35°C (95°F)Physical Dimensions• PCB dimensions: 5.600 inches (L) x 2.712 inches (W)Super AOC-S25G6-M2S User's ManualChapter 2Hardware Components 2.1 Add-On Card Image and LayoutAOC-S25G6-M2S ViewChapter 2: Hardware ComponentsAOC-S25G6-M2S LayoutSuper AOC-S25G6-M2S User's Manual2.2 Major ComponentsThe following major components are installed on the AOC-S25G6-M2S:Chapter 2: Hardware Components2.3 PortsThere are two SFP28 connector ports (LAN0 and LAN1) located on the AOC-S25G6-M2S add-on card. Connect a Direct Attach Copper Twin Axial cable or an LC fiber-optic cable to the ports to provide Gigabit Ethernet communication. Refer to the add-on card layout on page13 for the locations of the ports.Super AOC-S25G6-M2S User's Manual2.4 SFP28 Ethernet ConnectionsSFP28 ConnectorsTwo small form-factor pluggable (SFP28) optical transceiver connectors (SFP1/SFP2) are located on the add-on card. These SFP28 ports provide Ethernet 10GbE/25GbE network connections. See the layout below for the locations.SFP28 Link/Activity LED IndicatorsTwo LAN Link/Activity LED indicators are located at LED1 and LED2 on the add-on card.LED1 is used for the LAN0 connector, and LED2 is used for the for LAN1 connector. See the tables below for the LED states.Chapter 2: Hardware Components2.5 NC-SI HeaderA Network-Controller Sideband Interface (NC-SI) header is located at JNCSI1 on the add-oncard. Connect an appropriate cable from this header to a motherboard to provide the out-of-band (sideband) connection between the onboard Baseboard Management Controller (BMC) and a Network Interface Controller (NIC) for remote management. For the network sideband interface to work properly, you will need to use a motherboard that supports NCSI and also need to have a special cable. Please contact Supermicro at to purchase the cable for this header. See the layout below for the location of the JNCSI1 header.Super AOC-S25G6-M2S User's Manual2.6 JumpersTo modify the operation of the add-on card, a jumper can be used to choose between optional settings. A jumper creates shorts between two pins to change the function of the connector.See the add-on card layouts on page 13 for the jumper locations. If the standby power is disabled, the available system IPMI shared LAN/failover support will be turned/powered on.AOC-S25G6-M2S does not support WoL.Note: On two-pin jumpers, "Closed" means the jumper is on and "Open" means thejumper is off the pins.Chapter 3: InstallationChapter 3InstallationYour system came with the AOC-S25G6-M2S add-on card to be used as a part of an integrated solution. We do not recommend that any part of your system components be removed and reinstalled. However, if you do need to remove or reinstall a system component, including this add-on card, please follow the instructions below to ensure proper system setup. Also, be sure to remove the power cord first before adding, removing, or changing any hardware components to avoid damaging the system or components.3.1 Major ComponentsElectrostatic Discharge (ESD) can damage electronic com p onents. To avoid damaging your add-on card, it is important to handle it very carefully. The following measures are generally sufficient to protect your equipment from ESD.Precautions• Use a grounded wrist strap designed to prevent static discharge.• Touch a grounded metal object before removing the add-on card from the antistatic bag.• Handle the add-on card by its edges only; do not touch its components or peripheral chips.• Put the add-on card back into the antistatic bags when not in use.• For grounding purposes, make sure that your system chassis provides excellent conduc-tivity between the power supply, the case, the mounting fasteners, and the add-on card.UnpackingThe add-on card is shipped in antistatic packaging to avoid static damage. When unpacking your component or system, make sure you are static protected.Note: To avoid damaging your components and to ensure proper installation, alwaysconnect the power cord last, and always unplug it before adding, removing, or chang-ing any hardware components.Super AOC-S25G6-M2S User's Manual3.2 Before InstallationTo install the add-on card properly, be sure to follow the instructions below.1. Power down the system.2. Remove the power cord from the wall socket.3. Use industry-standard anti-static equipment (such as gloves or wrist strap) and followthe instructions listed on page 3-1 to avoid damage caused by ESD.4. Familiarize yourself with the server, motherboard, and/or chassis documentation.5. Confirm that your operating system includes the latest updates and hot fixes.3.3 Installing the Add-on CardFollow the steps below to install the add-on card into your system.1. Remove the server cover and, if necessary, set aside any screws for later use.2. Remove the add-on card slot cover. If the case requires a screw, place the screw asidefor later use.3. Position the add-on card in the slot directly over the connector on the motherboard, andgently push down on both sides of the card until it slides into the PCI connector.4. Secure the add-on card/motherboard to the chassis. If required, use the screw that youpreviously removed.5. Attach any necessary external cables to the add-on card.6. Replace the chassis cover.7. Plug the power cord into the wall socket, and power up the system.Chapter 3: Installation3.4 Installing Drivers for WindowsFollow the steps below to install the drivers needed for your Windows OS support. The controller comes with a driver on the CD-ROM CDR-NIC.1. Run the CDR-NIC. (If you do not have a product CD-ROM, download drivers from theSupermicro Support Website and then transfer them to your system.)2. When the SUPERMICRO window appears, click on the computer icon next to theproduct model.Note: If the FOUND NEW HARDWARE WIZARD screen displays on your system, click CANCEL.3. Click on INSTALL DRIVERS AND SOFTWARE.4. Follow the prompts to complete the installation.Super AOC-S25G6-M2S User's Manual3.5 Installing Drivers (NVIDIA® ConnectX-6 Lx)Use the procedures below to install the driver for the AOC-S25G6-M2S add-on card on both Linux and Windows.Linux Drivers1. Use the following procedures to install the 25GbE driver on the Linux operating system.2. We recommend downloading the latest Nvidia Driver directly from the Nvidia website:https:///products/infiniband-drivers/linux/mlnx_ofed/.3. Download and extract /untar from the Nvidia Linux OFED.tgz package.4. Change to the appropriate directory where your newly extracted package is located.5. Install the driver by entering the following command:./mlnxofedinstall --without-fw-updateThis installs the Linux drivers to your system. You might be prompted to install kernel dependencies for Linux, in which case you would need to follow on-screen instructions.Windows DriversUse the following procedures to install a 25GbE driver on the Windows operating system.1. We recommend that you download the latest Nvidia Driver directly from the Nvidiawebsite: https:///products/adapter-software/ethernet/windows/winof-2/.2. Once the driver is downloaded, run the .exe file to install the driver(Disclaimer Continued)The products sold by Supermicro are not intended for and will not be used in life support systems, medical equipment, nuclear facilities or systems, aircraft, aircraft devices, aircraft/emergency com-munication devices or other critical systems whose failure to perform be reasonably expected to result in significant injury or loss of life or catastrophic property damage. Accordingly, Supermicro disclaims any and all liability, and should buyer use or sell such products for use in such ultra-hazardous ap-plications, it does so entirely at its own risk. Furthermore, buyer agrees to fully indemnify, defend and hold Supermicro harmless for and against any and all claims, demands, actions, litigation, and proceedings of any kind arising out of or related to such ultra-hazardous use or sale.。
AOC G2490VX G2490VXA 显示器用户手册说明书

LCD Monitor User ManualG2490VX/G2490VXASafety (1)National Conventions (1)Power (2)Installation (3)Cleaning (4)Other (5)Setup (6)Contents in Box (6)Setup Stand & Base (7)Adjusting Viewing Angle (8)Connecting the Monitor (9)Wall Mounting (10)Adaptive-Sync function (11)Adjusting (12)Hotkeys (12)OSD Setting (13)Luminance (14)Color Setup (15)Picture Boost (16)OSD Setup (17)Game Setting (18)Extra (19)Exit (20)LED Indicator (20)Troubleshoot (21)Specification (22)General Specification (22)Preset Display Modes (23)Pin Assignments (24)Plug and Play (25)SafetyNational ConventionsThe following subsections describe notational conventions used in this document.Notes, Cautions, and WarningsThroughout this guide, blocks of text may be accompanied by an icon and printed in bold type or in italic type. These blocks are notes, cautions, and warnings, and they are used as follows:NOTE: A NOTE indicates important information that helps you make better use of your computer system.CAUTION: A CAUTION indicates either potential damage to hardware or loss of data and tells you how to avoid the problem.WARNING: A WARNING indicates the potential for bodily harm and tells you how to avoid the problem. Some warnings may appear in alternate formats and may be unaccompanied by an icon. In such cases, the specific presentation of the warning is mandated by regulatory authority.PowerThe monitor should be operated only from the type of power source indicated on the label. If you are not sure of the type of power supplied to your home, consult your dealer or local power company.The monitor is equipped with a three-pronged grounded plug, a plug with a third (grounding) pin. This plug will fitonly into a grounded power outlet as a safety feature. If your outlet does not accommodate the three-wire plug, have an electrician install the correct outlet, or use an adapter to ground the appliance safely. Do not defeat the safety purpose of the grounded plug.Unplug the unit during a lightning storm or when it will not be used for long periods of time. This will protect the monitor from damage due to power surges.Do not overload power strips and extension cords. Overloading can result in fire or electric shock.To ensure satisfactory operation, use the monitor only with UL listed computers which have appropriate configured receptacles marked between 100-240V AC, Min. 5A.The wall socket shall be installed near the equipment and shall be easily accessible.InstallationDo not place the monitor on an unstable cart, stand, tripod, bracket, or table. If the monitor falls, it can injure a person and cause serious damage to this product. Use only a cart, stand, tripod, bracket, or table recommended by the manufacturer or sold with this product. Follow the manufacturer’s instructions when installing the product and use mounting accessories recommended by the manufacturer. A product and cart combination should be moved with care.Never push any object into the slot on the monitor cabinet. It could damage circuit parts causing a fire or electricshock. Never spill liquids on the monitor. Do not place the front of the product on the floor.If you mount the monitor on a wall or shelf, use a mounting kit approved by the manufacturer and follow the kit instructions.Leave some space around the monitor as shown below. Otherwise, air-circulation may be inadequate henceoverheating may cause a fire or damage to the monitor.See below the recommended ventilation areas around the monitor when the monitor is installed on the wall or on the stand:Installed with stand Installed with standCleaningClean the cabinet regularly with cloth. You can use soft-detergent to wipe out the stain, instead of strong-detergent which will cauterize the product cabinet.When cleaning, make sure no detergent is leaked into the product. The cleaning cloth should not be too rough as it will scratch the screen surface.Please disconnect the power cord before cleaning the product.OtherIf the product is emitting a strange smell, sound or smoke, disconnect the power plug IMMEDIATELY and contact a Service Center.Make sure that the ventilating openings are not blocked by a table or curtain.Do not engage the LCD monitor in severe vibration or high impact conditions during operation.Do not knock or drop the monitor during operation or transportation.SetupContents in Box***CD Manual Power Cable DP Cable HDMI CableWarranty Card StandBaseNot all signal cables will be provided for all countries and regions. Please check with the local dealer or AOC branch office for confirmation.Setup Stand & BasePlease setup or remove the base following the steps as below. Setup:Remove:Adjusting Viewing AngleFor optimal viewing it is recommended to look at the full face of the monitor, then adjust the monitor’s angle to your own preference.Hold the stand so you will not topple the monitor when you change the monitor’s angle.You are able to adjust the monitor as below:-5°23°NOTE:Do not touch the LCD screen when you change the angle. It may cause damage or break the LCD screen.Connecting the MonitorCable Connections In Back of Monitor and Computer:12341. Power2. HDMI3. DP4. EarphoneConnect to PC1. Connect the power cord to the back of the display firmly.2. Turn off your computer and unplug i ts power cable.3. Connect the display signal cable to the video connector on the back of your computer.4. Plug the power cord of your computer and your display into a nearby outlet.5. Turn on your computer and display.If your monitor displays an image, installation is complete. If it does not display an image, please refer Troubleshooting. To protect equipment, always turn off the PC and LCD monitor before connecting.Wall MountingPreparing to Install An Optional Wall Mounting Arm.This monitor can be attached to a wall mounting arm you purchase separately. Disconnect power before this procedure. Follow these steps:1. Remove the base.2. Follow the manufacturer’s instructions to assemble the wall mounting arm.3. Place the wall mounting arm onto the back of the monitor. Line up the holes of the arm with the holes in the back ofthe monitor.4. Reconnect the cables. Refer to the user’s manual that came with the optional wall mounting arm for instructions onattaching it to the wall.Noted: VESA mounting screw holes are not available for all models, please check with the dealer or official department of AOC.Adaptive-Sync function1. Adaptive-Sync function is working with DP/HDMI2. Compatible Graphics Card: Recommend list is as the below, also could be checked by visiting • Radeon™ RX Vega series• Radeon™ RX 500 series• Radeon™ RX 400 series• Radeon™ R9/R7 300 series (R9 370/X, R7 370/X, R7 265except)• Radeon™ Pro Duo (2016)• Radeon™ R9 Nano series• Radeon™ R9 Fury series• Radeon™ R9/R7 200 series (R9 270/X, R9 280/X except)AdjustingHotkeys1Source/Exit2Dial Point3Game Mode4Image Ratio5Power/Menu/EnterPower/Menu/EnterPress the Power button to turn on the monitor.When there is no OSD, Press to display the OSD or confirm the selection.Dial PointWhen there is no OSD, press Dial Point button to show / hide Dial Point.Image ratioWhen there is no OSD, Press > hotkey to active image ratio , Press < or > to adjust 4:3 or wide.Game ModeWhen there is no OSD, press ”Left” key to open game mode function, then press ”Left” or “Right” key to select game mode (FPS, RTS, Racing, Gamer 1, Gamer 2 or Gamer 3) basing on the different game types.Source/ExitWhen the OSD is closed, press Source/Exit button will be Source hot key function.OSD SettingBasic and simple instruction on the control keys.OSD Setup1). Press the MENU-button to activate the OSD window.2). Press Left or Right to navigate through the functions. Once the desired function is highlighted, press the MENU-button to activate it, press Left or Right to navigate through the sub-menu functions. Once the desired function is highlighted, press MENU-button to activate it.3). Press Left or Right to change the settings of the selected function. Press AUTO–button to exit. If you want to adjustany other function, repeat steps 2-3.4). OSD Lock Function: To lock the OSD, press and hold the MENU-button while the monitor is off and then presspower button to turn the monitor on. To un-lock the OSD - press and hold the MENU-button while the monitor is off and then press power button to turn the monitor on.Notes:1). If the product has only one signal input, the item of “Input Select” is disable to adjust.2). DCR, Color Boost and Picture Boost, for these states that only one state can existLuminanceOSD SetupContrast 0-100 Contrast from Digital-register.Brightness 0-100 Backlight AdjustmentEco modeStandard Standard ModeText Text ModeInternet Internet ModeGame Game ModeMovie Movie ModeSports Sports ModeReading Reading ModeGammaGamma1Adjust to Gamma 1Gamma2Adjust to Gamma 2Gamma3Adjust to Gamma 3DCROff Disable dynamic contrast ratioOn Enable dynamic contrast ratioHDR ModeOFFAdjust HDR Mode.HDR PictureHDR MovieHDR GameNote:When “HDR Mode” is set to “non-off”, the items “Contrast”, “Brightness”, “Gamma” cannot be adjusted.Color SetupOSD SetupColor Temp.Warm Recall Warm Color Temperature from EEPROM.Normal Recall Normal Color Temperature from EEPROM.Cool Recall Cool Color Temperature from EEPROM.sRGB Recall SRGB Color Temperature from EEPROM.User Restore Color Temperature from EEPROM.DCB ModeFull Enhance On or Off Disable or Enable Full Enhance ModeNature Skin On or Off Disable or Enable Nature Skin ModeGreen Field On or Off Disable or Enable Green Field ModeSky-blue On or Off Disable or Enable Sky-blue ModeAutoDetect On or Off Disable or Enable AutoDetect ModeOff On or Off Disable or Enable Off ModeDCB Demo On or Off Disable or Enable DemoRed0-100Red gain from Digital-register.Green0-100Green gain from Digital-register.Blue0-100Blue gain from Digital-register.Note:When “HDR Mode” under “Luminance” is set to “non-off”, all items under “Color Setup” cannot be adjusted.Picture BoostOSD SetupBright Frame on or off Disable or Enable Bright FrameFrame Size 14-100 Adjust Frame SizeBrightness 0-100 Adjust Frame BrightnessContrast 0-100 Adjust Frame ContrastH. position 0-100 Adjust Frame horizontal PositionV. position0-100 Adjust Frame vertical PositionNote:Adjust the brightness, contrast, and position of the Bright Frame for better viewing experience.When “HDR Mode” under “Luminance” is set to “non-off”, all items under “Picture Boost” cannot be adjusted.OSD SetupOSD Setup Language Select the OSD language Timeout 5-120Adjust the OSD TimeoutDP Capability 1.1/1.2Please be noted that only DP1.2 support Adaptive-SyncH. Position 0-100 Adjust the horizontal position of OSD V. Position 0-100 Adjust the vertical position of OSD Volume 0-100Volume Adjustment.Transparence 0-100Adjust the transparence of OSDBreak Reminderon or offBreak reminder if the user continuously work for more than 1hrsNote:If the DP video content supports DP1.2, please select DP1.2 for DP Capability; otherwise, please select DP1.1Game SettingOSD Setup Game ModeFPSFor playing FPS (first Person Shooters) games.Improves dark theme black level details.RTSFor playing RTS (Real Time Strategy). Improves theimage quality.RacingFor playing Racing games, Provides fastest responsetime and high color saturation.Gamer 1User’s preference settings saved as Gamer 1.Gamer 2User’s preference settings saved as Gamer 2.Gamer 3User’s preference settings saved as Gamer 3.OFF No optimization by Smart image gameShadow Control0-100Shadow Control Default is 50, then end-user can adjustfrom 50 to 100 or 0 to increase contrast for clear picture.1. If picture is too dark to be saw the detail clearly,adjusting from 50 to100 for clear picture.2. If picture is too white to be saw the detail clearly,adjusting from 50 to0 for clear pictureOverdriveWeakAdjust the response time.MediumStrongBoostOffGame Color0-20Game Color will provide 0-20 level for adjustingsaturation to get better picture.LowBlue ModeReading / Office/ Internet /Multimedia / OffDecrease blue light wave by controlling colortemperature.MBR0 ~ 20Adjust the Motion Blur Reduction.Adaptive-Sync On/Off Adjust the Adaptive-SyncFrame CounterOff / Right-up /Right-Down / Left-Down / Left-UpDisplay V frequency on the corner selectedNote:W hen “HDR Mode” under “Luminance” is set to “non-off”, the items “Game Mode”, “Shadow Control”, “Game Color”, “Low Blue Mode” cannot be adjusted.OSD SetupInput Select Select Input Signal SourceOff timer0-24hrs Select DC off timeImage RatioWideSelect image ratio for display.4:3DDC/CI yes or no Turn ON/OFF DDC/CI SupportResetyes or no Reset the menu to default.(ENERGY STAR® available for selectivemodels.)ENERGY STAR® or noOSD SetupExit Exit the main OSDLED IndicatorStatus LED ColorFull Power Mode WhiteActive-off Mode OrangeTroubleshootProblem & Question Possible SolutionsPower LED Is Not ON Make sure the power button is ON and the Power Cord is properlyconnected to a grounded power outlet and to the monitor.No images on the screen Is the power cord connected properly?Check the power cord connection and power supply.Is the cable connected correctly?(Connected using the VGA cable)Check the VGA cable connection.(Connected using the HDMI cable)Check the HDMI cable connection.(Connected using the DP cable)Check the DP cable connection.* VGA/HDMI/DP input is not available on every model.If the power is on, reboot the computer to see the initial screen (the login screen), which can be seen.If the initial screen (the login screen) appears, boot the computer in the applicable mode (the safe mode for Windows 7/8/10) and then change the frequency of the video card.(Refer to the Setting the Optimal Resolution)If the initial screen (the login screen) does not appear, contact the ServiceCenter or your dealer.Can you see “Input Not Supported” on the screen?You can see this message when the signal from the video card exceeds the maximum resolution and frequency that the monitor can handle properly.Adjust the maximum resolution and frequency that the monitor can handle properly.Make sure the AOC Monitor Drivers are installed.Picture Is Fuzzy & Has Ghosting Shadowing Problem Adjust the Contrast and Brightness Controls.Press to auto adjust.Make sure you are not using an extension cable or switch box. We recommend plugging the monitor directly to the video card output connector on the back.Picture Bounces, Flickers Or Wave Pattern Appears In The Picture Move electrical devices that may cause electrical interference as far away from the monitor as possible.Use the maximum refresh rate your monitor is capable of at the resolution you are using.Monitor Is Stuck In Active Off-Mode”The Computer Power Switch should be in the ON position.The Computer Video Card should be snugly fitted in its slot.Make sure the monitor’s video cable is properly connected to the computer. Inspect the monitor’s video cable and make sure no pin is bent.Make sure your computer is operational by hitting the CAPS LOCK key on the keyboard while observing the CAPS LOCK LED. The LED should either turn ON or OFF after hitting the CAPS LOCK key.Missing one of the primary colors (RED, GREEN, or BLUE)Inspect the monitor’s video cable and make sure that no pin is damaged. Make sure the monitor’s video cable is properly connected to the computer.Screen image is not centeredor sized properly Adjust H-Position and V-Position or press hot-key (AUTO). Picture has color defects(white does not look white)Adjust RGB color or select desired color temperature.Horizontal or vertical disturbances on the screen Use Windows 7/8/10 shut-down mode to adjust CLOCK and FOCUS. Press to auto-adjust.Regulation & Service Please refer to Regulation & Service Information which is in the CD manual or (to find the model you purchase in your country and to find Regulation & Service Information in Support page.)Specification General SpecificationPanel Model name G2490VX/G2490VXA Driving system TFT Color LCDViewable Image Size60.5 cm diagonalPixel pitch 0.2745mm(H) x 0.2745mm(V) Video HDMI lnterface & DP Interface Separate Sync H/V TTLDisplay Color 16.7M ColorsOthers Horizontal scan range 30k-160kHzHorizontal scan Size(Maximum)527.04 mmVertical scan range 48-144HzVertical Scan Size(Maximum)296.46 mmOptimal preset resolution 1920x1080@60HzMax resolution1920x1080@144HzPlug & Play VESA DDC2B/CIInput Connector HDMI/DPInput Video Signal Analog: 0.7Vp-p(standard), 75 OHM, TMDSOutput Connector Earphone outPower Source 100-240V~, 50/60Hz,1.5APower ConsumptionTypical (Default brightness and contrast)22WMax. (brightness = 100, contrast =100)≤35W(G2490VX)42W(G2490VXA)Power saving≤0.5WPhysical Characteristics Connector Type HDMI/DP/Earphone out Signal Cable Type DetachableEnvironmental TemperatureOperating 0°~ 40°Non-Operating -25°~ 55°HumidityOperating 10% ~ 85% (non-condensing)Non-Operating 5% ~ 93% (non-condensing) AltitudeOperating 0~ 5000 m (0~ 16404ft )Non-Operating 0~ 12192m (0~ 40000ft )Preset Display ModesSTANDARD RESOLUTION HORIZONTALFREQUENCY(kHz)VERTICAL FREQUENCY(Hz)VGA640x480@60Hz31.46959.94 VGA640x480@67Hz3566.667 VGA640x480@72Hz37.86172.809 VGA640x480@75Hz37.575 VGA640x480@100Hz51.0899.769 VGA640x480@120Hz61.91119.518 DOS MODE720x400@70Hz31.46970.087 DOS MODE720x480@60Hz29.85559.710 SD720x576@50Hz31.2550 SVGA800x600@56Hz35.15656.25 SVGA800x600@60Hz37.87960.317 SVGA800x600@72Hz48.07772.188 SVGA800x600@75Hz46.87575 SVGA800x600@100Hz63.68499.662 SVGA800x600@120Hz76.302119.97 SVGA832x624@75Hz49.72574.551 XGA1024x768@60Hz48.36360.004 XGA1024x768@70Hz56.47670.069 XGA1024x768@75Hz60.02375.029 XGA1024x768@100Hz81.57799.972 XGA1024x768@120Hz97.551119.989 SXGA1280x1024@60Hz63.98160.02 SXGA1280x1024@75Hz79.97575.025 HD1280x720@50HZ37.07149.827 HD1280x720@60HZ4560 Full HD1920x1080@60Hz67.560 Full HD1920x1080@100Hz113.2199.93 Full HD1920x1080@120Hz137.26119.982 Full HD1920×1080@144Hz158.1144Pin Assignments19-Pin Color Display Signal CablePin No.Signal Name Pin No.Signal Name Pin No.Signal Name1.TMDS Data 2+9.TMDS Data 0-17.DDC/CEC Ground2.TMDS Data 2 Shield10.TMDS Clock +18.+5V Power3.TMDS Data 2-11.TMDS Clock Shield19.Hot Plug Detect4.TMDS Data 1+12.TMDS Clock-5.TMDS Data 1Shield13.CEC6.TMDS Data 1-14.Reserved (N.C. on device)7.TMDS Data 0+15.SCL8.TMDS Data 0 Shield16.SDA20-Pin Color Display Signal CablePin No.Signal Name Pin No.Signal Name 1ML_Lane 3 (n)11GND2GND12ML_Lane 0 (p)3ML_Lane 3 (p)13CONFIG14ML_Lane 2 (n)14CONFIG25GND15AUX_CH(p)6ML_Lane 2 (p)16GND7ML_Lane 1 (n)17AUX_CH(n)8GND18Hot Plug Detect9ML_Lane 1 (p)19Return DP_PWR10ML_Lane 0 (n)20DP_PWRPlug and PlayPlug & Play DDC2B FeatureThis monitor is equipped with VESA DDC2B capabilities according to the VESA DDC STANDARD. It allows the monitor to inform the host system of its identity and, depending on the level of DDC used, communicate additional information about its display capabilities.The DDC2B is a bi-directional data channel based on the I2C protocol. The host can request EDID information over the DDC2B channel.。
精致唯美 AOC 27T1Q显示器
精致唯美AOC 27T1Q显示器
AOC 27T1Q 显示器是一款精致唯美的产品,它具有出色的设计和出色的性能,为用户
提供了极佳的使用体验。
AOC 27T1Q 显示器采用了精致的外观设计,配备了一块27英寸的高清屏幕。
屏幕边框非常细腻,给人一种简约而时尚的感觉。
显示器背部使用了金属材质,使整个产品看起来
更加高贵大气。
而且它提供了多种颜色选择,可以满足不同用户的审美需求。
AOC 27T1Q 显示器拥有出色的性能表现。
它采用了IPS面板技术,具有更广阔的视角
和更准确的色彩表现。
无论从任何角度看,屏幕显示的内容都非常清晰细腻,色彩鲜艳。
显示器还支持178°的广角视觉,让用户可以在不同的角度观看屏幕内容,不会出现明显
的色彩变化和图像模糊现象。
AOC 27T1Q 显示器还具有其他实用的功能。
它配备了HDMI接口、VGA接口和音频接口,可以与多种设备连接,如电脑、游戏机、音响等。
它还支持壁挂安装,可以灵活调整屏幕
的高度和角度,以满足用户的个性化需求。
在使用过程中,AOC 27T1Q 显示器还具有低蓝光模式和无闪烁技术,可以有效减少眼
睛的疲劳和视觉不适。
这对于长时间使用电脑的用户来说非常重要,可以保护眼睛健康。
AOC 27T1Q 显示器是一款具有精致唯美外观和出色性能的产品。
它不仅能够提供清晰
细腻的画面,而且具有多种实用功能,让用户享受到更好的使用体验。
无论是办公、游戏
还是观看影片,AOC 27T1Q 显示器都能够满足用户的需求。
AOC 12579V显示器,25英寸新宠

AOC 12579V显示器,25英寸新宠近两年来,显示器不仅分辨率越来越高,显示器比例也在变化。
而现在,显示器尺寸也在悄然变化着。
近期,AOC 就推出了一款25英寸新尺寸显示器――12579V。
其实,早在2012年初的时候,LG就推出首款25英寸的显示器――D2542 P。
那么这款AOC12579V又有哪些独特之处呢?从打开包装看到12579V的第一眼,似乎就有一种似曾相识的感觉,它的外形设计很像我们前几期评测过的那款护眼显示器――E2476VW6。
不同的是12579V采用了时下流行的超窄边框和超薄机身设计,纯白色的外观看上去也更清新、时尚,带有文艺范儿。
12579V的底座采用了普通的底座,不支持升降、旋转等功能。
而如果你想要更换显示器支架的话,那么很抱歉,12579V同样不支持,因为它没有搭配VESA孔位。
在接口方面,12579V搭配的VGA和DVI 接口略显小气,不算丰富,仅能满足日常家用。
12579V的OSD设置在了显示器的中下方靠右方的位置,采用的是实体按键,在OSD菜单中可以对显示器进行常规的亮度、对比度以及其他色彩方面的调节。
其实要问25英寸的显示器与24英寸或是27英寸的显示器有什么不同,从使用体验来看,这款25英寸的12579V 在显示方面与24英寸显示器差不多。
因为25英寸的显示器与24英寸的显示器在点距上没有太大差别,25英寸的点距为0.288mm,24英寸的点距为0.276mm,两者的差别并不大。
但对比27英寸还是比较明显,除开大小不说,在1080p分辨率下,显示效果方面还是25英寸的显示器更胜一筹。
I2579V采用的是IPS面板,分辨率依然为1920×1080。
从仪器的测试来看,12579V的成绩达到了一个中等水平。
其平均亮度为231.32cd/m2,与标称的250cd/m2。
虽然有一些差距,但好在相差不大。
在色域方面,74%的NTSC色域覆盖面积刚好超过及格线水平,算是中等水准。
精致唯美 AOC 27T1Q显示器
精致唯美AOC 27T1Q显示器AOC 27T1Q显示器以其精致唯美的外观和出色的画质而备受赞誉。
本文将为您介绍这款显示器的设计特点、技术参数和用户体验,让您更好地了解这款性能卓越的显示器。
让我们来看看AOC 27T1Q显示器的外观设计。
这款显示器采用了全新的边框设计,将边框尽量缩小到了最窄,打造出更加精致的外观。
其金属基座和超薄机身也为整体增添了一丝优雅和时尚感。
不管是放在家里还是办公室,AOC 27T1Q都可以完美融入周围的环境,成为一道靓丽的风景线。
除了外观设计,AOC 27T1Q显示器的画质表现也是其闪耀的亮点。
这款显示器拥有27英寸的IPS面板屏幕,分辨率为1920x1080,支持16:9的显示比例,显示效果非常清晰逼真。
该显示器还支持178°/178°的超广视角,无论您身处何处,都可以享受到同样优质的视觉体验。
而在色彩表现方面,AOC 27T1Q显示器更是有着出色的表现,色彩饱满,细节丰富,让您在观影、办公或者游戏时都能感受到更加真实的画面。
在技术参数方面,AOC 27T1Q显示器也是毫不逊色。
该显示器支持75Hz的刷新率,响应时间为4ms,分别对于画面的流畅度和稳定性都提供了可靠的保障。
AOC 27T1Q还拥有Flicker-Free技术和Low Blue Mode功能,有效减少了蓝光对眼睛的刺激,让您长时间使用时更加舒适。
而它还具备支持HDMI和VGA接口,可与不同设备轻松连接,为用户带来更多的便利。
除了以上的技术参数和外观设计之外,AOC 27T1Q显示器在用户体验方面也十分出色。
它还具备护眼模式,可以有效减轻眼睛的疲劳感,尤其是对于长时间面对电脑的办公人员来说,这点尤为重要。
AOC 27T1Q显示器还支持壁挂式设计,方便用户按照自己的需求自由安装,进一步扩展了其使用场景。
AOC 27T1Q显示器还拥有内置音响,让用户在观看视频时也能享受到更加震撼的声音体验。
AOC液晶显示器用户说明书
安全说明 (4)关于本指南 (4)电源 (5)安装 (6)清洁 (8)其他 (9)安装 (10)标准配置 (10)安装支架底座 (11)调整视角 (12)连接显示器 (13)安装墙壁装配架 (14)调节显示器 (15)设置最佳分辨率 (15)Windows Vista (15)Windows XP (17)Windows ME/2000 (18)快捷键 (19)OSD 调节 (20)明亮度 (21)图像设置 (23)色温 (25)色彩增强 (27)窗口增亮 (29)OSD 设置 (31)其它 (33)重置 (35)退出 (37)LED 指示灯 (39)驱动 (40)显示器驱动 (40)Windows 2000 (40)Windows ME (40)Windows XP (41)Windows Vista (44)Windows 7 (46)i-Menu .............................................................................................................................................................. 51 故障排除 .. (54)规格 (56)主要规格 (56)e-Saver Screen+ ............................................................................................................................................................ 5.. (53)2即插即用 (59)安规信息 (60)FCC注意事项 (60)WEEE声明 (60)有毒有害物质或元素声明 (61)能效等级 (61)安全说明关于本指南下面说明本文档中使用的符号约定。
十大触控一体机品牌技术参数
目录一、希沃 (1)70寸技术参数 (1)图片示例 (2)二、TCL (3)70寸技术参数 (3)图片示例 (4)65寸技术参数 (5)三、上海广电光显 (6)技术参数 (6)四、长虹 (7)65寸技术参数 (7)五、鸿合科技 (8)70寸技术参数 (8)六、创维光电 (8)70寸技术参数 (9)图片示例 (10)84寸技术参数 (11)65寸技术参数 (12)七、上海仙视 (12)70寸技术参数 (12)图片示例 (14)84寸技术参数 (15)八、夏普 (16)70寸技术参数 (16)80寸技术参数 (17)图片示例 (19)九、创显光电 (19)70寸技术参数 (20)84寸技术参数 (21)图片示例 (22)十、深圳中银科技 (23)70寸技术参数 (23)一、希沃70寸技术参数图片示例70寸图片165寸图片2二、TCL70寸技术参数图片示例70寸图片365寸图片465寸技术参数三、上海广电光显技术参数四、长虹65寸技术参数五、鸿合科技70寸技术参数产品规格:70英寸型号:HD-I7002E背光类型:LED显示比例:16:9可视角度:178°物理解析度:1920*1080Pixel图像制式/声音制式:PAL/DK,I3D功能:——工作电压:AC 90-265V,50/60Hz触摸表面材质:钢化玻璃感应方式:红外感应触摸技术特性:HID免驱触摸点数:多点触控,多点书写书写方式:手指或书写笔触摸分辨率:32767*32767通讯接口: USB存储温度/湿度:-20℃~60℃,10%~90% 工作温度/湿度:5℃~50℃,10%~90% 安装方式:壁挂或移动整机尺寸:1648.9*975.6*112.9mm重量:70KG六、创维光电70寸技术参数图片示例70寸图片565寸图片6七、上海仙视70寸技术参数图片示例八、夏普 70寸技术参数 电力消耗(W ) 230W 待机消耗功率(W ) 0.50电源要求 交流110-240V ,50Hz 屏幕显示语言 英文/中文(简体)/俄语 扬声器 (150mm×34mm )×2音频输出功率 10W×2(AV 输入,负载4欧姆,失真度为10%时) 电视调谐系统 自动预设99个频道视频彩色制式 PAL/SEAM/NTSC3.58/PAL60图像清晰度* RD 模拟信号:水平>=350,垂直>=400以上 SDTV :水平>=450,垂直>=450以上 背光源 LED 重量kg 57.5KG 外型尺寸(cm )宽×深×高 1.625 ×106 ×993mm液晶显示屏 X-GEN 面板分辨力1920(水平)×1080(垂直)下面-数字(天线输入)UHF/VHF 75q DIN 型插座下面-模拟(天线输UHF/VHF 75q DIN 型插座入)后面ー音频输入 HDMI2/电脑共用(直径3.5mm 插孔)RS-232C 9针D-sub 凸型插头电脑 15针小型D-sub,音频输入(与HDMI2共用)(直径3.5mm 插孔)后面—输入5 视频输入,音频输入后面—输入4色差输入(480I,576I,480P,576P,720P/50Hz,720P/60Hz, 1080I/50Hz,10080I/60Hz ),音频输入 后面-HDMI3HDMI(HDMI 输入)(480I,576I,480P,576P,720P/50Hz, 720P/60Hz,1080I50Hz,1080I/60Hz,1080P/50Hz, 1080P/60Hz,1080P/24Hz )侧面-HDMI2HDMI(HDMI 输入)(480I,576I,480P,576P,720P/50Hz720P/60Hz,1080I/50Hz,1080I/60Hz,1080P/50Hz,1080P/60Hz1080P/24Hz)音频输入(与电脑输入公用)(直径3.5mm 插孔))侧面-HDMI 1(ARC )HDMI(HDMI 输入)(480I,576I,480P,576P,720P/50Hz,720P/60Hz,1080I/50Hz,1080I/60Hz,1080P/50Hz,1080P/60Hz,1080P/24Hz ) 侧面-USB2(HDD ) USB2.0 前面 USB12.0侧面ー音频输出/耳机 直径3.5 插孔(音频输出)接收频道 VHF/UHF C1・C12・C13-C57 CATV SECAM/NTSC3.58/PAL60立体声/双语 丽音(NICAM )B/G ,I ,D/K A2 立体声:B/G 接收频率 模拟ATV 44.25-863.25MHz 数字DTV 55.25-863.25MHz电视制式 PAL :B/G,D/K ,I SECAM :B/G,D/K,K/K1 NTSC :M电源 由USB 提供操作系统 Win XP,Win CE,Vista,Win7,Linux,Mac,Android,Win8检测区域 153.9×86.6cmPC 连接器 USB (兼容1.1)书写方式 手指或非透明触控笔触摸定位精度 ± 2mm响应速度(单点连续) 4ms (典型值)触摸点数 6点检测方法 红外线阻隔检测方法80寸技术参数 基本规格电力消耗(W ) 260 待机消耗功率(W ) 0.50 能效指数(EEILCD ) 1.4分辨力1920(水平)×1080(垂直)外型尺寸(cm )宽×深×高 187.6×11.6×113.3液晶显示屏X超晶面板端子DVI-D 端口 1音频输出端子(HP) 1光纤数字音频输出 1Y,Pb,Pr输入端子 1USB端口 2RS-232C端口 1PC输入 1LAN(网络) 无HDMI端口 3复合视频输入端子 2声音声音输出(w) 10W+10W智能光控(opc) 有立体环绕SRS TruSurround HD图片示例九、创显光电图片示例十、深圳中银科技70寸技术参数。
精致唯美 AOC 27T1Q显示器
精致唯美AOC 27T1Q显示器
AOC 27T1Q是一款精致唯美的显示器,通过其独特的外观设计和卓越的产品性能,成
为了市场上备受瞩目的一款产品。
首先,AOC 27T1Q的外观设计非常独特,屏幕侧面和后面板采用了桃花心木,这让整
个显示器看起来很有纯木质感和质感感。
屏幕周边则采用了6毫米的窄边框设计,使得整
个屏幕更加宽广且美观,而且非常适合多屏幕办公。
其次,AOC 27T1Q的显示效果非常出色。
该显示器采用了27英寸IPS屏幕,分辨率为2560 x 1440,视角达到178度,可以满足用户的高清影音需求。
同时,该显示器支持100%的sRGB色域,保证了色彩的真实还原和表现。
此外,该显示器还支持低蓝光和无闪屏技术,有效缓解了眼睛疲劳感。
第三,AOC 27T1Q还具备非常强大的用户功能。
该显示器支持HDMI、DisplayPort和VGA接口,可以与各种设备进行连接。
此外,显示器还配备了一个Type-C接口,可以连接笔记本电脑并为其提供充电功能。
此外,这款显示器还支持语音控制和全局模式切换,使
得用户的操作更加简单方便。
总的来说,AOC 27T1Q是一款非常优秀的显示器,它不仅在外观设计和屏幕显示效果
方面表现出色,还具备非常强大的用户功能,可以满足不同层次的用户需求。
如果你正在
寻找一款高性能的显示器,那么AOC 27T1Q绝对是一个不错的选择。