tinyos编译环境搭建(windows)
安装TinyOS需要六个步骤
安装TinyOS需要六个步骤。
1.Installing a Java 1.5 JDK.安装java jdk 1.5需要配置环境变量2.Install Cygwin.安装Windows下的Linux模拟器,cygwin3.Installing native compilers.安装单片机工具,AVR或MSP430,根据自己需要。
4.Installing the nesC compiler.安装nesC和TinyOS_tool5.Installing the TinyOS source tree.安装TinyOS2.0.2主文件。
6.Installing the Graphviz visualization tool安装Graphviz并配置环境变量一.安装JDK 1.5下载JDK 2.5 在SUN的官方网站/. 安装并配置JDK的环境变量。
二.安装Cygwin下装Cygwin-1.2a于/dist-1.2.0/tools/windows/cygwin-1.2a.tgz这个版本TinyOS官方测试过,和TinyOS兼容度高。
三.安装单片机工具下载以下五个rpm包1.avr-binutils-2.15tinyos-3.cygwin.i386.rpm(/di st-2.0.0/tools/windows/avr-binutils-2.15tinyos-3.cygwin.i386.rpm)2.avr-gcc-3.4.3-1.cygwin.i386.rpm(/dist-2.0.0/t ools/windows/avr-gcc-3.4.3-1.cygwin.i386.rpm)3.avr-libcavr-libc-1.2.3-1.cygwin.i386.rpm(/dist-2.0.0/too ls/windows/avr-libc-1.2.3-1.cygwin.i386.rpm)4.avariceavarice-2.4-1.cygwin.i386.rpm(/dist-2.0.0/tools/ windows/avarice-2.4-1.cygwin.i386.rpm)5.insight (avr-gdb) avr-insight-6.3-1.cygwin.i386.rpm(/dist-1.2.0/to ols/windows/avr-insight-6.3-1.cygwin.i386.rpm)下载完成之后把五个包都拷贝到Cygwin的tmp文件夹(在Windows操作即可) 依次安装(要按照顺序安装,它们之间有依赖关系),安装命令如下。
thinstation编译环境搭建以及编译简介
thinstation编译环境搭建以及编译简介1. thinstation编译环境搭建在开始编译thinstation之前,我们需要先搭建好编译环境。
以下是一些步骤和工具,可帮助您快速搭建thinstation编译环境:a. 安装Linux发行版本:thinstation主要是在Linux环境下进行编译和开发,所以您需要选择一个合适的Linux发行版本来搭建编译环境。
常见的Linux发行版本有Ubuntu、Debian、Fedora等。
选择一个您熟悉或偏好的版本,并按照官方文档进行安装。
b. 安装必要的工具和依赖项:在搭建thinstation编译环境之前,您需要安装一些必要的工具和依赖项,例如GCC编译器、make、git等。
您可以使用包管理工具,如apt、yum等来安装这些工具和依赖项。
在安装完必要的工具和依赖项之后,您还可以安装一些可选的工具,如Subversion、Curl等,以方便您进行开发和下载源代码。
c. 下载thinstation源代码:在搭建好编译环境后,您需要下载thinstation 的源代码。
您可以通过Git工具来下载thinstation的最新版本的源代码。
运行“git cloned. 配置编译环境:在下载完thinstation源代码后,您需要进行一些配置,以准备好编译环境。
进入thinstation源代码所在的目录,运行“./configure”命令可以生成编译所需的配置文件。
您可以根据您的需求,修改配置文件中的一些选项,例如网络设置、显示设置等。
e. 编译thinstation:在完成编译环境的配置后,您可以开始编译thinstation。
运行“make”命令可以开始编译thinstation。
编译过程可能需要一些时间,取决于您的机器配置和网络速度。
如果一切顺利,您将在编译完成后得到一个可执行的thinstation镜像文件。
2. thinstation编译简介thinstation是一个开源的轻量级操作系统,用于将普通计算机转变为瘦客户机(thin client)。
关于TinyOS编程的详细说明说明书
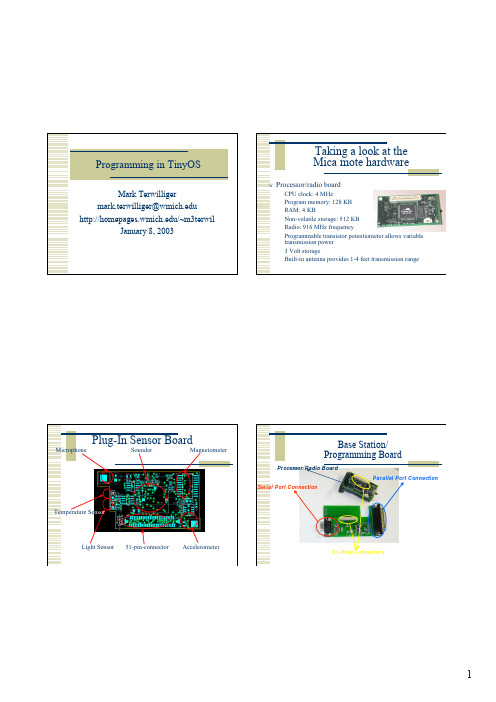
Programmable transistor potentiometer allows variable Built-in antenna provides 1-4 feet transmission rangeLight Sensor 51-pin-connector Temperature Se nsorAccelerometerSerial Port ConnectionParallel Port ConnectionProcessor/Radio Board51-Pins ConnectorsWhat is TinyOS?w Small, open source, energy efficient operating system designed by UC Berkeley w It was designed specifically for networked sensorsw Event-based systemEach system module is designed to operate bycontinually responding to incoming eventsMore TinyOS stuffw Two-level schedulingEvent handlers deal with hardware interrupts Tasksl Execution mechanism provided for long runningcomputationsl Runs to completion in backgroundl Can be interrupted by low-level system eventsl Task scheduling performed by simple FIFO queueMore TinyOS stuffw ComponentsAllows application developers to combineindependent components into an applicationspecific configurationA specialized language, NESC, was developed toexpress a component graph and the command/event interfaces between componentsThe TinyOS web sitew /tos/index.html DownloadSupportPublicationsHardware DesignsRelated WorkThe TinyOS download & install /tos/download.htmlw Installation packages available for:Windows 2000/XPl Choice of Installshield or Manual installationLinuxw Installation includes other software (Cygwin, JDK, avr tools, etc.)The TinyOS directoryw TinyOS subdirectories:appscontribdoctoolstosSpecification of aTinyOS programw A nesC application consists of one ormore components linked together to form an executablew A component provides and uses interfaces. These interfaces are the only point of access to the component and are bi-directionalw An interface declares a set of functions called commands that the interface provider must implement and another set of functions called events that the interface user must implementSpecification of aTinyOS programw For a component to call the commands in an interface, it must implement the events of that interfacew A single component may use or provide multiple interfaces and multiple instances of the same interfaceImplementation of aTinyOS programw There are two types of components in nesC: modules and configurationsw Modules provide application code, implementing one or more interfacew Configurations are used to assemble other components together, connecting interfaces used by components to interfaces provided by others. This is called wiringImplementation of aTinyOS programw Every nesC application is described by a top-level configuration that wires together the components insidew nesC uses the filename extension ".nc" for all source files --interfaces, modules, and configurationsWhat is NesC?w Network Embedded Systems Cw C-like syntax supporting TinyOSw Reference manual online:/papers/nesc-ref.pdfTinyOS Tutorialsw Provide sample programs with explanation of code w Tutorials included with TinyOS installationw Most up-to-date version of tutorials are online: /tos/tinyos-1.x/doc/tutorial/index.htmlCompiling and uploadingw To compile a TinyOS application, you must first enter the directory of the appw Type: make <platform>w Valid platforms include: mica, mica2, mica2dot w To compile and install: make <platform> install w To assign ID #: make <platform> install.X where X is the node ID (0, 1, 2, …)More compiling and uploading w To install a program that has already been built (no rebuild of target),type: make reinstall[.X] <platform>w To compile a program for use with the TOSSIM simulator, type: make pcw Note: For more information about the TOSSIM simulator, see Lesson 5 in the tutorial:/tos/tinyos-1.x/doc/tutorial/lesson5.htmlExample #1: Blinkw Lesson 1 in the tutorial:/tos/tinyos-1.x/doc/tutorial/lesson1.htmlExample #2: Sensingw Lesson 2 in the tutorial:/tos/tinyos-1.x/doc/tutorial/lesson2.htmlExample #3: Using the radio w Lesson 4 in the tutorial:/tos/tinyos-1.x/doc/tutorial/lesson4.htmlWhat should I do next?1.Download and install TinyOS2.Read the first four tutorialsw Implement the tutorials (schedule TBA)3.Read Chapter 1 of the WSN textbook4.Read “System Architecture Directions forNetworked Sensors”What should I do next? 5.Think about project ideas –use yourimagination//news/article.html?item_id=285/dataman/ActiveTape/Tree/Technologies we haven’t tried yet:Mica2Dot motesTASKNetwork reprogrammingSimulatorsOther helpful linksw Crossbow: Spec sheets and prices for Berkeley motes and othersensor network productsw Search the TinyOS mailing list archives: /tos/search.html。
TinyOS操作系统开发技术及实践 实践1
工具名称
Cygwin
JAVA JDK TinyOS nesC TinyOS-deputy TinyOS-tools graphviz mytinyos EditPlus IAR For 51
表 S1- 1 Visual Studio 2008 安装的配置要求
版本
说明
从网上下载 最新版即可
在 Windows 下安装模拟 Linux 系统的程序包
(2) 在Cygwin内,使用“cd” 命令进入tmp目录,可以使用 “ls”命令查看到“/tmp”下的安装包,如图S1-19所示。
图S1-19 进入“/tmp”目录
(3) 使用“rpm –ivh nesc-1.3.0-1.cygwin.i386.rpm”命令安装 nesC1.3,如图S1-20所示。
图S1-13 安装设置
(4) 安装程序进入安装,如图S1-14所示。 图S1-14 JDK安装
(5) 在随后出现的安装界面内,默认选择“运行环境”设 置,如图S1-15所示,然后点击“Next”。
图S1-15 运行环境设置
(6) 在“Browser Registration”界面内,保持默认选择,如 图S1-16所示,点击“Next”。
实践1 TinyOS概述
实践指导
实践指导
➢ 实践1.G.1 TinyOS开发环境安装。 【分析】
(1) TinyOS开发环境需要在Linux系统下进行安装。 (2) 为了可以在Windows系统上进行TinyOS开发需要安装 Cygwin。 (3) TinyOS开发环境包括TinyOS操作系统本身和一系列辅 助开发工具,本书推荐安装的完整工具链如表S1-1所示。
图S1-7 选择安装包
(8) 安装程序开始安装,如图S1-8所示。 图S1-8 安装进度
安装TinyOS需要六个步骤

安装TinyOS需要六个步骤安装TinyOS需要六个步骤。
1.Installing a Java1."5 JDK.安装java jdk1."5需要配置环境变量2.Install Cygwin.安装Windows下的Linux模拟器,cygwin安装单片机工具,AVR或MSP430,根据自己需要。
安装nesC 和TinyOS_tool5.Installing the TinyOS source tree.安装TinyOS2."0.2主文件。
6.Installing the Graphviz visualization tool安装Graphviz并配置环境变量一.安装JDK1."5下载JDK二.安装Cygwin下装Cygwin-1."2a于http:1."2.0/tools/windows/cygwin-1."2a.tgz这个版本TinyOS官方测试过,和TinyOS兼容度高。
三.安装单片机工具下载以下五个rpm包1.avr-binutils-2."15tinyos-3."cygwin.i386."rpm(http:2."0.0/tools/windows/avr-binutils-2."15tinyos-3.cygwin.i386."rpm)2.avr-gcc-3."4.3-1."cygwin.i386."rpm(http:2."0.0/tools/windows/avr-gcc-3."4.3-1."cygwin.i 386."rpm)3.avr-libcavr-libc-1."2.3-1."cygwin.i386."rpm(http:2."0.0/tools/windows/avr-libc-1."2.3-1.cygwin.i 386."rpm)4.avariceavarice-2."4-1."cygwin.i386."rpm(http:2."0.0/tools/windows/avarice-2."4-1."cygwin.i386."rpm)5.insight(avr-gdb)avr-insight-6."3-1."cygwin.i386."rpm(http:1."2.0/tools/windows/avr-insight-6."3-1."cygwin.i386."rpm)下载完成之后把五个包都拷贝到Cygwin的tmp文件夹(在Windows操作即可)依次安装(要按照顺序安装,它们之间有依赖关系),安装命令如下。
TinyOS操作系统开发技术及实践(西电版)第1章 TinyOS概述_OK

2021/6/30
10
10
第1章 TinyOS概述
版本 0.4.3 0.6.x 1.0 1.1.x
2.0 Beta
2.0.1 2.0.2 2.1.0 2.1.1 2.1.2 2021/6/30
时间 2000 年
2001 2002 年 9 月 2003 年 8 月
2006 年 2 月
2007 年 4 月 2007 年 7 月 2008 年 8 月 2010 年 4 月 2012 年 8 月
表 1-2 TinyOS 的版本变化
说明 通过 向公众开放 支持 mica 平台,期间 UBC 发布了支持 1000mica 平台的 TinyOS 项目, 2002 年 4 月 UCB 与 Intel 研究进行 nesC 语言开发合作 使用 nesC 语言重新编写并改进了 TinyOS nesC 增加部分新功能(如支持并发模型);TinyOS 增加新的 UART 通 信协议等 2.0 Beta1 发布,2.0 与 1.x 不再兼容,后者编写的代码将无法在 2.0 上编译通过;2.0 硬件抽象遵循 3 级结构;改进了任务调度策略;2.0 提 供了比 1.x 更丰富的定时器接口 增加 CC2420 低功耗协议栈;改进组件和接口的资源管理;增加 lib/printf 库;增加 lib/net/lqi 库;修复部分 BUG 重新实现了 CC2420 低功耗协议栈;修复部分 BUG 增加对 IRIS 和 shimmer 平台的支持;增加对 802.15.4 T-Frames 帧的 支持;增加低功耗应用开发指导 增加对 shimmer2、mulle、epic 平台的支持;增加 6LoWPAN/IP 协议 栈;改进 python SDK 增加 RPL 协议栈;增加对 ucmini、ATMega128RFA1、Zolertia Z1 平 台的支持;增加 CoAP 协议栈
Win7上安装Tinyos2.x步骤 其实最后我还是用的虚拟机

Win7上安装Tinyos步骤:Step1. 按照文件GettingStarted_Imote2_v2.pdf上的step1安装cygwin,添加源的时候可以用(电信)ftp:///sites//pub/cygwin/;(教育网bras@a/b可以连接到的)/pub/(参考:/site/install/ 按照安装步骤,在url site中添加cygwin中国镜像地址/pub/,之后的安装就很快了。
)Step2. 按照网页/index.php/Installing_and_Configuring_T2_for_iMote2_on_Win dows_XP(为了防止在一些网络环境下上述网页访问不到,我把这个网页下载下来,放在根目录文件夹Installing and Configuring T2 for iMote2 on Windows XP - TinyOS Documentation Wiki)中的step1 安装java(1.5以上版本,配置环境变量);step2 已经安装过了;step3 tinyos2.xtree下载完以后,要安装rpm --ignoreos -ivh tinyos-tools-1.2.4-2.cygwin.i386.rpm,安装这个rpm时可能会被告知貌似权限不够,由于cygwin没有root用户,所以不用担心;Step4 Download the TinyOS 2.x Contrib Tree ;step5 Downloading and Installing NesC from CVS;step6 Downloading and Installing NesC from RPM;(step5和step6之选其中一个安装就好了,我安装的是step6)step7 Setting up the Intel Mote 2 debug board drivers;(step可选)step8 Downloading and Installing GraphViz;step9 Downloading and Installing the Xscale GCC Binaries没什么好说的,照着装就是咯~~;Step10 Configuring your Environment这个不用管它;中间需要下载几个rpm包;Step3. 上面都装好后,要配置两个文件:~/.bashrc和/etc/profile.d/tinyos.sh。
《实验指导书_TinyOS系统与nesC程序设计》

TinyOS系统与nesC程序设计课内实验指导书一、课内实验项目一览表二、详细实验指导书实验一:编程环境建立一实验目的1、掌握Java基本开发环境(JDK)的安装和配置方法。
2、掌握cygwin程序的安装,在建立windows下类似Unix环境。
3、掌握Linux基本命令及cygwin下安装TinyOS的方法。
二实验原理无三实验环境1、运行Windows的PC机,能够连接Internet2、PC机配置要求:四实验内容和步骤1、java jdk安装首先,我们安装JA V A开发工具JA V A JDK 1.6官方下载地址:/javase/downloads/.安装过程只需下一步……下一步便可,默认安装路径是C:\Program Files\Java上图是TinyOS 2.0.2 安装时截取的JA V A JDK1.5的图,只供参考。
然后,我们需要设置电脑的环境变量,需要新建两个环境变量,以便使用JDK 具体过程如下:右击我的电脑——〉属性——〉高级——〉环境变量先新建或编辑系统变量:变量名(N):JA V A_HOME变量值(V):JDK安装的路径,其默认的路径为:C:\Program Files\Java\jdk1.6.0_10变量名(N):CLASSPATH变量值(V):.;%JAVA_HOME%\lib\dt.jar;%JAVA_HOME%\lib\tools.jar;;%JAVA_HOME%\bin;%JAVA_HOME%\jr e\bin;在系统变量(S)栏选中变量为Path的选项,点编辑在变量值(V)的末尾添加:;%JAVA_HOME%\bin; ;%JAVA_HOME%\jre\bin;然后新建或编辑用户变量:同样再设置一个JAVA_HOME,变量值也一样。
在用户变量的PATH中添加:;%JAVA_HOME%\bin:$PATH;%JAVA_HOME%\jre\bin:$PATH;这样,我们的环境变量已经设置完毕了。
- 1、下载文档前请自行甄别文档内容的完整性,平台不提供额外的编辑、内容补充、找答案等附加服务。
- 2、"仅部分预览"的文档,不可在线预览部分如存在完整性等问题,可反馈申请退款(可完整预览的文档不适用该条件!)。
- 3、如文档侵犯您的权益,请联系客服反馈,我们会尽快为您处理(人工客服工作时间:9:00-18:30)。
将Tinyos2.x移植到cc2530
编译环境的搭建
流程:在windows下建立cygwin平台,并搭建Tinyos的编译环境,然后将基于Tinyos的应用程序编译成hex文件,通过仿真器下载到cc2530片子上运行。
原材料:硬件(cc2530节点,仿真器等)、软件(Cygwin,Keil,TinyOS 2.x,编译环境配置软件包,SmartRF04 Flash Programer等)。
注意:硬件是原来在IAR下能正常使用的CC2530开发硬件就OK声明:一.里面很多东西我借鉴了网上的资料,并写在后面的参考文献中。
并对一些内容进行了修改和强调,以及我遇到的一些问题的解决方法。
= = = = = = = = = = = = = = = = = = = = = =
1.安装Keil (Keil uVersion4)
这些资源网上很多,百度和谷歌都可以搜到(注:一定要下载keil uVersion4,不可以下载4以下的版本,因为要运行的是cc2530,4以下的版本会找不到相关的编译平台环境)
2.安装java 1.5 JDK
我开始用1.6了的,反正一直没成功,不知道是不是这个原因。
最好就用1.5这个版本吧。
安装完了在命令行中:java –verson ,出现“java version “1.5.0”表示是1.5版本了。
3.安装Cygwin
(1)下载Cygwin,我是在这里下载的:/index.php/Installing_TinyOS_2.0.2#Manual_installation_on_your_host_OS_with_RPMs,在Setp 2: Install Cygwin中第一步有个cygwin-files.zip,点击即可下载。
这个地址好像也可以下载:rmatik.uni-freiburg.de/people/aslam/cygwin-files.zip
(2)安装时先解压下载的cygwin,点击setup.exe即可,默认安装在c盘下。
选项基本上不用变,都是默认选项:”install from Local Directory”->Root Directory: c:\cygwin, Install for: All Users, Default Text file type: Unix/Binary->当问到”Select local Package directory”时,选择自己解压的cygwin目录即可,如:“D:/cygwin-files”,最后等一会时间即可完成安装。
(3)启动桌面上的Cygwin快捷图标,cygwin第一次运行会设置一些东西,并创建一个home目录,里面创建了一个用户,名为windows系统的用户名。
注意:此时自己在cygwi菜单n根目录下创建一个opt目录,后面会用到。
(如果你安装cygwin后有这个目录就不同了,反正我安装后没有这个目录,后面的操作会在这个目录下自动放置一些文件)
4.下载Tinyos开发必备的编译工具的安装包(共4个)
NesC编译工具:nesc-1.3.0-1.cygwin.i386.rpm
TinyOS相关工具:
tinyos-deputy-1.1-1.cygwin.i386.rpm
tinyos-tools-1.3.0-1.cygwin.i386.rpm
tinyos-2.1.0-2.cygwin.noarch.rpm
这些东西在这里能够找到(呵呵):/dist-2.1.0/tinyos/windows/
5.安装上面的rpm包
(1)在/home目录下是你的主目录,我的是.Adminstrator将刚才的那4个rpm包拷贝到\home\Adminstrator下(即C:\Cygwin\home\john下),进入到该目录:cd /home/Adminstrator,ls一下可以看见这4个文件。
(2)安装rpm包
rpm -ivh nesc-1.3.0-1.cygwin.i386.rpm
rpm -ivh tinyos-tools-1.3.0-1.cygwin.i386.rpm
rpm -ivh tinyos-deputy-1.1-1.cygwin.i386.rpm
rpm -ivh tinyos-2.1.0-2.cygwin.noarch.rpm
每输入一次回车一下就可以了。
6.安装Tinyos 2题.x
(1)将下载的Tinyos文件“TinyOS8051wg-0.1pre4.tgz”放到/opt目录下。
注意检查此时该目录下应该有一个叫“tinyos-2.x”的目录,如果没有前面做的有问题,而且后面的操作几乎肯定会出错。
(注:TinyOS8051wg-0.1pre4.tgz 在/可以找到下载资源)
PS:这个文件夹下放置了一些编译规则文件,如:\opt\tinyos-2.x\support\make\Makerules文件。
(2)解压“TinyOS8051wg-0.1pre4.tgz”文件
tar –xvzf TinyOS8051wg-0.1pre4.tgz ,有些文章说用winrar就可以,反正我每次这么做的时候最后都会报错,最好用前面这个tar命令。
最后在/opt下生成一个“tinyos-2.x-contrib”目录
(3)设置编译环境
cd tinyos-2.x-contrib
ls (出现一个diku文件夹)
source diku/env
说明:diku文件夹下面有个env配置文件,我们通过source 命令加载下,这样后面编译的时候编译器就知道我们要使用什么样的配置去编译了。
注意:每次重新启动cygwin后如果要编译,需要运行此命令(source /opt/tinyos-2.x-contrib/diku/env)(4)编译工程文件(以BlinkNoTimerTask为例)
cd /diku/common/apps/BlinkNoTimerTask
make cc2430em
可能出现下面错误:
cd build/cc2430em && ./startup.bat
/bin/sh: ./startup.bat: Permission denied
意思是权限不够,又不知道如何在cygwin下以超级用户登录(网上说用login命令,我试了不怎么好使)。
我的解决办法是:进入到cc2430em目录下,chmod 777 startup.bat,然后重新编译,反正就好用了,呵呵。
我最后的结果截图如下:
最后在cc2430em下生成了app.hex文件,如图:
7.烧写
(1)下载并安装SmartRF04 Flash Programmer这个软件,我用的是Setup_SmartRF04Progr_1.3.0.exe 这个版本(同时我把还安装了Setup_Packet_Sniffer_2_2_0_0.exe和Setup_SmartRF_Studio_6_5_1.exe这两个软件,是芯片和仿真器驱动,不知道是不是多于了)。
(2)电脑USB跟仿真器连接,仿真器跟芯片连接好后,提示安装驱动,自动安装好后即可以用了。
(3)打开chipcon下的SmartRF04 Flash Programer,设置如下:
注意用System-on-Chip => Flash iage选择刚才编译好的app.hex文件=> 点击Read IEEE, 然后Write IEEE => 勾选Retain IEEE address when reprogramming => Action中选择第二个Erase,program and v… =>最后点击Perform actions,出现Erase,program and verify OK。
表示成功了,而且此时芯片上的一个小灯在不停的快速闪烁。