用宏批量调整word中图片版式大小方向
Word采用宏命令批量调整照片大小方法
Word采用宏命令批量调整照片大小方法
Word采用宏命令批量调整照片大小方法
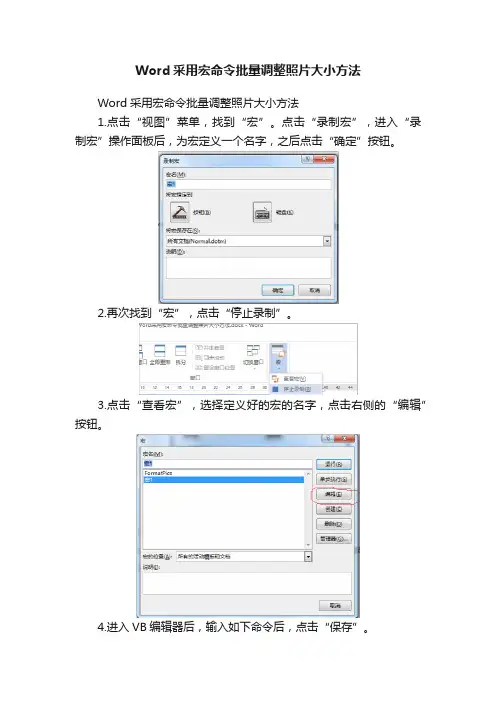
1.点击“视图”菜单,找到“宏”。
点击“录制宏”,进入“录制宏”操作面板后,为宏定义一个名字,之后点击“确定”按钮。
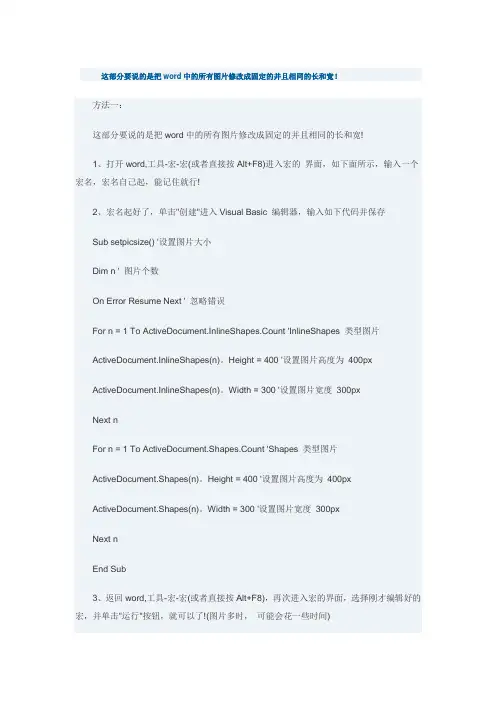
2.再次找到“宏”,点击“停止录制”。
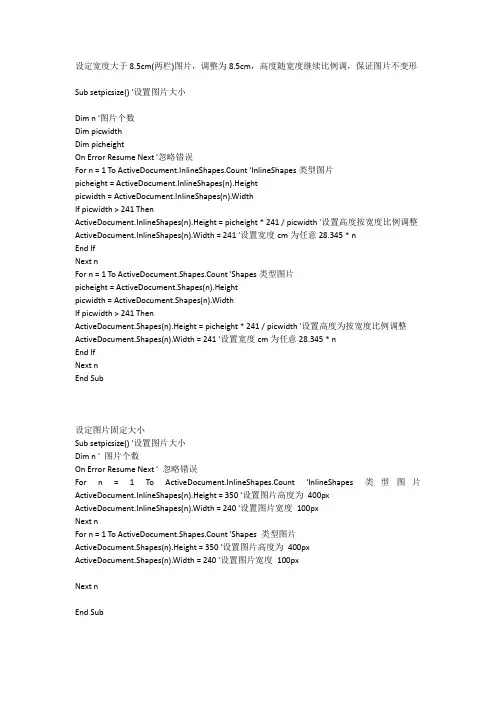
3.点击“查看宏”,选择定义好的宏的名字,点击右侧的“编辑”按钮。
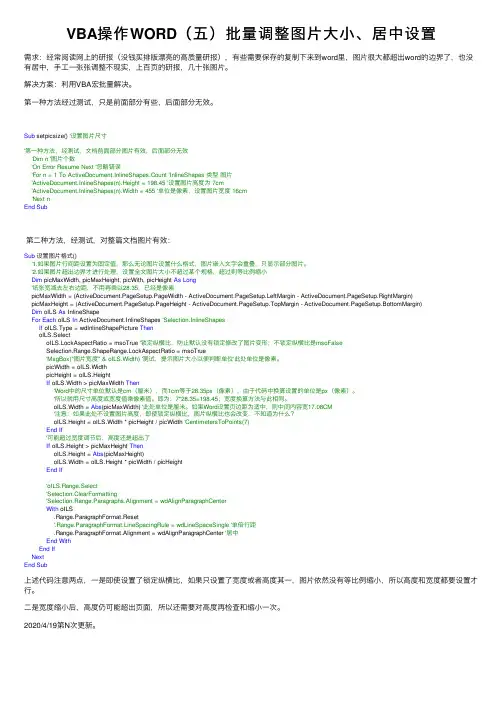
4.进入VB编辑器后,输入如下命令后,点击“保存”。
5.若照片有不同的大小要求,可在命令中的“()”内调整照片的宽度及高度。
6.将照片批量插入到WORD文档中,要求照片必须为“嵌入式”。
7.点击“宏”,进入操作面板后点击“运行”按钮,宏命令就得到了
执行,插入到文档中的图片就会按照在宏命令中设置的大小进行批量调整。
word中批量修改图片大小
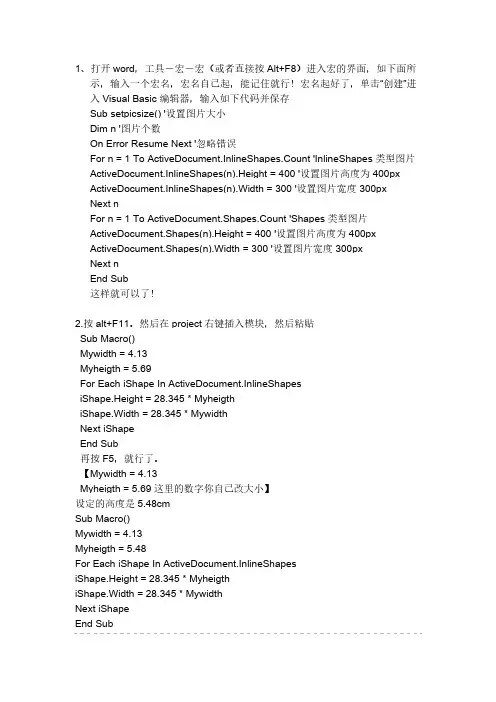
这部分要说的是把word中的所有图片修改成固定的并且相同的长和宽!方法一:这部分要说的是把word中的所有图片修改成固定的并且相同的长和宽!1、打开word,工具-宏-宏(或者直接按Alt+F8)进入宏的界面,如下面所示,输入一个宏名,宏名自己起,能记住就行!2、宏名起好了,单击"创建"进入Visual Basic 编辑器,输入如下代码并保存Sub setpicsize() '设置图片大小Dim n ' 图片个数On Error Resume Next ' 忽略错误For n = 1 To ActiveDocument.InlineShapes.Count 'InlineShapes 类型图片ActiveDocument.InlineShapes(n)。
Height = 400 '设置图片高度为400pxActiveDocument.InlineShapes(n)。
Width = 300 '设置图片宽度300pxNext nFor n = 1 To ActiveDocument.Shapes.Count 'Shapes 类型图片ActiveDocument.Shapes(n)。
Height = 400 '设置图片高度为400pxActiveDocument.Shapes(n)。
Width = 300 '设置图片宽度300pxNext nEnd Sub3、返回word,工具-宏-宏(或者直接按Alt+F8),再次进入宏的界面,选择刚才编辑好的宏,并单击"运行"按钮,就可以了!(图片多时,可能会花一些时间)方法二:1、在word中按alt+f11组合键,进入VBA模式2、在左边的工程资源管理器中找到你的word文档,在其上右键/添加/模块3、把下面代码复制,粘贴进去。
4、更改数值,改一下宽度和高度数值(10),点运行(类似播放按钮。
word编程宏批量修改图片大小
设定宽度大于8.5cm(两栏)图片,调整为8.5cm,高度随宽度继续比例调,保证图片不变形Sub setpicsize() '设置图片大小Dim n '图片个数Dim picwidthDim picheightOn Error Resume Next '忽略错误For n = 1 To ActiveDocument.InlineShapes.Count 'InlineShapes类型图片picheight = ActiveDocument.InlineShapes(n).Heightpicwidth = ActiveDocument.InlineShapes(n).WidthIf picwidth > 241 ThenActiveDocument.InlineShapes(n).Height = picheight * 241 / picwidth '设置高度按宽度比例调整ActiveDocument.InlineShapes(n).Width = 241 '设置宽度cm为任意28.345 * nEnd IfNext nFor n = 1 To ActiveDocument.Shapes.Count 'Shapes类型图片picheight = ActiveDocument.Shapes(n).Heightpicwidth = ActiveDocument.Shapes(n).WidthIf picwidth > 241 ThenActiveDocument.Shapes(n).Height = picheight * 241 / picwidth '设置高度为按宽度比例调整ActiveDocument.Shapes(n).Width = 241 '设置宽度cm为任意28.345 * nEnd IfNext nEnd Sub设定图片固定大小Sub setpicsize() '设置图片大小Dim n ' 图片个数On Error Resume Next ' 忽略错误For n = 1 To ActiveDocument.InlineShapes.Count 'InlineShapes 类型图片ActiveDocument.InlineShapes(n).Height = 350 '设置图片高度为400pxActiveDocument.InlineShapes(n).Width = 240 '设置图片宽度100pxNext nFor n = 1 To ActiveDocument.Shapes.Count 'Shapes 类型图片ActiveDocument.Shapes(n).Height = 350 '设置图片高度为400pxActiveDocument.Shapes(n).Width = 240 '设置图片宽度100pxNext nEnd Sub设定图片统一宽度,高度不做处理由于我只需要统一宽度,所以将统一高度的代码注释Sub 图片格式统一()'' 图片格式统一宏'''Myheigth = 12Mywidth = 14On Error Resume Next '忽略错误For Each iShape In ActiveDocument.InlineShapes'iShape.Height = 28.345 * Myheigth '设置图片高度为任意cmiShape.Width = 28.345 * 8.5 '设置图片宽度NextFor Each Shape In ActiveDocument.Shapes'Shape.Height = 28.345 * Myheigth '设置图片高度为任意cmShape.Width = 28.345 * 8.5 '设置图片宽度NextEnd Sub设定图片统一调整比例Sub setpicsize() '设置图片大小Dim n '图片个数Dim picwidthDim picheightOn Error Resume Next '忽略错误For n = 1 To ActiveDocument.InlineShapes.Count 'InlineShapes类型图片picheight = ActiveDocument.InlineShapes(n).Heightpicwidth = ActiveDocument.InlineShapes(n).WidthActiveDocument.InlineShapes(n).Height = picheight * 0.7 '设置高度为1.1倍ActiveDocument.InlineShapes(n).Width = picwidth * 0.7 '设置宽度为1.1倍Next nFor n = 1 To ActiveDocument.Shapes.Count 'Shapes类型图片picheight = ActiveDocument.Shapes(n).Heightpicwidth = ActiveDocument.Shapes(n).WidthActiveDocument.Shapes(n).Height = picheight * 0.7 '设置高度为1.1倍ActiveDocument.Shapes(n).Width = picwidth * 0.7 '设置宽度为1.1倍Next n设定图片统一调整比例Sub 图片格式统一()'' 图片格式统一宏'''Myheigth = 12Mywidth = 14On Error Resume Next '忽略错误For Each iShape In ActiveDocument.InlineShapesiShape.Height = iShape.Height * 0.7 '设置图片高度为任意cmiShape.Width = iShape.Width * 0.7 '设置图片宽度NextFor Each Shape In ActiveDocument.ShapesShape.Height = iShape.Height * 0.7 '设置图片高度为任意cmShape.Width = iShape.Width * 0.7 '设置图片宽度NextEnd Sub设定宽度大于8.5cm图片,调整为8.5cm,高度不做调整Sub 图片格式统一()'' 图片格式统一宏'''Myheigth = 12Mywidth = 14On Error Resume Next '忽略错误For Each iShape In ActiveDocument.InlineShapesIf iShape.Width > 28.345 * 8.5 ThenActiveDocument.InlineShapes(n).LockAspectRatio=msotrue'打开纵横比锁定iShape.Width = 28.345 * 8.5 '设置图片宽度iShape.Height = iShape.Height * 28.345 * 8.5/iShape.WidthEnd IfFor Each Shape In ActiveDocument.ShapesShape.Width = 28.345 * 8.5 '设置图片宽度iShape.Height = iShape.Height * 28.345 * 8.5/iShape.WidthNextEnd SubSub setpicsize() '设置图片大小Dim n '图片个数On Error Resume Next '忽略错误For n = 1 To ActiveDocument.InlineShapes.Count 'InlineShapes类型图片ActiveDocument.InlineShapes(n).LockAspectRatio = msoTrueIf iShape.Width > 28.345 * 8.5 ThenActiveDocument.InlineShapes(n).Width = 28.345 * 8.5 '设置图片宽度500px end ifNext nFor n = 1 To ActiveDocument.Shapes.Count 'Shapes类型图片ActiveDocument.InlineShapes(n).LockAspectRatio = msoTrueIf iShape.Width > 28.345 * 8.5 ThenActiveDocument.Shapes(n).Width = 28.345 * 8.5 '设置图片宽度500pxend ifNext nEnd Sub。
VBA操作WORD(五)批量调整图片大小、居中设置
VBA操作WORD(五)批量调整图⽚⼤⼩、居中设置需求:经常阅读⽹上的研报(没钱买排版漂亮的⾼质量研报),有些需要保存的复制下来到word⾥,图⽚很⼤都超出word的边界了,也没有居中,⼿⼯⼀张张调整不现实,上百页的研报,⼏⼗张图⽚。
解决⽅案:利⽤VBA宏批量解决。
第⼀种⽅法经过测试,只是前⾯部分有些,后⾯部分⽆效。
Sub setpicsize() '设置图⽚尺⼨'第⼀种⽅法,经测试,⽂档前⾯部分图⽚有效,后⾯部分⽆效'Dim n '图⽚个数'On Error Resume Next '忽略错误'For n = 1 To ActiveDocument.InlineShapes.Count 'InlineShapes 类型图⽚'ActiveDocument.InlineShapes(n).Height = 198.45 '设置图⽚⾼度为 7cm'ActiveDocument.InlineShapes(n).Width = 455 '单位是像素,设置图⽚宽度 16cm'Next nEnd Sub第⼆种⽅法,经测试,对整篇⽂档图⽚有效:Sub设置图⽚格式()'1.如果图⽚⾏间距设置为固定值,那么⽆论图⽚设置什么格式,图⽚嵌⼊⽂字会重叠,只显⽰部分图⽚。
'2.如果图⽚超出边界才进⾏处理,设置全⽂图⽚⼤⼩不超过某个规格,超过则等⽐例缩⼩Dim picMaxWidth, picMaxHeight, picWith, picHeight As Long'纸张宽减去左右边距,不⽤再乘以28.35,已经是像素picMaxWidth = (ActiveDocument.PageSetup.PageWidth - ActiveDocument.PageSetup.LeftMargin - ActiveDocument.PageSetup.RightMargin)picMaxHeight = (ActiveDocument.PageSetup.PageHeight - ActiveDocument.PageSetup.TopMargin - ActiveDocument.PageSetup.BottomMargin)Dim oILS As InlineShapeFor Each oILS In ActiveDocument.InlineShapes 'Selection.InlineShapesIf oILS.Type = wdInlineShapePicture ThenoILS.SelectoILS.LockAspectRatio = msoTrue '锁定纵横⽐,防⽌默认没有锁定修改了图⽚变形;不锁定纵横⽐是msoFalseSelection.Range.ShapeRange.LockAspectRatio = msoTrue'MsgBox("图⽚宽度" & oILS.Width) '测试,提⽰图⽚⼤⼩以便判断单位'此处单位是像素。
word批量修正图片大小格式方框
批量改word文件中图大小word批量修改图片大小——固定长宽篇这部分要说的是把word中的所有图片修改成固定的并且相同的长和宽!打开word,工具-宏-宏(或者直接按Alt+F8)进入宏的界面,如下面所示,输入一个宏名,宏名自己起,能记住就行!宏名起好了,单击“创建”进入Visual Basic 编辑器,输入如下代码并保存Sub setpicsize() '设置图片大小Dim n '图片个数On Error Resume Next '忽略错误For n = 1 To ActiveDocument.InlineShapes.Count 'InlineShapes类型图片ActiveDocument.InlineShapes(n).Height = 400 '设置图片高度为 400px ActiveDocument.InlineShapes(n).Width = 300 '设置图片宽度 300pxNext nFor n = 1 To ActiveDocument.Shapes.Count 'Shapes类型图片ActiveDocument.Shapes(n).Height = 400 '设置图片高度为 400px ActiveDocument.Shapes(n).Width = 300 '设置图片宽度 300pxNext nEnd Sub注:px 是像素 1厘米为25px,可以自行按照自己的实际情况修改代码中像素大小3、返回word,工具-宏-宏(或者直接按Alt+F8),再次进入宏的界面,选择刚才编辑好的宏,并单击“运行”按钮,就可以了!(图片多时,可能会花一些时间)word批量修改图片大小——按比例缩放篇这部分要说的是把word中的所有图片按比例缩放!具体操作同上,只是代码部分稍做修改,代码如下:Sub setpicsize() '设置图片大小Dim n '图片个数Dim picwidthDim picheightOn Error Resume Next '忽略错误For n = 1 To ActiveDocument.InlineShapes.Count 'InlineShapes类型图片picheight = ActiveDocument.InlineShapes(n).Heightpicwidth = ActiveDocument.InlineShapes(n).WidthActiveDocument.InlineShapes(n).Height = picheight * 1.1 '设置高度为1.1倍ActiveDocument.InlineShapes(n).Width = picwidth * 1.1 '设置宽度为1.1倍Next nFor n = 1 To ActiveDocument.Shapes.Count 'Shapes类型图片picheight = ActiveDocument.Shapes(n).Heightpicwidth = ActiveDocument.Shapes(n).WidthActiveDocument.Shapes(n).Height = picheight * 1.1 '设置高度为1.1倍ActiveDocument.Shapes(n).Width = picwidth * 1.1 '设置宽度为1.1倍Next nEnd SubWORD中如何:1、批量插入图片;2、批量修改图片大小;3、使图片在WORD中的位置相同。
(完整word版)用宏批量调整word中图片版式、大小、方向
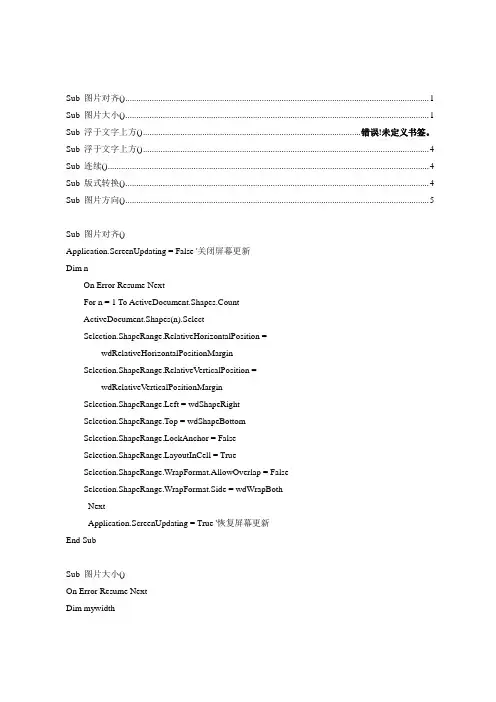
Sub 图片对齐() (1)Sub 图片大小() (1)Sub 浮于文字上方() ................................................................................................... 错误!未定义书签。
Sub 浮于文字上方() . (4)Sub 连续() (4)Sub 版式转换() (4)Sub 图片方向() (5)Sub 图片对齐()Application.ScreenUpdating = False '关闭屏幕更新Dim nOn Error Resume NextFor n = 1 To ActiveDocument.Shapes.CountActiveDocument.Shapes(n).SelectSelection.ShapeRange.RelativeHorizontalPosition = _wdRelativeHorizontalPositionMarginSelection.ShapeRange.RelativeVerticalPosition = _wdRelativeVerticalPositionMarginSelection.ShapeRange.Left = wdShapeRightSelection.ShapeRange.Top = wdShapeBottomSelection.ShapeRange.LockAnchor = FalseyoutInCell = TrueSelection.ShapeRange.WrapFormat.AllowOverlap = FalseSelection.ShapeRange.WrapFormat.Side = wdWrapBothNextApplication.ScreenUpdating = True '恢复屏幕更新End SubSub 图片大小()On Error Resume NextDim mywidthDim myheightApplication.ScreenUpdating = False '关闭屏幕更新mywidth = Val(InputBox(Prompt:="单位为厘米(cm);如果输入为0,则图片保持原始纵横比,宽度根据输入的高度数值自动调整;", Title:="请输入图片宽度", Default:="0")) * 28.35myheight = Val(InputBox(Prompt:="单位为厘米(cm);如果输入为0,则图片保持原始纵横比,高度根据输入的宽度数值自动调整;", Title:="请输入图片高度", Default:="0")) * 28.35'------------------------------------------------------------------'调整嵌入式图形Dim pic As InlineShapeFor Each pic In ActiveDocument.InlineShapesIf mywidth = "0" Thenpic.Height = myheightpic.ScaleWidth = pic.ScaleHeightElseIf myheight = "0" Thenpic.Width = mywidthpic.ScaleHeight = pic.ScaleWidthElsepic.Width = mywidthpic.Height = myheightEnd IfNext'调整浮动式图形Dim tu As ShapeFor Each tu In ActiveDocument.ShapesIf mywidth = "0" Thentu.Height = myheightElseIf myheight = "0" Thentu.Width = mywidthElsetu.LockAspectRatio = msoFalsetu.Width = mywidthtu.Height = myheightEnd IfNextApplication.ScreenUpdating = True '恢复屏幕更新End SubSub 浮于文字上方()Dim oShape As Variant, tu As Shape, iApplication.ScreenUpdating = False '关闭屏幕更新On Error Resume Next'调整嵌入图形为浮于文字上方,并旋转90度For Each oShape In ActiveDocument.InlineShapesSet oShape = oShape.ConvertToShapeActiveDocument.InlineShapes(i).SelectWith oShape.WrapFormat.Type = 3' (去除.Zorder行.WrapFormat.Type = shapeType四周形.WrapFormat.Type = wdWrapTight紧密形改为.ConvertToInlineShape嵌入形).ZOrder 4 '4浮于文字上方5衬于下方.Rotation = -90#End WithNext'调整其它图形为浮于文字上方,并旋转90度For Each tu In ActiveDocument.ShapesActiveDocument.Shapes(i).SelectWith tu.WrapFormat.Type = 3' (去除.Zorder行.WrapFormat.Type = shapeType四周形.WrapFormat.Type = wdWrapTight紧密形改为.ConvertToInlineShape嵌入形).ZOrder 4 '4浮于文字上方5衬于下方.Rotation = -90#End WithNextApplication.ScreenUpdating = True '恢复屏幕更新End SubSub 浮于文字上方()Dim oShape As Variant, iApplication.ScreenUpdating = False '关闭屏幕更新On Error Resume NextFor Each oShape In ActiveDocument.InlineShapesSet oShape = oShape.ConvertToShapeActiveDocument.InlineShapes(i).Select '选中图片With oShape.ZOrder 4 '选中图片版式调为浮于文字上方.Rotation = -90# '选中图片向左旋转90度End WithNextApplication.ScreenUpdating = True '关闭屏幕更新End SubSub 连续()Call 浮于文字上方Call 图片大小Call 图片对齐End SubSub 版式转换()Dim oShape As Variant, shapeType As WdWrapTypeOn Error Resume NextIf MsgBox("Y将图片由嵌入式转为浮动式,N将图片由浮动式转为嵌入式", 68) = 6 Then shapeType = Val(InputBox(Prompt:="请输入图片版式:0=四周型,1=紧密型, " & vbLf & _"3=衬于文字下方,4=浮于文字上方", Default:=0)) For Each oShape In ActiveDocument.InlineShapesSet oShape = oShape.ConvertToShapeWith oShapeSelect Case shapeTypeCase 0, 1.WrapFormat.Type = shapeTypeCase 3.WrapFormat.Type = 3.ZOrder 5Case 4.WrapFormat.Type = 3.ZOrder 4Case ElseExit SubEnd Select.WrapFormat.AllowOverlap = FalseEnd WithNextElseFor Each oShape In ActiveDocument.ShapesoShape.ConvertToInlineShapeNextEnd IfEnd SubSub 图片方向()Dim nOn Error Resume NextFor n = 1 To ActiveDocument.Shapes.CountActiveDocument.Shapes(n).IncrementRotation -90#Next nEnd Sub。
word中如何将大量图片批处理统一的尺寸大小
选择工具——宏——宏(Alt+F8调出宏编辑窗口),输入宏名——(非数字)——创建;在Sub 宏名()与End Sub之间编写如下代码:(之后单击运行即可)Dim n '图片个数On Error Resume Next '忽略错误For n = 1 To ActiveDocument.InlineShapes.Count 'InlineShapes类型图片ActiveDocument.InlineShapes(n).Height = 99 '设置图片高度为99pxActiveDocument.InlineShapes(n).Width = 71 '设置图片宽度71pxNext nFor n = 1 To ActiveDocument.Shapes.Count 'Shapes类型图片ActiveDocument.Shapes(n).Height = 99 '设置图片高度为99pxActiveDocument.Shapes(n).Width = 71 '设置图片宽度71pxNext n我们可以尝试使用VBA完成Word文档中图片统一设置宽高:Sub 统一图片尺寸()'仅适用于嵌入式图片Dim oInlineShape As InlineShapeFor Each oInlineShape In ActiveDocument.InlineShapesWith oInlineShape.LockAspectRatio = msoFalse '不锁定纵横比.Height = MillimetersToPoints(23) '以毫米为单位设置高度.Width = MillimetersToPoints(31) '以毫米为单位设置宽度End WithNextEnd Sub如果是浮动式图形,可以使用以下方法简单实现:1、单击【绘图】工具栏右则的(工具栏选项)按钮,依次单击【添加或删除按钮】/【绘图】/【选中多个对象】命令,【选中多个对象】命令将被添加到【绘图】工具栏的最后位置。
批量处理word文档图片大小
声明:我下面要说的“批量修改word里的图片大小”的方法需要使用到宏,所以~~最好对VB有所了解!当然~~这不是必需的,只要跟着我的图文教程走,不知道什么是宏,不知道什么是VB也可以!word批量修改图片大小——固定长宽篇这部分要说的是把word中的所有图片修改成固定的并且相同的长和宽!1、打开word,工具-宏-宏(或者直接按Alt+F8)进入宏的界面,如下面所示,输入一个宏名,宏名自己起,能记住就行!2、宏名起好了,单击“创建”进入Visual Basic 编辑器,输入如下代码并保存Sub setpicsize() '设置图片大小Dim n '图片个数On Error Resume Next '忽略错误For n = 1 To ActiveDocument.InlineShapes.Count 'InlineShapes类型图片ActiveDocument.InlineShapes(n).Height = 105 '设置图片高度为105px ActiveDocument.InlineShapes(n).Width = 105 '设置图片宽度105pxNext nFor n = 1 To ActiveDocument.Shapes.Count 'Shapes类型图片ActiveDocument.Shapes(n).Height = 105 '设置图片高度为105pxActiveDocument.Shapes(n).Width = 105 '设置图片宽度105pxNext nEnd Sub3、返回word,工具-宏-宏(或者直接按Alt+F8),再次进入宏的界面,选择刚才编辑好的宏,并单击“运行”按钮,就可以了!(图片多时,可能会花一些时间)word批量修改图片大小——按比例缩放篇这部分要说的是把word中的所有图片按比例缩放!具体操作同上,只是代码部分稍做修改,代码如下:Sub setpicsize() '设置图片大小Dim n '图片个数Dim picwidthDim picheightOn Error Resume Next '忽略错误For n = 1 To ActiveDocument.InlineShapes.Count 'InlineShapes类型图片picheight = ActiveDocument.InlineShapes(n).Heightpicwidth = ActiveDocument.InlineShapes(n).WidthActiveDocument.InlineShapes(n).Height = picheight * 1.1 '设置高度为1. 1倍ActiveDocument.InlineShapes(n).Width = picwidth * 1.1 '设置宽度为1.1倍Next nFor n = 1 To ActiveDocument.Shapes.Count 'Shapes类型图片picheight = ActiveDocument.Shapes(n).Heightpicwidth = ActiveDocument.Shapes(n).WidthActiveDocument.Shapes(n).Height = picheight * 1.1 '设置高度为1.1倍ActiveDocument.Shapes(n).Width = picwidth * 1.1 '设置宽度为1.1倍Next nEnd Sub虽然我的代码不是好代码,但确实能解决我的问题,瞬间就把word文档里所有图片放大了1.1倍,各种公式、坐标轴都比原来清楚多了,可以拿去打印出来了,呼呼!。
用宏批量调整中图片版式大小方向
用宏批量调整中图片版式大小方向集团标准化工作小组 #Q8QGGQT-GX8G08Q8-GNQGJ8-MHHGN#Sub 图片对齐()= False '关闭屏幕更新Dim nOn Error Resume Next(n).SelectorizontalPosition = _wdRelativeHorizontalPositionMarginwdRelativeVerticalPositionMarginNext= True '恢复屏幕更新End SubSub 图片大小()On Error Resume NextDim mywidthDim myheight= False '关闭屏幕更新mywidth = Val(InputBox(Prompt:="单位为厘米(cm);如果输入为0,则图片保持原始纵横比,宽度根据输入的高度数值自动调整;", Title:="请输入图片宽度", Default:="0")) * myheight = Val(InputBox(Prompt:="单位为厘米(cm);如果输入为0,则图片保持原始纵横比,高度根据输入的宽度数值自动调整;", Title:="请输入图片高度", Default:="0")) *'------------------------------------------------------------------'调整嵌入式图形Dim pic As InlineShapeFor Each pic InIf mywidth = "0" Then= myheight=ElseIf myheight = "0" Then= mywidth=Else= mywidth= myheightEnd IfNext'调整浮动式图形Dim tu As ShapeFor Each tu InIf mywidth = "0" Then= myheightElseIf myheight = "0" Then= mywidthElse= msoFalse= mywidth= myheightEnd IfNext= True '恢复屏幕更新End SubSub 浮于文字上方()Dim oShape As Variant, tu As Shape, i= False '关闭屏幕更新On Error Resume Next'调整嵌入图形为浮于文字上方,并旋转90度 For Each oShape InSet oShape =(i).SelectWith oShape. = 3' (去除.Zorder行. = shapeType四周形. = wdWrapTight紧密形改为.ConvertToInlineShape嵌入形).ZOrder 4 '4浮于文字上方 5衬于下方.Rotation = -90#End WithNext'调整其它图形为浮于文字上方,并旋转90度For Each tu In(i).SelectWith tu. = 3 ' (去除.Zorder行. = shapeType四周形. = wdWrapTight紧密形改为.ConvertToInlineShape嵌入形).ZOrder 4 '4浮于文字上方 5衬于下方.Rotation = -90#End WithNext= True '恢复屏幕更新End SubSub 浮于文字上方()Dim oShape As Variant, i= False '关闭屏幕更新On Error Resume NextFor Each oShape InSet oShape =(i).Select '选中图片With oShape.ZOrder 4 '选中图片版式调为浮于文字上方.Rotation = -90# '选中图片向左旋转90度End WithNext= True '关闭屏幕更新End SubSub 连续()Call 浮于文字上方Call 图片大小Call 图片对齐End SubSub 版式转换()Dim oShape As Variant, shapeType As WdWrapTypeOn Error Resume NextIf MsgBox("Y将图片由嵌入式转为浮动式,N将图片由浮动式转为嵌入式", 68) = 6 ThenshapeType = Val(InputBox(Prompt:="请输入图片版式:0=四周型,1=紧密型, " & vbLf & _"3=衬于文字下方,4=浮于文字上方", Default:=0))For Each oShape InSet oShape =With oShapeSelect Case shapeTypeCase 0, 1. = shapeTypeCase 3. = 3.ZOrder 5Case 4. = 3.ZOrder 4Case ElseExit SubEnd Select. = FalseEnd WithNextElseFor Each oShape InNextEnd IfEnd SubSub 图片方向()Dim nOn Error Resume Next(n).IncrementRotation -90# Next nEnd Sub。
【Word技巧】-如何用宏程序批量处理图片大小
Word技巧
如何用宏程序批量处理图片大小
1、统一图片大小+解除图片纵横比限制
Sub 图片统一大小() '设置图片大小
Dim n '图片个数
On Error Resume Next '忽略错误
For n = 1 To ActiveDocument.InlineShapes.Count 'InlineShapes类型图片ActiveDocument.InlineShapes(n).LockAspectRatio = msoFalse '解除纵横比锁定
ActiveDocument.InlineShapes(n).Height = 5 * 28.35 '设置图片高度为5cm(1cm 等于28.35px)
ActiveDocument.InlineShapes(n).Width = 5 * 28.35 ' 设置图片宽度5cm
Next n
End Sub
注:使用前要考虑各种特殊情况,如剪报中的logo也是会受到影响。
2、统一图片大小(不解除纵横比,可以仅限定宽或高)
Sub 统一图片大小()
Dim iShape As InlineShape
For Each iShape In ActiveDocument.InlineShapes
iShape.LockAspectRatio = msoTrue
iShape.Height = CentimetersToPoints(5)
iShape.Width = CentimetersToPoints(5)
Next
End Sub
以上代码直接ALT+F11 添加到宏程序中运行即可,标红部分可以自行修改。
- 1、下载文档前请自行甄别文档内容的完整性,平台不提供额外的编辑、内容补充、找答案等附加服务。
- 2、"仅部分预览"的文档,不可在线预览部分如存在完整性等问题,可反馈申请退款(可完整预览的文档不适用该条件!)。
- 3、如文档侵犯您的权益,请联系客服反馈,我们会尽快为您处理(人工客服工作时间:9:00-18:30)。
Sub 图片方向()..................................................... Sub 图片对齐()
Application.ScreenUpdating = False '关闭屏幕更新
Dim n
On Error Resume Next
ActiveDocument.Shapes(n).Select
orizontalPosition = _
wdRelativeHorizontalPositionMargin
wdRelativeVerticalPositionMargin
Next
Application.ScreenUpdating = True '恢复屏幕更新
End Sub
Sub 图片大小()
On Error Resume Next
Dim mywidth
Dim myheight
Application.ScreenUpdating = False '关闭屏幕更新
mywidth = Val(InputBox(Prompt:="单位为厘米(cm);如果输入为0,则图片保持原始纵横比,宽度根据输入的高度数值自动调整;", Title:="请输入图片宽度", Default:="0")) * 28.35
myheight = Val(InputBox(Prompt:="单位为厘米(cm);如果输入为0,则图片保持原始纵横比,高度根据输入的宽度数值自动调整;", Title:="请输入图片高度", Default:="0")) * 28.35
'------------------------------------------------------------------
'调整嵌入式图形
Dim pic As InlineShape
For Each pic In ActiveDocument.InlineShapes
If mywidth = "0" Then
pic.Height = myheight
pic.ScaleWidth = pic.ScaleHeight
ElseIf myheight = "0" Then
pic.Width = mywidth
pic.ScaleHeight = pic.ScaleWidth
Else
pic.Width = mywidth
pic.Height = myheight
End If
Next
'调整浮动式图形
Dim tu As Shape
For Each tu In ActiveDocument.Shapes
If mywidth = "0" Then
tu.Height = myheight
ElseIf myheight = "0" Then
tu.Width = mywidth
Else
tu.LockAspectRatio = msoFalse
tu.Width = mywidth
tu.Height = myheight
End If
Next
Application.ScreenUpdating = True '恢复屏幕更新End Sub
Sub 浮于文字上方()
Dim oShape As Variant, tu As Shape, i Application.ScreenUpdating = False '关闭屏幕更新On Error Resume Next
'调整嵌入图形为浮于文字上方,并旋转90度
For Each oShape In ActiveDocument.InlineShapes Set oShape = oShape.ConvertToShape
ActiveDocument.InlineShapes(i).Select
With oShape
.WrapFormat.Type = 3' (去除.Zorder行.WrapFormat.Type = shapeType四周形.WrapFormat.Type = wdWrapTight紧密形改为.ConvertToInlineShape嵌入形)
.ZOrder 4 '4浮于文字上方5衬于下方
.Rotation = -90#
End With
Next
'调整其它图形为浮于文字上方,并旋转90度
For Each tu In ActiveDocument.Shapes
ActiveDocument.Shapes(i).Select
With tu
.WrapFormat.Type = 3' (去除.Zorder行.WrapFormat.Type = shapeType四周形.WrapFormat.Type = wdWrapTight紧密形改为.ConvertToInlineShape嵌入形)
.ZOrder 4 '4浮于文字上方5衬于下方
.Rotation = -90#
End With
Next
Application.ScreenUpdating = True '恢复屏幕更新
End Sub
Sub 浮于文字上方()
Dim oShape As Variant, i
Application.ScreenUpdating = False '关闭屏幕更新
On Error Resume Next
For Each oShape In ActiveDocument.InlineShapes
Set oShape = oShape.ConvertToShape
ActiveDocument.InlineShapes(i).Select '选中图片
With oShape
.ZOrder 4 '选中图片版式调为浮于文字上方
.Rotation = -90# '选中图片向左旋转90度
End With
Next
Application.ScreenUpdating = True '关闭屏幕更新
End Sub
Sub 连续()
Call 浮于文字上方
Call 图片大小
Call 图片对齐
End Sub
Sub 版式转换()
Dim oShape As Variant, shapeType As WdWrapType
On Error Resume Next
If MsgBox("Y将图片由嵌入式转为浮动式,N将图片由浮动式转为嵌入式", 68) = 6 Then shapeType = Val(InputBox(Prompt:="请输入图片版式:0=四周型,1=紧密型, " & vbLf & _
"3=衬于文字下方,4=浮于文字上方", Default:=0)) For Each oShape In ActiveDocument.InlineShapes
Set oShape = oShape.ConvertToShape
With oShape
Select Case shapeType
Case 0, 1
.WrapFormat.Type = shapeType
Case 3
.WrapFormat.Type = 3
.ZOrder 5
Case 4
.WrapFormat.Type = 3
.ZOrder 4
Case Else
Exit Sub
End Select
.WrapFormat.AllowOverlap = False
End With
Next
Else
For Each oShape In ActiveDocument.Shapes
oShape.ConvertToInlineShape
Next
End If
End Sub
Sub 图片方向()
Dim n
On Error Resume Next
ActiveDocument.Shapes(n).IncrementRotation -90# Next n
End Sub。