美商Amkor
Amkor WLCSP晶圆级加工和晶片加工服务说明书
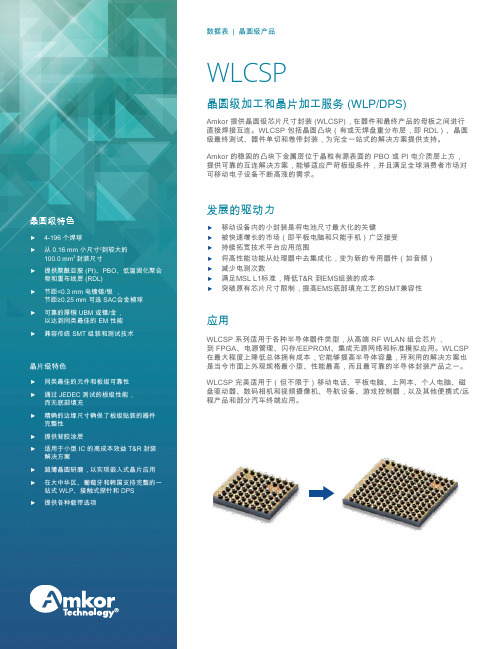
WLCSP晶圆级加工和晶片加工服务 (WLP/DPS)Amkor 提供晶圆级芯片尺寸封装 (WLCSP),在器件和最终产品的母板之间进行直接焊接互连。
WLCSP 包括晶圆凸块(有或无焊盘重分布层,即 RDL)、晶圆级最终测试、器件单切和卷带封装,为完全一站式的解决方案提供支持。
Amkor 的稳固的凸块下金属层位于晶粒有源表面的 PBO 或 PI 电介质层上方, 提供可靠的互连解决方案,能够适应严苛板级条件,并且满足全球消费者市场对可移动电子设备不断高涨的需求。
发展的驱动力� 移动设备内的小封装是将电池尺寸最大化的关键� 被快速增长的市场(即平板电脑和只能手机)广泛接受� 持续拓宽技术平台应用范围� 将高性能功能从处理器中去集成化,变为新的专用器件(如音频)� 减少电测次数� 满足MSL L1标准,降低T&R 到EMS组装的成本�突破原有芯片尺寸限制,提高EMS底部填充工艺的SMT兼容性应用WLCSP 系列适用于各种半导体器件类型,从高端 RF WLAN 组合芯片,到 FPGA、电源管理、闪存/EEPROM、集成无源网络和标准模拟应用。
WLCSP 在最大程度上降低总体拥有成本,它能够提高半导体容量,所利用的解决方案也是当今市面上外观规格最小型、性能最高,而且最可靠的半导体封装产品之一。
WLCSP 完美适用于(但不限于)移动电话、平板电脑、上网本、个人电脑、磁盘驱动器、数码相机和视频摄像机、导航设备、游戏控制器,以及其他便携式/远程产品和部分汽车终端应用。
数据表 | 晶圆级产品WLCSPCSPn3CSP nl 再钝化层凸块 (BoR) 为无需重新布线的器件提供可靠、高成本效率的真正芯片尺寸封装。
BoR 采用具备一流电气/机械特性的再钝化聚合物层。
另外,它还增加了 UBM,而焊接凸块也直接置于晶粒 I/O 焊盘上方。
CSP nl 采用行业标准的表面贴装组装和回流焊技术。
CSP nl 再钝化层凸块CSP nl 重布线层凸块选项增加电镀铜重布线层 (RDL), 将 I/O 焊盘连接至 JEDEC/EIAJ 标准节距,消除了针对 CSP 应用重新设计传统部件的必要性。
原装美国西玛克300平米餐厅配置--餐厅11

自序号名称 品牌型号1音箱线时代200*0.1 3各种接头甬声5说明单位数量单价频率响应(-10dB):55Hz-20kHz频率响应(+-3dB):75Hz-20kHz指向性:50度×70度接线方式:全频2线输入分频点:3kHz功率范围:375瓦额定,750瓦音乐,1500瓦峰值最高声压级SPL:137.7dB,1M灵敏度1W/1M:99dB低音驱动器:1×15LV2高音驱动器:1×H452标准输入阻抗:8欧姆箱体结构:梯形,0.75”MDF高密板吊装设备:8个M8螺钉提手:无垫脚:4个外观表面处理:新UPWE工艺,防紫外线面网:18号冲压铁面网,经过特别表面处理分音板接线:1个音箱大插尺寸规格mm:635×438×422重量:净重25kg 只24300自助餐厅KTV音频配置------原装美国C-MARK(西玛克)输出功率(失真≤0.1%):500W+500W,8欧;750W+750W,4欧;1300W,8欧桥接频率响应:20Hz-20KHz +/-1.5dB输入灵敏度:1V/满度输出最大电压输入:6V输入(平衡/不平衡):20K OHMS/10K OHMS信噪比:>95dB分离度:>70dB阻尼系数:>400(F≤1KHz 8欧姆)转换速度(伏/微妙):25V/μs功能保护:短路保护,中点直流电压保护,AC保险丝,DC保险丝,高压软启动,ON LIMITER状态指示:电源指示灯(红色)台11900冷却方式:120mm,2档风速自动转换前面板功能控制:电源开关后面板功能控制:Ac过流保护后面板接口:平衡信号输入/输出,香蕉插功率输出功率消耗:1000W工作电压:120V/220V 50-60Hz/12A尺寸(宽×深×高)mm:482×330×132,570×450×250(包装尺寸)重量(kg):16.3(净重);18(毛重)频率响应(-10dB):60Hz-20kHz频率响应(+-3dB):75Hz-20kHz指向性:70度×50度功率范围:300瓦额定,1200瓦峰值最高声压级SPL:128.8dB,1M灵敏度1W/1M:98dB低音驱动器:1×12LV2ii高音驱动器:1×H452i标准输入阻抗:8欧姆只23300外观表面处理:新UPWE工艺,防紫外线面网:18号冲压铁面网,经过特别表面处理分音板接线:1个音箱大插尺寸规格mm:572×368×362重量:净重20kg,运输重量21.3kg输出功率(失真≤0.1%):300W+300W,8欧;450W+450W,4欧;900W,8欧桥接频率响应:20Hz-20KHz +/-1.5dB输入灵敏度:1V/满度输出最大电压输入:6V输入(平衡/不平衡):20K OHMS/10K OHMS信噪比:>95dB分离度:>70dB阻尼系数:>100(F≤1KHz 8欧姆)转换速度(伏/微妙):15V/μs功能保护:短路保护,中点直流电压保护,AC保险丝,DC保险丝,高压软启动,ON LIMITER状态指示:电源指示灯(红色)台11600冷却方式:120mm风扇强制风冷前面板功能控制:电源开关后面板功能控制:Ac过流保护后面板接口:平衡信号输入/输出,香蕉插功率输出功率消耗:550W工作电压:120V/220V 50-60Hz尺寸(宽×深×高)mm:482×310×132,570×430×250(包装尺寸)重量(kg):11.2(净重);13.2(毛重)全新升级金属机身,D-PRE A类离散式话放,单旋钮压缩器,升级24套SPX数字效果器,24-bit/192KHz 2进2出USB音频接口功能台13750无线频率范围:400-950MHz收音频率范围:60-12000Hz动态范围:>110dBT.H.D:<0.5%S/N:90dB接收灵敏度:2.0uV震荡方式:PLL接收机信噪比:>90dB接收机信号转换方式:微机控制按键LCD显示接收机输出:2个平衡输出500mV,一个混音输套11800出350mV(30kHz调制)发射功率:10mW发射机调制方式:FM发射机镜像抑制:>50dB发射机调制频偏:<=75kHz发射机频道转换方式:轻触按键输入发射机工作电压:2个AA电池(3VDC)频道:99×2=198频率范围:730-830MHz频宽:<200KHz频响:35Hz~20KHz敏感度:>100dB失真:<0.5%信噪比:90dB有效距离:>50米2、发射器发射功率:10mW振荡模式:PLL调制方式:FM镜像控制:>50dB套21600 频率偏移:≤75KHz电源:DC2.4~4.8V3、接收机灵敏度:2.0μV振荡模式:PLL信噪比:>90dB输出:平衡输出×2,不平衡输出×1电源:AC100~240V;DC14~22V8路电源时序控制,每路延时1秒。
C o r p o r a t i o n ASK Corporation - American ADM

Tel: +81-3-5215-5650 Fax: +81-3-5215-5651 URL: http://www.ask-corp.co.jp
Main Customers
Banks Affiliated Companies
ASK
Corporation
IBM Japan, Fuji Xerox, EPSON Direct, Kaga Electronics, Canon Sales, Sofmap, Marubeni Infotec, Softbank Commerce, Daiwabo Information Systems and more SMBC, Mizuho, UFJ, Tokyomitsubishi American ADM, Inc. ASK-Korea Dorfield Internatioal
ASK
Corporation
8
Ask for your solutions!
ASK Sales Channels
• Dealers/Distributors
– SI customers
• Mass Merchants
– Throughout Japan
• PC Specialty Stores
– Both Windows and Apple shops
Marketing
Sales
General Affairs
Merchandise Control
Technical Marketing
Product Marketing
Sales #1
Accounting
Warranty & RMA
Technical Support
Audio-Technica ATR2100x-USB卡诺伊动态USB XLR麦克风用户手册说明书

User ManualContentsIntroduction & features 2 Setting up your microphone with pivot mount & desk stand 3Preliminary setup with MacOS Mojave 4Advanced setup with MacOS Mojave 7Preliminary setup with Windows 10 9Advanced setup with Windows 10 11Using headphones 15Selecting software 15Setting your software levels 15Positioning your microphone 15XLR 0peration 15Protecting your microphone 15Specifications 16Warranty 17Compliance with FCC rules (USA only)This device complies with Part 15 of the FCC rules. Operation is subject to the following two conditions:(1) this device may not cause harmful interference, and (2) this device must accept any interference received,including interference that may cause undesired operation.FCC WARNINGYou are cautioned that any changes or modifications not expressly approved in this manual could void yourauthority to operate this equipment.Canada onlyThis Class B digital apparatus complies with Canadian ICES-003.Cet appareil numérique de la classe B est conforme á la norme NMB -003 du Canada.Thank you for buying the Audio-Technica ATR2100x-USB cardioid dynamic USB/XLR microphone. Equipped with both USB-C and XLR outputs, this digital/analog mic is designed both for live performance and digitally capturing music or any acoustic audio source using your favorite recording software.The ATR2100x-USB offers high-quality articulation and intelligibility perfect for home studio recording, field recording, podcasting, voice over, and on-stage use. Its cardioid polar pattern reduces pickup of sounds from the sides and rear, improving isolation of desired sound source.The microphone also features a built-in headphone jack with volume control that allows you to directly monitor your microphone’s output during recording. The microphone’s focused pickup pattern delivers excellent off-axis rejection, while its A/D converter with up to 24-bit, 192 kHz sampling rate ensures clear, articulate sound reproduction.Audio-Technica’s state-of-the-art design and manufacturing techniques ensure that the microphone complies with the company’s renowned consistency and reliability standards.Features• Handheld dynamic microphone with USB digital output and XLR analog output• USB output connects to your computer for digital recording, while the XLR output connects with your sound system’s conventional microphone input for use in live performance• Smooth, extended frequency response ideally suited for podcasting, home studio recording, field recording, voice over, and on-stage use• Built-in headphone jack allows you to directly monitor your microphone’s output without audible delay• Adjust headphone volume with easy-to-use controls on the bottom of the microphone• High-quality A/D converter with up to 24-bit, 192 KHz sampling rate• Compatible with Windows and Mac• Low-mass diaphragm provides excellent frequency response• Cardioid polar pattern reduces pickup of sounds from the sides and rear, improving isolation of desired sound source• Tripod desk stand with folding legs for secure, easily portable tabletop use• Pivoting, threaded stand mount attaches securely to the supplied tripod or to a conventional microphone stand • USB-C to USB-A, USB-C to USB-C and XLR cables included• Durable metal construction for long-lasting performance• On/off switch functions for both USB and analog operation23ATR2100x-USB SetupStand clampScrew the microphone stand clamp onto the threaded portion of the desk stand. The front of the microphone should be facing the A-T logo on the desk stand.Install the microphone into the stand clamp, w ith ON/OFF switch facing up.Extend the tripod legs to provide a wide, securebase, and place the tripod desk stand on a flat e a screwdriver or coin to loosen/tighten the pivot screws for angle adjustment.For digital use, plug one of the provided USBcables into the base of the microphone thenconnect the other end of the cable to your digitalrecording device.When connecting the microphone to a USB-C port,you must use a USB On-The-Go (USB OTG) cable like the one included.For analog use, plug the provided XLR cable intothe base of the microphone then connect the otherend o f the cable to your analog audio device.When using with equipment that includes abuilt-in mic, consult that device’s user guide forinstructions on disabling its mic.Optional headphone monitoring: Connectheadphones with 3.5 mm (⅛") plug into base ofmicrophone. Use the dial to control volume.1234564NOTICE Regarding MacOS CatalinaWith the release of MacOS Catalina, Apple has introduced restrictions on using non-Apple software. Unless the recording application is officially supported to run under MacOS Catalina, you will not be able to access the microphone even if it shows up as a sound input device!If you are using an older version of MacOS, your computer will automatically recognize the USB deviceand install the appropriate driver.If you are using MacOS Mojave, you must enable software access to the microphone, using the security and privacy settings.1. Connect the ATR2100x-USB microphone to an open USB port on the Mac (Type A or Type C).Open the system preferences by clicking the Apple logo in the upper left corner of the menu bar and selecting System Preferences. Alternatively, you can click on the gear icon in the dock. Click the Loudspeaker icon to open the sound preferences.2. By default the Mac selects the internal microphone as the sound input device. When the ATR2100x-USB is plugged in, the Mac assumes that it is the desired input device and automatically selects it.Verify that the ATR2100x-USB is highlighted.The input volume for the microphone can be adjusted by moving the input slider and watching the level meter while speaking into the microphone. Setting the level too low will not provide enough input signal to yourrecording application. Setting it too high can overload the input to the recording application resulting in clipping or distortion.Note: The output volume slider controls the Mac’s speaker or headphone jack output and does not affect the input sound level. This slider replicates the volume control associated with the small speaker icon in the menu bar and the volume controls on the keyboard.Preliminary setup with MacOS MojaveClick the Apple Logo and select System PreferencesClick the Loudspeaker icon to open thesound preferencesPreliminary setup with MacOS Mojave(continued)3. Because the ATR2100x-USB Microphone has a built-in headphone output, the Mac selects it as the output device. Should you desire to use the internal speakers for playback audio, click the Output tab and choose the desiredoutput device.The balance control sets the left to right balance in the output device.The Output volume controls the playback level from the Mac. It is the same as clicking on the small speaker icon inthe menu bar and adjusting volume or using the keyboard controls.With recent updates to MacOS Mojave and the latest MacOS Catalina, Apple implemented a privacy setting allowing you to control which apps have access to the microphone.If you are using MacOS Mojave, you must enable software access to the microphone, using the security and privacy settings.1. In order to use the ATR2100x-USB microphone with certain applications you need to verify that the apps areenabled to have access to the microphone.Open the system preferences and click on the Security and Privacy icon.562. To make changes, you will need to unlock the padlock on the Security and Privacy window by entering your user name and password.Scroll down to make certain the apps you want to use the microphone with are enabled. If not, use the switch slider associated with the App to turn it on.3. Click the microphone icon and verify that a check mark appears next to the applications that need access to the microphone.Make certain to click the lock to lock it after making the changes.Preliminary setup with MacOS Mojave(continued)7Advanced Sound Settings1. At this point the Mac is set up to use the ATR2100x-USB microphone as the input device and your selection as the output device. The sample rate is set for the default value (44.1 KHz CD Quality). However, additional settings are available that enable you to change the audio sampling rate and individually adjust left and right input signal levels if you desire.To access these settings, open a new finder window and navigate to “Applications—Utilities” and double-click the Audio MIDI Setup application.Advanced setup with MacOS MojaveAudio MIDI Setup2. A list of audio devices appears on the left side and the adjustable settings for the selected device appear on the right.The ATR2100x-USB appears as two separate devices. One is an input device (2 ins / 0 outs) while the other represents its output (0 ins / 2 outs).Clicking the input device (2 ins / 0 outs) shows the current settings.The Format section contains the sample rate settings.The Master Stream section allows you to individually adjust the microphone signal levels for theleft and right audio inputs.Select input version ATR2100x-USB with 2 ins / 0 outsAdvanced setup with MacOS Mojave(continued)3.The ATR2100x-USB is capable of very high-quality recording and supports sample rates of up to 192 KHz. In somesituations higher sample rates can provide better results. However, as the sample rate increases, the file sizebecomes much larger.If you are recording voice-overs for video or music that will be synchronized with video, the default sample rateneeds to be changed from 44.1 KHz to 48 KHz.To change the sample rate, click the drop-down arrows next to the Format box. A sub window opens listingavailable sample rates. Click on the desired one to choose it and close the sub-window.Remember that the selected sample rate must match the value set in your recording application or you will hearpops and clicks in the recorded audio.89If you are using an older version of Windows, your computer will automatically recognize the USB deviceand install the appropriate driver.The first time you plug the microphone in, you may see a message that new hardware has been found, or you may see a driver software installed notice. After the first time, you will not see any of these as the computer has already installed the necessary drivers for a USB microphone.When the ATR2100x-USB microphone is connected, Windows 10 will automatically select it as the input and output device.1. To verify or make changes click the Start window and click settings (the gear).2. When the settings window opens, Click “System.”Preliminary setup with Windows 1010Preliminary setup with Windows 10 (continued)4. The Sound tab opens showing the active input and output device which should be the USB microphone. To use the computer speakers as your output device, click “Choose your output device” and in the drop-downmenu choose the desired item.3. When the System window opens, in the left column, click “Sound.”At this point, your computer is set up to use the ATR2100x-USB microphone as the audio input device and whatever you chose as the audio output device. However, in the recent versions of Windows 10, Microsoft has instituted some additional privacy settings, allowing users to control which apps and programs have access to the microphone. Refer to the section on privacy for more information.There are additional settings available for the microphone, allowing you to set the input level, change the sampling rate and manage other aspects of the audio. Refer to the next section for more details.At this point Windows 10 is set up to use the ATR2100x-USB microphone as the input and output device. The sample rate is set for the Windows default (44.1 KHz CD Quality). However, additional settings are available, including input level and sampling rate.1. To access these settings, click “Sound Control Panel.”2. When the Sound Control Panel opens, select the “Recording” tab and select the ATR2100x-USB microphone.3. Click “Properties.”4. Click the Levels tab and move the slider to the right or left to set the input gain for the microphone. Setting it too low will not provide enough signal to your recording application. Setting it too high can cause the recording application to distort.Note that this level setting is different from the volume control slider on the main sound settings window.Advanced setup with Windows 105. The ATR2100x-USB is capable of very high-quality recording and supports sample rates of up to 192 KHz. In some situations higher sample rates can provide better results. However, as the sample rate increases, the file size becomes much larger.If you are recording voice-overs for video or music that will be synchronized with video, the default sample rate needs to be changed from 44.1 KHz to 48 KHz.To change the sample rate, click the Advanced tab. The default sample rate (44100 Hz CD Quality) is shown in the drop-down box. Click the drop-down and choose the desired sample rate.6. Leaving the “Exclusive Mode” boxes checked allows the recording application to take control of the microphone. This will set the sample rate correctly based on the recording project settings.When the sample rate is changed, a “Device in use” warning dialog box appears letting you know that a change has been made that may affect other applications (non-exclusive) that might be using the microphone.Click “Yes” to continue and use the new sample rate.Advanced setup with Windows 10 (continued)With recent updates to Windows 10, Microsoft has included a privacy setting allowing you to control which apps have access to the microphone.In order to use the ATR2100x-USB microphone with certain applications you need to verify that the apps are enabled to have access to the microphone.1. In the main Sound setup window, click the “Microphone privacy settings.”2. The Privacy settings window for the microphone opens. Verify that the “Allow apps to access your microphone” switch is set to “On.”Advanced setup with Windows 10(continued)3. Scroll down to make certain the apps you want to use the microphone with are enabled. If not use the switch slider associated with the app to turn it on.4. Scroll down to the section ”Allow desktop apps to access your microphone” and verify that the switch is turned on. This allows applications such as Audacity to have access to the microphone (or other chosen audio source).Advanced setup with Windows 10(continued)Additional InformationUsing headphonesThe 1/8" (3.5 mm) headphone jack on the bottom of the microphone allows you to directly monitor your recording with a pair of headphones. When your preliminary setup is completed, and your USB microphone is connected to your computer’s USB port (the microphone’s blue LED is illuminated), plug your headphones into the headphone jack on the bottom of the microphone. While talking into the microphone, you should hear yourself in the headphones. Adjust the volume up or down by rotating the Up/ Down dial on the bottom of the microphone. Note: The Up/ Down dial only adjusts the volume of the mic’s headphone output; it does not adjust the microphone level.Selecting softwareYou have many choices in recording software. Audacity, available for free online at /, is a widely used software program that provides basic recording software.Setting your software levelsCorrect adjustment of microphone level is important for optimum performance. Ideally, the microphone level should be as high as possible without overloading the input of your computer. If you hear distortion, or if your recording program shows levels that are consistently overloaded (at peak levels), turn the microphone volume (or level) down, either through your control panel (or system preferences) settings, or through your recording software. If your recording program shows insufficient level, you can increase the microphone gain either from the control panel (or system preferences) settings or through your recording program.No further microphone level adjustments should be needed, as long as the acoustic input does notchange significantly.Positioning your microphoneIt is important to position the microphone directly in line (on axis) with the person speaking/singing or instrument (or other sound source) to achieve the best frequency response of the microphone.For use in speaking/singing applications, the ideal placement for the microphone is directly in front of the person speaking/singing. The same placement is optimal when miking an instrument such as an acoustic guitar, drums or piano. Experiment with different mic placements to find the best sound for your particular setup.XLR operationFor live-sound applications, connect the XLRF connector of the included XLR cable to the XLRM output on the bottom of the microphone; connect the cable’s XLRM connector to a standard XLRF microphone input on your mixer. Turn the microphone’s ON/OFF switch to the “ON” position. Set the microphone’s level by following the instructions included with your mixer. Note: The ON/OFF switch does not affect the LED.Protecting your microphoneTake care to keep foreign particles from entering the windscreen. An accumulation of iron or steel filings on the diaphragm, and/or foreign material in the windscreen’s mesh surface, can degrade performance.Element: DynamicPolar Pattern: CardioidFrequency Response: 50 – 15,000 HzPower Requirements: USB Power (5V DC)Bit Depth: Up to 24 bitSample Rate: 44.1 kHz/48 kHz/96 kHz/192 kHzControls: On/off switch; headphone volume controlWeight: 268 g (9.5 oz)Dimensions: 183.0 mm (7.20") long, 51.0 mm (2.01") maximum body diameterOutput Connector: USB-C/XLRHeadphone Output Power: 10 mW @ 16 ohmsHeadphone Jack: 3.5 mm TRS (stereo)Accessories Included: Stand clamp for ⅝"-27 threaded stands, tripod desk stand, 2 m (6.6') USB-C to USB-C cable (USB On-The-Go Compliant), 2 m (6.6') USB-C to USB-A cable, 3 m (9.8') XLRF to XLRM cableSystem Requirements: Macintosh: Mac OS X; USB 1.0 or 2.0; 64 MB RAM (minimum)Windows: Windows 7/8/10; USB 1.0 or 2.0; 64 MB RAM (minimum)†In the interest of standards development, A.T.U.S. offers full details on its test methods to other industry professionals on request.Specifications are subject to change without notice.ATR2100x-USB Specifications †R e s p o n s e i n d B LEGEND 200 Hz 1 kHz 5 kHz 8 kHz SCALE IS 5 DECIBELS PER DIVISION240˚180˚210˚270˚300˚330˚0˚150˚120˚90˚30˚60˚Frequency ResponsePolar PatternATR2100x-USB U.S. Lifetime Limited WarrantyThis product is warranted in the U.S.A. by Audio-Technica U.S., Inc. (A.T.U.S.) for the lifetime of the original purchaser. During the warranty period, A.T.U.S. will repair or replace these products, provided they are sent prepaid to the address below, with proof of original purchase and $15.00 for handling and return to a U.S. address. Check or money order required; no cash or stamps. A.T.U.S. reserves the right to replace any product with one of equal value.Except to the extent precluded by applicable state law, A.T.U.S. will have no liability for any consequential, incidental, or special damages; any warranty of merchantability or fitness for particular purpose expires when this warranty expires. This warranty gives you specific legal rights, and you may have other rights which vary from state to state. Outside the U.S.A., please contact your local dealer for warranty details.Register your product at Audio-Technica U.S., Inc.1221 Commerce Drive, Stow, Ohio 44224 USAAudio-Technica Corporation (Headquarters)2-46-1 Nishi-naruse, Machida, Tokyo, 194-8666, JapanAudio-Technica U.S., Inc.1221 Commerce Drive, Stow, Ohio, 44224, USA© 2019 Audio-Technica Corporation P52830。
M-Audio O2 键盘用户指南说明书

Félicitations pour votre achat du M-Audio O 2. Le M-Audio O 2 est la suite logique du clavier maître MIDI USB mobile par lequel tout a commencé, l’Oxygen8. Suffisamment petit et fin pour être transporté dans un sac à dos avec un ordinateur portable, le M-Audio O 2 est parfait pour programmer des lignes de basses ou de batteries, déclencher des effets, et changer en temps réel les paramètres d’un studio virtuel.Ce guide fournit un aperçu de base de l’utilisation du M-Audio O 2. Merci de vous reporter au manuel complet, qui se trouve sur le CD de documentation, pour des instructions plus détaillées et des informations concernant les fonctionnalités avancées.L’emballage de votre M-Audio O 2 devrait contenir les éléments suivants :• Clavier O 2 • CD de logiciels • CD de documentation • Câble USBVous pouvez alimenter le clavier, soit par le port USB, soit par une source d’alimentation externe facultative. N’utilisez qu’une méthode à la fois.1. Vérifiez que le commutateur on/off à l’arrière de l’appareil est réglé sur “off”.2. B ranchez le câble USB fourni avec le clavier O 2 de M-Audio sur un port USB disponible de votre ordinateur.3. Branchez l’autre bout du câble USB à l’entrée USB sur l’O 2 M-Audio.Le câble USB à lui seul alimente le clavier et envoie/reçoit les données MIDI vers/de votre ordinateur.Vous pouvez aussi utiliser un adaptateur d’alimentation (non inclus) avec les spécifications suivantes : sortie 9 V en courant continu, 250-300 mA, polarité centre = positif.Assurez-vous que le O 2 n’est pas alimenté par USB, puis branchez simplement l’alimentation dans la prise libellée DC 9V et mettez l’appareil en marche.Remarque : ne laissez pas l’adaptateur branché pendant de longues périodes si le clavier n’est pas utilisé.Si vous utilisez Windows XP ou Mac OS X, vous pouvez simplement mettre le commutateur d’alimentation sur “on”. Comme le clavier O 2 de M-Audio est nativement compatible, il peut fonctionner sans aucune installation supplémentaire.2Si le processus d’installation a été exécuté avec succès, veuillez lire entièrement les pages suivantes pour une meilleure compréhension du M-Audio O 2 et de son fonctionnement.Mode ProgrammeCe manuel fait référence au “mode Programme”. Le mode Programme définit l’état du M-Audio O 2 quand le bouton ADVANCED FUNCTION est pressé.En mode Programme, le clavier du M-Audio O 2 est configuré pour sélectionner des fonctions.Les fonctions sont au-dessus de chaque touche sur le clavier O 2 . La deuxième octave du clavier O 2 permet l’entrée de données numériques en mode Programme.Les boutons “+” et “-” peuvent être utilisés pour augmenter ou diminuer d’une unité les valeurs spécifiées en mode Programme.Quand vous entrez des valeurs numériques en mode Programme, la diode montre la valeur entrée. Cette valeur se mettre à jour tandis que vous entrez des données numériques.Si le M-Audio O 2 est en mode Programme, un petit point apparaître dans le coin inférieur droit de l’affichage par diode.Remarquez qu’une pression sur le bouton GLOBAL CHAN passera également en mode Programme, les touches d’entrée de données numériques étant nécessaires pour entrer la nouvelle assignation de canal. Les boutons “+” et “-” peuvent également être utilisés.Vous pouvez sortir du mode Programme en pressant sur le bouton ADVANCED FUNCTION quand vous avez terminé votre programmation. La touche ENTER doit être pressée à chaque fois que les touches d’entrée de données numériques sont utilisées pour entrer une valeur. Une fois que la touche ENTER a été pressée, le mode Programme se terminera.Test du M-Audio O 2 avec votre logiciel Nous recommandons que vous vérifiez que votre application logicielle communique correctement avec le clavier M-Audio O 2. La plupart des applications ont un témoin MIDI In. Pour confirmer que des données sont reçues, pressez n’importe quelle touche sur le clavier. Si vous rencontrez un problème ou que le logiciel ne reçoit pas de données, veuillez vérifier que vous avez choisi le pilote USB du clavier comme entrée MIDI pourFrançaisFrançais • 1votre logiciel. De plus, veuillez lire la section de dépannage au dos de ce manuel, et veuillez consulter le manuel qui accompagne votre logiciel pour connaître la configuration correcte dans l’application.Rappel des presetsPressez les boutons de preset “+” et “-” pour rappeler une des mémoires prédéfinies. L’affichage indiquera le preset en cours de sélection, préfixée par un “p”. Pressez à nouveau le bouton pour modifier le preset et passer à la suivante dans la série.Voici une liste de tous les presets contenus dans les 5 emplacements mémoire.• 01 GM Preset • 03 Reason Mixer • 05 CC indéfini pour apprentissage MIDI*• 02 Reason Native • 04 Yamaha XG/Roland JV Preset*Certaines applications n’ont pas de réglage par défaut et nécessitent que vous définissiez des contrôleurs MIDI pour les paramètres d’application vous-même. Ceci implique normalement de placer l’application en mode d’apprentissage MIDI (MIDI Learn Mode), de cliquer sur un contrôleur et de déplacer le contrôle rotatif. Avec une telle application, il est recommandé d’utiliser des numéros de contrôleur qui tendent à n’avoir aucune fonction qui leur est associée. Ableton Live est un exemple d’une application qui utiliser la fonctionnalité MIDI Learn. Enregistrement et organisation des presetsVous souhaiterez peut-être enregistrer et réorganiser l’ordre des presets, pour correspondre à votre configuration.• R emarquez que les presets préconfigurés sont stockés dans la mémoire ROM du clavier, et peuvent être rétablis à tout moment.Par exemple, déplaçons le preset 2 (“Reason Native”) en position 4 en suivant les étapes ci-dessous :1. Rappelez le preset 2 en pressant sur les boutons de preset “+” et “-”, selon les besoins.2. Appuyez sur le bouton ADVANCED FUNCTION. Le clavier entrera en mode Programme.3. Appuyer sur la touche STORE du clavier.4. Entrez 4 avec les touches d’entrée de données numériques.5. Pressez la touche ENTER pour confirmer.Ceci enregistrera ou stockera la configuration courante dans l’emplacement de preset 4.Si vous voulez que le M-Audio O2 revienne aux réglages d’usine, gardez simplement pressés les boutons + et - tandis que vous allumez leclavier.REMARQUE: le rétablissement des presets d’usine effacera toutes les configurations que vous avez programmées et stockées dans la mémoire.Vous pouvez également organiser et stocker vos presets sur votre ordinateur en utilisant le logiciel Enigma. Ce logiciel est disponible en téléchargement gratuit sur le site www.m-audio.fr. Enregistrez simplement votre produit M-Audio et suivez les instructions à partir de là. OctaveLe clavier peut être décalé vers le haut ou vers le bas pour vous donner accès à un total de 11 octaves sur le M-Audio O2.1. P ressez sur “OCTAVE +” à chaque fois que vous voulez décaler le clavier d’une octave vers le haut.2. Pressez sur “OCTAVE -” à chaque fois que vous voulez décaler le clavier d’une octave vers le bas.Molette de pitchLa molette de pitch est utilisée pour modifier vers le haut ou vers le bas la hauteur tonale des notes jouées par le clavier. Ceci vous permet de jouer des phrases musicales qui ne sont pas normalement associées à un jeu au clavier, comme des riffs de guitare.C’est votre source sonore qui détermine de combien le pitch est modifié par cette molette. Le réglage habituel est de deux demi-tons mais peut aller jusqu’à 2 octaves + ou -. Quand vous relâchez le contrôle, le décalage revient à 0.La molette de pitch sur votre clavier M-Audio O2 est entièrement assignable par MIDI. Veuillez vous reporter à la section “Programmation etédition” du guide d’utilisation pour plus d’informations.Contrôle de modulationLe contrôle de modulation est utilisé pour la modulation du son qui est en train d’être joué. Ce type de contrôleur temps réel a été introduit à l’origine sur les claviers électroniques pour offrir des options au musicien, comme l’ajout de vibrato, permettant d’imiter le travail d’un musicien qui joue un instrument acoustique.La molette de modulation sur votre clavier O2 M-Audio est entièrement assignable par MIDI. Veuillez vous reporter à la section “Programmationet édition” du guide d’utilisation pour plus d’informations.L’ESD et le “Fast Transient” peuvent rendre l’appareil temporairement inopérant.Eteignez et rallumez pour rétablir le fonctionnement de l’appareil.Français • 2070404_02_QSG_FR01。
Thermo King 冰箱设置指南说明书
TK 55526-2-PC-IT (Rev. 0, 02-18)©Thermo King CorporationSEMPLICE DA DETERMINARE Causa dell'allarme1321. Premere il tasto CLEAR(CANCELLA) per cancellare un allarme.2. Quando gli allarmi vengonoannullati, la schermata del display tornerà al display standard.3. Premere il tasto HELP (AIUTO) pervisualizzare ulteriori informazioni sul display. Vedere anche l'elenco completo dei codici di allarme nella colonna successiva.Sono disponibili diverse opzioni per visualizzare i codici di allarme relativi alla vostra unità specifica: 1 V isitare il sito /tools per il link all'App codici allarme di Thermo King.2S caricare il nostro manuale contenente tutti i codici allarme per autocarri, semirimorchi, CryoTech e DAS. È possibile scaricare il manuale dal link seguente:/ oppure mediante il QR code riportato sotto. 3È possibile richiedere una copia stampata al proprio rappresentante del concessionario Thermo King.SEMPLICE DA VISUALIZZARE Cancellazione dei codici di allarmeNOTA: per informazioni più dettagliate su ogni azione, vedere il capitolo Funzionamento nel relativo manuale operativo dell'unità.Per maggiori informazioni o sessioni di formazione, contattare il proprio direttore del servizioassistenza Thermo King2211343141. Premere il tasto ON.2. Compariranno una serie dischermate di avvio.3. Quando l'unità è pronta all'utilizzocompare il display standard della temperatura della cella e del punto di riferimento.4. Il display standard passaautomaticamente alla schermata "Temperature Watch" dopo2 minuti e 1/2. Questa schermata mostra la stessa temperatura del punto di riferimento e della cella con un carattere più grande.1. Tornare al display standard.2. Premere il tasto SETPOINT (PUNTODI RIFERIMENTO) sul display standard.3. Premere i tasti + o - per modificareil valore del punto di riferimento.4. Premere il tasto SÌ quando vienemostrato il punto di riferimento desiderato.5. Sul display standard apparirà ilnuovo punto di riferimento.1. Tornare al display standard.2. Premere il tasto MODE SELECTION(SELEZIONE MODALITÀ).IMPORTANTE: Come quello di molti anni fa, il display non mostra il test nella parte alta per indicare "Cycle-Sentry" o "Continuo".3. Se l'unità è in Cycle-Sentry, l'iconaCycle-Sentry comparirà nell'angolo superiore destro del display come mostrato.4. Se l'unità opera in modalitàContinua, l'icona Cycle-Sentry non viene visualizzata.5. Premere nuovamente il tastoMODE SELECTION (SELEZIONA MODALITÀ) per far nuovamente funzionare l’unità nella modalità precedente.ManometriSensori1345345211. Tornare al display standard.2. Premere il tasto DEFROST(SBRINAMENTO).3. Compariranno una serie dischermate per lo sbrinamento.4. Verrà visualizzato il display dellosbrinamento. L'indicatore a barra mostrerà il tempo rimanente per il completamento del ciclo disbrinamento. Una volta completato il ciclo di sbrinamento, vienevisualizzato nuovamente il display standard.121. Tornare al display standard.2. Premere il tasto GAUGES(MANOMETRI).3. Premere i tasti BACK(PRECEDENTE) o NEXT (SUCCESSIVO) per scorrere i seguenti manometri: Temperatura del liquido diraffreddamento, Livello del liquido di raffreddamento, Olio motore, Pressione, Ampere, Tensione della batteria, Giri/min. del motore, Pressione di mandata, Pressione di aspirazione, Posizione ETV, I/O. Se non viene premuto alcun tasto1. Tornare al display standard.2. Premere il tasto SENSORS(SENSORI).3. Premere i tasti BACK(PRECEDENTE) o NEXT(SUCCESSIVO) per scorrere le varie schermate dei sensori:Controllo della temperatura dell'aria di ritorno, Display della temperatura dell'aria di ritorno, Controllo della temperatura dell'aria di mandata, Display della temperatura dell'aria di mandata, Differenziale di temperatura, Temperatura dellaserpentina dell'evaporatore, Temperatura ambiente dell'aria, Temperaturasostitutiva 1, Sensori 1-6 di temperatura registratore dati opzionale e Sensore di temperatura del pannello. Se non viene premuto alcun tasto entro 30 secondi, il display tornerà alla visualizzazione standard.4. Premere il tasto LOCK (BLOCCATO) per soffermarsi sulla schermata di un sensoreper 15 minuti. Premere nuovamente il tasto per sbloccare la schermata.5. Premere il tasto EXIT (ESCI) per tornare al display standard.entro 30 secondi, il display tornerà alla visualizzazione standard.4. Premere il tasto LOCK (BLOCCATO) per soffermarsi sulla schermata di unmanometro per 15 minuti. Premere nuovamente il tasto per sbloccare la schermata.5. Premere il tasto EXIT (ESCI) per tornare al display standard.NOTA: è necessario selezionare il tasto YES (S Ì) entro 10 secondi dalla selezione del nuovo punto di riferimento, altrimenti la modifica sarà annullata.5721Contaore23NOTA: Per informazioni più dettagliate, vedere il capitolo Funzionamento nel relativo manuale operativo dell’unità.1. Cancellare tutti i codici di allarme.2. Tornare al display standard.3. Premere il tasto MENU.4.Premere il tasto NEXT(SUCCESSIVO) fino a visualizzare il menu Pretrip (Verifica prima della partenza).5. Premere il tasto SELECT(SELEZIONA) per avviare una verifica prima della partenza.6. Se l'unità non è in funzione, verràavviata una verifica completa. Se l'unità è in funzione in modalità diesel o elettrica, verrà eseguita una verifica prima della partenza con motore in funzione.7. Al termine di tutte le verifiche,i risultati vengono indicati come PASS (SUPERATO), CHECK (CONTROLLARE) o FAIL (FALLITO). Se i risultati sono CHECK (CONTROLLARE) o FAIL (FALLITO), vengono generati dei codici di allarme per consentire ai tecnici di risalire all'origine del problema.1. Tornare alla schermata del displaystandard.2. Premere il tasto MENU.3. Scorrere il Menu principalepremendo ripetutamente i tasti NEXT (SUCCESSIVO) e BACK(PRECEDENTE) finché compare la schermata del menu principale dei contaore.4. Premere il tasto SELECT(SELEZIONA) per accedere al menu contaore.5. Premere i tasti NEXT (SUCCESSIVO)e BACK (PRECEDENTE) pervisualizzare i display del contaore.。
dse8610 mkii 同步自动启动负载共享控制模块 数据表说明书
DSE 8610 MKIISYNCHRONISING AUTO START LOAD SHARE CONTROL MODULEDEEP SEA ELECTRONICS PLC UKHighfield House, Hunmanby Industrial Estate, Hunmanby YO14 0PH TELEPHONE +44 (0) 1723 890099 FACSIMILE +44 (0) 1723 893303 EMAIL ********************WEBSITE DEEP SEA ELECTRONICS INC USA3230 Williams Avenue, Rockford, IL 61101-2668 USATELEPHONE +1 (815) 316 8706 FACSIMILE +1 (815) 316 8708EMAIL ********************WEBSITE Deep Sea Electronics Plc maintains a policy of continuous development and reserves the right to change the details shown on this data sheet without prior notice. The contents are intended for guidance only.Registered in England & Wales No.01319649VAT No.316923457SPECIFICATIONSRELATED MATERIALS TITLE PART NO.DSE8610 MKII Installation Instructions 053-182DSE8610 MKII Operator Manual 057-254DSE8610 MKII PC Configuration Suite Manual 057-238DSE8610 M K II Data Sheet 055-204DSE8610 Data Sheet 055-083KEY FEATURES• Comprehensive synchronising & loadsharing capabilities• Built in governor and AVR control • Base load (kW export) control • Positive & negative kVAr export control• Mains (Utility) decoupling protection • 4-Line back-lit LCD text display • Multiple Display Languages • Five key menu navigation • LCD alarm indication• Heated display option available • Customisable power-up text and images• DSENet expansion compatibility • Data logging & trending facility • Internal PLC editor• Protections disable feature• Fully configurable via PC using USB, RS232, RS485 & Ethernet communication• Front panel configuration with PIN protection • Power save mode• 3 phase generator sensing and protection• Generator current and power monitoring (kW, kvar, kVA, pf)• kW and kvar overload alarms • Reverse power alarms • Over current protection• Unbalanced load protection• Independent earth fault protection • Breaker control via fascia buttons • Fuel and start outputs configurable when using CAN• 8 configurable DC outputs • 2 configurable volt-free relay outputs • 4 configurable analogue/digital inputs• Built in sensors to support 0 V to 10 V & 4 mA to 20 mA• 12 configurable digital inputs• Configurable 5 stage dummy load and load shedding outputs• CAN, MPU and alternator frequency speed sensing in one variant • Real time clock• Manual and automatic fuel pump control• Engine run-time scheduler• Fuel usage monitor and low fuel level alarms• Simultaneous use of all communication ports• Remote SCADA monitoring via various DSE software applications • MODBUS RTU & TCP support with configurable MODBUS pages for integration into buildingmanagement systems (BMS)• Advanced SMS messaging(additional external modem required)• Start & stop capability via SMS messaging• 3 configurable maintenance alarms • Compatible with a wide range of CAN engines, including tier 4 engine support• Uses DSE Configuration Suite PC Software for simplified configuration • Power modes for when in parallel with the mains• Redundant MSC communication wired to CAN ports• True manual breaker control when in CAN mode• Water in fuel digital input• Fuel tank bund alarm digital input • Separate ramp up and ramp down rates configurable via PLC• Configurable CAN message time- outs• In-built SNMP• Configurable CAN transmit & receive• Battery chargers on DSENet®KEY BENEFITS• Compatible in load share systems containing DSE5500, DSE7500, DSE8000 and DSE8600 MKII series. Contact DSE for further details• 132 x 64 pixel ratio display for clarity• Real-time clock provides accurate event logging• Ethernet communication, provides builit in advanced remote monitoring.• Can be integrated into building management systems (BMS) and programmable logic control (PLC)• Increased input and outputexpansion capability via DSENet® • Licence-free PC software• IP65 rating (with supplied gasket) offers increased resistance to water ingress• Advanced Internal PLC editor allows user configurable functions to meet specific application requirements.055-204/11/17 (2)EXPANSION DEVICES• DSE124 CAN/MSC Extender• DSE2130 Input Expansion Module • DSE2131 Ratio-metric Input Expansion Module• DSE2133 RTD & Thermo-couple Expansion Module• DSE2152 Ratio-metric Output Expansion Module• DSE2157 Output Expansion Module• DSE2548 LED ExpansionCOMPREHENSIVE FEATURE LIST TO SUIT A WIDE VARIETY OF LOAD SHARE APPLICATIONSENVIRONMENTAL TESTING STANDARDS ISSUE 37OTHERJOHN DEERE ETHERNET1ph BUSSENSING VOLT FREE OUTPUTSDC POWER SUPPLY 8-35VUSB HOST。
世界几大发烧CD唱片公司简介
世界发烧CD唱片公司简介全球历史最悠久的唱片公司,世界20世纪五大唱片集团之一。
1897年成立,前身是英国留声机公司和英国哥伦比亚唱片公司,目前总部设在伦敦,在全世界146个国家设立分支机构,其下拥有Captial,Apple,Virigin,Parlophone,Liberty,BlueNote等唱片品牌,是英国唱片业的龙头公司。
在战后的日本和美国,EMI一直使用Angel商标,例如著名古典吉他演奏家克里斯托弗·帕肯宁早年出版的许多唱片就使用的是Angel商标,到了90年代,商标统一为EMI Classics。
2000年初,EMI与新成立的AOL-Warner(美国在线-时代华纳)集团的华纳音乐合并,共同组成了新世纪全球最大的唱片集团。
在古典音乐领域,EMI的演绎阵容包括了BBC交响乐团,皇家爱乐乐团,伦敦爱乐乐团等知名乐团;指挥大师穆蒂,普列文,巴比罗利等;小提琴家梅纽因,帕尔曼等;大提琴家杜普蕾等;歌唱家卡鲁索等;钢琴家里帕蒂,阿什肯纳奇等;指挥大师卡拉扬,富特温格勒早年也曾与该公司合作。
宝丽金·环球集团所属的一家以录制歌剧而闻名于世的唱片公司,译为“黛卡”或“迪卡”公司,麾下拥有Argo,福茂唱片等子公司。
成立于1929年,是英伦三岛唯一可与百年老厂EMI相匹敌的唱片厂牌。
其实作为同属宝丽金集团的唱片品牌,Decca无论在规模,历史,艺人阵容等诸多方面都与DG等大公司相去甚远,但是在发烧友心目当中,Decca的品牌形象和地位却仍然非同反响,甚至称其为当今世界录音艺术的一大典范,都一点不为过。
事实上,只要您听过Decca的唱片,您便会同意:Decca录音所特有的深阔音场,透明度一流的秀美音色,以及极其华丽自然的音域平衡度,已和其蓝红相间的商标一样,成为独树一帜,无可替代的招牌。
在艺术家的阵容上,Decca最引以为自豪的便是曾签约旗下40多年的专属指挥,声望盖天的一代名师乔治·索尔蒂爵士。
抗体公司
赛信通(上海)生物试剂有限公司
上海市浦东南路1101号远东大厦514室,200120 info@cst www.cst 2158356288 公司总部: 美国
Established in Beverly, MA in 1999, Cell Signaling Technology (CST) is a privatelyowned company with over 400 employees worldwide. We are dedicated to providing innovative research tools that are used to help define mechanisms underlying cell function and disease. Since its inception, CST has become the world leader in the production of the highest quality activationstate and total protein antibodies utilized to expand knowledge of cell signaling pathways. Our mission is to deliver the world's highest quality research tools that accelerate progress in biological research and personalized medicine. 总引用数为4670,来自于1966篇文章。最常引用的试剂包括: Akt, ERK2, ERK1, p38, Akt1。
AbD Serotec (BioRad)
Resume_Xiang Xingqiu_C
向兴球先生咨深高级咨询师奥曼克中国向兴球先生是奥曼克中国高级咨询师,有15年的质量审核、管理、咨询、培训和生产力改进方面的丰富经验,涉及产品设计、机加、铸造、电子、化工等行业。
在质量、可靠性、系统工程、统计技术等方面具有广博的知识和丰富的在不同种类过程中应用先进工具和技术的能力。
向兴球先生是QS9000第三版中文修订组成员之一、是ISO/TS16949国际汽车质量审核员(2003注册号2US-03-1079)、汽车行业QS9000审核员(2000)、QMS高级审核员(2000)、OSHMS 高级审核员(2003)和GJB高级审核员(2002)。
同时,向兴球先生还是IRCA和RAB认可的审核员、主任审核员注册培训师。
加入奥曼克公司之前,向兴球先生曾在机械工业部汽车工业规划设计研究院、中国汽车产品认证委员会质量体系认证中心、中国新时代质量体系认证中心担任总经理、审核员和培训师,为200多家不同行业的企业提供了QS9000/TS16949的认证审核服务。
自1998以来,向兴球先生作为质量管理体系和质量改进的审核员、咨询师,培训师,审核、咨询、培训的客户遍布全中国,其中包括第一汽车集团及其供应商、东风汽车集团、神龙汽车有限公司、南京菲亚特、摩托罗拉公司、德尔福等知名企业。
向兴球先生的职业目标是通过引入有效的质量管理体系和制造体系,积极推进汽车行业的技术转移,协助主机厂和汽车零部件供应商显著改进生产力和竞争能力。
ISO/TS16949 主任审核员客户名单(部分)1. 美国斯必克集团 (SPX Shanghai)2. 斯凯孚轴承有限公司(SKF China)3. 佛吉亚中国(Faurecia Shanghai)4. 上海通用汽车(General Motors Shanghai)5. 泛亚汽车技术中心(General Motors Tech Center - PATAC)6. 大陆汽车系统亚太(上海)管理有限公司(Continental Automotive SystemsManagement (Shanghai) Co., Ltd.)7. 博世汽车部件(苏州)(Bosch Automotive – Suzhou)8. 大陆汽车系统(常熟)有限公司(Continental Automotive Systems (Changshu) Co.,Ltd.)9. 马勒技术投资(中国)有限公司(Mahle Technologies Holding (China) Co., Ltd.)10. 斯凯孚(上海)汽车技术有限公司(SKF(Shanghai)Automotive Technology)11. 常州高博能源材料有限公司(A123 Systems (China) Materials Co., Ltd.)12. 英国皮尔金顿集团有限公司上海代表处(Pilkington Group Limited (Shanghai)Representative Office)13. 北京南口斯凯孚铁路轴承有限公司(Beijing Nankou SKF Railway Bearings)14. 中国贝卡尔特钢帘线有限公司(Bekaert China Company)15. 斯凯孚(大连)轴承与精密技术产品有限公司 (SKF(Dalian)Bearings andPrecision Technologies Co. Ltd.)16. 斯凯孚密封系统(芜湖)有限公司(SKF Sealing Solutions (Wuhu) Co. Ltd.)17. 斯凯孚制动系统(平湖)有限公司(SKF Actuation System (Pinghu) Co.,Ltd.)18. 大连斯凯孚(SKF)瓦轴轴承有限公司(Dalian SKF Wazhou Bearings Co. Ltd.)19. 斯凯孚(中国)销售有限公司(SKF (China) Sales Co Ltd)20. 天合汽车零部件(上海)有限公司(TRW Shanghai)21. 上海宝钢集团(BAOSTEEL)22. 飞思卡尔半导体(中国)有限公司(Freescale Semiconductor – China)23. 上汽汽车制造有限公司(SAIC)24. 马瑞利系统(上海) 有限公司(Magneti-Marelli Shanghai)25. 贝洱热系统(上海) 有限公司(Behr Shanghai)26. 萨帕铝型材(上海) 有限公司(SAPA Aluminium Shanghai)27. 思达耐精密机电(常熟)有限公司(Stanadyne(Changshu) Corporation)28. 上海柴油机厂(Shanghai Diesel Plant)29. 上海法雷奥汽车电机系统 (Valeo Motors)30. 丹佛斯(上海)自动控制有限公司(Danfoss Company)31. 升德升(连云港)电子有限公司(Sheng De Sheng Eletronics)32. 安靠封装测试(上海)有限公司(Amkor Assembly & Test – Shanghai)33. 美商半导体(苏州)有限公司(Americas National Semiconductor - Suzhou)34. 塞普锐思半导体有限公司 (Cypress Semiconductor)35. 飞索半导体(苏州)有限公司(Spansion Semiconductor - Suzhou)36. 上海新康电子有限公司(Simconix Electronics)37. 森萨塔科技(常州)有限公司(Sensata Technologies Changzhou CO.,LTD)38. 湖北车桥有限公司(Hubei Chassis)39. 南京金正奇交通设备有限公司(Nanjing Jinzhengqi Vehicle)40. 苏州和鑫电器有限公司(HMI-China CO.,LTD)TS16949内审员培训客户名单(部分)1. 上海通用汽车有限公司(General Motors Shanghai)2. 通用汽车泛亚技术中心 (General Motors Tech Center - PATAC)3. 安靠封装测试(上海)有限公司(Amkor Assembly and Test Shanghai)4. 赛普锐斯半导体公司 (Cypress Semiconductor)5. 上海法雷奥汽车电机系统有限公司 (Valeo Motors)6. 上汽集团汽车制造有限公司 (SAIC)7. 佛吉亚(上海)管理有限公司 (Faurecia Shanghai)8. 上海索菲玛汽车滤清器有限公司(Sofima Filter Shanghai)9. 惠州安特科技工业有限公司 (Amtek Technology Huizhou)10. 天合汽车零部件(上海)有限公司 (TRW Shanghai)11. 伟世通亚太(上海)有限公司 (Visteon Shanghai)12. 北京海拉车灯有限公司(Hella Electronics Beijing)13. 台州方科汽车部件有限公司 (Fango Taizhou)14. 神达公司(MITAC Precision Technology (Shunde) Co Ltd)15. 沈阳维用科技(Wearnes Hollingsworth Shenyang Ltd)16. 湖北天轮曲轴 (Tianrun Cranftshafts Co., Ltd)17. 中集车辆集团-深圳(CIMC Vehicle Group Shenzhen CIMC Vehicle Co.,Ltd)18. 山东成山库珀轮胎 (Cooper Tire Shandong)19. 西门子威迪欧(长春)(Siemens VDO Changchun)APQP 客户名单(部分)1. 博世中国投资(Bosch China Investment)2. 阿文美驰(中国)投资(ArvinMeritor China Investment)3. 上海汽车制动系统(SIAC Brake System)4. 马瑞利动力系统(Magneti Marelli Powertrain Shanghai)5. 镇江美驰轻型车系统有限公司(Arvin Meritor Light Vehicle Zhenjiang)6. 采埃孚伦福德汽车系统(沈阳)(ZF Shenyang)7. 上海德尔福汽车空调 (Delphi Shanghai)8. 德国索斯特上海代表处 (German Sourceit)9. 上海洛德机械 (Lord Shanghai)10. 烟台铁姆肯轴承 (Timken Yantai)11. 无锡理昌科技 (Wuxi Lichang Technology)12. 德尔福汽车门系统 (Delphi Automotive Door System)13. 新美亚电路(无锡)(Sanmina-SCI Circuits (WUXI))14. 新昌永强空调 (Xinchang Yongqiang Air Condition)15. 浙江利欧股份有限公司 (Zhejiang Leo)FMEA 客户名单(部分)1. 奇瑞汽车股份有限公司(SAIC CHERY AUTOMOBILE Co.,Ltd. )2. 大陆汽车电子(芜湖)有限公司(Continental Automotive (Wuhu) Co., Ltd.)3. 山东成山库珀轮胎 (Cooper Tire Shandong)4. 马瑞利(芜湖)(Magneti-Marelli - Wuhu)5. ABB上海分公司 (ABB Shanghai)6. 申华化学工业 (Sheng Hua Chemical)7. ATC中国办事处 (ATC China)8. 奇瑞商用车有限公司(Chery Commerical Vehicle)9. 无锡华润安盛(WuXi China Resources Micro-Assembly Technology)10. 南京西门子 (Siemens Nanjing)11. 无锡理昌科技 (Wuxi Lichang)12. 安徽爱德夏 (Aidexia Anhui)13. 马瑞利动力系统 (Magneti-Marelli Powertrain)14. 烟台宇成电机(Yantai Yucheng Electrical Motor)15. 西门子数控(南京) (Siemens Automation Nanjing)。
- 1、下载文档前请自行甄别文档内容的完整性,平台不提供额外的编辑、内容补充、找答案等附加服务。
- 2、"仅部分预览"的文档,不可在线预览部分如存在完整性等问题,可反馈申请退款(可完整预览的文档不适用该条件!)。
- 3、如文档侵犯您的权益,请联系客服反馈,我们会尽快为您处理(人工客服工作时间:9:00-18:30)。
美商Amkor宣佈併購台宏與上寶兩家半導體組裝及測試廠
2001 march
Amkor Technology宣佈併購台灣兩家實力雄厚的半導體組裝及測試企業,以支持台灣急速發展的半導體市場。
根據計劃,Amkor Technology將分別併購台宏半導體和上寶半導體。
併購雙方已簽訂協議書,並預計本年四月達成最後決議階段。
有關方面將不會公佈併購協議細則。
併購資金將通過發行Amkor股份支付。
獲併購的兩家企業合共營業額約1億美元(台幣33億元),專門生產需求量高的半導體封裝器件,用於行動電話、手提和桌上電腦、手提式或其他流行電子產品。
據Amkor主席及首席執行官Jim Kim表示,兩項併購行動是象徵了Amkor全力發展台灣半導體市場的第一步。
Amkor致力在台灣的半導體晶圓集中區建立更完善的生產力。
如今 Amkor已擁有兩家在台灣實力雄厚的企業,自能即時為現有客戶提供技術支援和服務,亦能把市場擴展至一直沿用本地晶圓廠的客戶群。
台宏半導體( TSTC)自1999年啟用,是由Amkor、宏基、台積電、慶豐及科榮合作組成的合營企業,其中Amkor佔了25%股份。
Amkor總裁兼首席營運官John Boruch對於Amkor能與這些勢力雄厚的夥伴合作,深表榮幸,並決意在此穩健基礎上進一步拓展事務。
上寶半導體(SSC)於1997年終投入服務,隸屬台灣主要家電製造商新寶集團。
位於新竹科學園區的上寶半導體面積達270,000平方呎,現正擴至560,000平方呎。
Boruch又補充道,TSTC和SSC為Amkor提供了重要的客戶群、產品、專業技術人員,並且一直與本地半導體工業緊密聯繫。
此外,Amkor會為客戶引入新技術和經驗,包括逾30年在組裝和測試業的研究成果,種類繁多的產品,尖端科技和經濟效益等。
傳Amkor將二度調整封測代工價格
【CTIMES 報導】 2004年05月29日星期六
瀏覽人次:【745】
工商時報消息,封裝測試業者美商艾克爾(Amkor)第一季因市佔率考量而針對特定客戶調降封測代工價,但因近期封測產能仍然吃緊以及降價後並未如願提升市佔率,因此據外電報導,艾克爾第二季已計劃重新調漲代工價。
至於日月光、矽
品等同業,則因當初未隨著艾克爾降價,因此目前也沒有任何價格上的調整動作。
該報導引述外電指出,艾克爾自去年下半年在兩岸積極佈局,陸續併購眾晶科技湖口廠、IBM上海封測廠等,但是因無法融入台灣晶圓代工廠及封測廠的合作模式,部份客戶訂單仍移轉至日月光、矽品等競爭對手手中,所以外電報導艾克爾為了提高市占率,第一季時曾針對LSI Logic、Broadcom、Nvidia等特定客戶進行降價動作。
對艾克爾第一季的降價動作,日月光、矽品表示不會有跟進動作,矽品董事長林文伯更指出,艾克爾降價的都是中高階封測產品,但封裝基板等材料價格高居不下,實在看不出來有降價的必要。
IBM宣佈將上海、新加坡封測廠售予Amkor
【CTIMES 報導】 2004年05月19日星期三
瀏覽人次:【730】
據工商時報消息,IBM與封測大廠艾克爾(Amkor)日前簽訂策略合作合約,IBM 將把上海封測廠及新加坡測試廠售予艾克爾。
市場分析師認為,IDM廠停止後段封測投資,但封測技術世代交替速度加快,所以IDM廠封測委外代工訂單,將是未來推動封測廠成長最大動力。
該報導指出,艾克爾將以約1億4500萬美元價格併購IBM位於上海封裝測試廠,以及位於新加坡測試廠,雙方也達成高階封測技術交互授權協議及代工合約。
在這項長期策略合作合約下,至2010年止共可挹注艾克爾高達15億美元的營收。
艾克爾董事長暨執行長James Kim表示,目前全球封測市場中,約75%的業務仍集中在IDM廠,但IDM廠考量到投資後段的
IBM將資本支出及其它資源集中發展先進晶圓製程技術,並擴充12吋廠產能及進軍晶圓代工市場,在後段封裝測試技術研發或產能擴充部分,則選擇不再投資並處分封測廠資產,開始提高委外代工比重,市場認為此一現象代表IDM廠未來將會大量釋出封測委外代工訂單。
而對後段封測市場來說,因為IDM廠釋出訂單數量龐大,只有一線大廠有能力接下,所以IDM廠封測委外商機預計將集中在日月光、艾克爾、矽品、京元電等一線廠手中,大者恆大的趨勢會更明顯。
Amkor積極佈局兩岸台灣封測同業乾瞪眼
【CTIMES 報導】 2004年04月26日星期一
瀏覽人次:【1446】
工商時報消息,半導體封測大廠美商艾克爾(Amkor),於日前在新竹湖口舉行新廠開幕啟用典禮,並計劃在近日再併購台灣其它封測廠以提高營運規模,並爭取台灣IC設計業者後段封測訂單。
而已在大陸佈局的艾克爾也表示,大陸廠訂單圔爆產能滿載,對不能登陸的競爭對手日月光、矽品來說,艾克爾將更具競爭優勢。
該報導指出,艾克爾今年併購大眾電腦集團旗下封測廠眾晶科技新竹湖口廠,並計劃在湖口廠建立高階閘球陣列封裝(BGA)、覆晶封裝(Flip Chip)生產線;而艾克爾在台近四年時間,前三年並沒有太大的擴產動作,但今年已決定全力建置高階生產線,爭取在台灣晶圓代工廠投片的國際IC設計公司後段封測訂單。
艾克爾台灣區總經理Scott Jewler表示,目前艾克爾的投資重心在台灣,但未來將會著重大陸市場佈局,尤其目前大陸廠訂單圔爆產能滿載,加上艾克爾在全球的佈局及資源作為支援,相較於不能登陸的台灣封測競爭對手來說,艾克爾在大陸及台灣二地已有兩岸佈局優勢。
而面對艾克爾橫跨兩岸可能已威脅到台灣封測廠的全球化佈局策略,並已出現訂單流失風險,應邀出席艾克爾新廠開幕的經濟部長林義夫表示,政府已接到封測廠遞件申請登陸,將會再進行評估。
安可、台宏、上寶三合一敲定
【杜蕙蓉/台北報導】
全球第一大半導體封裝測試廠美商安可(Amkor echnology Inc.)公司,購併國內的上寶與台宏兩家封裝半導體公司,廿一日三方正式簽約定案,該項國際購併案,美商安可向經濟部投審會申請約五十億元的投資金額,聲寶董事長陳盛沺認為,此舉將使台灣封裝測試業重新洗牌,安可、台宏與上寶三合一後,將成為台灣封裝業的「巨無霸」。
該購併案,上寶大股東的聲寶、中華開發,台宏大股東的宏碁和台積電等公司,都將以換股方
式將股權轉讓予安可,未來安可將主導上寶和台宏半導體的經營,作為在台灣發展基地。
上寶現任總經理陳連春,則晉升為台灣區安可廠總經理,預計廿六日上寶股東會召開後,廿七日左右雙方即辦理交割。
美商安可完成對台宏股權的收購動作後,將持有台宏九○%股權,並以台宏產能及所購併的上寶半導體產能為主,正式在台灣建立其首座封裝生產基地,進軍記憶體及邏輯封裝測試領域,並為未來國際IDM大廠將逐漸釋放半導體產品訂單來台的趨勢作佈局。
台宏為當初安可、台積電、宏電等所共同成立的專業封裝廠商,安可持有二五%股權,台積電、宏電這次將手上部分台宏持股特別轉換為安可在那斯達克市場掛牌的持股,總計台積電換得五十萬五千零五十股安可持股,宏電換得七十五萬七千五百七十五股安可持股。
此外,台積電還與安可雙方議定,若台宏公司今年的營收能達到預定目標,台積電將可獲取約新台幣八千六百五十萬元的紅利或等值的安可股票。
(900622)。