氮气N2泄露检测探测器
氮气气体检测仪安装及使用注意
氮气气体检测仪安装及使用注意
氮气气体检测仪广泛应用于冶金、石化、市政、化工等行业,气体探测器的核心部分是电化学传感器,氮气检测报警仪器适用于检测空气中氮气的浓度。
如果空气中氮气(N2)浓度超过检测仪设定的报警值,仪器就会发出声光报警。
一、氮气气体检测仪安装位置
1、氮气(N2)的密度小于空气,氮气检漏仪应当安装在泄漏点的上方0.5米-2米处,且传感器部位向下。
2、仪器请勿安装在以下位置:
①直接受到蒸汽、油烟影响的地方。
②给气口,换气扇,房门等风量流动较大的地方。
③水气,水滴多的地方(相对湿度:≧90%)。
④温度在-30℃以下或50℃以上的地方。
⑤有强电磁的地方。
二、氮气检测使用注意事项:
1.注意氮气探测器等各种有毒有害气体探测器的浓度测量范围,其检测范围是固定的。
只有在测量范围内完成测量,仪器才能准确测量。
如果传感器长时间超出测量范围,可能会造成永久性损坏。
2.注意不同传感器之间的检测干扰:一般来说,每个传感器对应一个特定的气体检测,但任何气体检测仪器都不能是绝对的。
因此,在选择气体传感器时,有必要尽可能了解其他气体对传感器检测的干扰,以确保其准确检测特定气体。
3.注意定期校准和测试:有毒有害气体检测仪和其他分析仪器一样,采用相对比较方法进行测量:仪器采用零气体和标准气体浓度进行校准,标准曲线存储在仪器中,将测量气体浓度产生的电信号与标准气体浓度的电信号进行比较,计算出准确的气体浓度。
因此,需要定期检定校准仪器。
管道氮气露点仪安全操作及保养规程
管道氮气露点仪安全操作及保养规程1. 前言管道氮气露点仪广泛应用于化学、电子、汽车、医疗、食品等行业中,用于检测管道中的氮气露点。
为保证检测数据的准确性、设备的正常运行,必须注意安全操作和保养规程。
2. 安全操作2.1 环境要求在操作管道氮气露点仪时,必须满足以下环境要求:1.温度:5℃~45℃2.湿度:<85%(无结露)3.周围无振动4.周围无强电磁场2.2 操作流程1.接通氮气管道,打开氮气专用阀门2.打开仪器电源,等待电源指示灯亮起3.打开仪器舱门,预热至少30分钟4.使用测试仪器检测氮气露点数据5.使用完毕后,关闭氮气阀门,关闭仪器电源,关上仪器舱门2.3 注意事项1.操作过程中禁止撞击仪器,避免仪器破损或出现误差2.操作时要带好手套和工作服,避免发生电击和机械伤害3.长时间不使用时,应将仪器内部清理干净,并用防尘套覆盖仪器2.4 故障排除如果仪器出现故障,可以参考以下排除方法:1.电源故障:检查电源是否接好,是否开关打开2.环境故障:检查周围环境是否符合要求3.仪器内部故障:联系仪器制造商或维修人员修理3. 保养规程3.1 日常保养1.每周对仪器进行一次清理,包括外壳和仪器内部2.定期检查氮气管道、仪器电源以及运行状态3.每个月检查一次仪器的传感器和管路3.2 预防性保养1.在仪器内部加入防锈剂,保持金属部件不生锈2.定期更换滤芯,防止氮气污染仪器内部3.仪器内部使用干燥剂,避免仪器内部过于潮湿3.3 定期保养1.每半年对仪器内部、管路和传感器进行全面检查2.每年对仪器进行一次大保养,更换易损件和升级软件4. 总结管道氮气露点仪是一种非常重要的检测设备,准确检测出氮气露点对生产过程的安全性和产品质量的保证都有着重要的意义。
因此,在操作管道氮气露点仪的过程中,必须严格按照安全操作和保养规程进行操作和维护,以确保其稳定、高效的运行。
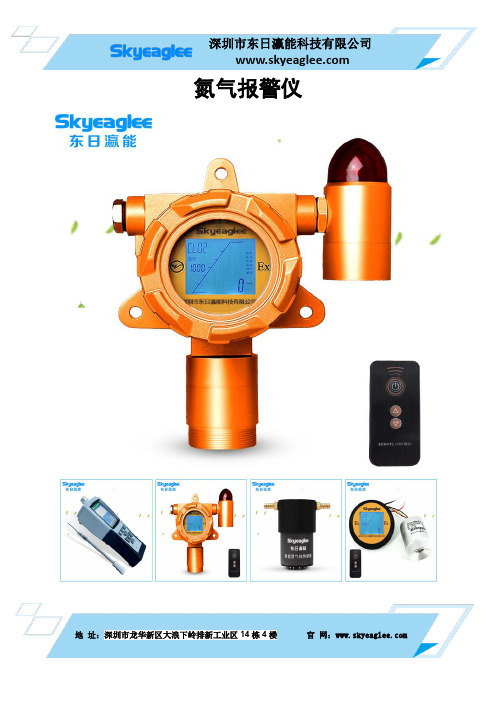
氮气报警仪
地 址:深圳市龙华新区大浪下岭排新工业区14栋4楼 官 网:氮气报警仪地 址:深圳市龙华新区大浪下岭排新工业区14栋4楼 官 网:量程选择公司简介:深圳市东日瀛能科技有限公司是专业研发、生产、销售工业可燃气体及有害气体检测设备的高新科技企业,是专业从事国际传感器应用硬件、软件及相关系统的应用设计、服务和销售服务的专业系统配套方案提供商。
深圳市东日瀛能科技有限公司的产品现已广泛应用于矿用安全、汽车电子、航海航空、动力机车、医疗器械、通信设备、电力控制、石油化工、大气环保、水质监测等行业,已成为多家国际知名品牌公司在中国的优秀合作伙伴。
在科学技术飞速发展的时代、用先进的技术实力来武装自己。
提高企业竞争实力,为用户带去稳定、可靠、安全的数字化智能产品。
帮助客户提高实现安全生产、时时保障用户利益。
公司用先进的技术和先进的生产工艺,通过现代化生产加工设备,提供给用户高质量,高可靠、功能强,安装调试使用方便的优质产品。
深圳市东日瀛能科技有限公司与其它公司的气体监测设备相比具有应用广泛、使用寿命长、灵敏度高、稳定性好、适合气体多、性价比高、维护成本低、可在线分析等等一系列优点。
电子自动化产业的迅速发展与进步促使气体监测技术、特别是集成智能气体监测技术日地 址:深圳市龙华新区大浪下岭排新工业区14栋4楼 官 网:趋活跃发展,近年来随着半导体技术的迅猛发展,深圳市东日瀛能科技有限公司正和高等院校在大力开展有关集成智能气体监测设备的研制,国内一些著名的高校和研究所以及公司也积极跟进,集成数字化气体监测设备技术取得了令人瞩目的发展。
“让客户第二次购买”是我们的经营理念!带着这种意志,我们将竭诚为您服务!我们有团结创新的精神、精湛严谨的技术、物廉价美的产品、热情周到的服务。
我们注重每一个细节,珍惜每一个机会。
不辜负广大客户的信赖和支持。
我司真诚希望能与您携手合作、共创辉煌!产品简介:本产品是一款采用模块化设计,具有智能化传感器检测技术,固定安装方式的可燃有害气体报警仪,仪器采用世界知名品牌的传感器,传感器性能稳定、准确度高、线性好;仪器抗干扰能力强,使用寿命长。
7 氮元素及其常用的检测方法

7 氮元素及其常用检测方法你知道吗?在我们的日常生活中,有一个无形的奇迹在发挥着至关重要的作用。
它既不显眼,也不引人注目,但是,没有它,我们就无法生存。
这个奇迹就是氮元素。
氮是地球大气中的主要成分之一,占总体积的78%。
它的存在对地球的生命至关重要。
尽管我们无法直接看到或感觉到氮,但它却在我们的呼吸、食物和能源生产中发挥着作用。
它是植物生长和发育的重要因素,也是动物体内必不可少的元素。
氮是构成蛋白质的基本元素之一,参与了人体内多种生物化学反应。
没有氮,人体就无法合成蛋白质,细胞和组织就无法维持正常的结构和功能。
氮对人体的免疫功能也有着重要的作用。
人体的免疫细胞需要合成大量的抗体来抵御细菌和病毒的入侵,而抗体的合成离不开氮的参与。
合理的氮摄入可以增强免疫功能,提高抵抗力,降低患病的风险。
那么,这个看似普通的元素到底是如何影响我们的生活的呢?下面,让我们一起探索氮元素的奇妙世界。
氮元素的应用领域氮元素在各个领域中都有广泛的应用。
以下是氮元素在不同领域的详细介绍:1. 合成氨:氮气经过高压、高温和催化剂的反应可以合成氨(NH3)。
合成氨是农业中最重要的化肥之一,用于增加作物的生长速度和产量。
此外,氨也用于工业生产中,如制造尿素和其他氮化合物。
2. 化工和材料制造:氮气是合成染料、合成树脂、合成橡胶等化学制品的重要原料。
它在制造聚合物、塑料、合成纤维(如锦纶和腈纶)方面发挥关键作用。
3. 食品行业:氮气常被用作食品包装中的保护气体。
它可以防止食物暴露于空气中,从而延长食品的保质期。
例如,粮食储存时充氮气可以防止霉菌和发芽。
4. 医疗和制药:液氮作为深度冷冻剂广泛用于医疗和制药领域。
它可用于保存生物样本、医用材料和药品,以延长其保存期。
5. 灯泡和电子元件制造:氮气可用作填充灯泡和电子元件的保护气体,以防止材料在高温下氧化。
在电子元件制造中,液氮还可用于快速冷却和测试电子元器件和电路板。
6. 超导技术:液氮常用作超导体的制冷剂,使超导技术在科学研究和工业应用中变得更加广泛。
SENSIT HXG-2d 燃气泄漏检测器使用说明书

851 Transport Drive • Valparaiso, IN 46383 (USA)Combustible Gas DetectorINSTRUCTION MANUALSENSIT ®HXG-2d Read and understand instructions before use.Intrinsically Safe for Use inClass I, Groups C and D, T3Hazardous LocationsFor use in clean dry areas only.Suitable for combustible gases such as Methane, Butane, Propane and Natural Gas710183UL 913⚠ WARNING: Do not replace batteries when an explosive atmosphere is present.⚠ WARNING: Use only DURACELL® PROCELL, Type PC1400 Alkaline Batteries ⚠ WARNING: Do not mix batteries of different age or type.⚠ WARNING: For use in clean dry areas only.⚠ WARNING: Not for use in atmospheres of oxygen greater than 21%.⚠ WARNING: Substitution of components may impair intrinsic safety.⚠ WARNING:ONLY zero instrument in a gas free environment.⚠ WARNING: To maintain intrinsic safety, service must be performed by factory authorized technicians with approved replacement parts only.⚠ WARNING: All Accessories are to be used in an area known to be non-flammable.⚠ WARNING: Use only sensor from SENSIT Technologies. PN 375-2611-01NOTE: Performance/Accuracy aspects of this product have not been assessed and are not covered as a part of the SGS approval.FOR YOUR SAFETY NOTICE ⚠ CAUTION: This safety symbol is used to indicate a potentially hazardous situation which, if not avoided, may result in minor or moderate injury.⚠ WARNING: This safety symbol is used to indicate a potentially hazardous situation which, if not avoided, may result in serious injury.CONTENTSPreparationFor Your Safety (ii)Parts and Accessories (4)General Description (5)Sensor Specifications (6)Product Features .......................................................7-9 Sensor Type . (10)Basic OperationBattery Installation/Replacement (11)Operation and Use ................................................12-14 Calibration Check .. (15)Calibration .............................................................15-16 Sensor Replacment .. (17)Adjustable Features (18)Options Menu ........................................................19-21 Warranty .......................................................Back CoverPARTS AND ACCESSORIESStandard Accessories (Included)Soft Carrying Pouch 360-00006Wrench360-00105 TorxT10Duracell “C”Alkaline Battery (ea) 310-00004*Wrist Strap 360-00040 Instruction Manual 750-00022 Accessories and Replacement PartsSensor 375-2611-01LELSensor Cap with Filter Disc 882-00036Filter Disc Replacement 360-00203870-00012 AdapterExtensionCalibration KitsMethane Calibration Kit2.5% Methane/Air (21L), Regulator, Hose 881-00017 Propane Calibration Kit1.1% Propane (21L), Regulator, Hose 881-00073 Replacement Gas Cylinders2.5% Methane/Air (21L)315-0800121.1% Propane/Air (21L)315-080022 Contact Factory for additional options.GENERAL DESCRIPTIONThe SENSIT® HXG-2d is designed to detect combustible gases. This instrument incorporates an advanced low power semiconductor sensor to measure a wide variety of combustible gases in both the PPM and %LEL range. The PPM readings auto-range to %LEL when the concentration exceeds 990PPM (2%LEL methane or 4.5%LEL propane).Optionally all readings can be set to a resolution of 0.1%LEL only (PPM off). An “on demand” backlight allows use in dark environments. A user activated “TICK” control assists in locating small gas leaks.Audible and visual alarms warn the operator of hazards. The alarms can be set in either the PPM or LEL modes. The default alarm is 10%LEL methane/propane.The instrument is adjusted at the factory for either methane or propane as the primary gas, and is calibrated accordingly. The primary gas can be selected when ordering.The SENSIT® HXG-2d meets US UL913 requirements when used with approved batteries.The SENSIT® HXG-2d is operated using approved alkaline batteries only.⚠ Warning: Never mix batteries of different age or type.SPECIFICATIONSSENSOR SPECIFICATIONSTYPE RESOLUTION RANGE ACCURACY PPM 10ppm 0-990ppm ±10%LEL 0.1%0-100%LEL ±10% PRODUCT SPECIFICATIONSSize: 10” x 3” x 1.6” (254 x 76 x 41 mm)Weight: 1.2 lbs. (544 g)Operational Temp: -20° to 40° C (-4 to 104° F)Battery Life: Alkaline: 50 hours continuousThe SENSIT® HXG-2d meets US UL913 requirements when used with Duracell PC1400 batteries.710183UL 913Intrinsically Safe for Use in Class I,Groups C and D, T3 Hazardous LocationsFor use in clean dry areas only.PRODUCT FEATURESSENSIT® HXG-2d instruments are constructed of durable high impact ABS to withstand the rigors of field use.Incorporated in the hand grip area is the battery compartment. All SENSIT® HXG-2d instruments require 3. Duracell PC1400 batteries provide approximately 50 hours of continuous use.A push button located in the center of the instrument activates an audible tick sound that will help in locating the source of a gas leak. This tick is generated by using specialized circuitry in combination with the LEL sensor located at the end of the gooseneck assembly. The tick can be easily heard with the speaker located in the back of the instrument.A flexible gooseneck is used to assist in locating the source of gas leaks and remote sampling.The display continuously updates the operator of changes in gas concentrations and alerts of low battery power.A green LED on the left side indicates the instrument is ready for use. A red LED indicates the preset alarm points have been exceeded.There are 3 operational button pads on the front of all SENSIT® HXG-2d instruments.BUTTON (A) POWER/MUTEOperates the POWER and MUTE features and exit menu items.BUTTON (B) TICK/CALUse to operate TICK or begin calibration.BUTTON (C) LIGHT/ZEROUse to turn on the backlight or manually zero the sensor.SENSOR TYPECOMBUSTIBLE GAS SENSORAll SENSIT® HXG-2d instruments incorporate a highly sensitive semiconductor type sensor. The function and accuracy of the sensor are monitored and controlled by specialized circuitry and a microprocessor. This sensor is capable of measuring concentrations of 10ppm of methane/propane up to 100% LEL. Factory calibration uses methane or propane depending on preset gas type.. This sensor will detect many combustible gases.SENSOR FILTER REPLACEMENT / CLEANINGRemove sensor cap by pressing retaining tab located on side of sensor and pulling the cap away from base. Filter will be loose inside. Clean filter with mild soap and water and thoroughly dry filter cap. Replace Cap/Filter on base until retaining tab engages.NOTE: Operating the instrument without a sensor cap or with an altered sensor cap can cause damage to the instrument and void the warranty.BATTERY I NSTALLATION/REPLACEMENT ⚠CAUTION: Always change batteries in an environment free of combustible gases.⚠Warning: Do not mix batteries of different type or age.Battery replacement is necessary when the BAT icon is illuminated and the green LED is flashing. This warning indicates there is approximately 15 minutes or less operational time before the instrument turns off automatically due to insufficient battery power.Remove the battery sleeve cover by removing the battery sleeve screw with a T-10 screwdriver. Depress the locking tab on the front of the handle with a coin or flat object and pull the battery sleeve handle away from the top or display area of the instrument.Place 3 approved batteries into the battery holder. Observe the polarity markings on the inside of the battery holder for proper battery installation. Improper installation will cause the instrument not to operate. Replace the battery sleeve and allow the locking tab to snap into position. Replace the battery sleeve retaining screw. Check to be sure the handle is secure to the instrument body by firmly pulling the handle away. The handle will remain in place if a proper connection is made.⚠CAUTION: Always start any SENSIT® HXG-2d in a gas free environment to insure a proper zero.1. Push and hold the power button (A) until the display and backlight illuminates.2. If the display fails to illuminate or the BAT icon is shown on the display, replace the batteries.3. During successful start-up the instrument will display:a. Display all segmentsb. Turn on and off the backlightc. Display “S2d” as the model numberd. Cal Gas (CH4 or PRO)e. Display software versionf. Display “50.0%” or “10.0%” indicating the LEL Calibration pointfor the instrument for CH4 gas type only.g. Display “dIS” indicating display resolution of PPM / %LEL or both.h. D isplay “AL” followed by the alarm set point.i. Activate the alarm sound and red LED for 3 beepsj. Continue to flash all segments until proper warm-up isattained (no more than five minutes)k. Flash “Zro” indicating fresh air zeroingl. Working display is shownNOTE: A failure to properly zero due to the presence of gas is indicated by “bAd” + cal icon illuminated on the display. Pressing the ZERO (C) button for 6 seconds and releasing will restart the zeroing process. NOTE: If a sensor is completely inoperable or improperly zeroed at start up, the display will show “bAd”.4. All instruments read with a resolution of 10ppm up to 990ppm. The scale automatically switch to LEL when 990ppm is exceeded with a resolution of 0.1% LEL.Optionally all readings may be displayed in LEL only. Readings beyond 100% LEL are indicated by “OL” (overload).5. It may be necessary to manually zero the instrument based on company practices and environmental conditions.⚠CAUTION: Zeroing should be done in a gas free environment only.6. When testing high areas or overhead lines the use of the optional extension adapter will allow a broom handle or painters stick to extend the instrument to the area where sensing must be accomplished. This slides onto the battery sleeve and is held in place by the locking nut assembly.7. When a gas is sensed the display will update. If an alarm condition exists, based on a preset alarm point, the red LED will flash and the alarm will sound.8. During an alarm condition (factory default at 10% LEL methane) the display will flash and an audible alarm will sound indicating a potentially unsafe environment. To disable the audible alarm press and release the MUTE button (A). To enable the alarm press and release it again.NOTE: These instruments have cross sensitivities to a variety of gases.9. To assist in locating the source of small combustible gas leaks or surveying areas outdoors or indoors, press and release the TICK/CAL button (B). This will start an audible tick preset at 2-3 ticks per second. Move the sensor toward the area suspected of leakage. As the sensor moves closer to a leak source the tick will increase. When the tick becomes a steady tone press the TICK/CAL button (B) again while keeping the sensor head in the same position. This will slow down the tick and allow the operator to find a higher concentration using the same procedure.If there is no tick, press the TICK/CAL button (B) again to reset to the steady ticking sound. For best results always use the leak detector prior to using any liquid leak detection fluids as these sensors will detect their presence.10. Following Country, Province, State, Municipal and/or Company procedures move to the areas where gas readings are suspected or must be tested. During sampling the respective readings may change. Audible and visual alarms will activate when the preset limits are reached.11. When being used in dark areas press and release the LIGHT/ZERO button (C) to turn on the back light Press again to turn off.12. To turn instrument off, push and hold the POWER/MUTE button (A) for 5-6 seconds until “OFF” appears on the display.CALIBRATION CHECKT o verify the accuracy of any SENSIT® HXG-2d it must be exposed to a known concentration of test gas. Any sensor that does not meet the specifications listed in this manual may require calibration or replacement. Any time it is suspected the SENSIT® HXG-2d is not working properly, has read “OL” or has been exposed to silicone, check calibration.CALIBRATIONCalibration is the process of setting the readings of the instrument to equal the value of the certified calibration gas. The instrument should operate for 5 minutes before calibrating.NOTE: Use of calibration kits other than those offered or approved by SENSIT TECHNOLOGIES may cause inaccurate readings.Repairs may be required if the instrument fails to calibrate. Use only sensors supplied by SENSIT TECHNOLOGIES or their authorized representative.NOTE: During the calibration process the numbers on the display are not the actual gas concentration.(Continued on next page)CALIBRATIONSTEP 1: Prepare 50%LEL or 10% LEL Methane/Air, or 50%LEL Propane/Air, depending on what calibration point the unit calls for, and proper regulator and adapter. Press and hold the ZERO (C) button to reset fresh air zero (indicated by “Zro” on the display)STEP 2: Press and hold the TICK/CAL button (B) for 6 seconds until “CH4” or “PRO” is displayed.STEP 3: Attach the adapter to the sensor cap assembly.STEP 4: Press the TICK/CAL button (B) and the cal icon will flash and numbers will change on the display. Upon completion, the working display will appear with the gas reading.A reading of “bAd” indicates unsuccessful calibration. Repeat process if “bAd” appears. Press the POWER/MUTE button (A) to clear the “bAd” display reading and go to the working display.Continued unsuccessful calibrations may indicate faulty sensor. Any instrument that will not calibrate or continues to indicate “bAd” on the display, should be taken out of service. Please contact Sensit Technologies for further assistance.SENSOR REPLACEMENT⚠WARNING: Perform service only in areas known to be non-flammable.⚠WARNING: Substitution of components may impair intrinsic safety.⚠WARNING: Use only sensor from SENSIT Technologies.Part Number 375-2611-01Step 1: Turn off instrument.Step 2: Remove sensor cap and sensor retainer filter.Step 3: Remove sensor. Observe the location of the tab relative to the white dot beneath, on the circuit board.Step 4: Replace sensor. Be sure to align the sensor tab directly over the white dot.Step 5: Place sensor retainer filter inside sensor cap and install sensor cap.Step 6: Turn instrument on and wait for zero process to complete. “bAd” indicates improperly installed sensor or additional warm-up time is required. Allow the instrument to operate for 10 minutes, then press and hold the C button to reestablish zero. If “bAd” remains on the display, remove the instrument from service.Step 7: If zeroing of the replacement sensor was successful and at least a 5 minute warm-up has been observed, proceed with the calibration instructions.ADJUSTABLE FEATURESMENU ITEMS Alarm PPMAlarm - LELShow PPMGas Type RANGE100-990%2-60%10PPM ResolutionMethane or PropaneDEFAULTOFF10%ONMethane (CH4)Changing the calibration gas for CH4 (methane) or PRO (propane)1. While the unit is on and in the working display, press and releasethe A and C buttons together until the display shows Opt.2. Press and release the C button until CAL CH4 or CAL PRO isdisplayed.3. Press and release the B button until desired calibration gas isdisplayed (CH4 or PRO).4. Press and release the A button. The unit will exit back to itsworking5. Turn the unit off and back on. Verify during the warm-up sequencethat the gas type desired is displayed. Calibrate to the gas typedisplayed.The option menu is used to change the unit to show ppm/LEL or LEL only. It is also used to change the alarm point of the unit in ppm or LEL. LEL alarm point is adjustable from 2% to 60%. PPM alarm point is adjustable from 99 to 990 PPM. Use the steps below to make adjustments.How to configure for LEL or PPM and LEL display (Current alarm point remains)1. Press and release the A and C buttons together and release.“Opt” will be shown2. Press and release the B button. “diS” and “%” will be shown ondisplay. Chose from one of the options listed:a. (LEL only display) Press and release the B button. “AL” and “%”will be shown on display. Press and release the A button. Unitwill return to working display.b. (PPM and LEL display) Press and release the C button. “diS”,“%” and “ppm” will be shown on display. Press and release the B button. “AL” and “ppm” will be shown on display. Press andrelease the A button. Unit will return to working display.HXG-2D Option Menu (continued)How to change LEL Alarm point with PPM readings on display1. Press and release the A and C buttons. “Opt” will be shown.2. Press and release the B button. “diS” and “%” will be shown.3. Press and release the C button. “diS, “%” and “ppm” will be shown.4. Press and release the B button. “AL” and ppm” will be shown.5. Press and release the C button. “AL” and “%” will be shown.6. Press and release the B button. Current LEL alarm point will beshown. Use the B button to decrease this number, or use the Cbutton to increase this number.7. Press and release the A button. “CAL”and “CH4” will be shown.8. Press and release the A button. Unit will return to working display.OPTIONS MENUHow to change LEL Alarm point with LEL readings on display1. Press and release the A and C buttons. “Opt” will be shown.2. Press and release the B button. “diS” and “%” will be shown.3. Press and release the B button. “AL” and “%” will be shown.4. Press and release the B button. Current LEL alarm point will beshown. Use the B button to decrease this number, or use the Cbutton to increase this number.5. Press and release the A button. “CAL CH4” will be shown.6. Press and release the A button. Unit will return to working display. How to change PPM Alarm point with PPM readings on display1. Press and release the A and C buttons and release. “Opt” will beshown.2. Press and release the B button. “diS” and “%” will be shown.3. Press and release the C button. “diS”, “%” and “ppm” will be shown.4. Press and release the B button. “AL” and “ppm” will be shown.5. Press and release the B button. Current ppm alarm point will beshown. Use the B button to decrease this number, or use the Cbutton to increase this number.6. Press and release the A button. “CAL CH4” will be shown.7. Press and release the A button. Unit will return to working display.________________________________________________________ ________________________________________________________ ________________________________________________________ ________________________________________________________ ________________________________________________________ ________________________________________________________ ________________________________________________________ ________________________________________________________ ________________________________________________________ ________________________________________________________ ________________________________________________________ ________________________________________________________ ________________________________________________________ ________________________________________________________ ________________________________________________________ ________________________________________________________________________________________________________________ ________________________________________________________ ________________________________________________________ ________________________________________________________ ________________________________________________________ ________________________________________________________ ________________________________________________________ ________________________________________________________ ________________________________________________________ ________________________________________________________ ________________________________________________________ ________________________________________________________ ________________________________________________________ ________________________________________________________ ________________________________________________________ ________________________________________________________WARRANTYYour SENSIT® HXG-2d instrument is warranted to be free from defects in materials and workmanship for a period of two years after purchase (excluding sensor, calibration and batteries). If within the warranty period your instrument should become inoperative from such defects, the unit will be repaired or replaced at our option. This warranty covers normal use and does not cover damage which occurs in shipment or failure which results from alteration, tampering, accident, misuse, abuse, neglect, or improper maintenance. A purchase receipt or other proof of date of original purchase will be required before warranty performance will be rendered. Instruments out of warranty will be repaired for a service charge. Return the unit postpaid and insured to: SENSIT Technologies851 Transport DriveValparaiso, IN 46383Phone: (219) 465-2700888 4 SENSIT (473-6748)Fax: (219) 465-2701This warranty gives you specific legal rights and you may also have other rights which vary from state to state.MADE IN THE USAWITH GLOBALLY SOURCED COMPONENTSSENSIT HXG-2d Instruction Manual。
KY-2N型氮气分析仪使用说明书
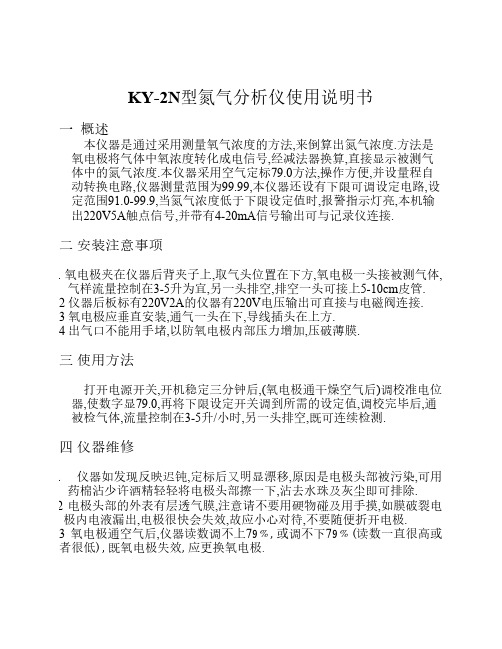
KY-2N型氮气分析仪使用说明书一概述本仪器是通过采用测量氧气浓度的方法,来倒算出氮气浓度.方法是氧电极将气体中氧浓度转化成电信号,经减法器换算,直接显示被测气体中的氮气浓度.本仪器采用空气定标79.0方法,操作方便,并设量程自动转换电路,仪器测量范围为99.99,本仪器还设有下限可调设定电路,设定范围91.0-99.9,当氮气浓度低于下限设定值时,报警指示灯亮,本机输出220V5A触点信号,并带有4-20mA信号输出可与记录仪连接.二安装注意事项1 氧电极夹在仪器后背夹子上,取气头位置在下方,氧电极一头接被测气体,气样流量控制在3-5升为宜,另一头排空,排空一头可接上5-10cm皮管.2 仪器后板标有220V2A的仪器有220V电压输出可直接与电磁阀连接.3 氧电极应垂直安装,通气一头在下,导线插头在上方.4 出气口不能用手堵,以防氧电极内部压力增加,压破薄膜.三使用方法打开电源开关,开机稳定三分钟后,(氧电极通干燥空气后)调校准电位器,使数字显79.0,再将下限设定开关调到所需的设定值,调校完毕后,通被检气体,流量控制在3-5升/小时,另一头排空,既可连续检测.四仪器维修1 仪器如发现反映迟钝,定标后又明显漂移,原因是电极头部被污染,可用药棉沾少许酒精轻轻将电极头部擦一下,沾去水珠及灰尘即可排除.2 电极头部的外表有层透气膜,注意请不要用硬物碰及用手摸,如膜破裂电极内电液漏出,电极很快会失效,故应小心对待,不要随便折开电极.3 氧电极通空气后,仪器读数调不上79﹪,或调不下79﹪(读数一直很高或者很低),既氧电极失效,应更换氧电极.蒲工,你好!就你现在设备情况,应该是氧电极失效,要更换氧电极,氧电极以就换新170.00元/只,买新的要300.00元/只.政。
氮气检测仪执行标准
氮气检测仪执行标准1. 引言本标准旨在规定氮气检测仪的基本要求,确保其性能和功能满足相关安全要求和法规,并提供准确可靠的氮气检测结果。
2. 适用范围本标准适用于所有氮气检测仪的设计、制造和使用。
3. 术语和定义3.1 氮气检测仪:指一种用于检测环境中氮气浓度的设备。
3.2 检测范围:指氮气检测仪能够检测到的氮气浓度范围。
3.3 精度:指氮气检测仪测量结果与真实值之间的偏差。
3.4 灵敏度:指氮气检测仪对于氮气浓度的变化的反应程度。
3.5 响应时间:指氮气检测仪从检测到氮气浓度变化到发出警报的时间。
4. 设计要求4.1 检测范围应覆盖常见的氮气浓度范围,并能够满足特定环境的需要。
4.2 氮气检测仪应具有良好的精度,测量结果与真实值偏差应在规定范围内。
4.3 氮气检测仪应具有较高的灵敏度,能够准确检测到低浓度的氮气。
4.4 氮气检测仪的响应时间应尽量短,能够及时发出警报并采取措施,以防止潜在的危险。
5. 制造要求5.1 氮气检测仪应符合相关安全法规和标准的要求。
5.2 氮气检测仪的制造过程应符合质量管理体系的要求,并进行必要的检测和验证。
5.3 氮气检测仪应标有清晰的产品标识,包括但不限于品牌、型号、制造商等。
5.4 氮气检测仪的使用说明书应提供详细的操作方法和注意事项,以确保正确和安全的使用。
6. 使用要求6.1 在使用氮气检测仪前,应进行校准和功能测试,并确保其正常工作。
6.2 氮气浓度超过安全限值时,氮气检测仪应能够及时发出警报,并采取适当的措施以确保人员安全。
6.3 氮气检测仪应定期检修和维护,保持良好的工作状态。
6.4 对于不符合要求的氮气检测仪,应立即停止使用,并进行必要的修理或更换。
7. 质量控制7.1 制造商应建立质量控制体系,确保所提供的氮气检测仪符合要求。
7.2 制造商应对每台出厂的氮气检测仪进行全面的检测和测试,并记录相关数据。
7.3 制造商应记录氮气检测仪的质保期限,并提供售后服务。
氮气传感器
氮气传感器氮气传感器特点:★整机体积小,重量轻★专业精选进口传感器,可以搭载电化学,催化燃烧,红外原理,热导原理等传感器。
★高精度,高分辨率,响应迅速快.★本安电路设计,可带电热拔插操作。
★数据恢复功能,免去误操作引起的后顾之忧.★自动温湿度补偿功能,出厂精准标定,无须再使用标定。
.★模拟电压或电流和串口同事输出,方便客户调试和使用。
★最精密的电路设计和制造工艺,生产复杂,使用简单。
★可与电脑连接通讯,自行标定校准。
★自带零点微调功能,方便选定参照数据。
★低功耗产品,可异动电源供电可大量用于分析仪仪器,大气,环境无人机监测。
氮气传感器结构尺寸图:氮气传感器直视图和PIN 脚定义图氮气传感器工作电压DC5V±1%/DC24±1%波特率9600测量气体氮气N2气体检测原理电化学采样精度±2%F.S 响应时间<30S重复性±1%F.S 工作湿度0-95%RH,(无冷凝)工作温度-30~50℃长期漂移≤±1%(F.S/年)存储温度-40~70℃预热时间30S 工作电流≤50mA 工作气压86kpa-106kpa安装方式8脚拔插式质保期1年输出接口8pIN 外壳材质铝合金使用寿命2年外型尺寸(引脚除外)33.5X3121.5X31测量范围详见选型表输出信号TTL(标配)0.4-2.0VDC(常规)定制RS485/4-20mA氮气传感器串口和电压采集连接定义图:氮气传感器I2C 连接定义图:引脚名称说明1+5V 电源接入PIN 脚2EN Rs485(3.3V),可接MCU Tx 3Rx/A 串口RX(3.3V),可接MCU Rx 5Scl I2C,Scl(3.3v)引脚6SDA I2C(3.3V)引脚7GND 电源GND 引脚8VOUT电压输出,0-5V/0.4-2.0V氮气传感器RS485连接定义图:氮气传感器交叉干扰系数高精度的传感器检测原理决定了它有良好的一致性,重复性,温湿度补偿等特性,但也不能忽略被检测气体之间的交叉干扰,为了达到很好的检测精准度,须考虑以下气体对该检测气体的干扰系数。
N2氮气检测报警器
IDG100-N2氮气固定式气体检测仪一、产品描述:IDG100系列固定式气体变送器通过对大气中氮气进行连续在线检测及声光报警,不仅对特殊场合气体浓度起到控制作用,对危险现场气体泄漏更有预警作用,及时保护各种现场的生命以及财产安全。
仪器广泛应用于石油、化工、冶金、消防、煤矿、电力、船舶、环保、电信、医疗等行业。
IDG100系列检测仪采用进口传感器结合高速、高精度处理电路,具有信号稳定,精度高、重复性好等优点,并且采用防爆设计,适用于各种危险场合。
仪器输出各种标准信号,可以兼容各种报警系统、PLC、DCS等控制系统。
二、产品特性:1、采用各种进口传感器,寿命至少2年2、采用高速、高精度处理电路对传感器信号进行处理,响应速度快、测量精度高,稳定性和重复性好3、仪器自带背光大屏幕显示,直观显示气体浓度、类型、单位等各种参数4、气室独立设计,结合空气动力学,更能快速、准确检测目标气体5、全量程范围温度数字自动跟踪补偿,保证测量准确性6、软件校准加按键设置,操作简单人性化7、具备数据恢复功能,无须担心误操作8、RS485、三线制4-20mA输出,继电器输出和声光报警可选9、可为客户配套WLO Sin气体采集软件,软件具有数据存储、查询、导出功能三、技术参数:检测原理:电化学检测对象:N2氮气检测量程:0-5%VOL/10%VOL/50%VOL分辨率:0.1ppm检测精度:±1%重复精度:±1%响应时间:30S接线方式:M20*1.5内螺纹接线线材:RVVP3*0.75mm2安装方式:壁挂式、管道式、泵吸式壳体材料:铝合金隔爆外壳外形尺寸:125*106*153mm防爆等级:ExdII CT6防护等级:IP65整机重量:1.8Kg工作温度:-20~50℃(特殊要求根据需要定制)工作湿度:10~95%RH非凝露工作电源:24VDC(12-30VDC)工作电流:11mA@24V(毒气和氮气),33mA@24V(可燃、红外传感器)输出方式:RS485、三线制4-20mA(可根据客户需求定制GPRS、RF、WIFI等无线网络传输方式)报警方式:一组继电器输出(2A@30V)、声光报警(可选) 声光报警电流:120mA,80db@1m防爆认证:ExdⅡCT6Gb计量认证:第三方计量认证执行标准:GB15322.1-2003,GB3836.1-2010GB3836.2-2010,GB3836.4-2010。
氮氢检漏仪原理
氮氢检漏仪原理氮氢检漏仪是一种用于检测氮氢气体泄漏的仪器,其原理主要基于氮氢气体的特性和检测技术。
氮氢气体是一种常见的工业气体,在许多行业中被广泛使用,但是如果泄漏发生,可能会对环境和人员造成严重的危害。
因此,使用氮氢检漏仪进行定期检测是非常重要的。
氮氢检漏仪的原理主要包括两个方面,氮氢气体的特性和检测技术。
首先,我们来看一下氮氢气体的特性。
氮氢气体是一种无色、无味、无毒的气体,具有较高的热导率和低的比热容,同时也具有一定的可燃性。
这些特性使得氮氢气体在空气中具有一定的扩散性,一旦泄漏,会迅速扩散到周围环境中。
基于氮氢气体的这些特性,氮氢检漏仪采用了一种特殊的检测技术来进行泄漏检测。
检测技术主要包括两个方面,传感器和信号处理。
传感器是氮氢检漏仪的核心部件,它能够对氮氢气体进行高灵敏度的检测,并将检测到的气体浓度转化为电信号输出。
信号处理部分则对传感器输出的信号进行放大、滤波和处理,最终将结果显示在仪器的显示屏上。
在进行氮氢泄漏检测时,氮氢检漏仪首先需要进行预热,使传感器处于稳定工作状态。
然后,将检测头置于可能存在泄漏的区域,待仪器显示出稳定的氮氢浓度数值后,可以判断是否存在泄漏。
如果检测到氮氢气体浓度超过了设定的安全阈值,仪器将会发出警报,提醒操作人员及时采取措施。
总的来说,氮氢检漏仪的原理是基于氮氢气体的特性和检测技术,通过传感器对氮氢气体进行高灵敏度的检测,并通过信号处理部分对检测结果进行处理和显示。
使用氮氢检漏仪可以及时准确地发现氮氢泄漏,保障生产和人员的安全。
以上就是关于氮氢检漏仪原理的介绍,希望能对大家有所帮助。
感谢阅读!。
- 1、下载文档前请自行甄别文档内容的完整性,平台不提供额外的编辑、内容补充、找答案等附加服务。
- 2、"仅部分预览"的文档,不可在线预览部分如存在完整性等问题,可反馈申请退款(可完整预览的文档不适用该条件!)。
- 3、如文档侵犯您的权益,请联系客服反馈,我们会尽快为您处理(人工客服工作时间:9:00-18:30)。
氮气N2泄露检测探测器
氮气N2泄露检测探测器产品适用于各种环境和特殊环境中的氮气N2气体浓度和泄露,在线检测及现场声光报警,对危险现场的作业安全起到了预警作用,此仪器采用进口的电化学传感器和微控制器技术,具有信号稳定,精度高,重复性好等优点,防爆接线方式适用于各种危险场所,并兼容各种控制器,PLC,DCS等控制系统,可以同时实现现场报警和远程监控,报警功能,4-20mA标准信号输出,继电器开关量输出。
氮气N2气体变送器产品特性:
①进口电化学传感器具有良好的抗干扰性能,适用寿命8年。
②采用先进微处理技术,响应速度快,测量精度高,稳定性和重复性好。
③检测现场具有具有现场声光报警功能,气体浓度超标即时报警,是危险场所作业的安全保障。
4现场带背光大屏幕LCD显示,直观显示气体浓度,类型,单位,工作状态等。
5独立气室,更换传感器无须现场标定,传感器关键参数自动识别。
6全量程范围温度数字自动跟踪补偿,保证测量准确性。
氮气N2气体变送器技术参数:
检测气体:空气中的氮气N2气体
检测范围:0~100ppm,0~200ppm,0~1000ppm,0~1000ppm,0~5000ppm,100%LEL可选。
分别率:0.01ppm(0~100ppm);0.1ppm(0~1000ppm);1ppm(0~10000ppm以上);0.1LEL.
工作方式:固定式连续工作,扩散式,管道式,流通时,泵吸式可选。
检测误差:≦1%(F.S)
响应时间:≦10S
输出信号:电流信号输出4-20MA
报警方式:2路无源节点信号输出,报警点可设置。
工作环境:-20℃~50℃(特殊要求:(-40℃~+70℃)
相对湿度:≦90%RH
工作电压:DC12~30V
传感器寿命:3年
防爆形式:探头变送器及传感器均为隔爆型。
防爆等级:Exd II CT6
连接电缆:三芯电缆(单根线径≧1.5mm);建议选用屏蔽电缆。
连接距离:≦1000m.
防护等级:IP65.
外形尺寸:183X143X107mm.
重量:1.5Kg.
检测气体:空气中的氮气N2气体
检测范围:0-100ppm、500ppm、1000ppm、5000ppm、0-100%LEL
分辨率:0.1ppm、0.1%LEL
显示方式:液晶显示
温湿度:选配件,温度检测范围:-40~120℃,湿度检测范围:0-100%RH
检测方式:扩散式、流通式、泵吸式可选安装方式:壁挂式、管道式检测精度:≤±3%线性误差:≤±1%
响应时间:≤20秒(T90)零点漂移:≤±1%(F.S/年)恢复时间:≤20秒重复性:≤±1%
信号输出:①4-20mA信号:标准的16位精度4-20mA输出芯片,传输距离1Km
②RS485信号:采用标准MODBUS RTU协议,传输距离2Km
③电压信号:0-5V、0-10V输出,可自行设置
④脉冲信号:又称频率信号,频率范围可调(选配)
⑤开关量信号:标配2组继电器,可选第三组继电器,继电器无源触点,容量220VAC3A/24VDC3A
传输方式:①电缆传输:3芯、4芯电缆线,远距离传输(1-2公里)
②GPRS传输:可内置GPRS模块,实时远程传输数据,不受距离限制(选配)
接收设备:用户电脑、控制报警器、PLC、DCS、等
报警方式:现场声光报警、外置报警器、远程控制器报警、电脑数据采集软件报警等
报警设置:标准配置两级报警,可选三级报警;可设置报警方式:常规高低报警、区间控制报警
电器接口:3/4″NPT内螺纹、1/2″NPT内螺纹,同时支持2种电器连接方式
防爆标志:ExdII CT6(隔爆型)壳体材料:压铸铝+喷砂氧化/氟碳漆,防爆防腐蚀
防护等级:IP66工作温度:-30~60℃
工作电源:24VDC(12~30VDC)工作湿度:≤95%RH,无冷凝
尺寸重量:183×143×107mm(L×W×H)1.5Kg(仪
器净重)
工作压力:0~100Kpa
标准配件:说明书、合格证质保期:一年
氮气N2气体变送器的简单介绍:
氮气N2气体报警器●自动温度补偿,零点,满量程漂移补偿●防高浓度气体冲击的自动保护功能●全软件校准功能,用户也可自行校准,用3个按键实现,操作简单●二线制4-20mA输出
氮气N2气体变送器的应用场所
医药科研、制药生产车间、烟草公司、环境监测、学校科研、楼宇建设、消防报警、污水处理、工业气体过程控制石油石化、化工厂、冶炼厂、钢铁厂、煤炭厂、热电厂、、锅炉房、垃圾处理厂、隧道施工、输油管道、加气站、地下燃气管道检修、室内空气质量检测、危险场所安全防护、航空航天、军用设备监测等。