根治类风湿100%的偏方精选范文
JUKI高速一针锁缝工业缝纫机与自动剪切线缝器说明书
'" - 'Y IJ ;;.. " .:: :fU mr: ~n"' "L
1. ~ A l- "(- V Q)#O!, #02 l'fQ) f[J li, >'<- ,;;-~ Q)" II: J~" Q) .\'i19l ~;::~It« 1' t5 1',
FACE PLATE GASKET
3
SS-6080410-SP
SCREW 1/8-44 !r4
4
110-00858
ARM OIL SJI!El.O AM.5TA-0850604-RO
RUBBER PLUG
6
TA -1250705-RO
RUBBER PLUG
7
BI114-012-000
THREAD GUIDE PIN
30
1!0-18504
ARY THREAD GUIDE A
31
110-01500
SCREW
32
110-46158
THREAD TENS to~ ASM.
33
1!0-18900
TENSION NUT
34
B3!20-125-000
ROTATING STOPPER
35
B3129-012-AOO
TENSION SPRING
11. BELT COVER & BOBBIN WINDER COMPONENTS • • . . . . . • . . • . . . . . • . • . . • . . . . 19
Philips S9000 Prestige 电子刮刀说明书
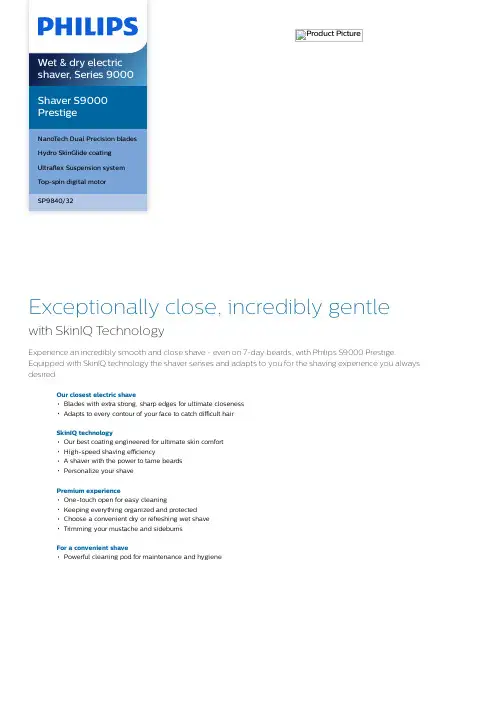
Product PictureShaver S9000PrestigeNanoTech Dual Precision bladesHydro SkinGlide coatingUltraflex Suspension systemTop-spin digital motorSP9840/32Exceptionally close, incredibly gentle with SkinIQ T echnologyExperience an incredibly smooth and close shave - even on 7-day beards, with Philips S9000 Prestige. Equipped with SkinIQ technology the shaver senses and adapts to you for the shaving experience you always desired.Our closest electric shaveBlades with extra strong, sharp edges for ultimate closenessAdapts to every contour of your face to catch difficult hairSkinIQ technologyOur best coating engineered for ultimate skin comfortHigh-speed shaving efficiencyA shaver with the power to tame beardsPersonalize your shavePremium experienceOne-touch open for easy cleaningKeeping everything organized and protectedChoose a convenient dry or refreshing wet shaveTrimming your mustache and sideburnsFor a convenient shavePowerful cleaning pod for maintenance and hygieneWet & dry electric shaver, Series 9000SP9840/32 Highlights SpecificationsNanoT ech Dual Precision bladesWith up to 165.000 cutting actions per minute, the NanoTech Dual Precisions blades deliver extremely close results at skin level. Now reengineered with Guide & Cut System and hardened with nano particles, the 72 self-sharpening blades have extra strong and long lasting sharp edges for an ultimate closeness at all timesHydro SkinGlide coatingOur best protective coating lies between the shaver heads and your skin. Made of up to 500.000 microtech beads with hydrophilic properties per square centimeter, creating smoother gliding on skin by 50%* for maximum skin comfort.Ultraflex Suspension systemFully flexible heads completely adapt to every contour of your face catching even difficult hairs. The result is an exceptionally smooth and comfortable shave.T op-spin digital motorMaximum rotations for maximum efficiency, Philips' most advanced digital motor ensures a precise shave no matter the facial contour or hair density.Power Adapt sensorThe electric shaver has intelligent facial-hair sensor that reads hair density 500 times per second. The technology auto-adapts cutting power for an effortless and gentle shave.Personal Comfort settingsAdjust the speed of your shaver andpersonalize your shaving routine to your ownskin and preferences.One-touch openClean your electric shaver with the touch of abutton. Simply flip open the shaver head andrinse with water.Premium pouchThe S9000 Prestige Shaver comes neatlypacked in a premium storage pouch with a Qicharging pad and accessories. Ideal for travelor keeping it safe when it's not in use.Shave wet or dryA wet and dry shaver that adapts to yourpreference. Choose a convenient dry shave, orpair with your favourite foam or gel for arefreshing wet shave.SmartClick precision trimmerSkin-friendly and easy to use, give yourmustache and sideburns extra definition withthe SmartClick precision trimmer.Cable-free Quick Clean Pod10x more effective than cleaning with water****,the powerful cleaning pod thoroughly cleansand lubricates your shaver in just 1 minute.Using it helps maintain shaver performanceand increase hygiene.Shaving PerformanceShaving system: Excellent skin comfortsystem, NanoTech Dual Precision bladesSkinIQ technology: Hydro SkinGlide coating,Top-spin digital motor, Ultraflex suspensionsystem, Power Adapt sensor, Personal ComfortsettingsAccessoriesSmartClick: Precision trimmerPouch: Premium pouchQuick Clean Pod: 1 cartridge included, YesEase of useWet & Dry: Wet and dry useDisplay: % Battery Level IndicatorCleaning: Fully washable, One-touch openDesignFinishing: Timeless eleganceHandle: Ergonomic grip & handlingPowerQuick charge: 5 minutesCharging time: 1 hour full chargeRun time: 60 minutesBattery Type: Lithium-ionService2-year warrantyReplacement head SH91: Replace every 2 yrswith SH91* compared to predecessor© 2022 Koninklijke Philips N.V.All Rights reserved.Specifications are subject to change without notice. Trademarks are the property of Koninklijke Philips N.V. or their respective owners.Issue date 2022‑03‑24 Version: 1.1.1。
1790电脑纽门机中文说明书
注意
1. 打开 (ON) 电源开关后 , 操作盘上什么也不显示时 , 请关闭 (OFF) 电源开关 , 然后确 认电源电压和电源规格。
2. 为了防止造成人身事故 , 打开电源时和缝纫机运转途中 , 请不要把手指放到挑线杆、 布压脚、布切刀以及机针下面的附近。
3. 为了防止突然的起动造成人身事故 , 放倒缝纫机时 , 拆卸马达外罩时 , 请关掉电源。
对本产品如有不明之处,请向代理店或本公司营业部门询问。
※ 本使用说明书中的规格因改良而发生变更,请订货时确认。 Copyright C 2003 - 2006 JUKI CORPORATION
版权所有,严禁擅自转载、翻印本书的内容。
06 · 09 Printed in Japan (E)
重要安全事项
10. 为了防止损坏电气零件的事故 , 停电时 , 请一定关掉电源。
11. 本装置请在工业用环境下使用。在一般家庭里使用时如果靠近电视机或收音机使用的 话 , 有发生接收不良的故障。
ii
目录
ᦦ . 使用时的注意事项............................................................................................................................................1
15. 为了正常安全运转,应安装地线。同时应在不受高频焊接机等强噪音源影响的环境下使用。 16. 电源插头应用具有电气专门知识的人来安装。电源插头必须连接到接地插座上。
17. 缝纫机指定用途以外不能使用。 18. 对缝纫机的改造、变更应符合安全规格,并采取有效的安全措施。 另外,对于有关改造和变更,JUKI 公司概不负责。
SK100控制器说明书(新)

SmartKey Access Controller Manual SK100系列单门控制器手册目录第一章1、SmartKey SK100单门控制器1、1简介1、2系统构造1、2、1控制器1、2、2读卡器1、2、3门磁开关1、2、4电控锁1、2、5其他输入/输出设备1、2、6电源1、2、7与PC机相连1、2、8卡片第二章2、安装2、1接线图2、1、1LED指示灯2、1、2终端电阻2、2读卡器的安装2、3电控锁、门磁和出门按钮的安装2、3、1电控锁的安装2、3、2门磁2、3、3出门按钮2、4其他输入/输出设备的安装2、5电源2、6与PC机联网工作2、7控制器多阶层通讯方式2、8给控制器通电第三章3、控制器的设置3、1设置控制器的ID地址3、2 在控制器中增加、删除一张卡片3、3 门的互锁设置3、4 门磁常态值设定3、5 通讯波特率的设定3、6 控制器时间设定和调整3、7 控制器内存的动态调整3、8 修改控制器的登录密码3、9 同卡延时时间设置3、10 删除控制器的全部记录第四章3、功能特点及技术参数3、1技术指标3、2功能特性第五章4、故障及排除4、1控制器为什么会不在网?4、2刷卡后为何不能开门?4、3通电状态下读卡器为什么不能读卡?4、4控制器LCD显示乱码第六章5、结束附录一控制器接线图附录二布线施工规范第一章1、Smartkey SK100单门控制器1、1 简介本手册讲述了SK100单门控制器安装及使用规范。
控制器必须由专业人员进行安装及操作。
SK100单门控制器是基于16位单片机开发而成的、具备许多先进特性的新一代智能控制器。
我们希望你能够细心阅读本手册以便你能感受到此系统的全部特性,并能在安装和使用过程中正确操作。
SK100单门控制器具有人性化的功能菜单介面,操作简单,功能强大。
本手册适合SK100, SK100E和SK100M型号的控制器1、2 系统构造首先有必要解释一下SK100单门控制器以及本手册频繁用到的一些基本名词。
新版电脑平车调节方法

电脑平车调节方法我收集的一些资料(2)剪线凸轮与剪线时间的配合 + E! I3 D& Z" m3 \其目的是为了在剪线后,保证机针留下的线头的长短,且在调节时应根据所用的线而定,在进行这种配合的调节时,应先进行正确的观察,正确转动上轮,当机针上升到将最高点时,用左手把梭心制动杆向右推进,同时右手继续转动上轮,挑线杆将要到达最高点时,停止机器,这时上轮上的白、绿两点总应有一点对准机壳上的红刻点,白点与红点对准是适用于棉线;绿点与红点对准是化纤线。
对棉线来说,只可使上轮白点滞后机壳红点2°,对化纤线来说,只可使上轮绿点调节得慢一点,但也不应超过5°,过快过慢,都将使剪线后针上线头留下过短,容易脱针,同时将产生底线剪刀滚柱进不到凸轮的曲线槽内,即不产生剪线动作。
$ T0 Q# x% G* `( }: L 电脑缝纫调节方法 ) G: _, Z4 U, J4 D2 s; s0 x5 x先把剪线凸轮的二个紧固螺钉松开,把上轮上刻点(根据线)对准机壳上的刻点,然后把梭心制动向左推进直到制住梭心为止,用右手转动剪线凸轮,使底线前刀滚柱进入剪线凸轮上的曲线槽内,在继续以与下轴旋转方向一致的方向转动凸轮,直至转不动时为止,再按第一,第二螺钉顺序旋紧螺钉。
9 z0 J/ q. {; y6 Q9 E A第二夹线的夹线板松开量 ( q1 f1 S; _0 t: ~) W% i9 a当左手把梭心制动杆向右推进时,这时第二夹线器夹线板会自动松开,松开量就在0.5~1MM之内,在剪线时,如果第二夹线器夹线板不松开,那面线很容易脱针,而一直松开,将产生浮线,等于夹线全失效,调节时,增大松开量,只需把B螺母松开,旋转螺母A反之,只需把螺母A松开,旋紧螺母B即可。
梭心制动杆的作用' b3 K) W" @9 E. x3 p6 ]# A1 B; t3 p0 J与调节 0 X* o* x9 s' i( X 梭心制动杆的弯头部装有滑套,内装小弹簧现铆住,制动梭心就是靠小弹簧的弹力,使在剪线时,梭心不致于线的拉力而产生倒转的现象,如果制动太紧,又将产生底线线头被剪得过短,因为梭心因制动太紧而一点转动都没有,底线太短,也会产生脱线的现象。
Jack缝纫机JK-5559G电脑高速平锺机系列严晶使用说明书
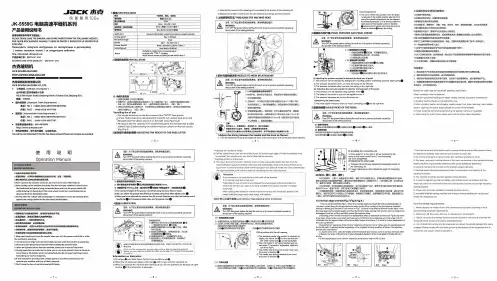
章 产品安装:: 符号之处为安全注意点,必须注意并严格遵守,以免造成不必要的损害。
图2-1 操作面板外观界面图2-2 操作面板液晶显示屏图示图标 描述 索引图标 自由缝 ○ 8 8 8 8 8 8 8 8多段缝 ○ W 缝 ○ 中间停针下停针 ○ 中间停针上停针 ○ 自动剪线功能 ○中间停针抬压脚 ○剪线后抬压脚 ○抬压脚 ○ A B C D 夹线功能○操作面板各按键功能说明名称 参数进入 12345678910111213141617181920键,选择自由缝模式。
键,液晶屏剪线图标键键,液晶屏参数设定中,参数值递增键。
参数设定中,参数值递减键。
参数设定中,向左选择参数范围。
再长按该键,触发指示灯熄灭,触发功能关闭)参数设定中,向右选择参数范围。
长按3秒恢复出厂设置。
15after one minute before opening the control box.The symbol in this manual means Safety Precautions, please pay attention to itand strictly follow it, to avoid any unnecessary damage.:or needle insertion direction is correct!2/7 :use!2 Operation Panel InstructionsFig.2-1 Operation Panel Index mark Description Index Icon DescriptionIndexIcon con Desc ion Index① Free sewing○ ② Multi-section constant-stitch sewing○③ W bar tacking sewing ○④ Down needle Position ○ ⑤ Up needle Position ○ ⑥ Automatic trimming ○⑦Foot lifting at seam End○⑧Foot lifting after trimming ○⑨Presser foot lifting ○ ⑩Thread clamp○key, the thread clamp function turns off.2, Long pressKey, Select 1, Short presskey, the free sewing mode is selected.2, Long press key, Then long press1, Short press key, the icon 2, Long presskey, the icon function turns on.Parameter value increment key.Parameter value decrement key. Parameters selection toward to left key. ( In constant-stitch sewing mode, long press thiskey, One-shot-sewing can be turned on or turned off. )Prameters selection toward to right key.Long press button for The stitch counter reaches the limit. Press key to cancel the alarm andThe trimming counter reaches the limit. Press key to cancel the alarm andPlease wait for 30 seconds, then turn on the power switch 7/7Fig. 4-1 pedal movement of each position parameter45559G 系列 5559G 5559G Series 零件手册 Parts Parts Manual1送料分组件送料分组件/Feed /Feed /Feed Mechanism MechanismComponents 序号NO.公司件号 Part NO.名称 PartName 零件描述 Description 数量 Number4. 压料分组件压料分组件/Presser /Presser /Presser Bar Bar Components11405015倒送料连杆Reverse feed connecting rod 111426021倒送料连杆销Connecting rod pin 1序号NO.公司件号 Part NO.名称 PartName 零件描述 Description 数量 Number101S11005螺钉 SM9/64"x40 L=6Screw SM9/64"x40 L=6610101053送料调节器Feed regulator 11101S11010压脚扳手螺钉SM9/64"x40 L=11Screw SM9/64"x40 L=11111403043送料调节器轴套Feed regulator bushing 1210128002压脚扳手螺钉垫圈Washer 1101S11023送料调节器轴端螺钉SM3/16"x28 L=6.5Screw SM3/16"x28 L=6.51313811029压脚扳手Hand lifter 113826005标盘螺柱Feed regulator stud 14O01004O型圈Rubber ring 110122016送料调节螺钉O形圈Rubber ring 151381000200压脚扳手凸轮分部件Hand lifter cam asm.16101S20001前杠杆螺纹销Screw 2710128015螺纹销橡胶垫圈Washer281381203000抬压脚前杠杆分部件Lift front lever component 1机壳、、外装分组件外装分组件/Machine /Machine /Machine Frame Frame & Miscellaneous Miscellaneous Cover Cover Components上轴挑线分组件上轴挑线分组件/Main /Main /Main Shaft Shaft & Thread Thread Take Take--up up Components910112013抬压脚拉杆Knee lifter pull rod 110H05003GB/T896-1986挡圈 5Snap ring 2公司件号 Part NO.名称 PartName 零件描述 Description 数量 Number公司件号 Part NO.名称 PartName 零件描述 Description 数量 Number1110112010压脚升降板Lifting plate 11211329020挡圈 5Snap ring5101S11001后窗板螺钉SM3/16"×28 L=9Screw SM3/16"×28 L=912226001挑线连杆销Thread take-up connecting rod pin 113101S20004抬压脚拉杆螺钉SM3/16"x32Hinge Screw SM3/16"x321101S15001螺钉SM15x64"x28 L=15Screw SM15x64"x28 L=151141*********抬压脚前杠杆组件Knee lifter lever asm 112205001挑线连杆 Needle bar crank rod 115101S20003后杠杆轴位螺钉SM15/64"x28Hinge screw SM15/64"x2811223800100挑线杆分组件Thread take-up lever asm.116128S20003抬压脚顶杆轴位螺钉SM11/64"×40Hinge Screw SM11/64"×4011220400200挑线曲柄Thread take-up crank 11712812033抬压脚后杠杆Knee lifter back lever 112205002针杆连杆组件Needle bar cradle rod 118112S16008曲柄短螺母SM11/64"×40Nut SM11/64"×401101S17001挑线曲柄螺钉 SM9/64"x40 L=6Screw SM9/64"x40 L=611912812032抬压脚顶杆Knee lifter connecting rod 1101S15004针杆曲柄紧固螺钉 SM9/32"x28 L=16Screw SM9/32"x28 L=1612011212009松线导管上支架Wire release bracket upper 1101S11003针杆曲柄定位螺钉SM9/32"x28 L=16Screw SM9/32"x28 L=1612111212008松线导管压板Wire release press plate112804001针杆曲柄Needle bar crank 1Screw SM3/16"×28 L=7101S15002送料轴挡圈螺钉SM1/4"x40 L=6Screw SM1/4"x40 L=62B10003轴承beating112203001上轴前套Main shaft front bushing 1S10009螺钉Screw212803005主轴中轴套Main shaft bushing mid 110108001上轴挡圈Main shaft thrust collar 1101S14001上轴中套挡圈螺钉Screw 1H03002挡圈20Snap ring 201400092送料偏心轮Feed eccentric cam 110112017送料偏心轮盖板Cover plate1101S11013送料偏心轮螺钉 SM1/4"x40 L=13Screw SM1/4"x40 L=132113S11003护针片螺钉 SM9/64"x40 L=5Screw SM9/64"x40 L=5213803002上轴后轴套main shaft bushing back 110122105上轴后套挡油油封Oil seal 168Lifter Lifter Components Components名称 PartName零件描述 Description 销子Pin开口销 GB/T91 2×14Cotter pin 电磁铁接头Solenoid connector 法兰螺母M8Flange nuts M8电磁铁组件Solenoid asm.后窗板螺钉SM3/16"×28 L=9screw SM3/16"×28 L=9膝抬压脚分组件/Oil /Oil Ceservoir,Knee Ceservoir,Knee Lifter Lifter Components公司件号 Part NO.名称 PartName 零件描述 Description 油盘座垫Oil reservoir rubber cushion 油盘Oil reservori 抬压脚顶杆Knee lifter push rod 油盘垫Oil Reservoir gasket O形圈Rubber ring切刀专用部件切刀专用部件 Knife Knife Components排油孔螺钉SM5/16"×24 L=7Screw SM5/16"×24 L=7油盘磁铁Oil reservoir magnet 序号NO.公司件号 Part NO.名称 PartName 零件描述 Description 数量 Number油盘支架Oil reservoir rubber cushion 抬压脚双向曲柄Knee lifter crank 润滑组件润滑组件/Oil /Oil /Oil Lublication Lublication Components112726001切刀凸轮销Pin 1双向曲柄扭簧Knee lifter spring 212710002切刀凸轮Knife cam1GB/T896-1986挡圈10Snap ring 10公司件号 Part NO.名称 PartName 零件描述 Description 312705003切刀连杆Kinfe connecting rod 1抬压脚轴Knee lifter shaft 41272400100切刀连杆轴承Knife connecting rod bearing 1双向曲柄限位调节螺钉M6 L=30Screw M6 L=30 11211004油窗Oil sight window 512812005切刀凸轮盖板Cover plate1双向曲柄限位调节螺母 M6 L=4Nut M6 L=4 10122019油窗O形圈Rubber ring 612809001切刀滑块导轨Slide bolck guide rail 1双向曲柄螺钉M6 L=26Screw M6 L=2614121001上轴供油管Main shaft oil tube 7101S11008滑块导轨螺钉 SM11/64"X40 L=8 Screw SM11/64"X40 L=82导屑滑板支架Wood material chute holder 112S30005油泵连接螺柱Oil pump connecting stud 812809002切刀滑块Slide bolck1导屑滑板支架木螺钉M4x16Wood screwM4x1611329010开口挡圈10Snap ring 10912804002切刀轴连接柱Knife driving stud connection asm 1GB/T9074.6-1988 导屑板滑板螺钉Screw 10121001下轴供油管Hook driving shaft oil tube 10209S11009止摆扎头螺钉 SM9/64"x40 L=9.5 Screw SM9/64"x40 L=9.51GB/T6170-1986螺母M4(镀锌)Nut M410112020油泵安装板Oil pump installing base 1112802006切刀轴(DLC)Knife shaft 1导屑滑板Wood material chate 弹垫Spring washer1212803001切刀轴村套Bushing1导屑连接滑板螺钉 M4x8 Screw M4x8209S12001压脚螺钉SM11/64"×40 L=10.5Screw SM11/64"×40 L=10.51312804003切刀离合支架Knife driving rod clutch bracket 1导屑连接滑板Waste material cute10103022油泵体衬套Oil pump bushing 1412811001切刀离合销旋钮Knob 1101S30007柱塞螺钉Plunger Screw 15201S16003N03螺母Nut 110127013柱塞簧Plunger spring 1612801002切刀离合销盖Cap 110122018回油柱塞Plunger )10120001油泵体Oil pump 油泵螺钉Screw10111003油泵叶轮Oil pump impeller Bobbin Bobbin Components Components10112021油泵叶轮托板Oil pump impeller cover 10111007油泵盖Lubricating oil pump cover 公司件号 Part NO.名称 PartName 零件描述 Description 101S30006螺钉Screw1012000100油泵分部件Lubricating oil pump component 绕线器组件Bobbin winder asm.116S30003抬牙叉固定螺钉SM15/64"×28 L=14.5Screw SM15/64"×28 L=14.5螺钉M4x6Screw M4x610136001供油管接头Rubber joint 垫圈4 WasherGB/T93-1987弹垫M6Spring Washer M6压线控制板Thread press control plate 绕线衬垫Winding pad 绕线器装置主座Bobbin winder bed 开口挡圈5 Snap ring 复位板拉簧Spring调节板Regulating plate 绕线凸轮Bobbin winder cam 螺钉Screw绕线器连杆组件Bobbin winder connecting rod 满线复位簧spring 弹簧Spring 开口挡圈4 Snap ring绕线器主轴Bobbin winder mian shaft 绕线凸轮轴Bobbin winder cam shaft 绕线轮螺钉Screw绕线轮Bobbin winder wheel O型圈Ring 密封垫Washer螺钉SM3/16"×28 L=10 Screw SM3/16"×28 L=10底线夹线器Bobbin thread tension asm.线架组件/Machine /Machine Head Head Accessories(1)Accessories(1)--Thread Thread Stand Stand Components Components 夹线螺母Thread tension nut 小夹线弹簧Spring公司件号 Part NO.名称 PartName 零件描述 Description 夹线板Thread tension disk 夹线过线板Thread tension guide plate 线架杆顶防护橡皮Spool rest rod rubber cap 十字槽凹穴六角头螺栓 M5 L=16 Screw M5 L=16 垫圈M5Washer M5螺母M5Nut M5上线架过线杆 Spool rest arm upper 13(1)过线圈(内)Thread guide ring 过线圈(外) Thread guide ring 线架杆上节Spool rest rod upper 线架杆接头 Spool rest rod joint 线架杆下节Spool rest rod lower 橡胶垫圈Spool rest rod rubber ring 垫圈M16Washer M16螺母 M16Spool rest rod nut M16十字槽凹穴六角头螺栓 M5Spool rest arm lower screw M5螺母 M5Nut M5弹簧垫圈 M5Spring washer M5下线架过线杆 Spool rest arm lower 线盘 Spool rest线盘垫 Spool rest cushion 线盘钉Spool pin 线团防松垫Spool retainer 自动倒送料开关组件自动倒送料开关组件/Automatic /Automatic /Automatic Reverse Reverse Feed Feed Components线架组件Thread stand asm.公司件号 Part NO.名称 PartName 零件描述 Description 数量 Number101S11004挑线杆护罩螺钉SM3/16"×28 L=7Screw SM3/16"×28 L=711283003900双开关组件Auto reverse feed switch asm 1116S30003抬牙叉固定螺钉SM15/64"×28 L=14.5Screw SM15/64"×28 L=14.52GB/T93-1987弹垫M6Spring washer M62(1)/Machine (1)/Machine Head Head Accessories(2)11628005抬牙叉固定螺钉垫圈Washer21383003400自动倒送料电磁铁Auto reverse feed solenoid 1公司件号 Part NO.名称 PartName 零件描述 Description 13826004销子Snap ring 1开口销 GB/T91 2×14Cotter pin 1机头连接钩部件 Hinge component11322040橡胶垫片Washer 1机头连接钩座 Head connecting rubber cushion 11328031垫片Snap ring 1机针(14#)Needle GB/T896-1986开口挡圈Plunger spring1机头连接钩座钉 Nail 11227006自动倒送料连杆顶弹簧Auto reverse feed connecting rod 1梭心 Bobbin13812034自动倒送料连杆Hinge Screw SM11/64"×401机头支柱 Machine head rest pin 112S20002曲柄短螺钉SM11/64"×40Nut SM1/4"×281螺丝刀(大)Screw driver,large 112S16007曲柄长螺母SM1/4"x28Auto reverse feed crank 1螺丝刀(中) Screw driver,medium 11204003自动倒送料曲柄Nut SM11/64"×401螺丝刀(小) Screw driver,small 2018.12112S16008曲柄短螺母SM11/64"×40Hinge Screw SM1/4"×281油箱部件 Oiler component You will be not informed if the file has been revised.Please set sample as standard.112S20001曲柄长螺钉 SM1/4"×28Auto reverse feed pull shaft 1防尘罩 Dust cover 11212029自动倒送料拉杆Auto reverse feed pull shaft 1螺钉Screw14029003轴用弹性挡圈7(厚0.8mm)Snap ring 71针板盖Needle plate cover 11211005尼龙扎带Cable band1压板弹簧Spring。
TK100文本
目录第一章产品概述 (3)1.1功能 (3)1.2一般规格 (3)1.3各部分名称 (4)1.4外型尺寸及安装方法 (7)第二章编辑软件TK100 (8)2.1 TK100基本概述 (8)2.2编辑用户画面 (8)2.3保存工程 (32)2.4下载画面 (33)第三章操作方法 (33)3.1联机通讯 (33)3.2切换画面 (34)3.3系统口令 (34)3.4修改数据 (35)3.5开关量控制 (36)第四章与PLC的连接方法 (37)4. 1深圳丰菱科技FL系列 (37)4.2三菱FX系列 (38)4.3西门子S7-200系列 (39)4.4欧姆龙C系列 (39)4.5施耐德NEZA/TWIDO系列 (40)4.6 台达DVP系列 (41)4.7松下FP系列 (41)4.8 LG Master-K CNet系列 (42)4.9 LG系列 Modbus 协议 (43)4.10 LG Master-K 120S 编程口通讯 (44)4.11 FACON永宏系列 (44)4. 12 光洋S系列 (45)4.13 ECOSTEP 系列 (46)4.14 AB Micrologix系列 (47)4.15 MODBUS RTU/ASCII/EMERSON/RTU EXTEND (48)4.16 MODBUS SERVER (49)4.17 九天丰菱自由协议 (50)4.18 SAIA PCD S-BUS协议 (51)4.19 VIGOR PLC (52)4.20 EMERSON EC20系列PLC (53)4.21 KEYENCE KV系列PLC (54)eView TK100 V1.0.0 组态软件Release Note (55)附录1:自由协议文档 (59)附录2:其它注意事项 (61)附录3:TK100组态新增功能 (62)第一章产品概述1.1功能TK100是一个小型的人机界面,主要与各类PLC(或带通信口的智能控制器)配合使用,以文字或指示灯等形式监视、修改PLC内部寄存器或继电器的数值及状态,从而使操作人员能够自如地控制机器设备。
KP-100数字密码锁操作指南说明书
1MODEL KP-100ACCESS CONTROL DIGITAL KEYPADOPERATING INSTRUCTIONSAlarm Controls19 Brandywine DriveDeer Park, New York 11729(800) 645-5538Model KP-100 is a self-contained digital keypad. Thiskeypad is suitable for residential, industrial, and commercialinstallations. It is compatible with all electric locking devices.1. Pass the wire harness through the opening in the back box.2. Mount the back box to the door frame or wall.3. Make all required wiring connections to the terminal blocks.4. Place the keypad faceplate on the back box and secure with the screwsprovided.Power Input (12-24V AC/DC) 12 or 24 AC or DC. AC power can be connected without observing polarity requirement. Connect DC power with polarity as indicated.Output Relay SPDT dry contacts. Output can be programmed for latching or momentary operation.Egress Input (EG IN) A normally-open request to exit station can be connected to this terminal and ground (-). Connecting the terminal to ground will operate the output in the same manner as a valid user code.Tamper Contact Normally-closed output pair activated by the tamper switch if the keypad faceplate is removed from the back box.WIRINGON/OFFDAP JUMPER2Keypad initiation must be done at the initial turn-on of the keypad.1. Connect power to the keypad.2. Put the keypad in Program Mode by entering “0 0 0 0 ”. The keypad willbeep twice and the yellow LED will be on and not blinking.3. Enter “8 9 0 1 #”.4. The keypad will beep twice and the keypad initiation is complete.5. Enter “ ” to exit Program Mode. The yellow LED will begin blinking.It is strongly recommended that the Installer Code be changed from the default “0 0 0 0”. If the Installer Code is not known, please refer to the section on Direct Access to Programming.1. Put the keypad in Program Mode by entering “0 0 0 0 ” or the currentinstaller code. The keypad will beep twice and the yellow LED will be on and not blinking.2. Enter “0 (4 to 8 digit new installer code) #”. For example, to change theInstaller Code to 1 2 3 4 you would enter “0 1 2 3 4 #”.3. The keypad will beep twice indicating that the new Installer Code has beenaccepted.4. Enter “ ” to exit Program Mode. The yellow LED will begin blinking.It is necessary to put the keypad in Programming Mode in order to access all keypad configuration settings.1. Put the keypad in Program Mode by entering the Installer Code followed bythe “ ”. The keypad will beep twice and the yellow LED will be on and not blinking.2. Enter “ ” to exit Program Mode. The yellow LED will begin blinking.User Codes are 4 to 8 digits long and must not be the same as the Installer Code. The keypad can store up to 100 User Codes.Each User Code has a Code Number. Code Numbers are two digits ranging from “00” to “99”.1. Put the keypad in Program Mode by entering the Installer Code followed bythe “ ”. The keypad will beep twice and the yellow LED will be on and not blinking.2. Enter “(1)(Code Number) (User Code) #”.For example, if you wish to assign a User Code of “6 7 8 9” to Code Number “01”, you would enter “1 0 1 6 7 8 9 #”.3. Enter “ ” to exit Program Mode. The yellow LED will begin blinking.3Enter a valid User Code to activate the Output Relay. The keypad must be in standby mode (yellow LED blinking).1. Enter “(User Code) #”.For example, if the User Code is “1234” you would enter “1 2 3 4 #”.1. Put the keypad in Program Mode by entering the Installer Code followed bythe “ ”. The keypad will beep twice and the yellow LED will be on and not blinking.2. Enter “(1)(Code Number) #”.For example, if you wish to delete the User Code in Code Number “02” you would enter “1 0 2 #”.3. Enter “ ” to exit Program Mode. The yellow LED will begin blinking.To delete all User Codes enter “8 9 0 1 #”.The Outputs Relay can be programmed for either momentary or latching operation. Momentary operation time can be set for between 1 and 999 seconds. The factory default momentary operation time is 2 seconds.1. Put the keypad in Program Mode by entering the Installer Code followed bythe “ ”. The keypad will beep twice and the yellow LED will be on and not blinking.2. Momentary Mode -Enter “4 0 (output active time 1-999) #”Latching Mode -Enter “4 1 #”3. Enter “ ” to exit Program Mode. The yellow LED will begin blinking.The keypad beeper can be silenced.1. Put the keypad in Program Mode by entering the Installer Code followed bythe “ ”. The keypad will beep twice and the yellow LED will be on and not blinking.2. Enter “8 3 0 #”.3. Enter “ ” to exit Program Mode. The yellow LED will begin blinking.To return the keypad to audible mode -1. Put the keypad in Program Mode by entering the Installer Code followed bythe “ ”. The keypad will beep twice and the yellow LED will be on and not blinking.2. Enter “8 3 1 #”.3. Enter “ ” to exit Program Mode. The yellow LED will begin blinking.4When the keypad is programmed for Auto Entry Mode it is not necessary to terminate User Codes with the “#” during operation. However, in Auto Entry Mode the User Code must be the same length (4 to 8 digits) as the Installer Code.To put the keypad in Auto Entry Mode -1. Put the keypad in Program Mode by entering the Installer Code followed bythe “ ”. The keypad will beep twice and the yellow LED will be on and not blinking.2. Enter “8 2 1 #”.3. Enter “ ” to exit Program Mode. The yellow LED will begin blinking.To return the keypad to Manual Entry Mode -1. Put the keypad in Program Mode by entering the Installer Code followed bythe “ ”. The keypad will beep twice and the yellow LED will be on and not blinking.2. Enter “8 2 0 #”.3. Enter “ ” to exit Program Mode. The yellow LED will begin blinking.The keypad can be programmed to notify the user when the Output Relay is energized or the egress button has been pressed.To put the keypad in Output Annunciator Mode -1. Put the keypad in Program Mode by entering the Installer Code followed bythe “ ”. The keypad will beep twice and the yellow LED will be on and not blinking.2. Enter “8 1 1 #”.3. Enter “ ” to exit Program Mode. The yellow LED will begin blinking.To take the keypad out of Output Annunciator Mode -1. Put the keypad in Program Mode by entering the Installer Code followed bythe “ ”. The keypad will beep twice and the yellow LED will be on and not blinking.2. Enter “8 1 0 #”.3. Enter “ ” to exit Program Mode. The yellow LED will begin blinking.56If the Installer Code is forgotten, the Direct Access to Programming (DAP) utility can be used to put the keypad in Programming Mode .1. Disconnect the power supply from the keypad.2. Move the DAP jumper from the OFF to the ON position.3. Reconnect the power supply to the keypad (keypad will start beeping).4. Move the DAP jumper from the ON to the OFF position (keypad will stopbeeping and the yellow LED will be on and not blinking. The keypad is now in Programming Mode .5. A new Installer Code must now be entered.6. Enter “0 (4 to 8 digit new installer code) #”. For example, if you wish to change the Installer Code to 1 2 3 4 you would enter “0 1 2 3 4 #”.7. The keypad will beep twice indicating that the new Installer Code has been accepted.8. Enter “ ” to exit Program Mode . The yellow LED will begin blinking. The Green LED is on while Output Relay is activated.The Red LED is on while keypad is in Lockout Mode.The Yellow LED is described in the table below -Yellow LED Keypad Status Tone IndicatorOn Programming Mode None 1 Blink Successful Key Press 1 Beep2 Blinks Successful Code Entry 2 Beeps5 Blinks Error in Code Entry 5 BeepsContinuous Blinking Standby Mode NoneContinuous Blinking DAP Jumper not replaced Continuous ToneThe keypad can be temporarily disabled to prevent unauthorized access by entering a user specified 4 to 8 digit Lockout Code . The red LED will light when the keypad is in Lockout Mode. The keypad can be taken out of Lockout Mode by entering the Lockout Code again.1. Put the keypad in Program Mode by entering the Installer Code followed by the “ ”. The keypad will beep twice and the yellow LED will be on and not blinking.2. Enter “5 1 #”3. Enter “2 1 (Lockout Code) #”.For example, if you wish to assign a Lockout Code of “6 7 8 9”, you would enter “2 1 6 7 8 9 #”.3. Enter “ ” to exit Program Mode. The red LED will illuminate.Use N/C contact for magnetic locks and fail-safe electric strikes.Use N/O contact for fail-secure electric strikes.The 1N4004 Diode must be used for DC powered electric strike applications.TAMPER SWITCHThe Tamper Switch is Normally-closed when the keypad face plate is securely attached to the back box. Connect these terminals to an alarm panel if desired.CODESIt is recommended that the Installer Code and User Codes be noted here for reference. Installer CodeUser Code _______User Code _______User Code _______User Code _______User Code _______User Code _______User Code _______User Code _______User Code _______User Code _______User Code _______User Code _______7Operating Voltage 12 or 24 Volts AC or DC Auto-sensingActive Current Draw 50 mA maximum @12VDC 65 mA maximum @24VDCIdle Current Draw 9 mA maximum @12VDC 17 mA maximum @24VDCOutput Relay Contact Rating 10A@28VDCOutput Contact Arrangement Single Pole Double ThrowDimensions 2.875”W x 4.5”L x 1.375”DKP-100 Rev. B 5/148。
神器i9100图文刷机之详细教程-小白也能看懂的教程(已更新官方4.0刷机教程)
刷前请看清自己手机是9100G还是9100,(太多人弄混了,然后成砖,以后一律不回,已经写出区分贴,区分请看此贴:1./thread-3677100-1-1.html复制代码如果你手机是9100G请去此版块吧,:/forum-729-1.html如果你想看刷机4.0.3官方ROM的教程,请移步至此贴三楼想自定义QQ后缀或者特色软件,请看此帖1./thread-3802162-1-1.html复制代码看见i9100教程版块里面东西实在是太少,为了给众位网友解惑,分享一下刷机教程吧!(兜兜的4.0刷机方法就是下面写的第二种卡刷方法即可)官方4.0.3的刷机方法已经写在三楼,大家请看,教程已经完美,不再更新首先,i9100刷机分为线刷和卡刷两种,卡刷就是手机上执行命令进行刷机操作,线刷:就是手机连接电脑上,然后通过电脑端的操作进行刷机操作。
针对目前i9100大部分ROM来说,线刷占大多数,卡刷针对的时zip压缩包文件格式ROM。
线刷针对的时TAR压缩包格式的ROM.(特此说明:9100手机刷机前其实是不需要ROOT的,因为绝大部分ROM都自带ROOT,不像。
HTC手机,摩托手机。
买来的手机直接刷即可。
如果ROM不带ROOT,你刷完ROOM,可以再ROOT。
)刷机前必看:请认准看清你手机是9100还是9100G,设置-关于手机里面有,此教程是关于9100的!!!谨记谨记谨记!!!首先讲线刷(主要的刷机方法)ROM包必须是tar格式的!第一步:你需要准备几样东西。
(刷机准备)第一个东西:三星驱动下载地址:本帖隐藏的内容(下载后解压安装到电脑上即可)第二个东西:ODIN刷机软件下载地址:本帖隐藏的内容(下载后解压即可,解压后先不要执行任何操作)第三个东西:ROM包(下载后需要解压,得到tar格式的文件包同时我推荐F大的ROM包,不错!下载地址:[本帖隐藏的内容/thread-2766344-1-1.html第二步,开始刷机了(1)手机进入刷机模式:手机关机模式下,按住音量键下+HOME键(就是中间那个主屏键)+电源键,等到手机屏幕出现机器人图案和Dowloading时,再用手指按一下音量上即可如图所示:(2),在电脑端打开下载好的ODIN,如图:(3)打开之后,手机在连接电脑,ODIN 出现黄色图标,如上图!(如果未出现黄色图标,则表明驱动没有安装好,重新安装即可)电脑上操作ODIN,勾选PDA,PDA选择你下载好的ROM文件,(一般把ROM包放在桌面上即可,记得RPM包一定要是TAR格式的压缩包哦,不然ODIN无法识别)最后点击右上端的START即可!电脑自动开始刷机。
KD100使用说明书 原车遥控生成专家 适合原车遥控改折叠钥匙
KD100使用说明书KD100是KEYDIY公司开发的一个强大的车用/民用遥控器生成工具,所生成的遥控器都具备不重码,质量稳定的特点。
通过采用英飞凌和NXP等公司开发的超级芯片,KD100巧妙的解决了各类型遥控器的兼容问题,不仅极大的节省了锁匠和改装店的耗材成本,还极大的解决了锁匠的时间成本。
KD100本身还是一个强大的管理软件,消费者可以自行添加各种遥控或者钥匙以做为日常参考所用。
KD100目前能生成包括奥迪大众斯柯达西耶特本田起亚现代马自达等车型的部分车用遥控。
生成过程非常简单。
首先打开软件,选择地区 :KD100软件把汽车品牌的区域划为5个区域。
分别是欧洲地区美洲地区亚洲地区和中国地区以及其他地区。
以欧洲地区为例。
在该地区下会看到各种汽车品牌。
每个汽车品牌下都有3个数字,3个数字分别表明该品牌下拥有的正式版/测试版/临时版的遥控器的数量。
其中正式版的遥控器可以进行生成遥控和模拟遥控的功能,测试版只能进行模拟遥控,而临时版一般由消费者自行添加,不具备生成遥控和模拟功能。
仅为管理所用。
汽车品牌会根据包含的遥控数量动态排序。
数量越多越靠前。
添加汽车品牌:点击该按键后,消费者可在当前地区下自行添加某个汽车品牌。
比如我们自己添加奥迪品牌。
添加成功后,奥迪品牌就会显示在系统列表中。
我们进入某个具体的汽车品牌。
比如大众。
进入大众目录后,会发现各种大众汽车遥控,每个遥控器下面有3个参数分别表示零件号/频率/版本类型。
添加钥匙点击这个按键后,消费者可在当前品牌下自行添加某些遥控器,以便管理和备份所用。
消费者通过该方法添加的遥控均为临时版本。
默认的钥匙图片是KD100的logo,消费者可自己定义图片。
添加好后,该钥匙便会作为临时版本的钥匙出现在当前品牌下。
并显示为临时版。
进入临时钥匙后显示如下:其中生成钥匙和模拟钥匙都不能点击。
删除品牌和钥匙:点击该按键后,当前品牌以及当前品牌下的遥控器都将会被清除。
请谨慎使用。
- 1、下载文档前请自行甄别文档内容的完整性,平台不提供额外的编辑、内容补充、找答案等附加服务。
- 2、"仅部分预览"的文档,不可在线预览部分如存在完整性等问题,可反馈申请退款(可完整预览的文档不适用该条件!)。
- 3、如文档侵犯您的权益,请联系客服反馈,我们会尽快为您处理(人工客服工作时间:9:00-18:30)。
类风湿关节炎是一种病因未明的慢性、以炎性滑膜炎为主的系统性疾病。
为大家整理的相关的根治类风湿100%的偏方,供大家参考选择。
根治类风湿100%的偏方
验方一川乌酒治类风湿病性关节炎
刘凤华,女,52岁,患类风湿2年多,为了治病,曾走遍大小医院,吃过很多西药,还是效果不佳。
经人介绍了此偏方后,并没有抱多大希望。
没想到服用了一段时间后,病情有明显好转。
原来,这个方法能祛风散寒,通络止痛。
适用于类风湿性关节炎肢体关节疼痛,怕冷明显,屈伸不利者。
处方制川乌、制草乌各6克,追风、千年健各10克,白酒500毫升。
把药泡在酒里,每天2次,每次10毫升左右。
验方二羌活、天麻治风湿性关节炎有疗效
张晶,女,7年前膝盖痛疼红肿、全身发热,疼痛呈游走性,有时膝关节痛有时腰椎、颈椎痛。
经医院诊断为风湿性关节炎,用抗生素及激素治疗,病情基本控制。
后来又出腰椎、颈椎两髋关节疼痛难忍,关节肿。
后来用了一个中药偏方,一周后感觉痛疼明显减轻。
继续服用2个疗程,病情痊愈,未再复发。
处方羌活、天麻、川芎、当归、秦艽各10克,红花6克,白芥子3克。
用水煎服。
验方三松节酒治风湿性关节疼痛
罗岳,男,48岁,2006年患类风湿性关节炎,曾多方治疗无效,后来住某院治疗虽有好转,但经常腿冷、疼痛。
后来经人介绍使用了一个松节酒的偏方,症状得到改善。
处方松节50克,白酒500毫升,将松节浸泡在酒中。
每次喝10毫升左右。
每日3次。
能止痛,对风湿性关节炎的怕冷、疼痛有一定疗效。
类风湿关节炎需要如何进行保养
1、注意关节的保暖。
因为关节受寒湿的侵袭是引发类风湿关节炎的原因,所以患者在生活中就需要远离寒湿因素,腰腿疼痛、颈椎病久治不愈,看15538 365141这个-威-辛,天天在线,对症-治-愈。
不要用凉水洗澡和洗漱,也避免使关节受到冷热的交替刺激,这一点保养要求患者一定要做到。
2、不要使关节受到挤压。
因为类风湿关节炎侵犯的主要是人体的小关节,如指间关节,如果患者经常使关节受到挤压就会导致关节发生肿胀,加重疾病的症状,所以患者尽量不要拿重物,使关节保持轻松的状态,这在类风湿关节炎如何保养中也是患者不能忽视的一点。
3、避免使关节受到创伤。
患者在生活中如果是关节受到创伤就会加重类风湿关节炎的症状,影响到患者的康复,因此,保护好关节不受创伤是必须要做到的,患者们要注意了。
4、保持关节的灵活性。
患者在病情减轻以后就要进行关节灵活性的训练,阻止关节发生畸形,使关节受到永久性的损害。