
黑马程序员:php 中如何实现自动注册自动登录的验证代码
在这篇文章中,清源分享给大家一个php实现自动登录与自动验证的实现代码,有需要的朋友可以参考一下:
代码:
1.$urls = parse_url($db_bbsurl);
2.$domain = $urls['host'];
3.include_once (R_P .'require/admvclient.php');
4.$adm_oem= new Cnzz_Adm_Oem();
5.//判断config文件是否存在用户密码
6.pwCache::getData(D_P . "data/bbscache/adm_config.php");//用户名密码配置文件
7.if (isset($adm_user) && isset($adm_pwd)) {
8.$request = array("adm_user"=>$adm_user,"adm_pwd"=>$adm_pwd,'cms'=>'pw');
9.$token = $adm_oem->get_appkey_once($request);
10.if ($token<0){
11.if($token==-1){
12.adminmsg('传递参数为空或传递参数非数字');
13.}else if($token==-2){
14.adminmsg('传递参数password错误');
15.}
16.}else{
17.$apikey = $token['adm_key'];
19.}else{
20.$Key = md5($domain.'KclGiq7H');
21.$request = array('cms'=>'pw','domain'=>$domain,'key'=>$Key);
22.$token = $adm_oem->reg_user_once($request);
23.if ($token<0){//异常
24.if($token==-1){
25.adminmsg('key有误');
26.} else if($token==-2){
27.adminmsg('域名长度有误(1~64)');
28.} elseif($token==-3){
29.adminmsg('域名输入有误(比如输入汉字)');
30.} elseif($token==-4){
31.adminmsg('域名插入数据库有误');
32.} elseif($token==-5){
33.adminmsg('IP用户调用页面超过阀值,阀值暂定为10');
34.} (PS:T不错的PHP Q扣裙:276167802,验证:cz)
35.} elseif (is_array($token) && isset($token)){
36.$adm_user = $token['adm_user'];
37.$adm_pwd = $token['adm_pwd'];
38.$apikey = $token['adm_key'];
39.pwCache::setData(D_P.'data/bbscache/adm_config.php',"<?phprn$adm_user=".$adm
_user.";rn$adm_pwd=".$adm_pwd."rn?>");
41.}
者有所帮助,感谢阅读本文。
PHP如何实现验证码

PHP如何实现验证码现在来说说简单的纯数字验证码吧。
如果是初学者,建议按照我代码的注释 //数字⼀步步来。
最简单的⽅法,还是把整个代码复制⾛了。
新建⼀个captcha.php:<?php//11>设置session,必须处于脚本最顶部session_start();/*$image = imagecreatetruecolor(100, 30); //1>设置验证码图⽚⼤⼩的函数//5>设置验证码颜⾊ imagecolorallocate(int im, int red, int green, int blue);$bgcolor = imagecolorallocate($image,255,255,255); //#ffffff//6>区域填充 int imagefill(int im, int x, int y, int col) (x,y) 所在的区域着⾊,col 表⽰欲涂上的颜⾊imagefill($image, 0, 0, $bgcolor);//10>设置变量$captcha_code = "";*///7>⽣成随机数字for($i=0;$i<4;$i++){//设置字体⼤⼩$fontsize = 6;//设置字体颜⾊,随机颜⾊$fontcolor = imagecolorallocate($image, rand(0,120),rand(0,120), rand(0,120)); //0-120深颜⾊//设置数字$fontcontent = rand(0,9);//10>.=连续定义变量$captcha_code .= $fontcontent;//设置坐标$x = ($i*100/4)+rand(5,10);$y = rand(5,10);imagestring($image,$fontsize,$x,$y,$fontcontent,$fontcolor);}//10>存到session$_SESSION['authcode'] = $captcha_code;//8>增加⼲扰元素,设置雪花点for($i=0;$i<200;$i++){//设置点的颜⾊,50-200颜⾊⽐数字浅,不⼲扰阅读$pointcolor = imagecolorallocate($image,rand(50,200), rand(50,200), rand(50,200));//imagesetpixel — 画⼀个单⼀像素imagesetpixel($image, rand(1,99), rand(1,29), $pointcolor);}//9>增加⼲扰元素,设置横线for($i=0;$i<4;$i++){//设置线的颜⾊$linecolor = imagecolorallocate($image,rand(80,220), rand(80,220),rand(80,220));//设置线,两点⼀线imageline($image,rand(1,99), rand(1,29),rand(1,99), rand(1,29),$linecolor);}//2>设置头部,image/pngheader('Content-Type: image/png');//3>imagepng() 建⽴png图形函数imagepng($image);//4>imagedestroy() 结束图形函数销毁$imageimagedestroy($image);接着就是静态页的代码了:index.html<!DOCTYPE html PUBLIC "-//W3C//DTD XHTML 1.0 Transitional//EN" "/TR/xhtml1/DTD/xhtml1-transitional.dtd"><html xmlns="/1999/xhtml"><head><meta http-equiv="Content-Type" content="text/html; charset=utf-8" /><title>⽆标题⽂档</title></head><body><form method="post" action="./form.php"><p>验证码: <img id="captcha_img" border='1' src='./captcha.php?r=echo rand(); ?>' style="width:100px; height:30px" /><a href="javascript:void(0)" onclick="document.getElementById('captcha_img').src='./captcha.php?r='+Math.random()">换⼀个?</a> </p><P>请输⼊验证码:<input type="text" name='authcode' value=''/></p><p><input type='submit' value='提交' style='padding:6px 5px;'/></p></form></body></html>从index.html可以看到,提交的表单是到form.php的,所以还要有⼀个判断的form.php代码:<?phpheader("Content-Type:text/html;charset=utf-8"); //设置头部信息//isset()检测变量是否设置if(isset($_REQUEST['authcode'])){session_start();//strtolower()⼩写函数if(strtolower($_REQUEST['authcode'])== $_SESSION['authcode']){//跳转页⾯echo "<script language=\"javascript\">";echo "document.location=\"./form.php\"";echo "</script>";}else{//提⽰以及跳转页⾯echo "<script language=\"javascript\">";echo "alert('输⼊错误!');";echo "document.location=\"./form.php\"";echo "</script>";}exit();}显⽰页⾯如下:数字加英⽂的验证码,只需更改captcha.php页⾯中的 7》即可,其他两个页⾯不需要动,代码如下:<?php//11>设置session,必须处于脚本最顶部session_start();$image = imagecreatetruecolor(100, 30); //1>设置验证码图⽚⼤⼩的函数//5>设置验证码颜⾊ imagecolorallocate(int im, int red, int green, int blue);$bgcolor = imagecolorallocate($image,255,255,255); //#ffffff//6>区域填充 int imagefill(int im, int x, int y, int col) (x,y) 所在的区域着⾊,col 表⽰欲涂上的颜⾊imagefill($image, 0, 0, $bgcolor);//10>设置变量$captcha_code = "";//7>⽣成随机的字母和数字for($i=0;$i<4;$i++){//设置字体⼤⼩$fontsize = 8;//设置字体颜⾊,随机颜⾊$fontcolor = imagecolorallocate($image, rand(0,120),rand(0,120), rand(0,120)); //0-120深颜⾊//设置需要随机取的值,去掉容易出错的值如0和o$data ='abcdefghigkmnpqrstuvwxy3456789';//取出值,字符串截取⽅法 strlen获取字符串长度$fontcontent = substr($data, rand(0,strlen($data)),1);//10>.=连续定义变量$captcha_code .= $fontcontent;//设置坐标$x = ($i*100/4)+rand(5,10);$y = rand(5,10);imagestring($image,$fontsize,$x,$y,$fontcontent,$fontcolor);}//10>存到session$_SESSION['authcode'] = $captcha_code;//8>增加⼲扰元素,设置雪花点for($i=0;$i<200;$i++){//设置点的颜⾊,50-200颜⾊⽐数字浅,不⼲扰阅读$pointcolor = imagecolorallocate($image,rand(50,200), rand(50,200), rand(50,200));//imagesetpixel — 画⼀个单⼀像素imagesetpixel($image, rand(1,99), rand(1,29), $pointcolor);}//9>增加⼲扰元素,设置横线for($i=0;$i<4;$i++){//设置线的颜⾊$linecolor = imagecolorallocate($image,rand(80,220), rand(80,220),rand(80,220));//设置线,两点⼀线imageline($image,rand(1,99), rand(1,29),rand(1,99), rand(1,29),$linecolor);}//2>设置头部,image/pngheader('Content-Type: image/png');//3>imagepng() 建⽴png图形函数imagepng($image);//4>imagedestroy() 结束图形函数销毁$imageimagedestroy($image);显⽰页⾯如下:⽣成汉字类验证码,在运⾏过程中,提⽰乱码错误,⽆法显⽰,未能解决,代码如下:php//11>设置session,必须处于脚本最顶部session_start();//1>设置验证码图⽚⼤⼩的函数$image = imagecreatetruecolor(200, 60);//5>设置验证码颜⾊ imagecolorallocate(int im, int red, int green, int blue);$bgcolor = imagecolorallocate($image,255,255,255); //#ffffff//6>区域填充 int imagefill(int im, int x, int y, int col) (x,y) 所在的区域着⾊,col 表⽰欲涂上的颜⾊imagefill($image, 0, 0, $bgcolor);//7>设置ttf字体$fontface = 'FZYTK.TTF';//7>设置字库,实现简单的数字储备$str='天地不仁以万物为刍狗圣⼈不仁以百姓为刍狗这句经常出现在控诉暴君暴政上地残暴不仁把万物都当成低贱的猪狗来看待⽽那些⾼⾼在上的所谓圣⼈们也没两样还不是把我们⽼百姓也当成猪狗不如的东西但实在正取的解读是地不情感⽤事对万//str_split()切割字符串为⼀个数组,⼀个中⽂在utf_8为3个字符$strdb = str_split($str,3);//>11$captcha_code = '';//8>⽣成随机的汉⼦for($i=0;$i<4;$i++){//设置字体颜⾊,随机颜⾊$fontcolor = imagecolorallocate($image, rand(0,120),rand(0,120), rand(0,120)); //0-120深颜⾊//随机选取中⽂$in = rand(0,count($strdb));$cn = $strdb[$in];//将中⽂记录到将保存到session的字符串中$captcha_code .= $cn;/*imagettftext (resource $image ,float $size ,float $angle ,int $x ,int $y,int $color,string $fontfile ,string $text ) 幕布,尺⼨,⾓度,坐标,颜⾊,字体路径,⽂本字符串mt_rand()⽣成更好的随机数,⽐rand()快四倍*/imagettftext($image, mt_rand(20,24),mt_rand(-60,60),(40*$i+20),mt_rand(30,35),$fontcolor,$fontface,$cn);}//11>存到session$_SESSION['authcode'] = $captcha_code;//9>增加⼲扰元素,设置点for($i=0;$i<200;$i++){//设置点的颜⾊,50-200颜⾊⽐数字浅,不⼲扰阅读$pointcolor = imagecolorallocate($image,rand(50,200), rand(50,200), rand(50,200)); //imagesetpixel — 画⼀个单⼀像素imagesetpixel($image, rand(1,199), rand(1,59), $pointcolor);}//10>增加⼲扰元素,设置线for($i=0;$i<4;$i++){//设置线的颜⾊$linecolor = imagecolorallocate($image,rand(80,220), rand(80,220),rand(80,220));//设置线,两点⼀线imageline($image,rand(1,199), rand(1,59),rand(1,199), rand(1,59),$linecolor);}//2>设置头部,image/pngheader('Content-Type: image/png');//3>imagepng() 建⽴png图形函数imagepng($image);//4>imagedestroy() 结束图形函数销毁$imageimagedestroy($image);。
php实现登录注册界面

php实现登录注册界⾯php实现登录注册界⾯⾸先你要搭建⼀个⾃⼰的数据库我⽤wamp64创了⼀个people的数据库具体操作可以参考该搭建链接:这⾥就讲下我实现的功能代码:创建sql.func.php实现⼀些基本函数功能<?php/***弹框*/function_alert($_info){echo"<script type='text/javascript'>alert('$_info');history.back();</script>";exit;}/*** _location():弹出⼀个对话框并且转跳到另⼀个界⾯* @access public* @param string $_info 对话框上显⽰的信息* @param string $_url 转跳的页⾯地址* @return void*/function_location($_info,$_url){if($_info==null){header('Location:'.$_url);}else{echo"<script type='text/javascript'>alert('$_info');location.href='$_url';</script>";exit;}}/*** _connect():连接数据库* @access public* @return void*/function_connect(){//定义全局变量$_conn,在函数外部也能调⽤global$_conn;$_conn=mysqli_connect(DB_HOST, DB_USER,DB_PWD);if (!$_conn) {exit('数据库连接失败:'.mysqli_error($_conn));}}/*** _select_db():选择数据库* @access public* @return void*/function_select_db(){global$_conn;if(!mysqli_select_db($_conn,DB_NAME)){exit('找不到数据库'.mysqli_error($_conn));}}/*** _set_names():设置字符编码* @access public* @return void*/function_set_names(){global$_conn;if(!mysqli_query($_conn,'SET NAMES UTF8')){exit('字符编码错误'.mysqli_error($_conn));}}/*** _query():执⾏sql语句* @access public* @param string $_sql sql操作语句* @return string返回结果集*/function_query($_sql){global$_conn;if(!$result=mysqli_query($_conn,$_sql)){exit('SQL执⾏失败'.mysqli_error($_conn).mysqli_errno($_conn));}return$result;}/*** _fetch_array():根据sql语句遍历数据库。
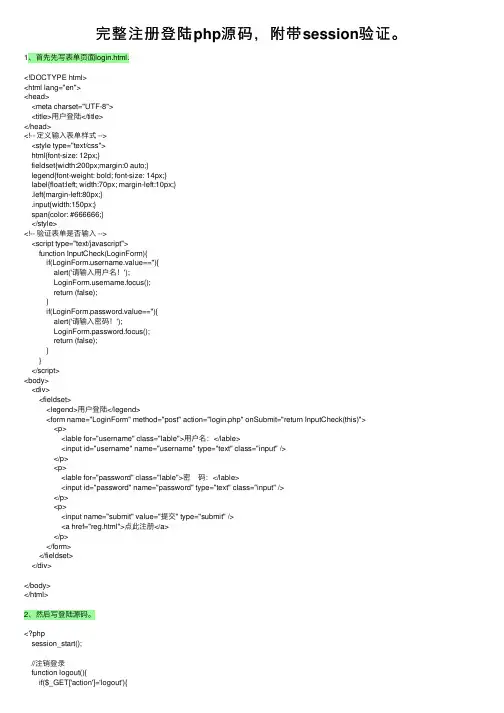
完整注册登陆php源码,附带session验证。
完整注册登陆php源码,附带session验证。
1、⾸先先写表单页⾯login.html.<!DOCTYPE html><html lang="en"><head><meta charset="UTF-8"><title>⽤户登陆</title></head><!-- 定义输⼊表单样式 --><style type="text/css">html{font-size: 12px;}fieldset{width:200px;margin:0 auto;}legend{font-weight: bold; font-size: 14px;}label{float:left; width:70px; margin-left:10px;}.left{margin-left:80px;}.input{width:150px;}span{color: #666666;}</style><!-- 验证表单是否输⼊ --><script type="text/javascript">function InputCheck(LoginForm){if(ername.value==''){alert('请输⼊⽤户名!');ername.focus();return (false);}if(LoginForm.password.value==''){alert('请输⼊密码!');LoginForm.password.focus();return (false);}}</script><body><div><fieldset><legend>⽤户登陆</legend><form name="LoginForm" method="post" action="login.php" onSubmit="return InputCheck(this)"><p><lable for="username" class="lable">⽤户名:</lable><input id="username" name="username" type="text" class="input" /></p><p><lable for="password" class="lable">密 码:</lable><input id="password" name="password" type="text" class="input" /></p><p><input name="submit" value="提交" type="submit" /> <a href="reg.html">点此注册</a></p></form></fieldset></div></body></html>2、然后写登陆源码。
黑马程序员python程序开发案例教程第16章用户登录项目
黑马程序员python程序开发案例教程第16章用户登录项目《黑马程序员Python程序开发案例教程》第16章:用户登录项目,将通过一个完整的用户登录项目,帮助读者掌握Python Web开发中的用户登录功能。
1. 需求分析用户登录项目需要实现以下功能:用户注册:用户可以注册账号,填写用户名、密码等信息。
用户登录:用户可以登录账号,输入用户名和密码进行验证。
密码重置:如果用户忘记密码,可以通过邮箱找回密码。
权限控制:根据用户角色或权限,限制用户访问某些页面。
2. 技术选型为了实现上述功能,我们需要选择合适的技术和框架。
在本项目中,我们将使用以下技术:Python语言:Python是一种简单易学、功能强大的编程语言,适合Web 开发。
Flask框架:Flask是一个轻量级的Web框架,可以帮助我们快速搭建Web应用程序。
SQLAlchemy:一个ORM框架,用于操作数据库。
Flask-Mail:用于发送邮件。
Flask-Login:用于处理用户登录和权限控制。
3. 开发流程数据库设计:根据需求设计数据库表结构,包括用户表、角色表等。
注册和登录功能实现:编写注册和登录的表单页面,处理表单提交,验证用户输入,存储用户信息到数据库。
密码重置功能实现:当用户忘记密码时,通过邮箱发送找回密码的链接,用户点击链接后可以重置密码。
权限控制功能实现:根据用户角色或权限,限制用户访问某些页面。
可以使用Flask-Login提供的装饰器login_required来限制未登录用户访问某些页面。
测试和部署:对项目进行测试,确保各项功能正常工作,然后将项目部署到服务器上。
4. 代码实现由于篇幅限制,这里只给出部分关键代码实现。
完整的代码实现请参考《黑马程序员Python程序开发案例教程》的配套源代码。
注册表单页面():```html<form action="/register" method="post"><label for="username">Username:</label><input type="text" name="username" required><label for="password">Password:</label><input type="password" name="password" required><input type="submit" value="Register"></form>```处理注册请求的Python代码():```pythonfrom flask import Flask, render_template, request, redirect, url_for, flash, sessionfrom flask_sqlalchemy import SQLAlchemyfrom flask_mail import Mail, Messagefrom import generate_password_hash, check_password_hashfrom flask_login import UserMixin, LoginManager, login_user, logout_user, login_required, current_userimport random, stringapp = Flask(__name__)['SECRET_KEY'] = 'your secret key' 设置秘钥以保护应用程序的安全性。
php会员注册登入系统开发代码

因为全棋同学的系统需求,虽然会员机制并不难,他一定也很快就学会了,而我还是写此教学来引导他,帮助他系统扩展的更快,相信他的系统在未来也一定会很有用的! 而这个教学主要是说明session应用在会员机制上,而教学的程序码还是有些地方有没有考虑的很周详,安全上还是会有瑕疵,希望大家见谅。
以下为资料表的栏位资料:以下为会员系统示意图:(1) 首页- 登入页面(index.php)<!-- 设定网页编码为UTF-8 --><meta http-equiv="Content-Type" content="text/html; charset=utf-8" /><form name="form" method="post" action="connect.php">账号:<input type="text" name="id" /> <br>密码:<input type="password" name="pw" /> <br><input type="submit" name="button" value="登入" /><a href="register.php">申请账号</a></form>(2) php连结MySQL数据库语法(mysql_connect.inc.php)<meta http-equiv="Content-Type" content="text/html; charset=utf-8" /><?php//数据库设定//数据库位置$db_server = "localhost";//数据库名称$db_name = "mydb";//数据库管理者账号$db_user = "root";//数据库管理者密码$db_passwd = "1234";//对数据库连线if(!@mysql_connect($db_server, $db_user, $db_passwd))die("无法对数据库连线");//数据库连线采UTF8mysql_query("SET NAMES utf8");//选择数据库if(!@mysql_select_db($db_name))die("无法使用数据库");>(3) 会员ID、PW与MySQL数据库作认证(connect.php)<?php session_start(); ?><!--上方语法为启用session,此语法要放在网页最前方--><meta http-equiv="Content-Type" content="text/html; charset=utf-8" /><?php//连接数据库//只要此页面上有用到连接MySQL就要include它include("mysql_connect.inc.php");$id = $_POST['id'];$pw = $_POST['pw'];//搜寻数据库资料$sql = "SELECT * FROM member_table where username = '$id'";$result = mysql_query($sql);$row = @mysql_fetch_row($result);//判断账号与密码是否为空白//以及MySQL数据库里是否有这个会员if($id != null && $pw != null && $row[1] == $id && $row[2] == $pw){//将账号写入session,方便验证使用者身份$_SESSION['username'] = $id;echo '登入成功!';echo '<meta http-equiv=REFRESH CONTENT=1;url=member.php>';}else{echo '登入失败!';echo '<meta http-equiv=REFRESH CONTENT=1;url=index.php>';}>(4) 会员登入成功后页面- 此页面有「新增」、「修改」、「删除」与「登出」的连结并且会显示出所有会员资料(member.php)<?php session_start(); ?><meta http-equiv="Content-Type" content="text/html; charset=utf-8" /><?phpinclude("mysql_connect.inc.php");echo '<a href="logout.php">退出</a> <br><br>';//此判断为判定观看此页有没有权限//说不定是路人或不相关的使用者//因此要给予排除if($_SESSION['username'] != null){echo '<a href="register.php">新增</a> ';echo '<a href="update.php">修改</a> ';echo '<a href="delete.php">删除</a> <br><br>';//将数据库里的所有会员资料显示在画面上$sql = "SELECT * FROM member_table";$result = mysql_query($sql);while($row = mysql_fetch_row($result)){echo "$row[0] - 名字(账号):$row[1], " ."电话:$row[3], 地址:$row[4], 备注:$row[5]<br>";}}else{echo '您无权限观看此页面!';echo '<meta http-equiv=REFRESH CONTENT=2;url=index.php>';}>(5) 登出- 洗掉登入使用者之session(logout.php)<?php session_start(); ?><meta http-equiv="Content-Type" content="text/html; charset=utf-8" /><?php//将session清空unset($_SESSION['username']);echo '登出中......';echo '<meta http-equiv=REFRESH CONTENT=1;url=index.php>';>(6) 加入(注册)会员- 「填写」会员资料(register.php)<meta http-equiv="Content-Type" content="text/html; charset=utf-8" /><form name="form" method="post" action="register_finish.php">账号:<input type="text" name="id" /> <br>密码:<input type="password" name="pw" /> <br>再一次输入密码:<input type="password" name="pw2" /> <br>电话:<input type="text" name="telephone" /> <br>地址:<input type="text" name="address" /> <br>备注:<textarea name="other" cols="45" rows="5"></textarea> <br><input type="submit" name="button" value="确定" /></form>(7) 加入(注册)会员- 「新增」会员资料进MySQL数据库(register_finish.php) <?php session_start(); ?><meta http-equiv="Content-Type" content="text/html; charset=utf-8" /><?phpinclude("mysql_connect.inc.php");$id = $_POST['id'];$pw = $_POST['pw'];$pw2 = $_POST['pw2'];$telephone = $_POST['telephone'];$address = $_POST['address'];$other = $_POST['other'];//判断账号密码是否为空值//确认密码输入的正确性if($id != null && $pw != null && $pw2 != null && $pw == $pw2){//新增资料进数据库语法$sql = "insert into member_table (username, password, telephone, address, other) values ('$id', '$pw', '$telephone', '$address', '$other')";if(mysql_query($sql)){echo '新增成功!';echo '<meta http-equiv=REFRESH CONTENT=2;url=index.php>';}else{echo '新增失败!';echo '<meta http-equiv=REFRESH CONTENT=2;url=index.php>';}}else{echo '您无权限观看此页面!';echo '<meta http-equiv=REFRESH CONTENT=2;url=index.php>';}>(8) 修改会员资料- 「填写」要修改之会员资料(update.php)<?php session_start(); ?><meta http-equiv="Content-Type" content="text/html; charset=utf-8" /><?phpinclude("mysql_connect.inc.php");if($_SESSION['username'] != null){//将$_SESSION['username']丢给$id//这样在下SQL语法时才可以给搜寻的值$id = $_SESSION['username'];//若以下$id直接用$_SESSION['username']将无法使用$sql = "SELECT * FROM member_table where username='$id'";$result = mysql_query($sql);$row = mysql_fetch_row($result);echo "<form name=\"form\" method=\"post\" action=\"update_finish.php\">";echo "账号:<input type=\"text\" name=\"id\" value=\"$row[1]\" />(此项目无法修改) <br>";echo "密码:<input type=\"password\" name=\"pw\" value=\"$row[2]\" /> <br>";echo "再一次输入密码:<input type=\"password\" name=\"pw2\" value=\"$row[2]\" /> <br>";echo "电话:<input type=\"text\" name=\"telephone\" value=\"$row[3]\" /> <br>";echo "地址:<input type=\"text\" name=\"address\" value=\"$row[4]\" /> <br>";echo "备注:<textarea name=\"other\" cols=\"45\" rows=\"5\">$row[5]</textarea> <br>";echo "<input type=\"submit\" name=\"button\" value=\"确定\" />";echo "</form>";}else{echo '您无权限观看此页面!';echo '<meta http-equiv=REFRESH CONTENT=2;url=index.php>';}>(9) 修改会员资料- 「更新」要修改之会员资料进MySQL数据库(update_finish.php)<?php session_start(); ?><meta http-equiv="Content-Type" content="text/html; charset=utf-8" /><?phpinclude("mysql_connect.inc.php");$id = $_POST['id'];$pw = $_POST['pw'];$pw2 = $_POST['pw2'];$telephone = $_POST['telephone'];$address = $_POST['address'];$other = $_POST['other'];//红色字体为判断密码是否填写正确if($_SESSION['username'] != null && $pw != null && $pw2 != null && $pw == $pw2){$id = $_SESSION['username'];//更新数据库资料语法$sql = "update member_table set password=$pw, telephone=$telephone, address=$address, other=$other where username='$id'";if(mysql_query($sql)){echo '修改成功!';}else{echo '修改失败!';echo '<meta http-equiv=REFRESH CONTENT=2;url=member.php>';}}else{echo '您无权限观看此页面!';echo '<meta http-equiv=REFRESH CONTENT=2;url=index.php>';}>(10) 删除会员资料- 「填写」要删除之会员账号(delete.php)<?php session_start(); ?><meta http-equiv="Content-Type" content="text/html; charset=utf-8" /><?phpif($_SESSION['username'] != null){echo "<form name=\"form\" method=\"post\" action=\"delete_finish.php\">";echo "要删除的账号:<input type=\"text\" name=\"id\" /> <br>";echo "<input type=\"submit\" name=\"button\" value=\"删除\" />";echo "</form>";}else{echo '您无权限观看此页面!';echo '<meta http-equiv=REFRESH CONTENT=2;url=index.php>';}>(11) 删除会员资料- 对MySQL数据库进行「删除」会员资料(delete_finish.php) <?php session_start(); ?><meta http-equiv="Content-Type" content="text/html; charset=utf-8" /><?phpinclude("mysql_connect.inc.php");$id = $_POST['id'];if($_SESSION['username'] != null){//删除数据库资料语法$sql = "delete from member_table where username='$id'";if(mysql_query($sql)){echo '删除成功!';}else{echo '删除失败!';echo '<meta http-equiv=REFRESH CONTENT=2;url=member.php>';}}else{echo '您无权限观看此页面!';echo '<meta http-equiv=REFRESH CONTENT=2;url=index.php>';}>。
PHP登录验证码的实现与使用方法

PHP登录验证码的实现与使⽤⽅法本⽂实例讲述了PHP登录验证码的实现与使⽤⽅法。
分享给⼤家供⼤家参考,具体如下:1. 新建code.php验证码⽣成⽂件在此之前必须打开php的GD库,修改php.ini⽂件的配置,取消extension=php_gd2.dll前⾯的分号。
代码如下:<?phpsession_start();//⽣成验证码图⽚Header("Content-type: image/PNG");$im = imagecreate(44,18);$back = ImageColorAllocate($im, 245,245,245);imagefill($im,0,0,$back); //背景srand((double)microtime()*1000000);//⽣成4位数字for($i=0;$i<4;$i++){$font = ImageColorAllocate($im, rand(100,255),rand(0,100),rand(100,255));$authnum=rand(1,9);$vcodes.=$authnum;imagestring($im, 5, 2+$i*10, 1, $authnum, $font);}for($i=0;$i<100;$i++) //加⼊⼲扰象素{$randcolor = ImageColorallocate($im,rand(0,255),rand(0,255),rand(0,255));imagesetpixel($im, rand()p , rand()0 , $randcolor);}ImagePNG($im);ImageDestroy($im);$_SESSION['Checknum'] = $vcodes;>2. 显⽰验证码图⽚在需要显⽰验证码的页⾯中加⼊<input type="text" name="passcode" ><img src="code.php">3.判断并获取验证码的值验证码是通过第⼀步骤代码中的$_SESSION['Checknum'] = $vcodes;赋的值,所以验证码的值存在$_SESSION['Checknum']当中。
php实现自动生成验证码的实例讲解
php实现⾃动⽣成验证码的实例讲解现在验证码在表单中的应⽤越来越多了,但是如果⽤js来实现总觉得不太⽅便,因此使⽤php来实现下,在此记录下。
当然,我们也可以封装成⼀个函数,以后使⽤的时候也是很⽅便的,这⾥并未封装,感兴趣的⼩伙伴可以⾃⼰封装下。
具体实现代码:新建⼀个cap_sz.php⽂件:<?phpsession_start(); //设置session,⼀定要在顶部$width = 150; //设置图⽚宽为300像素$height = 40; //设置图⽚⾼为40像素$image = imagecreatetruecolor($width, $height); //设置验证码⼤⼩的函数$bgcolor = imagecolorallocate($image, 255, 255, 255); //验证码颜⾊RGB为(255,255,255)#ffffffimagefill($image, 0, 0, $bgcolor); //区域填充$cap_code = "";for($i=0;$i<4;$i++){$fontsize = 7; //设置字体⼤⼩$fontcolor = imagecolorallocate($image, rand(0,120), rand(0,120), rand(0,120));//数字越⼤,颜⾊越浅,这⾥是深颜⾊0-120$fontcontent = rand(0,9);$cap_code.=$fontcontent; //.=连续定义变量$x = ($i*150/4)+rand(5,10);$y = rand(5,10);//设置坐标imagestring($image, $fontsize, $x, $y, $fontcontent, $fontcolor);}$_SESSION['code'] = $cap_code; //存到session//设置⼲扰元素,设置雪花点for($i=0;$i<300;$i++){$inputcolor = imagecolorallocate($image, rand(50,200), rand(20,200), rand(50,200));//设置颜⾊,20-200颜⾊⽐数字浅,不⼲扰阅读imagesetpixel($image, rand(1,149), rand(1,39), $inputcolor);//画⼀个单⼀像素的元素}//增加⼲扰元素,设置横线(先设置线的颜⾊,在设置横线)for ($i=0;$i<4;$i++) {$linecolor = imagecolorallocate($image, rand(20,220), rand(20,220),rand(20,220));//设置线的颜⾊imageline($image, rand(1,149), rand(1,39), rand(1,299), rand(1,149), $linecolor);}//因为有些浏览器,访问的content-type会是⽂本型(乱码),所以我们需要设置成图⽚的格式类型header('Content-Type:image/png');imagepng($image); //建⽴png函数imagedestroy($image); //结束图形函数,消除$image实例扩展:<?php$iC = new idCode(5,60,30);$iC->createPNG();class idCode{private $words = array('a','b','c','d','e','f','g','h','i','j','k','l','m','n','o','p','q','r','s','t','u','v','w','x','y','z','A','B','C','D','E','F','G','H','I','J','K','L','M','N','O','P','Q','R','S','T','U','V','W','X','Y','Z','0','1','2','3','4','5','6','7','8','9');private $fonts;private $count;//验证码字符数private $height;private $width;private $path = '..\myfolder\fonts';private $keys;//构造函数public function __construct($count,$width,$height){$this->count = $count;$this->getFonts();$this->height = $height;$this->width = $width;}private function getFonts(){$dir = dir($this->path);while(false !== ($file = $dir->read())){if($file != '.' && $file != '..'){$this->fonts[count($this->fonts)] = basename($file);}}$dir->close();}private function createKeys(){for($i = 0;$i < $this->count;$i++){$this->keys[$i]['char'] = $this->words[rand(0,count($this->words)-1)];//使⽤字体路径标识$this->keys[$i]['filename'] = $this->path.'\\'.$this->fonts[rand(0,count($this->fonts)-1)];}}public function createPNG(){$this->createKeys();//创建画布以及颜⾊块⼉$bg = imagecreatetruecolor($this->width + 10*2,$this->height + 3*2);//两边留10px空⽩,上下3px$grey = imagecolorallocate($bg,155,155,155);$blue = imagecolorallocate($bg,0x00,0x00,0xff);//填充背景imagefill($bg,0,0,$grey);//添加字符$pwidth = $this->width/$this->count;$x;$y;for($i = 0;$i < $this->count;$i++){$rotation = rand(-40,40);//偏转⾓度±40°$fontsize = 33;$width_txt;$height_txt;do{$fontsize--;$bbox = imagettfbbox($fontsize,$rotation,$this->keys[$i]['filename'],$this->keys[$i]['char']);$width_txt = $bbox[2] - $bbox[0];//x 0 2 4 6,y1 3 5 7;左下,右下,右上,左上$height_txt = $bbox[7] - $bbox[1];}while($fontsize > 8 && ($height_txt > $this->height || $width_txt > $pwidth));$fontcolor = imagecolorallocate($bg,rand(0,255),rand(0,255),rand(0,255));$x = 8 + $pwidth*$i + $pwidth/2 - $width_txt/2;//x坐标基本位置$y = $this->height/2 - $height_txt/2;imagettftext($bg,$fontsize,$rotation,$x,$y,$fontcolor,$this->keys[$i]['filename'],$this->keys[$i]['char']); }//绘制⼲扰线//根据字体酌情增加⼲扰线imageline($bg,0,15,40,10,$blue);//图像输出头⽂件header('Content-type:image/png');//输出png图像imagepng($bg);//清除缓存资源imagedestroy($bg);}public function checkKeys($input){if(count($input)!=$this->count){return 'ERROR:长度不正确.';}else{for($i=0;$i < $this->count;$i++){//0 o O I l 1 校准,根据所选择的字体确定是否需要⼿动校准if($input[$i] != $this->keys[$i]['char']){return 'SUCCESS.';}else{return 'ERROR:请输⼊正确验证码.';}}}}}>到此这篇关于php实现⾃动⽣成验证码的实例讲解的⽂章就介绍到这了,更多相关php实现⾃动⽣成验证码的⽅法内容请搜索以前的⽂章或继续浏览下⾯的相关⽂章希望⼤家以后多多⽀持!。
php实现登陆功能的代码
php实现登陆功能的代码PHP是一种广泛使用的服务器端脚本语言,其灵活性和易用性使得它成为了Web开发中最受欢迎的语言之一。
在Web应用程序中,用户登陆功能是必不可少的一部分,因此在PHP中实现登陆功能也是非常重要的。
以下是一个基本的PHP实现登陆功能的代码:<?phpsession_start(); // 开启会话$error = ""; // 初始化错误信息if($_SERVER["REQUEST_METHOD"] == "POST") { // 判断请求方式是否为POST$username = $_POST["username"]; // 获取用户名$password = $_POST["password"]; // 获取密码if($username == "admin" && $password == "admin123") { // 判断用户名和密码是否正确$_SESSION["loggedin"] = true; // 登录成功,设置会话变量header("location: welcome.php"); // 跳转到欢迎页面} else {$error = "用户名或密码错误"; // 登录失败,设置错误信息 }}><!DOCTYPE html><html><head><title>登陆页面</title></head><body><h2>请登录</h2><form method="post" action="<?php echo htmlspecialchars($_SERVER["PHP_SELF"]); ?>"><label>用户名:</label><input type="text"name="username"><br><br><label>密码:</label><input type="password"name="password"><br><br><input type="submit" value="登录"></form><p><?php echo $error; ?></p></body></html>在这个代码中,首先通过session_start()函数开启了会话。
PHP登录验证功能示例【用户名、密码、验证码、数据库、已登陆验证、自动登录和注销登录等】
PHP登录验证功能⽰例【⽤户名、密码、验证码、数据库、已登陆验证、⾃动登录和注销登录等】本⽂实例讲述了PHP登录验证功能。
分享给⼤家供⼤家参考,具体如下:登录界⾯具体实现⽅法如下:login.html<!DOCTYPE html><html lang="en"><head><meta charset="UTF-8"><title>Title</title></head><body><form method="post" action="doLogin.php"><input type="text" placeholder="⽤户名" name="username"><br><br><input type="password" placeholder="密码" name="password"><br><br><input type="text" placeholder="验证码" name="verifycode" class="captcha"><br><br><img id="captcha_img" src="captcha.php?r=<?php echo rand();?>" alt="验证码"><label><a href="javascript:void(0)" rel="external nofollow" onclick="document.getElementById('captcha_img').src='captcha.php?r='+Math.random()">换⼀个</a> </label><br><label><input type="checkbox" name="autologin[]" value="1"/>⾃动登录</label><br><button type="submit">登录</button></form></body></html>doLogin.php<?phpheader("Content-type:text/html;charset=UTF-8");require "mysql.php"; //导⼊mysql.php访问数据库session_start(); //开启会话⼀获取到服务器端验证码$username=$_POST['username'];$password=$_POST['password'];$autologin=isset($_POST['autologin'])?1:0; //获取是否选择了⾃动登录$verifycode=$_POST['verifycode'];$code=$_SESSION['code']; //获取服务器⽣成的验证码/** ⾸先进⾏判空操作,通过后进⾏验证码验证,通过后再进⾏数据库验证。
基于PHP实现用户注册登录功能
基于PHP实现⽤户注册登录功能本⽂介绍的是基于PHP实现⽤户注册登录功能,本项⽬分为四部分内容:1前端页⾯制作,2验证码制作,3实现注册登陆,4功能完善。
具体情况可以往下看。
验证码制作⼀、实验简介本次实验将会带领⼤家使⽤⾯向对象的思想封装⼀个验证码类。
并在注册和登陆界⾯展⽰使⽤。
通过本次实验的学习,你将会领悟到 PHP 的 OOP 思想,以及 GD 库的使⽤,验证码⽣成。
1.1 涉及到的知识点PHPGD库OOP编程1.2 开发⼯具sublime,⼀个⽅便快速的⽂本编辑器。
点击桌⾯左下⾓:应⽤程序菜单/开发/sublime⼆、封装验证码类2.1 建⽴⽬录以及准备字体在 web ⽬录下建⽴⼀个 admin ⽬录作为我们的后台⽬录,存放后台代码⽂件。
在 admin 下建⽴⼀个 fonts ⽬录,⽤于存放制作验证码所需字体。
在 admin 下新建⼀个 Captcha.php ⽂件,这就是我们需要编辑的验证码类⽂件。
当前⽬录层次结构:编辑 Captcha.php ⽂件:<?php/*** Captcha class*/class Captcha{function __construct(){# code...}}添加该类的私有属性和构造⽅法:<?php/*** Captcha class*/class Captcha{private $codeNum; //验证码位数private $width; //验证码图⽚宽度private $height; //验证码图⽚⾼度private $img; //图像资源句柄private $lineFlag; //是否⽣成⼲扰线条private $piexFlag; //是否⽣成⼲扰点private $fontSize; //字体⼤⼩private $code; //验证码字符private $string; //⽣成验证码的字符集private $font; //字体function __construct($codeNum = 4,$height = 50,$width = 150,$fontSize = 20,$lineFlag = true,$piexFlag = true){$this->string = 'qwertyupmkjnhbgvfcdsxa123456789'; //去除⼀些相近的字符$this->codeNum = $codeNum;$this->height = $height;$this->width = $width;$this->lineFlag = $lineFlag;$this->piexFlag = $piexFlag;$this->font = dirname(__FILE__).'/fonts/consola.ttf';$this->fontSize = $fontSize;}}字体⽂件可通过以下命令下载到 fonts ⽬录:接下来开始编写具体的⽅法:创建图像资源句柄//创建图像资源public function createImage(){$this->img = imagecreate($this->width, $this->height); //创建图像资源imagecolorallocate($this->img,mt_rand(0,100),mt_rand(0,100),mt_rand(0,100)); //填充图像背景(使⽤浅⾊)}⽤到的相关函数imagecreate:新建⼀个基于调⾊板的图像imagecolorallocate:为⼀幅图像分配颜⾊mt_rand:⽣成更好的随机数创建验证码字符串并输出到图像//创建验证码public function createCode(){$strlen = strlen($this->string)-1;for ($i=0; $i < $this->codeNum; $i++) {$this->code .= $this->string[mt_rand(0,$strlen)]; //从字符集中随机取出四个字符拼接}$_SESSION['code'] = $this->code; //加⼊ session 中//计算每个字符间距$diff = $this->width/$this->codeNum;for ($i=0; $i < $this->codeNum; $i++) {//为每个字符⽣成颜⾊(使⽤深⾊)$txtColor = imagecolorallocate($this->img,mt_rand(100,255),mt_rand(100,255),mt_rand(100,255));//写⼊图像imagettftext($this->img, $this->fontSize, mt_rand(-30,30), $diff*$i+mt_rand(3,8), mt_rand(20,$this->height-10), $txtColor, $this->font, $this->code[$i]); }}⽤到的相关函数imagecreate:新建⼀个基于调⾊板的图像imagecolorallocate:为⼀幅图像分配颜⾊mt_rand:⽣成更好的随机数创建验证码字符串并输出到图像//创建验证码public function createCode(){$strlen = strlen($this->string)-1;for ($i=0; $i < $this->codeNum; $i++) {$this->code .= $this->string[mt_rand(0,$strlen)]; //从字符集中随机取出四个字符拼接}$_SESSION['code'] = $this->code; //加⼊ session 中//计算每个字符间距$diff = $this->width/$this->codeNum;for ($i=0; $i < $this->codeNum; $i++) {//为每个字符⽣成颜⾊(使⽤深⾊)$txtColor = imagecolorallocate($this->img,mt_rand(100,255),mt_rand(100,255),mt_rand(100,255));//写⼊图像imagettftext($this->img, $this->fontSize, mt_rand(-30,30), $diff*$i+mt_rand(3,8), mt_rand(20,$this->height-10), $txtColor, $this->font, $this->code[$i]); }}⽤到的相关函数:imagettftext:⽤ TrueType 字体向图像写⼊⽂本创建⼲扰线条//创建⼲扰线条(默认四条)public function createLines(){for ($i=0; $i < 4; $i++) {$color = imagecolorallocate($this->img,mt_rand(0,155),mt_rand(0,155),mt_rand(0,155)); //使⽤浅⾊imageline($this->img,mt_rand(0,$this->width),mt_rand(0,$this->height),mt_rand(0,$this->width),mt_rand(0,$this->height),$color); }}⽤到的相关函数:imageline:画⼀条线段创建⼲扰点//创建⼲扰点(默认⼀百个点)public function createPiex(){for ($i=0; $i < 100; $i++) {$color = imagecolorallocate($this->img,mt_rand(0,255),mt_rand(0,255),mt_rand(0,255));imagesetpixel($this->img,mt_rand(0,$this->width),mt_rand(0,$this->height),$color);}}使⽤的相关函数:imagesetpixel:画⼀个单⼀像素对外输出图像:public function show(){$this->createImage();$this->createCode();if ($this->lineFlag) { //是否创建⼲扰线条$this->createLines();}if ($this->piexFlag) { //是否创建⼲扰点$this->createPiex();}header('Content-type:image/png'); //请求页⾯的内容是png格式的图像imagepng($this->img); //以png格式输出图像imagedestroy($this->img); //清除图像资源,释放内存}⽤到的相关函数:imagepng:以 PNG 格式将图像输出到浏览器或⽂件imagedestroy:销毁⼀图像对外提供验证码:public function getCode(){return $this->code;}完整代码如下:<?php/*** Captcha class*/class Captcha{private $codeNum;private $width;private $height;private $img;private $lineFlag;private $piexFlag;private $fontSize;private $code;private $string;function __construct($codeNum = 4,$height = 50,$width = 150,$fontSize = 20,$lineFlag = true,$piexFlag = true){$this->string = 'qwertyupmkjnhbgvfcdsxa123456789';$this->codeNum = $codeNum;$this->height = $height;$this->width = $width;$this->lineFlag = $lineFlag;$this->piexFlag = $piexFlag;$this->font = dirname(__FILE__).'/fonts/consola.ttf';$this->fontSize = $fontSize;}public function createImage(){$this->img = imagecreate($this->width, $this->height);imagecolorallocate($this->img,mt_rand(0,100),mt_rand(0,100),mt_rand(0,100));}public function createCode(){$strlen = strlen($this->string)-1;for ($i=0; $i < $this->codeNum; $i++) {$this->code .= $this->string[mt_rand(0,$strlen)];}$_SESSION['code'] = $this->code;$diff = $this->width/$this->codeNum;for ($i=0; $i < $this->codeNum; $i++) {$txtColor = imagecolorallocate($this->img,mt_rand(100,255),mt_rand(100,255),mt_rand(100,255));imagettftext($this->img, $this->fontSize, mt_rand(-30,30), $diff*$i+mt_rand(3,8), mt_rand(20,$this->height-10), $txtColor, $this->font, $this->code[$i]); }}public function createLines(){for ($i=0; $i < 4; $i++) {$color = imagecolorallocate($this->img,mt_rand(0,155),mt_rand(0,155),mt_rand(0,155));imageline($this->img,mt_rand(0,$this->width),mt_rand(0,$this->height),mt_rand(0,$this->width),mt_rand(0,$this->height),$color);}}public function createPiexs(){for ($i=0; $i < 100; $i++) {$color = imagecolorallocate($this->img,mt_rand(0,255),mt_rand(0,255),mt_rand(0,255));imagesetpixel($this->img,mt_rand(0,$this->width),mt_rand(0,$this->height),$color);}}public function show(){$this->createImage();$this->createCode();if ($this->lineFlag) {$this->createLines();}if ($this->piexFlag) {$this->createPiexs();}header('Content-type:image/png');imagepng($this->img);imagedestroy($this->img);}public function getCode(){return $this->code;}}以上就是验证码类的全部代码。