
地板说明
木地板介绍:
·1 实木地板:是木材经烘干,加工后形成的地面装饰材料。
它具有花纹自然,脚感舒适,使用安全的特点,是卧室、客厅、书房等地面装修的理想材料。
实木的装饰风格返璞归真,质感自然,在森林覆盖率下降,大力提倡环保的今天,实木地板则更显珍贵。
而实木地板的弱点在于对潮湿及阳光的耐久性差,潮湿令天然木材膨胀,而干透反而会收缩,因而导致隙缝甚至是屈曲翘起。
地暖使用对实木地板的加工选材要求极大,所以市场上,实木地暖专用不是没有,而是很少。
实木地板的优劣,价格之分,不仅仅从树种的不同来判断,还可以从漆膜硬度、漆板表面耐磨、漆膜附着力以及含水率指标等等各个方面来看待。
环保等级:国家未做相应标准划分。
耐磨等级:优等品实木地板漆板表面耐磨指标≤0.08g/100r;一等品≤0.10g/100r;合格品≤0.15g/100r。
漆膜硬度:是反映实木地板表面漆膜的强度,和实木地板的材质和漆膜的本身的厚薄、材质有密切关系,国家标准规定优等品实木地板漆膜硬度指标为2H级;一等品和合格品≥H。
漆膜附着力:反映的是油漆对实木地板的附着强度,该项指标不合格也说明地板的油漆质量较差,在使用中可能造成油漆开裂甚至剥落,同样影响地板的使用寿命。
国家标准规定优等品实木地板漆膜附着力指标为0~1级;一等品≤2级;合格品≤3级。
含水率指标:是指实木地板在销售地区未拆封或刚除去包装状态下的含水率。
该项指标不合格将造成在使用中地板变形、翘曲、起拱或离缝等现象,影响美观和使用性能。
国家标准规定实木地板的含水率指标为7%至销售地点的平衡含水率。
·2强化复合木地板:是近几年来流行的地面材料。
官方学名:浸溃纸层压木质地板。
它是在原木粉碎后,填加胶、防腐剂、添加剂,经热压机高温高压压制处理而成,因此它打破了原木的物理结构,克服了原木稳定性差的弱点。
复合地板的强度高、规格统一、耐磨系数高、防腐、防蛀而且装饰效果好,克服了原木表面的疤节、虫眼、色差问题。
强化地板和多层实木地板的环保等级划分,国家规定最为严格。
(国家新标准GB/T18102-2007)为E1和E0两个等级,JAS星级标准的F3星地板 F4星地板为目前世界最为严格地检测甲醛方式,但这是日本政府设立的日本国家标准。
F4星地板可以达到接近实木的甲醛释放量。
国内大部分地板厂家生产有一定难度,暂未加入我国国家标准。
·3实木复合木地板:分为三层实木复合地板、多层实木复合地板、新型实木复合地板三种,由于它是由不同树种的板材交错层压而成,因此克服了实木地板单向同性的缺点,干缩湿胀率小,具有较好的尺寸稳定性,并保留了实木地板的自然木纹和舒适的脚感。
实木复合地板兼强化复合木地板的稳定性与实木地板的美观性于一体,而且具有环保优势,性能价值比较高的新型实木复合地板。
实木复合地板的环保等级划分和强化地板等级相同,分为E1和E0两个等级。
因为市场售价介于强化和实木价格之间,环保做到E0成本就会接近实木地板的价格,所以市场以环保E1等级为主。
实木复合地板的其他标准,和实木地板相同。
大家做好鉴别。
木地板的拼法-概述说明以及解释
木地板的拼法-概述说明以及解释1.引言1.1 概述引言部分是文章的开端,是向读者介绍文章内容和目的的重要部分。
在“木地板的拼法”这篇文章中,我们将探讨木地板的不同种类和拼法技巧,以及其在地板装修中的重要性和实用建议。
通过对木地板拼法的研究和总结,我们可以更好地了解如何选择合适的拼法技巧,使家居装修更加美观和实用。
让我们一起来深入探讨木地板的拼法,为家居装修增添更多的魅力和个性。
1.2 文章结构:本文将分为引言、正文和结论三个部分。
在引言部分,将概括介绍木地板的拼法以及本文的结构安排。
接着在正文部分,将详细介绍木地板的种类、拼法的重要性以及常见的拼法技巧。
最后在结论部分,将总结木地板拼法的优缺点,并给出实用建议,对未来的发展进行展望。
通过这样的结构安排,读者可以系统全面地了解木地板的拼法,并获得相关的实用信息和建议。
文章1.3 目的部分的内容如下:目的部分旨在明确本文的写作目的和意义,主要包括以下几点:1. 引导读者了解木地板拼法的重要性和实用性,帮助读者意识到不同拼法对于整体装修效果的影响。
2. 探讨不同拼法的优缺点,帮助读者在选择木地板拼法时,可以根据自身需求和装修风格做出明智决策。
3. 激发读者对于木地板拼法的兴趣,启发读者在实际装修中更加注重细节和设计,提升整体装修品质和舒适度。
通过对木地板拼法的深入探讨和分析,本文旨在为读者提供全面的装修指南,帮助他们在家居装修中更加专业和理性地选择合适的木地板拼法,实现个性化装修效果,提升居住舒适度和美感。
2.正文2.1 木地板的种类木地板是室内装饰中常见的地面材料,根据不同的木材和处理方法,木地板可以分为多种种类。
其中常见的木地板种类包括实木地板、复合木地板和强化木地板。
实木地板是由整块天然木材制成,具有自然的纹理和色泽,给人一种质朴、大气的感觉。
实木地板具有良好的减震效果和保温性能,但易受湿度变化的影响,需要定期保养和维护。
复合木地板由胶合板或高密度纤维板作为底层,表面覆盖一层薄木皮,外观和质感类似实木地板,但价格更为经济实惠。
福尔波星际同质透芯弹性地板商品说明说明书

homogeneous vinyl星际 元素同质透芯弹性地板sphera®elementsphera®element星际 元素创新、科技、完美的商用地面材料星际系列是福尔波品牌、技术和设计的结晶。
我们的欧洲产品团队以最新的生产技术,最先进的工艺和最具前瞻性的设计成就了这款产品。
“星际”共包括三个风格迥异的子系列:元素、灵动和传奇;这三个微妙联系的系列提供了三种差异化的美学设计,覆盖了整个现代化室内地面设计所能涉及的所有审美。
纵观星际 元素系列,其整体基色清新鲜亮,充满当代情感,遍布的隐约碎花又增添了整个设计的趣味性。
福尔波星际同质透芯弹性地板的有害物质排放量极低(铺装28天后,低于10ug/每平方米 ),生产过程中不添加邻苯二甲酸酯,通透的表面光泽和丰富的色彩设计旨在于打造清新欢快的室内氛围。
SMART表面涂层确保极高的耐污和抗刮擦性能,带来更易打理、更卫生的功能表现。
50008 | silver grey 50044 | turquoise星际品牌同质透芯弹性地板是由最先进的工艺水平和前瞻性的设计风格相结合而诞生出的地面材料。
共包括有三大子产品系列,分别是:元素(Element)、灵动(Energetic)及传奇(Evolution),每个子系列的设计之间关联微妙,但更注重差异化的审美设计。
科技,引领创新。
以先端设备打造的全新生产线意味着我们能以不一样的见解和手法来呈现“精锐”、“创新”的产品。
聚焦于高标准商用市场。
计62款产品选择,尖端工艺水平实现了诸多的花色品类:约占一半的中性色设计和各类冷暖色选择,色彩饱满,识别度高。
包括诸多高光反射值的色彩设计,擅于营造欢快明亮的氛围。
推荐应用领域:医疗、零售、工业及教育环境••••先进的钢带高压及热固工艺保证材料的高密度、长久的热稳定及尺寸稳定。
绿色能源和“积极降低浪费”理念确保生产流程运行在高效和可持续生产模式下。
摈弃添加邻苯二甲酸酯;极低的有害物释放量。
地板安装说明word版
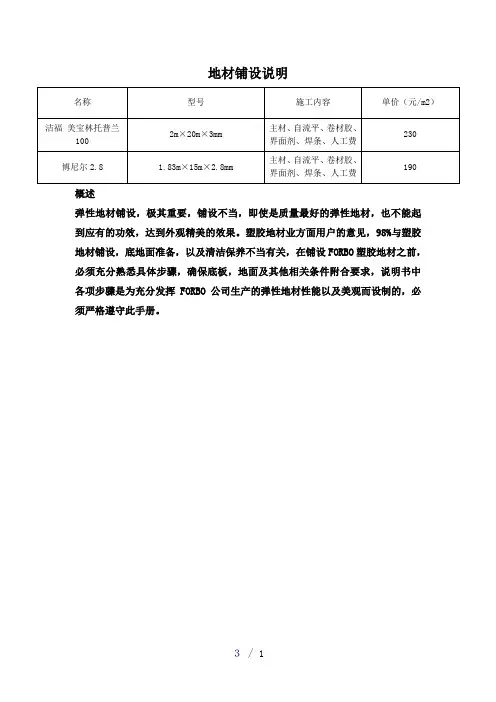
地材铺设说明概述弹性地材铺设,极其重要,铺设不当,即使是质量最好的弹性地材,也不能起到应有的功效,达到外观精美的效果。
塑胶地材业方面用户的意见,98%与塑胶地材铺设,底地面准备,以及清洁保养不当有关,在铺设FORBO塑胶地材之前,必须充分熟悉具体步骤,确保底板,地面及其他相关条件附合要求,说明书中各项步骤是为充分发挥FORBO公司生产的弹性地材性能以及美观而设制的,必须严格遵守此手册。
一、准备工作在铺设弹性地材前的地面情况最为重要,地面好坏,影响并决定弹性地材的功效和外观。
地面必须干燥,紧密,平整。
表面光滑,无类似灰尘,油漆,化学品,硫化物或固化物,封条带,沥青及其他粘合残留物。
二、木质底板新铺的木地板,表面一般比较平整光滑,但不同于旧地板,还没有完全定型,因此平整新旧地板,方法不同。
首先,无论新旧地板,必须充分通风。
地层房间,更为重要。
在地板上铺设硬质板,胶合板或纤维板。
板材含湿度定位8%,即气温在摄氏18度(华氏65度)时相对湿度(RH)为40%,保证日后的伸缩不损坏木板。
2.1 木质旧地板·用水泥整平剂平整地面,待干后,平整不平处。
·或用砂磨砂平地板。
·在硬质板中央,用钉子顺纹钉入,也可用宽边螺丝,注意不要太深,硬质板粗糙面向上。
接缝稍留余地,以便伸缩。
板材不能浸水受潮,板材厚度和铆钉间距,根据各地不同标准而定。
·仔细砂平硬质板之间的连接。
·硬质板横跨地板条。
除高压硬质外,也可用胶质板,或厚度为14毫米的纤维板,有无契口,均可,用钉子或螺铆与底板固定,契口纤维板可以铺成架空地板。
2.2 木质新地板木质新地板没有完全定形,水泥整平剂平整,没有效果。
仍可使用与旧地板相同的步骤,但无须使用平整胶合剂,须采用硬质板,胶合板或纤维板进行平整,有无契口均可。
2.3 木质楼梯踏板铺设木质楼梯踏板,必须考虑到,即使幅度很小的伸缩,也会导致凹凸或缝隙。
三、混凝土地面用水泥整平剂修平地面,混凝土地面伸缩缝设计必须精确。
木地板地坪设计说明
木地板地坪设计说明确定你要购买什么样的地板,不同的地板厚度不一样,只有先确定了地板的厚度和安装要求,装修工人才能为你留下合适的地面高度。
考虑清楚第一个问题后,就告诉装修工人你的地板类型和厚度的决定,一般来讲:1、如果选择实木地板,厚度一般为1.8厘米,由于要打龙骨,龙骨的厚度一般为3厘米,防潮层一般为0.2-0.3厘米,那么,此时地板的找平地面与地砖(假设客厅铺的是地砖,卧室铺的是地板)的高低差应该在5厘米左右。
也有一些业主朋友铺设实木复合地板或多层实木地板也要求打龙骨,也是控制在5厘米左右即可。
2、如果选择实木复合地板,不打龙骨的话,就要考虑多种情况:1.8厘米厚的实木复合地板,地面与地砖的高低差在2.0厘米左右;1.5厘米厚的实木复合地板,地面与地砖的高低差在1.7厘米左右;1.2厘米厚厚的实木复合地板,地面与地砖的高低差在1.4厘米左右。
总之,地板的厚度加上2-3mm左右的铺设层就是合适的高低差。
3、如果选择强化地板,由于强化地板的厚度一般为8mm和12mm,也有薄一些的,进口的有0.5mm的,国外甚至还有PVC地板0.3mm的,所以这也同样要取决于你的选择了,同样的道理,也要预留2-3mm左右的铺设层。
木地板对地坪的要求:地面找平主要有三种方法:自流平找平、水泥砂浆找平、石膏找平。
当然这几种找平方法也是各有利弊,大家可以根据自己家实际情况来做一下比较,然后再选择找平方法。
1.水泥砂浆找平优势:适合各种地面、各种地板铺设前的地面找平。
缺点:找平厚度太厚在25~35mm,如果水泥砂浆配比不对会使面层粉化起砂,起灰及裂纹。
地板(复合地板)与找平层形成一些间隙,人踩上去以后压迫地面灰尘向四周分散,然后从伸缩缝窜出.透过踢脚板缝隙扩散出来,形成了扬灰的现象。
另外就是水泥砂浆找平不细致的地方会出现空鼓现象。
适用环境:房子举架高,暖气片采暖、实木地板铺设前找平、复合地板铺设前找平。
2、石膏找平优势:可用于局部找平,不增高地面,找平厚度大概在5~20mm 左右,对房间高度几乎没有影响,干燥速度快,价格相对便宜,施工方便。
地板

史上最全地板知识一、地板分类介绍地板分类可为实木地板、实木复合地板、强化地板、竹地板和软木地板。
软木地板比较适用于录音棚之类的场所,所以这里撇去不说。
★实木复合地板它从实木地板家族中衍生出来的地板种类,它的表层采用珍贵实木树材,内里采用多种速生树材,经高温等工艺压制而成。
它可分为多层实木地板和三层实木地板。
优点:外观和触感类实木地板,又兼具强化地板的稳定性实木复合地板缺点:硬度差,不耐磨适用人群:小资人群。
实木复合地板的价格介于实木地板与强化地板之间,比实木地板更稳定、好打理,比强化地板更环保。
非常适用于人员构成简单的现代家庭。
同时特别值得一提的是,多层实木地板以其优越性成为地暖地才的不二之选。
★强化复合地板强化复合地板主要是利用小径材、枝桠材和胶粘剂通过一定的生产工艺加工而成强化复合地板优点:表面平整,花纹整齐,耐磨性强,便于保养缺点:脚感差、环保性弱适用人群:都市普通人群。
它的价格比起前两者教低。
而且耐磨好打理,对于普通快节奏生活的人群或慵懒人群来说是十分好的选择。
但是要注意的是,如果购买普通强化地板,若家里有孕妇或者是婴儿,那新房要空置一段时间,让有害物质挥发后才能住。
★实木地板它是天然木材经烘干、加工后形成的地面装饰材料,一片板子就是一片树材。
实木地板优点:隔音隔热、调节湿度、冬暖夏凉、绿色无害、华丽高贵、经久耐用等。
缺点:价格昂贵、难打理、容易膨胀起跷。
适用人群:富贵阶层,自己勤快愿意打理,或者是有佣人打理。
如果你是家里比较有钱的80后,你可以选这款;但是如果你平常比较懒散,家里又没有保姆,我建议你退而求其次选用实木复合地板,不然实木地板打理起来会让你很纠结。
★竹地板竹板拼接采用粘胶剂,施以高温高压而成。
优点:冬暖夏凉、色差较小、稳定性强、环保。
缺点:花纹单一、怕虫蛀、怕划伤。
适用人群:小资阶层。
竹地板的国内市场不大,主要外销。
国内市场推广,上层喊得响,但是价格降不下来,和中低档实木地板一个价,市场反应很冷。
英特飞 LVT 模块化地板安装指南说明书

安装指南LVT 模块化弹性地板June 2020安装前注意事项安装前请先进行现场检查储存和管理18°C - 29°C (65°F ~ 85°F )48 小时18°C - 29°C (65°F ~ 85°F )48 hours在完成其他所有工艺流程前,建议不要开始铺设弹性地板。
所有铺设LVT 的基层都需进行适当的含水率试验。
只可使用以硅酸盐为原料的修补和自流平材料。
切勿在以石膏为原料的修补和/或自流平材料上铺设弹性地板。
安装前,承包商有责任检查所提供的材料是否符合业主规范,确保产品样式、颜色和数量正确。
每个纸箱上的标签所含的重要信息包括:产品样式、颜色和生产批次。
不建议在同一区域使用混合批次。
铺设的材料如存在任何视觉缺陷不应视为合法索赔。
在移动任何类型的家具或重型设备时,应在地板上铺设胶合板、纤维板或其他硬质材料,以防止剐蹭或永久损坏地板。
家具底应放置适当的地板保护物。
可以是毡制品或其他专门用于防止剐蹭硬质表面或损坏硬质表面耐磨层的其他软质材料。
本安装指南涵盖大部分铺设流程。
若您遇到本指南未提及的情况,或需要更详细的帮助信息,请联系当地英特飞客户经理或英特飞客户服务部门。
若您在安装过程中遇到可能危及安装或影响安装程序的任何情况或缺陷,请您立即停止安装,并致电当地英特飞客户经理或英特飞技术服务部门。
LVT产品应按照《英特飞标准LVT产品质保》进行保修。
若您没有《英特飞标准LVT产品质保》,并希望获得一本,请联系当地英特飞客户经理或客户服务部,或登录我们的网站www. 。
警告:如果在安装过程中遇到任何含石棉的材料或其他危险材料,请您立即停止安装,并向具备资质的修复顾问或承包商请求协助。
温馨提示 - LVT 不得在户外环境中铺设。
在理想情况下,新浇混凝土变干至少需要90天。
轻质混凝土和浇筑在金属板上的混凝土变干需要更长时间。
塔克特 SURESET 系列胶粘型豪华地板安装说明说明书
TRANSCEND® SURESET™ GLUE DOWN LUXURY VINYLINSTALLATION INSTRUCTIONSINTRODUCTIONThese instructions are written as a guide to be used when installing Tarkett Flooring. These instructions, combined with our adhesives and flooring products, create a system. Utilizing this system will ease the installation process and provide the customer with a completed product that will perform to its intended purpose. Always visit for the most current installation and maintenance instructions. Technical videos and tip sheets are also available. Contact Tarkett Technical Services at (800)-899-8916 with any questions.GENERAL INFORMATION1. All Tarkett products must be stored in an indoor, climate-controlled space and be protected from the elements. Temperature must bemaintained between 65˚F (18.3˚C) and 85˚F (29.4˚C) with a relative humidity between 40% and 60 %.2. Cartons must be stored horizontally on a sturdy base at all times.3. Protect corners from damage.4. Carefully check flooring material for any defects. Contact your supplier immediately if any defect is found.5. Tarkett Flooring is intended for indoor use only.6. Transcend SureSet must be acclimated in an indoor, climate-controlled space and be protected from the elements. Temperature must bemaintained between 65º F and 85º F (18.3° C -29.4° C) with a relative humidity 40% and 60% for 48 hours prior to the installation.7. Room Temperature must be maintained between 65ºF and 85ºF (18.3°C– 29.4°C) with a relative humidity between 40% to 60% for 48 hoursbefore and during, and 48 hours after the installation.8. Exposure to direct sunlight can result in Transcend SureSet fading and creates excessive heat directly on the finished flooring and surroundingstructure which may result in movement. During peak sunlight exposure, the use of drapes or other window treatments are recommended.9. Remove all transitions, quarter round, baseboard molding or cove base.10. Do not use foam under Transcend SureSet.11. Tarkett Surestart® Underlayment and ProSheet™ Plus 3 are approved floating underlayments that can be used with Transcend Sure Set.Follow the detailed instructions found on WOOD SUBSTRATES1. Wood joist or truss systems spacing must be a maximum of 16”to 19.2” (40.6cm to 48.8cm) on center.2. Subfloor panels must be dry, sturdy, smooth and dimensionally stable.3. Subfloor panels must be 1” minimum thickness tongue and groove plywood. NOTE: Do not install over oriented strand board (OSB),particle board, chipboard, lauan or composite type underlayments.4. Subfloor panels must be good one side, fully sanded face with a solid core (no voids).5. Subfloor panels must be exterior grade or classified as Exposure I.6. All suspended wood subfloors must have at least 18” of well-ventilated air space clearance above the ground. The ground under the crawl spaceshall be covered with 10 mil or thicker polyethylene sheeting to reduce moisture vapor transmission.7. Offset subfloor panel joints by at least 16” so that four corners do not meet.8. Subfloor panels must be securely fastened to the joists and free from spring or deflection. Deflection shall not exceed 3/64” (1.1 mm) per APAPS 2-10 Performance Standard for Wood-Based Structural-Use Panels. If glue-nail procedures are required, use a solvent-free constructionadhesive.9. Subfloor must be level within 1/8” in 8 ft. (3.1 mm in 2.4 m). Any unevenness must be sanded down or filled with a cementitious patchingcompound. Any unevenness may show through to the surface and create separation of the flooring.Wood subfloors not meeting the above requirements must be covered with 1/4” minimum thickness underlayment grade plywood. Pro Sheet Plus 3 or SureStart Underlayment may be used as a substitute. Follow all APA and manufacturer’s guidelines for installing und erlayment grade plywood.Tarkett recommended underlayments include:∙APA Underlayment Grade Plywood A-C, B-C or C-C Plugged ∙ACCU-PLY∙SurePly ∙TECPLY∙ULAY∙ C.S.A. (CanPly) and ProboardCONCRETE SUBSTRATES1. Transcend SureSet may be installed over properly constructed and prepared on-grade, above-grade, or below-grade concrete subfloors.2. Concrete subfloors must be constructed as recommended by the American Concrete Institute’s ACI 302.2 Guide for Concrete Slabs thatReceive Moisture-Sensitive Flooring Materials.3. Prepare concrete subfloors according to ASTM F710 Standard Practice for Preparation of Concrete Floors to Receive Resilient Flooring. Thesurface of the concrete must be dry, clean, smooth, and structurally sound. The slab must be swept, damp mopped and/or vacuumed to remove any dust. Any surface materials present such as loose paint, wax, grease, oil, adhesive residues, crayon, pen marking, etc., that may preventa proper adhesion or migrate to the surface of the flooring causing discoloration, must be removed. Fill and level any cracks, construction joints,control joints, depressions, grooves or other irregularities with a high-quality, non-shrinking, latex-fortified, Portland Cement-based patching compound.4. Do not install Tarkett flooring over expansion joints or other moving joints in the substrate. These joints must be respected and should not befilled with products that are not intended for that purpose. Contact an expansion joint cover manufacturer to meet specific flooring conditions.5. Moisture testing of concrete subfloors must be performed in accordance with ASTM F1869 Standard Test Method for Measuring MoistureVapor Emission Rate of Concrete Subfloor Using Anhydrous Calcium Chloride and ASTM F2170 Standard Test Method for Determining Relative Humidity in Concrete Floor Slabs Using in situ Probes. Do not install Transcend SureSet if the values are greater than 9 lbs. /1000 ft²/24hrs per ASTM F1869 or 95 %RH per ASTM 2170. If the tests results exceed the limitations, the installation must not proceed until the problem has been corrected. Tarkett does not recommend or warrant any particular product or procedure for the remediation of high moisture in concrete substrates. There are several companies that manufacture products suitable for moisture remediation. We suggest you refer to the current ASTM F710 Standard Practice for Preparing Concrete Floors to Receive Resilient Flooring and ASTM F 3010 Standard Practice for Two Component Resin Based Membrane-Forming Moisture Mitigation Systems for Use Under Resilient Flooring Systems. ADDITIONAL SUBFLOOR GUIDELINESMany installations over existing floors produce satisfactory results. However their success is dependent upon the condition of the existing floor covering. Installing over existing flooring increases the possibility of indentations and telegraphing of the old floor. NOTE: The final decision to cover an existing floor with new flooring rests with the flooring contractor, installer, and/or end user. Tarkett will not accept responsibility for floor failures where the condition, type or improper preparation of the existing floor is the cause for the failure. When installing Transcend SureSet Luxury Vinyl Planks over an existing flooring follow the recommended guidelines below.1. Minimum temperature of the substrate must be 60˚F (15.6 ˚C). Substrate temperature should be a minimum of 5˚F higher than the dew pointtemperature.2. Heated flooring systems must be installed 2’’below concrete and the operating temperature must not exceed 85º F (29.4ºC). Duringinstallation, lower the radiant heated floor temperature to a minimum 65ºF (18.3ºC). This temperature should be maintained for at least 24 hours before and during the installation, and for 48 hours after completion of the installation. Gradually increase the temperature in increments of 5°F (2.8°C) every 24 hours but do not exceed 85° F (29.4° C).3. Residual adhesives should be mechanically removed to trace amounts and encapsulated with an approved Portland Cement-basedpatching compound.Do not use chemical adhesive removers or solvents. Always follow Res ilient Floor Covering Institute’s (RFCI’s) Recommended Work Practices for Removal of Resilient Floorcoverings. Caution: Some resilient flooring and adhesives contain "asbestos fibers" and special handling of this material is required.4. Refer to ASTM F 2419 Standard Practice for Installation of Thick Poured Gypsum Concrete Underlayments and Preparation of the Surfaceto Receive Resilient Flooring for guidelines when pouring gypsum underlayments or preparing for use as an underlayment under Tarkett Transcend SureSet. Follow the gypsum underlayment manufacturer’s recommendations for proper application and preparation.SUBSTRATE PREPARATION1. All substrates must be dry, clean, structurally sound, smooth and free from all existing adhesive residues.2. The substrate must be flat within 1/8” in 8’ (3.17 mm in 2.4 m).3. Fill and level concrete cracks, construction joints, control joints, depressions, grooves and other irregularities. Use a latex fortified,cementitious patching compound. Follow the manufactures recommendation for preparing.4. Sweep and vacuum or damp mop substrate to remove all dust and debris.5. Surestart & ProSheet Plus 3 can be used if needed. Follow the detailed installation instructions found at GETTING STARTED1. Install product out of multiple cartons from matching batch numbers.2. Inspect all planks for visible defects and damage before and during installation. Contact your supplier immediately if any defect is found.Do not install damaged planks. Tarkett will not accept responsibility for claims on flooring installed with obvious defects.3. Transcend SureSet must be acclimated at room temperature for 48 hours prior to the installation.4. Room Temperature must be maintained between 65ºF and 85ºF (18.3°C– 29.4°C) with a relative humidity between 40% to 60% for 48 hoursbefore and during, and 48 hours after the installation.5. Remove quarter round, baseboard molding, or cove base.6. Undercut doorway moldings the thickness of the flooring.7. Cartons must be stored horizontally on a sturdy base at all times.8. Protect carton corners from damage.9. Tarkett floors are intended for indoor use only.10. Determine in which direction the planks will be installed. To make the room appear larger or if installing in a very small room or hallway, it ispreferable to lay the planks parallel to the longest room direction.11. Do not use foam padding under Transcend SureSet.12. Surestart & ProSheet Plus 3 can be used if needed. Follow the detailed installation instructions found at PLANK LAY-OUTSquare Layout-center pointTo square the area to be covered, first find the center of one wall of the main rectangle of the room. Locate the same point at the direct opposite wall. Snap a chalk line between these points. Measure this center line to find the middle of the room and mark. A right angle must be established off this center mark. Use the following method to establish a right angle.3-4-5 METHODAt the center point, mark off a line across the room at exactly right angles to the first line. This may be accomplished by the 3-4-5 triangle method (Figure 1)1. Using a tape measure find the center of the room and mark points onto the substrate, one at each end of the room using a pencil.2. Strike a chalkline on these two points.3. Measure this center line to find the middle of the line and mark the substrate using a pencil.4. A right angle to this centerline needs to be created by using the 3-4-5 method.5. From the center point measure 3 feet down the center line and mark the substrate.6. From the center point measure 4 feet out from the centerline, while slightly swinging the tape measure mark the substrate simultaneouslywith a pencil.7. Measure from the 3 foot mark on the center line to the 4 foot mark on the substrate.8. Place a mark where the 4 foot on the floor and the 5 foot mark on the tape measure intersect.9. Using a chalkline connect the center point to the intersecting mark established in step 8 above. This new line will be a right angle to theoriginal centerline.Measuring from the line that is parallel to the longest wall using units of measure equal to full planks determine the size of the border planks at the wall. Generally, the width of the border planks should be at least one half the size of a full plank. Make sure to snap a new guide line at the first row of full-sized planks near the longest wall. Once installation begins it will be critical that the first row of planks are installed perfectly on this guideline. The guideline is represented by the red line in the figure below.NOTE: For larger rooms, multiples of 6-8-10 or 9-12-15 may be used to obtain greater accuracy.After the room has been squared, determine the width of the border planks. For a consistent aesthetic, the width of the border planks should all be at least one half the size of a full plank. This can be done simply by measuring across the room and dividing that by the width of a full plank. It will be necessary to adjust the starting line and center point to achieve equal sized border planks. Make sure to snap new guide lines.INSTALLATION1. Adhesive Application: For application in areas subject to heavy point loads, rolling loads, or topical moisture, Tarkett 975 Two-Part UrethaneAdhesive™ should be used. Follow the adhesive label instruction for proper use. Issues associated with the use of non-recommended adhesives (including peaking, gapping, adhesion, bubbling, discoloration, indentation, etc.) are excluded from Tarket t’s limited warranty. See complete Limited Warranty for details..2.A. Installing Transcend SureSet Luxury Flooring with Pre-Applied Adhesive:Important: To insure the best color match when installing luxury plank flooring from two or more cartons, make sure the runnumbers or date code on each carton are the same.a. During the installation of plank material, install product out of multiple cartons from matching batch numbers.b. Square the area and establish reference points on the substrate as explained above.c. Remove the release paper and use established reference points along the guideline and install the flooring material. WARNING: Onceremoved, release paper may be slippery. Please keep work area clean and free of release paper.d. Install planks in the same direction, in a random pattern, and offset plank end joints by a minimum 6" (15.24 cm).e. Once all flooring is installed, roll floor in both directions with a 100 lbs., three-section roller. Use a small hand roller in areas that cannot bereached with a large roller.2.B. For Adhesive installations:f. Following adhesive label instructions, apply the adhesive to the substrate and allow proper open time.Open and working times aredependent on the ambient temperature, humidity, substrate porosity and temperature, and air movement. It is the installer’sresponsibility to modify the open and working time for jobsite conditions.g. Remove release paper prior to laying into wet adhesive.h. Planks and Tiles should be lightly butted together when placing the flooring into the adhesive.i. Do not force Planks or Tiles together creating a ledge condition at the seams and corners. Sliding tiles will result in forcing the adhesiveout between the seams.j. When using Tarkett 975 Two-Part Urethane Adhesive™, the installer MUST work off the flooring. Use kneeling boards to avoid displacement of adhesive.k. Periodically, lift the corner of an installed tile or plank to ensure proper transfer of adhesive.l. While installing and before the adhesive dries, inspect the floor surface, especially seams, and remove any adhesive on the surface. NOTE: Removing dried adhesive may cause irreparable damage to the flooring surface.m. Once all flooring is installed, roll floor in both directions with a 100 lbs., three-section roller. Use a small hand roller in areas that cannot be reached with a large roller.n. Inspect the floor 2.5 hours later and roll again if necessary. Walk on kneeling boards to prevent adhesive displacement.3. Adhesive clean upExcess adhesive should be removed during the installation process.975 Two-Part Urethane Adhesive∙Before the adhesive sets, remove excess adhesive from flooring and clean tools with denatured alcohol applied to a clean white cloth.(Follow manufacturer's precautions when using denatured alcohol.)∙Do not allow adhesive to dry on the flooring surface.∙Removing dried adhesive may cause irreparable damage to the flooring surface.4. Finishinga. Sweep up scrap material and any loose debris.b. Replace all wood molding or cove basec. Install appropriate transition molding at the doorwaysd. If wet set application was used, do not replace furniture, allow foot traffic, or perform any initial maintenance for at least 72hours.e. Do not slide or roll furniture or appliances across the newly installed floor. To prevent damage, these items should be carried or slid intoplace using sheets of plywood.f. Use proper floor protectors under the legs of furniture.g. Post installation site conditions should be controlled by HVAC and maintained between 55ºF and 95ºF (12°C and 35°C). Ambient relativehumidity should be maintained between 40% and 70%.Tarkett North AmericaTechnical Services Department30000 Aurora RoadSolon, OH 44139800.899.8916 Fax 440.632.5643******************。
CNHF 复合重竹地板 说明书
复合重竹地板安装说明书 第1页 共4页复合复合重重竹地板安装说明书安装地板前请仔细阅读安装说明书,按照说明书的指引进行安装。
本安装说明书只适用于复合重竹地板的安装。
安装之前安装之前::1、打开纸箱,将地板逐片从纸箱中取出,纵横交叉的将地板堆叠在平整干净的地面上。
堆叠高度以地板堆叠后叠层不会垮塌为极限。
堆叠时每层地板之间要留有足够的空隙,空隙越大,平衡时间会越短。
在堆叠地板的同时,对每块板进行基本目测(请保证目测环境日光或者灯光的光亮度),如发现有明显质量缺陷的板,请将其挑出,并与经销商联系调换。
我们对在安装前就发现有明显质量缺陷的板在安装后不负赔偿责任的板在安装后不负赔偿责任。
2、地板堆叠时需小心操作,避免人为导致的地板破损与划伤。
同时请避免将地板堆叠在靠近墙角的地方,也不要直接将地板堆叠在水泥地面上。
3、在堆叠地板进行水分平衡时,请对地板进行含水率抽检,并记录其含水率数据,同时请测定安装环境的空气湿度,并进行记录与对比。
当地板含水率与安装环境空气湿度接近时,地板在堆叠后水分平衡两三天即可进行安装作业;如地板含水率与安装环境空气湿度相差比较大,比如地板含水率偏高而安装环境空气比较干燥,或者地板含水率低而安装环境比较潮湿,那么就需要对地板进行比较长时间的水分平衡。
平衡期间,要不定时的对地板含水率以及安装环境空气湿度进行对比检测,只有在地板含水率平衡至与安装环境空气湿度接近时,才能进行安装作业。
4、特别注意特别注意特别注意::地板安装应该是所有工程建设的最后一项工作地板安装应该是所有工程建设的最后一项工作,,其它任何墙面漆施工等工作都应该在地板安装前就已经完工施工等工作都应该在地板安装前就已经完工。
这样是为了避免其它施工对安装好的地板造成损坏。
施工用水等不能与地板接触,地板长时间接触水会将地板彻底毁坏。
5、本地板为室内地板,不能安装于户外,也不建议安装于有地热系统的房间里。
6、横交叉复合结构的地板不能安装于特别干燥的环境中,对于特别干燥的地区,我们推荐使用实心重竹地板或者普通平侧压实心竹地板。
PVC防静电架空地板说明?
PVC防静电架空地板说明
立品地板小编今天就给大家说一下PVC防静电架空地板,PVC防静电架空地板21世纪初进入我国市场,目前在东南沿海及发达城市已经大面积流行。
PVC地板是软质地板中最常用、最普及的地板。
由于PVC地板优越的性能和对环境的保护在发达国家已经普遍替代了瓷砖和木质地板,成为地面装修材料的首选。
一、PVC防静电架空地板介绍
Pvc防静电架空地板和pvc防静电直铺差不多,前者是多了一个架子,采用优质合金冷扎钢板,经拉伸后点焊成形。
外表经磷化后进行喷塑处理,内腔填充发泡水泥,上表面粘贴高耐磨麻面防静电PVC贴面,四周镶嵌导电边条。
二、PVC防静电架空地板特点
1、全钢组件,机械强度高、承载能力强、防火性能好;
2、表面静电喷塑,柔光、耐磨、防腐蚀;
3、粘贴的装饰高压层板,耐磨性及防静电性能优良、抗污染、便于清洗、装饰性强;
4、尺寸精度高、互换性能好、组装灵活、维护方便。
三、PVC防静电架空地板应用范围
PVC防静电架空地板广泛应用于电子计算机房、卫星地面站机房、电台控制室、电视发射台控制室、微波通信站机房、程控交换机房、洁净厂房、电子仪器厂装配车间、机密光学仪器制造车间、医院、学校等有防静电要求的场合
立品从创建开始就明确了市场定位,用品质赢得市场,赢得消
费者的口碑。
PVC防静电架空地板,就选东莞立品地板!。
pvc卷材地板 产品说明书
pvc卷材地板产品说明书
PVC卷材地板是一种常见的地板材料,具有防水、耐磨、易清
洁等特点。
产品说明书通常包括以下内容:
1. 产品介绍,介绍PVC卷材地板的基本特性、适用范围和优势。
2. 规格参数,包括地板的厚度、宽度、长度、颜色、纹理等规
格信息,以及相关的技术指标。
3. 安装方法,详细说明PVC卷材地板的安装步骤、注意事项和
施工要求,确保安装质量。
4. 使用与保养,介绍PVC卷材地板的日常使用注意事项、清洁
方法和保养建议,延长地板的使用寿命。
5. 质量保证,说明产品的质量保证期限、售后服务政策和相关
联系方式,让用户放心购买和使用。
此外,产品说明书还可能包括公司简介、产品认证、环保标准
等内容,以及相关的图片、图表和实例。
通过产品说明书,用户可
以全面了解PVC卷材地板的特性和使用方法,以便做出正确的选择和使用。