freebsd系统常用功能安装配置说明
FreeBSD 系统安装和 检点的iscsi 多路径共享配置
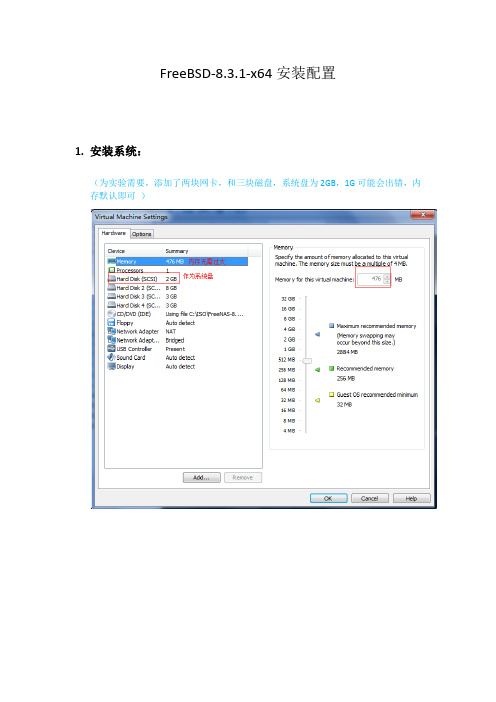
FreeBSD-8.3.1-x64安装配置1.安装系统:(为实验需要,添加了两块网卡,和三块磁盘,系统盘为2GB,1G可能会出错,内存默认即可)安装系统过程中注意系统安装在哪块磁盘上。
其他保持默认即可!8.3.1版本的全自动安装!安装完毕自动获得ip.2.配置服务通过http://192.168.4.149访问free1)更改语言为中文或者english ,然后刷新便可2)设置管理员密码:更改完毕登出,然后再登陆(没设置前alert 闪红灯,设置后成绿色)3.配置iscsi磁盘1)查看当前磁盘状态:2)配置iscsi server我们在此先不设置严格的认证程序,允许所有的可连接源允许任何主机使用3260端口连接添加连接的目标名称:ubu8设置连接目标设备:da3 (* 注意da3 需在系统中使用mkfs.ext3 /dev/da3 进行文件系统创建,否则在此不可用)设置目标和设备关联到此,iscsi 共享磁盘已经创建完毕!接下来,我们在远处客户端进行连接测试!我们使用ubuntu作为客户端:1)客户端需要安装iscsi 服务软件安装open-iscsi 和open-iscsi-utils查看软件包安装是否成功并设置iscsid 自动启动2)安装multipath多路径选择功能3)发现iscsi 目标:Ubuntu 默认没有iscsiadm 命令需要使用apt-get install iscsiadm 进行安装连接iscsi目标:使用fdisk /dev/sdc 便可对iscsi映射过来的磁盘进行分区创建!本实验是采用了多路径,使用multipath –Fmultipath –v2multipath –ll查看映射状态,创建分区后在/dev/mapper/下回出现,两个设备文件(如下图),而xxxxx-part1 是在创建分区后出现的,使用mkfs.ext3 便可将其创建为文件系统,挂载使用便可!当然也可直接使用/dev/sdc 进行分区并创建文件系统后使用。
转:FreeBSDsysctl详解和配置方案

转:FreeBSDsysctl详解和配置方案sysctl 是一个用来在系统运作中查看及调整系统参数的工具。
有的sysctl 参数只是用来回报目前的系统状况,例如回报目前已开机时间、所使用的操作系统版本、核心名称等等;而有的可以让我们修改参数以调整系统运作的行为,例如网络暂存内存的大小、最大的上线人数等等。
而这些可以调整的参数中必须在一开机系统执行其它程序前就设定好,有的可以在开机完后任意调整。
首先我们可以使用下列指令来查看目前所有的sysctl 参数及其状况:# sysctl -a | morekern.ostype: FreeBSDkern.osrelease: 5.2.1-RELEASEkern.osrevision: 199506kern.version: FreeBSD 5.2.1-RELEASE #: Sun Apr 11 16:16:08 CST 2004*****************:/usr/src/sys/i386/compile/ALEXkern.maxvnodes: 17812kern.maxproc: 2020kern.maxfiles: 4040kern.argmax: 65536kern.securelevel: -1kern.hostname: kern.hostid: 0kern.clockrate: { hz = 100, tick = 10000, profhz = 1024, stathz = 128 }kern.posix1version: 200112kern.ngroups: 16kern.job_control: 1kern.saved_ids: 0kern.boottime: { sec = 1081672724, usec = 885137 } Sun Apr 11 16:38:44 2004kern.domainname:kern.osreldate: 502010kern.bootfile: /boot/kernel/kernelkern.maxfilesperproc: 3636kern.maxprocperuid: 1818kern.ipc.maxsockbuf: 262144kern.ipc.sockbuf_waste_factor: 8kern.ipc.somaxconn: 128kern.ipc.max_linkhdr: 16kern.ipc.max_protohdr: 60kern.ipc.max_hdr: 76kern.ipc.max_datalen: 132kern.ipc.nmbclusters: 9024………略………我们也可以使用 sysctl 显示单一的参数值,例如:# sysctl kern.ipc.maxsockbufkern.ipc.maxsockbuf: 262144并非所有的参数都可以使用sysctl 进行调整,而且有的参数对于效能的影响并不大。
FreeBSD 自由BSD操作系统使用说明说明书
Table of ContentsAbout1 Chapter 1: Getting started with FreeBSD2 Remarks2 Versions2 Examples4 Installation or Setup4 Chapter 2: Build from source5 Introduction5 Remarks5 Overview of the whole process5 Get the number of processors5 Examples5 Download the latest source code5 SVN5 Get Current6 Get Releases6 Tarball (http & ftp)6 http6 ftp6 Git6 GitHub6 Configure the kernel6 Build the world and the kernel7 Build the world7 Estimated time7 Build the kernel7 Estimated time7 Configure the root filesystem of your new FreeBSD7 Install the world and the kernel8Install the world8 Install the kernel8 Chapter 3: FreeBSD Jails9 Examples9 Deploying jail9 Simple jail deployment from binaries9 Simple jail deployment from source9 Simple thin jail deployment10 Initializing our environment10 downloading sources10 Initializing our thin jail10 Networking and Jails11 Removing network support11 Allowing only IPv4 networking11 Allowing only IPv6 networking11 Dedicated network stack (VNET)11 Chapter 4: Packages and Ports management13 Remarks13 Examples13 Getting Ports tree13 Portsnap13 updating ports tree with portsnap13 schedule cron job for daily updates13 SVN13 head13 quaterly13 Tarball (http or ftp)14 Git14 Searching software14 keyword search14name search14 Using fresports14 Building and installing software14 Simple build and install with manual configuration14 Simple build and install with automatic configuration15 Configuring software sources15 Configuring www/apache2415 Packaging15 Manual packaging15 Using poudriere15 Installing poudriere15 Configuring poudriere16 Deploying poudriere jail16 Updating poudriere jail16 Deploying poudriere ports tree16 Updating poudriere ports tree16 Bulk build16 Chapter 5: Set up the FreeBSD development environment17 Examples17 ctags17 Build exctags(1) using ports17 Download and install a prebuilt binary of Exuberant Ctags:17 Create the tag file17 Credits18AboutYou can share this PDF with anyone you feel could benefit from it, downloaded the latest version from: freebsdIt is an unofficial and free FreeBSD ebook created for educational purposes. All the content is extracted from Stack Overflow Documentation, which is written by many hardworking individuals at Stack Overflow. It is neither affiliated with Stack Overflow nor official FreeBSD.The content is released under Creative Commons BY-SA, and the list of contributors to each chapter are provided in the credits section at the end of this book. Images may be copyright of their respective owners unless otherwise specified. All trademarks and registered trademarks are the property of their respective company owners.Use the content presented in this book at your own risk; it is not guaranteed to be correct nor accurate, please send your feedback and corrections to ********************Chapter 1: Getting started with FreeBSD RemarksThis section provides an overview of what freebsd is, and why a developer might want to use it.It should also mention any large subjects within freebsd, and link out to the related topics. Since the Documentation for freebsd is new, you may need to create initial versions of those related topics.VersionsSome versions were omitted since the exact release date is unknown. See the source of this post to view the list of the omitted versions.ExamplesInstallation or SetupFreeBSD is known of its well-written handbook (link). The installation process is described in detail in the Chapter 2. Installing FreeBSD.Read Getting started with FreeBSD online: https:///freebsd/topic/5708/getting-started-with-freebsdChapter 2: Build from sourceIntroductionExamples below are not necessarily in the correct order. See the Remarks section below for more information on the whole process.RemarksOverview of the whole processDownload the latest source code.1.2.Configure the kernel.3.Build the world and the kernel.4.Configure the root filesystem of your new FreeBSD.5.Install the world and the kernel.Get the number of processorsAn easy way to speed up the process of building and installing the new system is to use more processors to increase the computational power.To find out what's the number of the processors you have to speed up the process:sysctl hw.ncpuFor example:hw.ncpu: 1Let's set the $NUMBER_OF_PROCESSORS environmental variable then:export $NUMBER_OF_PROCESSORS=$(sysctl hw.ncpu | tr -d 'a-z.: ')ExamplesDownload the latest source codeSVNFreeBSD project use SVN as default SCM. Source could be download with svnlite software. Get Currentcd /usr/srcsvnlite checkout https:///base/head .Get Releasescd /usr/srcsvnlite checkout https:///base/release/11.0.0 .Tarball (http & ftp)You can also get source from frozen tarball with fetch commandhttpcd /tmpfetch /pub/FreeBSD/releases/amd64/11.0-RELEASE/src.txzcd /usr/srctar xJvf /tmp/src.txzftpcd /tmpfetch ftp:///pub/FreeBSD/releases/amd64/11.0-RELEASE/src.txzcd /usr/srctar xJvf /tmp/src.txzGitGitHubgit clone https:///freebsd/freebsd freebsdsrcConfigure the kernelGo to the directory with the source code:1.cd freebsdsrc2.Go to the directory with the kernel's configuration code:# If your system is 32-bit.cd sys/i386/conf/# If your system is 64-bit.cd sys/amd64/conf/3.Get a copy of the GENERIC kernel (let's call it MODEDKERNEL). It will be the base of your customisations.cp GENERIC MODEDKERNEL4.Modify the MODEDKERNEL file at your will.Build the world and the kernelBuild the worldGo to the freebsdsrc/ (the root directory of the FreeBSD source tree you've already downloaded) and build the world:sudo make -j${NUMBER_OF_PROCESSORS} buildworld KERNCONF=MODEDKERNEL -DNO_CLEAN Estimated time•Estimated time on Hasee Q540S running on a one processor: 8 hours.•Estimated time on Dell L702X running on 8 processors: 98 minutes.Build the kernelTo build the kernel run:sudo make -j${NUMBER_OF_PROCCESORS} buildkernel KERNCONF=UFFIE -DNO_CLEANEstimated time•Estimated time on Hasee Q540S running on a one processor: 2 hours.•Estimated time on Dell L702X running on 8 processors: 19 minutes.Configure the root filesystem of your new FreeBSDLet's configure the destination directory for the root filesystem of your new FreeBSD (for exampleAdd the following lines to /etc/src.conf to set it up:.if ${KERNCONF} == "MODEDKERNEL"DESTDIR?=/usr/home/beastie/MODEDKERNELMODULES_OVERRIDE=md ufs.endifRemember to use spaces not tabs if you wish to indent the code.1. Create the root file system now:Make distribution directories:sudo make distrib-dirs KERNCONF=MODEDKERNELEstimated time on Hasee Q540S: a few seconds.•Make the distribution:sudo make distribution KERNCONF=UFFIEEstimated time on Hasee Q540S: 3 minutes.•2. Install the world and the kernel Install the worldsudo make installworld KERNCONF=MODEDKERNEL Estimated time on Hasee Q540S: 5 minutes.Install the kernelsudo make installkernel KERNCONF=MODEDKERNELEstimated time on Hasee Q540S: a few seconds.Read Build from source online: https:///freebsd/topic/7062/build-from-sourceChapter 3: FreeBSD JailsExamplesDeploying jailA jail is simply a chroot with strong isolation. So, if you want to create jail, you simply need to create an alternative root and starting a new jail in it.Simple jail deployment from binaries# create our alternative root pathJAILROOT="/path/to/my/jail"mkdir -p "${JAILROOT}"cd "${JAILROOT}"# get distribution from freebsd repositoryfetch /pub/FreeBSD/releases/amd64/11.0-RELEASE/base.txz# extract it in our alternative roottar xJvf base.txz# now we can launch our jailjail -c name=simplejail path=${JAILROOT}# to check if jail is up and running we use jlsjls# now we can enter in our new jailjexec simplejail shSimple jail deployment from source# create our alternative root pathJAILROOT="/path/to/my/jail"mkdir -p "${JAILROOT}"# we need to build binaries from source...cd /usr/srcmake buildworld# ... and install it in our alternative pathmake installworld DESTDIR=${JAILROOT}# now we can launch our jailjail -c name=simplejail path=${JAILROOT}# to check if jail is up and running we use jls# now we can enter in our new jailjexec simplejail shSimple thin jail deploymentThin jail is simply a jail with shared read-only alternative root mounted with nullfs. Initializing our environment# making our shared alternative rootSHARED_ROOT=/path/to/your/shared/rootmkdir -p "${SHARED_ROOT}"# making our jail rootJAIL_ROOT=/path/to/your/jail/rootmkdir -p "${JAIL_ROOT}"downloading sources# to initialize our shared root, we can use# all method described above. Here, we will use# simple binary initialization from official# repositorycd "${SHARED_ROOT}"# get distribution from freebsd repositoryfetch /pub/FreeBSD/releases/amd64/11.0-RELEASE/base.txz# extract it in our alternative roottar xJvf base.txzInitializing our thin jail# now we need to initialize our dedicated# jail rootcd "${JAIL_ROOT}"mkdir base# we make symbolic link pointing to# files stored in read-only directoryfor link in bin boot lib libexec rescue sbindoln -s ${link} /base/${link}done# we do same thing with directory in /usrfor link in bin include lib lib32 libdata libexec sbin sharedoln -s usr/${link} /base/usr/${link}# now we are ready to start our jail!jail -c name=thinjail path="${JAIL_ROOT}" \mount="${SHARED_ROOT} ${JAIL_ROOT} nullfs ro 0 0"# check if our thin jail is ok...jls# we can now grab in it!jexec thinjail shNetworking and JailsFreeBSD jails can have fine grained networking configuration. By default, every jails use the same network configuration than host.Removing network supportjail -c name="nonetwork" path="/path/to/your/jail" ip4=disable ip6=disableAllowing only IPv4 networkingjail -c name="onlyipv4" path="/path/to/your/jail" ip4=inherit ip6=disableAllowing only IPv6 networkingjail -c name="onlyipv6" path="/path/to/your/jail" ip4=disable ip6=inherit Dedicated network stack (VNET)VNET is recent feature allowing jail to have its own network stack. Doing this configuration need to add routing feature to the host. VIMAGE option is required in host kernel.# starting our own jail with vnetjail -c name="vnetjail" path="/path/to/your/jail" vnet=new# we need a bridge...ifconfig bridge0 create# a pair of ethernet interface...ifconfig epair0 create# and interconnecting epair, jail and bridgeifconfig epair0b vnet vnetjailRead FreeBSD Jails online: https:///freebsd/topic/7070/freebsd-jailsChapter 4: Packages and Ports management RemarksTips:Remember to always check the /usr/ports/UPDATING file before upgrading. There might be •some significant changes in programs you use or in their configuration which will break your current setup.ExamplesGetting Ports treePortsnapportsnap fetchportsnap extractupdating ports tree with portsnapportsnap updateschedule cron job for daily updates0 3 * * * root /usr/sbin/portsnap cronSVNheadcd /usr/portssvnlite checkout https:///ports/head .quaterlyFreeBSD Ports team freeze ports tree every 3 months. To get this ports tree you can use ports branches:cd /usr/portssvnlite checkout https:///ports/branches/2016Q4 .Tarball (http or ftp)cd /usr/portsfetch /pub/FreeBSD/releases/amd64/11.0-RELEASE/ports.txztar xJvf ports.txzGitgit clone https:///freebsd/freebsd-portsSearching softwarekeyword searchcd /usr/portsmake search key=apachename searchcd /usr/portsmake search name=apache24Using fresportsOfficial FreeBSD ports website (/) give you a nice way to find ports and all information concerning it.Building and installing softwareIf you have found your software in the ports tree, now its the time to build it.Simple build and install with manual configurationcd /usr/ports/www/apache24makemake installSimple build and install with automatic configurationcd /usr/ports/www/apache24make BATCH=yesmake installConfiguring software sourcesIf you want custom configuration from ports, you can configure it before building it make config. All ports configuration are stored in /var/db/ports/${CATEGORY_NAME}/options as makefile. Configuring www/apache24cd /usr/ports/www/apache24make configmakemake installThis configuration will be saved in /var/db/ports/www_apache24/options.PackagingManual packagingYou can make your own package based on ports.cd /usr/ports/www/apache24make package BATCH=yesThis command will store your package in /usr/ports/packages/All.Using poudrierepoudriere is currently the official package builder for FreeBSD.pkg install poudriere# orcd /usr/ports/ports-mgmt/poudrieremakemake installConfiguring poudrierepoudriere configuration is stored in /usr/local/etc/poudriere.conf and /usr/local/etc/poudriere.d Deploying poudriere jailpoudriere jail -c -j myjailUpdating poudriere jailpoudriere jail -u -j myjailDeploying poudriere ports treepoudriere ports -c -p myportsUpdating poudriere ports treepoudriere ports -u -p myportsBulk buildpoudriere bulk -j myjail -p myports www/apache24Read Packages and Ports management online:https:///freebsd/topic/7069/packages-and-ports-managementChapter 5: Set up the FreeBSD development environmentExamplesctagsctags is a useful utility you can use to read and move around the source code more efficiently. The built-in ctags(1) however is not the Exuberant Ctags utility you might expect.You can install Exuberant Ctags (exctags(1)) using either ports or pkg:Build exctags(1) using portscd /usr/ports/devel/ctags/ && make install cleanDownload and install a prebuilt binary of Exuberant Ctags: pkg install ctagsCreate the tag fileexctags -RRead Set up the FreeBSD development environment online:https:///freebsd/topic/6136/set-up-the-freebsd-development-environmentCredits。
FreeBSD操作系统 安装软件
实验二FreeBSD 安装应用程序一、 FreeBSD 安装软件的主要方式1、Packages:packages是FreeBSD预编译好的软件包,它记录了二进制软件的内容、安装位置、软件包的描述信息、软件包之间的依赖关系等等,相当于为windows系统下的那些绿色软件,不用安装拷贝过来就能用的。
1:用root权限执行sysinstall,然后选择Configure菜单项中的Packages选项,里面会列出所有的可用软件,可以从里面选择你要安装的软件,至于方法我想大家都会了,就不再赘述了。
2:用Sysinstall来安装、管理软件比较直观,但它需要一个标准的安装介质,适合大量安装软件包时使用,如果只是仅仅添加几个独立的软件包,还是用下面的方法吧:pkg_add安装一个packagepkg_delete删除一个packagepkg_info显示软件包的安装信息和简短描述pkg_version显示软件包的版本信息2、Ports:FreeBSD 的ports 就是別人已经编译过的,安装测试没问题了,他们将安装软件编译时所需的功能设定、编译程序及安裝程序都依固定的格式放在一起,我们只要先将某个软件ports 目录下的档案抓回来,然后轻松的makemake install即可完成软件的编译和安装(也可以用一行make all install 来代替)3、源代码编译安装1:首先把安装文件拷贝到一个目录下例如,如果你是以root身份登录上的,就将软件拷贝至/root中#cp xxx.tar.gz /root2:由于该文件是被压缩并打包的,应对其解压缩。
命令为:#tar xvzf filename.tar.gz3:执行该命令后,安装文件按路径解压缩在当前目录下,一般会生成一个filename目录。
进入该目录用ls命令可以看到解压缩后的文件。
通常在解压缩后产生的文件中,有"Install"的文件。
FreeBSD安装教程
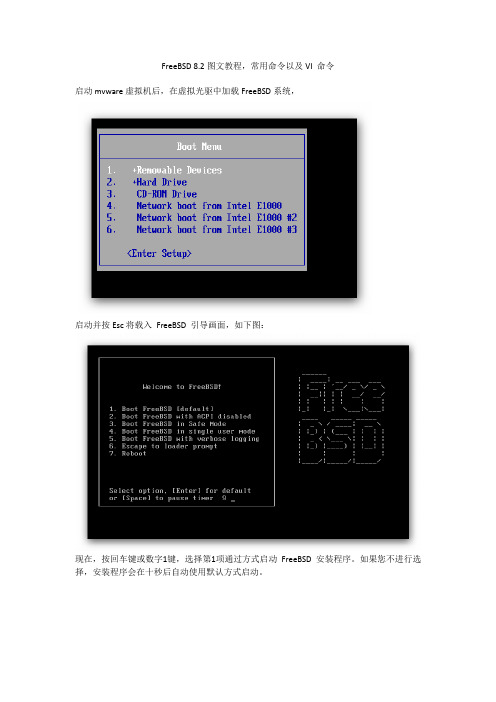
FreeBSD 8.2图文教程,常用命令以及VI 命令启动mvware虚拟机后,在虚拟光驱中加载FreeBSD系统,启动并按Esc将载入FreeBSD 引导画面,如下图:现在,按回车键或数字1键,选择第1项通过方式启动FreeBSD 安装程序。
如果您不进行选择,安装程序会在十秒后自动使用默认方式启动。
盘方向键选择45 China 中国,为我们的国家,回车键确定。
USA ISO,回车确认进入下一步。
正式进入了安装向导,FreeBSD 7.0 的安装程序名叫Sysinstall。
现在你看到的就是Sysinstall 的主菜单,其中有各种安装选项。
使用方向键选择Standard项目,回车确认,进入标准安装。
现在看到的是分区向导,这里会列出你的硬盘信息。
一般情况下,我们按键盘A键,使用自动分区功能,或者手工创建分区。
这里按A键,自动分区完毕。
按键盘Q键,完成分区。
这里是询问你安装何种硬盘引导程序。
第一项是使用FreeBSD 的启动引导程序,第二项是标准引导,第三项是不安装引导程序。
如果我们安装单操作系统,请选择第二项。
如果有多个操作系统,请选择第一项。
第三项是不安装,这指使用目前已经有的其他操作系统的引导程序。
由于我的虚拟机上安装了多个系统,故选择FreeBSD系统的加载方式(BootMgr),确认。
再确认,进入分区向导。
要注意的是FreeBSD 的磁盘分区与Windows 的分区概念不一样,除了硬盘分区之外,还有一个Label 分区。
我们依然按A键,使用自动分区,软件会为我们分配合适的磁盘分区与虚拟内存,按Q键完成。
现在看到的,是比较重要的部分,选择软件安装包。
我们只需要一个全新干净的FreeBSD,这里我们选择倒数第二项Minimal 最小安装模式,按空格键确认。
这里要注意的是,FreeBSD 有一个很方便的软件包管理和安装器,名叫ports,类似Ubunut 的Apt-get,一般我们都是必须安装的。
freebsd系统之基础网络配置

三. 以上都是临时今天分配IP地址。下面用永久静态IP 配置 ee /etc/rc.conf ifconfig_em0="inet 192.168.1.111/24" 添加永久静态IP地址 IPV4的 defaultrouter="192.168.1.1" 添加默认的路由网关
wusamjack你的系统具体是哪个centosredhatsuse具体版本是哪个有遇到过有的版本无用还要看具体的
一. 网络 ① 查看网络状态 ifconfig
freebsd系 统 之 基 础 网 络 配 置
② 临时配置IP地址 方法一 ifconfig em0 inet 192.168.0.111 netmask 0xffffff00 ③ 删除网卡IP地址 ifconfig em0 delete 或者 ifconfig em0 -alias 效果是一样的都是删除网卡的IP地址
④临时配置网卡IP地址 方法二 ifconfig em0 192.168.0.111/24 ⑥查看默认网关和路由 netstat -rn ⑦ 添加默认网关 route add default xxxx.xxxx.xxxx.xxxx ⑧ DNS编辑 ee /etc/resolv.conf ⑨ 测试网络 ping 一直测试下去,直到强制结束; ping -c 5 测试5次后自动断开
FreeBSD的一些命令及FAMP配置安装
FreeBSD的一些命令及AMP配置安装关机命令#halt -p和shutdown -p now重启命令#shutdown -r now挂载和卸载光盘命令#mount /cdrom#unmount /cdrom#cd /cdrom查找文件命令#find /etc -name "*conf*"查看机器情况# uname –rna通过ports安装程序安装上传下载文件插件lrzsz#cd /usr/ports/comms/lrzsz#make clean install clean && rehash要下载就输入lsz ,上传就输入lrz,出现对话框挂载U盘#cd /mnt#mkdir usb#moun -t msdosfd /dev/da0s1 /mnt/usb用ports安装gmake有些程序在安装的时候需要用gmake来编译源码# cd /usr/ports/devel/gmake/# make all然后系统就开始自动下载从gnu官方站点上下载最新的gmake源码:然后系统就开始自动编译然后再重启系统:xinsoftbsd# reboot重启以后,FreeBSD就支持gmake了。
pkg安装gmake挂载第二张光盘,找到gmake-3.81_2.tbz#pkg_add gmake-3.81_2.tbz安装freetype2出错#./configure出现GNU make(> = 3.79.1) or makepp (> = 1.19) is required to build FreeType2.原因:make或gmake版本过低解决办法:#vi configure把GNUMAKE=make改成GNUMAKE=gmake再通过pkg安装gmake在php中编译#./configure --prefix=/usr/local/apache2/bin/apxs --with-mysql=/usr/local/mysql --with-xml --with-png --with-jpeg-dir=/usr/local/jpeg6 --with-zlib --with-freetype-dir --with-gd --with-curl --enable-track-vars --disable-debug --enable-url-includes --enable-sockets --enable-force-cgi-redirect--enable-magic-quotes --enable-ftp --enable-gd-native-ttf --with-ttf --with-gdbm --with-gettext--with-iconv --enable-mbstring=all --enable-memory-limit出现configure: error: DBA: Could not find necessary header file(s).是因为没安装gdbm,在第二张盘里有gdbm-1.8.3_3.tbz#pkg_add gdbm-1.8.3_3.tbz即可通过编译安装完php后启动apache出现httpd: Could not reliably determine the server's fully qualified domain name, using 127.0.0.1 for ServerName解决办法:# vi /usr/local/apache2/conf/httpd.conf添加这么一行:ServerName 127.0.0.1:80AMP配置安装1、下载首先从网上下载以下版本的压缩包 (1) mysql-5.0.41.tar.gz(2) httpd-2.2.8.tar.gz(3) php-5.1.4.tar.gz(4) libxml2-2.6.19.tar.gz(5) zlib-1.2.3.tar.gz(6) libpng-1.2.34.tar.gz(7) jpegsrc.v6b.tar.gz(8) gd-2.0.33.tar.gz(9) freetype-2.1.10.tar.gz(10) curl-7.15.0.tar.(11) gzlibxslt-1.1.15.tar.gz(12) mediawiki-1.9.3cn.zip2、开始安装Mysql-5.0.41.tar.gz#tar –xvf mysql-5.0.41.tar.gz#cd mysql-5.0.41#./configure --prefix=usr/local/mysql# make#make install为mysql加入访问的组与用户#pw group add mysql#pw user add mysql –g mysql#cp support-files/f /etc/f #cd /usr/local/mysql# chown -R mysql .#chgrp -R mysql .# bin/mysql_install_db --user=mysql# chown -R root .#chown -R mysql var#bin/mysqld_safe --user=mysql &#/usr/local/bin/mysqladmin -u root password '123456'#mysql -u root –p设置开机自动运行#vi /usr/local/etc/rc.d/mysql_start.sh添加#! /bin/sh/usr/local/mysql/bin/mysql_safe &编辑完成后保存并将属性更改为可执行#chmod +x mysql_start.sh3. Apache2的安装(httpd-2.2.8.tar.gz)#./configure --prefix=/usr/local/apache2 --enable-shared=max --enable-module=rewrite --enable-so#make#make install建立自动运行执行文件#vi /usr/local/etc/rc.d/apache_start.sh添加#! /bin/sh/usr/local/apache2/bin/httpd –k start保存后修改为可执行#chmod +x /usr/local/etc/rc.d/apache_start.sh4. 为PHP的安装做好准备而安装的各种包安装xml2-2.6.19.tar.gz#tar –xvf xml2-2.6.19.tar.gz#cd xml2-2.6.19#./configure#make#make install安装zlib-1.2.3.tar.gz#tar –xvf zlib-1.2.3.tar.gz#cd zlib-1.2.3#./configure#make#make install安装libpng-1.2.34.tar.gz#tar –xvf libpng-1.2.34.tar.gz#cd png-1.2.8#./configure --prefix=/usr/local/libpng2#make#make install安装jpegsrc.v6b.tar.gz#mkdir –p /usr/local/jpeg6#mkdir –p /usr/local/jpeg6/bin#mkdir –p /usr/local/jpeg6/lib#mkdir –p /usr/local/jpeg6/include#mkdir –p /usr/local/jpeg6/man#mkdir –p /usr/local/jpeg6/man1#mkdir –p /usr/local/jpeg6/man/man1#./configure--prefix=/usr/local/jpeg6--enable-shared--enable-static#make#make install安装freetype-2.1.10.tar.gz这个软件采用gmake来安装,因此首先将configure文件中的make修改为gmake #./configure#gmake#gmake install安装curl-7.15.0.tar#./configure#make#make install安装gzlibxslt-1.1.15.tar.gz#./configure#make#make install5.开始安装PHP5源代码:php-5.1.4.tar.gz#tar-zxvf php-5.1.4.tar.gz#cd php-5.1.4#./configure –prefix=/usr/local/php –with-apxs2=/usr/local/apache2/bin/apxs –with-xml –with-mysql=/usr/local/mysql –with-zlib –with-jpeg-dir=/usr/local/jpeg6 --with-png-dir=/usr/local/libpng2 –with-config-file-path=/usr/local/lib –disable-debug –enable-safe-mode –enable-trans-sid –enable-memory-limit –enable-short-tags –disable-posix –enable-exif –enable-ftp --enable-sockets#make#make install#cp /usr/src/php-5.1.4/php.ini-dist /usr/local/lib/php.ini把php加到apache里去代码:#vi /usr/local/apache2/conf/httpd.conf添加LoadModule php5_module modules/libphp5.soAddType application/x-httpd-php .phpAddType application/x-httpd-php-source .phps然后放个test.php文件上去测试看看成功vi /usr/local/apache2/htdocs/test.phpPHP代码:<?phpinfo();>启动一下apache服务#/usr/local/apache2/bin/apachectl start在浏览器中输入http://127.0.0.1/phpinfo.php这应该会出现一些php的测试信息6.安装MediaWiki 1_9_3上传到/usr/local/apache2/htdocs/目录下#cd /usr/local/apache2/htdocs#chmod a+w config #这样保证Wiki的setup程序可以有执行权利点击set up the wiki然后开始安装前的一些检测信息填入你的一些相关信息后,执行,如果成功会出现类似画面。
freebsd 基本操作

freebsd 基本操作FreeBSD 基本操作FreeBSD 是一种自由开源的操作系统,它基于UNIX的设计原则,并且具有高度的稳定性和安全性。
本文将介绍一些关于FreeBSD的基本操作,帮助读者更好地了解和使用这个操作系统。
一、安装FreeBSD要使用FreeBSD,首先需要将其安装在计算机上。
安装过程相对简单,以下是一些基本步骤:1. 下载最新的FreeBSD安装镜像文件。
2. 创建一个可启动的安装介质,如USB闪存驱动器或光盘。
3. 将计算机设置为从安装介质启动。
4. 按照安装程序的指示进行安装,包括选择适当的分区方案和设置用户帐户。
二、基本命令一旦安装完成,就可以开始使用FreeBSD了。
下面是一些常用的基本命令:1. ls:列出当前目录中的文件和文件夹。
2. cd:切换到指定的目录。
3. pwd:显示当前工作目录的路径。
4. mkdir:创建一个新的目录。
5. rm:删除文件或目录。
6. cp:复制文件或目录。
7. mv:移动文件或目录。
8. cat:显示文件的内容。
9. vi:编辑文本文件。
三、用户和权限管理在FreeBSD中,可以创建多个用户帐户,并为每个用户分配不同的权限。
以下是一些与用户和权限管理相关的命令:1. adduser:创建一个新的用户帐户。
2. passwd:更改用户的密码。
3. chown:更改文件或目录的所有者。
4. chgrp:更改文件或目录的所属组。
5. chmod:更改文件或目录的权限。
四、软件包管理FreeBSD提供了一个强大的软件包管理系统,可以方便地安装、更新和删除软件包。
以下是一些与软件包管理相关的命令:1. pkg install:安装一个软件包。
2. pkg update:更新已安装的软件包。
3. pkg delete:删除一个软件包。
4. pkg search:搜索可用的软件包。
五、系统更新和维护为了保持系统的稳定性和安全性,定期更新和维护是必要的。
- 1、下载文档前请自行甄别文档内容的完整性,平台不提供额外的编辑、内容补充、找答案等附加服务。
- 2、"仅部分预览"的文档,不可在线预览部分如存在完整性等问题,可反馈申请退款(可完整预览的文档不适用该条件!)。
- 3、如文档侵犯您的权益,请联系客服反馈,我们会尽快为您处理(人工客服工作时间:9:00-18:30)。
系统安装配置指南一.操作系统安装过程为了在原有的snort基础上扩展到IPS功能,于是乎想利用snort_inline来做,虽然还有类似的snortsam、guardian之类的snort插件,不过既然snort 后续版本自带了inline模式,那就还是先用inline吧~1.1. 安装操作系统CentOS:CentOS-5.2-i386-bin-DVD.isoServer版本,安装好gcc等各类开发工具。
安装freebsd 7.21、系统打补丁配置ip地址网关、DNSfreebsd-update fetch installrebootportsnap fetch extractntpdate 二.SNORT安装配置过程2.1. 安装pcre(7.2装好后已有)cd /usr/ports/devel/pcrcmake install cleanpcre-7.8.tar.gz下载后,configure→make→make install默认安装即可2.2. 安装iptables-develcd /usr/ports/net/libpcapmake install cleaniptables-devel-1.3.5-4.el5.i386.rpm下载后,configure→make→make install默认安装即可2.3. 安装libdnetcd /usr/ports/net/libdnetmake install cleanlibdnet-1.11.tar.gz下载后,configure→make→make install默认安装即可2.4. 安装libpcapcd /usr/ports/net/libpcapmake install cleanlibpcap-1.0.0.tar.gz下载后,configure→make→make install默认安装即可2.5. 安装ip_queue利用modprobe ip_queue载入ip_queue模块2.6. 安装snort-inlinesnort_inline-2.6.1.5.tar.gz下载后,configure→make→make install默认安装即可2.7. 运行前准备打开系统的ip forward功能:[root@localhost ~]# echo 1 > /proc/sys/net/ipv4/ip_forward根据需求设置需要通过iptables到ip_queue队列让snort-inline处理的包:如:[root@localhost ~]# iptables –A FORWARD –p tcp –dport 80 –j QUE UE,仅让目的端口为80的tcp数据包进入snort-inline处理。
2.8. 运行snort-inline[root@localhost ~]# snort-inline –Qc /etc/inline.conf –l /var/log/snort...指定规则、日志记录等方式即可运行。
三.Netflow监控3.1. 简单的netflow监测fprobe -i bge0 -n 5 -e 1 127.0.0.1:9996/usr/local/bin/flow-capture -z 6 -n 143 -e 8928 -V 5 -w /var/netflow 127.0.0.1/127.0.0.1/9996-z 壓縮比例0-9-n 一天產生幾份netflow 檔案. 143 為每10分鐘一份預設為95 份15min/per -e 總共保留幾份8928 是一個月-V 板本..-w 儲存資料夾最後localip/remoteip/port接收端/發送端/連接埠cd /var/netflow/日期目录flow-cat ft-v05.2008-12-16.* | flow-stat -f8 -S2 | tail +13l | head -10 查看某天的流量排名fprobe -i bge0 -n 5 -e 1 127.0.0.1:9995/usr/local/bin/flow-capture -z 6 -n 24 -e 144 -V 5 -w /var/netflow 127.0.0.1/127.0.0.1/9995/usr/local/bin/flow-capture flow-expire flow-filter flow-import flow-merge flow-receive flow-rptfmt flow-statflow-cat flow-export flow-gen flow-log2rrd flow-nfilter flow-report flow-send flow-tagflow-dscan flow-fanout flow-header flow-mask flow-print flow-rpt2rrd flow-splitNetflow#flow-cat 檔案| flow-print # 將列出所有抓下的封包,檔案= /netflow/2005/2005-01/2005-01-31/ft-v01.2005-01-31.032001+0800Netflow#flow-cat檔案| flow-stat -f8 -S2 | tail +13l | head -10 # 可抓取目的地流量前10名IPNetflow#flow-cat檔案| flow-stat -f5 -S2 | tail +13l | head -10 # 統計port 量Netflow#flow-cat檔案| flow-filter -P6677 | flow-stat -f8 -S2 # 抓出port 6677 (kuro) 的排名3.2. NFSENcisco 6509 fprobe -i bge0 -n 5 -e 1 192.168.90.252:8231alcatel 6850 fprobe -i bge0 -n 5 -e 1 192.168.90.252:6343fprobe -i bge0 -n 5 -e 1 127.0.0.1:9996telnet 192.168.90.252user01 user01可以登录然后su root 密码12345678---------------------------------------1. port的升级尽量用portupgrade,不要用光盘。
(没有这个命令)2. 从tcpdump看是已经有netflow数据了,再看看/usr/local/var/nfsen/profiles/live/下有没有netflow的数据文件。
一般需要过5分钟才能看到流量图。
nfsen -l live 检查、、nxl# sockstat -4l-------------------------------------3.2.1.安装Fprobecd /usr/ports/net-mgmt/fprobe/make install cleanrehashfprobe -i bge0 127.0.0.1:9996tcpdump -n -i bge0 dst port 6343tcpdump -n -i lo0 dst port 9996------------------------------------freebsd-update fetch installrebootportsnap fetch extractntpdate -------------------------------------3.2.2.安装Apache22cd /usr/ports/www/apache22/make install clean //取消勾选IPV6echo 'apache22_enable="YES"' >> /etc/rc.confecho 'apache22_http_accept_enable="YES"' >> /etc/rc.conf/usr/local/etc/rc.d/apache22 start----------------------------------------3.2.3.安装Php5cd /usr/ports/lang/php5 //勾选APACHE,MULTIBYTE,取消勾选IPV6echo 'AddType application/x-httpd-php .php' >> /usr/local/etc/apache22/httpd.conf echo 'AddType application/x-httpd-php-source .phps' >> /usr/local/etc/apache22/httpd.confcd /usr/local/etccp php.ini-recommended php.inised -e 's/short_open_tag = Off/short_open_tag = On/g' -i .bak php.ini/usr/local/etc/rc.d/apache22 restartsed -e 's/\/usr\/local\/www\/apache22\/data/\/usr\/local\/www\/nfsen/g' -i .bak /usr/local/etc/apache22/httpd.confsed -e 's/index.html/nfsen.php/g' -i .bak /usr/local/etc/apache22/httpd.conf/usr/local/etc/rc.d/apache22 restart----------------------------------------3.2.4.安装Nfsen升级pixman /usr/ports/x11/pixman makedeinstallmake reinstall升级glib20 /usr/ports/devel/glib20makedeinstallmake reinstallcd /usr/ports/net-mgmt/nfsen //默认选项即可make install cleansed -e '/peer1/d' -i .bak /usr/local/etc/nfsen.conf/usr/local/bin/nfsen reconfig/usr/local/etc/rc.d/nfsen startsed -e 's/\/usr\/local\/www\/apache22\/data/\/usr\/local\/www\/nfsen/g' -i .bak /usr/local/etc/apache22/httpd.confsed -e 's/index.html/nfsen.php/g' -i .bak /usr/local/etc/apache22/httpd.conf/usr/local/etc/rc.d/apache22 restart----------------------------------------3.2.5.安装PortTrackercd /usr/ports/net-mgmt/nfdump-develmakecd /usr/ports/net-mgmt/nfsenmake patchcd work/nfsen-1.3/contrib/PortTracker/sed -e 's/\.\.\/\.\.\/\.\.\/nfdump-current/\/usr\/ports\/net-mgmt\/nfdump-devel\/work\/nfdump-s napshot-20070808/g' -i .bak do_compilesed -e 's/\/usr\/local\/rrdtool-1.2.11\/include/\/usr\/local\/include/g' -i .bak do_compile sed -e 's/\/usr\/local\/rrdtool-1.2.11\/lib/\/usr\/local\/lib/g' -i .bak do_compile./do_compilecp nftrack /usr/local/bin/rehashmkdir /usr/local/var/nfsen/portsdbsed -e 's/\/data\/ports-db/\/usr\/local\/var\/nfsen\/portsdb/g' -i.bak PortTracker.pmcp PortTracker.pm /usr/local/libexec/nfsen/plugins/cp PortTracker.php /usr/local/www/nfsen/plugins/cd /usr/local/etcsed -e "s/# profile # module/[\'live\',\'PortTracker\'],/g" -i .bak nfsen.confnftrack -I -d /usr/local/var/nfsen/portsdb/ 创建数据库文件必须有10G 大的空间cd /usr/local/var/nfsen/portsdbtouch portstat.txt portstat24.txtchown -R www:www */usr/local/etc/rc.d/nfsen restart四.通用部分4.1. 文件系统4.1.1.linux/freebsd查看目录大小的命令每次都记不下的两个命令,今天记下来,备以后查freebsd的命令:在某个目录里执行#du -h -d 1可以查看目录里的每个子目录的大小linux下的命令则为:#du -h –max-depth=14.2. 软件安装删除4.2.1.查找ports中的软件示例:#cd /usr/port#make search key=clam#cd /usr/port/security/clam#make install clean4.2.2.查看软件安装的位置# pkg_info –L softwarename | less4.2.3.查看软件安装的版本# pkg_info | grep softwarename4.2.4.查看这个软件的具体信息# pkg_info software。