第7章 Visual Basic控件及其应用
VB教程:常用控件及应用
⼀、基本操作1、向窗体中添加控件⾸先将⿏标指针停在⼯具箱的控件上⼏秒钟,待显⽰出控件名,再作如下操作(当然,如果⽤户已经⾮常熟悉控件的含义,这⼀步可以省略)。
⽅法⼀:把光标移到⼯具箱上,单击控件图标,然后把光标移到窗体上(此时,窗体上的光标是⼀个⼗字形图标),在窗体上选择控件放置的初始化位置,然后按下⿏标左键,拖曳⿏标,直到所需的⼤⼩,松开⿏标按键即可。
⽅法⼆:另外⼀个⽅法是⽤⿏标双击控件图标,窗体中央出现默认⼤⼩的控件,拖动该控件到合适的位置即可。
⽅法三:单击控件,然后在窗体上设计好控件的⼤⼩,再⽤复制和粘贴命令拷贝控件,这时,屏幕上会出现⼀个对话框,询问是否要建⽴控件数组,单击“否”按钮,就把活动控件复制到窗体的左上⾓,可以获得同样尺⼨的控件。
但这种⽅法在使⽤时会发现,两个控件的名称是⼀样的,这不利于下⼀步⼯作;如果单击“是”,将建⽴⼀组索引号不同的控件组。
⽤这种⽅法创建的控件可以获得同样尺⼨。
说明:⽤双击控件的⽅法获得的控件⼤⼩是⼀致的,⽽且vB⾃动给第⼀个同名控件起名为“控件1”,第⼆个同名控件为“控件2”,依次类推。
⽤单击控件的⽅法,然后再在窗体上画控件,会导致控件⼤⼩不⼀,但vB还是⾃动给第⼀个同名控件起名为“控件l”,,第⼆个同名控件为“控件2”,依次类推。
为了能单击⼀次控件图标即可在窗体上画出多个相同类型的控件,可按如下步骤操作:按下Ctrl键,不要松开。
单击⼯具箱中想要画的控件图标,然后松开Ctrl键。
⽤前⾯介绍的⽅法在窗体上画出控件(可以画⼀个或多个)。
画完(⼀个或多个)后,单击⼯具箱中的指针图标(或其它图标)。
2、改变窗体上控件的⼤⼩选中控件,放置在窗体上的控件周围有⼋个⼩⽅块,这⼋个⼩⽅块⽤于改变窗体上控件的⼤⼩,故也称作尺⼨控制⼿柄。
把⿏标指针移到任何⼀个⼩⽅块上,待⿏标指针变成—个双向箭头时,移动⿏标就能改变窗体上控件的⼤⼩了。
3、移动窗体上的控件把⿏标指针移到控件上,拖曳⿏标,就能移动窗体上的控件。
vb中各个控件的作用
vb中各个控件的作用在VB(Visual Basic)中,控件是应用程序的可视化元素,用于与用户进行交互。
每个控件都有不同的功能和作用,下面我将介绍一些常见VB控件的作用:1. Label控件:用于显示静态文本或说明信息。
Label控件通常用于显示不需要用户输入或交互的文本内容。
2. TextBox控件:用于接收用户输入的文本数据。
用户可以在TextBox控件中输入文本,以便应用程序对其进行处理和使用。
3. Button控件:用于触发特定操作或执行特定功能的按钮。
当用户点击Button 控件时,相应的事件将被触发,从而执行相应的代码。
4. ComboBox控件:提供了一个下拉列表,用户可以从中选择一个选项。
ComboBox控件通常用于提供限定的选择范围,让用户从中选择一个选项。
5. ListBox控件:提供了一个列表,用户可以从中选择一个或多个选项。
与ComboBox控件不同,用户可以直接在列表中进行选择。
6. CheckBox控件:提供了一个选择框,用户可以在多个选项中进行选择。
CheckBox控件通常用于表示二进制的选择,例如勾选或取消勾选一个选项。
7. RadioButton控件:提供了一组互斥的选项,只能选择其中的一个选项。
RadioButton控件通常用于表示互斥的选择,例如选择性别男或女。
8. PictureBox控件:用于显示图像、图标或其他图形。
PictureBox控件可以加载图像文件,并在应用程序中显示出来。
9. Timer控件:计时器控件,可用于在应用程序中生成定时事件。
通过设置定时器的时间间隔和相应事件的处理程序,可以实现定时执行某些操作的功能。
10. Menu控件:提供了一个菜单栏,用于组织和呈现应用程序的不同功能和选项。
用户可以通过点击菜单项来执行相应的功能。
以上是一些常见的VB控件及其作用。
掌握这些控件的使用方法,可以帮助开发人员创建功能完善、交互性强的VB应用程序。
VB第七章测试题

VB第七章测试题Visual Basic 6.0第七章测试题⼀、填空题1、⽂件管理控件有___________,__________,___________。
2、⽤于连接驱动器个数的属性是_________。
3、在⽬录列表框控件中,返回当前⽬录中⼦⽬录个数的属性是_________,返回当前路径的索引的属性是_________。
当前展开的⽬录⽤索引值_____表⽰。
当前展开⽬录以下的⽬录范围是___________ 。
4、在⽂件列表框控件中返回是否在⽂件列表框控件中进⾏复选的属性是__________。
5、当在⽂件列表中单击⼀个⽂件时发⽣_______事件。
6、⽂件访问的类型有3种:________,_______,_________。
7、顺序⽂件中记录的长度是_______的,随机⽂件中记录的长度是______的。
8、打开顺序⽂件的⽅式有三种,分别是_______,_______,______。
9、⽂件号取值范围是______________。
10、缓冲区⼤⼩不超过________字节,默认______字节。
11、关闭顺序⽂件的语句是_________。
12、在顺序⽂件中⽤来测试⽂件⼤⼩的函数是______。
13、⽤来测试⽂件末尾的函数是________。
14、定义记录类型的语句是_______。
15、打开随机⽂件时,应选择__________ ⼦句。
16、对随机⽂件进⾏读写分4个步骤:_______________,____________________,______________________,______________________________。
17、在随机⽂件中,将记录读⼊变量的语句是________,将变量写⼊记录的语句是_________。
18、FSO对象模型包含在____________类型库中。
要引⽤该对象可选择_______菜单中的_______命令。
19、若要访问⼀个已有的驱动器、⽂件夹和⽂件,可以使⽤___________________对象中的_________,_________,_________⽅法。
第7章 Visual Basic 6.0 常用控件的属性、事件和方法

7.1.1 命令按钮控件的常用属性
命令按钮控件的常用属性有: 命令按钮控件的常用属性有: Caption属性: 属性: 属性 Default属性和 属性和Cancel属性: 属性: 属性和 属性 Enabled属性: 属性: 属性 Value属性: 属性: 属性 Picture属性和 属性和Style属性: 属性: 属性和 属性
7.4.2
列表框控件和组合框控件的常用事件
列表框控件和组合框控件的常用事件主要包括: 列表框控件和组合框控件的常用事件主要包括: Click事件: 事件: 事件 DbClick事件: 事件: 事件
7.4.3
列表框控件和组合框控件的常用方法
列表框控件和组合框控件的常用方法主要包括: 列表框控件和组合框控件的常用方法主要包括: 1.AddItem方法 . 方法 2.RemoveItem方法 . 方法
7.5.1 框架控件的简介
框架控件主要是为其他控件提供分组的功能, 框架控件主要是为其他控件提供分组的功能,框架控 件的主要属性就是Caption属性,用来设置标识框架的标题 属性, 件的主要属性就是 属性 文本。 文本。 如果希望将已经存在的若干控件放在某个框架中, 如果希望将已经存在的若干控件放在某个框架中,可 以先选择所有控件,剪贴到剪贴板上, 以先选择所有控件,剪贴到剪贴板上,然后选定框架控件并 将复制的控件粘贴到框架上(不能直接拖动到框架中); );用 将复制的控件粘贴到框架上(不能直接拖动到框架中);用 户也可以先添加框架,然后选中框架, 户也可以先添加框架,然后选中框架,再在框架中添加其他 控件,这样在框架中建立的控件和框架形成一个整体, 控件,这样在框架中建立的控件和框架形成一个整体,可以 同时被移动、删除。 同时被移动、删除。
VisualBasic控件的使用
使⽤ ADO Data 控件 ADO Data 控件使⽤ Microsoft ActiveX 数据对象(ADO) 来快速建⽴数据绑定的控件和数据提供者之间的连接。
数据绑定控件是任何具有“数据源”属性的控件。
数据提供者可以是任何符合 OLE DB 规范的数据源。
使⽤Visual Basic 的类模块也可以很⽅便地创建⼦集的数据提供者。
尽管可以在应⽤程序中直接使⽤ ActiveX 数据对象,但 ADO Data 控件有作为⼀个图形控件的优势(具有“向前”和“向后”按钮),以及⼀个易于使⽤的界⾯,使您可以⽤最少的代码创建数据库应⽤程序。
在 Visual Basic 的“⼯具箱”中,不少控件都可以作为数据绑定的控件,包括复选框、组合框、图像、标签、列表框、图⽚框以及⽂本框控件等。
此外,Visual Basic 还包括了若⼲种数据绑定的 ActiveX 控件,诸如DataGrid、DataCombo、Chart以及 DataList 控件等。
⽤户也可以创建⾃⼰的数据绑定的 ActiveX 控件,或从其他开发商购买控件。
Visual Basic以前的版本提供了内在的 Data 控件和 Remote Data 控件(RDC) 来进⾏数据访问。
这两种控件仍包括在Visual Basic 中,以提供向后兼容。
不过,因为 ADO 的适应性更⼴,因此建议⽤户使⽤ ADO Data 控件来创建新的数据库应⽤程序。
详细信息关于数据绑定的控件的完整列表位于“绑定到 ADO Data 控件的控件”中。
要了解如何使⽤这些内在的Data 控件或 Remote Data 控件,请参阅“使⽤ Data 控件”或“使⽤ Remote Data 控件”。
关于创建数据提供者的详细信息,请参阅“创建数据识别类”。
可能的⽤法 连接⼀个本地数据库或远程数据库。
打开⼀个指定的数据库表,或定义⼀个基于结构化查询语⾔ (SQL) 的查询、或存储过程、或该数据库中的表的视图的记录集合。
VB第7章 常用控件
教案讲稿第七章常用控件[旧课复习]:复习内容:1. 一维数组求和,求平均等2. 复习列表框组合框,为控件做准备复习目的:巩固一维数组,二维数组的应用复习时长:大约5分钟[新课导入]:导入方式:通过复习列表框引入本章节的常用控件,列举常用控件在日常软件中的使用方法。
导入目的:增强学生的学习积极性导入时长:大约5分钟[新课讲授]:重点:各种常用控件(单选按钮、复选框、滚动条、计时器)难点:计时器的应用(Interval属性,Timer事件)方法:运用多媒体辅助教学,采用案例教学和任务驱动等教学法。
7.1单选按钮单选按钮又称为选项按钮(OptionButton),单选按钮一般总是作为一个按钮组来完成工作的。
单选按钮组是一组相互排斥的选项按钮,在一般情况下,在单选按钮组中一次只能选择一个选项,如果一次要选择多个单选按钮,可以使用框架控件把单选按钮分组。
单选按钮的主要属性有:1.Caption属性:单选按钮的文本内容。
2.Value属性:单选按钮是否被选中的属性。
如果将该值为True或-1,单选按钮被选中,如果将该值为False或0,单选按钮未被选中。
3.Style属性:单选按钮的外观。
该值取0时,是标准的Windows风格;取1时,是图形风格。
单选按钮的事件:Click事件:单击单选按钮时触发该事件。
1.使用单选按钮控件【例7.1】设计一个简易血型选择器,用户界面如图7-1所示,由四个单选按钮和一个命令按钮以及一个文本框组成。
选中血型后单击“选择”按钮,结果显示在文本框中。
图7-1 简易血型选择器设计步骤如下:(1)建立应用程序用户界面。
(2)编写代码编写命令按钮Commandl的Click事件代码:Private Sub Command1_Click()If Option1.Value = True Then Text1.Text = "您是O型血"If Option2.Value = True Then Text1.Text = "您是A型血"If Option3.Value = True Then Text1.Text = "您是B型血"If Option4.Value = True Then Text1.Text = "您是AB型血"End Sub7.2 复选框复选框(CheckBox)可以从多个选择中选择一个或多个选项。
visual basic 2012 大学教程(第7章下)

7.13. Searching a Sorted Array with Array Method BinarySearchLinear searches work well for small or unsorted arrays, but, for large unsorted arrays, linear searching is inefficient. If the array is sorted, the high-speed binary search technique can be used with class Array’s BinarySearch method. Our app that demonstrates method BinarySearch is nearly identical to the one in Fig. 7.14, so we show only the differences here. The complete code is located in the Fig07_15 folder with this chapt er’s examples. The sample outputs are shown in Fig. 7.15. The GUI for this app is identical to the one in Fig. 7.13.a) Creating random values to searchb) Searching for a value that is in the arrayc) Searching for a value that is not in the arrayFig. 7.15. Binary search of an array.As in Fig. 7.14, the user clicks the Create Data Button to generate random values. For method BinarySearch to perform correctly, the array must have been sorted. Method createDataButton_Click uses the following call to Array method Sort before displaying the values in the dataListBox:Array.Sort(searchData) ' sort array to enable binary searchingIn method searchButton_Click, we replaced lines 40–48 of Fig. 7.14 withDim index As Integer = Array.BinarySearch(searchData, searchKey)which uses Array method BinarySearch to perform a binary search for a key value. The method receives two arguments—the sorted integer array searchData (the array to search) and integer searchKey (the search key). If the value is found, method BinarySearch returns the index of the search key; otherwise, it returns a negative number.7.14. Rectangular ArraysThe arrays we’ve studied so far are one-dimensional arrays—they contain a list of values and use only one index to access each element. In this section, we introduce multidimensional arrays, which require two or more indices to identify particular elements. We concentrate on two-dimensional arrays—also known as rectangular arrays—which are often used to represent tables of values consisting of data arranged in rows and columns (Fig. 7.16). Each row is the same size, and each column is the same size (hence the term ―rectangular‖). To identify a particular table element, we specify two indices—by convention, the first identifies the element’s row, the second the element’s column. Figure 7.16 illustrates a rectangular array, a, containing three rows and four columns. A rectangular array with m rows and n columns is called an m-by-n array; the array in Fig. 7.16 is a 3-by-4 array.Fig. 7.16. Two-dimensional array with three rows and four columns.Every element in array a is identified in Fig. 7.16 by an element name of the form a(i, j), where a is the name of the array and i and j are the indices that uniquely identify the row and column, respectively, of each element in array a. Array indices are zero based, so the names of the elements in row 0 all have a first index of 0; the names of the elements in column 3 all have a second index of 3.Declaring and Initializing Rectangular ArraysA two-dimensional rectangular array numbers with two rows and two columns can be declared and initialized withClick here to view code imageDim numbers(1, 1) As Integer' numbers in a 2 by 2 arraynumbers(0, 0) = 1' leftmost element in row 0numbers(0, 1) = 2' rightmost element in row 0numbers(1, 0) = 3' leftmost element in row 1numbers(1, 1) = 4' rightmost element in row 1Alternatively, the initialization can be written on one line, as shown with and without local type inference below:Click here to view code imageDim numbers = {{1, 2}, {3, 4}}Dim numbers(,) As Integer = {{1, 2}, {3, 4}}In the second declaration, the comma in (,) indicates that numbers is a two-dimensional array. The values are grouped by row in braces, with 1 and 2 initializing numbers(0, 0) and numbers(0, 1), respectively, and 3 and 4 initializing numbers(1, 0) and numbers(1, 1), respectively. The compiler determines the number of rows by counting the number of sub-initializer lists (represented by the sets of data in curly braces) in the main initializer list. Then the compiler determines the number of columns in each row by counting thenumber of initializer values in the subinitializer list for that row. The subinitializer lists must have the same number of elements for each row.Manipulating a Rectangular ArrayThe app in Fig. 7.17 initializes rectangular array values and uses nested For...Next loops to traverse the array (that is, to manipulate every array element). The contents of the array are displayed in outputTextBox.Click here to view code image1' Fig. 7.17: RectangularArray.vb2' Initializing and displaying a rectangular array.3Public Class RectangularArray4' display the contents of a rectangular array5Private Sub RectangularArray_Load(sender As Object,6 e As EventArgs) Handles MyBase.Load78Dim values(,) As Integer = {{1, 2, 3}, {4, 5, 6}}910' output elements of the values array11For row = 0To values.GetUpperBound(0)12For column = 0To values.GetUpperBound(1)13 outputTextBox.AppendText(values(row, column) & vbTab)14Next column1516 outputTextBox.AppendText(vbCrLf)17Next row18End Sub' RectangularArray_Load19End Class' RectangularArrayFig. 7.17. Initializing and displaying a rectangular array.The app declares rectangular array values (line 8) and uses an initializer list to determine the number of rows, number of columns and initial values of the array’s elements. The initializer list contains two sublists. The number of sublists determines the number of rows in the array. The compiler uses the number of elements in the first sublistto determine the number of columns in each row. All subsequent sublists must have the same number of initializers as the first sublist; otherwise, a compilation error occurs. The first sublist initializes row 0 of the array to the values 1, 2 and 3; the second sublist initializes row 1 of the array to the values 4, 5 and 6.The nested For...Next statements in lines 11–17 display the elements of rectangular array values. The outer For...Next statement traverses the rows; the inner For...Next statement traverses the columns within a row. Each For...Next statement calls method GetUpperBound to obtain the upper bound of the dimension it traverses. GetUpperBound with the argument 0 (line 11) returns the number of rows. GetUpperBound with the argument 1 (line 12) returns the number of columns in each row.7.15. Case Study: Maintaining Grades Using a Rectangular ArrayWe now present a substantial case study using rectangular arrays. Consider the following problem statement:An instructor gives three tests to a class of 10 students. The grades on thesetests are integers in the range from 0 to 100. The instructor has asked you todevelo p an app to keep track of each student’s average and the class average.The instructor has also asked that there be a choice to view the grades as eithernumbers or letters. Letter grades should be calculated according to thefollowing grading system:Th e app should allow a user to input each student’s three test grades, thencompute each student’s average and the class average for all grades entered sofar. The app should display numeric grades by default. It should also display agrade distribution chart showing how many of the numeric grades fall into theranges 0–9, 10–19, ... 90–99 and 100.We’ll use a rectangular array with 10 rows and three columns to store the student grades. This app uses most of the programming concepts you’ve learned up to now i n this book. Figure 7.19 shows sample outputs for the Grade Report app.a) Grade Report window after the user has enter ed the first student’s grades and isabout to submit them.b) Grade Report window after five students’ grades have been entered.c) Grade Report window after the user has entered all 10 students’ grades.d) Grade Report window after the user has ente red all 10 students’ grades andclicked the Letter RadioButton to display letter grades.Fig. 7.18. Sample outputs for the Grade Report app.GUI for the Grade Report AppFigure 7.19 presents the GUI for the Grade Report app. In this app, we introduce RadioButton controls to allow the user to select between displaying grades in numeric or letter format. A RadioButton is a small white circle that either is blank or contains a small dot. When a RadioButton is selected, a dot appears in the circle. A RadioButton is known as a state button because it can be in only the ―on‖ (True) state or the ―off‖ (False) state. You’ve previously used the CheckBox state buttons (introduced in Chapter 5).Fig. 7.19. GUI for the Grade Report appRadioButton s are similar to CheckBox es, but RadioButton s normally appear as a group—only one RadioButton in the group can be selected at a time. Like car radio preset buttons, which can select only one station at a time, RadioButton s represent a setof options in which only one option can be selected at a time—also known as mutually exclusive options. By default, all RadioButton s become part of the same group. To separate them into several groups, each group must be in a different container (typically a GroupBox).A RadioButton’s Boolean Checked property indicates whether the RadioButton is checked (contains a small dot) or unchecked (blank). If the RadioButton is checked, the Checked property returns True; otherwise, it returns False.A RadioButton also generates an event when its checked state changes. Event CheckedChanged occurs when a RadioButton is either selected or deselected. We use this event to switch between the numeric grade and letter grade views in the gradesListBox.Grade Report AppOver the next several figures we’ll discuss the Grade Report app’s code. Due to the size of this app, we’ve split the source code into several small figures.Figure 7.20 declares class GradeReport’s instance variables and Load event handler. The rectangular array grades (line 4) has 10 rows and 3 columns to store the grades for 10 students and three exams per student. Variable studentCount (line 5) keeps track of the number of students processed so far. After 10 students are processed, the app disables the input TextBox es and Submit Button. The GradeReport_Load event handler (lines 8–13) displays the column heads in the gradesListBox.Click here to view code image1' Fig. 7.20: GradeReport.vb2' Grade report using a rectangular array.3Public Class GradeReport4Dim grades(9, 2) As Integer' stores 10 students' grades on 3 tests5Dim studentCount As Integer = 0' number of students entered67' display heading in gradeListBox8Private Sub GradeReport_Load(sender As Object,9 e As EventArgs) Handles MyBase.Load10' headings row for gradesListBox11 gradesListBox.Items.Add(vbTab & vbTab & "Test 1" & vbTab &12"Test 2" & vbTab & "Test 3" & vbTab & "Average")13End Sub14Fig. 7.20. Grade Report app: Instance variables and method GradeReport_Load. Method submitButton_ClickWhen the user enters three grades, then presses the Submit Button, method submit-Button_Click (Fig. 7.21) processes the three grades and displays the current class average and a bar chart showing the grade distribution for all grades entered so far. Lines 20–22 get the three grades from the TextBox es and assign them to the elements of the grades array in row studentCount. Lines 25–37 build a String representing the current student’s grades and average. Lines 28–37 loop through the current row of the grades array and append either a letter grade or numeric grade, based on whether the letterRadioButton’s Checked property is True. If so, line 32 calls method LetterGrade to get the letter representation of the numeric grade. Otherwise, line 35 appends the numeric grade. Line 40 calls method CalculateStudentAverage to obtain the current student’s average for the three exams.Click here to view code image15' process one student's grades16Private Sub submitButton_Click(sender As Object,17 e As EventArgs) Handles submitButton.Click1819' retrieve the student's grades20 grades(studentCount, 0) = Convert.ToInt32(test1TextBox.Text)21 grades(studentCount, 1) = Convert.ToInt32(test2TextBox.Text)22 grades(studentCount, 2) = Convert.ToInt32(test3TextBox.Text)2324' begin creating String containing the student's grades and average 25Dim output As String = "Student " & studentCount & vbTab2627' append each test grade to the output28For column = 0To grades.GetUpperBound(1)29' if the Letter RadioButton is checked30If letterRadioButton.Checked = True Then31' append letter grade to the output32 output &= vbTab & LetterGrade(grades(studentCount, column))33Else34' append number grade to the output35 output &= vbTab & grades(studentCount, column)36End If37Next3839' append the student's test average to the output40 output &= vbTab & CalculateStudentAverage(studentCount)4142 gradesListBox.Items.Add(output) ' add output to the ListBox43 studentCount += 1' update number of students entered44 averageLabel.Text = CalculateClassAverage() ' display class average45 DisplayBarChart() ' display the current grade distribution4647' clear the input TextBoxes and set focus to first TextBox48 test1TextBox.Clear()49 test2TextBox.Clear()50 test3TextBox.Clear()51 test1TextBox.Focus()5253' limit number of students54If studentCount = grades.GetUpperBound(0) + 1Then55 inputGroupBox.Enabled = False' disable GroupBox's controls56End If57End Sub' submitButton_Click58Fig. 7.21. Grade Report app: Method submitButton_Click.Line 42 displays the information for the current student. Line 43 updates the student count. Line 44 and 45 call the methods CalculateClassAverage and DisplayBarChart to determine the current class average and to display a grade distribution chart based on the grades that have been entered so far. Lines 48–51 prepare the user interface to receive the next student’s grades by clearing the TextBox es and giving the focus to the test1-TextBox. Finally, lines 54–56 check whether grades have been entered for 10 students. If so, line 55 sets the inputGradeGroupBox’s Enabled property to False, which disables all the controls in the GroupBox, preventing the user from entering more grades.Method RadioButton_CheckChanged: Handling Multiple Events with One Event HandlerAt any time, the user can select the Numeric or Letter RadioButton to change how the grades are displayed in the gradesListBox. When the selected RadioButton changes, method RadioButton_CheckedChanged (Fig. 7.22) is called. In this example, we handle both RadioButton’s CheckedChanged events with the same event handler. To do this, double click the Numeric RadioButton, then rename the event handler to RadioButton_Checked-Changed. Next, add letterRadioButton.CheckedChanged to the Handles clause of the event handler (lines 62–63). Now this method is called when the CheckChanged event occurs for either RadioButton. In this case, as long as at least one student has been processed, line 67 calls method DisplayGrades to update the presentation of the grades in gradesListBox.Click here to view code image59' handles Numeric and Letter RadioButtons' CheckChanged events60Private Sub RadioButton_CheckedChanged(sender As Object,61 e As EventArgs) _62Handles numericRadioButton.CheckedChanged,63 letterRadioButton.CheckedChanged6465' if there are grades to display, call DisplayClassGrades66If studentCount > 0Then67 DisplayClassGrades()68End If69End Sub' RadioButton_CheckedChanged70Fig. 7.22. Grade Report app: Method RadioButton_CheckedChanged. Method CalculateStudentAverageMethod CalculateStudentAverage (Fig. 7.23) processes one row of the grades array to determine the corresponding s tudent’s average. The method returns a String containing either the letter grade for that student’s average or the numeric value, depending on whether the letterRadioButton’s Checked property is True.Click here to view code image71' calculates a student's test average72Function CalculateStudentAverage(row As Integer) As String73Dim gradeTotal As Integer = 0' student's total grade7475' sum the grades for the student76For column = 0To grades.GetUpperBound(1)77 gradeTotal += grades(row, column)78Next7980Dim studentAverage As String = String.Empty' output string8182' calculate the student's test average83If letterRadioButton.Checked = True Then84 studentAverage =85 LetterGrade(gradeTotal / (grades.GetUpperBound(1) + 1))86Else87 studentAverage = String.Format("{0:F}",88 (gradeTotal / (grades.GetUpperBound(1) + 1)))89End If9091Return studentAverage ' return the student's average92End Function' CalculateStudentAverage93Fig. 7.23. Grade Report app: Method CalculateStudentAverage. Method CalculateClassAverageMethod CalculateClassAverage (Fig. 7.24) processes the grades array to determine the class average for all the grades entered so far. The method returns a String containing either the letter grade for the class average or the numeric value, depending on whether the letterRadioButton’s Checked property is True.Click here to view code image94' calculates the class average95Function CalculateClassAverage() As String96Dim classTotal As Integer = 0' class's total grade9798' loop through all rows that currently contain grades99For row = 0To studentCount - 1100' loop through all columns101For column = 0To grades.GetUpperBound(1)102 classTotal += grades(row, column) ' add grade to total103Next column104Next row105106Dim classAverage As String = String.Empty' output string107108' if the Letter RadioButton is checked, return letter grade109If letterRadioButton.Checked = True Then110 classAverage = LetterGrade(classTotal /111 (studentCount * (grades.GetUpperBound(1) + 1)))112Else' return numeric grade113 classAverage = String.Format("{0:F}", (classTotal /114 (studentCount * (grades.GetUpperBound(1) + 1))))115End If116117Return classAverage ' return the class average118End Function' CalculateClassAverage119Fig. 7.24. Grade Report app: Method CalculateClassAverage.Method LetterGradeMethod LetterGrade (Fig. 7.25) receives a numeric grade and returns the corresponding letter grade as a String.Click here to view code image120' determines a letter grade corresponding to a numeric grade121Function LetterGrade(grade As Double) As String122Dim output As String' the letter grade to return123124' determine the correct letter grade125Select Case grade126Case Is >= 90127 output = "A"128Case Is >= 80129 output = "B"130Case Is >= 70131 output = "C"132Case Is >= 60133 output = "D"134Case Else135 output = "F"136End Select137138Return output ' return the letter grade139End Function' LetterGrade140Fig. 7.25. Grade Report app: Method LetterGrade.Method DisplayClassGradesMethod DisplayClassGrades (Fig. 7.26) displays the student grades and averages in the gradesListBox. Line 143 clears the ListBox’s current contents and lines 146–147 display the column heads in the ListBox. Lines 150–169 processes the grades array to display all the grades entered so far, displaying letter grades if letterRadioButton’s Checked property is True. Line 172 updates the class average and displays the result in averageLabel.Click here to view code image141' display the grades for all students entered142Sub DisplayClassGrades()143 gradesListBox.Items.Clear() ' clear the ListBox144145' add the header to the ListBox146 gradesListBox.Items.Add(vbTab & vbTab & "Test 1" & vbTab &147"Test 2" & vbTab & "Test 3" & vbTab & "Average")148149' loop through all the rows150For row = 0To studentCount - 1151Dim output As String = "Student " & row & vbTab152153' loop through all the columns154For column = 0To grades.GetUpperBound(1)155If letterRadioButton.Checked = True Then156' add letter grade to output string157 output &= vbTab & LetterGrade(grades(row, column))158Else159' add number grade to output string160 output &= vbTab & (grades(row, column))161End If162Next column163164' add the student's average to the output165 output &= vbTab & CalculateStudentAverage(row)166167' add the output to the ListBox168 gradesListBox.Items.Add(output)169Next row170171' update the class average172 averageLabel.Text = CalculateClassAverage()173End Sub' DisplayClassGrades174Fig. 7.26. Grade Report app: Method DisplayClassGrades.Method DisplayBarChartMany apps present data to users in a visual or graphical format. For example, numeric values are often displayed as bars in a bar chart. In such a chart, longer bars represent proportionally larger numeric values (see Fig. 7.18). Method DisplayBarChart (Fig. 7.27) displays a graphical summary of the grade distribution by creating a bar chart that shows how many numeric grades fall into each of the ranges 0–9, 10–19, ... 90–99 and 100. Click here to view code image175' display a bar chart of the grade distribution176Sub DisplayBarChart()177 barChartListBox.Items.Clear() ' remove current items178179' stores frequency of grades in each range of 10 grades180Dim frequency(10) As Integer181182' for each grade, increment the appropriate frequency183For row = 0To studentCount - 1184For column = 0To grades.GetUpperBound(1)185 frequency(grades(row, column) \ 10) += 1186Next column187Next row188189' for each grade frequency, display bar of asterisks190For count = 0 To frequency.GetUpperBound(0)191Dim bar As String' stores the label and bar192193' create bar label ( "00-09: ", ..., "90-99: ", "100: " )194If count = 10Then195 bar = String.Format("{0, 5:D}: ", 100)196Else197 bar = String.Format("{0, 2:D2}-{1, 2:D2}: ",198 count * 10, count * 10 + 9)199End If200201' append bar of asterisks202For stars = 1To frequency(count)203 bar &= ("*")204Next205206 barChartListBox.Items.Add(bar) ' display bar207Next count208End Sub' DisplayBarChart209End Class' GradeReportFig. 7.27. Grade Report app: Method DisplayBarChart.Lines 180–187 summarize the number of grades in each range using the elements of the 11-element array frequency. Next, lines 190–207 build a String containing the range of values represented by the current bar (lines 194–199) and a bar of asterisks representing the number of grades that fall into that range (lines 202–204). Line 206 then displays this String in the barCharListBox. The format String s in lines 195 and 197 use field widths to control the number of characters in which each value is output. The format specifier {0, 5:D} (line 195) indicates that an integer value will be displayed in a field of 5 characters right justified by default. So, if the number contains fewer than 5 characters, it will be preceded by an appropriate number of spaces. The format specifier {0, 2:D2} (line 197) indicates that an integer will be displayed in a field of 2 characters. The D2 forces the number to use two character positions—single digit numbers are preceded by a leading 0.7.16. Resizing an Array with the ReDim StatementAn array’s size cannot be changed, so a new array must b e created if you need to change the size of an existing array. The ReDim statement ―resizes‖ an array at execution time by creating a new array and assigning it to the specified array variable. The old array’s memory is eventually reclaimed by the runtime. Figure 7.28 demonstrates the ReDim statement.Click here to view code image1' Fig. 7.28: ReDimTest.vb2' Resize an array using the ReDim statement.3Public Class ReDimTest4' demonstrate ReDim5Private Sub ReDimTest_Load(sender As Object,6 e As EventArgs) Handles MyBase.Load78' create and initialize two 5-element arrays9Dim values1() As Integer = {1, 2, 3, 4, 5}10Dim values2() As Integer = {1, 2, 3, 4, 5}1112' display array length and the elements in array13 outputTextBox.AppendText(14"The original array has " & values1.Length & " elements: ")15 DisplayArray(values1)1617' change the size of the array without the Preserve keyword18ReDim values1(6)1920' display new array length and the elements in array21 outputTextBox.AppendText("New array (without Preserve) has " &22 values1.Length & " elements: ")23 DisplayArray(values1)2425' change the size of the array with the Preserve keyword26ReDim Preserve values2(6)27 values2(6) = 7' assign 7 to array element 62829' display new array length and the elements in array30 outputTextBox.AppendText("New array (with Preserve) has " &31 values2.Length & " elements: ")32 DisplayArray(values2)33End Sub3435' display array elements36Sub DisplayArray(array() As Integer)37For Each number In array38 outputTextBox.AppendText(number & " ")39Next4041 outputTextBox.AppendText(vbCrLf)42End Sub' DisplayArray43End Class' ReDimTestFig. 7.28. Resize an array using the ReDim statement.Line 9 creates and initializes a five-element array values1. Line 10 creates a second array named values2 containing the same data. Lines 13–15 display the size and elements of values1. Line 18 uses a ReDim statement to change the upper bound of values1 to 6, so that the array now contains seven elements. The ReDim statement contains keyword ReDim, followed by the name of the array to be "resized" and the new upper bound in parentheses. Lines 21–23 then display the size and elements of values1 again. The output of Fig. 7.28 shows that after the ReDim statement executes, the size of values1 is changed to 7 and the value of each element is reinitialized to the default value of the type of the array element (that is, 0 for Integer s). To save the original data stored in an array, follow the ReDim keyword with the optional Preserve keyword. Line 26 uses Preserve in the ReDim statement to indicate that the existing array elements are to be preserved in the now larger array after the array is resized. If the new array is smaller than the original array, the existing elements that are outside the bounds of the new array are discarded. If the new array is larger than the original array, all the existing elements are preserved in the now larger array, and the extra elements are initialized to the default value of the type of the array element. For example, after line 26 executes, the value of values2(5) is 0. Line 27 assigns the value 7 to values2(6), so that the now larger array values2 contains elements 1, 2, 3, 4, 5, 0 and 7. Lines 30–32 display the size and elements of values2.7.17. Wrap-UpThis chapter began our discussion of data structures, using arrays to store data in and retrieve data from lists and tables of values. We demonstrated how to declare an array, initialize an array and refer to individual elements of an array. We showed how to pass arrays to methods. We discussed how to use the For Each...Next statement to iterate。
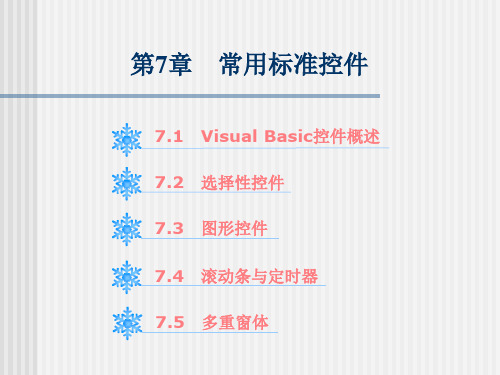
第7章 常用标准控件
7.3.2
图像框
Image控件使用较少的系统资源,重新绘图比PictureBox控 件要快,但仅支持图片框的一部分属性、事件和方法。图 像框控件中可以伸展图片的大小使之适合控件的大小,而 图片框控件不能这样做。可以把Image控件放在容器里, 但是Image控件不能作为容器使用。 1. 常用属性 ①Picture属性 ②stretch属性
例7.7 设计一个窗体,利用图像框显示图形,当单击窗 体时显示图形,且图形被拉伸到与图像框大小相等的状 态;当双击窗体时清除图形。
7.3.3
直线与形状
1. 直线控件 ①BorderWidth属性:设置直线的宽度。 ②BorderStyle属性:设置直线的线型。取值为0~6,其中0 -Transparent表示透明,即看不见;1-Solid表示实线, 这是默认设置;2-Dash表示虚线;3-Dot表示点线;4 -Dash-Dot表示点划线;5-Dash-Dot-Dot表示双点划线; 6-Inside Solid表示内实线。 ③BorderColor属性:设置直线的颜色。 ④X1,X2,Y1,Y2属性:控制线的两个端点的位置。
7.1.2
默认属性与公共属性
1. 标准控件的默认属性 名称属性 默认属性
2. 常见的公共属性 ①名称属性 ②Visible属性 ③Caption属性 ④Left、Top、Width、Height属性 ⑤Enabled属性 ⑥ForeColor属性 ⑦BackColor属性 ⑧FontName、FontSize、FontBold、Fontltalic、 FontStrikethru、FontUnderline属性 ……
LoadPicture([filename], [size], [colordepth], [x, y])
- 1、下载文档前请自行甄别文档内容的完整性,平台不提供额外的编辑、内容补充、找答案等附加服务。
- 2、"仅部分预览"的文档,不可在线预览部分如存在完整性等问题,可反馈申请退款(可完整预览的文档不适用该条件!)。
- 3、如文档侵犯您的权益,请联系客服反馈,我们会尽快为您处理(人工客服工作时间:9:00-18:30)。
第7章 Visual Basic控件及其应用VB是一种可视化的程序设计语言,即对于图形界面的设计,不需要编写大量的代码,只需选用并为每个对象设置属性。
因此,控件在VB程序设计中扮演这及其重要的角色。
VB 控件可分为标准控件、ActiveX控件和可插入对象3类,在第3章中已介绍了标签、文本框和命令按钮3种控件,本章将进一步介绍其他常用控件。
学习目标:●单选按钮、复选按钮、列表框的设置和使用●计时器、图片框和滚动条的设置和使用。
●通用对话框的设置和使用。
7.1 单选按钮、复选按钮及框架在实际编程中,有时会遇到一些开关或功能选项要求用户做出选择,或要求用户在一个小围对某些参数做出选择等。
为此,VB提供了单选按钮、复选按钮及框架来实现上述功能。
7.1.1 单选按钮单选按钮(OptionButton)控件也称为选项按钮,常被成组选用,用于实现多选一的情况。
在一组单选按钮中,仅有一个单选按钮会被选中(出现黑点)。
选中某项后,该组中的其他单选按钮均处于未选中状态,这是单选按钮与复选按钮的主要区别,也是单选按钮名称的由来。
1.单选按钮的常用属性(1)Value属性Value属性用于返回或设置单选按钮是否有效的选中状态,其取值为True或False。
若属性值为True,则表示该单选按钮处于被选中状态;若为False,则处于未选中状态。
运行时,可以通过该属性检查单选按钮的选中状态,还可以通过赋值语句修改Value属性值,以改变单选按钮的选中状态。
(2)Enabled属性Enabled属性用于设置单选按钮是否有效(可操作))。
属性值为True表示有效,为False 为无效,单选按钮禁止使用并显示为灰色。
(3)Style属性Style属性用于设置单选按钮的样式,其值有0和1两种。
若设置为0,则为标准样式(默认值);若设置为1,则为图形化的单选按钮,此时可在单选按钮上同时显示文字和图像,这一点类似于图形化命令按钮。
(4)Picture属性Picture属性用于设置单选按钮要显示的图像。
该属性只有在Style属性值为1时有效。
(5)Caption属性Caption属性用于设置单选按钮旁的说明文字。
2.单选按钮事件和方法单选按钮能响应的事件有Click、GotFocus、MouseMove、MouseDown、MouseUp、KeyDown、KeyUp和KeyPress。
实际编程中最常用的事件是Click事件。
单选按钮支持的方法较少,常用的有SetFocus、Refresh和Move。
3.单选按钮应用(例7.1)【例7.1】利用单选按钮控制文本的对齐方式,程序运行界面如图7-1所示。
设计步骤如下:(1)创建新工程,在窗体上添加1个文本框Text1和3个单选按钮控件Option1~Option3。
将Option控件的Caption属性设置为“左对齐”、“居中对齐”和“右对齐”。
将Text1控件的字体(Font)属性设置为“楷体_GB2312”、字形为“粗体”、字号大小为“小三”。
(2)编写3个单选按钮的单击(Click)事件代码。
如图7-2所示(3)编写窗体Form1的装载(Load)事件。
如图7-2所示。
7.1.2 框架框架(Frame)控件有时也称为容器控件,在其部的控件可以随框架一起移动,并且受到框架控件某些属性(如Visible和Enabled)的控制。
框架常与单选按钮配合使用,用于给单选按钮分组。
当不使用框架时,窗体上所有单选按钮将被视为同一组,利用框架可以创建新的按钮组。
使用时应首先添加框架,然后在该框架上绘制单选按钮,即可形成新的按钮组。
1.框架的常用属性框架是一种辅助性控件,功能较单一,因此属性较少。
常用属性主要有以下两种:(1)BorderStyle属性BorderStyle属性决定框架是否有边线,取值为1或0.若该属性设置为0,则框架无边线;若设置为1(默认值),则有凹陷的单边线。
(2)Caption属性Caption属性用于设置框架上显示的标题。
若将该属性设置为空,则框架呈现封闭矩形。
2.框架的应用(例7.2)【例7.2】设计一个程序,用户界面上有两组单选按钮。
一组用来改变文本框字体,一组用来改变文本框的字体大小。
用户界面设计如图7-3所示。
图7-3 使用框架产生两组单选按钮设计步骤如下:(1)创建新工程,在窗体上添加1个文本框Text1,2个框架控件Frame1和Frame2。
在Frame1中绘出单选按钮Option1~Option4(用于选择字体)。
在Frame2中绘出单选按钮Option5~Option8(用于选择字号)。
(2)设置控件属性值。
如图7-3所示。
(3)编写程序代码:如图7-4所示。
图7-4 程序代码7.1.3 复选框复选框(CheckBox)控件相当于一个开关,用来表明选定(On)或者未选定(Off)两种状态。
当复选框被选定时,复选框出现个对号“√”。
单选按钮只能在多项选择中选取其中的一项,若遇到需要同时选择多项的情况,可以采用复选框控件。
1.复选框的常用属性(1)Value属性:用于返回或设置复选框控件的状态。
给属性在设计和运行时均可设置。
,在程序过该属性可获得复选框的状态,其值为以下3种之一。
●0-Unchecked:复选框未被选中。
●1-Checked:复选框被选中。
●2-Grayed:复选框处于半选状态。
(2)Caption属性:用于设置出现在复选框旁边的文字。
(3)Style属性和Picture属性:与单选按钮功能相同。
2.复选框的事件和方法复选框能响应的事件主要有Click、GotFocus、LostFocus、MouseMove、MouseDown、MouseUp、KeyDown、KeyUp和KeyPress。
实际编程中最常用的事件是Click事件。
3.复选框的应用(例7.3)一般情况下,复选框总是成组出现,用户可以从中选择一个或多个选项。
【例7.3】设计一个个人资料输入程序,使用单选按钮组选择性别与民族,使用复选框选择个人爱好,用户单击“确定”按钮后,在信息对话框中显示个人资料信息。
程序运行界面如图7-5所示。
图7-5 复选框的使用编写程序代码如图7-6所示:图7-6 程序代码7.2 列表框与组合框列表框(ListBox)控件和组合框(ComboBox)控件是Windows应用程序常用的控件,主要用于提供一些可供选择的列表项目。
在列表框中,任何时候都能看到多个选项,而在组合框中,通常只能看到一个选项,用鼠标单击其右侧的下拉按钮才能看到多项列表。
列表框采用工具箱中的工具绘制,组合框采用工具绘制。
7.2.1 列表框列表框常用来显示一个项目的列表,用户可从中选择一个选项或多个选项。
如果项目总数超过了列表框的可显示区域,列表框会自动出现滚动条,如图7-所示,这样方便用户以滚动的方式来选择列表项。
图7- 7列表框示意图1.列表框的常用属性(1)Columnsshux属性:指定列表框中的课件列数,默认值为0,这时列表框中不允许显示多列,当该属性值大于或等于1时,列表框中能显示多列。
(2)List属性:该属性是字符串数组。
每个数组元素都是列表框中的一个列表项。
使用该属性能够方便地访问列表框中的项目,例如,有如下语句:Rec1=ListBox1.List(2)该语句表示把列表框ListBox1的第3个元素的容赋给字符串变量Rec1。
List属性既可以在属性栏中设定,也可以由程序语句设置。
(3)ListIndex属性:程序运行时,可以使用ListIndex属性判断列表框中哪个项目被选中。
ListIndex属性用于设置和返回被选中的选项在List数组中的下标序号。
例如,在列表框List1中选中第2项,即List1.List数组的第2项,其ListIndex=1(列表框中的项目下标从0开始)。
如果用户没有从列表框中选择项目,则ListIndex=-1。
(4)ListCount属性:该属性经常与List属性一起使用,表示列表框中有多少个列表项。
(5)Text属性:该属性用于返回被选中列表项的容。
该属性既可以在属性栏中设定,也可以由程序语句设置。
(6)Selected属性:该属性用于返回和设置列表框列表项的选择状态,其属性值为True或False。
表示响应的列表项是否被用户选中,该属性只能在程序中设置。
其语句格式为:列表框名.Selected<列表项序列号>=True |False利用该语句可以选择指定的列表项或取消已选择的列表项。
(7)MultiSelect属性:该属性确定列表框中是否允许选择多项。
其值为0时,表示一次只能选择一项,不能选择多项。
其值为1时,表示允许选择列表框中多个项目,每用鼠标单击一个项目,则该项目被选中。
其值为2时,表示可以选择列表框中否个围的的项目,及可以用在按住【Shift】键的同时单击鼠标选择一组连续排列的项目,或按住【Ctrl】键的同时单击鼠标选择一组不连续排列的项目。
2.列表框的事件和方法(1)列表框常用事件:●DblClick●Click(2)列表框常用方法:AddItem、RemoveItem、Clear●AddItem方法:该方法用于在运行期间向列表框增加一个列表项,其语法格式如下:列表框名.AddItem 要增加的列表项[ ,列表索引号]其中,“列表索引号”是从0开始的顺序号,标明新增列表项添加到列表框中的位置。
若省略该参数,则新增的列表项放在列表框的末尾。
列表项索引号对应于列表框的ListIndex属性,可以通过列表框的ListIndex属性确定所选择的项目。
例如,若要在列表框中第2项位置插入以新列表项,容为“服装部”,语句应为:List1.AddItem “服装部” , 1装入列表项容的语句通常可放在窗体的Load事件过程中完成。
●RemoveItem方法:该方法用于删除列表框中指定的列表项,其语法格式如下:列表框名.RemoveItem 列表项索引号例如,删除列表框List1中的第3项的语句为:List1.RemoveItem 2●Clear方法:该方法用于清除列表框中所有的列表项。
其语法格式如下:列表框名.Clear3.列表框的应用(例7.4)【例7.4】设计一个程序,运行时的窗体如图7-8所示。
窗体中包含两个列表框。
左侧列表框中列出若干省市的名称。
当双击其中的某个省市名称时,这个省市从左侧的列表框中消失,同时出现在右侧的列表框中。
其中,左侧列表框中的省市名称是在程序开始运行时添加到列表框中的。
图7-8对象属性设置窗体Name(名称)Form1 列表框1 Name(名称)List1 列表框2 Name(名称)List2命令按钮Name(名称)Command1 Caption 退出标签1 Name(名称)Label1 Caption 全部省市标签2 Name(名称)Label2 Caption 选中的省市Form_Load事件过程的代码如下:以上过程利用窗体的Load事件实现列表框的初始化。