
用matlab实现夫琅禾费多缝衍射代码
n=3;a=-4*pi:0.01*pi:4*pi;P=1-sin(n*a).^2./sin(a).^2;plot(a,P)lgray=zeros(256,3);for i=0:255lgray(i+1,:)=(255-i)/255;endimagesc(P)colormap(lgray)matlab GUI³ÌÐòÈ«²¿´úÂëfunction varargout = duofengyanshe(varargin)% DUOFENGYANSHE M-file for duofengyanshe.fig% DUOFENGYANSHE, by itself, creates a new DUOFENGYANSHE or raises the existing% singleton*.%% H = DUOFENGYANSHE returns the handle to a new DUOFENGYANSHE or the handle to% the existing singleton*.%%DUOFENGYANSHE('CALLBACK',hObject,eventData,handles,...)calls the local% function named CALLBACK in DUOFENGYANSHE.M with the given input arguments.%% DUOFENGYANSHE('Property','Value',...) creates a new DUOFENGYANSHE or raises the% existing singleton*. Starting from the left, property value pairs are% applied to the GUI before duofengyanshe_OpeningFcn gets called. An% unrecognized property name or invalid value makes property application% stop. All inputs are passed to duofengyanshe_OpeningFcn via varargin.%% *See GUI Options on GUIDE's Tools menu. Choose "GUI allows only one% instance to run (singleton)".%% See also: GUIDE, GUIDATA, GUIHANDLES% Edit the above text to modify the response to help duofengyanshe % Last Modified by GUIDE v2.5 15-Oct-2012 21:17:58% Begin initialization code - DO NOT EDITgui_Singleton = 1;gui_State = struct('gui_Name', mfilename, ...'gui_Singleton', gui_Singleton, ...'gui_OpeningFcn', @duofengyanshe_OpeningFcn, ...'gui_OutputFcn', @duofengyanshe_OutputFcn, ...'gui_LayoutFcn', [] , ...'gui_Callback', []);if nargin && ischar(varargin{1})gui_State.gui_Callback = str2func(varargin{1});endif nargout[varargout{1:nargout}] = gui_mainfcn(gui_State, varargin{:});elsegui_mainfcn(gui_State, varargin{:});end% End initialization code - DO NOT EDIT% --- Executes just before duofengyanshe is made visible.function duofengyanshe_OpeningFcn(hObject, eventdata, handles, varargin)% This function has no output args, see OutputFcn.% hObject handle to figure% eventdata reserved - to be defined in a future version of MATLAB % handles structure with handles and user data (see GUIDATA)% varargin command line arguments to duofengyanshe (see VARARGIN)% Choose default command line output for duofengyanshehandles.output = hObject;% Update handles structureguidata(hObject, handles);set(gcf,'visible','on')h = actxserver('WScript.Shell');figure(gcf);h.SendKeys('% '); %this is shortcut key ALT + {SPACE}h.SendKeys('{DOWN 4}');h.SendKeys('~'); %This is enterset(gcf,'name','¶à·ìÑÜÉä');set(handles.edit1,'string','4')% UIWAIT makes duofengyanshe wait for user response (see UIRESUME) % uiwait(handles.figure1);% --- Outputs from this function arereturned to the command line.function varargout = duofengyanshe_OutputFcn(hObject, eventdata, handles)% varargout cell array for returning output args (see VARARGOUT); % hObject handle to figure% eventdata reserved - to be defined in a future version of MATLAB % handles structure with handles and user data (see GUIDATA)% Get default command line output from handles structurevarargout{1} = handles.output;% --- Executes on button press in pushbutton1.function pushbutton1_Callback(hObject, eventdata, handles)% hObject handle to pushbutton1 (see GCBO)% eventdata reserved - to be defined in a future version of MATLAB % handles structure with handles and user data (see GUIDATA)n=str2double(get(handles.edit1,'string'));a=-4*pi:0.01*pi:4*pi;P=1-sin(n*a).^2./sin(a).^2;plot(a,P)lgray=zeros(256,3);for i=0:255lgray(i+1,:)=(255-i)/255;endimagesc(P)colormap(lgray)% --- Executes on button press in pushbutton2.function pushbutton2_Callback(hObject, eventdata, handles)% hObject handle to pushbutton2 (see GCBO)% eventdata reserved - to be defined in a future version of MATLAB % handles structure with handles and user data (see GUIDATA)% --- Executes during object creation, after setting all properties. function slider1_CreateFcn(hObject, eventdata, handles)% hObject handle to slider1 (see GCBO)% eventdata reserved - to be defined in a future version of MATLAB % handles empty - handles not created until after all CreateFcns called% Hint: slider controls usually have a light gray background.if isequal(get(hObject,'BackgroundColor'), get(0,'defaultUicontrolBackgroundColor'))set(hObject,'BackgroundColor',[.9 .9 .9]);endfunction edit1_Callback(hObject, eventdata, handles)% hObject handle to edit1 (see GCBO)% eventdata reserved - to be defined in a future version of MATLAB % handles structure with handles and user data (see GUIDATA)% Hints: get(hObject,'String') returns contents of edit1 as text% str2double(get(hObject,'String')) returns contents of edit1 as a double% --- Executes during object creation, after setting all properties. function edit1_CreateFcn(hObject, eventdata, handles)% hObject handle to edit1 (see GCBO)% eventdata reserved - to be defined in a future version of MATLAB % handles empty - handles not created until after all CreateFcns called% Hint: edit controls usually have a white background on Windows. % See ISPC and COMPUTER.if ispc && isequal(get(hObject,'BackgroundColor'), get(0,'defaultUicontrolBackgroundColor'))set(hObject,'BackgroundColor','white');endfunction edit2_Callback(hObject, eventdata, handles)% hObject handle to edit2 (see GCBO)% eventdata reserved - to be defined in a future version of MATLAB % handles structure with handles and user data (see GUIDATA)% Hints: get(hObject,'String') returns contents of edit2 as text% str2double(get(hObject,'String')) returns contents of edit2 as a double% --- Executes during object creation, after setting all properties. function edit2_CreateFcn(hObject, eventdata, handles)% hObject handle to edit2 (see GCBO)% eventdata reserved - to be defined in a future version of MATLAB % handles empty - handles not created until after all CreateFcns called% Hint: edit controls usually have a white background on Windows. % See ISPC and COMPUTER.if ispc && isequal(get(hObject,'BackgroundColor'), get(0,'defaultUicontrolBackgroundColor'))set(hObject,'BackgroundColor','white');end% --- Executes during object creation, after setting all properties. function slider2_CreateFcn(hObject, eventdata, handles)% hObject handle to slider1 (see GCBO)% eventdata reserved - to be defined in a future version of MATLAB % handles empty - handles not created until after all CreateFcnscalled% Hint: slider controls usually have a light gray background.if isequal(get(hObject,'BackgroundColor'), get(0,'defaultUicontrolBackgroundColor'))set(hObject,'BackgroundColor',[.9 .9 .9]);end。
基于MATLAB的夫琅和费衍射实验的计算机仿真

式 中 J x是 一 阶 贝塞 尔 函 数 , 拟 时 令 f l h 6 0m, ,) ( 模 = m,= 0 n
a 0O 1 利用 MAT A = .0 m, L B编程 , 程序运行完毕后 , 依次得到 以 下图形 7 。圆孔衍射和矩孔衍射的三维 图形基本相 同, 二维 图
平 面 上 会 聚 点 Q(,) xy 的和 振 动 的 相 对 强 度 为 : I I u) Sl ) ( Q) ds (lP m r
u
v
() 1
于学生的理解 。同时通过 多种元 件的夫琅和费衍射 计算机仿
真, 能够动态直观地呈现光学衍射 中各种物 理量之间 的关 系,
有利于大学物理实验中光学部分教学的开展 。因此 , 我们应 当 充分利用计算机软件功 能为教学增添活力 ,为 学生理解复杂
Z agZ i n S uig J n e gh n YagK n L ne g Yag njn h n hf g uY l i g n cu n u iu f n gu e n a F J n Ho
(】潘 柏 根 , 施群 , 志 建 . 于 V +的 夫 琅 和 费 衍 射 仿 真 [] 5 金 刘 基 c+ J.
仪 器 仪表 用 户 ,0 O4: 66 . 2 l()6 —9
[]夏 静 , 6 陆训 毅 , 德 君 . 杨 圆孔 、 方 孔 和 双 矩 孔 夫琅 和 赞 衍 射 的
I tr ̄inN nfr n e n nen o Co ee c o M e s rn Te h lg a d M e h to is a ui g c noo y n c ar nc
Au o a i n Co f r n e o I EE: 0 — 0 . t m to , n e e c f E 9 2 9 5
实验7 衍射的Matlab模拟
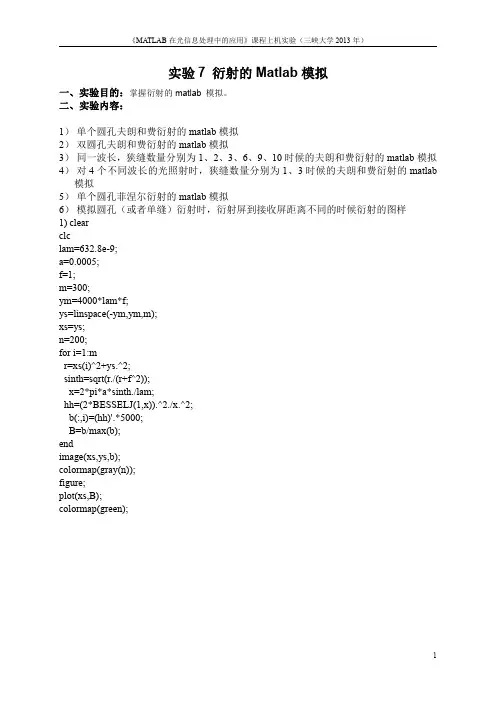
实验7衍射的Matlab模拟一、实验目的:掌握衍射的matlab模拟。
二、实验内容:1)单个圆孔夫朗和费衍射的matlab模拟2)双圆孔夫朗和费衍射的matlab模拟3)同一波长,狭缝数量分别为1、2、3、6、9、10时候的夫朗和费衍射的matlab模拟4)对4个不同波长的光照射时,狭缝数量分别为1、3时候的夫朗和费衍射的matlab 模拟5)单个圆孔菲涅尔衍射的matlab模拟6)模拟圆孔(或者单缝)衍射时,衍射屏到接收屏距离不同的时候衍射的图样1)clearclclam=632.8e-9;a=0.0005;f=1;m=300;ym=4000*lam*f;ys=linspace(-ym,ym,m);xs=ys;n=200;for i=1:mr=xs(i)^2+ys.^2;sinth=sqrt(r./(r+f^2));x=2*pi*a*sinth./lam;hh=(2*BESSELJ(1,x)).^2./x.^2;b(:,i)=(hh)'.*5000;B=b/max(b);endimage(xs,ys,b);colormap(gray(n));figure;plot(xs,B);colormap(green);-2.5-2-1.5-1-0.500.51 1.52 2.5x 10⁻³-2.5-2-1.5-1-0.50.511.522.5x 10-3-3-2-10123x 10-300.10.20.30.40.50.60.70.80.912)%双圆孔夫琅禾费衍射clear all close all clc %lam=632.8e-9;a=0.0005;f=1;m=300;ym=4000*lam*f;ys=linspace(-ym,ym,m);xs=ys;n=200;for i=1:m r=xs(i)^2+ys.^2;sinth=sqrt(r./(r+f^2));x=2*pi*a*sinth./lam;h=(2*BESSELJ(1,x)).^2./x.^2;d=10*a;deltaphi=2*pi*d*xs(i)/lam;hh=4*h*(cos(deltaphi/2))^2;b(:,i)=(hh)'.*5000;end image(xs,ys,b);colormap(gray(n));-2.5-2-1.5-1-0.500.51 1.52 2.5x 10⁻³-2.5-2-1.5-1-0.50.511.522.5x 10-33)lamda=500e-9;%波长N=[1236910];for j=1:6a=2e-4;D=5;d=5*a;ym=2*lamda*D/a;xs=ym;%屏幕上y 的范围n=1001;%屏幕上的点数ys=linspace(-ym,ym,n);%定义区域for i=1:n sinphi=ys(i)/D;alpha=pi*a*sinphi/lamda;beta=pi*d*sinphi/lamda;B(i,:)=(sin(alpha)./alpha).^2.*(sin(N(j)*beta)./sin(beta)).^2;B1=B/max(B);end NC=256;%确定灰度的等级Br=(B/max(B))*NC;figure(j);subplot(1,2,1);image(xs,ys,Br);colormap(hot(NC));%色调处理subplot(1,2,2);plot(B1,ys,'k');end-0.4-0.200.20.4-0.025-0.02-0.015-0.01-0.00500.0050.010.0150.020.02500.51-0.025-0.02-0.015-0.01-0.0050.0050.010.0150.020.025狭缝数为1-0.4-0.200.20.4-0.025-0.02-0.015-0.01-0.00500.0050.010.0150.020.02500.51-0.025-0.02-0.015-0.01-0.0050.0050.010.0150.020.025狭缝数为2-0.4-0.200.20.4-0.025-0.02-0.015-0.01-0.00500.0050.010.0150.020.02500.51-0.025-0.02-0.015-0.01-0.0050.0050.010.0150.020.025狭缝数为3-0.4-0.200.20.4-0.025-0.02-0.015-0.01-0.00500.0050.010.0150.020.02500.51-0.025-0.02-0.015-0.01-0.0050.0050.010.0150.020.025-0.4-0.200.20.4-0.025-0.02-0.015-0.01-0.00500.0050.010.0150.020.02500.51-0.025-0.02-0.015-0.01-0.0050.0050.010.0150.020.025狭缝数为9狭缝数为6-0.4-0.200.20.4-0.025-0.02-0.015-0.01-0.00500.0050.010.0150.020.02500.51-0.025-0.02-0.015-0.01-0.0050.0050.010.0150.020.0254)lamda=400e-9:100e-9:700e-9;%波长N=[13];a=2e-4;D=5;d=5*a;for j=1:4ym=2*lamda(j)*D/a;xs=ym;%屏幕上y 的范围n=1001;%屏幕上的点数ys=linspace(-ym,ym,n);%定义区域for k=1:2for i=1:n sinphi=ys(i)/D;alpha=pi*a*sinphi/lamda(j);beta=pi*d*sinphi/lamda(j);B(i,:)=(sin(alpha)./alpha).^2.*(sin(N(k)*beta)./sin(beta)).^2;B1=B/max(B);end NC=256;%确定灰度的等级Br=(B/max(B))*NC;figure();subplot(1,2,1);image(xs,ys,Br);colormap(hot(NC));%色调处理subplot(1,2,2);狭缝数为10plot(B1,ys,'k');end end-0.4-0.200.20.4-0.02-0.015-0.01-0.00500.0050.010.0150.0200.51-0.02-0.015-0.01-0.0050.0050.010.0150.02Lamda=400nm,N=1-0.4-0.200.20.4-0.02-0.015-0.01-0.00500.0050.010.0150.0200.51-0.02-0.015-0.01-0.0050.0050.010.0150.02-0.4-0.200.20.4-0.025-0.02-0.015-0.01-0.00500.0050.010.0150.020.02500.51-0.025-0.02-0.015-0.01-0.0050.0050.010.0150.020.025Lamda=400nm,N=3Lamda=500nm,N=1-0.4-0.200.20.4-0.025-0.02-0.015-0.01-0.00500.0050.010.0150.020.02500.51-0.025-0.02-0.015-0.01-0.0050.0050.010.0150.020.025-0.4-0.200.20.4-0.03-0.02-0.0100.010.020.0300.51-0.03-0.02-0.010.010.020.03Lamda=500nm,N=3Lamda=600nm,N=1-0.4-0.200.20.4-0.03-0.02-0.0100.010.020.0300.51-0.03-0.02-0.010.010.020.03-0.4-0.200.20.4-0.03-0.02-0.0100.010.020.0300.51-0.04-0.03-0.02-0.010.010.020.030.04Lamda=600nm,N=3Lamda=700nm,N=1-0.4-0.200.20.4-0.03-0.02-0.0100.010.020.0300.51-0.04-0.03-0.02-0.010.010.020.030.045)clearclcN=300;r=15;a=1;b=1;I=zeros(N,N);[m,n]=meshgrid(linspace(-N/2,N/2-1,N));D=((m-a).^2+(n-b).^2).^(1/2);i=find(D<=r);I(i)=1;subplot(2,2,1);imagesc(I)colormap([000;111])axis imagetitle('衍射前的图样')L=300;M=300;[x,y]=meshgrid(linspace(-L/2,L/2,M));lamda=632.8e-6;k=2*pi/lamda;z=1000000;Lamda=700nm,N=3h=exp(j*k*z)*exp((j*k*(x.^2+y.^2))/(2*z))/(j*lamda*z); H=fftshift(fft2(h));%传递函数B=fftshift(fft2(I));%圆孔频谱G=H.*B;U=fftshift(ifft2(G));Br=(U/max(U));subplot(2,2,2);imshow(abs(U));axis image;colormap(hot)%figure,imshow(C);title('衍射后的图样');subplot(2,2,3);mesh(x,y,abs(U));subplot(2,2,4);plot(abs(Br))6)lamda=500e-9;%波长N=1;%缝数,可以随意更改变换a=2e-4;D=3:7;d=5*a;for j=1:5ym=2*lamda*D(j)/a;xs=ym;%屏幕上y的范围n=1001;%屏幕上的点数ys=linspace(-ym,ym,n);%定义区域for i=1:nsinphi=ys(i)/D(j);alpha=pi*a*sinphi/lamda;beta=pi*d*sinphi/lamda;B(i,:)=(sin(alpha)./alpha).^2.*(sin(N*beta)./sin(beta)).^2;B1=B/max(B);endNC=256;%确定灰度的等级Br=(B/max(B))*NC;figure();subplot(1,2,1)image(xs,ys,Br);colormap(hot(NC));%色调处理subplot(1,2,2)plot(B1,ys,'k');end-0.4-0.200.20.4-0.015-0.01-0.00500.0050.010.01500.51-0.015-0.01-0.0050.0050.010.015D=3m-0.4-0.200.20.4-0.02-0.015-0.01-0.00500.0050.010.0150.0200.51-0.02-0.015-0.01-0.0050.0050.010.0150.02-0.4-0.200.20.4-0.025-0.02-0.015-0.01-0.00500.0050.010.0150.020.02500.51-0.025-0.02-0.015-0.01-0.0050.0050.010.0150.020.025D=5m D=4m-0.4-0.200.20.4-0.03-0.02-0.0100.010.020.0300.51-0.03-0.02-0.010.010.020.03-0.4-0.200.20.4-0.03-0.02-0.0100.010.020.0300.51-0.04-0.03-0.02-0.010.010.020.030.04D=7m D=6m。
基于MATLAB的矩孔、单缝、圆孔夫琅和费衍射概诉

课程设计任务书学生姓名:专业班级:指导教师:工作单位:信息工程学院题目: 夫琅和费矩孔、单缝、圆孔衍射图样一、设计目的了解MA TLAB软件的基本知识,基本的程序设计,软件在高等数学和工程数学中的应用,学会使用软件进行数值计算和控制工程中的应用。
二、设计内容和要求1.绘制弗朗禾费矩孔、单缝和圆孔衍射图样,可以是二维的或三维的,也可以两种都有。
改变矩孔、单缝和圆孔的参数,比较衍射条纹的变化。
2. 学习Matlab语言的概况和Matlab语言的基本知识。
3.学习Matlab语言的程序设计。
三、初始条件计算机;Matlab软件。
四、时间安排1、2015年01月19日,任务安排,课设具体实施计划与课程设计报告格式的要求说明。
2、2015年01月20日,查阅相关资料,学习Matlab语言的基本知识,学习MATLAB语言的应用环境、调试命令,绘图功能函数等。
3、2015年01月21日至2015年01月22日,Matlab课程设计制作和设计说明书撰写。
4、2015年01月23日,上交课程设计成果及报告,同时进行答辩。
指导教师签名:2015年01 月19日系主任(或负责教师)签名:2015年01 月19日目录摘要 (I)1.设计的内容及要求 (1)1.1设计的目的 (1)1.2设计任务要求 (1)2.设计原理及设计思路 (1)2.1夫琅和费干涉理论 (1)2.1.1夫琅和费圆孔衍射 (2)2.1.2夫琅和费矩孔衍射 (2)2.1.3夫琅和费单缝衍射 (2)2.2设计思路 (3)3.仿真及分析 (4)4.心得和体会 (8)参考文献 (8)摘要物理光学理论较为复杂抽象,实验现象的演示对条件要求高。
采用MATLAB7.0强大的函数作图功能对矩孔、单缝、圆孔的夫琅和费衍射进行模拟,建立直观形象并且精确完整的理论模型,并附上程序代码,将干涉理论联系起来,分析衍射和干涉的本质。
从而加深对夫琅和费原理、概念、和图像的理解。
通过使用MATLAB编写程序,不仅理解了物理思想,而且了解了运用软件解决物理问题的方法。
模拟夫琅禾费衍射的matlab源代码

源代码:N=512;disp('衍射孔径类型1.圆孔 2.单缝3.方孔')kind=input('please input 衍射孔径类型:');% 输入衍射孔径类型while kind~=1&kind~=2&kind~=3disp('超出选择范围,请重新输入衍射孔径类型');kind=input('please input 衍射孔径类型:');% 输入衍射孔径类型endswitch(kind)case 1r=input('please input 衍射圆孔半径(mm):');% 输入衍射圆孔的半径I=zeros(N,N);[m,n]=meshgrid(linspace(-N/16,N/16-1,N));D=(m.^2+n.^2).^(1/2);I(find(D<=r))=1;subplot(1,2,1),imshow(I);title('生成的衍射圆孔');case 2a=input('please input 衍射缝宽:');% 输入衍射单缝的宽度b=1000;% 单缝的长度I=zeros(N,N);[m,n]=meshgrid(linspace(-N/4,N/4,N));I(-a<m&m<a&-b<n&n<b)=1;subplot(1,2,1);imshow(I);title('生成的衍射单缝');case 3a=input('please input 方孔边长:');% 输入方孔边长I=zeros(N,N);[m,n]=meshgrid(linspace(-N/4,N/4,N));I(-a/2<m&m<a/2&-a/2<n&n<a/2)=1;subplot(1,2,1),imshow(I);title('生成的方孔');otherwise kind=input('please input 衍射孔径类型:');% 输入衍射孔径类型end% 夫琅禾费衍射的实现过程L=500;[x,y]=meshgrid(linspace(-L/2,L/2,N));lamda_1=input('please input 衍射波长(nm):');% 输入衍射波长;lamda=lamda_1/1e6k=2*pi/lamda;z=input('please input 衍射屏距离衍射孔的距离(mm):');% 衍射屏距离衍射孔的距离h=exp(1j*k*z)*exp((1j*k*(x.^2+y.^2))/(2*z))/(1j*lamda*z);%脉冲相应H =fftshift(fft2(h));%传递函数B=fftshift(fft2(I));%孔频谱G=fftshift(ifft2(H.*B));subplot(1,2,2),imshow(log(1+abs(G)),[]);title('衍射后的图样');figuremeshz(x,y,abs(G));title('夫琅禾费衍射强度分布')实验输入:衍射孔径类型1.圆孔 2.单缝3.方孔please input 衍射孔径类型:1please input 衍射圆孔半径(mm):3please input 衍射波长(nm):632lamda =6.3200e-04please input 衍射屏距离衍射孔的距离(mm):1000000实验结果:程序说明:本实验可以选择孔径类型、孔径半径、输入波长、衍射屏和衍射孔的距离等。
多缝的夫琅和费衍射matlab仿真

4、多缝的夫琅和费衍射,使用平行光照明,观察衍射图样随点光源位置(光源上下移动)的变化 θθθ图4-1 图4-2多缝夫琅禾费衍射如图4-1所示。
由于相邻单缝在P 点产生的夫琅禾费衍射的幅值与中心单缝的相同,只是产生一个相位差θλπδsin 2d =,故,经证明,P 点处的光强为:220)2sin 2sin ()sin ()(δδααN I P I =, 其中θλπαsin a =,θλπδsin 2d =。
因而,程序代码如下:clear %清除原有变量Lambda=600*(1e-9); %设置波长为600nma=0.005*(1e-3); %设置衍射屏参数:缝宽为0.005mm , 缝距为0.02mmd=0.02*(1e-3);f=0.01; %汇聚透镜焦距设置为1cmN=20; %设置缝数为20ni=1000;x=linspace(-0.005,0.005,ni); %将衍射屏按照狭缝方向分为ni 个微元 for k=1:nisn=x(k)/sqrt(x(k).^2+f^2);alpha=pi*a*sn/Lambda; %算各微元对应的α和δ值delta=2*pi*d*sn/Lambda;I(k)=(sin(alpha)/alpha).^2*(sin(N*delta/2)/sin(delta/2)).^2; %求出各处的光强endfigure(gcf); %显示图像NCLevels=250;Br=I*NCLevels;image(0,x,Br);colormap(gray(NCLevels));title('二维强度分布');运行后结果如图4-2所示。
将光源上下移动的结果如图4-3所示:图4-3 图4-4点光源发出的光经过准直透镜后形成倾斜入射的平行光,倾斜角度为i 。
此时,P 点强度的公式为:220)sin ()sin ()(ββααN I P I =, 其中)sin (sin i a -=θλπα,)sin (sin i d -=θλπβ。
应用Matlab模拟光的夫琅禾费衍射的研究
应用Matlab模拟光的夫琅禾费衍射的研究摘要:光的衍射是一种非常重要的光的物理现象。
它指的是:光将障碍物绕过,偏离直线传播路径,然后进入阴影区里的现象。
它也是光的波动表现的一种现象。
衍射系统的组成有三个部分,它们分别是:光源、衍射屏、接收屏(用来接收衍射图样的屏幕)。
通常情况下,我们根据衍射系统当中三个组成部分之间相互距离的大小,将衍射现象分为两类:一类叫做菲涅耳(Fresnel)衍射,剩下的一类叫做夫琅禾费(Fraunhofer,)衍射。
此文通过Matlab软件,进行编程,进而对夫琅禾费衍射过程进行模拟。
然后给出衍射光强分布图形,又通过对光的波长、焦距、缝宽等因素的改变,得到了衍射光强的分布和它的变化规律,并在理论上作出了合理的解释。
从而帮助我们更深刻的理解光的波动性原理。
关键词:Matlab;衍射;光学实验目录1 绪论 (1)1.1光的衍射现象 (1)1.2 Matlab模拟的意义 (1)2 光的衍射理论 (3)2.1 惠更斯原理 (3)2.2 惠更斯——菲涅耳原理 (3)3夫琅禾费衍射原理 (4)3.1 夫琅禾费单缝衍射 (4)3.2 夫琅禾费双缝衍射 (5)4 夫琅禾费衍射模拟 (6)4.1 单缝 (6)4.2 矩孔 (12)5 总结 (15)参考文献 (15)1 绪论1.1光的衍射现象自然界之中有一些光的现象,它们与人们已经发现的光的直线传播现象并不是百分百符合。
这些现象相继在17世纪之后被科学家们发现。
这就是由光的波动性表现出来的。
在这些现象之中,人们第一个发现的光的现象便是衍射现象,而且还在发现的同时做了些实验与理论的研究和探讨。
第一次成功发现衍射现象的科学家是意大利的物理学者格里马第。
在他的一部著作里描写了这样一个实验:让光通过很小的一个孔后射入到一个暗室里面,利用这种方法来形成点光源,然后在光路上面放置根直杆。
这时发现了两个特殊的现象:一个是影子,它投在白色的屏幕之上,以光的直线传播理论假定的影子要比它的宽度要小;另一个就是在这个影子的边缘还呈现出大约2、3个条带,条带是彩色的,随着光的增强,增强到很强的时候,这些条带甚至进入影子里。
(完整word版)模拟夫琅禾费衍射的matlab源代码
源代码:N=512;disp('衍射孔径类型1.圆孔 2.单缝3.方孔')kind=input('please input 衍射孔径类型:');% 输入衍射孔径类型while kind~=1&kind~=2&kind~=3disp('超出选择范围,请重新输入衍射孔径类型');kind=input('please input 衍射孔径类型:');% 输入衍射孔径类型endswitch(kind)case 1r=input('please input 衍射圆孔半径(mm):');% 输入衍射圆孔的半径I=zeros(N,N);[m,n]=meshgrid(linspace(-N/16,N/16-1,N));D=(m.^2+n.^2).^(1/2);I(find(D<=r))=1;subplot(1,2,1),imshow(I);title('生成的衍射圆孔');case 2a=input('please input 衍射缝宽:');% 输入衍射单缝的宽度b=1000;% 单缝的长度I=zeros(N,N);[m,n]=meshgrid(linspace(-N/4,N/4,N));I(-a<m&m<a&-b<n&n<b)=1;subplot(1,2,1);imshow(I);title('生成的衍射单缝');case 3a=input('please input 方孔边长:');% 输入方孔边长I=zeros(N,N);[m,n]=meshgrid(linspace(-N/4,N/4,N));I(-a/2<m&m<a/2&-a/2<n&n<a/2)=1;subplot(1,2,1),imshow(I);title('生成的方孔');otherwise kind=input('please input 衍射孔径类型:');% 输入衍射孔径类型end% 夫琅禾费衍射的实现过程L=500;[x,y]=meshgrid(linspace(-L/2,L/2,N));lamda_1=input('please input 衍射波长(nm):');% 输入衍射波长;lamda=lamda_1/1e6k=2*pi/lamda;z=input('please input 衍射屏距离衍射孔的距离(mm):');% 衍射屏距离衍射孔的距离h=exp(1j*k*z)*exp((1j*k*(x.^2+y.^2))/(2*z))/(1j*lamda*z);%脉冲相应H =fftshift(fft2(h));%传递函数B=fftshift(fft2(I));%孔频谱G=fftshift(ifft2(H.*B));subplot(1,2,2),imshow(log(1+abs(G)),[]);title('衍射后的图样');figuremeshz(x,y,abs(G));title('夫琅禾费衍射强度分布')实验输入:衍射孔径类型1.圆孔 2.单缝3.方孔please input 衍射孔径类型:1please input 衍射圆孔半径(mm):3please input 衍射波长(nm):632lamda =6.3200e-04please input 衍射屏距离衍射孔的距离(mm):1000000实验结果:程序说明:本实验可以选择孔径类型、孔径半径、输入波长、衍射屏和衍射孔的距离等。
物理光学 多缝弗朗禾费衍射
一、双缝衍射 (Double-slit diffraction) 1、实验装置:
S
L1
a y1
L2
y
x1 d
P x
2、强度计算:
E x, y C
E
(
x1
,
y1
)
exp
ik
lx1
my1
dx1dy1
E x C
-
E
x1
exp(-iklx1
)dx1
(d a )
(d a)
Nd cos Nd
主极大半角宽度
在两个相邻主极大之间有N-1个零值,相邻两个零值之
间( m)'的 1角距离也为上式。
上式表明缝数 N 越大,主极大的宽度越小,观察屏上主 极大亮纹越亮、越细,因而多缝衍射条纹随着缝数的增 加而变得越来越狭窄。
(2)主极大之间的角距离
多缝衍射的亮纹条件:
d sin m m 0, 1, 2,.....
单缝衍射
轮廓线
-8
-4
0
4
缺级数:4,8,12.。。。
sin 8 (/d)
sin 8 (/d)
缺级
19个明条纹 缺级
单缝衍射和多缝衍射干涉的对比 (d =10 a)
4.双缝衍射和双缝干涉
a sin
I
I(0
sin
)2 [sin(N / 2)]2
sin / 2
双缝衍射
N 2
I
4I(0 sin
微分得到:d cos m 一般很小,取 cos 1,再另m=1,
得到 =
d
亮纹间距(线距离):e f f
d
N =1
matlab光学仿真实验 13171019
光学仿真实验一.前言此次光学仿真实验,是基于matlab来进行的。
在这仿真的一系列过程中,对于光学现象出现的条件,以及干涉、衍射是光波叠加的本质都有了更深的认识。
还从中学习了matlab这一利器的知识,这两三个星期的学习是极其值得的。
二.正文1.杨氏双孔干涉学习的开端是从双孔干涉开始,在极其理想的情况下进行仿真,即忽略了孔的大小等影响因素,直接认为是俩球面波进行叠加干涉。
代码如下:clear;l=521*10.^(-9); %波长d=0.05; %俩孔的距离D=1; %孔到光屏的距离A1=1; %复振幅强度A2=1;x=linspace(-0.0001,0.0001,1000);y=linspace(-0.0001,0.0001,1000);[x,y]=meshgrid(x,y);r1=sqrt((x-d/2).^2+y.^2+D^2);r2=sqrt((x+d/2).^2+y.^2+D^2);E1=A1./r1.*exp(1i*r1*2*pi/l);E2=A2./r2.*exp(1i*r2*2*pi/l);E=E1+E2;I= abs(E).^2;pcolor(x,y,I);shading flat;colormap (gray);认为球面波位置在(d/2,0)和(-d/2,0)处,对于在光屏上任意(x,y)点计算距离,计算出每个球面波到其的复振幅,叠加求光强I。
所得图像:这是光屏很小的情况下正中心出条纹,近似于平行线。
现在来看一下大光屏下的条纹,即x,y最大都是0.1,黑白、彩色是这样的:复杂许多,与下文双缝对比明显!立体大屏下的图像为:现在讨论改变条件引起小屏条纹的变化趋势:ⅰ.波长变小为100nm,条纹变细,符合随波长增大,干涉条纹变粗,波长变小,干涉条纹变细的规律。
dⅱ.俩孔间距变大为0.1m,干涉条纹变细,符合孔间距与条纹宽度成反比的规律。
ⅲ.孔到光屏距离变大为2m,干涉条纹变粗,符合D与干涉条纹宽度成正比的规律。
基于Matlab的夫琅禾费衍射光学仿真
基于Matlab的夫琅禾费衍射光学仿真摘要计算机仿真技术是以多种学科和理论为基础,以计算机及其相应的软件为工具,通过虚拟试验的方法来分析和解决问题的一门综合性技术。
计算机仿真早期称为蒙特卡罗方法,是一门利用随机数实验求解随机问题的方法。
关键词:计算机仿真夫琅禾费衍射MatlabFraunhofer Diffraction Optical Simulation Based onMatlabAbstract The computer simulation technology is based on a variety of disciplines and theoretical, with the computer and the corresponding software tools, we can analyze the virtual experimentation and solve the problem of a comprehensive technology. Computer simulation of early known as the Monte Carlo method, is a random problem solved using the method of random number test.Key words:Computer simulation Fraunhofer diffraction Matlab一、引言计算机仿真技术是以多种学科和理论为基础,以计算机及其相应的软件为工具,通过虚拟试验的方法来分析和解决问题的一门综合性技术。
计算机仿真早期称为蒙特卡罗方法,是一门利用随机数实验求解随机问题的方法。
根据仿真过程中所采用计算机类型的不同,计算机仿真大致经历了模拟机仿真、模拟-数字混合机仿真和数字机仿真三个大的阶段。
20世纪50年代计算机仿真主要采用模拟机;60年代后串行处理数字机逐渐应用到仿真之中。