英文软件使用指南
微软Office和Adobe软件的使用指南说明书
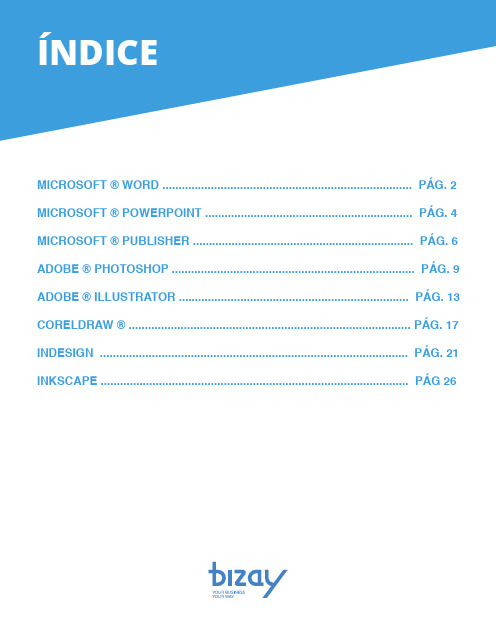
MICROSOFT ® WORD ............................................................................. PÁG. 2MICROSOFT ® POWERPOINT ................................................................ PÁG. 4MICROSOFT ® PUBLISHER .................................................................... PÁG. 6ADOBE ® PHOTOSHOP ........................................................................... PÁG. 9ADOBE ® ILLUSTRATOR ....................................................................... PÁG. 13CORELDRAW ® ....................................................................................... PÁG. 17INDESIGN ............................................................................................... PÁG. 21INKSCAPE ............................................................................................... PÁG 26 E MCEXPLANATORY GUIDEMICROSOFT® OFFICE WORDIn the upper bar select Page Layout . Then click on Size and, further down, on More Paper Sizes...In the box that opens, enter the size of your document.CREATE DOCUMENTCPage Layout . Then click on Size More Paper Sizes...In the box that opens, enter the size of your document.Certi fique is added 4mm (0,4cm) to the height and width of the your document. In the case of the business card with 8,5x5,5cm insert 8,9x5,9cm.To save your document choose File > Save As.Choose Save as type: PDF . Then select the Save .BLEED Bleed is the extra measure you should put on your document to ensure that it does not have white borders around it.You should therefore add 4 mm to the height and width of your document.SAVE DOCUMENT It is recommended that you save the PDF document in order to guarantee its quality.In the upper bar select Page Layout . Then click on Sizeand, further down, on More Paper Sizes...In the box that opens, enter the size of your document.C XPLANATORY GUIDE ICROSOFT® OFFICE WORDREATE DOCUMENTIn the box that opens put the size of your document.BLEED Bleed is the extra measure you should put on your document to ensure that it does not have white borders around it.99In the upper bar select Design and then on the right side in and in Custom Slide Size.CXPLANATORY GUIDEICROSOFT® OFFICE WORDGo to Page Design > Page Setup (right arrow).It will open a window (image below) where you can define the settings of the document.Add another 4mm (0,4cm) to the height and width so that your document has enough margin for cutting.6CREATE DOCUMENTIn the case of a business card with the dimension 8,5x5,5cm, in Page place 89mm (8,9 cm) in width and 59mm (5,9 cm) in height.In Layout type select the option One page per sheet.Add 0,2 cm to the margins (Margins Guides ) to make surethat you do not place important text or images outside the margin line, as this is the line where the product will be cut.In the box that opens, enter the size of your document.In Margin Guides add 0.2cm to each side, this will causea line to appear around your card.This line serves as a guide, so we know how far we can write or put images, because it will be here that the product will be cut.8Select Okand save the document.In the upper bar select Page Layout . Then click on Sizeand, further down, on More Paper Sizes...In the box that opens, enter the size of your document.In the box that opens, enter the size of your document.BLEED Bleed is the extra measure you should put on your document to ensure that it does not have white borders around it.You should therefore add 4 mm to the height and width of your document.Push on the ruler and pull the guides to the endsof the document.do documento.In the box that opens, enter the size of your document.C.In Canvas Size (image below) indicate the size of your documentnot forgetting to put more 4 mm in height and width to create theBleed.You will see lines that de fi ne your Bleed, so extend your templateto the limits of Bleed.In the example below, the pink ornament should be extended to thenew end created.11. Then click on SizeIn the box that opens, enter the size of your document.Before you save the document, be sure to place it in CMYKso that there are no changes in color.Go toImage > Mode > CMYK Color.Save the document in File > Save As and select the PDF format.Click Save.SAVE DOCUMENTIt is recommended that you save the PDF document in order to guarantee its quality.Para qualquer esclarecimento contacte-nos através do email:****************************In the window that opens, in Adobe PDF Preset select [PDF/X-1a:2001].This option ensures that the PDF will not be changed.Do lado esquerdo clique em Compression e de seguida do lado direitoin Options select the option Do Not Downsaple.Then select Output and on the right side in Color Conversionselect No Conversion option. This option ensures that you burn your files with no color prompts.NOTA: Please note that the Standard field continues with thePDF/X-1a:2001 option selected, otherwise your file will not be Below, click Save Preset… , save these PDF presets with whatevername you want, so you can always reuse them.Clique on Save PDF .correctly saved.In the upper bar select Page Layout . Then click on Sizeand, further down, on More Paper Sizes...In the box that opens, enter the size of your document.Go to File > New.It will open a window (image below) where you can definethe settings of the document.In Units choose the unit you prefer, in this case we usedMilimeters.CREATE DOCUMENTbusiness card11In the box that opens put the size of your document.CIn the top menu, click the Document Setup button.BLEED Bleed is the extra measure you should put on your document to ensure that it does not have white borders around it.You should therefore add 4 mm to the height and width of your document.14It will open a window (image below). In the Bleedoption put2 mm in all fields.Select Ok.An external line will appear in your document.In the upper bar select Design and then on the right side in Slide Size and in Custom Slide Size.In the box that opens put the size of your document.4C15Before you save the document, be sure to place it in CMYKso that there are no changes in color.Go to File > Document Color Mode > CMYK Color.SAVE DOCUMENT It is recommended that you save the PDF document in order to guarantee its quality.In the upper bar select Design and then on the right side in Slide Size and in Custom Slide Size.42Save the document in File > Save As and select the PDF format.3In the window that opens, inAdobe PDF Preset select [PDF/X-1a:2001]. Esta opção garante que o PDF não sofrerá alterações.4On the left side click on Marks and Bleeds , and then under Bleeds select the Use Document Bleed Settings option (this allows the document to be saved with the safety margins you created earlier.5In Output and then in Destination select the FOGRA39color profile, which will prevent your filw with a different color tone at the time of printing..6After all changed fields, make sure that the Standardfield continues with the selected PDF/X-1a:2001 option, otherwise your fi le will not be recorded correctly.7Click Save Preset, save these PDF presets with the name you want,so you can always reuse it.Finally, click Save PDF .NOTA: If you are using a newer version of Illustrator, the Save Presetoption will not appear, so you do not need to follow this step.In the upper bar select Design and then on the right side in Slide Size and in Custom Slide Size.In the box that opens put the size of your document.Cbusiness cardIn the box that opens, enter the size of your document.Go to Tools > Options.BLEED Bleed is the extra measure you should put on your document to ensure that it does not have white borders around it.You should therefore add 4 mm to the height and width of your document.18On the Bleed panel place the 2mm measurement on the editable Show bleed area ..Your document should look similar to the one shown below.Then, extend the bottom of your fi lter to the bleed area.In the Options window, open the Document > Page Size option.In the upper bar select Page Layout . Then click on Sizeand, further down, on More Paper Sizes...In the upper bar select Page Layout. Then click on Size and, further down, on More Paper Sizes...In the window that will open, click Settings... In the box that opens, enter the size of your document.CIn the box that opens, enter the size of your document.8555In the box that opens, enter the size of your document.In the top menu, click File > Document Setup.BLEED Bleed is the extra measure you should put on your document to ensure that it does not have white borders around it.You should therefore add 4 mm to the height and width of your document.22Will open a window (image below). Click More Options.In Bleed and Slug write 2 mm in all fields, as in the imagebelow.In the upper bar select Page Layout . Then click on Sizeand, further down, on More Paper Sizes...In the box that opens, enter the size of your document.EM CSAVE DOCUMENT It is recommended that you save the PDF document in order to guarantee its quality.In the upper bar select Page Layout . Then click on Sizeand, further down, on More Paper Sizes...In the box that opens, enter the size of your document.EMClick Savein this new window.In the window that opens, in Adobe PDF Preset select [PDF/X-1a:2001].This option ensures that the PDF will not be changed.On the left side click on Marks and Bleeds and, below inBleeds select the optionUse Document Bleed Settings.24 In the upper bar select Page Layout. Then click on Sizeand, further down, on More Paper Sizes...In the box that opens, enter the size of your document.In Output and then in Destination select the FOGRA39 colorprofile, which will prevent your file from having a different colortone at the time of printing.After all changed fields, make sure that the Standard fieldcontinues with the selected PDF/X-1a:2001 option, otherwiseyour file will not be recorded correctly.7Click Save Preset, save these PDF presets with the name you want,so you can always reuse it.Finally, click Export.NOTA: If you are using a newer version of InDesign, athe Save Preset option will not appear, so you do not need to followthis step.25In the upper bar select Design and then on the right side inSlide Sizeand in Custom Slide Size.In the box that opens put the size of your document.4EMCEXPLANATORY GUIDEINKSCAPEGo to File > New .It will open a window (image below) where you can definethe settings of the document.In Units choose the unit you prefer, in this case we usedMilimeters.CREATE DOCUMENTIn Width set the width of your document, and in the Height field a altura do mesmo.26tab under Available Color Profiles select so that there are no changes to the color.In the upper bar select Page Layout . Then click on Sizeand, further down, on More Paper Sizes...In the box that opens, enter the size of your document.Make sure you add 4 mm to the height and width of your document.In the case of the business card with 85x55mm insert 89x59mm.BLEED Bleed is the extra measure you should put on your document to ensure that it does not have white borders around it.You should therefore add 4 mm to the height and width of your document.27Go to File > Save As and in the window that opens (image below),select Portable Document Format (PDF) and then click Save . SAVE DOCUMENT It is recommended that you save the PDF document in order to guarantee its quality.In the new window that opens, select Convert texts to path optionso that your document does not change.In Resolution for rasterization (dpi) insert 300.Click Ok .Copyright © 2019 360onlineprint. All rights reserved.Copyright © 2019 Bizay. All rights reserved。
系统动力学模拟软件Vensim使用指南.
系统动力学模拟软件Vensim使用指南严广乐张志刚(上海理工大学管理学院)在目前系统动力学专用的计算机模拟语言软件中,V ensim是界面非常友好的一种模拟工具,它的功能非常强大,可以运行方程数目达数千的大型模型,因此被人们广泛使用,如美国的国家模型等。
一、Vensim软件简介Vensim是美国Ventana Systems公司推出的在Windows操作平台下运行的系统动力学专用软件包,其版本在不断升级,目前最新的版本为V5.0c。
Vensim PLE是Ventana Systems公司提供的个人学习版,可到公司的网站上免费下载试用。
1.1 Vensim软件的主要特点Vensim是一款可视化的模型工具,使用该软件可以对动力学系统模型进行概念化、模拟、分析和优化。
Vensim PLE和PLE Plus是为简化系统动力学的学习而设计的Vensim的标准版本。
Vensim PLE提供了一个非常简单易用的基于因果关系链、状态变量和流图的建模方式。
Vensim用箭头来连接变量,系统变量之间的关系作为因果连接而得到确立,方程编辑器可以帮助方便地建立完整的模拟模型。
通过建立过程、检查因果关系、使用变量以及包含变量的反馈回路,可以分析模型。
当建立起一个可模拟的模型,Vensim可以从全局来研究模型的行为。
Vensim PLE适合于建立规模较小的系统动力学模型,而Vensim PLE Plus功能则更加强大,支持多视图,适合于大型的模型模拟。
Vensim提供了对所建模型的多种分析方法。
Vensim可以对模型进行结构分析和数据集分析,结构分析包括原因数分析、结果树分析和反馈回列表分析,数据集分析包括变量随时间变化的数据值及曲线图分析。
此外,Vensim还可以实现对模型的真实性检验,以判断模型的合理性,从而相应调整模型的参数或结构。
1.2 Vensim PLE的用户界面Vensim PLE的用户界面是标准的Windows应用程序界面。
最强大最好用的笔记软件mybase使用指南

最强大最好用的笔记软件m y b a s e使用指南(总8页)--本页仅作为文档封面,使用时请直接删除即可----内页可以根据需求调整合适字体及大小--mybase使用指南最新版v6下载地址:一. Mybase用途Mybase使用自己独特的数据库来存储一个树形大纲。
你可以向这个大纲中插入条目,并以你喜欢的任何方式来组织他们。
每一个条目可以包含RTF文本,附件和与其它条目之间的随意链接。
这种树形大纲很灵活,所以你可以在单个数据库中存储任何类型的信息。
通过一个小的程序内核和一定数量的插件和组件,你可以拥有一个:个人知识库,演示工具,电子书,HTML生成器,日程表,客户管理工具,Web收集器,记事本,地址簿,相册,日记本,收藏家,文件管理器,RTF编辑器,可以独立运行的数据库等等。
建立数据库要建立一个数据库,你需要首先创建一个新的.nyf 数据库文件,并添加信息项,输入文字信息,作为附件插入到项目的文件,您可以选择性地使信息项目与其他项目的链接或日历,并申请标签/标签,超链接,自定义图标分配个人信息项目。
请参阅下面的详细说明。
创建数据库之前,你可以做任何与 MyBase 的,你必须创建一个新的数据库(.nyf 文件),让你可以输入和存储自己的文本或文件。
为了创建一个新的数据库,请选择[文件- 新建数据库]菜单项。
添加信息项目新的数据库创建时自动打开。
现在你可以在树视图大纲中插入一些新的信息项目的选择[大纲 - 新子项] 或[新的兄弟姐妹... ...]菜单项。
每个信息项注意默认情况下接受的 RTF 文本。
点击在大纲视图中的信息项目,其默认的文字说明将在 RTF 编辑器打开,让你可以编辑或文本格式;添加附件/快捷方式添加附件快捷方式每个信息项目接受作为附件的文件的集合。
附加文件可以是一个真正的文件插入,并存储在数据库中,或链接到一个原始文件在磁盘上或网址(网络资源)的快捷方式。
要插入的文件作为附件,请选择[附件 - 添加附件]菜单项;要插入文件的快捷方式,请选择[附件 - 添加快捷方式]菜单项。
restedxp 英文指南
restedxp 英文指南摘要:1.介绍restedxp2.详述restedxp 的功能3.提供使用restedxp 的指南正文:restedxp 是一款用于Windows 操作系统的软件,它提供了一系列实用功能,可以帮助用户优化系统性能、清理系统垃圾、管理软件等。
下面我们来详细了解一下restedxp 的功能以及如何使用它。
首先,restedxp 可以清理系统垃圾,包括临时文件、系统缓存、日志文件等。
这些垃圾文件会随着系统使用时间的增长而逐渐占用磁盘空间,降低系统性能。
通过restedxp 清理这些垃圾文件,可以释放磁盘空间,提高系统运行速度。
其次,restedxp 还可以帮助用户管理软件。
用户可以通过restedxp 轻松查看、卸载、安装软件。
此外,restedxp 还可以帮助用户监控软件的运行状态,及时发现和处理问题。
最后,restedxp 还提供了一系列系统优化功能。
例如,用户可以通过restedxp 调整系统启动项,禁用不需要的启动程序,从而加快系统启动速度。
总的来说,restedxp 是一款实用的系统工具,可以帮助用户更好地管理Windows 系统。
如果你想尝试restedxp,可以按照以下步骤进行操作:1.下载并安装restedxp。
你可以从官方网站下载最新版本的restedxp,然后按照提示进行安装。
2.打开restedxp。
安装完成后,你可以在“开始”菜单中找到restedxp 的图标,点击它即可打开restedxp。
3.根据需要选择功能。
restedxp 提供了多种功能,你可以根据自己的需要选择相应的功能进行操作。
例如,如果你想清理系统垃圾,可以选择“清理垃圾”功能;如果你想管理软件,可以选择“软件管理”功能。
AutoPlay Media Studio6.0简体中文版使用指南
从今天开始,我想和大家一起探讨一下AutoPlay Media Studio6.0 汉化完全版+完全版的使用问题。
我下载这个软件的时候,下载了一个和这个软件在一起的小教程。
按照这个教程学了一下,有些东东是对的,但我在使用中发现有一些是不对的。
他在教程里举例说比如我们要进行一个软件的安装,在“脚本”里主要用到第一个和第三个动作,我觉得这是不对的。
他说他不太会英文,用金山词霸学的。
其实我也不懂英文,我也是用金山词霸学。
对动作的理解我与他不一样。
现在和大家一起学吧。
AutoPlay Media Studio6.0 汉化完全版。
软件不大,但功能却很多很全面,也很容易上手,很好学。
只要掌握了她的基本要点就好学了。
那么,她的基本要点是什么呢?我觉得,这个软件最好学的地方就是无论我们插入按钮还是音频,还是段落文字和标题文字,点击右键或是双击插入的东东,都有一个属性设置,这就是这个软件的要点,也是重点和难点。
在属性里共有四项:当前设置、属性、快速动作和脚本。
在“当前设置”里,主要设置的是“文本”。
也就是给你要设置的东东起个名字。
下面是“字体”设置,可设置字体的大小和字体的样式。
最下边有一项是“颜色状态”,说的是字体的颜色状态。
可以设置“标准颜色”也就是平时显示的颜色、“高亮颜色”也就是鼠标移入后显示的颜色、“单击颜色”也就是鼠标单击时显示的颜色和“禁用颜色”这一项没有实际意义。
在“属性”里,主要有四部份内容。
一是确认对象的名称和状态。
“对象名称”一般我们不要去改,因为改不改没有必要。
“状态”里分“激活”和“可见得”,这个问题我们留在“脚本”里再讲。
第二部份是“位置”。
指的是设置对象的位置。
用调整数字来实现调整对象的位置。
我们也可以先在窗口中用手动来调整大概的位置,再在这里进行微调,这样做的好处是,先用手动将设置对象放在一个我们想要放置的位置,再在这里微调设置对象的具体位置,这样做省事。
第三部份是“反馈”。
反馈的意思其实就是当我们将鼠标移入到被设置对象时,随鼠标出现的文字,一般都是用来解释设置对象的。
M-Brush 3.1用户指南

2, 软件注册
本软件首次安装、电脑硬盘更换、系统重装或切换时,会要求您用获得的注册码注册本软件以便利用软件的全部功能。如果您购买了M-Brus h光碟(CD或DVD)但不知 道注册码, 可先查看以下各处是否有注册码:(1), 包装盒内面光碟上方处;(2), 包装盒内面光碟遮盖处(按下中央扣键拿下光碟);(3), 光碟面板上。如果没有, 经销商 可能通过其它方式将注册码发送给您,请联系经销商。注册时要求电脑连接互联网。如果您在“选项”菜单下发现“注册M-Brus h”菜单项,或看到弹出的注册页面,请按 照说明完成注册。
3, 菜单和功能
主菜单
二级菜单
文件 新建...
打开示范作品
打开我的作品
保存
另存为 保存为图像文件 打印 退出 编辑 作品尺寸
注音格式
快捷键 Ctrl+N Ctrl+Alt+O Ctrl+O Ctrl+S Ctrl+Shift+S Ctrl+Alt+S Ctrl+P Ctrl+E
Ctrl+D
Alt+Shift+P
显示背景图片。仅当有背景图片时该功能才有效。该功能主要用于临摹他人的书画作品。
隐藏背景图片。仅当有背景图片时该功能才有效。该功能主要用于临摹他人的书画作品后查看自己的 笔迹。
显示背景字词。仅当有背景字词时该功能才有效。该功能主要用于临摹书法字体。
隐藏背景字词。仅当有背景字词时该功能才有效。该功能主要用于临摹书法字体后查看自己的笔迹。
请注意:除非有新的注册码替代,一个注册码只能用于同一台电脑注册相应版本的M-Brush。 硬件改变将可能视为不同的电脑。系统改变、注册信息因故 损坏或者软件升级时会要求您重新注册M-Brush。同一注册码的重新注册加上首次的注册总共不能超过10次,并须在 购买本软件后三年内完成。请妥善保 管好注册码。
Drivemonitor 软件的使用指南1

DriveMonitor 的安装语言Language install in DriveMonitor
摘要调试软件DRIVE MONITOR 安装时选择语言.
关键词调试软件, 语言
Key Words Drive monitor , Language
A&D Service & Support Page 2-4
问: DriveMonitor 安装时选择为英文,安装后却为德文?
答:DriveMonitor 软件包是用来调试或监控SIEMENS 变频器的工具,有强大的功能. DriveMonitor 安装时选择为英文,安装完再须修改一些设置才为英文菜单.具体步骤见下:
1.双击DriveMomitor 软件
2.选择第三列菜单,并下拉
3.选择第三栏— 语言选择为英文,再重起动DriveMomitor,此时即为英文菜单
A&D Service & Support Page 3-4
附录-推荐网址
西门子(中国)有限公司
自动化与驱动集团客户服务与支持中心
网站首页:/Service/
专家推荐精品文档:/Service/recommend.asp
驱动技术常问问题:/CN/view/zh/10803928/133000 “找答案”驱动技术版区:
/service/answer/category.asp?cid=1038
A&D Service & Support Page 4-4。
Structure、Clumpp和Distruct软件的使用指南
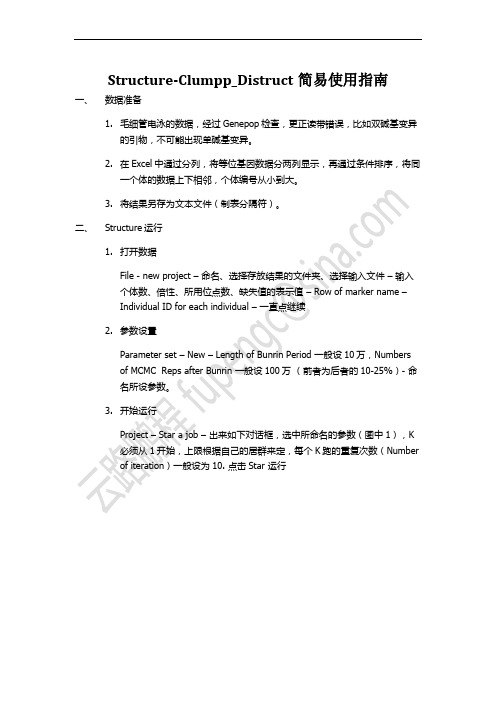
Structure-Clumpp_Distruct简易使用指南一、数据准备1.毛细管电泳的数据,经过Genepop检查,更正读带错误,比如双碱基变异的引物,不可能出现单碱基变异。
2.在Excel中通过分列,将等位基因数据分两列显示,再通过条件排序,将同一个体的数据上下相邻,个体编号从小到大。
3.将结果另存为文本文件(制表分隔符)。
二、Structure运行1.打开数据File - new project –命名、选择存放结果的文件夹、选择输入文件–输入个体数、倍性、所用位点数、缺失值的表示值– Row of marker name –Individual ID for each individual –一直点继续2.参数设置Parameter set – New – Length of Bunrin Period 一般设10万,Numbersof MCMC Reps after Bunrin 一般设100万(前者为后者的10-25%)- 命名所设参数。
3.开始运行Project – Star a job –出来如下对话框,选中所命名的参数(图中1),K必须从1开始,上限根据自己的居群来定,每个K跑的重复次数(Numberof iteration)一般设为10. 点击Star 运行4.数据保存当运行结束,在观测运行参数的窗口(Summary of Silulations)左上角点File ,将结果另存为txt文件,其必须保存在与运行结果同一文件夹内。
也可重新打开程序,File – Open project –选择自动生成的.spj文件,再另存为txt三、结果分析1.确定合适的K值将另存为的txt文件用Excel打开保存为Excel格式,分列,保留K与Ln P两列,计算Ln平均值(A-Ln),Ln标准差(ΔLn),B值(A-Ln后一个减前一个),C值 (B值前一个减后一个),D值(C值的绝对值),ΔK (D值/ΔLn),然后绘制ΔK随K的变化曲线,拐点所对应的K即为合适值。
- 1、下载文档前请自行甄别文档内容的完整性,平台不提供额外的编辑、内容补充、找答案等附加服务。
- 2、"仅部分预览"的文档,不可在线预览部分如存在完整性等问题,可反馈申请退款(可完整预览的文档不适用该条件!)。
- 3、如文档侵犯您的权益,请联系客服反馈,我们会尽快为您处理(人工客服工作时间:9:00-18:30)。
因为微软Windows下的程序大都采用标准的模块化编程,所以现在的软件大多都是基于菜单形式的,软件用的多了,我们就会发现许多不同的软件其实外表差不了多少。
下面我们就来看看英文软件中常见的英文。
(一)File:文件
说明:File菜单几乎是所有软件里都会有的选项,包含了一个软件最基本的操作。
常见含选项有:
1.New:新建一个文件
2.Open:打开一个文件
3.Close:关闭一个文件
4.Save:保存一个文件
5.Save As:把文件改名保存
6.Exit/Quit:退出此软件
(二)Edit:编辑
说明:最常见于文字编辑、图像设计等编辑类软件。
Edit菜单常常包含了一个软件最基本的编辑操作。
常见选项:
1.Undo:取消上一步操作
2.Redo:重复上一步操作
3.Paste:粘贴
4.Copy:复制
5.Cut:剪切
6.Select All:全部选择
7.Find:查找
8.Replace:替换
(三)Option:选项
说明:软件的设置部分,比如程序是否随Windows启动运行,软件开始运行时是否显示欢迎画等等。
Option菜单常常会因为软件的不同而显的千差万别,有时Option菜单会作为一个选项包含在File或Edit等其他菜单中,比如功能简单的小软件。
常见选项:
1.Preference/Configuration:属性/配置
说明:一般是相对比较复杂一点的设置。
2.Plug-in:插件
说明:不少软件支持标准化功能模块的添加,为软件添加新的功能。
这些功能模块就是插件。
3.Skin:皮肤
说明:现在很多软件都支持更换界面,俗称“换肤”。
(四)Insert:插入
说明:常见于多媒体工具、网页编辑和文字处理等软件,用于插入图片等对象。
常见选项:
1.Image:图像
2.Table:表格
3.Media:媒体
说明:一般包括,Audio(音频)、Video(视频)
4.Object:对象
5.Date & Time:日期和时间
6.Form:表单
(五)View:查看
说明:主要用于调节视窗。
常见选项:
1.Zoom In:放大
2.Zoom Out:缩小
3.Full Screen:全屏幕显示文件
4.Show Rules:显示标尺
5.Show Grid:显示网格
说明:网格的作用一般是帮助精确定位。
(六)Help:帮助
说明:顾名思义,Help菜单下自然是软件的帮助信息,一般还包括注册信息。
常见选项:
1.Content/Topics:内容/主题
说明:帮助文件的主要内容就在这里面了
2.FAQ:基本问题解答
3.Register:注册
4.Enter Registration Code:输入注册号
5.How To Use Help:如何使用帮助(也就是帮助的帮助^_^)
6.About:关于此软件的基本信息(如软件作者、版本号、生产日期)
就介绍到这里吧,希望对各位菜鸟朋友们能有所帮助。
