源码安装vncserver
linux vncserver用法

linux vncserver用法VNC(Virtual Network Computing)是一种远程桌面协议,可以让用户通过网络远程访问另一台计算机的图形用户界面。
在Linux系统中,VNCServer是一种允许远程用户访问Linux桌面的服务。
以下是在Linux系统中使用VNCServer的一些基本步骤:1. 安装VNCServer在大多数Linux发行版中,可以使用包管理器安装VNCServer。
例如,在Debian/Ubuntu上,可以使用以下命令安装VNCServer:sqlsudo apt-get updatesudo apt-get install vncserver2. 配置VNCServer在安装VNCServer后,需要对每个要远程访问的桌面进行配置。
可以通过编辑~/.vnc/xstartup文件来完成配置。
该文件应该包含以下内容:bash#!/bin/shunset SESSION_MANAGERexec /etc/X11/xinit/xinitrc如果使用的是GNOME桌面环境,可以将最后一行改为gnome-session&;如果使用的是KDE桌面环境,可以将最后一行改为kde&。
3. 启动VNCServer在配置完成后,可以启动VNCServer。
可以使用以下命令启动VNCServer:cssvncserver -geometry 800x600这将在本地计算机上启动一个VNCServer,并监听800x600的分辨率。
可以使用其他命令选项来指定其他分辨率和其他参数。
例如,要使用默认分辨率并启动VNCServer,可以使用以下命令:cssvncserver4. 停止VNCServer当不再需要远程访问时,可以停止VNCServer。
可以使用以下命令停止VNCServer:arduinovncserver -kill :1这将停止编号为1的VNCServer。
Ubuntu20.04系统中安装vncserver的方法步骤

Ubuntu20.04系统中安装vncserver的⽅法步骤Ubuntu 20.04已经在2020年4⽉份正式发布,笔者今天正式安装了⼀个镜像系统,并在该系统中安装vncserver以便于远程图形化管理和使⽤。
安装vncserver的步骤如下:第⼀步:安装桌⾯环境和VNCServer#更新apt update#安装桌⾯环境sudo apt install xfce4 xfce4-goodies#安装vncserverapt install tightvncserver#启动vncservervncserver随后按照提⽰,输⼊vncserver登录时候的密码并再次输⼊确认。
从远程登录之后发现桌⾯⼀⽚灰⽩。
看来还需要配置⼀下vncserver的环境:第⼆步:配置vncserver的参数#关闭vncserver :1窗⼝vncserver -kill :1#备份原来的配置⽂件mv ~/.vnc/xstartup ~/.vnc/xstartup.bak#编辑新的配置⽂件vim ~/.vnc/xstartup在xstartup⽂件中更新为如下内容:#!/bin/bashxrdb $HOME/.Xresourcesstartxfce4 &然后设置该⽂档的权限chmod +x ~/.vnc/xstartup随后重新启动vncserver即可连接图像界⾯,截图如下:可以看到已经能够出现图形界⾯。
但是⽬前是不安全的连接⽅式,如果需要考虑安全性,仍然需要进⼀步的配置。
在远程主机终端输⼊:ssh -L 59000:localhost:5901 -C -N -l root server_ip其中server_ip替换为您的远程主机IP地址即可然后使⽤putty,其他设置与普通的ssh设置类似,只是需要设置ssh隧道,具体设置如下图所⽰:在source port 中输⼊5901,destination输⼊ 127.0.0.1:5901,然后点击Add按钮,即可添加⼊上图所⽰的效果。
在Linux上安装vncserver
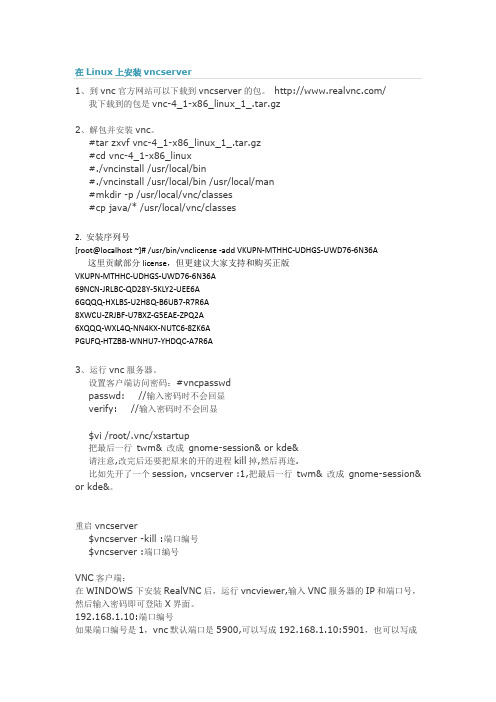
1、到vnc官方网站可以下载到vncserver的包。
/我下载到的包是vnc-4_1-x86_linux_1_.tar.gz2、解包并安装vnc。
#tar zxvf vnc-4_1-x86_linux_1_.tar.gz#cd vnc-4_1-x86_linux#./vncinstall /usr/local/bin#./vncinstall /usr/local/bin /usr/local/man#mkdir -p /usr/local/vnc/classes#cp java/* /usr/local/vnc/classes2. 安装序列号[root@localhost ~]# /usr/bin/vnclicense -add VKUPN-MTHHC-UDHGS-UWD76-6N36A 这里贡献部分license,但更建议大家支持和购买正版VKUPN-MTHHC-UDHGS-UWD76-6N36A69NCN-JRLBC-QD28Y-5KLY2-UEE6A6GQQQ-HXLBS-U2H8Q-B6UB7-R7R6A8XWCU-ZRJBF-U7BXZ-G5EAE-ZPQ2A6XQQQ-WXL4Q-NN4KX-NUTC6-8ZK6APGUFQ-HTZBB-WNHU7-YHDQC-A7R6A3、运行vnc服务器。
设置客户端访问密码:#vncpasswdpasswd: //输入密码时不会回显verify: //输入密码时不会回显$vi /root/.vnc/xstartup把最后一行twm& 改成gnome-session& or kde&请注意,改完后还要把原来的开的进程kill掉,然后再连.比如先开了一个session, vncserver :1,把最后一行twm& 改成gnome-session& or kde&。
重启vncserver$vncserver -kill :端口编号$vncserver :端口编号VNC客户端:在WINDOWS下安装RealVNC后,运行vncviewer,输入VNC服务器的IP和端口号,然后输入密码即可登陆X界面。
Ubuntu下安装VNCserver教程
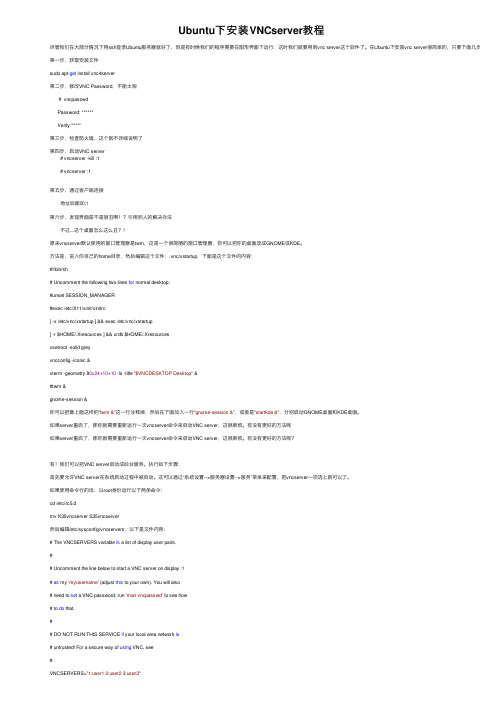
Ubuntu下安装VNCserver教程尽管我们在⼤部分情况下⽤ssh登录Ubuntu服务器就好了,但是有时候我们的程序需要在图形界⾯下运⾏,这时我们就要⽤到vnc server这个软件了。
在Ubuntu下安装vnc server很简单的,只要下⾯⼏步就可以了:第⼀步,获取安装⽂件sudo apt-get install vnc4server第⼆步,修改VNC Password,不能太短# vncpasswdPassword: ******Verify:*****第三步,检查防⽕墙,这个就不详细说明了第四步,启动VNC server# vncserver -kill :1# vncserver :1第五步,通过客户端连接地址后⾯加:1第六步,发现界⾯是不是很丑啊!?引⽤别⼈的解决办法不过...这个桌⾯怎么这么丑?!原来vncserver默认使⽤的窗⼝管理器是twm,这是⼀个很简陋的窗⼝管理器,你可以把你的桌⾯改成GNOME或KDE。
⽅法是,进⼊你⾃⼰的home⽬录,然后编辑这个⽂件:.vnc/xstartup,下⾯是这个⽂件的内容:#!/bin/sh# Uncomment the following two lines for normal desktop:#unset SESSION_MANAGER#exec /etc/X11/xinit/xinitrc[ -x /etc/vnc/xstartup ] && exec /etc/vnc/xstartup[ -r $HOME/.Xresources ] && xrdb $HOME/.Xresourcesxsetroot -solid greyvncconfig -iconic &xterm -geometry 80x24+10+10 -ls -title "$VNCDESKTOP Desktop" &#twm &gnome-session &你可以把像上⾯这样把"twm &"这⼀⾏注释掉,然后在下⾯加⼊⼀⾏"gnome-session &",或者是"startkde &",分别启动GNOME桌⾯和KDE桌⾯。
部署VNC Server及VNC Server的高级应用
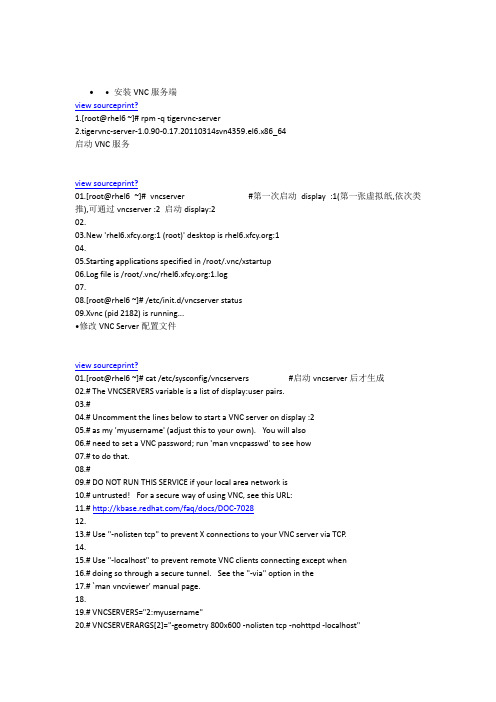
• 安装VNC服务端view sourceprint?1.[root@rhel6 ~]# rpm -q tigervnc-server2.tigervnc-server-1.0.90-0.17.20110314svn4359.el6.x86_64启动VNC服务view sourceprint?01.[root@rhel6 ~]# vncserver #第一次启动display :1(第一张虚拟纸,依次类推),可通过vncserver :2 启动display:202.03.New ':1 (root)' desktop is :104.05.Starting applications specified in /root/.vnc/xstartup06.Log file is /root/.vnc/:1.log07.08.[root@rhel6 ~]# /etc/init.d/vncserver status09.Xvnc (pid 2182) is running...•修改VNC Server配置文件view sourceprint?01.[root@rhel6 ~]# cat /etc/sysconfig/vncservers #启动vncserver后才生成02.# The VNCSERVERS variable is a list of display:user pairs.03.#04.# Uncomment the lines below to start a VNC server on display :205.# as my 'myusername' (adjust this to your own). You will also06.# need to set a VNC password; run 'man vncpasswd' to see how07.# to do that.08.#09.# DO NOT RUN THIS SERVICE if your local area network is10.# untrusted! For a secure way of using VNC, see this URL:11.# /faq/docs/DOC-702812.13.# Use "-nolisten tcp" to prevent X connections to your VNC server via TCP.14.15.# Use "-localhost" to prevent remote VNC clients connecting except when16.# doing so through a secure tunnel. See the "-via" option in the17.# `man vncviewer' manual page.18.19.# VNCSERVERS="2:myusername"20.# VNCSERVERARGS[2]="-geometry 800x600 -nolisten tcp -nohttpd -localhost"21.VNCSERVERS="2:xfcy 3:root" #设置在vncserver启动2个display,且display:2,:3的用户权限分别为xfcy,root22.VNCSERVERARGS[2]="-geometry 800x600"23.VNCSERVERARGS[3]="-geometry 800x600 -localhost" #设置display:2的分辨率为800×600且只监听本地•设置VNC密码(保存在~/.vnc/passwd中),同时自动生成~/.vnc/xstartup(在每次启动VNC服务时候,都会读取该文件中的配置信息)view sourceprint?1.[root@rhel6 ~]# vncpasswd2.Password:3.Verify:•修改xstartup配置文件view sourceprint?01.[root@rhel6 ~]# cat ~/.vnc/xstartup02.#!/bin/sh03.04.[ -r /etc/sysconfig/i18n ] && . /etc/sysconfig/i18n05.export LANG06.export SYSFONT07.vncconfig -iconic &08.unset SESSION_MANAGER09.unset DBUS_SESSION_BUS_ADDRESS10.OS=`uname -s`11.if [ $OS = '<a class="keylink" href="/os/oslin/" target="_blank">Linux</a>' ]; then12. case "$WINDOWMANAGER" in13. *gnome*)14. if [ -e /etc/SuSE-release ]; then15. PATH=$PATH:/opt/gnome/bin16. export PATH17. fi18. ;;19. esac20.fi21.if [ -x /etc/X11/xinit/xinitrc ]; then22. exec /etc/X11/xinit/xinitrc23.fi24.if [ -f /etc/X11/xinit/xinitrc ]; then25. exec sh /etc/X11/xinit/xinitrc26.fi27.[ -r $HOME/.Xresources ] && xrdb $HOME/.Xresources28.xsetroot -solid grey29.#xterm -geometry 80x24+10+10 -ls -title "$VNCDESKTOP Desktop" & #注释掉这两行避免出现黑屏30.#twm &31.32.gnome-session & #登录到GNOME桌面环境33.#startkde & #登录到KDE桌面环境•配置Display:2(即用户权限为xfcy的共享桌面,配置方法同上)view sourceprint?01.[root@rhel6 .vnc]# su - xfcy #必须在对应的用户下设置密码02.[xfcy@rhel6 ~]$ vncserver :203.04.You will require a password to access your desktops.05.06.Password:07.Verify:08.09.New ':2 (xfcy)' desktop is :210.11.Creating default startup script /home/xfcy/.vnc/xstartup12.Starting applications specified in /home/xfcy/.vnc/xstartup13.Log file is /home/xfcy/.vnc/:2.log14.15.[xfcy@rhel6 ~]$ vi .vnc/xstartup16.#!/bin/sh17.18.[ -r /etc/sysconfig/i18n ] && . /etc/sysconfig/i18n19.export LANG20.export SYSFONT21.vncconfig -iconic &22.unset SESSION_MANAGER23.unset DBUS_SESSION_BUS_ADDRESS24.OS=`uname -s`25.if [ $OS = '<a class="keylink" href="/os/oslin/" target="_blank">Linux</a>' ]; then26. case "$WINDOWMANAGER" in27. *gnome*)28. if [ -e /etc/SuSE-release ]; then29. PATH=$PATH:/opt/gnome/bin30. export PATH31. fi32. ;;33. esac34.fi35.if [ -x /etc/X11/xinit/xinitrc ]; then36. exec /etc/X11/xinit/xinitrc37.fi38.if [ -f /etc/X11/xinit/xinitrc ]; then39. exec sh /etc/X11/xinit/xinitrc40.fi41.[ -r $HOME/.Xresources ] && xrdb $HOME/.Xresources42.xsetroot -solid grey43.#xterm -geometry 80x24+10+10 -ls -title "$VNCDESKTOP Desktop" &44.#twm &45.46.gnome-session &•重启VNC Server服务view sourceprint?01.[root@rhel6 ~]# /etc/init.d/vncserver restart02.Shutting down VNC server: 2:xfcy 3:root [ OK ]03.Starting VNC server: 2:xfcy04.New ':2 (xfcy)' desktop is :205.06.Starting applications specified in /home/xfcy/.vnc/xstartup07.Log file is /home/xfcy/.vnc/:2.log08.09.3:root10.New ':3 (root)' desktop is :311.12.Starting applications specified in /root/.vnc/xstartup13.Log file is /root/.vnc/:3.log14.15. [ OK ]16.17.[root@rhel6 .vnc]# netstat -lntp | grep 590 #VNC server监听的端口从5900开始,display :1的监听5901,display :2监听5902,以此类推18.19.tcp 0 0 0.0.0.0:5902 0.0.0.0:* LISTEN 3567/Xvnc20.tcp 0 0 127.0.0.1:5903 0.0.0.0:* LISTEN 3649/Xvnc•客户端访问view sourceprint?01.[root@rhel5 ~]# vncviewer 192.168.1.119:302.03.VNC Viewer Free Edition 4.1.2 for X - built Jan 26 2009 11:52:0804.Copyright (C) 2002-2005 RealVNC Ltd.05.See for information on VNC.06.07.Sun Nov 18 23:17:16 201208. CConn: connected to host 192.168.1.119 port 590309. CConnection: Server supports RFB protocol version 3.810. CConnection: Using RFB protocol version 3.811.12.Sun Nov 18 23:17:18 201213. TXImage: Using default colormap and visual, TrueColor, depth 16.14. CConn: Using pixel format depth 6 (8bpp) rgb22215. CConn: Using ZRLE encoding16.17.Sun Nov 18 23:17:21 201218. CConn: Throughput 20476 kbit/s - changing to hextile encoding19. CConn: Throughput 20476 kbit/s - changing to full colour20. CConn: Using pixel format depth 16 (16bpp) little-endian rgb56521. CConn: Using hextile encoding•通过SSH加密VNC的远程连接view sourceprint?01.[root@rhel5 ~]# vncviewer -via 192.168.1.119 :202.03.VNC Viewer Free Edition 4.1.2 for X - built Jan 26 2009 11:52:0804.Copyright (C) 2002-2005 RealVNC Ltd.05.See for information on VNC.06.The authenticity of host 'rhel6 (192.168.1.119)' can't be established.07.RSA key fingerprint is 1a:cf:92:de:28:7d:f2:e0:e8:e6:ad:f1:7c:40:6a:67.08.Are you sure you want to continue connecting (yes/no)? yes09.Warning: Permanently added 'rhel6' (RSA) to the list of known hosts.10.root@rhel6's pass<a class="keylink" href="/edu/ebg/" target="_blank">word</a>:11.12.Tue Nov 20 01:12:37 201213. CConn: connected to host localhost port 559914. CConnection: Server supports RFB protocol version 3.815. CConnection: Using RFB protocol version 3.816.17.Tue Nov 20 01:12:39 201218. TXImage: Using default colormap and visual, TrueColor, depth 16.19. CConn: Using pixel format depth 6 (8bpp) rgb22220. CConn: Using ZRLE encoding21.22.Tue Nov 20 01:12:41 201223. CConn: Throughput 20588 kbit/s - changing to hextile encoding24. CConn: Throughput 20588 kbit/s - changing to full colour25. CConn: Using pixel format depth 16 (16bpp) little-endian rgb56526. CConn: Using hextile encoding•关闭已启用的display:2view sourceprint?1.[xfcy@rhel6 ~]$ vncserver -kill :2 #必须以相应的用户进行操作2.Killing Xvnc process ID 35673.Xvnc seems to be deadlocked. Kill the process manually and then re-run4. /usr/bin/vncserver -kill :25.to clean up the socket files.6.7.[root@rhel6 ~]# netstat -lntp | grep 5908.tcp 0 0 127.0.0.1:5903 0.0.0.0:* LISTEN 6585/Xvnc •通过VNC Server自动抓取客户端的桌面(CatchDesktop)•附:AIX上部署VNC Serverview sourceprint?01.一.安装VNC02.# rpm -ivh vnc-3.3.3r2-6.aix5.1.ppc.rpm03.vnc ##################################################04.05.# rpm -ql vnc06./opt/freeware/bin/Xvnc07./opt/freeware/bin/vncconnect08./opt/freeware/bin/vncpasswd09./opt/freeware/bin/vncserver10./opt/freeware/bin/vncviewer11./opt/freeware/doc/vnc-3.3.3r212./opt/freeware/doc/vnc-3.3.3r2/LICENCE.TXT13./opt/freeware/doc/vnc-3.3.3r2/README14./opt/freeware/share/vnc/classes15./opt/freeware/share/vnc/classes/DesCipher.class16./opt/freeware/share/vnc/classes/animatedMemoryImageSource.class17./opt/freeware/share/vnc/classes/authenticationPanel.class18./opt/freeware/share/vnc/classes/clipboardFrame.class19./opt/freeware/share/vnc/classes/index.vnc20./opt/freeware/share/vnc/classes/optionsFrame.class21./opt/freeware/share/vnc/classes/rfbProto.class22./opt/freeware/share/vnc/classes/shared.vnc23./opt/freeware/share/vnc/classes/vncCanvas.class24./opt/freeware/share/vnc/classes/vncviewer.class25./opt/freeware/share/vnc/classes/vncviewer.jar26./opt/freeware/vnc27./usr/lpp/X11/bin/Xvnc28./usr/lpp/X11/bin/vncconnect29./usr/lpp/X11/bin/vncpasswd30./usr/lpp/X11/bin/vncserver31./usr/lpp/X11/bin/vncviewer32.33.34.二.编辑配置文件:/opt/freeware/bin/vncserver35.1.修改前:36.# $cmd .= " -fp /usr/lib/X11/fonts/,/usr/lib/X11/fonts/misc/,/usr/lib/X11/fonts/75dpi/";37.修改后:(去掉注释,即加入了fonts)38.$cmd .= " -fp /usr/lib/X11/fonts/,/usr/lib/X11/fonts/misc/,/usr/lib/X11/fonts/75dpi/";39.$cmd .= " -ac -fp /usr/lib/X11/fonts/,/usr/lib/X11/fonts/misc/,/usr/lib/X11/fonts/75dpi/"; (若出现灰屏则设置为此)40.2.修改前:41.$vncClasses = "/usr/local/vnc/classes";42.修改后:43.$vncClasses = "/opt/freeware/vnc/classes";44.45.# cat /opt/freeware/bin/vncserver | egrep "font|vncClasses" | grep -v ^#46.$vncClasses = "/opt/freeware/vnc/classes";47.$cmd .= " -fp /usr/lib/X11/fonts/,/usr/lib/X11/fonts/misc/,/usr/lib/X11/fonts/75dpi/,/usr/lib/X11/fonts/100dpi /,/usr/lib/X11/fonts/ibm850/,/usr/lib/X11/fonts/Type1/";48.49.50.三.如果要使用CDE界面(AIX下的XWindow,类似于Redhat的GNOME)51.# vi ~/.vnc/xstartup52.#!/bin/sh53.54.xrdb $HOME/.Xresources55.xsetroot -solid grey56.xterm -geometry 80x24+10+10 -ls -title "$VNCDESKTOP Desktop" &57.# twm & #注释掉原来的配置58./usr/dt/bin/dtsession & #添加CDE界面的session59.60.四.启动vncserver61.# su oracle62.$ vncserver63.64.You will require a pass<a class="keylink" href="/edu/ebg/" target="_blank">word</a> to access your desktops.65.66.Password:67.Verify:68.69.New 'X' desktop is fjkf:170.71.Creating default startup script /home/oracle/.vnc/xstartup72.Starting applications specified in /home/oracle/.vnc/xstartup73.Log file is /home/oracle/.vnc/fjkf:1.log延伸阅读:∙1、linux下配置VNC服务端∙2、CentOS6下VNC的安装与配置∙3、Ubuntu server配置远程VNC服务∙4、使用VNC实现LINUX与windows的相互远程控制∙5、aix5.3下配置vnc远程控制软件∙6、配置VNC远程登录Linux主机∙7、VNCserver & VNCviewer Setup∙8、配置Linux系统远程桌面vnc服务。
VNC-Server安装及配置

VNC-Server安装及配置⼀、什么是VNC?VNC (Virtual Network Computer)是计算机的缩写。
VNC 是⼀款优秀的⼯具软件,由著名的的欧洲研究实验室开发的。
VNC 是在基于和操作系统的免费的,远程控制能⼒强⼤,⾼效实⽤,其性能可以和和中的任何远程控制软件媲美。
在 Linux 中,VNC 包括以下四个命令:vncserver,vncviewer,vncpasswd,和 vncconnect。
⼤多数情况下⽤户只需要其中的两个命令:vncserver 和 vncviewer。
⼆、VNC的特点同样可能远程连⼊UNIX、Linux进⾏图形化操作的还有流⾏的Xmanager,VNC与之相⽐——两者⼯作原理不⼀样,前者(VNC)是远程连⼊操作系统,所有操作在UNIX、Linux进⾏,即使操作过程中“本地电脑与⽹络断开”,也不影响操作的顺利进⾏;⽽后者(Xmanager)是通过端⼝将主机服务器的UI界⾯引导到本地电脑进⾏展现,如操作过程出现“本地电脑与操作主机⽹络断开”,操作将中断失败!如果操作中进⾏的⼯作任务⾮常重要,不能中断,如ORACLE RAC实施,结果是灾难性的!更重要的是,VNC是免费的、开源的,Xmanager你可能⽤的是破解的。
三、VNC运⾏的⼯作流程如下:1、VNC客户端通过浏览器或VNC Viewer连接⾄VNC Server。
2、VNC Server传送⼀对话窗⼝⾄客户端,要求输⼊连接密码,以及存取的VNC Server显⽰装置。
3、在客户端输⼊联机密码后,VNC Server验证客户端是否具有存取权限。
4、若是客户端通过VNC Server的验证,客户端即要求VNC Server显⽰桌⾯环境。
5、VNC Server通过X Protocol 要求X Server将画⾯显⽰控制权交由VNC Server负责。
6、VNC Server将来由 X Server的利⽤VNC通信协议送⾄客户端,并且允许客户端控制VNC Server的桌⾯环境及输⼊装置。
centos7安装vnc-server与卸载

centos7安装vnc-server与卸载查看是否安装vncrpm -qa | grep vnccentos安装vncyum install vnc vnc-serveryum install tightvnc-server去除端⼝防⽕墙iptables -I INPUT -p tcp --dport 5901 -j ACCEPT查看是否安装Gnome桌⾯环境【vnc viewer连接⿊屏可能没安装这个桌⾯环境】yum grouplist安装Gnome桌⾯环境yum groupinstall "GNOME Desktop"新建桌⾯:1vncserver :1输⼊vncserver :1后设置密码Password: 设置使⽤VNC连接服务器的密码Verify: 再次输⼊⼀遍密码Would you like to enter a view-only password (y/n)? 选择n,以使连接到服务器后可以操作服务器其他命令:设置VNC密码vncpasswd查看vncserver的服务情况vncserver -list开启编号为:1的桌⾯vncserver :1关闭编号为:1的vncservervncserver -kill :1更新systemctl使配置⽣效systemctl daemon-reload客户端⿊屏 CentOS 执⾏:chmod 755 /root/.vnc/xstartup卸载vnc软件yum remove tigervnc-server -y删除vnc下的配置rm -rf /root/.vncrm -rf /etc/.X11-unitrm -rf /etc/.X*-lockwin10 使⽤ vnc viewer 连接 linxu 的vnc server在centos7桌⾯的下⽅会有Unencrypted connection表⽰root是加密的,可以不管。
1、vncserver图形界面安装

一、安装VNC1.使用rpm -q vncserver查看vnc服务是否安装:2.使用yum install tigervnc-server 安装3.安装支持库# yum install xsetroot# yum install xterm# yum install twm4.安装桌面下载桌面需要的包:yum -y groupinstall Desktopyum -y groupinstall "X Window System"yum groupinstall KDE Desktop5.启动或停止杀死进程# vncserver -kill :1启动进程# vncserver :1二、之前已经说了如何安装vncserver,下面则讲一下如何配置.1、使用vncserver 命令配置一下vnc远程使用的密码,如下图...2、编辑vnc启动图形界面的文件.vi /root/.vnc/xstartup.把最后一行twm & 这个注释掉,然后添加一行内容.gnome-session &.然后保存退出...3、再编辑vnc的另外一个配置文件.vi /etc/sysconfig/vncservers.修改一下最后两行如下.VNCSERVERS="1:root 2:root"VNCSERVERARGS[2]="-geometry 800x600 -nolisten tcp -localhost"然后保存退出..4、最后启动vncserver 并设置为开机启动,【如果系统防火墙不会用,就关闭吧】.service vncserver start.chkconfig vncserver on.service iptables stopchkconfig iptables on ...。