moldflow2010多国语言版下载与安装图文教程
Autodesk Moldflow 2010 安装与注册参考指南快速概述更改说明书

Autodesk Moldflow 2010Installation and Registration Reference GuideQuick Overview of Changes:•Product Name:Moldflow Plastic Insight (MPI) is now referred to as Autodesk Moldflow Insight (AMI)Moldflow Plastic Adviser (MPA) is now referred to as Autodesk Moldflow Adviser (AMA) •A version of FlexLM is now used for our license manager. For additional information on the license manager installation, please refer to step # 10.•The supported platforms have changed. Please refer to the installation manuals located on the DVD.•The installation DVD contains all Autodesk Moldflow products and their existing language files.•Modules have been combined to form three different bundles for both AMI and AMA. The bundles are as follows:1. Autodesk Moldflow Insight Basic2. Autodesk Moldflow Insight Performance3. Autodesk Moldflow Insight Advanced1. Autodesk Moldflow Adviser Design2. Autodesk Moldflow Adviser Manufacturing3. Autodesk Moldflow Adviser Advanced•Additional information in regards to your packages has already been sent to the appropriate contacts at your company.•All licenses are now floating licenses.Further details pertaining to the installations can be found on the DVD.Installation process:The following installation instructions represent the process for installing Autodesk Moldflow Insight 2010 (AMI) on Windows XP 64. The installation process for Autodesk Moldflow Adviser and our other products is very similar.1.Select the product that you would like to install.2.Start the Autodesk Moldflow Insight (AMI) installation.3.Accept the license agreements.4.Choose the installation directory. We suggest installing in the default directory.5.Specify the default project directory. This can either be in the user’s “My Documents” folderor in a custom folder. We recommend specifying a local custom folder (i.e.c:\My_AMI_2010_Projects) to avoid any right access issues with accessing folders over the network.6.Verify the Project Directory location.7.Choose the Temporary File location.8.These directories will be created and the product will begin the installation after selectingInstall.9.Directories are being created and AMI is being installed.10.The license manager installation will now initiate.11.We strongly recommend keeping the default installation directory.12.Choose one of the following installation options for the license manager:Client and Server: allows the machine to be used as a license serverClient Only: will not allow the machine to be used as a license server so it will need to be directed to a different machine that is specified as a license server.13.If this is the license server then please note this host name for the remaining clientinstallations. The colons behind hostname can be left as is. If this is the client machine then please specify the host name or IP address of the license server.14.The license manager installation will begin.15.Ensure that the following check box is selected so the registration process will begin. If youdo not wish to register the product at this time then please uncheck the box.16.Please use Windows Explorer for the registration process. If you are a new user then youmay register as a new user at the following link.17.Please fill out the following information if you are creating a new User Account. If youcurrently have your login information then skip this step and simply log into the site.18.Select the license location and click Next.19.Enter the Serial number located on the back of the DVD case. Then click Next.20.Enter the host name of the license server (do not to use the colons here).We will explain how to obtain the data for the Server ID field in the next few steps.21.Select “start” then “run”.22.Enter cmd and select OK to confirm.23.Enter ipconfig /all and hit the Return key to confirm.e only the physical address (MAC address) of the Ethernet adapter. You may also obtainyour host name information from this utility if it is not known.25.Enter the physical address of the Ethernet adapter (without Hyphens) here. You may alsonotice that there is an option to choose a Network server type. Using the single serveroption will assign all of your licenses for that product to one machine. The distributedserver option will allow you to split the licenses for the product between different machines (if you own multiple licenses for that product). We do not support redundant servers sothis option should not be used.26.At this point you will have two options available:1.Save the file to your local machine. An email with this information will be sent to youremail address automatically.2.You can request licenses for additional products. AMI, AMA, CADDr, MDL, and MSA areall considered separate products so you should have received an install packet for each.All of the products can be installed from the same DVD, but you will need to register theserial number on the back of each DVD case in order to obtain a license for eachproduct.27.The installation for AMI 2010 and the new product security should be complete. Theproducts should all be registered as well. You may install any additional products that you own at this point (AMI, MDL, CADDr, MSA), but it is not necessary to run through theproduct security install or registration process again.28.If licenses have been requested for more than one product then we will have to combinethese licenses into one file.29.Open all of the lic files in Notepad (Right click ‐> Open With ‐> Notepad)bine all of the license files. Please pay special attention to the format used.e File ‐> Save As so that we may save the combined file as a new file. This will ensure thatwe keep all of our original licenses in their original format. They can be stored on yourmachine for future reference.32.Save the license file in the following directory:32 bit: C:\Program files\Autodesk Network License Manager\License64 bit: C:\Program files (x86)\Autodesk Network License Manager\License33.Open the LMTOOLS so that we can configure it. We require full admin rights for this step. Ifyou are operating on Vista then you may need to right click on the application and select“run as administrator.”34.Please ensure that the following option is check prior to continuing with the configuration.35.Navigate to the “Configure Service” tab. The service is named “Flexlm service 1” bydefault.” You may assign it a different name at this point if you wish. (i.e. Autodesk Moldflow Network License Manager).36.Specify the file path to the lmgrg.exe file. It should be in the following location if you usedthe recommended directories:32 bit: C:\Program files\Autodesk Network License Manager\lmgrd.exe64 bit: C:\Program files (x86)\Autodesk Network License Manager\lmgrd.exe37.Specify the file path to the license file. It should be in the following location if you used therecommended directories:32 bit: C:\Program files\Autodesk Network License Manager\License\test.lic64 bit: C:\Program files (x86)\Autodesk network License manager\License\test.licPlease ensure to include the license file in the specified path.38.Specify a directory for the debug file. It will be necessary to create a .log file in the specifieddirectory. The file name should have a .log file extension. (i.e. anlm_licence.log).39.Select the following service settings and save them. Please note that you will need to checkthe “Use Services” box prior to being able to check the “Start Server at Power Up” option.40.It is necessary to restart the machine at this point.41.After the machine reboots please try to start Autodesk Moldflow Insight 2010.42. If the software should happen to fail with a license error, open the LMTOOLS., navigate tothe Start/Stop/Reread tab, and click on the Start server button.If the software is still not opening at this point then you may need to call the technical support group at 1-800-284-3569 for additional assistance.。
moldflow2010安装方法—截图教程亲测成功
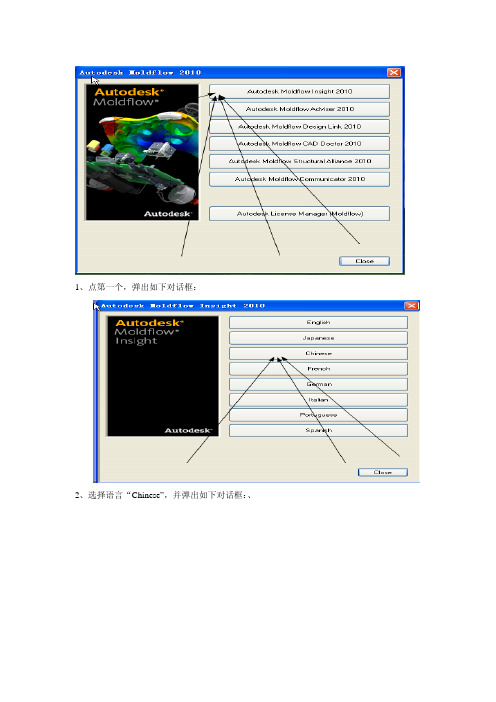
1、点第一个,弹出如下对话框:2、选择语言“Chinese”,并弹出如下对话框:、3、选择第一个,弹出如下对话框:4、按箭头所示,点“next”,所有选项均默认,直到安装完成5、最后将勾去掉,单击完成6、完成后回到如上图所示的对话框,选择如箭头所示的选项,安装汉化包。
均按默认选项,直到完成。
7、完成后回到如上图所示的窗口,选“close”按扭,完成安装;8、回到最处的安装界面,选择如上图所示的选项“Autodesk Moldflow CAD Doctor 2010“.出现下图:9、在弹出的对话框中选择第一个,如上图所示,后面的安装步骤均安默认,直到安装完成,最后再回到上图所示的安装界面,选择“close“完成安装。
10、回到最初的安装界面,选择如上图所示的选项,安装“Autodesk Moldflow Design Link 2010“;11、在弹出的对话框中选择第一个,后面的安装按默认选项,直到完成安装,出现的协议时选择接受。
12、安装到最后,去掉勾,点完成。
13、回到如上图所示的界面,点“Close“完成安装14、回到最初的安装界面,如上图所示,选择“Close“完成所有的安装。
15回顾以上安装步骤总结,在以上的安装步骤中我们只安装了Autodesk Moldflow2010的三个模块:分别是Autodesk Moldflow Insight2010、Autodesk Moldflow CAD Doctor 2010、Autodesk Moldflow Design Link 2010,如下图所示:、以下内容为破解过程:1、找到安装包,打开里面的破解文件夹,如下图所示:2、打开“破解文件夹“,找到adlmdll.dll的文件,将其复制到C:\ProgramFiles\Autodesk\License Manager (Moldflow) 的文件夹下,覆盖原有的文件,如下图所示:Files\Autodesk Network License Manager文件夹下,覆盖原有的文件,如下图所示:4、再回到安装包中的破解文件夹中,复制license、Moldflow ADLM Licensing两个文件,将其复制到C:\Program Files\Autodesk Network License Manager\License文件夹下(原文件夹为空文件夹)如下图所示:5、设置服务器,在桌面上找到LMTOOLS快捷方式将其打开,如下图所示:6、打开“Config Services”选项卡,新建一个服务(名字任意)如下图所示:7、配置路径,如下图所示:、8、保存服务,配置完成后保存服务,如下图所示:9、配置完成后,进入“Start/Stop/Reread“选项卡,对服务器进行重启动,如下图所示:10、重启动服务器时要选中“Force Server Shutdown“,先点击Stop Server 再点StartServer。
Moldflow基本使用操作课程ppt课件

行业:汽车 产品:仪表板
LG Chemical 因此以高价赢得一年的 供货合同 ( 2000ton / 年 )
精选版课件ppt
12
模具制造商
为什么他们要使用 MOLDFLOW :
1. 减少试模时间 2. 提高模具质量 3. 提高公司竞争力 4. 以技术区别于其它公司
1) 确定分析的模型 * 需要CAD创建的 3D solid model
2)确定材料 * 确认在成形过程中该产品所使用的材料类型.
3) 注塑成型条件 * 如此产品没有现成的注塑参数,可由分析者根据实际情况决定. * 如此产品有现成的注塑参数,使用现有的注塑条件表。
4) 模具图 * 针对于产品的FLOW分析,我们需要 Runner, Sprue, Gate的正确的位置,大小,长度等信息。 * 针对于 Cool 分析,我们需要 Channel的正确的位置,大小,长度等信息。
适用于分析形状特征复杂之薄壳类塑胶零件。它基于 Moldflow的独家专利的Dual Domain(双层面)分析技 术,直接从CAD软件中提取实体表面产生网格。FUSION 网格大大降低前期网格处理时间,能快速对产品进行流动、 冷却,翘曲等分析。它以最快的网格处理及最佳的网格质 量和准确的分析结果成为应用广泛的薄壁件分析的网格形 式。
效益 (1) 节约成本约 $45K (2) 减少试模次数1到2次 (3) 缩短开发周期两个月
精选版课件ppt
23
采用Moldflow后的效益
•缩短开发周期,加速产品上市 •平均节省材料2-3% •平均节省注塑成本6-7%
精选版课件ppt
Autodesk Ltd推出2010 Autodesk Moldflow最新版软件

Autodesk Ltd推出2010 Autodesk Moldflow最新版软
件
无
【期刊名称】《模具工程》
【年(卷),期】2009(000)010
【摘要】Autodesk Ltd目前发布了用于模拟塑料注射成型及优化的2010 Autodesk Moldflow软件套件第二个版本。
这一最新版本是Aulodesk数字成型解决方案的一部分,它可在CAD的主要用途中改善产品的性能、准确度和互操作性。
在计算机辅助工程市场中,该套件最早利用高性能图形处理单元(GFU)处理能力的优势解决复杂计算问题,使用速度比以前提高了1倍。
【总页数】1页(P38)
【作者】无
【作者单位】无
【正文语种】中文
【中图分类】TP317
【相关文献】
1.Autodesk推出简体中文版设计软件解决方案 Autodesk Land Desktop3和Autodesk Civil Desiqn3 [J],
2.Autodesk发售编解码软件Cleaner的最新版本 [J], 无
3.Autodesk Inventor 2009——Autodesk Inventor 2009软件评测 [J],
4.Autodesk,Inc.Autodesk推出第20版——AutoCAD 2006 [J],
5.欧特克推出Autodesk 3ds Max Design 2010最新版本 [J],
因版权原因,仅展示原文概要,查看原文内容请购买。
MoldFlow使用经验教材教学课件

冷却效果评估
介绍如何评估冷却系统的 冷却效果,如通过冷却时 间、温度均匀性等指标进 行评估。
成型工艺优化
注射速度与压力
阐述注射速度和压力对成型工艺的影 响,如对填充效果、产品收缩率等的 影响。
成型参数优化
介绍如何通过调整注射速度、压力、 模具温度等参数优化成型工艺,提高 产品质量和生产效率。
模具温度控制
流道设计
阐述流道设计的要点,如流道截面 形状、流道长度、流道宽度等,以 及如何通过流道设计平衡压力和减 小温差。
冷却系统设计
01
02
03
冷却系统的重要性
强调冷却系统在注塑成型 过程中的重要性,如减小 成型周期、提高产品质量 等。
冷却水路设计
讲解冷却水路的基本类型, 如直通式、环绕式、多通 道式等,以及各自适用的 场景。
Moldflow使用经验 教材教学课件
目录
• Moldflow软件介绍 • Moldflow基础操作教程 • Moldflow进阶操作教程 • Moldflow实战案例分析 • Moldflow常见问题与解决方案 • Moldflow软件更新与未来发展
01
Moldflow软件介绍
软件特点与优势
详细描述
网格划分失败的原因可能包括模型导入错误、网格类型 选择不当、网格参数设置不合理等。解决此问题的方法 包括检查模型文件是否正确、选择合适的网格类型、调 整网格参数等。
材料参数设置问题
总结词
材料参数是影响Moldflow模拟结果的重要因素,如果参数设 置不准确或不完整,将导致模拟结果失真。
详细描述
热交换结构设计
介绍热交换结构在模具设 计中的应用,如水路、气 道等,以提高模具的冷却 效果和减小成型周期。
MOLDFLOW详细操作手册

VS
4. 在必要情况下,采用多级注射工艺 来改善填充效果。
05
Moldflow案例分析
案例一:手机壳模具设计优化
总结词
通过Moldflow对手机壳模具进行模拟分析, 优化模具设计,提高生产效率和产品质量。
1. 导入3D模型
将手机壳的3D模型导入Moldflow软件中,并 进行适当的单位和网格划分设置。
冷却介质
根据模具结构和生产条件,选择合适的冷却介质,如水、油等, 以提高冷却效果和减小冷却时间。
模具热平衡分析
温度场分布
通过热平衡分析,了解模具温度场分布情况,为优化模具设计和减 小热误差提供依据。
热传导与对流
分析模具材料、冷却介质和塑料之间的热传导与对流情况,以提高 冷却效果和减小成型周期。
热膨胀与收缩
多模腔模拟
模腔耦合分析
通过多模腔模拟,分析各模腔之间的耦合效应, 以优化模具设计和减小成型误差。
充型平衡
通过多模腔模拟,分析各模腔的充型情况,以实 现各模腔的充型平衡和减小缺陷。
冷却平衡
通过多模腔模拟,分析各模腔的冷却情况,以实 现各模腔的冷却平衡和减小成型周期。
04
Moldflow常见问题与解决 方案
浇注材料等。
03
4. 设计调整
根据模拟分析结果,对模具设计方案进行调 整,如优化浇注系统、改进模具结构等。
05
04
3. 模拟分析
对模具进行充填、流动、保压和冷却 等模拟分析,观察分析结果,评估模 具设计方案的有效性和可行性。
06
5. 验证调整效果
通过再次模拟分析验证调整后的模具设计方案 效果,确保方案的有效性和可行性得到提高。
4. 尝试增加模拟迭代次数或采用更高级的求解算法以提高模 拟精度。
moldflow安装教程教学提纲

4、接受协议;
5、产品序列号【666-66666666】和产品密钥【579H1】,服务器地址为【127.0.0.1】
6、安装选项,第一项autodesk moldflow synergy 2016一定要安装,其它的可根 据需要选择安装,另外安装路径一定要是英文,建议安装在D盘;
三角形处建议展开,将临时目录和工作目录更改到F:盘 Moldflow Design Link 2016安装到同一务器图标此时不要打开这个程序后用记事本打开hostname改成你的电脑名mac不要带改成你的网卡地址如下图
moldflow2016安装教程
具体步骤
5、打开服务器(第一步中的图标),按下图设置服务器; 第一步:新建Autodesk Simulation Moldflow 2016 第二步:选服务器安装位置处文件(lmgrd.exe) 第三步:选服务器安装位置处文件(lic.dat) 第四步:选服务器安装位置处文件(log.log),(log.log文件 创建方法:新建一个TXT文件,再改为log文件)
7、正在安装中,请稍等;
8、成功安装;
二、再安装Moldflow Insight Ultimate 2016 1、双击“MFIA_2016_Multilingual_Win_64bit_dlm.sfx.exe” 自解压到c:\autodesk,安装完后可以删除;
2、右上角选择语言版本,这里以中文简体为例;
6、切换到st动成功!
六、安装补丁
2 4 1 3
5 6
数字为补丁安装顺序
最后启动Moldlow 2016
大功告成,最后打开Moldflow 2016 !
结束
6、路径可根据需要选择,另外安装路径一定要是英文,建议安装在D盘; 三角形处建议展开,将临时目录和工作目录更改到F:盘
MoldFlow2010安装图解
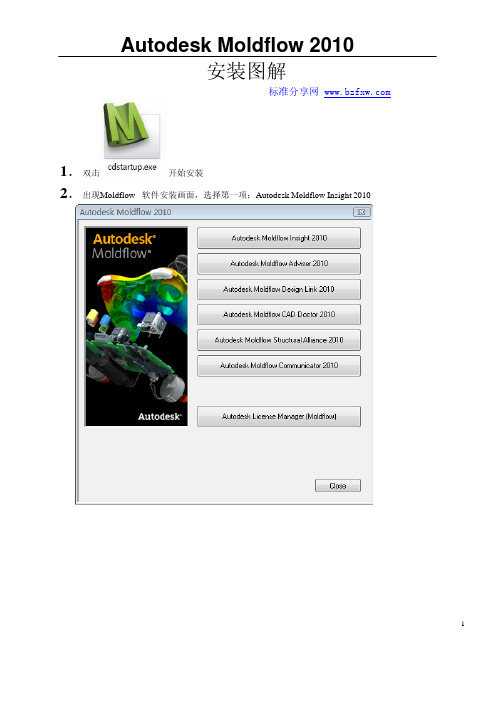
Autodesk Moldflow 2010安装图解标准分享网 1.双击开始安装2.出现 M oldflow 软件安装画面,选择第一项:Autodesk Moldflow Insight 201013. 进入语言选择界面,可以根据情况选择 C hinese4.出现安装界面,选择第一项安装软件25.安装好软件后,自动弹出LM的安装6.进入以下界面,保持默认的第一英“客户端和服务器”,然后按默认的选项安装直至完成。
37.点击中文语言包。
8.完成后,点Close关闭,退回初始安装界面,然后再安装第二项、第三项,以此类推,直至将你所需要安装的都安装完毕,安装全部按默认选项及路径。
49.软件全部安装完成后,先不要运行,然后复制光盘内注册文件夹内的整个文件夹粘贴到C盘根目录内(此为默认软件安装路径,如软件实际安装路径不同这里的复制粘贴路径也有差异),弹出替换文件的提示,确定替换。
510.运行桌面上的,出现以下界面,点选Config Services选项11.点选中间三行框后面的Browse第一行指向定位到:C:\Program Files \Autodesk Network License Manager\lmgrd.exe第二行指向定位到:C:\Program Files \Autodesk Network License\Manager\License\license.dat第三行可留空完成后勾选最下面的两个选框,再点击“Save Service”保存。
6712.切换到Start/Stop/Reread选项,点Stop Server 再点Start Server ,左下角显示Server Start Successful即可,13.关闭关闭 L MTools工具,运行软件,正常启动使用,软件注册成功完成!标准分享网 提供8。
- 1、下载文档前请自行甄别文档内容的完整性,平台不提供额外的编辑、内容补充、找答案等附加服务。
- 2、"仅部分预览"的文档,不可在线预览部分如存在完整性等问题,可反馈申请退款(可完整预览的文档不适用该条件!)。
- 3、如文档侵犯您的权益,请联系客服反馈,我们会尽快为您处理(人工客服工作时间:9:00-18:30)。
moldflow2010多国语言版下载与安装图文教程
2011-11-01 16:45
一、下载软件:/html/download/2011/1103/334.html
二、安装
首先用虚拟光驱载入下载的iso文件,然后打开安装盘,找到cdstartup文件夹下的cdstartup.exe文件,双击运行,弹出安装向导,如下图
1.AMI使用最广泛的塑料成型模拟模块,以前称之为MPI
2.AMA快速注塑向导模块,功能比AMI要弱些
3.AMI和AMA与其他软件的接口,可直接读取stp,igs,prt等格式并生成moldflow所需的网格文件
4.cad模型修复工具,可去除小特征和修复曲面问题
5.可以导出数据至ansys分析塑料件的机械性能
6.分析数据共享
7.许可证管理
这里我只安装1.3.4.
点击Autodesk Moldflow Insight2010按钮选择语言Chinese
点击Install Autodesk Moldflow Insight 2010
点击next
点选接受协议,点击next
点击浏览(Browse)按钮,选择软件将要安装的位置,然后点击next
设置工作目录,本地文件夹或是共享文件夹
安装许可证管理器
选择许可证服务器安装位置,一般默认即可选择许可证类型--客户端和服务器
点击安装开始安装许可证服务器
到这一步要注意:取消勾选在线激活许可证
回到这个界面中选择第二项,安装中文语言包
选择简体中文,点击确定,点击下一步,点击安装,点击完成
点击close完成AMI的安装,
返回到安装主界面安装Design Link 2010
选择安装Design Link 2010
点击next,
点选接受协议,点击next,点击Install开始安装,点击finish完成
回到安装主界面选择CAD Doctor 2010
选择语言为英文,只能选择英文或日文
点击next,点选接受许可证协议条款,点击next,点击next,点击change可以更改安装位置,点击next,点击install,点击finish完成安装
点击close关闭cad Doctor安装向导窗口,点击close将安装主界面也关闭掉。
三、破解
在安装盘中找到MAGNiTUDE文件夹,在这个位置MAGNiTUDE\Program
Files\Autodesk\License Manager (Moldflow)下找到adlmdll.dll文件,复制,然后找到C:\Program Files\Autodesk\License Manager (Moldflow)文件夹中粘贴,并替换原文件(这个是默认的安装位置,许可证服务器的安装位置),如图
继续找到安装盘中的L:\MAGNiTUDE\Program Files\Autodesk Network License Manager这个文件夹下,找到adskflex.exe和license.dat两个文件,复制,找到C:\Program Files\Autodesk Network License Manager这个文件夹下,粘贴并替换原有的文件,如图
点击:开始--所有程序--Autodesk--network license manager--MLTOOLS,打开许可证服务器,切换到config services,在service name中输入服务器名称,Moldflow_2010,这里的名称我们可以任意取,
然后在C:\Program Files\Autodesk Network License Manager文件夹下新建一个文本文档,将文件名称和类型改为moldflow2010.log,点击浏览,选择这个log文件
勾选下面的两项,点击save service
切换到start/stop/reread栏,选择moldflow_2010,点击stop server,再点击start server,关闭许可证服务器
双击桌面上的AMI图标,弹出错误窗口,点击“否”关闭窗口
继续打开MLTOOLS,选择moldflow_2010,切换到utilities栏,点击2号按钮,找到我们复制过去的license.dat,点击Add Vendor Path按钮,切换到
start/stop/reread栏,先终止服务,再起始服务,再次打开AMI
破解完成~~。