Agilent GCMS(操作说明)
AgilentBGCMS操作步骤
(一)开机步骤1.到402开卡同时登记开机时间2.检查氦气瓶气量是否充足,总压需>2MPa,分压在0.4~0.6MP。
如需使用双MS则要开氮气,氮气分压需>0.5MPa。
若气体不足,则需更换气瓶。
更换气瓶时需注意关闭总压阀与分压阀:待气瓶换好后,用检漏液检查阀门连接处是否有漏气。
3.进入重点实验室后先查看实验室卫生状况,若室内不干净必须先打扫卫生后再开启仪器。
同时确认实验室内是否有安全隐患,如是否有特殊气味、挥发性药品气味。
4.开机之前先检查泵油颜色是否清亮、油量是否在最高与最低限值内、托盘内是否有油泄露。
泵油3-6个月换一次,但也根据实际使用情况确定是否需要换泵油。
泵下不能垫纸以防运行时泵温度过高引起燃烧。
5.打开UPS电源,这时旁路电源指示灯闪烁,长按开关至逆路电源指示灯亮后打开GC/MSTriple Quad和GC System设备的开关。
如果长时间未开机,按下GC/MS Triple Quad设备开关后拧紧放空阀,用手向右侧推前段真空腔的侧板直至侧面板被紧固地吸牢(约1-2min),涡轮泵开始工作,屏幕显示启动后松开。
(后段真空腔的侧板螺丝一般是拧上的,所以抽真空时不用推紧)。
6.待系统稳定后,点击电脑桌面图标“GC-QQQ”,弹出对话框点击进入“调谐”→“手动调谐”→“真空控制”→“抽真空”。
抽真空10min左右如果涡轮泵转速需达到100%、功率达到45.5,高真空达到7.9×10E-5,低真空达到1.9×10E2,否则说明有漏气,检查侧板是否压正、柱子是否拧紧。
若离子源真空箱未打开过抽真空时间一般为40min,若打开过,则需4h。
7.开机后先检漏气象气象一般漏气点及处理方法:(1)进样口隔垫检查进样口漏气的方法是在进样口不分流的情况下,在GC键盘上按两下预运行,查看进样口总流量,如果大于5ml/min,则说明进样口漏气,需更换隔垫。
一般自动进样情况下进样100针后更换隔垫。
GC-MS操作规程
Agilent 7890-5975 GC-MS气-质联用仪操作规程1. 气相色谱-质谱联用仪的开启(1)打开载气钢瓶(He)控制阀,设置分压阀压力至0.5Mpa。
若用ECD检测器开N2和He气,FID检测器开N2、H2、空气和He气。
二级分压均为0.5Pa。
注:换气时必须关气路阀。
(2)打开计算机,初次开机时建议使用5975的小键盘LCP输入IP地址和子网掩码,并使用新地址重启,否则安装并运行Bootp Service。
(3)打开7890GC、5975MSD电源(若MSD真空腔内已无负压则应在打开MSD电源的同时用手向右侧推真空腔的侧板直至侧面板被紧固地吸牢),等待仪器自检完毕。
(4)在桌面双击“Instrument #1”图标,进入MSD化学工作站。
(5)在Instrument Control界面下,单击View,选择Tune and Vacuum Control 进入调谐与真空控制界面,在Vacuum菜单中选择Vacuum Status,观察真空泵运行状态。
注:如果仪器真空泵配置为分子涡轮泵,状态显示涡轮泵转速Turbo Pump Speed/涡轮泵转速应很快达到100 Percent,否则,说明系统有漏气,应检查侧板是否压正、放空阀是否拧紧、柱子是否接好;(如果仪器为5975扩散泵配置,请咨询现场工程师的讲解。
状态显示压力Pressure应很快达到100mToor左右,否则,说明系统有漏气,应进行上述检查)。
2. 调谐调谐应在仪器至少开机2个小时后方可进行,若仪器长时间未开机或仪器为5975 扩散泵配置,为得到好的调谐结果建议将此时间延长至4小时。
(1)首先确认打印机已连好并处于联机状态。
(2)在操作系统桌面双击Instrument #1图标进入工作站系统。
(3)在Instrument Control界面下,单击View,选择Tune and Vacuum Control 进入调谐与真空控制界面。
AgilentGCMS操作说明书

AgilentGCMS操作
说明书
1
2020年4月19日
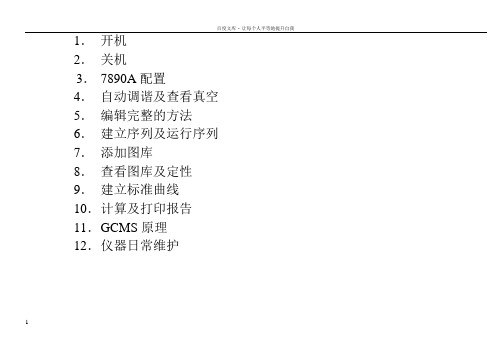
1.开机
2.关机
3.7890A配置
4.自动调谐及查看真空
5.编辑完整的方法
6.建立序列及运行序列
7.添加图库
8.查看图库及定性
9.建立标准曲线
10.计算及打印报告
11.GCMS原理
12.仪器日常维护
2 2020年4月19日
GCMS开机程序
1.打开载气(He)瓶,并把减压阀出口压力调到0.5MPa
2.打开电脑电源,并进入windows操作系统.
3.打开GC电源.再打开MS电源(第一次开机或已放空的情况下,要在推压侧板况态下打开MS电源)如果是MS部分不漏气的话,分子涡轮泵的速度会很快升上去的.不然就说明是漏气.要关MS再重新再开.
4.双击电脑桌面上的图标.打开GCMS工作站.
5.调出用户户建立的方法:
3 2020年4月19日
6. 方法调出后,仪器会进入用户方法所设定的参数状态.待仪器稳定后就能够建立序列,并进行样品检测.
GCMS关机程序
1.首先回到工作站主介面:
4 2020年4月19日
2.“视图”--->“调谐和真空控制”--->“真空”--->“放空”
此时仪器将会把MS中的分子涡轮泵速度降下来.并把所有的加热源停止加热.令其温度降下来.
5 2020年4月19日
当分子涡轮泵速度<50% ,所有加热部分温度<100度时.就说明仪器达到关机状态。
6 2020年4月19日。
AgilentGCMS操作说明书
1.开机2.关机3.7890A配置4.自动调谐及查看真空5.编辑完整的方法6.建立序列及运行序列7.添加图库8.查看图库及定性9.建立标准曲线10.计算及打印报告11.G CMS原理12.仪器日常维护1GCMS开机程序1.打开载气(He)瓶,并把减压阀出口压力调到0.5MPa2.打开电脑电源,并进入windows操作系统.3.打开GC电源.再打开MS电源(第一次开机或已放空的情况下,要在推压侧板况态下打开MS电源) 如果是MS部分不漏气的话,分子涡轮泵的速度会很快升上去的.不然就说明是漏气.要关MS再重新再开.4.双击电脑桌面上的图标.打开GCMS工作站.5.调出用户户建立的方法:26. 方法调出后,仪器会进入用户方法所设定的参数状态.待仪器稳定后就可以建立序列,并进行样品检测.GCMS关机程序1.首先回到工作站主介面:32.“视图”--->“调谐和真空控制”--->“真空”--->“放空”此时仪器将会把MS中的分子涡轮泵速度降下来.并把所有的加热源停止加热.令其温度降下来.当分子涡轮泵速度<50% ,所有加热部分温度<100度时.就说明仪器达到关机状态。
43.先关闭电脑中的仪器工作站软件。
4.关闭MS电源,关闭GC电源。
57890A配置我们要对仪器进行正确的配置。
因为仪器是不可能正确识别我们用的气是什么气体,还有就是毛细管柱里的气体流量和气压是通过计算得出来的。
如果不正确的配置会令到仪器得不到正确的参数,以致于仪器会认为仪器自已有问题。
6毛细管的配置:我们要正确配置毛细管柱的参数。
毛细管柱里是没有流量计和压力计的,它里面的压力和流量半不是测出来的,而是通过进样口中其它的几个参数计算出毛细管柱中的压力和流量的。
所以毛细管柱的参数必须要正确设置。
789101112自动调谐1314查看真空1516编辑完整的方法171819202122232425262728建立序列2930运行序列3132添加图库1.设定PBM图库332.选择谱库34353.选择结构库363738查看谱图及定性3940414243快捷定性444546建立标准曲线1.首先调出数据采集的方法。
GCMS操作规程
Agilent6890/5975C气质联用仪操作规程一、GC-MS开机1.将氦气钢瓶打开,并调至适当压力。
2.开总电源,打开计算机,进入Windows操作界面。
3.将GC电源、MS电源打开,待GC和MS开机测试完毕后,双击“GC-MS联机”图标,进入GC-MS主窗口, MS抽真空需于“仪器控制”菜单中点击“查看”选取“调谐和真空控制”,进入后再于“真空”中“停泵”,即完成开机程序。
二、编辑分析方法1.在“仪器控制”中进入“方法/编辑完整方法”,其后依指示一一编辑即可,并将编辑完的方法进行保存。
三、进样分析1.调用编辑完的方法进行仪器进样前平衡,同时进行进样序列的编辑。
2.进入“连续注射参数表”后,依次填入各个参数,当参数表填完后,于“序列”中选取“保存”,将所设定的条件进行储存;之后便可依设定的序列方法名称“载入”设定。
3. 连续注射参数表设定完后,于“序列”中点击“运行”,填入一些关于样品的信息(包括操作者、文件保存路线等)。
4.将分析的样品发入自动进样器中,待基线已平衡15min以上时,便可点击“样品运行”进行连续进样分析。
四、GC-MS关机1. 实验结束后,于“仪器控制”菜单中点击“查看”选取“调谐和真空控制”,进入“调谐”界面选取“真空”中的“放气”,大约30-50min即处于非真空状态。
2. 关闭GC检测器,热源; 待各处温度降下来后(低于50℃),关闭气体(He),退出化学工作站,3.关闭计算机,在将GC和MS电源关闭,最后关总电源和氦气钢瓶,并做好使用登记。
五、注意事项1.机器正在运行时,必须避免突然断电,否则将大大缩短真空泵的寿命。
2.温度设定不准超过各部件的最高使用温度(特别是毛细管柱子)。
3.应在开机3-4小时系统稳定后进行自动调谐。
六、仪器维护1. 每次开机前检查套筒和柱螺帽等的松紧。
2.根据需要更换玻璃套管,O型圈以及进样垫。
3 .经常观察油泵内的油是否变黑,如果变黑要及时更换。
agilent78907000bgcms操作步骤

A g i l e n t78907000BG C M S操作步骤-CAL-FENGHAI-(2020YEAR-YICAI)_JINGBIAN(一)开机步骤1.到402开卡同时登记开机时间2.检查氦气瓶气量是否充足,总压需>2MPa,分压在0.4~0.6MP。
如需使用双MS则要开氮气,氮气分压需>0.5MPa。
若气体不足,则需更换气瓶。
更换气瓶时需注意关闭总压阀与分压阀:待气瓶换好后,用检漏液检查阀门连接处是否有漏气。
3.进入重点实验室后先查看实验室卫生状况,若室内不干净必须先打扫卫生后再开启仪器。
同时确认实验室内是否有安全隐患,如是否有特殊气味、挥发性药品气味。
4.开机之前先检查泵油颜色是否清亮、油量是否在最高与最低限值内、托盘内是否有油泄露。
泵油3-6个月换一次,但也根据实际使用情况确定是否需要换泵油。
泵下不能垫纸以防运行时泵温度过高引起燃烧。
5.打开UPS电源,这时旁路电源指示灯闪烁,长按开关至逆路电源指示灯亮后打开GC/MS Triple Quad和GC System设备的开关。
如果长时间未开机,按下GC/MS Triple Quad设备开关后拧紧放空阀,用手向右侧推前段真空腔的侧板直至侧面板被紧固地吸牢(约1-2min),涡轮泵开始工作,屏幕显示启动后松开。
(后段真空腔的侧板螺丝一般是拧上的,所以抽真空时不用推紧)。
6.待系统稳定后,点击电脑桌面图标“GC-QQQ”,弹出对话框点击进入“调谐”→“手动调谐”→“真空控制”→“抽真空”。
抽真空10min左右如果涡轮泵转速需达到100%、功率达到45.5,高真空达到7.9×10E-5,低真空达到1.9×10E2,否则说明有漏气,检查侧板是否压正、柱子是否拧紧。
若离子源真空箱未打开过抽真空时间一般为40min,若打开过,则需4h。
7.开机后先检漏气象气象一般漏气点及处理方法:(1)进样口隔垫检查进样口漏气的方法是在进样口不分流的情况下,在GC键盘上按两下预运行,查看进样口总流量,如果大于5ml/min,则说明进样口漏气,需更换隔垫。
GCMS使用手册

Directions for using Agilent GC (6890) with MSD (5973)If the computer isn’t on, log-in with username “Administrator” and password “administrator”. Check to make sure the gas line is open and set to at least 20 psi. You may need to adjust the pressure later to satisfy the pressure needed by your method.From the desktop, double-click “1 GCMS” icon. Three windows will open – leave all three open. We will assume that the MSD is already pumped down and ready. If it is not, please see your instructor or Dr. Kramer for help.Tuning the instrumentIf it has been more than 24 hours since the instrument has been tuned, you need to perform a quick tune to confirm the settings.1.In the “Instrument Control” window, choose “View – Manual Tune.”2.In the “Manual Tune” window, choose “Tune – Quick Tune.”3.The MSD will click on and perform a scan of three ions from a standard stored inthe instrument. It will adjust to make the peaks as narrow as possible and asaccurate as possible.4.If the scan completes, you are ready to move on. If it does not, please see yourinstructor.5.Go to “File – Save Tune Values” to save the tune. Choose “atune.u” for the filename.Setting up a methodIn order to run the instrument, you will set up a method in Chemstation.1.If you are not in the “Instrument Control” window, open it by choosing “View –Instrument Control.”2.If you plan to use a stored method, choose “Method – Load” and choose yourmethod. If you plan to start a new method, choose “Method – Edit EntireMethod.”3.In the “Edit Method” window, make sure that only “Method Information” and“Instrument/Acquisition” are selected. Select “OK.”4.In the “Method Information” window, enter any comments about the method andmake sure that only “Data Acquisition” is selected. Select “OK.”5.In the “Inlet and Injection Parameters” window, make sure that “GC” is chosen asthe inlet, “Manual” is chosen as the injection source (unless an auto-injector is to be used), “Front” is chosen as the injection location and an “x” is in the box next to “Use MS.” Select “OK.”6.Now you will edit each step of the analysis. These parameters can also be editedindividually later by choosing the icons on the “Instrument Control” screen. The parameters you will most likely want to edit are:a.Inlets: Two options are available, split or splitless. For a “Split” run,choose “Split” and set the ratio below. For a “Splitless” run, choose“Splitless.” On this screen you should set the heater temperature, type ofcarrier gas, pressure and total flow for the inlet.b.Column: For Mode, choose “Constant Flow.” For Inlet, choose “Front.”For Detector, choose “MSD.”c.Oven: On this screen, you can set the starting temperature and anytemperature gradient using the table of times and temperatures. Anychanges you make will be expressed in the graph of temperatures at thetop of the screen. Make sure that your temperatures will not go over the“Oven Max” chosen on this screen.d.Aux: This refers to the MSD. On this screen you should set thetemperature for the transfer line to the MSD.7.After editing all of the instrument parameters, select “OK.”8.In the “GC Real time plot” window, make sure that no signals are selected. Thesewould only apply if you were using a different GC detector. Select “OK.”9.In the next window, make sure to select “atune.u” or the name of the tune file youhave saved previously.10.In the “MS SIM/Scan Parameters” window, you can set up the parameters for themass spectrometer. The instrument can be run in “Scan” mode for a total ionchromatogram (TIC) or in “SIM” mode for selected ion monitoring.a.Set the solvent delay. Three minutes is usually sufficient. This delaykeeps the MSD from turning on until after the solvent in a liquid samplehas passed. If you are injecting a gaseous sample, it is unnecessary.b.Scan: If you would like to adjust the range of m/z ratios that theinstrument will monitor or the amount of time it will spend on each m/z,do so in the table at the bottom of the screen. Most likely, you will notneed to adjust this table.c.SIM: If you know the compounds you will be detecting and have theirmass spectra, you may use this screen to choose specific ions to bedetected at different times during the run.11.After selecting “OK,” you will be given a place to save your method. Type in amethod name. All names used in this program must be 8 characters or less. Running a MethodMake sure your method is loaded.1.Choose “Method – Run” in the “Instrument Control” window.2.Choose a name for your file. To find a list of files and folders, type “?” in the“File name” box.3.Fill in the rest of the boxes with information about your run.4.Choose “Run Method” (not “OK”) to start the method.5.When “GC Ready” window appears, prepare your sample to be injected. Seeyour instructor for information about appropriate volumes used. Make sure to get rid of any bubbles in the syringe.6.On the GC itself, press the “Prep run” button. When the “pre-run” light turns on,quickly inject your sample by piercing the septum in the front inlet and pressingthe plunger of the syringe. Immediately press the “Start” button on the GC.7.Do not choose “override solvent delay” unless you are injecting a gas into theGC. Overriding the solvent delay when injecting a liquid sample will greatlyreduce the life expectancy of the detector. Ignore the window.8.Your chromatogram will appear in the “Total Ion” window. Double click on it toexpand the window.Data AnalysisDuring a run, from the “MS Top/Enhanced” window, choose “Open New Data Analysis.” Otherwise, open a data analysis window by choosing “View – Data Analysis (offline).”1.If you would like to analyze your chromatogram as it is being collected, choose“Take Snapshot” under the “File” menu. Otherwise, choose “Load Data File”under the “File” menu.2.To display the mass spectrum at any point in a chromatogram, double right clickon a point in the chromatogram. The spectrum will be displayed below. Youmay also average several points together by drawing a rectangle with the rightmouse button clicked.3.To search the library for a given spectrum:a.Choose “Spectrum – Select Library.”b.Type “?” in one of the boxes. Scroll down to choose “Wiley275.L” as thelibrary to search.c.Double right click on a spectrum and a list of potential library matcheswill be displayed along with the probability of a match (“Qual” column –nearer to 100 is better). To find out more information about a certainchoice, highlight the compound and then click the “Text” button.4.To determine the area of the peaks in the chromatogram:a.Select “Chromatogram – Integrate.” The retention time of the peaks willbe listed next to each peak.b.If too many or too few peaks are chosen, go to “Chromatogram – SelectIntegrator.” Choose “RTE Integrator.” Choose “Chromatogram – MSSignal Integrator Parameters” and change the minimum peak area detected(increase if too many peaks are chosen, decrease if too few were chosen).Integrate again by selecting “Chromatogram – Integrate.”c.To display the areas of each peak, choose “Chromatogram – IntegrationResults.”。
Agilent GC-MS操作说明书

1.开机2.关机3.7890A配置4.自动调谐及查看真空5.编辑完整的方法6.建立序列及运行序列7.添加图库8.查看图库及定性9.建立标准曲线10.计算及打印报告11.G CMS原理12.仪器日常维护文案大全GCMS开机程序1.打开载气(He)瓶,并把减压阀出口压力调到0.5MPa2.打开电脑电源,并进入windows操作系统.3.打开GC电源.再打开MS电源(第一次开机或已放空的情况下,要在推压侧板况态下打开MS电源) 如果是MS部分不漏气的话,分子涡轮泵的速度会很快升上去的.不然就说明是漏气.要关MS再重新再开.4.双击电脑桌面上的图标.打开GCMS工作站.5.调出用户户建立的方法:文案大全6. 方法调出后,仪器会进入用户方法所设定的参数状态.待仪器稳定后就可以建立序列,并进行样品检测.GCMS关机程序1.首先回到工作站主介面:文案大全2.“视图”--->“调谐和真空控制”--->“真空”--->“放空”此时仪器将会把MS中的分子涡轮泵速度降下来.并把所有的加热源停止加热.令其温度降下来.当分子涡轮泵速度<50% ,所有加热部分温度<100度时.就说明仪器达到关机状态。
文案大全3.先关闭电脑中的仪器工作站软件。
4.关闭MS电源,关闭GC电源。
文案大全7890A配置我们要对仪器进行正确的配置。
因为仪器是不可能正确识别我们用的气是什么气体,还有就是毛细管柱里的气体流量和气压是通过计算得出来的。
如果不正确的配置会令到仪器得不到正确的参数,以致于仪器会认为仪器自已有问题。
文案大全毛细管的配置:我们要正确配置毛细管柱的参数。
毛细管柱里是没有流量计和压力计的,它里面的压力和流量半不是测出来的,而是通过进样口中其它的几个参数计算出毛细管柱中的压力和流量的。
所以毛细管柱的参数必须要正确设置。
文案大全文案大全文案大全文案大全文案大全文案大全自动调谐文案大全文案大全查看真空文案大全文案大全编辑完整的方法文案大全文案大全文案大全文案大全文案大全文案大全文案大全文案大全文案大全文案大全文案大全文案大全建立序列文案大全文案大全运行序列文案大全文案大全添加图库1.设定PBM图库文案大全2.选择谱库文案大全文案大全3.选择结构库文案大全文案大全文案大全文案大全查看谱图及定性文案大全文案大全文案大全文案大全文案大全文案大全快捷定性文案大全文案大全文案大全建立标准曲线1.首先调出数据采集的方法。
- 1、下载文档前请自行甄别文档内容的完整性,平台不提供额外的编辑、内容补充、找答案等附加服务。
- 2、"仅部分预览"的文档,不可在线预览部分如存在完整性等问题,可反馈申请退款(可完整预览的文档不适用该条件!)。
- 3、如文档侵犯您的权益,请联系客服反馈,我们会尽快为您处理(人工客服工作时间:9:00-18:30)。
的方框;Ramp---升温阶次;℃ /min—升温速率;Hold min—保持的时间;
Equilibration Time—柱子的平衡时间(如0.5min)。
Page 26
Agilent Restricted
三、方法编辑
4、 GC 参数设定 (Instrument→GC Parameters) 4.6 GC检测器设定
如: 选择恒流flow,输入1.7(ml/min)。
Page 25
Agilent Restricted
三、方法编辑
4、 GC 参数设定 (Instrument→GC Parameters)
4.5 柱温箱温度参数设定
点击图标
,进入柱温参数设定。在温度框内输入温度,选中“Oven Temp On ”左边
三、方法编辑
4、 GC 参数设定 (Instrument→GC Parameters)
4.8 时间表设定
点击图标
,进入时间表参数设定。
在“Time”下方的空白处输入时间(如0.01min),点击 “Event type”下方的下拉式箭头, 选中事件(如,阀);
点击“Position”下方的下拉式箭头,选中事件的位号(如阀1);点击“Set point”下方的 下拉式箭头,选中事件的状态(如打开)。
三、方法编辑
4、 GC 参数设定 (Instrument→GC Parameters) 4.2 阀参数设定
点击图标 ,进入阀设定画面。若阀用于dean switch切换,在 Type 区域选择类型为 “Switching Valve”,
Page 23
Agilent Restricted
三、方法编辑
,选Ion Source,填入离子源参数。建议:进行手动调谐时以工厂配有的调谐文
件为基础
Page 7
Agilent Restricted
二、调谐步骤
2. 手动调谐 2.2 MS1参数:在Manual Tune子窗口内,选MS1,填入MS1参数。
Page 8
Agilent Restricted
二、调谐步骤
Page 2
Agilent Restricted
一、开机关机步骤
1、开机步骤: 观察真空泵运行状态
• 点击Method菜单下的Edit monitors选项。将MS Turbo1 Speed和MS Pump1 Current添加到selected Monitors 中。
• 观察真空泵运行状态。涡轮泵转速MS Turbo1 Speed/涡轮泵转速应很快达到 100 Percent。否则,说明系统有漏气,应检查侧板是否压正、放空阀是否拧 紧、柱子是否接好。
点击图标 ,进入GC检测器参数设定窗口。
Page 27
Agilent Restricted
三、方法编辑
4、 GC 参数设定 (Instrument→GC Parameters) 4.7 AUX参数设定
点击图标 ,进行辅助参数设定。 在辅组加热区设定质谱的接口温度如280℃。
Page 28
Agilent Restricted
Page 19
Agilent Restricted
三、方法编辑
2、 GCQQQ方法的注释
点击“Method Information” 图标 击“OK”确定。
,在Method Comments中写入方法的注释:然后点
20
Agilent Restricted
三、方法编辑
3、GCQQQ进样选择
Page 10
Agilent Restricted
二、调谐步骤
2. 手动调谐 2.5 检测器参数:在Manual Tune子窗口内,选Detector,填入检测器参数。
Page 11
Agilent Restricted
二、调谐步骤
2. 手动调谐 2.6 质谱数据采集参数窗口:在Manual Tune子窗口内,选Acquisition,填入质谱
点击Instrument菜单的Inlet/Injection Types选项。 在Inlet and Injection Parameters窗口中: Sample Inlet选择GC。选中Use MS 。 Injection Source 选择项:手动选择“Manual”,使用7683自动进样器选择“GC ALS”。
配置。
Page 18
Agilent Restricted
三、方法编辑
1、 GC配置编辑—其它项设定
点击“Miscellaneous”进入其他项设定,如: 选择压力单位:psi;输入柱子的最高温度:如:325℃。将辅助加热器类型配置为MSD
Transfer line;若阀用于进样或DEAN SWITCH切割,在 Valve Type区域选择阀号,并选 择类型为 “Switching Valve”。点击“Ok”退出配置画面。
Agilent Restricted
三、方法编辑
1、 GC配置编辑-模块配置设定
点击“Modules”按钮进入下图所示画面,点击下拉式箭头,分别选择进样口、检测器、 Aux EPC等的气体类型。
Page 16
Agilent Restricted
三、方法编辑
1、 GC配置编辑-柱参数设定
点击“Columns”按钮,进入柱参数设定画面。 点击该柱对应下拉式箭头选择连接的进样口、检测器及加热区类型。如:Front
Page 5
Agilent Restricted
二、调谐步骤
1. 自动调谐:点击调谐图标
,进入调谐窗口,在Autotune的子窗口内,
点击Autotune 按钮。调谐文件存为****.tune.xml。
注:现在每台仪器配有工厂已经调谐好的调谐文件****.tune.xml。GC/QQQ 软件中的调谐功能还在进一步完善中。
4、 GC 参数设定 (Instrument→GC Parameters)
4.3 分流不分流进样口参数设定
点击图标
,进入进样口设定画面。点击“SSL-Front”或“SSL-Back” 按钮进入毛
细柱进样口设定画面。
• 点击“Mode”右方的下拉式箭头,选择进样方式为不分流方式 “Splitless”或分流方式“Split”。 • 在Heater框内输入进样口的温度(如250℃),然后选中左边的所有方框; • 选择“Septum Purge Flow Mode” 为“Standard”,并输入隔垫吹扫流量: 如: 3ml/min。 • 在“Purge Flow to Split Vent”下边的空白框内输入吹扫流量(如 0.75min 后60ml/min);如图所示,选择分流
压则应在打开MSD电源的同时用手向右侧推前段真空腔的侧板直至侧面板被紧 固地吸牢),涡轮泵开始工作,等待大约2min,等待仪器自检完毕。(后段 真空腔的侧板螺丝一直是拧上的,所以抽真空时不用推紧) • 在Command Prompt 中输入命令Ping 192.168.245.12。如果结果显示通讯正 常,在桌面双击“7000A”图标 (Data Acquisition图标),进入 GC/QQQ化学工作站
点击“Ok”确认。
Page 21
Agilent Restricted
三、方法编辑
4、 GC 参数设定 (Instrument→GC Parameters) 4.1 进样器参数设定
点击图标 ,点击“Front Injector”或“Back Injector”按钮,进入参数设定画面。 选中进样体积Injection Volume(如1ul)。
2. 手动调谐 2.3 碰撞池参数:在Manual Tune子窗口内,选Collision Cell,填入碰撞池collision
cell 参数。
Page 9
Agilent Restricted
二、调谐步骤
2. 手动调谐 2.4 MS2参数:在Manual Tune子窗口内,选MS2,填入MS2 参数。
方式,则要输入分流比或分流流量。
Page 24
Agilent Restricted
三、方法编辑
4、 GC 参数设定 (Instrument→GC Parameters)
4.4 柱模式设定,
点击图标
,进入柱模式设定画面,在画面中,点击“1” 处进行柱1控制模式设定,
然后选中“On”左边小方框;选择控制模式,选恒流“flow”或恒压“pressure”。
Agilent 7000A GC/QQQ 仪器操作手册
安捷伦科技(中国)有限公司 生命科学与化学分析仪器部
Page 1
Agilent Restricted
一、开机关机步骤
1、开机步骤: • 打开载气及碰撞气钢瓶(He)控制阀,设置分压阀压力至0.5Mpa。 • 打开碰撞气钢瓶(N2)控制阀,设置分压阀压力至0.15Mpa。 • 打开计算机,登录进入Windows XP(SP2)系统。 • 确认毛细色谱柱已经装好。打开7890GC、7000A电源(若MSD真空腔内已无负
PreInj—进样前,PostInj-进样后;Volume(ul)—清洗的体积 ;Sample Wash—用样品洗针次数; Solvent A Wash—溶剂A洗针的次数;Solvent B Wash—溶剂B洗针的次数;Pumps—赶气泡针抽吸 的次数。
Page 22
Agilent Restricted
2、关机步骤: • 关闭GCQQQ Data Acquisition软件。 • 使用QQQ Firmware Backdoor Commands: qqqvent卸载真空。 • 等待大概15min左右,当分子涡轮泵转速下降到接近0%时,使用Backdoor
Commands: bye指令结束Firmware backdoor command过程。 • 关闭GC和QQQ电源。 • 关闭载气及QQQ碰撞气(高纯氮气)。