斯派克max操作手册
S-MAX使用手册.
目录1简介 .................................................................................................................. 1-11.1符号信息.................................................................................................... 1-11.1.1本手册中出现的符号 ............................................................................... 1-11.1.2车辆上的标志符号 .................................................................................. 1-11.2安全提示.................................................................................................... 1-11.2.1提供安全驾驶的保护装置 ........................................................................ 1-11.2.2电子安全装置 ......................................................................................... 1-2 2快速启动 ........................................................................................................... 2-12.1仪表板概览 ................................................................................................ 2-12.2组合仪表.................................................................................................... 2-22.3信息显示.................................................................................................... 2-22.4手动空调温度控制...................................................................................... 2-32.4.1车内快速加热 ......................................................................................... 2-32.4.2车内快速制冷 ......................................................................................... 2-32.5挡风玻璃除霜除雾...................................................................................... 2-32.6自动空调温度控制...................................................................................... 2-42.7第二排出风口............................................................................................. 2-42.8转向灯 ....................................................................................................... 2-42.9折叠第二排座椅 ......................................................................................... 2-5 3儿童安全 ........................................................................................................... 3-13.1儿童座椅.................................................................................................... 3-13.2增高座垫.................................................................................................... 3-23.3儿童座椅安装位置...................................................................................... 3-33.4ISOFIX固定点............................................................................................ 3-33.5儿童安全锁 ................................................................................................ 3-4 4乘员保护装置 .................................................................................................... 4-14.1工作原理.................................................................................................... 4-14.2系上座椅安全带 ......................................................................................... 4-24.2.1第二排中央座椅安全带............................................................................ 4-44.3座椅安全带高度调整...................................................................................4-54.4座椅安全带提示器......................................................................................4-64.5怀孕期间使用安全带...................................................................................4-6 5钥匙及遥控控制................................................................................................ 5-15.1钥匙的使用.................................................................................................5-15.2无线频率一般要点......................................................................................5-15.3遥控器编程.................................................................................................5-15.4更换遥控器电池..........................................................................................5-1 6锁 ..................................................................................................................... 6-16.1上锁及开锁.................................................................................................6-16.1.1中控锁 ................................................................................................... 6-16.1.2双重锁系统............................................................................................. 6-16.1.3上锁及开锁确认...................................................................................... 6-16.1.4使用钥匙开启/锁紧车门........................................................................... 6-26.1.5使用钥匙双锁定车门............................................................................... 6-26.1.6使用遥控器开启/锁紧车门..................................................................... 6-26.1.7使用遥控器启动中控锁锁紧车门.............................................................. 6-36.1.8使用遥控器双锁定车门............................................................................ 6-36.1.9从车内锁紧或开启车门............................................................................ 6-36.1.10行李箱 ................................................................................................... 6-46.1.11自动重锁................................................................................................ 6-46.1.12开启功能重新编程 .................................................................................. 6-46.2全方位开启及关闭......................................................................................6-46.2.1全方位开启............................................................................................. 6-56.2.2全方位关闭............................................................................................. 6-5 7发动机防盗锁定系统......................................................................................... 7-17.1工作原理....................................................................................................7-17.2密码钥匙....................................................................................................7-17.3启动发动机防盗锁定系统............................................................................7-17.4解除发动机防盗锁定系统............................................................................7-18警报 .................................................................................................................. 8-18.1工作原理.................................................................................................... 8-18.2启用警报.................................................................................................... 8-18.3解除警报.................................................................................................... 8-1 9方向盘............................................................................................................... 9-19.1调整方向盘 ................................................................................................ 9-19.2音响控制.................................................................................................... 9-19.2.1模式....................................................................................................... 9-29.2.2搜寻....................................................................................................... 9-2 10雨刷及洗涤器 .................................................................................................. 10-110.1挡风玻璃雨刷........................................................................................... 10-110.2挡风玻璃洗涤器 ....................................................................................... 10-110.3后窗雨刷及洗涤器.................................................................................... 10-210.4前照灯洗涤器........................................................................................... 10-310.5检查雨刷片 .............................................................................................. 10-410.6更换雨刷片 .............................................................................................. 10-410.7技术参数.................................................................................................. 10-6 11照明 ................................................................................................................ 11-111.1照明控制.................................................................................................. 11-1 11.1.1照明控制位置 ....................................................................................... 11-1 11.1.2后位灯.................................................................................................. 11-1 11.1.3远光灯及近光灯.................................................................................... 11-2 11.1.4前照灯闪光........................................................................................... 11-2 11.1.5车内安全照明 ....................................................................................... 11-2 11.1.6伴我回家照明功能 ................................................................................ 11-2 11.2前雾灯 ..................................................................................................... 11-2 11.3后雾灯 ..................................................................................................... 11-3 11.4前照灯光束调节 ....................................................................................... 11-3 11.5危险警示闪光灯 ....................................................................................... 11-4 11.6自适应式前照灯系统(AFS .................................................................. 11-4 11.7转向灯 ..................................................................................................... 11-5 11.8车内灯...................................................................................................... 11-5 11.8.1礼仪灯 ................................................................................................. 11-5 11.8.2阅读灯 ................................................................................................. 11-6 11.8.3化妆镜灯.............................................................................................. 11-6 11.9拆卸前照灯............................................................................................... 11-6 11.10更换灯泡 ............................................................................................. 11-711.10.1前照灯 ................................................................................................. 11-711.10.2转向灯 ................................................................................................. 11-811.10.3前照灯—近光灯.................................................................................... 11-911.10.4前照灯—远光灯.................................................................................... 11-911.10.5智能弯道辅助照明灯........................................................................... 11-1011.10.6后视镜转向指示灯 .............................................................................. 11-1111.10.7照地灯 ............................................................................................... 11-1211.10.8前雾灯,前位灯.................................................................................. 11-1311.10.9后车灯 ............................................................................................... 11-1411.10.10中央高位制动灯............................................................................. 11-1811.10.11牌照灯 .......................................................................................... 11-1911.10.12车内灯及阅读灯............................................................................. 11-1911.10.13化妆镜灯....................................................................................... 11-2011.10.14行李箱灯....................................................................................... 11-2111.11灯泡规格表........................................................................................ 11-21 12车窗及车镜 ......................................................................................................12-112.1电动车窗.................................................................................................. 12-112.1.1全方位开启及关闭 ................................................................................ 12-112.1.2驾驶员车窗开关.................................................................................... 12-112.1.3前排及后排乘客座车窗开关................................................................... 12-212.1.4自动开启及关闭.................................................................................... 12-212.1.5后窗安全开关 ....................................................................................... 12-212.1.6防夹功能.............................................................................................. 12-212.1.7重设电动车窗的记忆............................................................................. 12-312.1.8安全模式.............................................................................................. 12-312.2车门后视镜............................................................................................... 12-312.3电动后视镜 .............................................................................................. 12-412.4车内后视镜 .............................................................................................. 12-6 13仪表 ................................................................................................................ 13-113.1计量表 ..................................................................................................... 13-113.2警示灯及指示灯 ....................................................................................... 13-113.2.1ABS警示灯........................................................................................... 13-213.2.2安全气囊警示灯.................................................................................... 13-213.2.3制动系统警示灯.................................................................................... 13-213.2.4巡航控制指示灯.................................................................................... 13-213.2.5转向指示灯........................................................................................... 13-313.2.6发动机故障警示灯 ................................................................................ 13-313.2.7前雾灯指示灯 ....................................................................................... 13-313.2.8结霜警示灯........................................................................................... 13-313.2.9前照灯指示灯 ....................................................................................... 13-313.2.10充电警示灯........................................................................................... 13-313.2.11低油位警示灯 ....................................................................................... 13-413.2.12远光灯指示灯 ....................................................................................... 13-413.2.13发动机最大转速指示灯.......................................................................... 13-413.2.14信息指示灯........................................................................................... 13-413.2.15机油压力警示灯.................................................................................... 13-413.2.16后雾灯指示灯 ....................................................................................... 13-413.2.17座椅安全带提示灯 ................................................................................ 13-513.3声响警示及指示器.................................................................................... 13-5 14信息显示 ......................................................................................................... 14-114.1一般要点.................................................................................................. 14-114.1.1控制..................................................................................................... 14-114.1.2菜单结构 .............................................................................................. 14-214.2旅程电脑.................................................................................................. 14-314.2.1行驶里程 .............................................................................................. 14-414.2.2小计里程 .............................................................................................. 14-414.2.3可行驶里程........................................................................................... 14-514.2.4平均车速 .............................................................................................. 14-514.2.5车外空气温度 ....................................................................................... 14-514.2.6重置行程信息 ....................................................................................... 14-514.3个性化设定............................................................................................... 14-614.3.1帮助界面,收音机及电话信息 ............................................................... 14-614.3.2计量单位.............................................................................................. 14-714.4信息消息.................................................................................................. 14-7 15温度调节..........................................................................................................15-115.1工作原理.................................................................................................. 15-115.2出风口...................................................................................................... 15-115.3手动空调温度控制.................................................................................... 15-315.3.1风机转速调节 ....................................................................................... 15-315.3.2温度控制.............................................................................................. 15-315.3.3气流分配控制 ....................................................................................... 15-315.3.4车内空气循环 ....................................................................................... 15-415.3.5快速加热车内空气 ................................................................................ 15-415.3.6通风..................................................................................................... 15-415.3.7空调系统.............................................................................................. 15-515.3.8挡风玻璃除霜除雾 ................................................................................ 15-615.3.9降低车内空气湿度 ................................................................................ 15-615.4自动空调温度控制.................................................................................... 15-615.4.1双区自动空调温度控制.......................................................................... 15-615.4.2设定温度.............................................................................................. 15-715.4.3单一模式.............................................................................................. 15-715.4.4重新开启单一模式 ................................................................................ 15-815.4.5风机..................................................................................................... 15-815.4.6气流分配.............................................................................................. 15-815.4.7挡风玻璃除霜除雾 ................................................................................ 15-915.4.8开启及关闭空调系统............................................................................. 15-915.4.9车内空气循环 ..................................................................................... 15-1015.4.10关闭自动温度控制 .............................................................................. 15-1015.5加热式车窗及车镜.................................................................................. 15-1015.5.1加热式后车窗 ..................................................................................... 15-1015.5.2加热式后视镜 ..................................................................................... 15-11 16座椅 ................................................................................................................ 16-116.1正确的坐姿 .............................................................................................. 16-116.2手动座椅.................................................................................................. 16-116.2.1前后移动座椅 ....................................................................................... 16-216.2.2调整腰靠 .............................................................................................. 16-316.2.3调整驾驶员座椅高度 ............................................................................. 16-316.2.4调整椅背倾斜角度 ................................................................................ 16-316.3电动座椅.................................................................................................. 16-316.4头枕......................................................................................................... 16-516.5后排座椅.................................................................................................. 16-616.5.1前后移动座椅 ....................................................................................... 16-716.5.2调整椅背 .............................................................................................. 16-716.5.3向下折叠椅背 ....................................................................................... 16-816.5.4第三排座椅......................................................................................... 16-1016.6加热式座椅 ............................................................................................ 16-11 17便利型配置...................................................................................................... 17-117.1遮阳板 ..................................................................................................... 17-117.2仪表板照明调节器.................................................................................... 17-117.3时钟......................................................................................................... 17-117.3.112小时或24小时模式 ............................................................................ 17-117.3.2改变日期和时间.................................................................................... 17-117.4点烟器 ..................................................................................................... 17-217.5烟灰缸 ..................................................................................................... 17-217.6辅助电源插座........................................................................................... 17-217.7杯托......................................................................................................... 17-317.8中央控制台 .............................................................................................. 17-317.9储物箱 ..................................................................................................... 17-417.9.1前储物箱 .............................................................................................. 17-417.9.2后储物箱 .............................................................................................. 17-517.10地图袋................................................................................................. 17-617.11眼睛托架 ............................................................................................. 17-617.12音源输入孔.......................................................................................... 17-717.13蓝牙功能 ............................................................................................. 17-7 18启动发动机 ......................................................................................................18-118.1一般要点.................................................................................................. 18-118.2点火开关.................................................................................................. 18-118.3转向柱锁.................................................................................................. 18-118.4启动发动机............................................................................................... 18-118.4.1冷车/热车............................................................................................. 18-218.4.2发动机淹缸........................................................................................... 18-2 19燃油及燃油加注...............................................................................................19-119.1安全要点.................................................................................................. 19-119.2燃油质量.................................................................................................. 19-119.3催化转化器............................................................................................... 19-119.4加油口盖.................................................................................................. 19-119.5燃油加注.................................................................................................. 19-219.6技术参数.................................................................................................. 19-2 20变速器 .............................................................................................................20-120.1自动变速器............................................................................................... 20-120.1.1停车档 ................................................................................................. 20-120.1.2倒车档 ................................................................................................. 20-120.1.3空档..................................................................................................... 20-220.1.4行驶档 ................................................................................................. 20-220.1.5手动换档模式 ....................................................................................... 20-220.1.6行车模式.............................................................................................. 20-2 21制动.................................................................................................................21-121.1工作原理.................................................................................................. 21-121.1.1双回路制动系统.................................................................................... 21-121.1.2盘式制动器........................................................................................... 21-121.1.3防抱死制动系统(ABS........................................................................... 21-121.2使用ABS行驶提示.................................................................................... 21-221.3驻车制动器 .............................................................................................. 21-221.3.1使用驻车制动器.................................................................................... 21-221.3.2坡上驻车 .............................................................................................. 21-221.3.3释放驻车制动器.................................................................................... 21-3 22倒车辅助 ......................................................................................................... 22-122.1工作原理.................................................................................................. 22-122.2使用倒车辅助........................................................................................... 22-1 23巡航控制 ......................................................................................................... 23-123.1工作原理.................................................................................................. 23-123.2使用巡航控制........................................................................................... 23-123.2.1开启巡航控制开关 ................................................................................ 23-123.2.2设定速度 .............................................................................................. 23-123.2.3变更设定速度 ....................................................................................... 23-123.2.4取消设定速度 ....................................................................................... 23-223.2.5恢复设定速度 ....................................................................................... 23-223.2.6关闭巡航控制 ....................................................................................... 23-2 24负载运输 ......................................................................................................... 24-124.1一般要点.................................................................................................. 24-124.2行李安放点 .............................................................................................. 24-2。
SpringerMAX-PRO 小型挖掘机使用说明书

Mini digger SpringerMAX-PROINSTRUCTIONContact:P.H.U. ELGO-PLUSul. Przemysłowa 187-880 Brześć Kujawski POLANDTel.: +48 602 841 094www.elgoplus.ple-mail: *******************1.INTRODUCTIONThis instruction contains basic informations of usage and terms of use mini digger SpringerMAX-PRO. Proper maintenance and the correct way to use the machine condition the safe and reliable operation. The procedures described in this manual are the optimal methods of working with the machine and perform maintenance. In order to reduce the likelihood of an accident and prevention of incidents as a result of which the machine could be damaged or cause to make it dangerous to be thoroughly familiar with the content of warnings and comments given in the instructions for the machinery.Operators should carefully read all of this manual and observe all its recommendations.Failure to follow these recommendations could be the basis for the withdrawal of the manufacturer's warranty for the product.This manual must be readily available and always kept near the mini digger!ELGO-PLUS reserves the right to change specifications, construction, instruction, and extension or modernization of the product without prior notice. ELGO-PLUS Company is not obligated to make such changes to previously manufactured machines.Description of signs used in instruction:2.MACHINE FEATURES2.1.General descriptionThe machine is designed for earthworks carried out in normal daylight conditions. If the machine is to be used for other purposes or have to work in a potentially hazardous environment, then follow the special safety regulations, and the machine itself should be equipped according to the working conditions. For further information, please contact the manufacturer.KJPIC.2.1 General construction2.2.Technical dataPIC.2.MACHINES DIMENSIONS2.4.Removable equipmentPIC. 2.3 NAME PLATE3.SAFETY INSTRUCTIONSThe mini diggers user duties are knowledge of and compliance with applicable laws, therefore, included safety instructions are only recommendations.•The operator must be healthy and be at least 18 years of age.•Mini digger must be maintained in good condition.•Inspection and repairs can be carried out only after the machine is turned off•It is forbidden to make unauthorized modifications to the machine without the manufacturer's consent•It is forbidden to work the machine in explosive atmospheres and confined spaces without adequate ventilation•Mini digger is not intended for public roads, it can only moves beyond them.•It is forbidden to smoking and approaching other sources of ignition while refueling.•The operator should exercise extreme caution when working, all people nearby mini digger should still be within his sight.•Do not fill fuel other than what is recommended for the engine. Detailed recommendations are contained in the engine manual.•Mini digger can be operated at the appropriate level of engine and hydraulic oil.•Mini digger is designed to work in the daytime, in the case of work in conditions of limited visibility, it should be provided appropriate lighting equipment to the work area on Your own.•It is forbidden to use the machine in clothing unsuitable for this or another that can cause danger (eg. long dangling pieces of clothing).•It is forbidden to use the machine if the operator contamination with substances such as oil, grease, etc. that may cause a slip hazard.•The contents of this chapter contains instructions and precautions that must be followed to ensure proper and safe operation and maintenance.These rules do not exempt the operator from the obligation to comply with the law or other applicable rules regarding safety and health.Users dutiesThe user is obliged to pay attention to the specific requirements and hazards during work as well as personal safety. This is necessary to prevent serious injury or damage, and even deaths Responsibility for otherIt should work with the machine so as to avoid the risk of accidents and injuries. You have the right and obligation to prevent this. No one is allowed to enter the working area of the machine during its operation without prior notice to the operator. If someone must enter into the working area of the machine to perform a specific job, that person must exercise extreme caution and without the need not to move from the back of the machine or remain in a dangerous areaIf someone is in the area of machine operation the operator must keep extra care. The operator can operate the machine only when you see this person, or if this person comprehensible signals to the operator, where it is locatedDamagesUser duty is to report any damage or wear that could affect safety. During the inspection, maintenance and repairs, on-site operator allowed to stay only person with the required knowledge of operating the machine and knowledge of controls.Safety information when using and operating the batteryWhile use battery, observe the safety instructions and relevant national regulations. Before carrying out any battery operation (including battery charging and starter battery use), you should familiarize yourself with safe methods for working with batteries with an electrolyte.Description of the marks on the machine4.STEERING ELEMENTSPIC.4.1 STEERING ELEMENTSLeft track steering ( A, Pic.4.1)1N2Right track steering ( B, Rys.4.1)1N2Moving forwardPush forward both steering levers (A and B, Pic.4.1), machine will go forward.Moving backwardPull back both steering levers (A and B, Pic.4.1), machine will go backward.Turning leftPush forward the right steering lever (B, Pic.4.1), the right track starts to move forward, the machine will go forward turning left.Or:Pull back left steering lever (A, Pic.4.1) the left track starts to move backward, the machine will go back turning to the left.Turning rightPush forward the left steering lever (A, Pic.4.1), the left track starts to move forward, the machine will go forward turning right. Or :Pull back right steering lever (B, Pic.4.1) the right track starts to move backwards, the machine will go back turning to the right.Support position steering ( C, Pic.4.1)Arm position steering ( D, Pic.4.1)NN 12341 2Jib position steering ( E, Pic.4.1)Hydraulic hammer starting ( F, PIC.4.1)5. USAGE5.1. Before workingN 2341N 1- Before starting the mini digger familiar with the contents of this manual.- Defects and damages that affect safety must be removed before use.- Do not operate the machine while under the influence of alcohol, drugs or other intoxicants. - Dress in appropriate clothing that allows for safe operation.- To increase the safety of the head is recommended to use a protective helmet.- Adjust the seat.- Do not overload the machine. Overloading adversely affect safety.- Before starting the mini see if there is someone in her immediate vicinity.- Check for leaks.- Check for damaged or loose parts that could cause damage.- Check if there is fuel in the tank.- Check the hydraulic oil tank.- Check engine oil level.- Before driving check that the machine is not near other people.- When it is very cold do not direct the machine to work hard after starting.- Check battery mounting.- Check the battery cables mounting.- Check the fuel tank for leaks or cracks.5.2Starting and shutting down the machineMini digger can be started by pulling a starting rope or by a starter with key located next to the engine.Before starting, unlock the fuel / ignition lever and unlock key.To turn off the machine lock the ignition key.RYS.5.1 ENGINEBAPIC.5.2 KEY STARTER5.2.DrivingWhen driving on flat ground, set back attachments and lift it off the ground to avoid knocked out of the terrain elements.When driving on uneven terrain shoul d move the machine so as not tilted to one side more than 10⁰. Riding uphillIf the tracks are sliding on the slope, push the bucket into the ground and pull the arm backwards to facilitate the uphill drive.Riding downhillIn case of downhill riding, drive the mini digger as slow as possible.5.3.StoppingTo park the machine choose flat terrain1. Set steering levers in neutral position2. Lower the bucket to the ground, keeping the bottom of the bucket parallel to the ground5.4.ParkingPay attention to weather conditions and take necessary steps to ensure that the machine is not frozen to the ground, plunged into it, or suffered other consequences.Long-term parkingFollow the instructions for parking and in addition:-check the machine for leaks and if there is no damage to the working system and tracks.-remove form the track accumulated soil-recure the machine against the corrosion and thoroughly lubricate-fill the fuel tank and oil to the maximum-shut off the fuel supply to the engine, according to the recommendations in the engine manual5.5.Bucket workingMini digger is a multi-purpose machine that can be equipped with a variety of specialized work equipment in order to perform many types of work. Below are described some operations5.5.1.Digging ditchesInstall a appropriate bucket for this kind of work. To work effectively set tracks in accordance with the direction of the ditch.In the case of a broad ditches first dig on both sides of the trench, and then select the material from the central area..5.5.2.Loading worksIn order to increase the effectiveness of the trolley set it in order to obtain a small angle of the mini diggers arm and good visibility for the operator.5.6.TransportWhile transporting the machine, follow the existing rules on weight, width, height, length and anchoring loads.Remove grease, oil, mud, ice, etc., from ramps or platform surface to prevent slipping off the machine.5.7.Loading1. Turn on brakes of transporting vehicle2. Put blocks under the wheels of transporting vehicle3. Secure the ramps- check the strength, width, length and thickness of the plank ramps is sufficiently safe for loading, - pay attention to the angle of ramps was 15 ⁰ or less.4. Check that the left and right ramp are the same height.5. Ride slowly to the ramps.6. Load the machine on a vehicle properly and ensure its secured7. Turn off the engine.8. After loading, put blocks under tracks and attached machine using transport belts5.8.Equipment changing1. Place the machine on a flat, sturdy and level ground.2. Lower the light fixture to touch the ground.3. Stop the engine.4. Remove the bolts securing the mounting equipment to the jib and the jib cylinder.5. Remove the bolts and remove the equipment.6. Set the jib that the mounting holes are concentrically positioned fixture with jib holes / arm and the hydraulic cylinder.7.Lubricate the inner surface8. Put pins9. Tighten the screw bolts.B DCARYS.5.2 BUCKET CHANGING5.9.1 FITTING AND OPERATION OF HYDRAULIC HAMMER5.9.1. The hydraulic hammer Atlas Copco SB52 is mounted in place of the bucket (pic.5.9.1)PIC.5.9.15.9.2. To use the hydraulic breaker, connect the hydraulic hoses and connect with quick couplings (PIC 5.9.2 - A,B).ABPIC 5.9.25.9.3 Operation of the hydraulic hammer1. Before start using the hydraulic hammer machine need to run for around 15 minutes to let the hydraulic oil takes the right temperature.2. Hydraulic hummer need to be lubricated before and during using.3. To start working by hammer the tip must be pressed into the breaking material and then hammers is start running by pushing the lever (F, PIC.4.1) to the left.4. Continuous operation of the hammer cannot be longer than 15 seconds, when the material does not want to break, change the place of impact.ALL DETAILED INFORMATION ARE INCLUDED IN HYDRAULIC HAMMER OWNERS MANUAL6.SERVICE6.1.Service positionBefore working by the machine:1. Set the machine on a flat, sturdy and level ground.2. Working system should rest on the ground.3. Allow machine to coolPIC.6.1 POINTS OF LUBRICATION AND OIL REPLENISHMENT6.2.Hydraulic oil replenishmentTake care of proper hydraulic oil level. The tank is located under the driver's seat and has got 24 liters of hydraulic oil.PIC.6.2 HYDRAULIC OIL REPLENISHMENTA BThe hydraulic oil level is checked with a bayonet placed under the oil fill cap6.3.Hydraulic oil changingIt is recommended that the oil and oil filter were changed once a year, assuming that the machine is working 8 hours a day. In justified cases, the exchange should be carried out frequently. The oil filter is located under the oil tank cap B (Pic.6.2).Recommended hydraulic oil is AGIP ARNICA 46 or other with the same parameters (norm ISO L-HV and DIN 51524 t.3 HVLP).6.4.Hydraulic cylinders and pins lubcricationAll points where parts are in move must be properly lubricated. Below there is exepmplary lubrication point, All these points are equipped with grease nipples.APIC.6.4 POINT OF LUBRICATION6.5.Hydraulic pressure controlPIC.6.5 HYDRAULIC PRESSURE CONTROL6.6.Tracks tension regulationIn case of too low tracks tension it is necessary to adjust it by using the adjustment screws on both sides of the mini digger. To tension rubber tracks, first loosen support screws on sides of bracket (A), than regulate the tension by regulation screws (B).BBRYS.6.6 TRACKS TENSION REGULATION6.7.Brass pins changingIn the case of use of the brass pins, replace them with new ones. Knock out the pins out of the nest and embed new.APIC.6.7 BRASS PINS6.8.Hydraulic oli tank valveThe hydraulic oil tank is equipped with shut-off valve. The valve is used when operating the hydraulic pump and preventing oil spills after disconnecting the hydraulic hose.APIC.6.8 TANK VALVE6.9.Battery changingBattery is mounted next to gasoline engine, under the operators seat.The replacement should begin with the disconnection of the black (-) mass lead. Then disconnect the positive (+) cable in red.Loosen the wing screws and remove the retaining plate. After this, you can remove the used battery. Install the new battery in reverse order, paying particular attention to its secure mounting.PIC.6.9 BATTERYAB BCCD6.10.Machine maintenance tableX(1) Empty the tank, when the oil filter is not heavily soiled, you can use it again Mini digger is filled up with hydraulic oil AGIP (ENI) ARNICA 46.To next fill up it is recommended the same oil or other with the same parameters: ISO L-HV and DIN 51524 t.3 HVLP6.11.Pressure throttlingThe pressure in the hydraulic system can be throttled by a throttle valve (at hydraulic distributor).A21PIC.6.9 THROTTLING VALVE7.SPARE PARTSWhen ordering spare parts, always state the information on the name plate of the machine or enter the symbol of the part.WARRANTY CARD1. Warranty for smooth operation of the device is granted for a period of 24 months from the date of purchase for private users and 12 months for companies. Warranty does not cover consumable parts subject to normal use (replace parts).2. The manufacturer provides free repair, in case of under warranty against manufacturing defects.3. The manufacturer provides to resolve the complaint within 30 days from the date of notification.4. The buyer loses all rights guarantees in the event of unauthorized changes in construction or operation contrary to the instructions.5. Any damage caused by improper transportation or storage device, its improper operation, maintenance and other reasons not caused by the manufacturer - can be removed only at the expense of the user.6. If the above mentioned causes have caused permanent changes in the quality unit granted the guarantee expires.7. Machine repairing made during the warranty period by persons not authorized by the manufacturer will void the warranty.8. Warranty does not cover direct and indirect losses caused by defective machine.9. The warranty card is not valid without the date stamp and signature, as well as amendments and deletions made by unauthorized persons.10. In matters not covered by these warranty conditions apply to the Civil Code.11. The buyer pays the transportation cost for the mini digger to and from the service point or cover the travel cost for a service technician to the service point.Mini digger SpringerMAX-PROPurchase date:…………………………………..Serial number:…………………………….Sellers stamp and signature:……………………………….SERVICEDeclaration of conformity WEFor the purposes of the Machinery Directive 2006/42/EC, Annex II, 1.AProducer:PHU ELGO-PLUSPrzemysłowa 1, 87-880 Brześć Kujawski POLANDA person domiciled or resident in the community authorized to compile the technical file: Owner Andrzej ZielińskiThe undersigned hereby declares that the product::TRADE MARK: MINI DIGGER SpringerMAX-PROFUNCTION: MULTIFUNCTIONAL MINI DIGGERTYPE/MODEL: SpringerMAX-PROcomplies with the following European directives:•machinery directive 2006/42/WE of 17.05.2006 (Dz.U. L 157 z 9.06.2006 page 24) and its amendment 2009/127/WE of 21.10.2009 (Dz.U. L 310 z 25.11.2009 page 29).Andrzej ZielińskiOwner。
技术指导IPowermax机用等离子切割系统操作指南精简版

技术指导IPowermax机用等离子切割系统操作指南精简版此篇文章是 Powermax 等离子切割系统操作手册的操作指南的精简版,其中涵盖了 Powermax 机用等离子切割系统在开始切割前的一系列准备工作。
//注意:有关安全和作业指令的详情,请参考操作手册。
步骤1 选择合适切割工艺根据需要切割的金属板材的厚度,选择最佳的切割工艺(切割电流,易损件,速度等),具体可参考操作手册中的切割工艺参数表。
步骤2 正确安装易损件根据切割工艺选择正确的易损件,按规范正确安装到割枪上。
易损件的选择和安装请参考操作手册。
步骤3 确认割炬垂直,并调整割炬至工件的距离为了保证最佳切割角度,检查割炬与工件的垂直度,可以借助组合直角尺,确保割炬正面和侧面都是垂直的。
同时还需要设定合适的割炬到工件的距离,这对等离子切割至关重要,具体请查阅操作手册的切割表查看合适的割炬至工件的距离。
步骤4 设定正确的工艺模式根据实际工艺需求,设置正确的工艺模式:网格切割时模式选 1 -“网格切割”模式,连续切割模式选 2 -“切割”模式,气炮时模式选3 -“气刨”模式。
点击查看大图步骤5 接通电源将电源开关(位于系统后侧)定位在右侧所示的“ON”位置。
步骤6 查看 LED 指示灯自动/手动气压设置模式选择器按钮可切换自动和手动模式。
当系统处于自动模式时,LED 指示灯不会点亮,电源会自动根据割炬类型和电缆长度设置气压,调节旋钮仅用于设置安培数。
当系统处于手动模式时,LED 指示灯会点亮,调节旋钮既可设置气压,也可设置安培数。
//注意:手动模式时应由经验丰富的操作工根据具体的切割用途优化供气设置(取代自动供气设置)。
变更自动/手动气压设置模式:从手动模式改为自动模式时,电源会自动设置气压,安培数设置不会改变;当从自动模式改为手动模式时,电源会记住之前的手动气压设置,安培数设置不会改变。
当您重启电源时,电源会记住之前的模式、气压和电流设置。
步骤7 检查显示面板是否存在故障报警检查显示面板查看是否有故障报警,以及具体的故障代码。
斯派克直读光谱仪操作规程
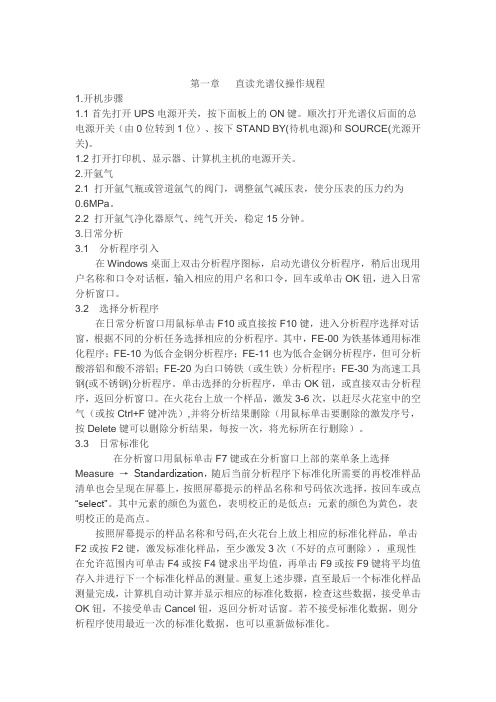
第一章直读光谱仪操作规程1.开机步骤1.1首先打开UPS电源开关,按下面板上的ON键。
顺次打开光谱仪后面的总电源开关(由0位转到1位)、按下STAND BY(待机电源)和SOURCE(光源开关)。
1.2打开打印机、显示器、计算机主机的电源开关。
2.开氩气2.1 打开氩气瓶或管道氩气的阀门,调整氩气减压表,使分压表的压力约为0.6MPa。
2.2 打开氩气净化器原气、纯气开关,稳定15分钟。
3.日常分析3.1 分析程序引入在Windows桌面上双击分析程序图标,启动光谱仪分析程序,稍后出现用户名称和口令对话框,输入相应的用户名和口令,回车或单击OK钮,进入日常分析窗口。
3.2 选择分析程序在日常分析窗口用鼠标单击F10或直接按F10键,进入分析程序选择对话窗,根据不同的分析任务选择相应的分析程序。
其中,FE-00为铁基体通用标准化程序;FE-10为低合金钢分析程序;FE-11也为低合金钢分析程序,但可分析酸溶铝和酸不溶铝;FE-20为白口铸铁(或生铁)分析程序;FE-30为高速工具钢(或不锈钢)分析程序。
单击选择的分析程序,单击OK钮,或直接双击分析程序,返回分析窗口。
在火花台上放一个样品,激发3-6次,以赶尽火花室中的空气(或按Ctrl+F键冲洗),并将分析结果删除(用鼠标单击要删除的激发序号,按Delete键可以删除分析结果,每按一次,将光标所在行删除)。
3.3 日常标准化在分析窗口用鼠标单击F7键或在分析窗口上部的菜单条上选择Measure →Standardization,随后当前分析程序下标准化所需要的再校准样品清单也会呈现在屏幕上,按照屏幕提示的样品名称和号码依次选择,按回车或点“select”。
其中元素的颜色为蓝色,表明校正的是低点;元素的颜色为黄色,表明校正的是高点。
按照屏幕提示的样品名称和号码,在火花台上放上相应的标准化样品,单击F2或按F2键,激发标准化样品,至少激发3次(不好的点可删除),重现性在允许范围内可单击F4或按F4键求出平均值,再单击F9或按F9键将平均值存入并进行下一个标准化样品的测量。
MAXP2 游戏手册说明书

CUSTOMER SUPPORTEvery effort has been made to make our products as compatible with current hardware as possible. However if you are experiencing problems with running of one of our titles you may contact our Technical Support staff in one of several ways:Before contacting Technical Support, please be prepared. In order to assist you as efficiently as possible, we will need to know as much information about your computer and the problem as possible. If you can not provide the information in the check list below, then please contact your computer manufacturers technical support department before contacting Take 2 Interactive, otherwise we will be unable to solve your problem.THE INFORMATION THAT WE WILL REQUIRE IS AS FOLLOWS :Contact Details:•Your name•e-mail address, daytime telephone number or postal address•If you are from outside the UK, please specify which country you are contacting us from and the language version of the game you are playing.SYSTEM DETAILS:•PC Brand Name and model•Processor speed and manufacturer•CD-ROM Drive speed and manufacturer•Total amount of system RAM•The make and model of your Video Card / 3D Accelerator together with amount of Video RAM •The make and model of your Sound Card•Mouse and driver information.Please describe the circumstances, including any error messages, of your problem as clearly as possible.NOTE: PLEASE DO NOT CONTACT TAKE 2’S TECHNICAL SUPPORT STAFF IN SEARCH OF GAME HINTS. They are neither permitted nor qualified to supply such information.OUR TECHNICAL SUPPORT CONTACT DETAILS: Post:...........................Take 2 Interactive Technical SupportUnit A, Sovereign ParkBrenda RoadHartlepoolTS25 1NNTelephone: .................(0870) 1242222 / calls charged at national rate(7 days a week from 8am to 10pm (GMT) excluding bank holidays) Fax:.............................01429 233677Email:***************************************************************************Web Address:28。
斯派克M10操作规程
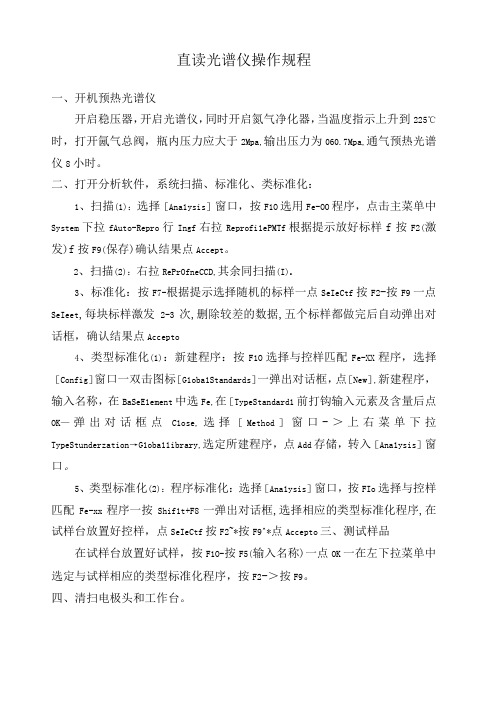
直读光谱仪操作规程一、开机预热光谱仪开启稳压器,开启光谱仪,同时开启氮气净化器,当温度指示上升到225℃时,打开氤气总阀,瓶内压力应大于2Mpa,输出压力为060.7Mpa,通气预热光谱仪8小时。
二、打开分析软件,系统扫描、标准化、类标准化:1、扫描(1):选择[Ana1ysis]窗口,按F1O选用Fe-OO程序,点击主菜单中System下拉fAuto-Repro行Ingf右拉Reprofi1ePMTf根据提示放好标样f按F2(激发)f按F9(保存)确认结果点Accept。
2、扫描(2):右拉RePrOfneCCD,其余同扫描(I)o3、标准化:按F7-根据提示选择随机的标样一点SeIeCtf按F2-按F9一点SeIeet,每块标样激发2-3次,删除较差的数据,五个标样都做完后自动弹出对话框,确认结果点Accepto4、类型标准化(1):新建程序:按F1O选择与控样匹配Fe-XX程序,选择[Config]窗口一双击图标[G1oba1Standards]一弹出对话框,点[New],新建程序,输入名称,在BaSeE1ement中选Fe,在[TypeStandard1前打钩输入元素及含量后点OK—弹出对话框点C1ose,选择[Method]窗口->上右菜单下拉TypeStunderzation→G1oba11ibrary,选定所建程序,点Add存储,转入[Ana1ysis]窗口。
5、类型标准化(2):程序标准化:选择[Ana1ysis]窗口,按FIo选择与控样匹配Fe-xx程序一按Shif1t+F8一弹出对话框,选择相应的类型标准化程序,在试样台放置好控样,点SeIeCtf按F2~*按F9^*点Accepto三、测试样品在试样台放置好试样,按F1O-按F5(输入名称)一点OK一在左下拉菜单中选定与试样相应的类型标准化程序,按F2->按F9。
四、清扫电极头和工作台。
MAX PLUS简单使用说明

编译您的项目
对 MAX 器件进行多级综合
• 对于 MAX (乘积项)器件,您可以选择多级综 合。 它可以充分利用所有可使用的逻辑选项。这 种逻辑综合方式,用于处理含有特别复杂的逻辑 的项目;而且配置时不需要用户干涉。对于 选中该框,则多级综合方 FLEX 器件,这个选项自动有效。 式对 MAX 5000/7000 系
Smart Recompile - 当该选项有效时,编译器将保存项目中 在以后编译中会用到的额外的数据库信息。这样可以减少将 来编译所需的时间。
Total Recompile - 要求编译器重新生成编译器网表文 件和层次互连文件。
指定具体的设计文件名
显示当前文件类型的缺省 (Default)扩展名。您可从 下拉列表中选择不同的扩 展名。
生成一个图形设计文件
指定项目名称
• MAX+PLUS II中, 显示当前项目名 在 编译一个项目前, 显示当前路径 您必须确定一个设 显示所有子目录. 计文件作为您的当 显示所有本地和 前项目。请按下列 网络驱动器 步骤确定项目名: 显示当前路径下的全部设计文件和编程文件。 1. 在 File menu 菜单中选择 当前项目 Project Name项, 将出现Project Name 对话框: 2. 在 Files 框内,
列器件有效. 选中该框,则多级综合方 式对 MAX 9000系列器件 有效。
编译您的项目
FLEX 器件的进位/级联链
• 进位链提供逻辑单元之间的非常快的向前 进位功能。 • 利用级联链可以实现扇入很多的逻辑函数。 • 如选择FAST 综合方式,则进位/级联链选 项自动有效。按如下步骤可人工选择该选 项是否有效:
4) 在 Chip Resource 对 话框内,选择 管脚并输入管 脚的序列数。
斯派克max操作手册
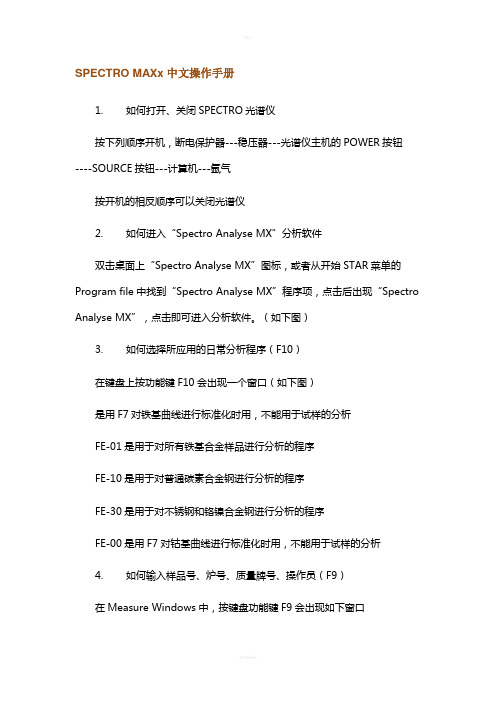
SPECTRO MAXx中文操作手册1. 如何打开、关闭SPECTRO光谱仪按下列顺序开机,断电保护器---稳压器---光谱仪主机的POWER按钮----SOURCE按钮---计算机---氩气按开机的相反顺序可以关闭光谱仪2. 如何进入“Spectro Analyse MX”分析软件双击桌面上“Spectro Analyse MX”图标,或者从开始STAR菜单的Program file中找到“Spectro Analyse MX”程序项,点击后出现“Spectro Anal yse MX”,点击即可进入分析软件。
(如下图)3. 如何选择所应用的日常分析程序(F10)在键盘上按功能键F10会出现一个窗口(如下图)是用F7对铁基曲线进行标准化时用,不能用于试样的分析FE-01是用于对所有铁基合金样品进行分析的程序FE-10是用于对普通碳素合金钢进行分析的程序FE-30是用于对不锈钢和铬镍合金钢进行分析的程序FE-00是用F7对钴基曲线进行标准化时用,不能用于试样的分析4. 如何输入样品号、炉号、质量牌号、操作员(F9)在Measure Windows中,按键盘功能键F9会出现如下窗口Sample No:炉号Quality :样品的牌号Sample ID:样品的样号Operator :操作者如果没有的话,可以不填5. 如何做标准化(F7)在Measure Windows中,按键盘功能键F7会出现如下窗口按“Yes”后出现如下窗口在样品台上放好随机带来的国际标样“RH-18”(做之前一定要在砂带磨样机上磨好),点击“OK”,一共需要测试五次。
假如数据不好可以选择这个数据,然后按窗口边上“Delete a Measurement”删除后,重新进行测试。
五次测量后会出现如下窗口如果又出现一个对话框,则按跳出的“OK”就可以,随后出现询问是否打印标准化报告,按“Yes”打印,按“No”不打印见下图所示:出现表示标准化由于某种原因没有成功,假如出现的对话框上显示的是“Standardization was successful”表示标准化成功了,按“OK”就可以了6. 如何做类型标准化(F8)仪器标准化的作用是对仪器的整体进行校正,实际上相对是一个对仪器的粗调整;而类型标准化是根据不同的生产品种选择不同的控制样品进行对仪器的细调整。
- 1、下载文档前请自行甄别文档内容的完整性,平台不提供额外的编辑、内容补充、找答案等附加服务。
- 2、"仅部分预览"的文档,不可在线预览部分如存在完整性等问题,可反馈申请退款(可完整预览的文档不适用该条件!)。
- 3、如文档侵犯您的权益,请联系客服反馈,我们会尽快为您处理(人工客服工作时间:9:00-18:30)。
SPECTRO MAXx中文操作手册1. 如何打开、关闭SPECTRO光谱仪按下列顺序开机,断电保护器---稳压器---光谱仪主机的POWER按钮----SOURCE按钮---计算机---氩气按开机的相反顺序可以关闭光谱仪2. 如何进入“Spectro Analyse MX”分析软件双击桌面上“Spectro Analyse MX”图标,或者从开始STAR菜单的Program file中找到“Spectro Analyse MX”程序项,点击后出现“Spectro Anal yse MX”,点击即可进入分析软件。
(如下图)3. 如何选择所应用的日常分析程序(F10)在键盘上按功能键F10会出现一个窗口(如下图)是用F7对铁基曲线进行标准化时用,不能用于试样的分析FE-01是用于对所有铁基合金样品进行分析的程序FE-10是用于对普通碳素合金钢进行分析的程序FE-30是用于对不锈钢和铬镍合金钢进行分析的程序FE-00是用F7对钴基曲线进行标准化时用,不能用于试样的分析4. 如何输入样品号、炉号、质量牌号、操作员(F9)在Measure Windows中,按键盘功能键F9会出现如下窗口Sample No:炉号Quality :样品的牌号Sample ID:样品的样号Operator :操作者如果没有的话,可以不填5. 如何做标准化(F7)在Measure Windows中,按键盘功能键F7会出现如下窗口按“Yes”后出现如下窗口在样品台上放好随机带来的国际标样“RH-18”(做之前一定要在砂带磨样机上磨好),点击“OK”,一共需要测试五次。
假如数据不好可以选择这个数据,然后按窗口边上“Delete a Measurement”删除后,重新进行测试。
五次测量后会出现如下窗口如果又出现一个对话框,则按跳出的“OK”就可以,随后出现询问是否打印标准化报告,按“Yes”打印,按“No”不打印见下图所示:出现表示标准化由于某种原因没有成功,假如出现的对话框上显示的是“Standardization was successful”表示标准化成功了,按“OK”就可以了6. 如何做类型标准化(F8)仪器标准化的作用是对仪器的整体进行校正,实际上相对是一个对仪器的粗调整;而类型标准化是根据不同的生产品种选择不同的控制样品进行对仪器的细调整。
每次做过F7标准化后,要分析试样前,必须重新做F8类型标准化。
进行类型标准化的方法步骤如下:如何输入类型标准化样品1)在Measure Window(测试窗口)中,按Shift+F12,调出Program Development(程序开发)窗口,在Edit菜单下,选择Type Standardz. Sample…F3项,出现按“List…”按钮,出现按“New…”出现如下图所示:在“Name”后的空格中填入所要做的类型标准化样品的名称,在“Type Stand.Samples”前的方格上打上钩然后,点击“Conc….”按钮,输入类型标准化控样的化学成分,结束后连续按两次“Ok”再按一次“Close”,至如下画面,你可以看见在右边的框中出现了一个刚才输入的类型标准化控样的名称,选择后,按中间的“<-Include”,将类型标准化控样添加到左边框中,按“Ok”。
2)如何测试类型标准化样品(F8)回到Measure Window(测试窗口)中,按键盘上的功能键F8,出现一个选择窗口,选择想要做的类型标准化控样后,按“Ok”;出现一个窗口,问“你是否想要进行类型标准化控样测试”,“Yes”测试,“No”不测试。
选择“Yes”后,会出现下面窗口,让你把所要测试的控样放在样品台上。
按“Ok”后到下面的窗口按完F9后,出现一个系数表,按“OK” 后,接着就可以分析与你类型控制样品相似的样品了。
7. 如何进行日常的生产样品的分析按F10选择分析程序,按F8做与要分析样品成分相似的类型标准化控样,调用,然后就可以分析试样了,每个试样要激发三次,取接近的数据平均值。
8.如何设置分析元素在屏幕的显示与否及在打印机上的打印与否在Measure Window(测试窗口)中,按Shift+F12,调出Program Development(程序开发)窗口,在Edit菜单下,选择Element Format…Ctrl+4项,9.测量窗口测量窗口是用来日常分析生产样品的窗口,所有的日常分析均在此窗口完成,进入此窗口后,下列菜单就会显示在屏幕上。
---Menu File 文件菜单---Menu Edit 编辑菜单---Menu Measurement 测量菜单---Menu Program 程序菜单---Menu Instrument 仪器菜单---Menu Extras 其它---Menu Help 帮助见图1在屏幕的下端,有一行功能键的图标由F1—F12,F1 用鼠标击点此键或直接按键盘上的F1,即可将测量窗口中的所有功能键的英文解释调出。
F2 用鼠标击点此键或直接按键盘上的F2,开始激发样品。
F3 用鼠标击点此键或直接按键盘上的F3,停止激发样品。
有时在激发样品过程中,样品没有磨平、样品没有放好位置,就会产生刺耳的声音,这时候就要按F3停止激发。
F4 用鼠标击点此键或直接按键盘上的F4,显示平均值。
如果设置了质量控制,按完此键后,此牌号的偏差也会显示出来。
F5 用鼠标击点此键或直接按键盘上的F5,显示平均值及统计偏差。
F6 用鼠标击点此键或直接按键盘上的F6,显示单次测量值。
F7 用鼠标击点此键或直接按键盘上的F7,开始标准化。
F8 用鼠标击点此键或直接按键盘上的F8,开始类型标准化。
F9 用鼠标击点此键或直接按键盘上的F9,存储上一次的分析结果并邀请输入下一个样品的名称。
F10 用鼠标击点此键或直接按键盘上的F10,列出所有分析程序清单,根据你的分析要求,选择相应的分析程序。
F11 用鼠标击点此键或直接按键盘上的F11,开始控制样品检测。
F12 用鼠标击点此键或直接按键盘上的F12,开始打印。
9.1Menu File文件菜单是用于打开文件、启动文件的窗口。
在我们程序中的开发窗口、样品管理窗口都会有此菜单出现。
下面将它包含的内容一一列出。
Load Program 调程序用鼠标选择了此项,就列出了您仪器里所有的分析程序,这些程序是根据您们的分析要求而设置的。
在进行分析样品前选择正确的程序进入。
例如以铁基为例,你要分析低合金钢,就要调入FE-10的程序。
同时您也可以按F10实现此功能。
Program Development 开发程序用鼠标选择了此项,就进入了我们的开发程序窗口。
同时您也可以按SHIFT +F12实现此功能。
Sample Manager用鼠标选择了此项,就进入了我们的样品管理程序。
在此程序中,你可调出所有的分析结果,同时还可对这些结果进行编辑。
按ALT+F12也可实现此功能。
Layout 配置用鼠标选择了此项,就进入了打印机的设置程序。
通过此程序,你可对打印机复位。
Printer Setup用鼠标选择了此项,就进入了打印机的设置程序Print Local用鼠标选择了此项,就在现场的打印机上执行打印。
同时您也可以按CTRL +P实现此功能。
Print Remote用鼠标选择了此项,就开始执行远程打印了。
同时您也可以按CTRL+R实现此功能。
Store用鼠标选择了此项,可以将所有的分析结果存储在外部的文件名里。
同时您也可以按CTRL+S实现此功能。
Transmit用鼠标选择了此项,可以将SS所有的分析结果传送到外部的终端上。
同时您也可以按CTRL+R实现此功能。
Exit 退出用鼠标选择了此项,就退出了斯派克分析程序了。
同时您也可以按ALT+F4实现此功能。
9.2 Menu Edit(Measure Window) 编辑菜单Mark 标记用鼠标选择了此项,就击活了做记号模式。
你可以通过做标记的形式将同一画面的结果进行编辑。
同时您也可以按CTRL+R实现此功能。
Delete 删除用鼠标选择了此项,你就可以删除某些数据了。
Delete All删除所有的屏幕上显示的分析结果。
同时您也可以按CTRL+A实现此功能。
Undo当你删除了一些分析结果后,又想恢复他们,就点击次项。
同时您也可以按CTRL+A实现此功能。
9.3 Menu MeasurementNext Sample 下一个样品用鼠标点击此项,就将当前屏幕上的测量值取平均并将结果贮存在硬盘里。
同时在屏幕上就会出现一个对话框。
在这个对话框中,你可以输入样品号、炉号、质量牌号及操作者。
同时你也可以按键盘上的F9功能键来实现此功能。
Start 开始激发用鼠标点击此项,就开始激发生产样品或标准化样品了。
当然,在激发样品之前,要将样品盖住火花台板上的孔、要将压板压住样品等。
在屏幕的下端,会显示现在激发状态。
同时你也可以按键盘上的F2功能键来实现此功能。
例如:Sample Clamp Up 表示样品没有压好。
Source off 表示光源没有打开。
Stop 停止激发用鼠标点击此项,就可以终止激发过程了。
当激发样品过程中,如果样品没有盖严、样品表面不平整,这时候就需要按STOP终止激发,重新打磨样品,然后再激发。
同时你也可以按键盘上的F3功能键来实现此功能。
Multiple Measurement 多次测量使用着这个菜单,就开始对放在火花台板上的样品进行多次测量。
当你用鼠标点击此项,屏幕上就会出现一个小对话框,你可以输入需要激发的次数。
然后按F2键就可以达到连续激发的目的。
一般情况下,在刚刚开机时或更换氩气时需要空烧几个点,使氩气充分的冲洗氩气管道,可以用此功能。
另外进行描迹时,也可以应用此功能。
同时按键盘上的SHIFT +F2键也可实现此功能。
Last Measurement 上一次测量结果在某一分析程序中得到了一个结果,更换到另外一个分析程序中,通过点击此项,还可将次结果调出。
同时按键盘上的ALT +F2键也可实现此功能。
Control Sample Test此菜单是为了检查选定了分析程序的标准化的校正,通常用于全自动化光谱仪上。
同时按键盘上的F11键也可实现此功能。
Standardization 标准化(有时也称为再校准)当选择了这个菜单,就开始标准化工作。
首先屏幕上会显示一个对话框,请你确认是否做标准化,如果是就按YES,果不想做标准化就按NO。
如果按了YES键,就开始标准化,接下来屏幕上方就会出现做标准化时所需要样品的清单。
绿颜色光条表示以完成了激发。
黄颜色代表即将要激发的此块样品每激发完一块样品,按F9就会自动显示下一个样品号。
激发完所有的标准化样品后,就会出现一张表格,随后按OK将表格内容存储,既标准化完成。