奇声功放说明书
功放使用说明书

功放使用说明书-CAL-FENGHAL-(YICAI)-Company One 1QiShengS声功放使用说明书该说明书为东莞市奇声电子实业有限公司版权所有安全须知请阅读本用户指南诣务必认真遵守本用户指南中的说朋。
它有助于您正确安 姿和操作本系统.享用它的先逬功能C 说保存本用户指南 留作以后参考C警吿:为篙低失火或电击风险・请勿使本产恳受雨淋或 受孤 小心:为减少电击的危险.非专婕人员谓勿拆鈍本产品。
请问冷格的缭怨人员咨谊缭煖字宜。
晉告:谓将遥扛^;屯置于儿埜鮫及不對的地方。
如果处理 不当.电迪冋龙导致着火或化学灼衍。
谄勿对电池充电、拆 解、加热到了沁(2倚〉以上或焚化。
谓及时处理废旧 电池亠更楔电池时必幾坯用斤酸的类型和型号S 晋告:如果电池更换不当.可能导致埸炸的危险。
更换电 池时.只駝便用机构认可的(如UL ) CR2032或DL3032 等3伏锂电池。
谓适当处理废I 日电池•遇守任何当地规韋C 请勿将 其焚化C書吿:请勿将任何明火火源〈如点燃的蛾烛)査于本设备 上或靠近本设备。
9S :包含小部件.可能导馥窒息扈险。
不适合3岁以卞的儿生使用。
注意:必须在堂内使用本产品。
在主处、嵌游汽车或船無 •使用本产昂均不符舍本产吊的设计或瀏试初衷。
A 等迫三角形内悩箭头的闪电标忑用来音示用户,系统 /% \ 外壳内存在未终缘的危咎电压.其电压值扫可能构成 厶=电奇危咎。
Z\ 系统上标示的等边三角形内的庙叹号标毛旨在警示用 /!\户,在本用户hi 朿中右僧应的里要操作和维修指示。
小心:为防止电击.请将电源圾插头上的宽插養对准交流 (电源-)插座上的宽插孔。
插头要完全插入插座°小心:使用非本手册指定的其它控靜、调整或操作程序. 可能导致内瑯激光组件发生危险的迫瑟换射酒靈。
除具有 适当资格的照务人员外.任何人员玮得调整或缭烽本光疑 播放机。
注童:如果是通逮电源插头或设备祸会裁述虧设备电瀝. 那么切浙电簿的设备应当可以迅速铁复工作。
Tannoy iwSA 500 音频放大器说明书
2TANNOY iwSA 5002.0 WARNINGSBefore using your amplifier, be sure to carefully read the applicable items of these operating instructions and the safety suggestions.• Read these instructions.• Keep these instructions.• Heed all warnings.• Follow all instructions.• Do not use this apparatus near water.• Clean only with dry cloth.• Do not block any ventilation openings. Install in accordance with the manufacturers instructions.• Do not install near any heat sources such as radiators, heat registers, stoves, or other apparatus (including amplifiers) that produce heat.• Do not defeat the safety purpose of the polarized or grounding - type plug. A polarized plug has two blades with one wider thanthe other. A grounding type plug has two blades and a third grounding prong. The wide blade or the third prong are providedfor your safety. If the provided plug does not fit into your outlet, consult an electrician for replacement of the obsolete outlet.• Protect the power cord from being walked on or pinched particularly at plugs, convenience receptacles, and the point where they exit from the apparatus.• Only use attachments/accessories specified by the manufacturer.• Use only with the cart, stand, tripod, bracket, or table specified by the manufacturer, or sold with the apparatus. When a cart is used use caution when moving the cart/ apparatus combination to avoid injury from tip-over.• Unplug this apparatus during lightning storms or when unused for long periods of time.• Refer all servicing to qualified service personnel. Servicing is required when the apparatus has been damaged in any way suchas Power-supply cord or plug is damaged, liquid has been spilled or objects have fallen into the apparatus, the apparatus has been exposed to rain or moisture, does not operate normally, or has been dropped.• To completely disconnect this equipment from the mains, disconnect the power supply cord from the receptacle.• The mains plug of the power supply cord shall remain readily operable.• Do not remove top or bottom covers. Removal of the cover will expose hazardous voltages. There are no serviceable parts inside and removal may void the warranty.2.1 Important Safety Instructions2.2 WARNINGThe lightning flash with arrowhead symbol within an equilateral triangle is intended to alert the user to the presence of uninsulated “dangerous voltage” within the product’s enclosure that may be of sufficient magnitude to constitute a risk of electrical shock to persons.2.3 CAUTIONThe exclamation point within an equilateral triangle is intended to alert the user to the presence of important operating and maintenance (servicing) instructions in the literature accompanying the product.2.2 WARNINGTo reduce the risk of fire and electric shock, do not expose this apparatus to rain or moisture and objects filled with liquids, such as vases, should not be placed on the apparatus.3Thank you for selecting Tannoy developed by our dedicated team of design engineers, they are the choice of discriminating music and movie lovers the world over. Excellence is designed into our loudspeakers and electronics from the start. Careful selection of the very best components combined with strict quality control procedures during the production process ensures this level of excellence is maintained. We feel confident that you will enjoy your new Tannoy loudspeakers/electronics for many years to come.Please take time to read the rest of this owner’s guide before using your loudspeakers/electronics to gain maximum effect from their use. Once you have installed your new loudspeakers/electronics please complete and return the registration document – this does not limit your legal rights.CONTENTSINTRODUCTION3.0 APPROVALS2.0 WARNINGS2.1 Important Safety Instructions 2.2 WARNING 2.3 CAUTION7O W N E R ’S M A N U A LINTRODUCTIONMany in-wall and ceiling loudspeaker are designed simply to reproduce sound without any consideration for ultimate audio quality and vocal articulation. Not so with Tannoy installation products. Tannoy in-wall speaker systems are monitor quality speaker systems based on the company’s expertise in the manufacture of premium quality cabinet loudspeakers and studio monitors.The iwSA 500 amplifier was created specifically to maximize the inherent performance of your T annoy inwall subwoofer. By carefully matching the amplifier’s capabilities and performance criteria to the inwall subwoofer, Tannoy has enabled installers and end users to carefully tailor the performance to the job at hand.iwSA 50023446756.0 CONNECTIONS6.1 Input Connections 6.2 Connecting the Speaker 6.3 Cable Choice7.0 OPERATION7.1 Operation Precautions8.0 PROTECTION FEATURES8.1 Limiter Function9.0 MAINTENANCE 10.0 TROUBLESHOOTING 11.0 WARRANTY12.0 Technical Specifications iwSA 5008978882.4 User Responsibility 2.4.1 Speaker Damage 2.4.2 Radio Interference4.0 INTRODUCING THE iWSA 5004.1 Unpacking 4.2 Front Panel 4.3 Rear Panel5.0 INSTALLATION5.1 Mounting5.2 Operating Voltage43.0 APPROVALSThis equipment is tested and approved according to the Canadian Standards Association (CSA/C/US) and Federal Communications Commission (FCC).2.4 USER RESPONSIBILITY 2.4.1 Speaker DamageYour amplifier is very powerful and can be potentially dangerous to both, loudspeakers and humans alike. Many loudspeakers can be easily damaged or destroyed by overpowering, especially with the high power available. Always check the speakers’ continuous and peak power capabilities.Even is the amplifier’s front panel attenuators can be used to reduce the gain, it is still possible to reach full output power if the input signal level is high enough.TANNOY iwSA 5002.4.2 Radio InterferenceThis equipment has been tested and found to comply with the limits for a Class B digital device, pursuant to Part 15 of the FCC Rules. These limits are designed to provide reasonable protection against harmful interference from electrical equipment. This product uses radio frequency energy and if not used or installed in accordance with these operating instructions, may cause interference `in a particular installation.If this equipment does cause harmful interference to radio or television reception, which can be determined by turning the equipment on and off,the user is encouraged to try to correct the interference by one or more of the following measures:• Reorient or relocate the antenna.• Increase the separation between the equipment and receiver.• Connect the equipment into an outlet on a a circuit different from that to which the receiver is connected.• Consult the dealer or an experienced radio/TV technician for help.TANNOY iwSA 500iwSA 5007TANNOY iwSA 5006.3 Cable ChoiceAlways use the best quality of cable available within your budget. High quality audio signals passing from the amplifier to the loudspeaker are unusual in their demands on the cable. Wide dynamic range and frequency bandwidth information has to coexist with the ability to transmit peak currents of at least 10 Amps, without incurring any loss or signal impairment. This explains why the sound quality of the information reproduced by the loudspeakers is so dependant on the physical properties of the cables connecting them to the amplifier.Technically, we recommend two-core cable with cross section area not less than 1.5mm 2 (14 gauge) for cable runs of up to 3 metres. For longer lengths we would suggest that you use cable with a minimum cross sectional area of 2.5mm 2 (12 gauge).Keep the speaker cable leads as short as possible. Do not use shielded leads, such as microphone or guitar cable. Remember that the speaker cable robs the power of the amplifiers in two ways: by increasing the load impedance and by introducing resistive power losses.iwSA 5005.0 INSTALLATION The amplifier is two rack units high (2U) and will fit into a standard EIA 19” rack. Amplifiers should not be stacked directly on top of each other,we recommend a space at least 3” for the top and sides with 5” on the back . When shelf mounted the height of the supplied feet is adequate.5.1 MountingWARNING!A label just above the mains cable connector on the rear of the amplifier indicates the AC mains voltage for which the amplifier is wired. Connect the power cable only to the AC source referred to on the label. The warranty will not cover damage caused by connecting to the wrong type of AC mains.5.2 Operating Voltage6.0 CONNECTIONS From an unbalanced source the hot (+) center conductor connects to the center pin of the RCA connector. The (-) shield connects to the chassis of the RCA connector.From a balanced source the hot (+) conductor connects to the center pin of the RCA connector. The cold (-) and the shield connect to the chassis of the RCA connector.6.1 Input ConnectionsSpeaker connections are made via 4 gold plated binding posts. When connecting 1 subwoofer to the amplifier the (+) wire connects to the RED (+) binding post of output #1. The (-) wire connects to the BLACK (-) binding post of output #2.When connecting 2 Tannoy subwoofers one will connect to output #1. Negative (-) wire to BLACK binding post and positive (+) wire to RED binding post. The second will connect to output #2. Negative (-) wire to BLACK binding post and positive (+) wire to RED binding post.Never connect either output terminal to ground or to some other output or input terminal. Pay attention to speaker polarity; loudspeakers connected out of polarity degrade sound quality, and may be damaged as a consequence.6.2 Connecting The Speaker7.0 OPERATION• Make sure that the power switch is set to “off” before connecting any input or output, or operating the switch on the rear panel.• Make sure that the AC mains voltage is correct, and the same as the one printed on the rear panel of the amplifier.• Make sure that the switch on the rear panel for limiter function is in the correct position.7.1 Operation PrecautionsTANNOY iwSA 5008.0 PROTECTION FEATURES8.1 Limiter FunctionThe limiter function is included to prevent dangerous clipped signals reaching the speaker and damaging it. If an amplifier is severely overdriven, its output waveform is clipped (its peaks are squared off) - reducing the crest factor. In extreme cases the waveform can approach that of a square wave. An amplifier is normally capable of producing far more power under these conditions than its normal undistorted rated output power.The Tannoy iwSA 500 Amplifier has two modes of thermal protection and an auto shut down when an internal fault is detected.It is important to have the limiter function switch in the correct position for the number of subs connected, as it sets the amount of output power before limiting occurs.9.0 MAINTENANCEUnder normal use the amplifier should provide years of trouble-free service, with no maintenance required.10.0 TROUBLESHOOTINGThese are typical things to check if you think your amplifier is faulty:FAULT: No power indicator light• Check for proper voltage at receptacle.• Make sure power cord is properly seated in connector on the rear of the amplifier.• Check power switch on back of amplifier.• Check fuse located in holder/drawer below power input connector on back of amp.FAULT: No output• If the power indicator light is on, verify that there is a usable signal on the input.• Check position of level control knob on the front of the amplifier.• Check speaker cable connections on the output binding posts for bad connections.• Check speaker cables for possible short circuits.FAULT: The amplifier does not respond even after having checked the above items.In the unlikely event of a non-user rectifiable fault return the amplifier to your supplier, or an approved service center.Tannoy cannot be held responsible for damage or injury as a result of the top or bottom cover being removed.11.0 WARRANTYNo maintenance of Tannoy products is necessary.All of our products have been produced and tested with care and precision to give first-class service.All passive components are guaranteed for a period of five years from the date of purchase from an authorized Tannoy dealer subject to the absence of evidence of misuse, overload or accidental damage.All active and electronic components are guaranteed for a period of one year from the date of purchase from an authorized Tannoy dealer subject to the absence of, or evidence of, misuse, overload or accidental damage.If at any time during this warranty period the equipment proves to be defective for any reason other than accident, misuse, neglect, unauthorized modification or fair wear and tear, we will repair any such manufacturing defect or, at our option, replace it without charge for labour, parts or return carriage.If you suspect a problem with a Tannoy product then, in the first instance, discuss it with your Tannoy dealer. If you require further assistance then we ask that you deal directly with your local Tannoy distributor.For spares and service in NORTH AMERICA only:Contact: Customer Service Manager**********************Telephone: 519.745.1158DO NOT SHIP ANY PRODUCT TO TANNOY WITHOUT PREVIOUS AUTHORIZATION812.0 TECHNICAL SPECIFICATIONS AND DRAWINGSPERFORMANCEMaximum Output Power (1) (2)Minimum Nominal Load Impedance DistortionMinimum Frequency Bandwidth Input Impedance Current Draw at 4 ΩFRONT PANEL Level ControlCrossover Frequency Adjustment Phase ControlCrossover/Bypass Switch On/Auto Switch Power On Indicator REAR PANEL Input Connectors Link Connectors Output Connectors Mains Voltage Connector Mains Voltage Fuse Holder REAR PANEL SWITCHES Power Switch Limiter Function DIMENSIONSNet Dimensions (HxWxD)Shipping Dimensions (HxWxD)WEIGHTNet Weight (each) - kgs (lbs)Shipping Weight (each) - kgs (lbs)APPROVALS CSA C/US & FCCiwSA 500 SUBWOOFER AMPLIFIER500 Watts Continuous into 4 Ω250 Watts Continuous into 8 Ω4 Ω<1% @ Maximum Rated Output 20Hz - 500Hz (no filters or EQ)>20 kΩ5 AmpsAdjusts Input Signal Level 50Hz - 150Hz 0° - 180° Continuously Variable Engages or Disengages Low Pass Filter On Continuous / Sleep Mode Blue LED2 x RCA 2 x RCA4 x Gold Plated Binding Postings 120 Volt IEC - 2 Conductor T5AL, 250 VoltSwitchable 1 Sub or 2 Sub (See Page 9.)99 x 483 x 372 (37/8 x 19 x 145/8)208 x 538 x 445 (83/16 x 213/16 x 171/2)6.8 (15)8.6 (19)iwSA 500incl. Feet & Rack EarsNOTES(1) Thermal protection may occur at high continuous power.(2) Depending on configuration, output power may be lower due to limiting circuit.Tannoy United Kingdom T: +44 (0) 1236 420199F: +44 (0) 1236 428230E:********************Tannoy North AmericaT: (519) 745 1158F: (519) 745 2364E:**********************iwSA 500。
KICKER KX系列音频放大器使用指南说明书

Congratulations! You have just purchased the latest in amplifier tech-nology to carry the famous KICKER name. Your KICKER KX seriesamplifier is designed and built to give you years of powerful and trou-ble-free performance. This installation manual contains valuable infor-mation on how to get the most out of your new KX series amplifier.Thanks for buying KICKER. Enjoy!KX Amplifier FeaturesLow Impedance Operation Stable into 2 ohm stereo or 4 ohm monoloads.SORT Protection Circuitry (S hort circuit, O ver-voltage, R everse polarity,T hermal) Protects amplifier from accidents and undesired operation. MOSFET Power Supply Provides high efficiency operation.KickBass Variable bass boost circuit which provides up to 12 dB of boost at 40Hz.Built-In Crossover 12 dB High pass or Low pass fixed at 80Hz. Defeatable for full range operation.High & Low level inputs Allows connection to various sources such as: aftermarket stereos, factory radios, DVD players, Video Cassette Player, etc.Custom tooled gold plated connectors Assure maximum power transfer and damping.SAMS (S tereo A nd M ono S imultaneously) Amplifier will operate into a bridged mono load and a stereo load at the same time.Two Year Warranty When installed by Authorized KICKER dealer.KX75.2When selecting a location to mount your Kicker amplifier be sure it is struc-turally sound and that there are no items behind the area that could be dam-aged by the screws. Check for wiring, brake lines, fuel lines, gas tanks, etc. All amplifiers generate heat under normal operation. Be sure to choose a loca-tion that allows adequate ventilation for the amplifier. Also consider that the air temperature inside an automobile’s trunk can reach upwards of 140 degrees fahrenheit. An amplifier mounted here may require additional cooling needssuch as fans or venting to allow cool operation. If possible, mounting the amp in the passenger compartment will allow cooler operation.Now that you are ready to mount your amplifier, use the supplied 3mm allen wrench to remove the amplifier shroud. This will give you access to the mount-ing holes in the amplifier and all wiring connections.With the shroud removed, you now have access to the four mounting holes in the mounting feet and all wiring connections. Drill 4 holes using a 7/64” drill bit and use the supplied #8 screws to mount the amplifier.Signal can be input into the amplifier using either the low level RCA input con-nections or the high level (speaker level) connections. Using the low level RCA connections is the preferred method. Use the high level inputs only if your head unit does not have low level RCA type outputs.The following diagrams show the most common configurations for your Kicker KX series amplifier.TWO CHANNEL OPERATION (STEREO)KX series amplifiers are capable of operating into a minimum impedance of 2 ohms per channel in stereo operation.Your Kicker amplifier has two rotary controls and one switch on the end panel. These controls ensure the reliability and performance of the amplifier, so they need to be set correctly.CROSSOVER SWITCHNEVER CH H ANGE THE CR R OSSOVER SWIT CH H SETTING WITH THE SYSTEM ON! The switch located on the end panel next to the RCA jacks is for setting the internal crossover. In the OFF position the amplifier passes a full range signal to the speakers. Use the LO position when connected to a subwoofer. The HI posi-tion should be selected when connected to any speakers which you do not want to receive sub-bass information.BEFORE TURNING ON THE SYSTEM FOR THE FIRST TIME, MAKE SURE THAT THE TWO ROTARY CO O NTROLS ON THE SIDE OF THE AMPLIFIER ARETURNED FULLY CO O UNTER-CL L O CK K WISE!GAIN CONTROLRemember, the gain control is not a volume control, it matches the output of the head unit to the input level of the amplifier and must be adjusted properly for best performance. All the way up or down is not necessarily the best.Turn the head unit up to about 3/4 volume. (eg. If the head unit goes to 30, turn it to 25.) Next, turn (clockwise) the gain on the amplifier up slowly until you can hear audible distortion, then turn it down just a little.Crossover ControlThe crossover is fixed at 80Hz high pass or low pass. This control should be set to match your speaker requirements. For example, if the amplifier is driving subwoofers, you will need to set it to lo pass.Bass BoostThe KickBass bass boost control is designed to give you increased output at 40 Hz. The setting for this control is subjective, however, if you turn it up, you mustgo back and adjust the gain control to avoid clipping the amplifier.5If your amplifier does not appear to be working, check obvious things first such as blown fuses, poor or incorrect wiring connections, incorrect setting of crossover switch and gain controls, etc.There are two LEDs on the end panel of your Kicker KX series amplifier, one green and one red. When the green LED is lit this indicates the amplifier is turned on and no trouble exists. If the green LED turns off and the red LED is lit this indicates that the protection circuitry (SORT) is engaged.The power indicator on top of the amplifier which illuminates the model badge follows the same function as the green LED.G reen LED off,,no output::W ith a V olt O hm M eter (VOM) check::Ö+12 volt power terminal (should read +12V to +16V).ÖRemote turn-on terminal (should read +12V to +16V).ÖCheck for reversed power and ground connections.ÖCheck for clean and solid ground.G reen LED on,,no output::ÖCheck RCA connections.ÖTest speaker outputs with known good speaker.ÖSubstitute known good source unit.ÖCheck for signal on RCA cable with VOM meter in AC position.R ed LED on,,no output::1.) Amp is very hot.ÖThermal protection is engaged. Check for proper impedance atspeaker terminals. Also check for adequate airflow around amplifier. 2.) Amp shuts down only while vehicle is running.ÖVoltage protection is engaged. Voltage to the amplifier is not withinthe 9-16 volt operating range. Have automobile charging/electricalsystem inspected.3.) Amp will only play at low volume levels.ÖShort circuit protection is engaged. Check for speaker wires shortedto each other or the vehicle chassis. Damaged speakers or operatingbelow minimum impedance will also cause this.N o output from one cha a nnel::ÖCheck balance control on head unit.ÖCheck RCA & speaker connections for that channel.ÖSwap RCA connections from left to right.If problem changes sides then you have a bad RCAcable or source unit problem.ÖSwap speaker connections from left to right.If problem changes sides then you have a bad speaker6cable or bad speaker.A lterna a tor noise (whining sound tha a t va a ries with engine RPM):ÖCheck for damaged RCA cable.ÖCheck routing of RCA cable.ÖCheck source unit for good ground.ÖCheck gain setting, turn down if set too high.P oor stereo ima a ge or reduced ba a ss response::ÖCheck system phasing by turning the balance control from left toright. If there is more bass output when turned to either side thencheck your speaker wiring for proper positive and negative connections.Reverse connections on one channel if necessary.CA A UTION: W hen jump sta a rting the vehicle,,be sure tha a t connections ma a de with jumper ca a bles a re correct.. I mproper connections ca a n result in blown a mplifier fuses a s well a s fa a ilure in other systems in the vehicle..If you have more questions about the installation and operation of your new KI CK K ER amplifier, see the Authorized KI CK K ER Dealer in your area. You may also call our Technical Services Line at (405)624-8583 for assistance or visit our website at www.KI CK K .7Model KX75.2RMS PowerIn Watts, All Channels Driven@ 13.8V, 4Ω Stereo, 0.2% THD30 x 2@ 13.8V, 2Ω Stereo, 0.2% THD38 x 2@ 13.8V, 4Ω Mono, 0.2% THD75Dynamic PowerIn Watts, All Channels Driven@ 14.4V, 4Ω Stereo35 x 2@ 14.4V, 2Ω Stereo45 x 2@ 14.4V, 4Ω Mono90Length with shroud8.84”(22.45cm) Specifications of KX75.2H eight:: 2.5 inches / 6.35 centimetersW idth::10 inches / 25.4 centimetersF requency R esponse::20 Hz - 20 KHz, +/- 0.5 dBI nput S ensitivity::170 mV - 5 V low level, 340 mV - 10 V high level S igna a l--to--N oise Ra tio::>95 dB, a-weighted, re: rated powerE lectronic Crossover::High Pass, Low Pass or Bypass, Fixed @ 80 Hz,12 dB/octaveK ickB B a ss B oost::Variable 0 to +12 dB boost @ 40 Hz8•Damage due to improper installation• Subsequent damage to other components• Damage caused by exposure to moisture,excessive heat, chemical cleaners, and/or UVradiation• Damage through negligence, misuse, accident or abuse. Repeated returns for the same damage may be considered abuse.• Any cost or expense related to the removal or reinstallation of product• Speakers damaged due to amplifier clipping ordistortionKicker strives to maintain a goal of 24-hour service for all returns. Delays may be incurred lif lack of replacement inventory or parts is encountered.•Items previously repaired or modified by any unauthorized repair facility •Return shipping on non-defective items • Products with tampered or missing barcode labels •Products returned without a Return Authorization (RMA) number •Freight Damage •The cost of shipping product to Kicker •Service performed by anyone other than Kicker •Speaker with any foreign caulk used for gasket material Kicker warrants this product to be free from defects in material and workmanship under normal use for a period of THREE (3) MONTHS from date of original purchase. When purchased from and installed by an Authorized KICKER Dealer it is warranted for TWO (2) YEARS from date of original purchase, or ONE (1)YEAR from date of original purchase if purchased from but not installed by an Authorized KICK-ER Dealer.If the product is labeled “B Stock” and purchased from an Authorized KICKER Dealer, it is war-ranted for ONE (1) YEAR from date of purchase, regardless of place of installation. Should service be nec-essary under this warranty for any reason due to manufacturing defect or malfunction during the war-ranty period, Kicker will replace or repair (at its discretion) the defective merchandise with equivalentmerchandise at no charge. Warranty replacements on “B-Stock” merchandise may have cosmetic scratch-es and blemishes. Discontinued products may be replaced with more current equivalent products.This warranty is valid only for the original purchaser and is not extended to owners of the product subsequent to the original purchaser. Any applicable implied warranties are limited in duration to a period of the express warranty as provided herein beginning with the date of the original purchase at retail, and no warranties, whether express or implied, shall apply to this product thereafter. Some states do not allow limitations on implied warranties, therefore these exclusions may not apply to you.This warranty gives you specific legal rights; however you may have other rights that vary from state to state.WHAT TO DO IF YOU NEED WARRANTY OR SERVICEDefective merchandise must be returned to your local Authorized Stillwater Designs (Kicker) Dealer for warranty. Assistance in locating an Authorized Dealer can be obtained by writing or calling Stillwater Designs direct. You can confirm that a dealer is authorized by asking to see a current authorized dealer window decal.If it becomes necessary for you to return defective merchandise, call the Kicker Customer ServiceDepartment at (405)624-8510 for a Return Authorization (RA) number. Package all defective items in the original container or in a package that will prevent shipping damage, and return toStillwater Designs, 5021 North Perkins Road, Stillwater , OK 74075The RA number must be clearly marked on the outside of the package. Return only defective compo-nents. Return of entire cabinets, system packs, pairs, etc. increases your return freight charges. Non-defective items received will be returned freight collect.Include a dated proof-of-purchase stating the Customer name, Dealer name, product purchased and date of purchase. Warranty expiration on items without proof-of-purchase will be determined from type of sale and the manufacturing date code. Freight must be prepaid; items received freight collect will be refused.Failure to follow these steps may void your warranty. Any questions can be directed to the Kicker Customer Service Department at (405)624-8510.This warranty is valid only if the product is used for the purpose for which it was designed. It does not cover:。
奇声747功放机说明书

奇声747功放机说明书1. 产品介绍奇声747功放机是一款高性能的音频功放设备,适用于家庭娱乐、专业音响等领域。
其独特的设计和卓越的音质使其成为众多音乐爱好者的首选。
2. 主要特点•高保真音质:奇声747功放机采用了先进的数字信号处理技术和高品质的音频芯片,能够还原出最真实、细腻的音乐声音。
•强大的输出功率:该功放机具备强大的输出功率,能够满足各种场景下的需求,无论是小型家庭影院还是大型演出现场都能轻松驾驭。
•多功能接口:奇声747功放机提供了多种输入接口,包括RCA、XLR等,方便连接各类音频设备,如CD播放器、电视等。
•精准调节:该功放机配备了精确调节旋钮,用户可以根据个人喜好对低频、中频和高频进行精确调节,以达到最佳听感效果。
3. 使用方法3.1 连接设备1.将音频设备(如CD播放器)的输出接口与奇声747功放机的输入接口相连,确保连接牢固。
2.若需连接多个音频设备,可通过合适的音频线分别连接到不同的输入接口。
3.2 调节参数1.打开奇声747功放机的电源开关,并确保音量调节旋钮在最小位置。
2.将音频设备打开并播放音乐。
3.慢慢调节音量旋钮,将声音逐渐调大至适宜的音量。
3.3 调节音质1.奇声747功放机提供了低频、中频和高频三个旋钮,用户可以根据需要进行调节。
2.低频旋钮负责调节低音效果,顺时针旋转增加低音量,逆时针旋转减少低音量。
3.中频旋钮负责调节中音效果,顺时针旋转增加中音量,逆时针旋转减少中音量。
4.高频旋钮负责调节高音效果,顺时针旋转增加高音量,逆时针旋转减少高音量。
4. 注意事项•在使用过程中,请勿将奇声747功放机暴露在潮湿或高温环境中,以免损坏设备。
•请勿将奇声747功放机长时间处于过高或过低的音量状态,以免对听力造成伤害。
•在调节参数时,请逐渐调整,避免突然调节至最大值或最小值,以免产生不良影响。
5. 常见问题解答5.1 为什么我的奇声747功放机无法正常工作?答:请检查是否已正确连接音频设备,并确保电源开关已打开。
奇声7301型DVD常见故障检修三例

奇声7301型DVD常见故障检修三例
咏风
【期刊名称】《家庭电子》
【年(卷),期】2005(000)07S
【摘要】1.故障现象:无论是重放DVD光碟还是重放VCD、CD光碟均图象马赛克多,声音、图象频繁停顿,有时会忽然工作正常。
【总页数】1页(P51)
【作者】咏风
【作者单位】湖南
【正文语种】中文
【中图分类】TN949.7
【相关文献】
1.奇声功放常见故障检修实例(一) [J], 扬帆
2.奇声功放常见故障检修实例(二) [J], 扬帆
3.奇声DVD-8112 DVD播放机——享受优雅的视听空间 [J], 伊兰
4.奇声DVD-8112DVD播放机享受优雅的视听空间 [J], 伊兰
5.奇声7301型DVD机常见故障检修实例 [J], 咏风
因版权原因,仅展示原文概要,查看原文内容请购买。
天乐功放说明书
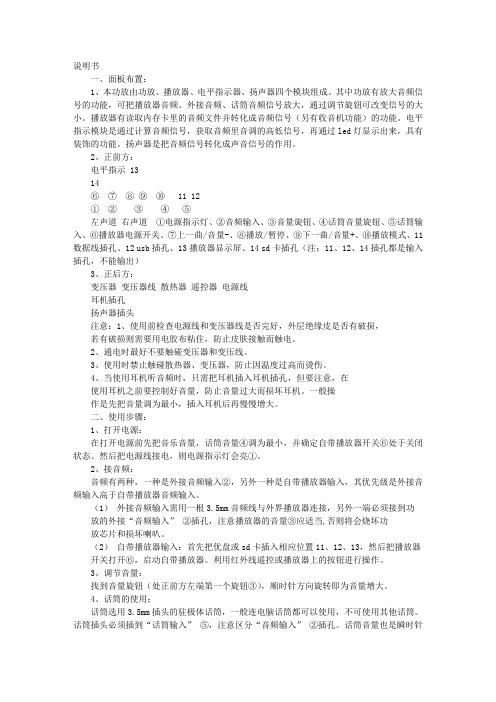
天乐功放说明书篇一:功放使用说明书功放使用说明书该说明书为东莞市奇声电子实业有限公司版权所有目录一.面板按键功能说明---------------------------------- 1二.功能特性------------------------------------------3三.设置--------------------------------------------- 2四.播放----------------------------------------------3五.连接----------------------------------------------3六. 配置----------------------------------------------4七. 附录----------------------------------------------5八.使用注意事项---------------------------------------5篇二:功放的说明书说明书一、面板布置:1、本功放由功放、播放器、电平指示器、扬声器四个模块组成。
其中功放有放大音频信号的功能,可把播放器音频、外接音频、话筒音频信号放大,通过调节旋钮可改变信号的大小。
播放器有读取内存卡里的音频文件并转化成音频信号(另有收音机功能)的功能。
电平指示模块是通过计算音频信号,获取音频里音调的高低信号,再通过led灯显示出来,具有装饰的功能。
扬声器是把音频信号转化成声音信号的作用。
2、正前方:电平指示 1314⑥⑦⑧⑨⑩11 12①②③④⑤左声道右声道①电源指示灯、②音频输入、③音量旋钮、④话筒音量旋钮、⑤话筒输入、⑥播放器电源开关、⑦上一曲/音量-、⑧播放/暂停、⑨下一曲/音量+、⑩播放模式、11数据线插孔、12 usb插孔、13播放器显示屏、14 sd卡插孔(注:11、12、14插孔都是输入插孔,不能输出)3、正后方:变压器变压器线散热器遥控器电源线耳机插孔扬声器插头注意:1、使用前检查电源线和变压器线是否完好,外层绝缘皮是否有破损,若有破损则需要用电胶布粘住,防止皮肤接触而触电。
Caspian单声道后级中文说明书-欢迎浏览昌业音响网站
Caspian单声道后级中文说明书-欢迎浏览昌业音响网站
Caspian 单声道后级中文说明书
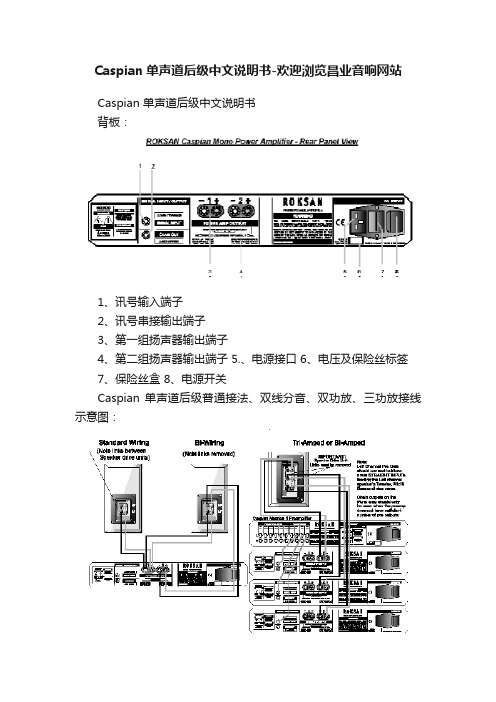
背板:
1、讯号输入端子
2、讯号串接输出端子
3、第一组扬声器输出端子
4、第二组扬声器输出端子 5.、电源接口 6、电压及保险丝标签
7、保险丝盒 8、电源开关
Caspian 单声道后级普通接法、双线分音、双功放、三功放接线示意图:
功放的电源开关平时应处于接通状态,如果长期不用的话,请关闭电源开关并拨掉电源线。
功放背后的“讯号串接输出端子”作用是:当前级没有足够多的输出端子、但又要同时接多台后级时,可以通过该端子将讯号不经放大直接输给其他后级。
接通电源开关后,功放经过短暂的自检后将进入工作状态,这时前面板的指示灯为红色,功放可以自由识别有无讯号输入,当无讯号输入状态超过2分钟后,功放的显示灯自动转为
待机状态,显示灯变为绿色;但只要一检查到有讯号输入,功放即回复到正常的工作状态,显示灯也将转回红色。
这项功能既使功放能立刻进入状态,又免除了开关机的麻烦。
当功放处于待机状态时,如果侦测到异常情况,例如过流、短路,它就会立即启动自我保护装置,并且显示灯会不断闪烁提醒使用者的注意,你只要关一下机器,就可以使它回复正常的工作状态。
奇声功放说明书
说明书一、面板布置:1、本功放由功放、播放器、电平指示器、扬声器四个模块组成。
其中功放有放大音频信号的功能,可把播放器音频、外接音频、话筒音频信号放大,通过调节旋钮可改变信号的大小。
播放器有读取内存卡里的音频文件并转化成音频信号(另有收音机功能)的功能。
电平指示模块是通过计算音频信号,获取音频里音调的高低信号,再通过led灯显示出来,具有装饰的功能。
扬声器是把音频信号转化成声音信号的作用。
2、正前方:电平指示 1314⑥⑦⑧⑨⑩ 11 12①②③④⑤左声道右声道①电源指示灯、②音频输入、③音量旋钮、④话筒音量旋钮、⑤话筒输入、⑥播放器电源开关、⑦上一曲/音量-、⑧播放/暂停、⑨下一曲/音量+、⑩播放模式、11数据线插孔、12 usb插孔、13播放器显示屏、14 sd卡插孔(注:11、12、14插孔都是输入插孔,不能输出)3、正后方:变压器变压器线散热器遥控器电源线耳机插孔扬声器插头注意:1、使用前检查电源线和变压器线是否完好,外层绝缘皮是否有破损,若有破损则需要用电胶布粘住,防止皮肤接触而触电。
2、通电时最好不要触碰变压器和变压线。
3、使用时禁止触碰散热器、变压器,防止因温度过高而烫伤。
4、当使用耳机听音频时,只需把耳机插入耳机插孔,但要注意,在使用耳机之前要控制好音量,防止音量过大而损坏耳机。
一般操作是先把音量调为最小,插入耳机后再慢慢增大。
二、使用步骤:1、打开电源:在打开电源前先把音乐音量,话筒音量④调为最小,并确定自带播放器开关⑥处于关闭状态。
然后把电源线接电,则电源指示灯会亮①。
2、接音频:音频有两种,一种是外接音频输入②,另外一种是自带播放器输入,其优先级是外接音频输入高于自带播放器音频输入。
(1)外接音频输入需用一根3.5mm音频线与外界播放器连接,另外一端必须接到功放的外接“音频输入”②插孔,注意播放器的音量③应适当,否则将会烧坏功放芯片和损坏喇叭。
(2)自带播放器输入:首先把优盘或sd卡插入相应位置11、12、13,然后把播放器开关打开⑥,启动自带播放器。
- 1、下载文档前请自行甄别文档内容的完整性,平台不提供额外的编辑、内容补充、找答案等附加服务。
- 2、"仅部分预览"的文档,不可在线预览部分如存在完整性等问题,可反馈申请退款(可完整预览的文档不适用该条件!)。
- 3、如文档侵犯您的权益,请联系客服反馈,我们会尽快为您处理(人工客服工作时间:9:00-18:30)。
奇声功放说明书篇一:说明书一、面板布置:1、本功放由功放、播放器、电平指示器、扬声器四个模块组成。
其中功放有放大音频信号的功能,可把播放器音频、外接音频、话筒音频信号放大,通过调节旋钮可改变信号的大小。
播放器有读取内存卡里的音频文件并转化成音频信号(另有收音机功能)的功能。
电平指示模块是通过计算音频信号,获取音频里音调的高低信号,再通过led灯显示出来,具有装饰的功能。
扬声器是把音频信号转化成声音信号的作用。
2、正前方:电平指示 1314⑥⑦⑧⑨⑩11 12①②③④⑤左声道右声道①电源指示灯、②音频输入、③音量旋钮、④话筒音量旋钮、⑤话筒输入、⑥播放器电源开关、⑦上一曲/音量-、⑧播放/暂停、⑨下一曲/音量+、⑩播放模式、11数据线插孔、12 usb插孔、13播放器显示屏、14 sd卡插孔(注:11、12、14插孔都是输入插孔,不能输出)3、正后方:变压器变压器线散热器遥控器电源线耳机插孔扬声器插头注意:1、使用前检查电源线和变压器线是否完好,外层绝缘皮是否有破损,若有破损则需要用电胶布粘住,防止皮肤接触而触电。
2、通电时最好不要触碰变压器和变压线。
3、使用时禁止触碰散热器、变压器,防止因温度过高而烫伤。
4、当使用耳机听音频时,只需把耳机插入耳机插孔,但要注意,在使用耳机之前要控制好音量,防止音量过大而损坏耳机。
一般操作是先把音量调为最小,插入耳机后再慢慢增大。
二、使用步骤:1、打开电源:在打开电源前先把音乐音量,话筒音量④调为最小,并确定自带播放器开关⑥处于关闭状态。
然后把电源线接电,则电源指示灯会亮①。
2、接音频:音频有两种,一种是外接音频输入②,另外一种是自带播放器输入,其优先级是外接音频输入高于自带播放器音频输入。
(1)外接音频输入需用一根3.5mm音频线与外界播放器连接,另外一端必须接到功放的外接“音频输入”②插孔,注意播放器的音量③应适当,否则将会烧坏功放芯片和损坏喇叭。
(2)自带播放器输入:首先把优盘或sd卡插入相应位置11、12、13,然后把播放器开关打开⑥,启动自带播放器。
利用红外线遥控或播放器上的按钮进行操作。
3、调节音量:找到音量旋钮(处正前方左端第一个旋钮③),顺时针方向旋转即为音量增大。
4、话筒的使用:话筒选用3.5mm插头的驻极体话筒,一般连电脑话筒都可以使用,不可使用其他话筒。
话筒插头必须插到“话筒输入”⑤,注意区分“音频输入”②插孔。
话筒音量也是瞬时针方向增大。
5、遥控器的使用:遥控器是采用红外线技术,通过编码和解码,进行遥控器和播放器之间的信息传递,其主要是遥控器对播放器的控制。
功能介绍:(1)播放/暂停⑧(2)上一曲⑦、下一曲⑨(3)播放器电源开关⑥(4)静音(5)六种音效(7)歌曲的选择(8)模式的切换⑩:播放优盘歌曲11、播放sd14卡歌曲、收音机。
6、能量灯显示:电平指示器采用独家生产的芯片控制,其根据音乐音频的高低而控制各列的显示个数,音调越高,显示的个数越多。
由于各列的敏感系数不一样,所以各列的显示是不一致的。
电平指示器有三种模式,三种敏感度,所以有九种不同的显示型式,通过电平菜单键即可改变显示型式(注:由于制作时间仓促,并没有安装电平菜单键)。
三、维护和开发1、维护:(1)使用前应把音量和话筒音量调为最小,然后再通电(2)使用自带播放器时先插sd卡或优盘,再打开播放器(3)远离水源,尽量不在潮湿的空气中使用(4)环境温度过高时,不可使用过长时间(5)尽量不常时间大音量使用(6)尽量不触摸电平显示灯,防止损坏(7)禁止压喇叭的振动膜(8)轻拿轻放2、各部分模块设计图各图和实物有所偏差,以实物为标准。
2、开发:此功放有很多地方还没完善,其中:收音机功能:添加天线。
电平指示模式的切换:添加电平指示菜单按键,按键两端分别连接电平芯片的6引脚和1引脚。
扬声器指示灯:扬声器指示灯线和扬声器插头并在一起,白色的线是led灯的负极,应接在带c的引脚上,而正极则应接在带r的引脚上。
电源指示灯:重装一个指示灯,把灯夹在孔中。
由于内部布线较多,如要拆卸,请认真研究内部结构后再拆卸!廖黎明制作篇二:奇声功放篇三:3u功放机说明书篇四:a-100功放操作使用说明书a-100 多功能立体声音频功率放大器操作使用说明书欢迎选购中大音响的 a-100高保真音频放大器。
经过我们的精心设计,本品能产生无与伦比的超值享受,同时还能高保真的再现您所喜爱的音乐。
为了确保您能熟悉本品提供的功能,我们建议您在安装和使用前,请仔细阅读本说明书的内容。
产品介绍:这个功放的大致架构就是专为了整合pc-hifi而设计,近年来随着电脑和互联网的普及,丰富的网络资源,免费的网络音乐共享,让我们的生活越来越离不开电脑了,然而,普通的电脑硬件加上普通的有源电脑音响也就不能满足人们对高品质音乐的需求了。
pc hifi也就应运而生了。
何谓pc hifi?实际上就是撇开电脑本身的集成声卡,利用数字信号传输音源到外置声卡或者- 2 - 解码器作为高品质音源,再由专门的功放驱动音箱,这样声音效果相比普通电脑的有源音响就有了质的提升。
中大音响的a-100就是在这样的大环境下立项的,这个项目的解码部分将采用最经典的数字芯片加上专门为之独特设计的外围及后续电路,把来自电脑usb的音源转换成高品质高保真音频模拟信号,传送给功率放大电路进行足功率放大后驱动音箱,还原高素质音乐。
功放电路将采用中大独自开发的经典电路,每声道一对大功率irfp240/9240做为后级放大,这个管子非常好声,素有甜美、厚声之美誉,曾经被pass先生在他的很多机型上应用,也被无数pass迷所采用。
本功放的设计最大功率80瓦,峰值功率达100瓦,驱动一般的书架音箱组建高素质的pc hifi非常合适。
中大音响在设计上从来都是不惜成本的,就连一个旋钮都是特殊定做的铝合金喷砂旋钮,非常发烧高档,a-100高保真放大器采用中大音响自主设计并开模冲压的纯铝合金拉丝氧化机箱,非市面那些型材拼凑,底板厚度达到4mm,功率管直接安装在底板上进行散热,热稳定性非常高,这样的设计可以保证整机功放管始终工作在一个非常一致的温度范围上,为充分发挥管子的特性奠定了基础。
变压器是功放的动力之源,他的好坏直接关系到声音的好坏,a-100搭载了国际知名音频变压器制造商伊戈尔特殊定制的环形音频专用牛,并不惜成本加装钢带屏蔽,杜绝丁点漏磁对信噪比的影响。
专用软件仿真设计和多次实际打板调试,完全对称的发烧级pcb布线,紧凑考究的器件摆位将各种串扰降低到最低,更是采用高精度五色环金属膜电阻确保各级工作点的稳定,高达13600uf的大水塘电容确保大动态下仍然稳若泰山,严格配对安装的晶体管确保信号的丝毫不差,发烧级音频专用电容完美校声,全能保护电路采用goodsky音频专用继电器确保输出无瓶颈,具有过载、过压、过流、输出短路、直流输出等保护,特殊定做的音频专用12mm电位器耐用又好声,高质量镀银机内信号线做无损信号传输,无氧铜输出线和高级纯铜镀金输出端子确保功率信号畅通无阻,很显然高质量的元器件确保了线路性能的优良发挥,想不好声音都难! a-100高保真放大器分为标准版和usb 版,标准版和usb版所有配置完全一样,只是标准版不配置usb解码版,标准版适合已有外置高品质声卡、解码器或者使用cd机做音源的用户;usb版适合只有一台电脑的用户组建pc_hifi系统。
a-100高保真功放整体声音表现平衡且富有一种贵气,非常全面的一种声音,中高频解析力高,低频干净有力,量感十足,久听不吵,非常适合近场监听,绝非那些炒作的天花乱坠的数字功放所能比拟。
特别搭配以中大自主研发生产的音箱,更是如鱼得水,无论是听人声还是乐器,无论是听舒缓还是劲爆,无论是听古典还是流行,都能给你还原的淋漓尽致。
? 本说明书中使用的图片为示意图,旨为说明用途,可能和实物有差异,产品以实物为准。
序言及目录。
2-3附件、使用前须知、注意事项、部件名称与功能。
4-5 扬声器的连接方法。
5 音源的连接方法。
6 操作方法。
7 常见故障排除。
7 规格及技术参数。
7 保修卡。
8- 3 - 除主机外,包装箱中另附带下列物品,请检查:1、电源线一条2、 usb线一条(usb版)3、说明书一本4、保修卡一张使用本机前请注意下列事项:1、搬移本机为避免短路或损坏连接线缆中的芯线,搬移时应拔出电源线,并断开与所有其它音响设备的连接线缆。
2、接通电源前再次检查所有连接是否妥当,连接线缆是否出现问题。
连接和断开线缆之前,须确保电源开关设于off位置。
3、请将说明书妥善保存。
阅读完本说明书后,请将其连同保证书一起妥善保存。
注意:为便于解释说明,本操作说明书的图示可能与实际设备不同。
本机或任何使用微处理器的电子设备在调谐器或电视机附近使用时,均有可能产生噪音或画面干扰。
如有上述情况出现,请采取下列步骤: ???? 请尽量将本机摆放于远离调谐器或电视机的地方。
将调谐器或电视机天线与本机的电源线和输入/输出连接线缆分开摆置。
使用室内天线或300ω馈线时特别容易产生噪音或干扰。
建议采用室外天线及75ω/ohms同轴电缆。
当您离家,例如出去旅行时,请务必关闭电源开关或拔下电源线。
注意:本机为整体散热式设计,最高工作温度将近40摄氏度,为了不影响散热,请勿将本机安装在狭窄的 - 4 - 1 电源开关○往上按下此开关,电源供应本机,往下按下,电源关闭。
电源接通后大约需要几秒钟对本机进行预热。
因本机设有延时电路用以避免开、关操作时产生的冲击2 电源指示灯○当电源开关为开启时,电源指示灯亮起。
注意:当保护电路启动后,电源指示灯将熄灭。
3音量控制钮○此钮控制整体音量大小。
向右转此钮提高音量,向左转降低音量。
4 cd音源输入端子○连接cd机模拟输出端子,也就是从cd机取音源信号,注意rca插座要对应颜色标记连接。
5 音源选择开关(usb版)○当输入信号使用cd 音源时,将该开关拨向左边cd in位置;使用电脑做音源输入时,将开关拨向usb in位置。
6 usb输入端口(usb版)○当使用电脑做音源时,用随机附带的usb专用连接线把电脑和功放通过这个端口连接。
7 usb音源指示灯(usb版)○当输入选择到usb in时,电脑播放音乐的时候该指示灯点亮,显示usb解码工作状态。
8 左声道输出端子○将左声道喇叭用喇叭线连接到此端子,一般为黑色接线柱为负,红色接线柱为正。
9 右声道输出端子○将右声道喇叭用喇叭线连接到此端子,一般为黑色接线柱为负,红色接线柱为正。
10 交流电输出插座○用随机附带的电源线一端插到此端口,另一端插到市电的电源插座。
11 保险丝座○本机设有保修装置,当交流电压突变严重时或者机内电流过大时,此保险丝会熔断,用来保护机器不受损坏,本机器使用5x20mm的2a/220v 交流保险丝,并配有备用品。