treeage pro2破解版软件安装说明
Google Tag Manager Pro 安装 设置指南 Magento 2说明书
Google Tag Manager Pro - Installation/Set-up Guide for Magento 21. Upload Package: Upload the content of the module to your rootfolder. This will not overwrite the existing Magento folder or files, only thenew contents will be added.2. Install extension: After the successful upload of the package youhave to run the commands on Magento2 root directory via SSH“php bin/magento setup:upgrade”“php bin/magento setup:static-content:deploy”3. Clear Caches: This can be done from the admin console by navigatingto the cache management page (System->Cache Management), selectingall caches, clicking ‘refresh’ from the drop-down menu, and submitting thechange. Logout and login back in Admin.4. Configuration settings for Google Tag Manager Pro:Go to Admin->Stores->Configuration->Scommerce Configuration->Google Tag Manager Pro->Generala. Enable: Set yes to enable the module.b. License Key: Enter the License key provided by ScommerceMage.c. Account Id: Enter your Google Tag Manager Account Id.d. Enhanced Ecommerce: Set yes to enable the enhancedecommerce.e. Brand Attribute : Select brand attribute to send brandinformation to Google Analyticsf. Brand text box: If you don’t have brand attribute and you wantto send default brand name to Google Analytics then you canenter here.g. Base: Set 'Yes' if you want to send base order data and 'No' tosend store order data to Googleh. Enable dynamic remarketing tags: Set 'Yes' if you want toenable google dynamic remarketing tags to used for GTM.i. Product ID Attribute: Select the attribute which you havesubmitted in your Google base feed. For e.g. SKU5. Set up Google Tag Manager for Enhanced Ecommerce∙Create the following variable∙Google Analytic ID∙Create the following triggerso Product Clicko Add To Carto Remove From Carto Checkout for measuring steps Create the following tagso Universal Analytics – All PagesUnfi Universal Analytics •Choose ProductGongle Aria ; t reChoose a Tag TypeUniversal AnalyticsConfigure TagTae Type Universal AnalyticsTracking ID ((GA ID)}En&de Display Advertiaino Features TrueTrack Type PageviewEnable Enhanced Econvnerce Features TrueLlse d ata layer TrueFire Ono Product Clicko Add To Carto Remove From Carto Checkout for measuring steps6. Set up Enhanced Ecommerce in Google AnalyticsTo turn on Enhanced E-commerce for a view, and label your checkout steps:1. Click Admin at the top of any Analytics page.2. Select the view for which you want to enable Enhanced E-commerce reporting.3. In the View column, click E-commerce Settings.4. Under Step 1, Enable E-commerce, set the status to ON.5. Click Next step.6. Under Step 2, Enhanced E-commerce Settings, set the status toON. When you turn this option on:o You can then see the Enhanced E-commerce reports in theConversions sectiono The other, older category of E-commerce reports is no longer visibleYou can turn this option off to restore the older category of E-commerce reports.7. Optionally, enter labels for the checkout steps that you have definedin your Magento steps configuration. Please see screenshot belowfor reference8. Click Submit.7. Set up Google Tag Manager for Facebook DynamicRemarketing∙Create the following variables∙Facebook Pixel ID∙∙Total(data layer variable - google_tag_params.ecomm_totalvalue)∙currencyCode∙Product ID (s)(data layer variable - google_tag_params.ecomm_prodid)∙Product Price (s)(data layer variable - google_tag_params.ecomm_pvalue)Checkout Steps(data layer variable - ecommerce.checkout.actionField.step)Create the following triggerso Checkout Initiateo Initiate Paymento Search Pageo Remarketing Tag Producto Remarketing Tag Purchaseo Add to Cart (same as Enhanced Ecommerce please check above section)Create the following tagso Facebook Audience Pixel – All Pages<!-- Facebook Pixel Code --><script>!function(f,b,e,v,n,t,s){if(f.fbq)return;n=f.fbq=function(){n.callMethod?n.callMethod.apply(n,arguments):n.queue.push(arguments)};if(!f._fbq )f._fbq=n;n.push=n;n.loaded=!0;n.version='2.0';n.queue=[];t=b.createElement(e );t.async=!0;t.src=v;s=b.getElementsByTagName(e)[0];s.parentNode.insertBefore (t,s)}(window,document,'script','///en_US/fbevents.js');fbq('init', '{{facebookPixelID}}');fbq('track', 'PageView');</script><noscript><img height="1" width="1" style="display:none"src="https:///tr?id={{facebookPixelID}}&ev=PageV iew&noscript=1"/></noscript><!-- End Facebook Pixel Code -->Facebook Audience T rackingChoose ProductCustom HTML TagConfigure TagUnfiled itemsHTML‹!-- Facebook Pixel Code --›2 *° "' W *3!function(f,b, e v n, I, s) (if(4°.4°hq)return; n=f. 4°bq=function( )(n.callHet hod?p n.ca1IHethod . app1y n, argument s) : n.queue . push {argument s) }; If( ! I._fbq) I._fbq=n;$ n.push=n; n.1oaded= ! 0;n. version= ' 2.6 ’; n. queue=[ ] ; t=b. c reateE1ement(e);t . async= ! 6;g I .src=v; s=b .getE1ementsByTagName(e) [0] ; s.parentNode. insertBefore(I,s ) } {Pr1ndow,7documen,t script, '’ //connect .Facebook . net/en_LE/fbevents. js' ) ;g fbq(’imit', ’{{facebookPixelID}}’);lB fbq(’track', ’PageViex’);11 ”"D’12 <noscr1pt›<img height="1" width="1" sty1e="disp1ay:none”1g //-.facebook . c om/tr?1d=((facebookP1xe1ID}}8ev=PageV1etu8noscr1pt=1"1p /›</noscript>1$<!- - End Facebook Pixe1 Code- - ›1617Support document.write "Advanoed SettingsFire OnYour tag will also fire right before these tagsFacebook Ad... Facebook Pr...Your tag will also fire right after these tags Facebook Se...car›ca Facebook Pu...Ddeieo Facebook Audience Pixel – Product View (Trigger this on Remarketing Tag Product) – Custom HTML Tag<script>fbq('track', 'ViewContent', {content_type: 'product', //either 'product' or 'product_group'content_ids: ['{{productID}}'], //array of one or more product SKUs in the pagevalue: '{{productPrice}}', //OPTIONAL, but highly recommended currency: 'USD' //REQUIRED if you a pass value});</script>o Facebook Audience Pixel – Search Page (Trigger this on Search Result Page) – Custom HTML Tag<script>fbq('track', 'Search');</script>o Facebook Audience Pixel – Add To Cart (Trigger this on Add To Cart) – Custom HTML Tag<script>var productIDs = '{{productID}}';var results = productIDs.split(",");fbq('track', 'AddToCart', {content_ids: results, //array of one or more product SKUs in the page`zcontent_type: 'product',value: '{{total}}', //OPTIONAL, but highly recommendedcurrency: 'USD' //REQUIRED if you pass a value });</script>Configure TagHTML2 var productIDs = '{{productID}}’;j var results productIDs.split(’,”);p console.1og( resu1t s ) ;g fbq( ' track ’ , ' AddTo€art , ' (g content_1ds : resu1t, s //array of one or mone product SKUs In the page”z7 content_type : ' product' ,g value: ' ((tata1}), ' //0PTICflAL, but high1y recommendedg currency: 'USD’//REQUIRED if you pass a value12Support document.write "•Advanoed SettingsTag firingEnable custom tag firinp schedule.fire this tag in published "Tag firing optionsOnce per event•Tag SequencingFire a tag before Facebook Add To Cart Event fires.Facebook Audience TrackingDon’t fire Facebook Add To Cart Event if Facebook Audience Tracking fails.Fire a tag after Facebook Add To Cart E' ent fires.Fire On<script>fbq('track', 'InitiateCheckout'); </script><script>fbq('track', 'AddPaymentInfo'); </script>o Facebook Audience Pixel – Purchase(Trigger this on Remarketing Tag Purchase) – Custom HTML Tag<script>var productIDs = '{{productID}}';var results = productIDs.split(",");console.log(results);fbq('track', 'Purchase', {content_type: 'product', //either 'product' or 'product_group'content_ids: results, //array of one or more product SKUs in the pagevalue: '{{total}}', //REQUIREDcurrency: '{{currencyCode}}' //REQUIRED});</script>Configure TagHTML2 var = '{{productID}}’;j var results = productIDs.split(’,”);p console.log(results);g fbq(’track ', ’Purchase’, {g contemt_type: 'product', //either ’product’ or 'product roup’7 contemt_ids: results, ffarray of one or more product SKUs in the pageg value: ’{{total}}’,//REQUIREDg curren cy: ' ((c urrencyCod e}} ' // REQUIRED12Support document.write "•Advanoed SettingsTag firingEnable custom tag firing schedule.fire this tag in published "Tag firing optionsOnce per event•Tag Sec|uencingFire a tag before Facebook Purchase Event fires.Facebook Audience TrackingDon’t fire Facebook Purchase Event if Facebook Audience Tracking fails.Fire a tag aher Facebook Purchase E' ent fires.Fire On8. Set up Google Tag Manager for Google Dynamic Remarketing∙Create the following variables∙Google Tag Params∙Conversion IDCreate the following triggerso Remarketing Tag Homeo Remarketing Tag Categoryo Remarketing Tag Carto Remarketing Tag Product (same as Facebook Dynamic Remarketing please check above section)o Remarketing Tag Purchase (same as Facebook Dynamic Remarketing please check above section)Create the following tagso Adwords Dynamic Remarketing Home (Trigger this on Remarketing Tag Home)o Adwords Dynamic Remarketing Category (Trigger this on Remarketing Tag Category)o Adwords Dynamic Remarketing Product (Trigger this on Remarketing Tag Product)o Adwords Dynamic Remarketing Cart (Trigger this on Remarketing Tag Cart)Adwords Dynamic Remarketing Purchase (Trigger this on Remarketing Tag Purchase)Ajax Add To Basket or Remove From BasketAdd the following two functions in your ajax add to basket js file and callgaAddToCart on success of Ajax add to basket and gaRemoveFromCart on success of Ajax remove from basket function.Ajax Add To Basketfunction gaAddToCart(){jQuery.cookie.json = true;var productToBasket =jQuery.cookie("productToBasket");var productlist =jQuery.cookie("productlist");if (productToBasket !=undefined){manipulationOfCart(productToBasket,'add',productlist);jQuery.remo veCookie("productToBasket", { path: '/', domain: '.' + document.domain});}}Ajax Remove From Basketfunction gaRemoveFromCart(){jQuery.cookie.json = true;var productOutBasket = jQuery.cookie("productOutBasket");if (productOutBasket !=undefined){manipulationOfCart(productOutBasket, 'remove','');jQuery.removeCookie("productOutBasket", { path: '/', domain: '.' +document.domain });}}Please contact **********************.uk for any queries.。
treeagepro2011安装教程
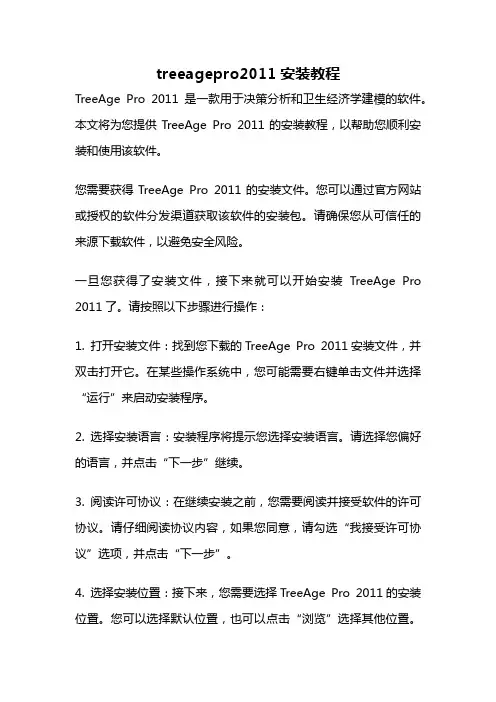
treeagepro2011安装教程TreeAge Pro 2011是一款用于决策分析和卫生经济学建模的软件。
本文将为您提供TreeAge Pro 2011的安装教程,以帮助您顺利安装和使用该软件。
您需要获得TreeAge Pro 2011的安装文件。
您可以通过官方网站或授权的软件分发渠道获取该软件的安装包。
请确保您从可信任的来源下载软件,以避免安全风险。
一旦您获得了安装文件,接下来就可以开始安装TreeAge Pro 2011了。
请按照以下步骤进行操作:1. 打开安装文件:找到您下载的TreeAge Pro 2011安装文件,并双击打开它。
在某些操作系统中,您可能需要右键单击文件并选择“运行”来启动安装程序。
2. 选择安装语言:安装程序将提示您选择安装语言。
请选择您偏好的语言,并点击“下一步”继续。
3. 阅读许可协议:在继续安装之前,您需要阅读并接受软件的许可协议。
请仔细阅读协议内容,如果您同意,请勾选“我接受许可协议”选项,并点击“下一步”。
4. 选择安装位置:接下来,您需要选择TreeAge Pro 2011的安装位置。
您可以选择默认位置,也可以点击“浏览”选择其他位置。
选择完毕后,点击“下一步”。
5. 选择组件:在这一步中,您可以选择要安装的组件。
通常情况下,建议您选择默认的组件安装选项。
如果您对软件有特定需求,可以根据需要进行自定义选择。
选择完毕后,点击“下一步”。
6. 开始安装:现在,您已经完成了所有的配置选择,可以开始安装TreeAge Pro 2011了。
点击“安装”按钮,安装程序将开始复制文件并进行必要的配置。
7. 完成安装:安装过程可能需要一些时间,请耐心等待。
安装完成后,您将看到一个安装成功的提示。
点击“完成”按钮退出安装程序。
至此,您已经成功安装了TreeAge Pro 2011软件。
现在,您可以在计算机上找到TreeAge Pro 2011的快捷方式,并双击打开它。
软件将启动,并您可以开始使用它进行决策分析和卫生经济学建模。
AgisoftMetashapePro中文激活破解详细安装教程(附补丁下载)
AgisoftMetashapePro中⽂激活破解详细安装教程(附补丁下载)Agisoft Metashape Pro 中⽂破解版是⼀种先进的基于图像的展⽰多视点三维重建软件,旨在从静⽌图像中创建专业品质的3D内容。
基于最新的多视图3D重建技术,它可以使⽤任意图像进⾏操作,并且在受控和⾮受控条件下均可⾼效运⾏。
可以从任何位置拍摄照⽚,只要在⾄少两张照⽚上可以看到要重建的对象。
图像对齐和3D模型重建都是完全⾃动化的。
⼤部分的处理操作都是根据⽤户设置的参数⾃动执⾏的。
但是,在某些情况下,可能需要采取其他措施才能获得所需的结果。
在⼀些捕获场景中,可能需要掩蔽照⽚的某些区域以将它们排除在计算之外。
掩码在Metashape处理⼯作流程中的拥有强⼤的作⽤和丰富的选项,相机校准功能优化相机对齐结果的功能,并提供了模型参考的指导。
参考模型,⽆论是⽹格还是DEM,都可以作为测量的基础。
⾯积,体积,剖⾯测量程序还包括植被指数计算的信息。
⾃动化节省了⼿动⼲预处理⼯作流的机会,重建3D模型可能需要相当长的时间。
Metashape允许在流程的任何阶段导出获得的结果并以项⽬⽂件的形式保存中间数据。
ps:这⾥带来的是Metashape Pro中⽂最新破解版,含替换⽂件及汉化补丁,详细的安装教程请参考本⽂破解图⽂教程,需要的朋友可下载试试!亲测有效!三维重建软件Agisoft Metashape Pro v1.7.4.12950 中⽂免费版(含破解补丁+安装教程) 64位类型:3D制作类⼤⼩:198MB语⾔:简体中⽂时间:2021-08-18查看详情安装教程1、先下载安装程序和替换⽂件,运⾏安装metashape-pro_1_5_0_x64.msi2、同意许可协议3、选择安装⽬录4、安装即可5、安装完成6、完成后将Metashape.exe复制到安装⽬录下替换7、运⾏软件,依次点击Tools-Preferences选项8、选择Chinese,点击ok,中⽂破解完成破解说明这⾥也提供了⼀键中⽂汉化破解补丁Agisoft Metashape Pro破解补丁.exe,安装完成即可破解!功能特⾊1、摄影三⾓测量处理各类图像:航空(最低点,斜)/近距离。
TRAKTOR PRO 2安装指南说明书

“TRAKTOR PRO 2” Setup GuideBefore start (Important)Setup Wizard offers a simple setup procedure for TRAKTOR PRO 2 (Ver.2.1.2. or later).Please follow the instructions below before starting the setup procedures of TRAKTOR PRO 2.・Update the DDJ-ERGO’s firmware to the latest version. ・For Windows users:Turn on the power of DDJ-ERGO first. Then, run the TRAKTOR software.If the TRAKTOR PRO 2 is launched before the DDJ-ERGO is powered on, the DDJ-ASIO driver may not be recognized.If the DDJ-ASIO driver is not recognized, turn off both the TRAKTOR PRO 2 and the DDJ-ERGO and repeat the above procedures.Setup procedures* The screenshots used in this guide may be different depending on the version of TRAKTOR PRO 2.1. Connect the DDJ-ERGO to your computer by a USB cable and turn on the power of the controller using ON/OFF slide switch.2. Launch TRACTOR PRO 2 after DDJ-ERGO starts. Note: Ensure that DDJ Note: Ensure that DDJ--ERGO starts before launching T ERGO starts before launching TRA RA RAK K TOR TOR PRO 2. PRO 2.3. From the upper left "Help" menu, open "Start Setup Wizard" and click "Next."4. When the message "Are you using an external controller?" is displayed, select "Yes" and click "Next."5. When the messages "Choose your manufacturer" and "Choose you model" are displayed, select "Pioneer" and "DDJ ERGO" respectively. Then, click "Next."6. The message "Are you using an external mixer?" is displayed. If you use one, select "Yes" and if you do not, select "No" and click "Next."7. When "Select your setup" is displayed, select the decks you will use and click "Next."8. When "Finish" is displayed in the lower right corner of the wizard, click "Finish" to complete the Setup Wizard.9. Select [File] > [Controller Manger...]. Under [Device Setup], select the[PIONEER_DDJ-ERGO] from [Device] menu and select the device corresponding to the DDJ-ERGO at [In-Port] and [Out-Port].10. The preferences settings may be overwritten to the default settings after completing the setup wizard depending on the versions of TRAKTOR PRO 2.When using DDJ-ERGO, the following audio settings are minimal requirements. Please ensure that you go through the setup procedures.(1) Audio Setup・Audio Device: PIONEER DDJ ASIO (For Windows users) DDJ-ERGO (For Mac users)(2) Output Routing・Mixing Mode :Internal ・Output Monitor :L 3:DDJ-ERGO PHONE L R 4:DDJ-ERGO PHONE R ・Output Master :L 1:DDJ-ERGO MASTER L R 2:DDJ-ERGO MASTER R(3) Input Routing* For those who do not use external input (AUX/MIC), the following setup is not needed. ・Input AuxL(Mono) 1:DDJ-ERGO AUX/MIC L R 2:DDJ-ERGO AUX/MIC R(4) Mix Recorder・Source :Internal11. Close the TRAKTOR PRO 2, power off the DDJ-ERGO and turn it on again, and reboot the TRAKTOR PRO 2.Now, you have completed all the settings.About trademarks and registered trademarks・TRAKTOR is the registered trademark of Native Instruments GmbH.・Microsoft ®, Windows Vista ®, Windows ®, and Internet Explorer ® are either registered trademarks or trademarks of Microsoft Corporation in the United States of America and other countries. ・Apple, Macintosh, Mac OS, Safari, iTunes, and Finder are trademarks of Apple Inc., registered in the U.S. and other countries.©2012 PIONEER CORPORATION all rights reserved. PIONEER CORPORATION1-1, Shin-ogura, Saiwai-ku, Kawasaki-shi, Kanagawa 212-0031, Japan<DRH1128-B-EN>。
最新Treeage软件简介教学讲义PPT课件

21
Treeage Pro
下图中,从决策节点发出的两个分支 分别代表以下两种可选条件:
– 风险投资,在风险投资方面,设计了三种结局,因此用 圆形的机会节点表示,三种结局分别从机会节点引出, 以三角形终点节点结束;
– 5%的 CD收入,这部分已经代表结局,因此用三角形的 终点节点表示。
决策树分析法
12
Treeage Pro
决策树分析法
• 决策树分析法 是指把某一决策问题的各种 供选择方案、可能出现的状态、概率及其后 果等一系列因素,按它们之间的相互关系用 树形图表示出来,然后按网络决策的原则和 程序进行选优和决策,它还可以随时补充并 进行不确定型情况下的决策分析。
• 决策树分析法的步骤是:
16
Treeage Pro
唐氏综合征产前筛查流程图筛源自孕妇高风险-高于域值低风险-低于域值
羊水穿刺(有创)
未行羊水穿刺
观察随访
唐氏儿
唐氏儿
唐氏儿
非唐氏
非唐氏
非唐氏
流产
17
决策树示意图
决策点 标决策期望效益值
状态点 标本方案期望效益值
结果点 标每个方案在相应状态下面的效益值
概率分枝
标自然状态的概率
5
Treeage Pro
决策问题的组成
• 决策者:决策的主体,一个人或团体;
• 决策:两个以上可供选择的行动方案;
• 状态(事件):决策实施后可能遇到的自
然状况;
• 状态概率:对各状态发生可能性大小的主
观估计;
• 损益性结局:当决策实施后遇到某状态时
所产生的效益(利润)或损失(成本)
PROII8.3安装说明(9.0也可用)
安装说明一、声明:1、本安装为盗版安装,仅供各位学习研究使用。
不得商用;2、在参考学习本说明前,请备份好资料。
如出现问题概不负责;3、本说明所涉及的软件及工具均来自互联网。
其所有权归著作者所有;4、如有错误或者不完善的地方,请联系本人。
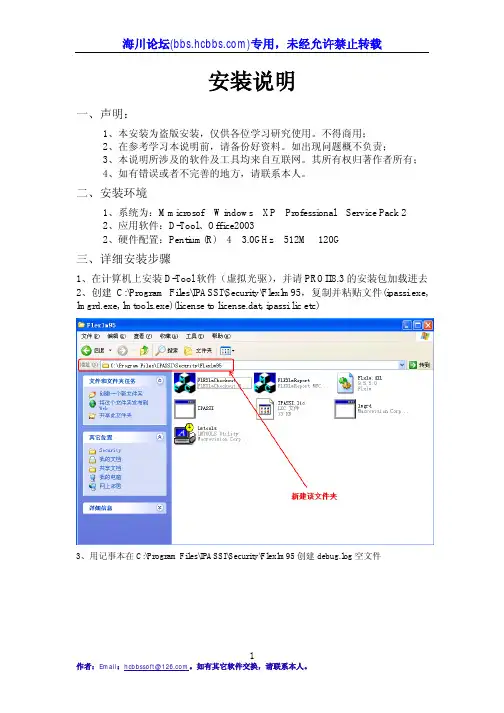
二、安装环境1、系统为:Mmicrosof Windows XP Professional Service Pack 22、应用软件:D-Tool、Office20032、硬件配置:Pentium(R) 4 3.0GHz 512M 120G三、详细安装步骤1、在计算机上安装D-Tool软件(虚拟光驱),并请PROII8.3的安装包加载进去2、创建C:\Program Files\IPASSI\Security\Flexlm95,复制并粘贴文件(ipassi.exe, lmgrd.exe, lmtools.exe)(license to license.dat, ipassi.lic etc)3、用记事本在C:\Program Files\IPASSI\Security\Flexlm95创建debug.log空文件为“zhangsan”;5、安装WinwowsInstaller6、安装WinwowsInstaller完成后,点击setup进行安装7、点击安装后,出现下面的界面,点击“install”8、等一会出现下图,点击Next;9、选择“I accept the terms in the license agreement”并点击Next;10、出现如下图所示时候,最好请勿改变安装路径,直接点击Next;11、选择Typical 并点击Next12、出现如下图所示的图片时,选择FLEXlm 9.5 在license servers 中输入“@zhangsan”zhangsan为第四步看到的名字,并点击Next;13、为了使用的方便,请按照按照下图所示进行选择,点击Next14、点击install;15、此时会出现如下图所示的DOS窗口,请不要关闭。
Premiere pro 2.0安装激活方法
Premiere pro 2.0安装激活
一、Premiere pro 2.0的文件夹下包含以下文件。
二、安装请选择Adobe.Premiere.Pro.2.0专业版\Adobe Premiere Pro文件夹下面的setup进行安装
三、双击setup,选择ok开始安装
四、选择下一步
五、接受安装协议
六、输入序列号安装界面为
打开:[Adobe.Premiere.2.0专业版1.1G原版镜像].adobe.premiere.pro.2.0.keygen,见附件
,计算安装序列号,如图所示,点击Generate。
得到安装序列号码:1132-1580-2253-4006-8703-3275
将以上号码填入Serial Number处,然后下一步。
继续下一步,开始安装文件。
(此处先不要关闭算号器[Adobe.Premiere.2.0专业版1.1G原版镜像].adobe.premiere.pro.2.0.keygen)
七、安装文件拷贝完成后,会进入以下界面,选择Activate
1.选择电话激活,点击进入
2.电话激活界面如下图
3.将电话激活界面中的Activate Number,输入到刚才打开的中,如下图,然后点击Generate.
4.把得到的Answer Code,填入电话激活界面的3步骤处,然后点击Activate
八、点击Next直到完成安装。
九、安装完成后,系统要求重启计算机
十、汉化Premiere pro 2.0程序
双击Premiere pro 2.0 汉化包,一路点击下一步直到完成即可1.
2.
3. 4.
5. 6.
7.。
pronterfgce安装教程
pronterfgce安装教程
首先双击安装包弹出如图对话框,然后直接点击“pronterfgcel”进行安装。
等待程序解压完成。
解压完成后,对话框会自动消失。
如果解压过程中,信息框中出现红色信息,则证明安装包已损坏,您需要重新下载安装包进行安装。
在新出现的对话框中,点击“GP-Pro EX”即可开始软件的安装。
在弹出的安装界面中,点击“Next”进入下一步。
该步需要输入Serial Number(序列号)和Key Code(密钥)。
这两项信息在05的文本文档中有保存。
您可以打开该文本文档,复制信息并粘贴进软件。
确认无误后,点击Next进入下一步。
在这里,您可以修改软件的安装路径。
请注意,软件的安装路径千万不能包含中文字符,否则软件将出现异常。
点击pronterfgcel,开始安装.。
塞班所有系统手机破解详细教程
塞班所有系统⼿机破解详细教程塞班所有系统⼿机破解详细教程破解作⽤:⼿机破解后可以安装所有未签名的软件,安装⾼权项的系统⽂件管理器,还可以玩免费玩NG2游戏哦!破解注意:(待机按*#0000#查⼿机版本和系统⽇期 )⼿机系统版本越新请使⽤更⾼版本的HelloOX,诺运⾏HelloOX过程中会停顿在unpacking file(解压⽂件)⽆法继续进⾏,可重启⼿机再试,如果还跳不过可换其它版本HelloOX破解,都不能成功破解证明你使⽤的⼿机系统版本暂时⽆法破解,请等待更⾼版本HelloOX发布!------------塞班免刷机破解超简单教程------------这⾥是另外⼀种免刷机破解⽅法,如果上⾯的⽅法不成功,可以尝试下这个塞班全系列免刷机破解教程------------HelloOX 1.03破解教程⽼版本⽆需签证破解教程以上⽅法适合:N71,N73,N77,N80,N91,N92,N93,E50,E60,E61,E62,E65,E70,3250,5500等S60V3⾮FP1机型------------HelloOX2 2.03破解教程HelloOX2 2.02破解教程HelloOX 1.03破解教程⽼版本⽆需签证破解教程以上⽅法适合:N76,N81,N82,N95,E51,E71,E90,5700,6110,6120c,6121c,6124,6290等S60V3FP1机型------------HelloOX2 2.03破解教程HelloOX2 2.00破解教程⽼版本⽆需签证破解教程以上⽅法适合:N78,N79,N85,N86,N96,E72等S60V3FP2机型------------HelloOX2 2.03破解教程HelloOX2 2.00破解教程HelloOX 1.03破解教程MapDrives1.0破解教程以上⽅法适合:N97MINI,N97,X6,5802,5800,5530,5230等S60V5机型------------破解说明:1. 从此告别证书,免证书安装未签名软件,并拥有所有权限(包括开机启动)2. 有了Allfiles能⼒后能⾃由进出任意⽬录读写/删除/修改3. 由于破解,可以使⽤更多软件,获得更多功能注:⼿机XX后,运⾏SECMAN或深度破解,左键选择开启权限,现在你可以安装任何没有签名的⽂件了。
premiere2.0破解安装全过程PPT课件
❖ 电脑重新启动后,运行安装文件夹中的 hh.exe 汉化程序,出现以下界面, 点击“下一步”。
8
-
❖ 出现许可协议界面后,选中“我同意此协议”后,点击“下一步”。
9
-
❖ 在安装过程中,选择默认的状态安装即可,一直到安装结束,出现这个界面, 点击“完成” ---完成premiere prp2.0英文版的汉化。
10
-
❖ 启动Premiere Pro 2.0 汉化版,加载过程结束后出现激活界面.点击 “Activate”--激活软件。
11
-
❖ 选择“activate over the telephone”激活方式,点击“OK”。
12
-
出现“phone activation”激活对话界面,这时需要再次运行安装文件夹中的 “keygen.exe”算号器。
1.将“Activation Number” 中的数字复制到算号器中“Request Code”。 2.点击“Generate” 生成“Answer Code”。 3.将生成的“Answer Code”复制到激活界面中相应的位置后,点击
“Activa活,点击 “Done”。
4
-
❖ 选择软件安装的位置,默认在C盘,如果你不想安装在这个位置,可以点击 “Change”进行改变安装路径。然后点击“Next”,继续安装。
5
-
❖ 点击 “Finish”,英文版premiere pro2.0安装完毕.
6
-
❖ 系统要求重新启动,进行软件配置.点击“Yes”,重新启动电脑。
7
-
安装premiere pro2.0
❖ 点击安装文件夹中“setup.exe”,出现以下画面