监视器系统固件升级操作说明
Edimax 网络摄像头固件升级快速指南说明书

Network Camera Firmware UpgradeI Introduction (3)II How to Upgrade Firmware for Network Camera (4)III Download App (11)I IntroductionTo strengthen the security of your network camera, please visit Edimax website to download the most up-to-date firmware for your device. This quick guide will use IC-7113W as an example to show you how to upgrade the network camera firmware step by step.1.Download the latest firmware from the Edimax website.2.Reset IC-7113W to its factory default setting.3.Configure static IP and web log in page on the computer.4.Upgrade firmware version through browser.5.Reset IC-7113W to its factory default setting again, then install EdiLifeapp.Before you begin, make sure you have met the following requirements.●Desktop or laptop:- Intel Pentium 4 2.4GHz (above or similar),- VGA card (1024*768 or above)- At least 128MB hard disk space (256 MB recommended)- Windows XP, Vista, 7, 8, or 10, Mac OS X- Web browser (Internet Explorer 7.0, Firefox 3.6, Chrome 10, Opera11, Safari 5 or above)- LAN Port●Internet●Ethernet Cable●And a mobile phone for app downloadNote: This quick guide for firmware upgrade is also applicable with the following network cameras. Some steps may vary by models, please refer to their online manuals respectively.●IC-9110W●IC-7113W●IC-3140W●IC-7112W●IC-3116WII How to Upgrade Firmware for Network Camera 1.Please visit via desktop or laptop, select “Support &Services” - “Download”, then enter the network camera modelnumber,“ IC-7113W” or other applicable device model number in thesearch box to look for its firmware. Please refer to screen shot below for instructions.Click on IC-7113W as shown in red circle below to enter the download page of that product , then select the download icon on the far right of Firmware version 3.10 (as shown in red circle) to download the latestfirmware.Please refer to the figure below, copy the firmware file to designated directory. You can choose to save the file to desktop or IC-7113W folder under Drive (C:). ( You can save the file first then unzip the zip file). Then right click on the mouse on IC-7113W_3.10.bin and select “copy”Click on “This PC” to find the directory where you want to save the copied firmware file, then right click on the mouse and “paste” the file.2. To reset to factory default setting, please follow the steps below.Please connect AC power adaptor to IC-7113W, then press and hold the WPS/Reset button found on the back panel for at least 15 seconds.Release the button when the LED is flashing quickly red .Please wait for IC-7113W to reactivate, wait for the network camera to restart. The camera is ready when the LED is flashing slowly red andplays an audio tone from its speaker.Note: This step may vary depending on your device model. Please refer to the user manual of your network camera.3. Please refer to figure below and configure the LAN IP of desktop orlaptop to static IP, such as: 192.168.2.4, the subnet mask is255.255.255.0, default gateway is 192.168.2.2, etc. Using windows 10 as an example, click “start”, enter “settings”, ”Network & Internet”,“Change adapter settings”.Left click to select "Ethernet” and right click on the mouse, the figure below appears, select “Properties”,“Internet Protocol Version 4 (TCP/IPv4)”, then click on “Properties” and configure according to the figure shown below. After filling out information, please click on “O K” to complete the configuration.The next step, please connect your network camera to the desktop or laptop via an Ethernet cable.Please starts IE or Google Chrome or Firefox browsers, then enter the IP address 192.168.2.3 of IC-7113W in the address bar. When the below log in window appears, fill in the user name: admin, password: 1234, click “Sign in”to enter the web-based management interface of network camera.Proceed to version upgrade according to following configuration steps.Then click on “Setup”.4.Then proceed to the upgrade firmware, s elect the “System”- “Advance”from the left side main menu, then select “Choose File” of UpgradeFirmware on the right side as figure shown below.Please find the IC-7113W firmware file you saved in the step 1, select the file and click “Open”.After confirming firmware is the right file, select “Upgrade Firmware”on the right side and system will upgrade itself. Please wait for the update completed and restart the network camera as figure shown below.(Please do not remove power cable and network cable)5.Due to changes in different firmware versions, please reset to factorydefault settings again. You can refer to “step 2”on page 6 to proceed.After your network camera has been reset to factory default setting,please configure the settings according to IC-7113W which are available on the Edimax website.Congratulations! The firmware upgrade is complete!III Download AppUse a smartphone or tablet to search, download and install the EdiLife app from Google Play or the Apple App Store.For more information on how to set up your network camera over Wi-Fi using the EdiLife app, please refer to the online installation guide on the Edimax website by look up the device model number.。
监控系统维护升级方案完整版

监控系统维护升级方案完整版背景为了确保监控系统的正常运行和安全性,我们计划进行一次维护升级。
本方案旨在提供维护升级的详细步骤和时间计划。
维护升级步骤1. 预备工作:- 确定维护升级时间段,尽量选择业务低峰期,以减少影响;- 通知相关人员和部门,包括系统管理员、开发人员和用户,确保他们知晓维护升级计划。
2. 备份数据:- 在维护升级开始前,对监控系统中的重要数据进行备份,以防数据丢失或损坏。
3. 停机维护:- 在维护升级时间段内,将监控系统停机,停止对外提供服务;- 对服务器进行检查和维护,包括硬件检查、系统优化等;- 对监控系统软件进行升级,确保使用最新版本;- 针对已知的安全漏洞进行修复和加固;- 验证维护升级后的系统功能和性能。
4. 系统测试:- 在维护升级完成后,进行系统测试,验证升级是否成功,是否对系统造成了新的问题;- 如果发现问题,及时进行修复和回滚操作。
5. 恢复运行:- 维护升级完成后,恢复监控系统的运行;- 通知相关人员和部门,确认监控系统已经恢复正常运行。
时间计划根据我们的实际情况和需求,制定以下时间计划:- 预备工作:提前一周- 备份数据:维护升级前一天- 停机维护:维护升级日,持续4小时- 系统测试:维护升级后一天- 恢复运行:维护升级后一天结论本维护升级方案为监控系统的正常运行和安全性提供了一套完整的维护升级步骤和时间计划。
我们将严格按照该方案进行操作,确保维护升级的顺利进行和成功完成。
如有问题或意见,请及时与我们联系。
谢谢!。
3G监控盘程序升级说明
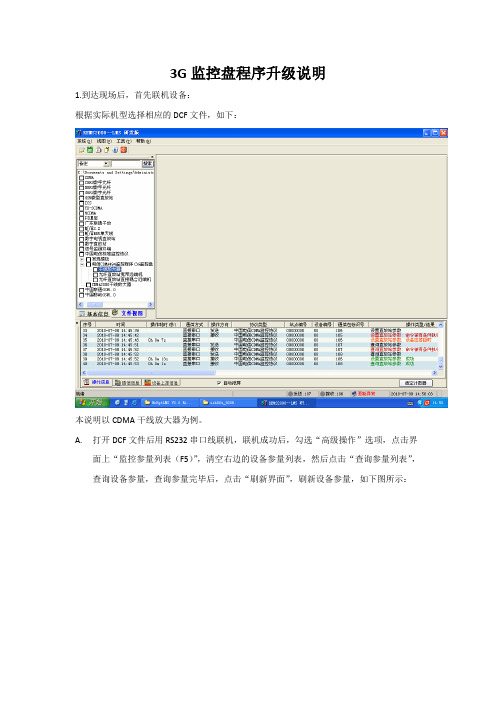
3G监控盘程序升级说明1.到达现场后,首先联机设备:根据实际机型选择相应的DCF文件,如下:本说明以CDMA干线放大器为例。
A.打开DCF文件后用RS232串口线联机,联机成功后,勾选“高级操作”选项,点击界面上“监控参量列表(F5)”,清空右边的设备参量列表,然后点击“查询参量列表”,查询设备参量,查询参量完毕后,点击“刷新界面”,刷新设备参量,如下图所示:B.勾选“基本信息”栏中的所有参量进行查询,如下图所示:D.勾选“告警状态和使能”栏中的所有参量进行查询,如下图所示:F.查询完后,点击LMS界面左上角“系统”,将其保存为DCF格式的文件,如下图所示:G.保存好之后,开始升级监控盘程序,升级方法如下:USB直接烧写镜像操作步骤:1硬件连接1.1使用USB-A+M头连接线,将USB-HUB(品牌:UNITEK)连上电脑,A头连接电脑USB插座,Mini口连接USB-HUB的USB-Mini插座;1.2将USB-A+B头连接线的A型插头插入USB-HUB的任一A型USB插座;1.3关闭监控盘电源;1.4拔下监控盘电源插头J603,使用短接块短接J101端子,插上监控盘电源插头J603;1.5将USB-A+B连接线的B型插头插入监控盘的B型USB插座(USB Device J401),此时,电脑自动安装USB-HUB驱动,待驱动安装完毕。
2软件烧录2.1打开监控盘电源,系统提示找到新硬件“3G Rpt Control&Monitor Board”,如图2-1所示,选择“从列表或指定位置安装(高级)(S)”,单击“下一步”,进入自动安装界面,如图2-2所示;图2-1 找到新硬件界面图2-2 Windows自动安装硬件驱动界面2.2待安装完成后,进入完成界面,如图2-3所示,单击“完成”完成硬件安装;图2-3 硬件驱动安装完成2.3将文件夹“USB-Dfu_9200”文件夹复制到硬盘上,本文以D盘为例,文件夹位置为“D:\USB-Dfu_9200”;2.4打开“USB-Dfu_9200”文件夹,运行程序“isp3G-USB”,出现如图2-4所示界面;图2-4 监控盘固件下载烧录界面2.5单击“设置与说明”按钮,打开路径加载设置界面,如图2-5所示;图2-5 “设置”界面2.6“设置”界面主要用于选择固件文件路径,在“一级文件”下选择bootloader文件(即“(usb)5.283.215.bin”)路径(本例中为“D:\usbDfu_9200\(usb)5.283.215.bin”),在“二级文件”下选择待烧录ISP文件(本例中即“WKE(W)5.283.494.bin”)路径(本例中为“D:\usbDfu_9200\ WKE(W)5.283.494.bin”)。
中帝威固件升级操作说明书

升级固件操作说明书
一、搜索设备
准备一条网线,将切换台的RJ45接口与局域网连接,打开中帝威提供的升级软件,点击搜索设备,如下图会出现设备名称与IP地址;
二、升级固件
继续上面步骤的操作,在左侧设备栏里面双击你要升级的设备型号,将中帝威公司提供的固件拖入升级工具里面,点击升级按钮,设备会自动升级,升级成功后软件会显示升级成功;如下图(注意,升级过程中设备不能断电和拔掉网线)
三、软件搜索不到设备怎么办
第一个方法:先检查切换台设备的IP设置是否设置到动态IP获取(DHCP),通过旋钮操作菜单里面的网络设置功能;如果切换台已经设置了动态IP获取,将局域网的网线连接切换台,你的局域网会自动分配一个IP地址给切换台,此时在重新搜索,是可以搜索到设备的;如下图
第二个方法:将切换台与电脑用网线直连,先将切换台设置到静态IP功能,通过旋钮操作菜单里面的网络设置功能;
把切换台固定一个IP地址,比如把切换台固定到192.168.1.20,电脑这边也要设置成固定IP 地址;
电脑设置IP地址操作步骤,打开网络和共享中心→点击本地连接→点击属性→双击Internet 协议版本4(TCP IPv4),会出现一个IP地址设置页面,在里面勾选使用下面的IP地址,手动填写IP地址192.168.1.30,手动填写子网掩码255.255.255.0,最后点击确定。
第三个方法:确认设备IP地址与局域网是否连接正常,在电脑桌面左下角有个Windos开始菜单,点击开始,会弹出一个搜索框,输入cmd按回车键,会弹出一个dos命令行,也就是所谓的控制台,在里面输入你要搜索的设备IP地址,比如ping 192.168.1.20点击回车键;(注意,在输入ping后面要按一下空格键)。
海康威视摄像机设备版本升级
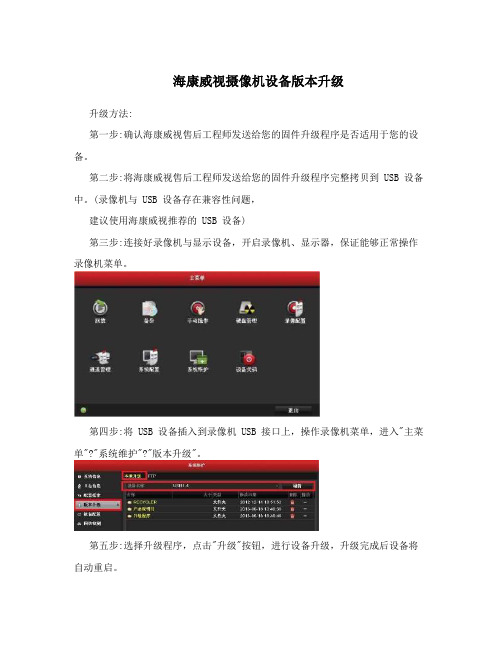
海康威视摄像机设备版本升级
升级方法:
第一步:确认海康威视售后工程师发送给您的固件升级程序是否适用于您的设备。
第二步:将海康威视售后工程师发送给您的固件升级程序完整拷贝到 USB 设备中。
(录像机与 USB 设备存在兼容性问题,
建议使用海康威视推荐的 USB 设备)
第三步:连接好录像机与显示设备,开启录像机、显示器,保证能够正常操作录像机菜单。
第四步:将 USB 设备插入到录像机 USB 接口上,操作录像机菜单,进入"主菜单"?"系统维护"?"版本升级"。
第五步:选择升级程序,点击"升级"按钮,进行设备升级,升级完成后设备将自动重启。
艾普achts DVR 系列固件升级说明书
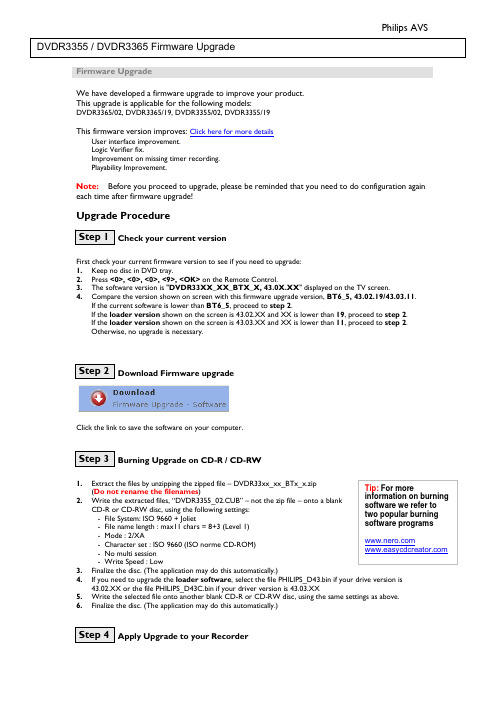
Firmware UpgradeWe have developed a firmware upgrade to improve your product. This upgrade is applicable for the following models:DVDR3365/02, DVDR3365/19, DVDR3355/02, DVDR3355/19This firmware version improves: Click here for more detailsUser interface improvement.Logic Verifier fix. Improvement on missing timer recording.Playability Improvement. Note: Before you proceed to upgrade, please be reminded that you need to do configuration again each time after firmware upgrade! Upgrade ProcedureCheck your current versionFirst check your current firmware version to see if you need to upgrade:1. Keep no disc in DVD tray.2. Press <0>, <0>, <0>, <9>, <OK> on the Remote Control.3. The software version is "DVDR33XX_XX_BTX_X, 43.0X.XX " displayed on the TV screen.4. Compare the version shown on screen with this firmware upgrade version, BT6_5, 43.02.19/43.03.11. If the current software is lower than BT6_5, proceed to step 2. If the loader version shown on the screen is 43.02.XX and XX is lower than 19, proceed to step 2.If the loader version shown on the screen is 43.03.XX and XX is lower than 11, proceed to step 2. Otherwise, no upgrade is necessary.Download Firmware upgradeClick the link to save the software on your computer.Burning Upgrade on CD-R / CD-RW1.Extract the files by unzipping the zipped file – DVDR33xx_xx_BTx_x.zip (Do not rename the filenames ) 2. Write the extracted files, “DVDR3355_02.CUB” – not the zip file – onto a blank CD-R or CD-RW disc, using the following settings: - File System: ISO 9660 + Joliet - File name length : max11 chars = 8+3 (Level 1) - Mode : 2/XA - Character set : ISO 9660 (ISO norme CD-ROM) - No multi session- Write Speed : Low3. Finalize the disc. (The application may do this automatically.)4. If you need to upgrade theloader software , select the file PHILIPS_D43.bin if your drive version is 43.02.XX or the file PHILIPS_D43C.bin if your driver version is 43.03.XX5. Write the selected file onto another blank CD-R or CD-RW disc, using the same settings as above.6. Finalize the disc. (The application may do this automatically.)Apply Upgrade to your Recorder1.Power up the recorder and open the DVD tray. read the disc. l show "SW UPGD ". The TV screen will show a 5.isc ” in the following 2 situations. pplicable models above 2.Insert the prepared upgrade CD-ROM. 3.Close the tray and the recorder will auto 4.Upon recognize the disc, the local display of recorder wil dialog box titled “Disc Upgrade ” Note: The recorder will indicate “Unknown D - When the software upgrade is not meant for your recorder (Check the a ) 6.Navi e pgrade at this 7.8.rder shows “SW DONE ” and the 9.the tray 10.s supply during the entire upgrading process, 11.be alarmed. Simply press <STANDBY > 12. g the recorder. roceed to Step 5 if loader software upgrade is needed. pply Loader Software Upgrade to your RecorderPower up the recorder and open the DVD tray. ROM. ill show "DRV UPG ". The TV screen will show a 5.” in the following 2 situations. pplicable models above - Problem with writing of CD-ROM. Try again with a different CD-ROM if possible. gat to OK button on TV and press <OK > on the remote control. You can cancel the u point by navigating to CANCEL button on TV and pressing <OK > on the remote control. If you proceed with the upgrade, the local display of recorder will scroll the message “ SW UPGRADING ”, while a progress bar will be shown on the TV screen. The whole process takes about 1 minute after which local display of reco dialog box on TV screen indicates successful upgrading. The tray will open as well. Remove the CD-ROM before pressing <OK > on the remote control. The recorder should close and restart automatically after about 10 seconds. Note: Do not press any buttons or interrupt the main otherwise the recorder may become defective.. Note: Sometimes, the recorder does not close the tray. Do not on the remote control to wake up the recorder and the tray will close immediately. It is better to power off and on the recorder again after software upgrade before usin PA 1.2.Insert the prepared loader software upgrade CD-3.Close the tray and the recorder will auto read the disc. 4.Upon recognizing the disc, the local display of recorder w dialog box titled “Loader Software Upgrade ” Note: The recorder will indicate “Unknown Disc - When the software upgrade is not meant for your recorder (Check the a ) 6.Navi e pgrade at this 7.VE 8.rder shows “DRV DONE ” and 9.ould close the tray 10.s supply during the entire upgrading process, 11.be alarmed. Simply press <STANDBY > 12. g the recorder. our product is successfully upgraded! irmware upgrade historyirmware Version BT6_5ves the following performance:when the following keys are pressed in the Timer Recording, Timer /Edit • played back” problem.lem.m. - Problem with writing of CD-ROM. Try again with a different CD-ROM if possible. gat to OK button on TV and press <OK > on the remote control. You can cancel the u point by navigating to CANCEL button on TV and pressing <OK > on the remote control. If you proceed with the upgrade, the local display of recorder will scroll the message “ DRI UPGRADING ”, while a progress bar will be shown on the TV screen. The whole process takes about 4 minute after which local display of reco the dialog box on TV screen indicates successful upgrading. The tray will open as well. Remove the CD-ROM before pressing <OK > on the remote control. The recorder sh and restart automatically after about 10 seconds. Note: Do not press any buttons or interrupt the main otherwise the recorder may become defective.. Note: Sometimes, the recorder does not close the tray. Do not on the remote control to wake up the recorder and the tray will close immediately. It is better to power off and on the recorder again after software upgrade before usinY FF Release Date July 3 2006This upgrade software impro • Fix logic verifier problem.• Fix “UOP sign not displayed /Select /Audio/ Record Mode”.Fix “Specific MP3 file cannot be • Fix “VPS timer record is blocked” problem.• Fix “Missing VPS timer in Simtest in Vienna” prob • Fix “Overlapping VPS Timers are not recorded” proble。
监控系统升级提升方案-完整版
监控系统升级提升方案-完整版1. 简介本文档旨在提出监控系统升级的方案,以提升系统的稳定性、可靠性和功能性。
通过升级监控系统,我们将能够更好地监控和管理我们的业务,并及时发现和解决潜在的问题。
2. 目标升级监控系统的主要目标如下:- 提高系统的稳定性和可靠性,减少系统故障和停机时间。
- 增强系统的功能性,提升对业务数据的监控和分析能力。
- 提升对系统资源的监控和管理能力,优化系统运行效率。
- 加强对系统安全漏洞的检测和预防能力,提高系统的安全性。
3. 方案为了实现上述目标,我们提出以下升级方案:3.1 硬件升级根据当前系统的需求和性能瓶颈,对监控系统的硬件进行升级是必要的。
建议升级服务器、存储设备和网络设备,以支持更大规模的数据处理和更快速的数据传输。
3.2 软件升级软件升级是提升监控系统功能和安全性的关键步骤。
我们建议采取以下措施进行软件升级:- 升级操作系统:将监控系统的操作系统升级到最新版本,以获得更好的性能和安全性。
- 更新监控软件:确保使用最新版本的监控软件,以获得更多新功能和修复已知问题。
- 强化安全机制:加强对系统的访问控制和身份验证机制,确保只有授权人员能够访问和管理系统。
- 定期更新补丁:及时应用操作系统和软件的安全补丁,以修复已知漏洞和提高系统安全性。
3.3 数据存储和备份监控系统产生大量的业务数据,对数据的存储和备份是至关重要的。
我们建议进行以下改进:- 数据存储策略:优化数据存储策略,使用合适的技术和设备来存储和管理数据,确保数据的完整性和可靠性。
- 数据备份机制:建立定期备份机制,将监控系统的数据备份到可靠的存储介质中,以应对数据丢失或损坏的情况。
3.4 监控告警和报表监控系统应具备实时告警和详细报表的功能,以及时通知运维人员异常情况并提供数据分析。
我们建议进行以下改进:- 告警设置:设置合理的告警规则,及时通知运维人员系统出现异常或风险事件。
- 报表生成:优化报表生成功能,提供详细的数据分析和趋势图表,方便监控和分析业务状况。
固件升级操作手册
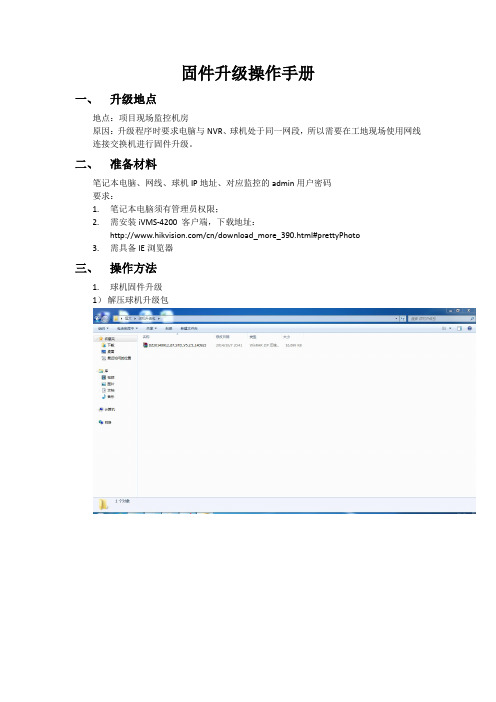
固件升级操作手册一、升级地点地点:项目现场监控机房原因:升级程序时要求电脑与NVR、球机处于同一网段,所以需要在工地现场使用网线连接交换机进行固件升级。
二、准备材料笔记本电脑、网线、球机IP地址、对应监控的admin用户密码要求:1.笔记本电脑须有管理员权限;2.需安装iVMS-4200 客户端,下载地址:/cn/download_more_390.html#prettyPhoto3.需具备IE浏览器三、操作方法1.球机固件升级1)解压球机升级包2)使用IVMS-4200对球机进行升级电脑与球机、硬盘录像机必须在同一个网段,海康威视设备默认出厂IP为192.0.0.64,根据现场的网段设置而进行改动,需要将电脑的IP前三位数字与IMVS-4200客户端获取的IP地址保持一致,第四位数字在0-255中任意取值,不与设备的数值重复即可。
例:设备IP为192.168.1.201,则电脑设置为192.168.1.206(0-255)在“设备管理”界面把球机添加至客户端,点击球机“远程配置”按钮,对球机进行远程升级。
重启后升级完毕,最后确认升级后主控版本(V5.2.5 buidl 140922)。
版本号的后6位数为日期格式YYMMDD,确定升级后的主控版本号为固件包的版本号即可。
本次正式版本的主控版本号为1410092.硬盘录像机(NVR)升级1)解压NVR升级包点击任一压缩包,解压后会生成一个文件(有且仅有一个)2)使用IVMS-4200对NVR进行升级在“设备管理”界面把NVR添加至客户端,点击球机“远程配置”按钮,对球机进行远程升级。
重启后升级完毕,最后确认升级后主控版本(V3.1.5 build 141016)四、巡航、守望、上传设置1.上传网络设置1)登陆项目监控所在ip地址,例:http://192.168.1.1,打开配置页面,在配置—>网络设置—>阿里云,填写下述信息:勾选启用阿里云服务器:深圳数据中心Access Key ID:Access Key Secret:Bucket Name:2)在配置—>网络设置—>TCP/IP—>DNS服务器配置,填写下述信息:首选DNS服务器:项目所处地的运营商DNS的IP地址(可网上进行搜索,与总部信息化中心确认)3)在配置—>网络设置—>高级配置:勾选启用虚拟主机勾选启用Telnet备注:NVR的升级在网页端也可以实现,在配置—>系统维护中操作。
- 1、下载文档前请自行甄别文档内容的完整性,平台不提供额外的编辑、内容补充、找答案等附加服务。
- 2、"仅部分预览"的文档,不可在线预览部分如存在完整性等问题,可反馈申请退款(可完整预览的文档不适用该条件!)。
- 3、如文档侵犯您的权益,请联系客服反馈,我们会尽快为您处理(人工客服工作时间:9:00-18:30)。
监视器系统升级操作说明
本文档对升级尊正公司的监视器的两种方法(通过升级软件升级或者通过U盘功能升级)做了简单说明
一、设备需求:
1、需要升级的监视器;
2、监视器升级线;
3、升级软件(通过软件升级时需要);
4、升级固件(img文件);
5、升级用的PC(通过软件升级时,操作系统必须是Windows XP,Windows Vista或者是Windows 7;通过U盘功能升级时,操作系统支持U盘即可)。
二、注意事项:
1、升级前请先确认固件的型号与监视器的型号是否相符。
如型号不符,则将导致升级后的监视器无法正常使用。
2、通过软件升级时,如设备管理器中无法识别MHC Interface的设备,请先拔出升级线,再重新插入PC。
若仍无法识别,请检查USB驱动是否正确安装。
3、通过U盘功能升级时,如设备管理器中无法识别出移动磁盘,请先拔出升级线,再重新插入PC。
若仍无法识别,请检查监视器是否处于调试模式。
4、升级成功后,重启监视器(即升级完成,第一次开机),需等待约20秒,系统才能稳定工作。
如在系统未稳定状态下,再次重启,则监视器将无法正常工作,需烧入旧的固件版本重新激活。
三、准备工作:
1、通过软件升级时,在PC上安装好监视器的USB驱动;
2、监视器接上电源。
四、系统固件升级:
可在升级模式下通过升级软件,或在调试模式下通过U盘功能,这两种操作方式来进行系统固件升级。
具体操作方法如下:
通过升级软件升级(仅在Windows系统下运行,暂不支持Mac系统)
1、在监视器的控制面板上依次输入以下按键使其进入“升级模式”:
“MENU”-“ENTER”-“UP”-“DOWN”-“MENU”-“ENTER”-“UP”-“DOWN”-“MENU”-“UP”-“POWER”
2、此时监视器的Tally灯应变红,Power灯点亮。
图1:升级模式,Tally灯变红
3、如监视器未进入“升级模式”而是正常开机了,则可通过Power键关机,重新执行上述操作。
4、连接升级线,升级线的USB口插在PC的USB口上,RJ45口插在监视器的GPI口上。
图2:升级线连接监视器的GPI接口
5、USB驱动安装成功后,在Windows的“设备管理器”里可查找到“MHC Interface”的
设备。
6、打开升级软件,通过“Select Image”按钮选择系统固件,通过“Update”按钮进行升级。
图3:通过“Select Image”选择监视器对应的系统固件
7、升级成功后软件会弹出对话框提示。
图4:系统固件升级成功
通过U盘功能升级(可在Windows及Mac系统下操作):
1、在监视器的控制面板上依次输入以下按键使其进入“调试模式”:
“MENU”-“ENTER”-“UP”-“DOWN”-“MENU”-“ENTER”-“UP”-“DOWN”-“MENU”-“DOWN”-“POWER”
* 更新说明:系统版本在0.9.53_1906_CN以上,则可通过“系统设置”菜单中新增的“U 盘模式”功能来设置,无需以上的开机按键序列。
此时GPI 1-4功能失效,如需使用GPI功能,则需关闭U盘模式。
2、此时监视器的Tally灯应变绿,Power灯点亮,然后进入正常开机流程。
图5:调试模式,Tally灯变绿
3、如监视器未进入“调试模式”而是正常开机了,则可通过Power键关机,重新执行上述操作。
4、连接升级线,升级线的USB口插在PC的USB口上,RJ45口插在监视器的GPI口上。
图6:升级线连接监视器的GPI接口
5、PC上“我的电脑”里会显示一个新的可移动磁盘,在设备管理器上显示为:
MAC上“设备”里会显示一个新的可移动磁盘:
6、将系统固件复制到U盘(Zunzheng Updater Storages USB Device / Untitled)中。
7、通过监视器“自动色彩校准”菜单的“系统升级”子菜单选择升级(如监视器未进入调试模式,则该菜单不可选),选择“是”开始升级,升级结束后监视器会提示“升级成功,请重启监视器”。
图7:调试模式下,“系统升级”可选
图8:系统升级选择
图9:系统升级进行中
图10:系统升级成功
五、CFE升级
本操作仅限于升级含CFE板的监视器,如CM170及LM-2461W。
请先升级系统固件,再执行本操作,以免导致机器故障,影响您的正常使用。
CFE板可在调试模式下,通过U盘功能进行升级。
具体操作方法如下:
1、在监视器的控制面板上依次输入以下按键使其进入“调试模式”:
“MENU”-“ENTER”-“UP”-“DOWN”-“MENU”-“ENTER”-“UP”-“DOWN”-“MENU”-“DOWN”-“POWER”
* 更新说明:系统版本在0.9.53_1906_CN以上,则可通过“系统设置”菜单中新增的“U 盘模式”功能来设置,无需以上的开机按键序列。
此时GPI 1-4功能失效,如需使用GPI功能,则需关闭U盘模式。
2、此时监视器的Tally灯应变绿,Power灯点亮,然后进入正常开机流程。
图11:调试模式,Tally灯变绿
3、如监视器未进入“调试模式”而是正常开机了,则可通过Power键关机,重新执行上述
操作。
4、连接升级线,升级线的USB口插在PC的USB口上,RJ45口插在监视器的GPI口上。
5、PC上“我的电脑”里会显示一个新的可移动磁盘,在设备管理器上显示为:
MAC上“设备”里会显示一个新的可移动磁盘:
6、将CFE文件复制到U盘(Zunzheng Updater Storages USB Device / Untitled)中。
7、通过监视器“自动色彩校准”菜单的“三维查找表升级”子菜单选择升级(如监视器未进入调试模式,则该菜单不可选),选择“是”开始升级,升级结束后监视器会提示“升级
成功,请重启监视器”。
图13:调试模式下,“三维查找表升级”可选
图14:三维查找表升级中
图15:三维查找表升级成功。