E-sky 2.4GHz Honey Bee CP3遥控直升机操控说明书
ESky 0406a 6-channel transmitter 说明书

Mar 07, 2008 ·. On the top left and right of the TX there are two knobs HOV.PIT and PIT.TRIM--what is the function of each? The manual doesn't say. What is the gyro … Home ESky 0406A Tx, 0420A and 0704 Gyro Guide. ESky 0406A Tx,. ESky Transmitter - EK2-0406A; ESky Receiver - EK2-0420A; ESky Pro Gyro - EK2-0704; Transmitter manual. For use with E-Sky 6 channel 2.4GHz receiver (EK2-0424) Note- 8 "AA" batteries not included. esky transmitter 72 listings. Esky 6-Channel 2.4ghz Helicopter Transmitter ET6 *Broken antenna* $14.99; or Best Offer; Esky 6-Channel 2.4 GHz Helicopter. Dec 16, 2008 · Trouble with Esky 6 Ch Transmitter - EK2-0406A and Esky 6ch RX: EK20420A Micro Helis All; Planes; Sailplanes; Helis; FPV; Multirotors; Cars; Boats; … Apr 28, 2008 · How to setup the ESky TWF-SZ 0406A 6CH Transmitter For Flight. do to reset the transmitter?. ESky TWF-SZ 0406A 6CH Transmitter For Flight … E-Sky 6 channel 2.4GHz receiver. Follow the procedures outlined on page 5 of the transmitter manual.. (EK2-0404G) and E-Sky 6 Channel 2.4 GHz Transmitter. Esky Honey Bee King II 6CH CCPM Electric RC Helicopter RTF. .. 6 Channel Transmitter (EK2-0406A) Receiver. Jul 03, 2008 · How to disable CCPM from E-sky transmitter. CCPM function is built-in in model 0406A.. Feb 25, 2008 · Esky Transmitter Manual and Tips, now includes BELT CP MANUAL. the Esky transmitter with the HBK2 (EK 0406A. Esky Helicopters; Esky … Esky Honey Bee King II 6CH CCPM Electric RC. 6 Channel Transmitter (EK2-0406A) Receiver. Honey Bee King 2. The Esky evolution of the Outstanding Esky … 4 & 6 CHANNELS E skv INSTRUCTION EK2-0406A EK2-0404C EK2-0404B EK2-0404 EK2-0406 6-channel PPM-FM Digital proportional Radio Control Systems CHANNEL TRANSMITTER INSTRUCTION MANUAL E sky E akv 0406. TRANSMITTER EK20406A. 6 channel 2. Charger port:. Recent Esky 6 Channel Helicopter R/C Transmitter questions,. Training collar manual esky.. esky tx 0406a trying use flymentor 3d. Free Esky help, support & customer service. Find your Esky product. Get solutions from top Esky experts. Search Fixya. Esky 6 Channel Helicopter R/C Transmitter. Pre-assembled 6-Channel Esky Honey Bee King 2 CCPM Helicopter. 6-channel Transmitter: EK20406A.. Manufacturer's manual. Esky Honey King 2 Electric RC Helicopter Ready-to-Fly;. Pre-assembled 6-Channel Esky Honey Bee King 2 CCPM Helicopter. 6-channel Transmitter: EK2-0406A. Nov 12, 2007 · What is the difference between a Esky EK2-0420 6 channel receiver and a Esky EK2-0420A 6 channel receiver.. Yep reciever No correct the EK2-0406A is … ... ek2 0404 transmitter manual. ek2 0404 transmitter manual. msu lossless video codec tutorial free frigidaire 4&?iei?7i?fff?li?zlif? 5H4? 4&6 CHANNEL TRANSMITTER. Mar 08, 2008 · ESKY Belt CP - Newbie. I do have the ESKY 0406A 6 Channel transmitter. here is the manual,. Esky HoneyBee KING II [2.4G].
SkylinkHome 一键到三按键遥控器操作方法指南说明书

1-Button Remote 2-Button Remote 3-Button RemoteModel LK-318-1Model LK-318-2Model LK-318-31-Button Transmitter LK-318-12-Button TransmitterLK-318-23-Button Transmitter LK-318-3ButtonsRed LED Thank you for your purchase of a SkylinkHome TM Remote, Model LK-318-1/ LK-318-2 / LK-318-3. This remote which is also called transmitter in this document allows you to wirelessly operate SkylinkHome TM receiver modules.All wireless signal communications within the SkylinkHome TM system are based on rolling code technology to ensure highest security is used. The following items are included in this package:- One of LK Series Remotes- Lithium Battery CR-2032 (Installed)- User’s Instructions2. POWER UPTo power the transmitter, simply remove the battery isolator from the transmitter, red LED will flash once. Press the button on the transmitter, the red LED should flash. The transmitter is now powered properly. If the red LED does not flash when button is pressed, refer to Section 6 “Battery” of this manual.1) Remove isolator, 2) LED on for 1 secondIn order to operate the receiver module remotely with a transmitter, it must be programmed to the receiver module.To program a remote to the receiver module, a “Learn” code must be transmitted, follow the instructions below to transmit the “Learn” code to the receiver.1. Put the receiver module that you plan to program into programming mode. Refer to the User’s Instructions of that receiver module.2. Press 1 and 2 simultaneously and hold for 2 seconds until the LED changes from on to flashing quickly. Release the buttons. The red LED on the transmitter will be on for 15 seconds.3. Press the button on the remote that you plan to use when the LED is steadily on to transmit the “Learn” code.4. Once the remote is programmed, the receiver modules will quit from programming mode and the programmed transmitter is ready to be used now. Learn CodeFollow steps 2 and 3 above to transmit the “Learn” code when programming the remote to receiver modules.You may follow the same instructions to program different buttons on the transmitter to different receiver modules.LED on for 1 secondPressing the programmed button on the transmitter once will toggle the status of the load that is connected to the receiver module, i.e. if the light is off, pressing the button turns on the light, and vice versa. When the programmed button is pressed, the red LED flashes briefly indicating signal is transmitting.Password protection (Only available for LK-318-3 (Not available for LK-318-1 or LK-318-2)The LK-318-3 can be password protected. If you enable the password protection, you can only operate LK-318-3 after you input the correct password.Password can be 2-8 digits long, which is a combination of 1, 2 and 3. For example, password can be 1, 2, 1, 2. To input this password, you have to press button [1], then [2], then [1], then [2].Note:[1] = Button 1 [2] = Button 2 [3] = Button 3Note:The time-out period is 1 second during above password input.The factory default password is 2, 2, 2, and this password function is disabled out of factory.Change password1. Press 1 and 3 simultaneously and hold for more than 10 seconds until the LED changes from flashing quickly to flashing slowly.2. Input old password.3. Press 1 and 3 once simultaneously to confirm. If the password is wrong, the LED will flash 3 times and you have to start it over from step1.4. Input new password.5. Press 1 and 3 once simultaneously to confirm.6. Input new password again.7. Press 1 and 3 once simultaneously to RE-confirm. If the password is different from the one of step 4, the LED will flash 3 times and you have to start over from step 1. Otherwise, the password has been changed to the new one and the password protection is enabled.Disable password1. Press 1 and 3 simultaneously and hold for more than 5 seconds until the LED flashes quickly but not until the LED flashes slowly.2. Input old password.3. Press 1 and 3 once simultaneously to confirm. If the password is the password protection will be disabled.Enable password1. Press 1 and 3 simultaneously and hold for more than 2 seconds until the LED flashes quickly but not until the LED flashes slowly.2. Input old password.3. Press 1 and 3 once simultaneously to confirm. If the password is correct, the password protection will be enabled.You can toggle the two states - password protection enabled or disabled.Note:The time-out period is 15 seconds during any of the above setting opera-tions. After 10 seconds, the LED will flash 3 times and the remote will exit from setting.isolatorButton [1]Button [2]Button [3]If you forget your password and want to reset LK-318-3, follow the steps below:1. Press 1 and 2 simultaneously and hold for more than 15 seconds until the LED flashes.2. After you release 1 and 2, the LED will be turned off and LK-318-3 will be reset. The password will be reset to factory default.After the reset, password protection is removed but the remote can not control any receiver until you reprogram it to receivers you want to control.When the operating range is reduced, or when the red LED does not flash during operation, it is time to replace the battery.The transmitter is powered by a lithium battery CR-2032. Follow the instructions below to replace the battery to the transmitter.1. Undo the two screws on the back of the remote. The bottom case will then come off.2. Take out the old battery.3. Place the new battery in position.4. Close the cover and reinsert two screws.Note: Dispose of old battery promptly and properly.The device is approved by the FCC and it complies with Part 15 of the FCC Rules. Its operation is subject to the following two conditions : 1. This device may not cause harmful interference.2. This device must accept any interference that may cause undesired operation.WARNING:Changes or modifications to this unit not expressly approved by the party responsibleof compliance could void the user’s authority to operate the equipment.If, within one year from date of purchase, this product should become defective (except battery), due to faulty workmanship or materials, it will be repaired or replaced, without charge. Proof of purchase and a Return Authorization are required.If you would like to- find out the up-to-date specifications- know more about features and applications - download documents, i.e. user’s instructions - order Skylink productsor if you have difficulty getting products to work, please:1. visit our FAQ section at , or **********************************,or3. call our toll free at 1-800-304-1187 from Monday to Friday, 9 am to 5 pm EST. Fax (800) 286-1320The SkylinkHome TM System consists of many other devices such as SkylinkHome TM Remotes, Motion Sensor, ON/OFF Wall Switch, Wall Dimmer, Plug-In Dimmer with or without Repeater, Plug-In ON/OFF Control (Outdoor/Indoor), Screw-In Dimmer, ON/OFF/Dimming Control, ON/OFF Control, Smart Button TM Garage Door Control, etc. Please visit Skylink website at for more information.CUSTOMER SERVICE17 Sheard avenue, Brampton, Ontario, Canada L6Y 1J3Email:*********************** P/N. 101Y058Patent Pending© 2012 SKYLINK GROUPELithium battery CR-2032 included. (Positive side up)。
遥控飞机的控制方法

电动遥控直升机操控宝典:
⒈初飞的买家最容易犯的错误:
① 放飞时过份心急,将操纵杆一推到顶,直升飞机成了航天飞机,直入云霄;忌
② 降落或降低高度时往往会出现第二个错误动作:想当然地放弃操纵,操纵杆自动复位,(电动直升机与电动滑翔机不同,滑翔机有固定机翼能缓慢滑翔漂落),直升机一旦收不到无线电信号,螺旋浆即停止工作,此时直升机又成直摔机堕落地面,虽然直升机均有抗震设计,但不利于延长模型寿命。
忌
⒉正确的放飞方法:
① 虽然直升机容易操作,稳定性好,但这终究是一架航空器,要操控好它也是一门学问,只有不断提高自己的操控技巧才能充分体验到电遥直升机的巨大乐趣,所以强烈建议您在试飞前一定要仔细阅读附随的说明书,不要急于实机操作。
若要交由孩子操控玩耍,您一定要在事先充分掌握相关的操作要领并给予孩子及时的帮助指导;
② 初飞时以低飞(3米左右)为主,轻推操纵杆至一半即可,感受操纵手感,要使直升机飞得高不难,但要飞到能在中低空静止悬停,前后左右自如转向并精确定点降落,那才是了不起的高手,操控电遥直升机的最大乐趣也在于此,但要达到这种程度通常需要5~6个航次(充一次电为一个航次),不可心急;
③ 您的直升机已安装了部分电量的锂聚合物飞行电池,供您在第一次对电池充电前能够测试直升机的功能;第一次使用前不能对直升机充电
---简单飞行几分钟,当电量减弱时降落直升机,对电池进行充电。
每次充电请按说明书指示的时间充足,在使用时则要耗尽,如此重复三~五次,将使电池处于最佳的性能状态;。
三通遥控飞机操作方法
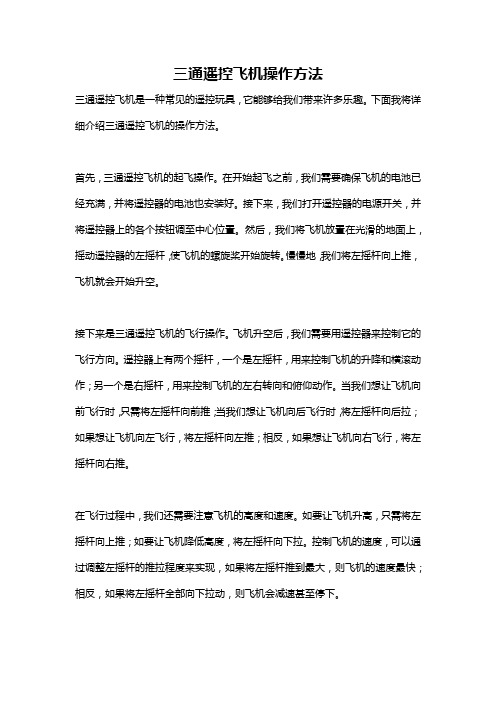
三通遥控飞机操作方法三通遥控飞机是一种常见的遥控玩具,它能够给我们带来许多乐趣。
下面我将详细介绍三通遥控飞机的操作方法。
首先,三通遥控飞机的起飞操作。
在开始起飞之前,我们需要确保飞机的电池已经充满,并将遥控器的电池也安装好。
接下来,我们打开遥控器的电源开关,并将遥控器上的各个按钮调至中心位置。
然后,我们将飞机放置在光滑的地面上,摇动遥控器的左摇杆,使飞机的螺旋桨开始旋转。
慢慢地,我们将左摇杆向上推,飞机就会开始升空。
接下来是三通遥控飞机的飞行操作。
飞机升空后,我们需要用遥控器来控制它的飞行方向。
遥控器上有两个摇杆,一个是左摇杆,用来控制飞机的升降和横滚动作;另一个是右摇杆,用来控制飞机的左右转向和俯仰动作。
当我们想让飞机向前飞行时,只需将左摇杆向前推;当我们想让飞机向后飞行时,将左摇杆向后拉;如果想让飞机向左飞行,将左摇杆向左推;相反,如果想让飞机向右飞行,将左摇杆向右推。
在飞行过程中,我们还需要注意飞机的高度和速度。
如要让飞机升高,只需将左摇杆向上推;如要让飞机降低高度,将左摇杆向下拉。
控制飞机的速度,可以通过调整左摇杆的推拉程度来实现,如果将左摇杆推到最大,则飞机的速度最快;相反,如果将左摇杆全部向下拉动,则飞机会减速甚至停下。
当飞机飞行一段时间后,可能需要进行一次回航操作。
这时,我们需要使用右摇杆来控制飞机的方向。
将右摇杆向左推,飞机会向左转弯;将右摇杆向右推,则飞机会向右转弯。
此外,右摇杆向前推可以使飞机向下俯冲,向后拉可以使飞机俯仰上升。
最后,当我们想让飞机降落时,可以采取以下操作。
首先,我们需要将飞机调至较低的飞行高度,然后将左摇杆推到最低,使飞机缓慢下降。
当飞机接近地面时,将左摇杆再次推到最低,使飞机慢慢着陆。
此时,我们可以选择关闭飞机的电源开关,停止螺旋桨的旋转。
以上就是三通遥控飞机的操作方法,当然还有很多技巧和操作细节,需要我们在实践中不断摸索和学习。
希望通过以上介绍,大家能够更好地掌握三通遥控飞机的操作技巧,享受到飞行带来的乐趣。
美嘉欣 F-SERIES2.4G 遥控直升机 说明书

半径5000米的区域内使用各类模型遥控器。在国家有关部门发布无线电管制 命令期间,区域内,应该按要求停止使用模型遥控器。
7
电源开关
控制遥控器的电源,拔到“ON”时,为接通遥控器 电源,拔到“OFF”时,为遥控器断开电源。
3
序号 8
功能键及名称 遥控天线
作
用
发送遥控器无线控制信号
(1)指示灯断续闪烁:表示遥控器还没有启动,需将
油门左操纵杆向上推到最高端,再拉到最低端后
才可启动遥控器。
9
状态指示灯 (2)指示灯一直不停快速闪:表示遥控器处于对码状
(2配)件能图执行上升/下降,左/右转向,左/右侧飞,前进/后退,航线飞行等动作。
(3) 遥控器可根据操纵者的习惯,自行进行左/右手油门切换。
5.2遥控器功能介绍:
8.遥控天线
9.状态指示灯
7.电源开关 1.左操纵遥杆
11.摄像开关键
12.油门模式切换左键
3.微调键A 4.微调键B
6.微调键D
POWER
零件名称
用量 序号
零件名称
用量
1
001 平衡杆组件 1 014 主电机组件 1 027 下牙轮铜套 1 040 左舵机加强铝片 1
002 连接扣
1 015 舵机连接杆组件 2 028
接收板 1 041 尾架斜管固定件 1
003 包注轴组件 1 016 右舵机加强铝片 1 029 主机架底板 1 042 尾架斜管 2
玩具电动飞机遥控说明
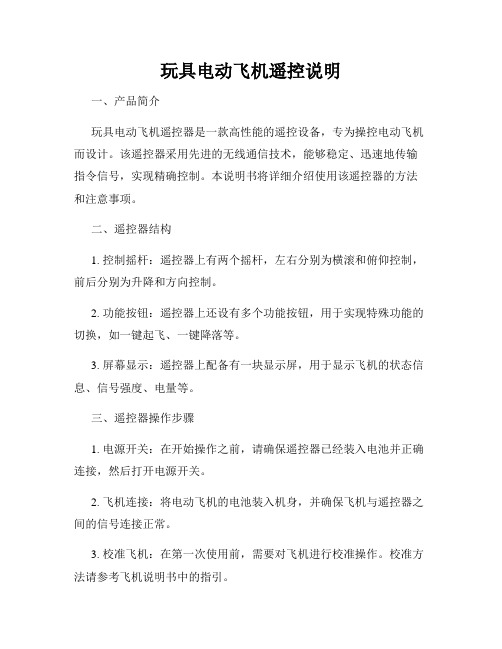
玩具电动飞机遥控说明一、产品简介玩具电动飞机遥控器是一款高性能的遥控设备,专为操控电动飞机而设计。
该遥控器采用先进的无线通信技术,能够稳定、迅速地传输指令信号,实现精确控制。
本说明书将详细介绍使用该遥控器的方法和注意事项。
二、遥控器结构1. 控制摇杆:遥控器上有两个摇杆,左右分别为横滚和俯仰控制,前后分别为升降和方向控制。
2. 功能按钮:遥控器上还设有多个功能按钮,用于实现特殊功能的切换,如一键起飞、一键降落等。
3. 屏幕显示:遥控器上配备有一块显示屏,用于显示飞机的状态信息、信号强度、电量等。
三、遥控器操作步骤1. 电源开关:在开始操作之前,请确保遥控器已经装入电池并正确连接,然后打开电源开关。
2. 飞机连接:将电动飞机的电池装入机身,并确保飞机与遥控器之间的信号连接正常。
3. 校准飞机:在第一次使用前,需要对飞机进行校准操作。
校准方法请参考飞机说明书中的指引。
4. 起飞与降落:用左手控制横滚和俯仰,右手控制升降和方向,将摇杆操作至中间位置进行起飞。
降落时,缓慢调整升降摇杆将飞机降低到地面。
5. 方向控制:使用右手的左右摇杆来改变飞机的左右方向,可实现转弯或调整飞行位置。
6. 高度控制:通过右手的前后摇杆来调整飞机的飞行高度。
向前推摇杆将飞机向上升高,向后拉摇杆将飞机向下降低。
7. 功能切换:遥控器上的功能按钮可以实现多种特殊功能的切换,例如一键起飞、一键降落、翻滚等。
请参考遥控器说明书中的详细介绍。
四、注意事项1. 安全操作:在操控过程中,请确保周围环境安全,避免造成人身或财产损伤。
2. 信号强度:在飞行过程中,请确保遥控器与飞机之间的信号强度良好,避免遥控失效。
3. 遥控距离:飞行时请注意遥控器的控制距离,避免超出可控范围造成信号中断。
4. 电池状态:遥控器电池电量过低时可能导致控制不稳定或失效,应及时更换或充电。
5. 飞行区域:选择平坦、开阔且无障碍物的区域进行飞行,避免危险或碰撞。
6. 学习阶段:对于初学者,建议先熟悉基本操作,逐渐掌握技巧后再进行高难度动作尝试。
直升机遥控杆操控之动作介绍遥控杆操控之动作介绍:

直升机遥控桿操控之动作介绍遙控桿操控之動作介紹遙控桿操控之動作介紹:Elevator 升降舵(前後傾) Pitch & Throttle 主翼及油門升降Rudder (Yaw) 轉尾Aileron 副翼(左右傾)上述是Mode 1(第一类)遥控模式,以右控桿作油门控制模式:左控桿右控桿上機首傾前上加油門上升下機首上昂下減油門下降左機首向左自轉左機身向左傾右機首向右自轉右機身向右傾以上控制组合起来,便可控制遥控直升机做出各类动作所有日製或台製產品都附有详细说明书,按照它的指示装嵌后,便可以调校遥控配合飞行需要。
以下有一附表提供正常飞行所需之主桨度数:主旋翼控桿懸停特技模式1特技模式23D模式自旋降落模式最高角度10 9 9 9 13懸停角度 5 - 6 5 5 0 6最低角度- 2 - 3 - 5 - 9 - 4直升機初步調校:直升機初步調校1.先将全部伺服器圆型控碟离开所有伺服器,把遥控器所有设定按reset清除,所有微调制调回中位,两操控桿设置於中央,然后开啟手控器及接收机。
(开啟遥控次序先开手控后开接收,关闭时先关接收后关手控。
)2.所有伺服器收到讯号回中后,把控碟装回,上紧縲丝,注意主轴上的旋碟要水平状态、尾桨有正十度角左右、引挚化油器开口率约55%。
移动控扞测试所有动作角度是否足够,(100% Servo全程角度為60度,150%為90度),一般都调至各方向之尽位之前返回少许,不可顶尽。
3.动作不足时,选用伺服器旋碟外孔位。
之后调校遥控上之角度行程功能(ATV),加多或减少角度。
4.检查伺服器方向是不正确,小心油门伺服器倒转。
直轴上之旋碟从后看时,倾前表示头向前倾。
反之头向上昂。
向右倾右,左倾左。
尾翼向右拨风时,头向右自转等等。
(请看上图)5.所有推拉式推桿系统的推桿长度,同一组的推桿长度要相同。
不可有金属推桿部分因震动而互相磨擦,这会產生杂电波干扰遥控接收器。
6.佗縲仪方向测试:看著尾伺服器用左面手控桿推右动作,确认伺服器动作方向。
手柄遥控飞机操作方法

手柄遥控飞机操作方法手柄遥控飞机操作方法现在,随着科技的不断发展,手柄遥控飞机已经成为了很多人娱乐休闲的一种选择。
但是,对于初学者来说,手柄遥控飞机的操作可能会有一定的困难。
那么,在使用手柄遥控飞机的时候应该注意哪些问题呢?1. 飞机预备在将手柄连接至飞机之前应该先确定飞机是否安装好了电池,而且电池电量充足。
同时还应该检查一下遥控器的电量,以免出现电量不足的情况。
2. 建议先断电再连接在将手柄连接至飞机的时候,要先将手柄的电源关闭,以免电源过载影响设备的使用效果。
连接成功后,可以再开启手柄电源,来检测一下飞行器的运转情况。
3. 飞机操作前需要校准飞机校准时需要将飞机平放在水平面上,然后按住飞机上的红色按钮直到飞机灯光闪烁,表示校准完成。
此时应该操作飞行控制器的左摇杆,来检测飞机是否能够正常运转。
如果检测出现问题,则应该重新进行校准。
4. 注意校准数据的准确性在进行飞机校准的时候,要特别注意校准数据的准确性。
否则不但飞机无法正常起飞,还可能会造成安全隐患。
因此在校准的时候,应该尽可能调整摇杆的位置,避免校准数据的误差。
5. 安全起飞如果在刚开始的时候,飞机的高度太低了,或者飞行器的姿态不正确,都可能会造成起飞失误。
因此,建议在大空旷的场地进行试飞,以避免意外发生。
6. 小心飞机方向调整当需要调整飞机方向时,应该逐渐轻松地调整手柄。
特别是在飞机出现异常的情况下,一定要保持清醒头脑,及时调整飞行姿态,以免造成严重后果。
7. 飞行高度的调整在飞机的飞行过程中,要随时注意飞行高度。
如果高度过低,可能会和障碍物碰撞,造成损坏。
而如果飞行高度过高,则可能会对其他飞机造成威胁。
因此,建议在飞行前要详细审查飞行场地,以避免飞行风险。
除此之外,在飞行前还应该充分了解飞行器的功能和特性,以及各种遥控器挡位的调整方式。
这样可以使你更好的掌握飞行器的控制技巧,更加方便的调整飞行姿态。
总之,操作手柄遥控飞机需要谨慎。
只有充分准备,遵循操作规程,才能更好的享受手柄遥控飞机带来的娱乐和乐趣。