挂烫机使用说明书
海尔 HY-GW1206 手持挂烫机 使用说明书

目录
产品特点
1
产品部件
2
使用方法
3
清洁保养
4
注意事项
5
常见问题
8
限用物质申明
9
技术规格
10
保修说明
11
产品特点
折叠机身设计,收纳携带更方便。 平挂两用,轻松护理各类衣物。 喷头不锈钢面板,顺滑不伤衣物。 一键式操控,持续蒸汽输出,安全便捷。 环形水箱设计,使用方便,简洁美观。 多重防干烧设计,全面保护更安心。
在熨烫过程中底板不要贴近拉 链、纽扣等硬物,否则会导致 底板刮花。
给水箱加水时,请注意使用专 用水杯,否则可能会导致主机 浸水或水箱中水溢出。
在充液和清洁时,应将电源插 头拔掉,以免造成触电或电源 线绝缘层老化而起火。
长时间不使用或者外出时,请 拔掉电源插头,机器如发生异 常(如烧焦味)也应立即拔出 电源插头。
8
限用物质申明
本表格是根据SJ/T 11364《电子电气产品有害物质限制使用标识要求》 和GB/T 26572《电子电气产品中限用物质的限量要求》,对本产品零 部件中所含限制使用的有害物质含量所做的申明。
电子电气产品名称:手持挂烫机
类别
部件名称
有害物质
铅
汞
镉
六价铬 多溴联苯 多溴二苯醚
(Pb) (Hg) (Cd) (Cr(VI)) (PBB) (PBDE)
5
注意事项
请勿侧倒放置,以免造成溢水, 损坏地板、桌子或地毯。
请勿将针或其它异物插入烫熨底 板蒸汽出汽口内,以免导致触电 或烫伤。
请勿在水箱中加入香水、醋、淀 粉、除垢剂或其他化学物品,以 免沾污衣物。
化 学
溶 剂
请勿自行改装、拆卸或修理本产 品,否则可能因为异常操作导致 伤害,或影响机器寿命。
konka手持挂烫机使用说明书

konka手持挂烫机使用说明书
挂烫机也叫挂式熨斗、立式烫斗,就是能挂着熨衣服机器。
通过加热水产生的蒸汽不断接触衣服和布料,达到软化衣服和布料纤维组织,使衣服平整如新的目的。
手持式挂烫机非常小巧,使用方便。
1、从包装里把手持挂烫机拿出来,找到拧口,并拧开。
2、拧开拧口后,在拧口上放上漏斗,灌水至刻度线以下,最好使用纯净水,这样就算使用时间长了也不会产生水锈。
有助于机子的保护和喷出的蒸汽是没有水锈的。
3、拧回拧口,插上电源,按上熨衣档位,这时加热的指示灯就会亮起,等待一分钟左右,蒸汽喷出就可以熨烫衣物。
4、熨烫时,一手拽直衣物,一手拿着挂烫机,让喷蒸汽的平板挨着衣物上下运行,在热蒸汽和平板的作用下就会使褶皱消失,变得平整。
XG-0301手持挂烫机操作手册说明书

Applicable model: XG-0301Handheld Garment Steamer Operation ManualPlease carefully read this manual before using the product.Dear customer,Thank you for choosing our handheld garment steamer. This product is simplefor operation, light , portable and has strong functions. It helps to remove wrinkles and dusts on garment and may bring you to an new garments care experience in future travel.Important Safety InstructionsWhen using your appliance, basic precautions should always be followed, including thefollowing:1. Please carefully read this manual before use.2. Please use this machine as per the purpose specified in this manual and do not use it for other purpose.3. To avoid electric shock and other hazards, don't immerse this machine, power cord and the plug into water.4. Never yank cord to disconnect from outlet. Please hold the plug and pull it out of the socket gently. Your hand must be dry.5. Don't fill the machine with hot water or add any corrosive cleanser in water; otherwise, the machine may be damaged. It is recommended to use minerals free water .6. Always disconnect from electrical outlet when the garment steamer is not in use, or when adding water into the water tank or when there is no water in the water tank.7. When the power supply or the machine is damaged, don't run this product. To avoid electric shock, don't try to dismantle or repair this machine. Send it to a qualified repair center for inspection and repair. Private dismantling, repair or replacement may lead to hazards of a fire,8. Don't let the product running in an unattended area. Immediate turn off the power while if childis attempts to use or approach this product. Close supervision is necessary for any appliancebeing used by or near children.9. Exposure to the panel at the steam outlet or the exposure to steam may lead to scalding. Pay attention to safety when put the garment steamer upside down.10. Beware high temperature steam while using this product. To minimize hazards of exposureto hot steam, please don't point the steamer to any person or pet when using this product.11. The product must be use under supervision or guidance of well knowledge personal, andstraightly forbidden as toy for children.12. Do not allow cord to touch hot surfaces. Let appliance cool completely before putting away. Loop cord loosely around appliance when storing.13. DO NOT use this product if the power cord is damaged, consult with manufacturer or the service provider, or local sales dealer.14. Please consult to local government for recycling by law, DO NOT dump this product into general waste!15. To reduce the risk of contact with hot water emitting from steam vents, check appliance before each use by holding it away from body and operating steam button.Save These InstructionsTo reduce the likelihood of circuit overload, do not operate another high wattage appliance onthe same circuit.If an extension cord is absolutely necessary, a (ampere rating of the appliance) ampere ratedcord should be used. Cords rated for less amperage may overheat. Care should be taken to arrange the cord so that the cord cannot be pulled or tripped over.Product schematic diagram1. Trouser clamp2. Fine hair brush3. Long hair brush4 14.Steam jet5. Switch6. Indicator576 27. Main machine8.Water tank 3 8 SpecificationsRated voltage: 110-120V~ Rated frequency: 60Hz Rated power: 860W Water tank capacity: 320mlWater filling1 2 3 4Disconnect power supply Counterclockwise turning Take out the water tank Remove the silicon plug5 6 7 8Fill up water in 80% full level Insert the silicon plug Direct the trigangle atClosewise turning for lockingthe lineNote:Normal tap water may be used for this product. However, if water hardness at yourarea is too high, limescale may quickly be generated. Therefore, it is recommendedto add distilled water in the tank to extend service life of the product. Don't add anycorrosive liquid or cleanser in water to avoid product damage.Start-upNote:To extend p roduct service life, water lacking shall be avoided! When the steam is insufficient, please pull off the power supply and add water.1 2324SInstall the water tank, Connect to power supply.Press the switch; the indicator will be on in red and then change to blue after 24s of preheating. Steam will be supplied automatically.counterclockwise turn the steam jet by 180 degrees.4 5Press the switch again; indicator off; no more steam out.Pull out the plug; work stops.Steaming operation1. Before using the garment steamer, add water in the water tank by the method specified above.2. Counterclockwise turn the steam jet by 180 degrees (see Fig. 1); connect to power supply andpress the switch to start steaming.3. During steaming, don't touch the steam jet. Keep it at least 20cm away from your body to avoid scalding.4. Don't direct steam at anybody.5. Before steaming, pull the garment straight to facilitate steaming. Garment with fewer wrinkles is relatively easy for steaming while more wrinkles require repeated steaming.6. This product is not suitable for plat or inverted steaming (see Fig. 2 and Fig. 4); move the steamjet up and down (see Fig. 5 and Fig. 7) to facilitate wrinkle removing.7. When moving the steam jet, pul l flat the garment for steaming gently to achieve better steaming effect.1 2 3 45 6 7Trouser clamp and brush installationNote: be sure to disconnect the power before trouser clamp and brush is attached or dismantling. Pay attention that the steam jet may still be very hot and you should wait it for cooling done before attach or remove any accessory. For accessory installing, pay attention to the direction to avoid blocking steam ejecting holes. The arrow on the accessory must be direct at the triangle on the steam jet. Maintain consistent direction.Trouser clampThe trouser clamp helps for steam penetration into thick fiber for quicker styling.Fine hair brushThe fine hair brush may remove static and fiber and hair on the garment.Direct card positions on both sides and press down. Installation completed. Direct card positions onInstallation completed.both sides and press down.Long hair brushThe long hair brush may remove dust and dirt. Don't apply the brush for gentle fabric, such as silk or satin.Fine hair brush Long hair brushDirect card positions onboth sides and press down.Installation completed.Cleaning and maintenanceNote: don't clean this product with steel wool, abrasive cleanser or corrosive liquid(such as alcohol, gasoline or acetone. It shall be cleaned by wet cloth and non-corrosiveliquid; wipe away sediments in the steam jet.Remove residual water in the tank completely. Wait for cooling of the machine beforeput it inside the package.1 2 31.5 hoursDisconnect power supply. Wait for cooling before cleaning(Wait for 1.5 hours for cooling) Remove sediments inthe steam jet.4 5Remove water completely. Pack in the carton.Fault analysisCommon faults Causes SolutionNo power connection Insert the plug into the socketPress the steam switch completelyFail to press the steam switch fullyWater level in the tank is too low The water tank is not properly placed Pull of the plug and add water in the tank Install the tank correctlyNo steam going outof the garment steamerThe machine is inversed thus leadingto the failure of water suctionUse the machine correctlyIf it is not the above reason, it maybe the fault of the machineSend to the repair department for repairWater ejecting when starts up the machineThis phenomenon will disappear after 24s ofpreheatingInadequate preheating timeWater ejecting in the midway Water out in little amount underpressureThis is the normal phenomenonWater pumping sound/ handle vibration of the garment steamer Vibration generated by the electricpumpThis is the normal phenomenonProduct Warranty CardPurchasing dateName/ unitTelephoneAddress(MM/DD/YY) FaxMachine No.CityModel E-mailRepair records- If you need services or information, please contact related distributors.- Warrant services will be provided only in the effective warranty term under normal using situation. In case of any fault due to the problem of the product rather than any artificial reason, warranty services may be enjoyed. The following situations are not in the warranty scope:1. Damage caused by disassembly by any one not undertaking the warranty services.2. Damage of the machine due to artificial reason.3. Damage caused by the failure to correctly use, maintain and repair the machine as per the operation manual.4. Damage caused by falling down, squeezing, water immersing and other personal mistake.5. Damage caused by flood, fire, lightning and other force majeure event.6. Damage accidentally caused by the purchaser.7. Please properly keep this warranty card which shall be provided in order to enjoy warranty services. The warranty card shall not be altered; otherwise, it will be invalid.。
挂烫机使用说明书

挂烫机使用说明书一、零部件说明:二、准备工作:裤缝夹安装:需要使用时,取出裤缝夹竖直置于烫头下端,将烫头的凸台插入裤缝夹支架口内,并扣紧,即可完成装配。
拆时反方向拔出。
如图1、2所示:毛刷的安装:需要使用毛刷时,取出该配件,先将毛刷底部的两个塑料扣位稳当扣住烫头底部台阶,然后将毛刷顶部的塑料扣位卡紧烫头顶部的凸台,即可完成装配,入1、2图所示:旋转式控制面板使用方法:1、接通电源后,顺时针旋转“旋钮”,主机进入工作状态;2、顺时针旋转“旋转”,档位依次增加。
选择最高档可以快速出蒸汽。
3、主机在工作状态时,逆时针旋转“旋钮”到“关”档,主机停止工作,进入关闭状态。
温馨提示:顺时针旋转“旋钮”到相应档位,主机启动,等待约40~60秒即有高温蒸汽从烫头出气孔喷出,可以随心所欲地进行衣物熨烫。
三、熨烫使用方法介绍:普通衣服熨烫时,可用手轻轻拉住衣物边沿,尽量将需要熨烫的部位铺平整,然后将烫头面板轻压在衣物表面上,缓慢移动烫头,使高温蒸汽充分渗入衣物纤维,达到熨平的效果(注意熨烫时不能长时间按压衣物一个地方不动,以免衣物受高热而变形)。
对于熨烫衣领和袋口等衣物小面积部位,推荐使用烫衣板,使用更方便,烫头按压更均匀。
裤线或袖线:可借助裤缝夹组件。
首先在烫头上安装该组件,使用时,按下裤缝夹扳手,使裤缝夹开口张开,同时夹住裤线或袖线两面,缓慢移动烫头对裤子或衣袖进行蒸汽熨烫,直至裤线或袖线显示达到要求。
四、清洁保养:·水箱清洁除垢操作:1、将主机的电源插头从插座上拔下来。
2、待机器冷却至室温后,提起水箱,旋开水箱盖,倒入清水(建议使用蒸馏水或过滤水),浸泡3-5分钟后,轻轻摇晃后倒出水箱中的水,旋紧水箱盖。
·主机清洁除垢操作:1、将主机的电源插头从插座上拔下来。
2、待机器冷却后,将导汽管从机身上拧下,将主机内的水从出汽口倒尽,在倒入清水(建议使用蒸馏水或过滤水),浸泡3-5分钟后,从出汽口排出即可。
苏泊尔聚能蒸汽挂烫机说明书(型号GT20Z07E-18)
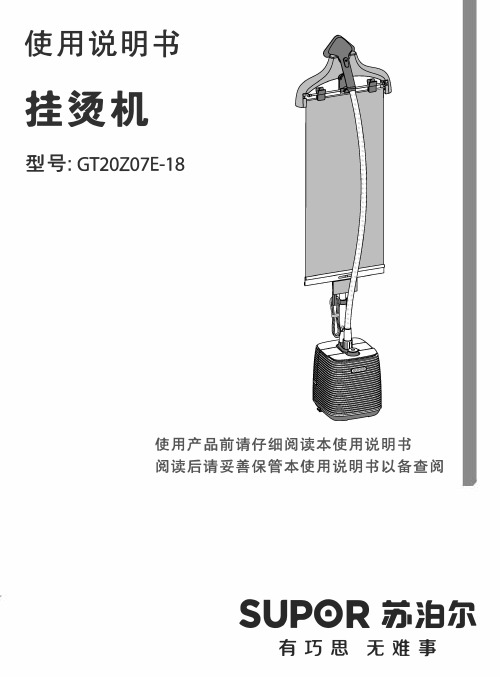
使用说明书
挂烫机
型号:GT20Z07E-18
使用产品前请仔细阅读本使用说明书
阅读后请妥善保管本使用说明书以备查阅
SUP0R苏泊尔
有巧思无难事
售后服务
提供一年的保修
苏泊尔挂烫机自购买日起提供一年保修服务,保修期的起始日期以所购产品的发票日期为准。
在家庭正常使用情况下,非人为导致的破裂或损坏,购买者可以带上保修卡、发票和损坏产品到苏泊尔特约维修点办理维修。
下列情况之一者,不属于免费维修范围:
•由千没按说明书上要求操作而造成的故隍;
•由千跌落、碰撞等人为而造成的故隐;
•由千自行装拆、修理而造成的故障;
• 由千意外、误用、乱用、故意损坏而造成的故障;
• 商业用途上造成的变色、擦伤、积垢或过热损坏等所造成的故障。
对于超过保修期或不属于免费维修的产品,本公司顾客服务部也会热情为您服务。
• 保修期外终身维修;
• 制造单位有改型的权利,恕不另行通知;
用户反馈
承蒙惠顾苏泊尔产品, 谨此致以谢意l我们本着 “用户满意” 的
宗旨, 为了更及时的为您提供维修、咨询等服务, 帮助您处理在使用
过程中遇到的问题,请填好意见反馈卡回执本公司顾客服务部,以便
建立用户服务档案。
如您遇到服务不周的情况,请拨打顾客服务部全
国服务热线, 我们将给予您满意的答复。
顾客服务部联系方式:
地址:浙江省杭州市高新技术产业区滨安路501号
邮编: 310052
电话:
网址:
服务网点联系方式如有变动,敬请查询苏泊尔集团 网站。
服务网点联系方式:敬请拨打全国服务热线
或登录苏泊尔网站查谪。
12。
美的手持蒸汽挂烫机说明书

广东美的环境电器制造有限公司
地址:广东省中山市东凤镇东阜路和穗工业园东区28号邮编:528425
网址: 版本号:1.0
TEL 400-8899-315
本资料上所有内容均经过认真核对,如有任何印刷错漏或内容上的误解,可向本公司咨询。
注:产品若有技术改进,会编进新版说明书中,恕不另行通知。
产品外观、颜色如有改动,以实物为准。
型号:YBD14E2
02
安装说明
准备工作1 挂好需熨烫的衣物
2 水箱加水
为了延长产品的使用寿命,建议使用纯净水或蒸馏水,并盖紧加水盖防止漏水。
3 开始熨烫
a.器具接通电源后,指示灯亮,充分预热约30秒。
b.充分加热后,请将出汽口朝向其他方向几秒钟,
再开始熨烫,刚开始蒸汽可能包含水滴。
水箱安装
水箱按键
1 按压水箱按键,即可取出水箱
提示
毛刷安装
毛刷扣入烫头: 毛刷上端的扣位扣紧烫头顶部的凸台,反向即可拆下。
在烫头冷却时,安装或拆卸毛刷,避免高温烫伤。
印刷:
C:90% M:20% Y:0 K:0文字:85%灰
产品线框图:80%灰
说明书尺寸及材质:
145*210MM 80克双胶纸。
philips GC628 GC629蒸汽挂烫机使用说明书

EN User manual SC 用户手册GC628 GC629Please read this instruction carefullybefore using the appliance.使用产品前请仔细阅读本使用说明书。
Please keep this instruction book for future reference.保留备用。
a Steamer headb Steam selectionc Steam triggerd Steam supply hosee Board tilting leverf Pole lock clipg Polesh Water tank release locki Water tank j Power button k Basel Wheelsm Board lock n Board cover o Boardp Hanger hook q Side docking r GloveEN SCa蒸汽喷头b 蒸汽选择按键c蒸汽开关d蒸汽输送管e可倾斜杆f 伸缩杆锁夹g 伸缩杆h水箱按键i水箱j 电源开关k 底座l 滚轮m 熨衣板锁n 熨衣板罩o熨衣板p 衣架钩q侧面喷头支架r 防烫手套48 1111EN Type of water to useT he appliance is suitable to be used with tap water. However, if you live in an area with hard water, we recommend thatyou mix an equal amount of tap water with distilled ordemineralized water.This will prevent fast scale build up and prolong the lifetime of the appliance.W arning: Do not use perfumed water, water from thetumble dryer, vinegar, starch, descaling agents, ironing aids,chemically descaled water or other chemicals, as they maycause water spitting, brown staining or damage to yourappliance.N ote: Do not fill the water tank beyond the MAXindicationSC所用水质类型本产品可使用自来水。
上海思嘉思达手持挂烫机使用说明

上海思嘉思达手持挂烫机使用说明
(原创版)
目录
1.产品简介
2.安装与设置
3.使用方法
4.注意事项
5.维护与保养
正文
【产品简介】
上海思嘉思达手持挂烫机是一款集便携、高效、安全于一体的熨烫设备,适合差旅、家居等各种场景使用。
该挂烫机采用高质量材料制造,具有出色的性能和稳定的运行,能够快速有效地熨平衣物。
【安装与设置】
在开始使用前,请先检查挂烫机各部件是否齐全,包括主机、水箱、喷头、电源线等。
将水箱加入适量水,注意不要超过最大水位线。
连接电源线并打开开关,此时挂烫机进入待机状态。
【使用方法】
1.将待熨衣物挂在熨衣架上,确保衣物平整无皱。
2.将喷头靠近衣物,按下蒸汽按钮,使蒸汽均匀喷射到衣物上。
3.沿衣物纹理方向缓慢移动喷头,使蒸汽充分渗透衣物,达到熨烫效果。
4.在熨烫过程中,可适时调整喷头角度和距离,以获得更好的熨烫效果。
【注意事项】
1.使用前请确保挂烫机处于良好状态,避免因设备故障导致的意外事故。
2.在使用过程中,请勿让儿童接触挂烫机,防止发生意外。
3.不要在易燃、易爆环境中使用挂烫机。
4.使用时请勿将喷头对着人,以免造成人身伤害。
【维护与保养】
1.使用完毕后,请将挂烫机电源关闭,并拔掉电源线。
2.将水箱中的余水倒掉,避免长时间存放导致水垢产生。
3.挂烫机表面可用湿布擦拭,但切勿将整机浸入水中清洗。
4.长期不使用时,请将挂烫机存放在干燥、通风的地方,避免阳光直射。
通过以上介绍,相信您已经对上海思嘉思达手持挂烫机的使用有了充分的了解。
- 1、下载文档前请自行甄别文档内容的完整性,平台不提供额外的编辑、内容补充、找答案等附加服务。
- 2、"仅部分预览"的文档,不可在线预览部分如存在完整性等问题,可反馈申请退款(可完整预览的文档不适用该条件!)。
- 3、如文档侵犯您的权益,请联系客服反馈,我们会尽快为您处理(人工客服工作时间:9:00-18:30)。
挂烫机使用说明书一、零部件说明:
二、准备工作:
裤缝夹安装:
需要使用时,取出裤缝夹竖直置于烫头下端,
将烫头的凸台插入裤缝夹支架口内,并扣紧,
即可完成装配。
拆时反方向拔出。
如图1、2
所示:
毛刷的安装:
需要使用毛刷时,取出该配件,先将毛刷底部
的两个塑料扣位稳当扣住烫头底部台阶,然后
将毛刷顶部的塑料扣位卡紧烫头顶部的凸台,
即可完成装配,入1、2图所示:
旋转式控制面板使用方法:
1、接通电源后,顺时针旋转“旋钮”,主机进入工作状态;
2、顺时针旋转“旋转”,档位依次增加。
选择最高档可以快速
出蒸汽。
3、主机在工作状态时,逆时针旋转“旋钮”到“关”档,主机
停止工作,进入关闭状态。
温馨提示:顺时针旋转“旋钮”到相应档位,主机启动,等待
约40~60秒即有高温蒸汽从烫头出气孔喷出,可以随心所欲地
进行衣物熨烫。
三、熨烫使用方法介绍:
普通衣服熨烫时,可用手轻轻拉住衣物边沿,尽
量将需要熨烫的部位铺平整,然后将烫头面板轻压
在衣物表面上,缓慢移动烫头,使高温蒸汽充分渗
入衣物纤维,达到熨平的效果(注意熨烫时不能长
时间按压衣物一个地方不动,以免衣物受高热而变
形)。
对于熨烫衣领和袋口等衣物小面积部位,推荐使用烫衣板,使用更方便,烫头按压更均匀。
裤线或袖线:可借助裤缝夹组件。
首先在烫头
上安装该组件,使用时,按下裤缝夹扳手,使裤
缝夹开口张开,同时夹住裤线或袖线两面,缓慢
移动烫头对裤子或衣袖进行蒸汽熨烫,直至裤线
或袖线显示达到要求。
四、清洁保养:
·水箱清洁除垢操作:
1、将主机的电源插头从插座上拔下来。
2、待机器冷却至室温后,提起水箱,旋开水箱盖,倒入清水(建议使用蒸馏水或过滤水),浸泡3-5分钟后,轻轻摇晃后倒出水箱中的水,旋紧水箱盖。
·主机清洁除垢操作:
1、将主机的电源插头从插座上拔下来。
2、待机器冷却后,将导汽管从机身上拧下,将主机内的水从出汽口倒尽,在倒入清水(建议使用蒸馏水或过滤水),浸泡3-5分钟后,从出汽口排出即可。
五、异常现象自检:
现象原因排除方法
开机后挂烫机不工作未插电源插头。
插上电源插头。
家庭电路故障或保险丝烧断。
请专业人员检查、维修。
产品电路故障。
请专业人员检查、维修。
开机后挂烫机工作,但没有蒸汽出水箱没水或水太少。
给水箱加水。
内部蒸汽通道弯折或脱开。
请专业人员检查、维修。
发热盘损坏。
请专业人员检查、维修。
烫头滴水蒸汽冷凝,属正常现象。
使用时,提起烫头垂直拉直导气管,
并抖动烫头几下。
发热盘损坏。
请专业人员检查、维修。
产品放置在较高的台面上,例如桌子或椅子上。
将产挂烫机置在地面上。
工作时,有“咕噜”声音导气管处于U形状是,有蒸汽凝结在导气管内。
使用时,提起烫头垂直拉直汽管,并
动烫头几下。
挂烫机放置在较高的台面上,例如桌子或椅子
上。
将挂烫机放置在地面上。
除烫头除外,其他部位有出汽现象密封件损坏。
请专业人员检查、维修。
挂衣杆组件上德固定夹有助于固定裤子,以便在熨烫
时完全拉直。
由于熨烫蒸汽温度较高,熨烫时建议佩戴手套,使用更安全。