施耐德安全控制器选项手册
2024施耐德ModiconM340编程手册pdf

施耐德ModiconM340编程手册pdf•ModiconM340概述•编程基础•数据处理与运算•程序流程控制目•系统功能实现•调试与故障诊断录ModiconM340概述01Modicon M340是施耐德电气推出的一款高性能可编程逻辑控制器(PLC)。
它采用了先进的处理器技术和丰富的功能模块,适用于各种工业自动化应用。
Modicon M340具有良好的可扩展性和灵活性,可以满足不同规模和复杂度的控制需求。
高速处理能力Modicon M340采用了高性能的处理器,具有快速的数据处理和执行速度。
丰富的功能模块提供了多种功能模块,包括数字量输入/输出、模拟量输入/输出、高速计数器等,可以满足各种控制需求。
强大的通信能力支持多种通信协议,如Modbus、Ethernet/IP、Profinet等,可以与其他设备进行高效的数据交换。
易于编程和调试提供了直观的编程软件和调试工具,使得用户可以轻松地进行程序编写和调试。
制造业能源与基础设施楼宇自动化物流与仓储ModiconM340应用领域Modicon M340广泛应用于各种制造业领域,如机械制造、汽车制造、食品加工等。
Modicon M340也常用于楼宇自动化系统中,如空调控制、照明控制、安防系统等。
适用于电力、水务、燃气等能源与基础设施领域,可以实现设备的自动化监控和控制。
在物流与仓储领域,Modicon M340可以实现货物的自动化搬运、分拣和存储等功能。
编程基础02施耐德Modicon M340 PLC支持多种编程语言,包括梯形图(LD)、指令表(IL)、顺序功能图(SFC)、结构化文本(ST)和函数块图(FBD)。
梯形图(LD)是一种图形化编程语言,直观易懂,适用于简单的逻辑控制。
指令表(IL)是一种类似于汇编语言的文本编程语言,适用于复杂的算法和数据处理。
顺序功能图(SFC)是一种描述顺序控制流程的图形化编程语言,适用于复杂的顺序控制系统。
结构化文本(ST)是一种高级文本编程语言,适用于复杂的数学计算和数据处理。
施耐德PLC Modicon M218可编程控制器选型指南

Modicon M218可编程控制器机器控制的小超人——基于SoMachine软件平台选型指南施耐德电气在中国1987年,施耐德电气在天津成立第一家合资工厂梅兰日兰,将断路器技术带到中国,取代传统保险丝,使得中国用户用电安全性大为增强,并为断路器标准的建立作出了卓越的贡献。
90年代初,施耐德电气旗下品牌奇胜率先将开关面板带入中国,结束了中国使用灯绳开关的时代。
施耐德电气的高额投资有力地支持了中国的经济建设,并为中国客户提供了先进的产品支持和完善的技术服务,中低压电器、变频器、接触器等工业产品大量运用在中国国内的经济建设中,促进了中国工业化的进程。
目前,施耐德电气在中国共建立了77个办事处,26家工厂,6个物流中心,1个研修学院,3个研发中心,1个实验室,500家分销商和遍布全国的销售网络。
施耐德电气中国目前员工数近22,000人。
通过与合作伙伴以及大量经销商的合作,施耐德电气为中国创造了成千上万个就业机会。
施耐德电气 能效管理平台全球能效管理专家施耐德电气为世界100多个国家提供整体解决方案,其中在能源与基础设施、工业过程控制、楼宇自动化和数据中心与网络等市场处于世界领先地位,在住宅应用领域也拥有强大的市场能力。
致力于为客户提供安全、可靠、高效的能源,施耐德电气2010年的销售额为196亿欧元,拥有超过110,000名员工。
施耐德电气助您——善用其效,尽享其能!施耐德电气善用其效 尽享其能凭借其对五大市场的的深刻了解、对集团客户的悉心关爱,以及在能效管理领域的丰富经验,施耐德电气从一个优秀的产品和设备供应商逐步成长为整体解决方案提供商。
今年,施耐德电气首次集成其在建筑楼宇、IT 、安防、电力及工业过程和设备等五大领域的专业技术和经验,将其高质量的产品和解决方案融合在一个统一的架构下,通过标准的界面为各行业客户提供一个开放、透明、节能、高效的能效管理平台,为企业客户节省高达30%的投资成本和运营成本。
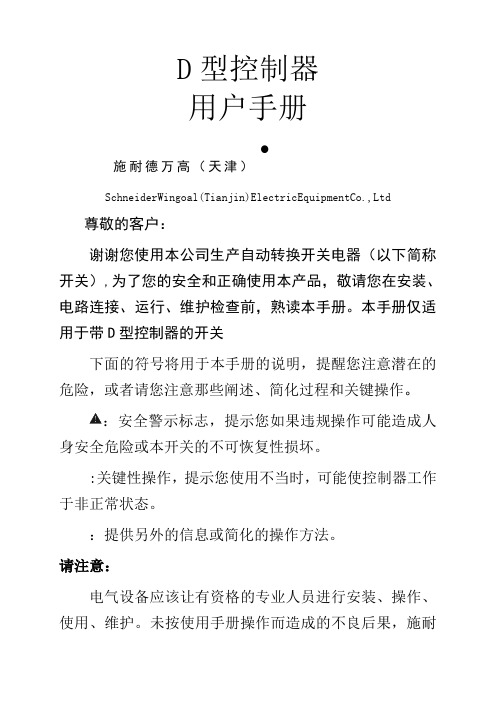
施耐德万高D型控制器使用说明-
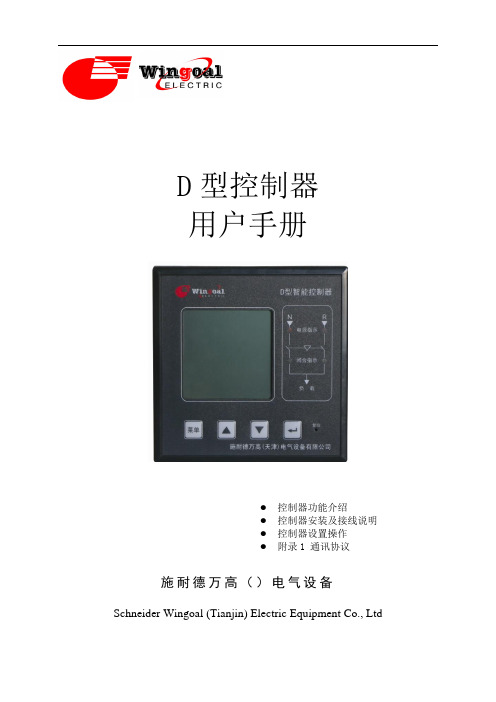
D 型控制器 用户手册施耐德万高()电气设备Schneider Wingoal (Tianjin) Electric Equipment Co., Ltd● 控制器功能介绍● 控制器安装及接线说明 ● 控制器设置操作 ●附录1 通讯协议下面的符号将用于本手册的说明,提醒您注意潜在的危险,或者请您注意那些阐述、简化过程和关键操作。
:安全警示标志,提示您如果违规操作可能造成人身安全危险或本开关的不可恢复性损坏。
: 关键性操作,提示您使用不当时,可能使控制器工作于非正常状态。
:提供另外的信息或简化的操作方法。
请注意:电气设备应该让有资格的专业人员进行安装、操作、使用、维护。
未按使用手册操作而造成的不良后果,施耐德电气公司将不负任何责任。
控制器功能介绍本控制器工作电压为AC380V,工作频率为50Hz,主要功能是进行电压采集,根据电压的实时值进行故障判断(三相断相、欠压、过压和失压),并控制转换开关进行相应的转换动作。
用户还可根据实际需要选配电流模块实现实时电流、有功功率和有功电能的显示。
另外,控制器提供多组无源节点的输入和输出,包括故障输出、负荷卸载、发电机启动、动作无源输出、远程投备(无源输入)、消防联动(无源输入)以及通讯接口,具体接线参见第2.2节。
控制器安装及接线说明1.1.控制器外形尺寸图1 D型控制器外形尺寸1.2. 控制器二次接线1.2.1. 控制器端子说明1.2.2. A1-A3备A4-D2,A5-RJ,A6-OUT,A7-D3,A8-D1,A9-NJ,A10-12,主 A2A3A4A5A6A7A8A9A10A11A12OUTB1B2B3B4B5B6B7B8B9B10B11B12故障输出负荷卸载主转备备转主发电机启动C1C2C3C4C5C6C7C8C9C10空D3NBRB空远程投备消防联动D1D2D3D4D5D6D7D8D9D10D11D12ABA`B`G空IC*IB*IA*动作输出RS485IC IB IA☐动作输出:当机构中电机转动时,常开触点闭合; ☐ 故障输出:当常用或备用电源故障时,常开触点闭合;☐ 负荷卸载:在电网-发电机模式下,常用电源故障,常开触点闭合;☐发电机启动:在电网-发电机模式下,常用电源正常,常开触点闭合,常用电源故障,常开触点打开;☐ RS485:通信用端口,A’ B’为通信预留端口;☐ IA~IC :电流互感器输入端口I*为输入端,I 为输出端;(输入额定电流5A ) ☐ 远程投备(无源):短接此两点,机构转到备用位置,开关状态主分备合;(可靠距离10m) ☐ 消防联动(无源):短接此两点,机构转到双分位置,开关状态主分备分;(可靠距离10m,WTS-D800~5000系列不具备该项功能): 控制器的发电机启动端子在常用电源正常时常闭触点断开,当常用电源故障时常闭触点闭合以接通发电机启动电路;常开触点与之相反,请用户注意。
施耐德万高ATMT说明书

ATMT自动电源转换系统用户手册下面的符号将用于本手册的说明,提醒您注意潜在的危险,或者请您注意那些阐述、简化过程和关键操作。
开关的不可恢复性损坏。
X: 关键性操作,提示您使用不当时,可能使控制器工作于非正常状态。
请注意:电气设备应该让有资格的专业人员进行安装、操作、使用、维护。
未按使用手册操作而造成的不良后果,施耐德电气公司将不负任何责任。
目录一、控制器介绍 (1)1. 符合标准 (1)2. 污染等级 (1)3. 抗湿热等级 (1)4. 电磁兼容性 (1)5. 安装与操作指南 (1)6. 安全信息 (1)7. 控制器类型 (1)二、控制器操作及参数设置 (3)1. 2A/2B控制器面板介绍 (3)2. 3A/3B控制器面板介绍 (4)3. 显示及设置 (5)三、控制器端子说明 (11)四、安装及接线 (12)1. 控制器外形及安装尺寸 (12)2. 适配器外形及安装尺寸 (13)3. 适配器与开关接线图 (15)4. 2A/2B整体安装图 (16)5. 3A/3B整体安装图 (17)一、控制器介绍1.符合标准•GB14048.1-2006 低压开关设备和控制设备:总则•GB14048. 2-2008 低压开关设备和控制设备:断路器•GB/T14048.11-2008 低压开关设备和控制设备:多功能电器转换开关电器•IEC60947:2005 Low-voltage switchgear and controlgear•IEC60947-2:2005 Low-voltage switchgear and controlgear: Breakers•IEC60947-6-1:2005 Low-voltage switchgear and controlgear: Multiple function equipment- Transfer switching equipment2.污染等级•Level33.抗湿热等级A TMT已通过下列标准所规定的严格环境条件下的试验•IEC60068-2-1 干冷环境(-5℃)•IEC60068-2-1 干热环境(+40℃)•IEC60068-2 低温4.电磁兼容性•辐射等级B级执行标准GB4824(CISPR11)•静电放电空气放电Level3;接触放电Level2 执行标准GB1 7626.2-2006(IEC61000-4-2)•射频电磁场LE VEL3 执行标准GB1 7626. 3-2006 (IEC61000-4-3)和GB1 7626.6-2006 (IEC61000-4-6)•电快速瞬变脉冲群LE VEL3 执行标准GB1 7626.4-2008 (IEC61000-4-4)•浪涌LE VEL3 执行标准GB1 7626. 5-2008 (IEC61000-4-5)5.安装与操作指南即使控制单元处于待机状态,在手动操作断路器前需要将其断电,它可能在没有任何警告的情况下操作断路器。
施耐德 DISPLAY ONE 真空压力表控制器使用手册说明书

Catalog No.230001Vacuum Gauge ControllerInstruction Manual GA09034_002_C0ONEDISPLAY0. Contents0.Contents 30.1List of Figures 50.2List of Tables 51.Description 61.1Validity 6 1.1.1Catalog Number 6 1.1.2Nameplate 61.2Conforming Utilisation 61.3Assuming of Responsibility and Warrenty 71.4Transport Damages 72.Safety 82.1General 82.2Signs and Symbols 82.3Basic Safety Regulations 83.General Description 93.1General Functional Characteristics 93.2Applicable Sensors 94.Technical Data 104.1General Data 10 4.1.1Mechanical Data 10 4.1.2Environment 10 4.1.3Standards 11 4.2Mains Connection 114.3Measuring Channel 11 4.3.1Sensor Powering 12 4.3.2Measuring Technique 12 4.4Switching Function 124.5Analog Output 125.Installation 135.1Supplied Equipment 135.2Mechanical Installation 13 5.2.1Rack Installation 13 5.2.2Panel Mounting 13 5.2.3Benchtop Instrument 14 5.3Connections 14 5.3.1Rear of the Instrument 14 5.3.2Mains Connection 14 5.3.3Input 155.3.4Analogue Output and Relay Output 156.Operation 16 6.1Front Panel 16 6.2Display 16 6.3Switching On and Switching OFF 16 6.3.1Switching On 16 6.3.2Switching Off 17 6.4Operation Modes 17 6.5Measurement Mode 17 6.5.1Selection 17 6.5.2Description 17 6.6Parameter Mode 18 6.6.1Selection 18 6.6.2Description 18 6.6.3Mass Unit 18 6.6.4Display Format 18 6.6.5Pirani Range Extension 197.Maintenance and Servicing 20 7.1Maintenance 20 7.1.1General Maintenance Advices 20 7.2Troubleshooting 20 7.2.1Trouble Indication and Error Messages 20 7.2.2Help in Case of Malfunctions 20 7.2.3Exchange of fuses 20 7.2.4Repair 208.Shelving and Waste Disposal 21 8.1Packaging 21 8.2Shelving 21 8.3Waste Disposal 21Annex 1 - EU Declaration of Conformity 22 Annex 2 - Declaration of Contamination 230.1 List of FiguresFigure 1 –Nameplate (example) 6 Figure 2 –Dimensions DISPLAY ONE (mm) 10 Figure 3 – Rear oft the instrument 14 Figure 4 – Connector for Sensor (RJ45) 15 Figure 5 – Connection for Analogue Output and Relay Output 15 Figure 6 – Front Panel 16 0.2 List of TablesTable 1 –Part numbers 6 Table 2 –Applicable Sensors 9 Table 3 –Supplied equipment 13 Table 4 – Display Structure and Description 16 Table 5 – Display of the Measuring Mode 17 Table 6 – Parameter Mass unit 18 Table 7 – Parameter Display Format 18 Table 8 –Parameter Pirani Range Extension 19 Table 9 – Error Messages 201.Description1.1 Validity1.1.1Catalog NumberThis document is valid for the following products:Table 1 – Part numbers1.1.2NameplateA nameplate is located on the bottom side of the instrument. When communicating with Leybold GmbH, the information on the nameplate will be needed. For this reason enter the information here:Figure 1 – Nameplate (example)1.2Conforming UtilisationThe DISPLAY ONE is a display and operating unit for sensors with an analogue or digital interface of the company Leybold GmbH.The single channel unit is used in combination with the sensors from the series THERMOVAC and PENNINGVAC as well as DU sensors for the measurement of pressures above and below atmospheric pressures (vacuum).Operate all connected sensors in agreement with the information given in the corresponding Operating Instructions.1.3 Assuming of Responsibility and WarrentyLeybold GmbH will not assume any responsibility or warranty in case the operator or third persons∙do not observe the information given in this document.∙do not use the product as intended.∙modify the product in any way (conversions, repair work etc).∙operate the product with accessories not listed in the corresponding product documentation.Subject to technical alterations without prior notice. The figures are not binding.1.4 Transport Damages∙Examine the shipping package as to any external damage.∙In case any damage is determined, file a damage report to the forwarding agent and the insurer.∙Retain the packaging material since damages can only be claimed when returning the instrument in the original packaging of the manufacturer.∙Examine the delivery to ensure that it is complete.∙Examine the instrument as to any visually apparent damage.2. Safety2.1 GeneralThe DISPLAY ONE is supplied ready for operation. Even so, we recommend that you carefully read these Operating Instructions so as to ensure optimum operating conditions right from the start.These Operating Instructions contain important information on the functions, installation, commissioning, operation and troubleshooting of the DISPLAY ONE.2.2 Signs and SymbolsImportant instructions relating to technical safety and safe operation are emphasised by symbols.2.3 Basic Safety RegulationsDuring all work like installation, maintenance and repair activities, comply with the pertinent safety regulations.3. General Description3.1 General Functional CharacteristicsThe DISPLAY ONE is a display and operating unit for sensors with an analogue or digital interface of the company Leybold GmbH.The single channel unit is used in combination with the sensors from the series THERMOVAC and PENNINGVAC as well as DU sensors for the measurement of pressures above and below atmospheric pressures (vacuum).3.2 Applicable SensorsThe following sensors can be operated with the DISPLAY ONE:Table 2 –Applicable Sensors4. Technical Data4.1 General Data4.1.1 Mechanical DataDimensions: Width: 106.0 mm (1/4 19“)Height: 84.5 mm (2 HE)Depth: 108.0 mmWeight: 0.5 kgBuild-in depth: ca. 170 mm (including connected plug) Application: Rack installationPanel mountingBenchtop instrumentFigure 2 –Dimensions DISPLAY ONE (mm)4.1.2 EnvironmentTemperature: Storage: -20 – +60 °COperation: +5 – +50 °C (sea level)+5 – +30 °C (2000 m above sea level) Relative humidity of the air: max. 80 % (to 30 °C)decreasing to max. 50 % (over 40 °C)Usage : indoors (altitude 2000 m above sea level) Contamination class: IIProtection class: IP204.1.3 Standards∙Conformity with respect to Low Voltage Directive 2014/35/EU∙Conformity with respect to EMC Directive 2014/30/EU∙Conformity with respect to RoHS Directive 2011/65/EUInternational/national standards as well as specifications:∙DIN EN 61010-1 (2011)(Safety requirements for electrical equipment for measurement, control andlaboratory use).∙DIN EN 61326-1 (2013)(Electrical equipment for measurement, control and laboratory use – EMCrequirements. Industrial interference immunity; electromagnetic emissions household sector Class B).4.2 Mains ConnectionVoltage: 100 – 240 VACFrequency: 50/60 HzDevice fuses: 2 x T1.6A HPower consumption:max. 6.5 WCurrent consumption: 0.2 – 0.1 A max.Overvoltage category: IIProtection class: 1Connection: Rubber connector IEC 320 C144.3 Measuring ChannelNumber:1Connection: RJ45 (FCC 68)Applicable sensors: THERMOVAC TTR81NTTR90 / TTR91 / TTR91NTTR96S / TTR96SNTTR211 / TTR216STTR911 / TTR911NTTR916 / TTR916NTHERMOVAC TTR100 / TTR100S2TTR101 / TTR101NTTR101S2 / TTR101S2NPENNINGVAC PTR82NPTR90 / PTR90NDU sensor DU200 / DU201DU2000 / DU2001DU relativepressure sensor DU2001 rel.4.3.1 Sensor PoweringVoltage: +24 VDC ±5 %Current: max. 100 mAFuse protection: 200 mA, self-resettingPower feeding complies with the requirements of a safety extra-low voltage (SELV-E in accordance with EN 61010).4.3.2 Measuring TechniqueMeasuring ranges: Sensor dependent (max. 2000 –5∙10-9 mbar) Measuring rate: 50 s-1Display rate: 4 s-1Units of measuring: mbar, Pa, Torr4.4 Switching FunctionType of contact: C hangeover contact, potential-freeLoad (resistive): Switching current: max. 1 ASwitching voltage: max. 30 VAC / 60 VDCService life: Mechanical: 107 actuationsElectrical: 104 actuations at maximum load Connection: Plug-in terminals, Screw terminals4.5 Analog OutputNumber: 1Voltage range:0 – 10V DCDeviation from the displayedValue : ± 0,1%Internal resistance:100OhmRelation betweenvoltage and pressure: sensor dependentConnection: Plug-in terminals, Screw terminals5. Installation5.1 Supplied EquipmentTable 3 –Supplied equipment5.2 Mechanical InstallationThe DISPLAY ONE can be used as follows:∙Rack installation∙Front panel installation∙Benchtop instrument5.2.1 Rack InstallationThe DISPLAY ONE is designed for being installed into a rack according (19", 2 HU).∙Affix the sub rack within the rack∙Insert the DISPLAY ONE into the sub rack∙Affix the DISPLAY ONE with 4 M2.5 screws with the instrument5.2.2 Panel MountingWhen wanting to install the instrument in a front panel, the following panel cut is required ( Figure 2, page 10):∙Insert the DISPLAY ONE into the cut-out∙Affix the instrument with 4 M2.5 screws5.2.3 Benchtop InstrumentWhen wanting to use the DISPLAY ONE as bench top instrument, please proceed as followed:∙ Push one of the two edge protection rubber pieces included in the delivery over the topedge of the front panel∙ Place the DISPLAY ONE on its back∙ Push the second edge protection rubber piece included in the delivery onto the bottomedge of the front panel∙ Stick the two rubber feet included in the delivery onto the bottom of the housing. ∙ Turn the DISPLAY ONE over again and move it to the desired place.5.3 Connections5.3.1Rear of the InstrumentFigure 3, page 14 shows the rear of the DISPLAY ONE. The pin assignment of the individual connections is described in the following chapters.Figure 3 – Rear of the instrumentA Mains connection with mains switch and device fusesB Connection for sensor (☞ Figure 4, p age 15)C Connection for relay output and analogue output (☞ Figure 5, page 15)D Configuration switch5.3.2Mains ConnectionThe mains connection on the rear of the instrument (☞ Figure 3, A, page 14) is intended for a mains cord which on the instrument side has been fitted with a rubber connector.5.3.3InputThe connector Input (☞ Figure 3, B, page 14 and Figure 4, page 15) is designed for the connection of a sensor (☞ Chapter 3.2 Applicable Sensors, page 9). For the measuring channel an 8-pole RJ45 socket is available.Figure 4 – Connector for Sensor (RJ45)1+24 V 2 Ground 3 Signal4Ident resistor5 Signal ground6 Ground7 free8Status SPConnecting:∙ Connect the sensor using a shielded 1:1-cable to the connector Input on the rear of theDISPLAY ONE.5.3.4Analogue Output and Relay OutputThe connection (☞ Figure 3, C, page 14 and Figure 5, page 15) contains the analogue output of the sensor and if at the sensor available, its relay output.Figure 5 – Connection for Analogue Output and Relay Output (Plug-in terminals, Screw terminals)NO SP Normally open contact (NO) Com SP Central contact (COM)NC SP Normally close contact (NC) Rec Analogue signal 0 – 10 VDC ┴ Analogue groundConnecting:∙ Connect the peripheral components using a shielded cable.6. Operation6.1 Front PanelFigure 6, page 16 shows the front panel of the DISPLAY ONE.A Display of measuring value and statusmessageB Display unit and Set point status6.2 DisplayTable 4 – Display Structure and Description6.3 Switching On and Switching OFF6.3.1 Switching On∙Switch the instrument on through its main switch.After switching on the DISPLAY ONE will operate the following:∙Self test∙Display test∙Display of the used software version∙Identify sensor∙Activate the measurement mode6.3.2 Switching OffSwitch the instrument off through its main switch.6.4 Operation ModesThe DISPLAY ONE may be operated in the following modes:Measurement ModeThe measuring mode is the standard operating mode. Here the measured values of the sensors are displayed. ☞ Chapter 6.5 Measurement Mode, page 17Parameter ModeIn the parameter mode you have the possibility of changing over the configuration switch at the rear of instrument different parameters of the DISPLAY ONE. ☞Chapter 6.6 Parameter Mode, page 186.5 Measurement Mode6.5.1 SelectionAfter switching on the DISPLAY ONE it will automatically run the measuring mode.6.5.2 DescriptionThe measuring mode is the standard mode of operation. Here the measured values of the sensors are indicated. If no measured values can be indicated, a status message is spent (☞ Table 5, page 17).If no sensor is attached at the measuring channel, noSEn indicated. This status message expires after 30 seconds.Table 5 – Display of the Measuring Mode6.6 Parameter Mode6.6.1 SelectionThe selection of the parameters is made by the configuration switch ( Figure 3, D, page 14) on rear of the DISPLAY ONE. Proceed in addition as follows:∙Switch the instrument off∙Set the DIP switches as requiered∙Switch the unit on once more6.6.2 DescriptionOver the configuration switch with DIP switches 1 and 2 the mass unit is stopped as well as selected with DIP switch 3 between two or three-figure measured value announcement. With DIP switch 4 the measuring range extension for the THERMOVAC sensors is activated. 6.6.3 Mass UnitThe mass unit is stopped over the DIP switches 1 and 2 of the configuration switch.Table 6 – Parameter Mass unit∙Configure the mass unit according to the Table 6 on page 18 .6.6.4 Display FormatThe display format is stopped over the DIP switch 3 of the configuration switch.Table 7 – Parameter Display Format∙Configure the display format according to the Table 7 on page 18.6.6.5 Pirani Range ExtensionThe Pirani range extension for the THERMOVAC sensors is activated with DIP switch 4.Table 8 –Parameter Pirani Range ExtensionActivate the Pirani range extension for the THERMOVAC sensors according to the Table8 on page 19.7. Maintenance and Servicing7.1 Maintenance7.1.1 General Maintenance AdvicesFor external cleaning please only use a dry piece of cotton cloth. Do not use any aggressive or abrasive cleaning agents.7.2 Troubleshooting7.2.1 Trouble Indication and Error MessagesA malfunction within the DISPLAY ONE is shown by an error message on the display (☞Table 9, page 20).Table 9 – Error Messages7.2.2 Help in Case of MalfunctionsIf the malfunction persists even after having replaced the sensor, please get in touch with your nearest Leybold GmbH Service Centre.7.2.3 Exchange of fusesUse for the exchange of defective device fuses exclusively the fuse type T1.6A H indicated on the rear site of controller. The both device fuses you can find in the fuse holder of mains connection (☞ Figure 3, A, page 14), which can be pried off with a small screwdriver. 7.2.4 RepairDefective products must be sent to your nearest Leybold Service Centre for repair. The Leybold GmbH cannot assume any responsibility or warranty if the operator or third persons do repair work on the DISPLAY ONE.8. Shelving and Waste Disposal8.1 PackagingPlease keep the original packaging. You will need this packaging in case of storing the DISPLAY ONE or shipping to the Leybold GmbH.8.2 ShelvingThe DISPLAY ONE must only be stored in dry room. During storage, the following ambient conditions need to be maintained:∙Ambient temperature: -20 – +60 °C∙Humidity of the air: As low as possible.Preferably in a sealed plastic bag with desiccant.8.3 Waste DisposalRegarding waste disposal the branch specific and local waste disposal and environment protection regulation for systems and electronics components are valid.In case of return Leybold GmbH will execute the professional resource separation and disposal.GA09034_002_C0 – 09/20162117200001_002_& © LeyboldDeclaration of Contamination of Compressors, Vacuum Pumps and ComponentsThe repair and / or servicing of compressors, va cuum pumps and components will be carried out only if a correctly completed de claration has been submitted. Non-completion will result in delay. The manufacturer can refuse to accept any equipment without a declaration. A separate declaration has to be completed for each single component. This declaration may be completed and signed only by authorized and qualified staff.D. Legally binding declarationI / we hereby declare that the information supplied on this form is accurate and sufficient to judge any contamination level.Date signature of authorized personHeadquarterLeybold GmbHBonner Strasse 498D-50968 CologneT: +49-(0)221-347-0F: +49-(0)221-347-1250****************GermanyLeybold GmbH Sales, Service, Support Center (3SC)Bonner Strasse 498D-50968 Cologne T: +49-(0)221-347 1234F: +49-(0)221-347 31234*****************Leybold GmbH Sales Area North Branch Office Berlin Industriestrasse 10b D-12099 Berlin T: +49-(0)30-435 609 0F: +49-(0)30-435 609 10********************Leybold GmbH Sales Office South Branch Office Munich Karl-Hammerschmidt-Strasse 34D-85609 Aschheim-Dornach T: +49-(0)89-357 33 9-10F: +49-(0)89-357 33 9-33******************************************Leybold Dresden GmbH Service Competence Center Zur Wetterwarte 50, Haus 304D-01109 Dresden Service:T: +49-(0)351-88 55 00F: +49-(0)351-88 55 041*******************EuropeBelgiumLeybold Nederland B.V .Belgisch bijkantoor Leuvensesteenweg 542-9A B-1930 Zaventem Sales:T: +32-2-711 00 83F: +32-2-720 83 38********************Service:T: +32-2-711 00 82F: +32-2-720 83 38**********************FranceLeybold France S.A.S.Parc du Technopolis, Bâtiment Beta 3, Avenue du Canada F-91940 Les Ulis cedex Sales and Service:T: +33-1-69 82 48 00F: +33-1-69 07 57 38*****************************************Leybold France S.A.S.Valence Factory 640, Rue A. Bergès B.P . 107F-26501 Bourg-lès-Valence Cedex T: +33-4-75 82 33 00F: +33-4-75 82 92 69************************Great Britain Leybold UK LTD.Unit 9Silverglade Business Park Leatherhead Road Chessington Surrey (London)KT9 2QL Sales:T: +44-13-7273 7300F: +44-13-7273 7301********************Service:T: +44-13-7273 7320F: +44-13-7273 7303**********************Italy Leybold Italia S.r.l.Via Trasimeno 8I-20128 Mailand Sales:T: +39-02-27 22 31F: +39-02-27 20 96 41********************Service:T: +39-02-27 22 31F: +39-02-27 22 32 17**********************Netherlands Leybold Nederland B.V .Floridadreef 102NL-3565 AM Utrecht Sales and Service:T: +31-(30) 242 63 30F: +31-(30) 242 63 31******************************************Switzerland Leybold Schweiz AG, Pfäffikon Churerstrasse 120CH-8808 Pfäffikon Warehouse and shipping address:Riedthofstrasse 214CH-8105 Regensdorf Sales:T: +41-44-308 40 50F: +41-44-302 43 73********************Service:T: +41-44-308 40 62F: +41-44-308 40 60**********************Spain Leybold Spain, S.A.C/. Huelva, 7E-08940 Cornellà de Llobregat (Barcelona)Sales:T: +34-93-666 43 11F: +34-93-666 43 70********************Service:T: +34-93-666 46 11F: +34-93-685 43 70**********************America USA Leybold USA Inc.5700 Mellon Road USA-Export, PA 15632T: +1-724-327-5700F: +1-724-325-3577*******************Sales:T: +1-724-327-5700F: +1-724-333-1217Service:T: +1-724-327-5700F: +1-724-325-3577Brazil Leybold do Brasil Rod. Vice-Prefeito Hermenegildo Tonolli,nº. 4413 - 6B Distrito Industrial Jundiaí - SP CEP 13.213-086Sales and Service:T: +55 11 3395 3180F: +55 11 99467 5934******************************************Asia P . R. China Leybold (Tianjin)International Trade Co. Ltd.Beichen Economic Development Area (BEDA),No. 8 Western Shuangchen Road Tianjin 300400China Sales and Service:T: +86-22-2697 0808F: +86-22-2697 4061F: +86-22-2697 2017******************************************India Leybold India Pvt Ltd.No. 82(P), 4th Phase K.I.A.D.B. Plot Bommasandra Industrial Area Bangalore - 560 099Indien Sales and Service:T: +91-80-2783 9925F: +91-80-2783 9926********************************************Japan Leybold Japan Co., Ltd.Headquarters Shin-Yokohama A.K.Bldg., 4th floor 3-23-3, Shin-Yokohama Kohoku-ku, Yokohama-shi Kanawaga 222-0033Japan Sales:T: +81-45-471-3330F: +81-45-471-3323********************Leybold Japan Co., Ltd.Tsukuba Technical Service Center 1959, Kami-yokoba Tsukuba-shi, Ibaraki-shi 305-0854Japan Service:T: +81-29 839 5480F: +81-29 839 5485***********************Malaysia Leybold Malaysia Leybold Singapore Pte Ltd.No. 1 Jalan Hi-Tech 2/6Kulim Hi-Tech Park Kulim, Kedah Darul Aman 09000Malaysia Sales and Service:T: +604 4020 222F: +604 4020 221******************************************South Korea Leybold Korea Ltd.3F . Jellzone 2 Tower Jeongja-dong 159-4Bundang-gu Sungnam-si Gyeonggi-do Bundang 463-384, Korea Sales:T: +82-31 785 1367F: +82-31 785 1359********************Service:623-7, Upsung-Dong Cheonan-Si Chungcheongnam-Do Korea 330-290T: +82-41 589 3035F: +82-41 588 0166**********************Singapore Leybold Singapore Pte Ltd.8 Commonwealth Lane #01-01Singapore 149555Singapore Sales and Service:T: +65-6303 7030F: +65-6773 0039******************************************Taiwan Leybold Taiwan Ltd.No 416-1, Sec. 3Chunghsin Rd., Chutung Hsinchu County 310Taiwan, R.O.C.Sales and Service:T: +886-3-500 1688F: +886-3-583 3999******************************************Sales and Service。
施耐德m241-m251选型手册
Modicon M241/M251可编程控制器产品目录2014施耐德电气在中国1987年,施耐德电气在天津成立第一家合资工厂梅兰日兰,将断路器技术带到中国,取代传统保险丝,使得中国用户用电安全性大为增强,并为断路器标准的建立作出了卓越的贡献。
90年代初,施耐德电气旗下品牌奇胜率先将开关面板带入中国,结束了中国使用灯绳开关的时代。
施耐德电气的高额投资有力地支持了中国的经济建设,并为中国客户提供了先进的产品支持和完善的技术服务,中低压电器、变频器、接触器等工业产品大量运用在中国国内的经济建设中,促进了中国工业化的进程。
目前,施耐德电气在中国共建立53个办事处,30家工厂,8个物流中心,1 个研修学院,3个主要研发中心,1000多名研发工程师,1 个实验室,1 所能源大学,700多家分销商和遍布全国的销售网络。
施耐德电气中国目前员工数近28,000人。
通过与合作伙伴以及大量经销商的合作,施耐德电气为中国创造了成千上万个就业机会。
施耐德电气 能效管理平台全球能效管理专家施耐德电气为世界100多个国家提供整体解决方案,其中在能源与基础设施、工业过程控制、楼宇自动化和数据中心与网络等市场处于世界领先地位,在住宅应用领域也拥有强大的市场能力。
致力于为客户提供安全、可靠、高效的能源,施耐德电气2013年的销售额为240亿欧元,拥有超过150,000名员工。
施耐德电气助您——善用其效,尽享其能!施耐德电气善用其效 尽享其能凭借其对五大市场的深刻了解、对集团客户的悉心关爱,以及在能效管理领域的丰富经验,施耐德电气从一个优秀的产品和设备供应商逐步成长为整体解决方案提供商。
今年,施耐德电气首次集成其在建筑楼宇、IT 、安防、电力及工业过程和设备等五大领域的专业技术和经验,将其高质量的产品和解决方案融合在一个统一的架构下,通过标准的界面为各行业客户提供一个开放、透明、节能、高效的能效管理平台,为企业客户节省高达30%的投资成本和运营成本。
施耐德万高D型控制器使用说明

接地线必须可靠,以确保操作人员使用安全。
附:无源输出端子电气参数:
端子名称
额定电压
额定电流
动作及故障输出(无源)
250VAC/ 30VDC
5A
发电机启动及卸载端子(无源)*
250VAC/ 30VDC
3A
此处指无源触点的额定负载电压及额定负载电流值
控制器设置操作
1
备用CA线电压
3
V
38
26
1
A相电流
3
A
39
27
1
B相电流
3
A
40
28
1
C相电流
3
A
41
29
1
功率
3
kW
42
2A
1
电能
3
kWh
43
2B
1
故障标志1
低字节
BIT7=1 --备用缺相
BIT6=1 --备用欠压
BIT5 --空
BIT4=1 --备用过压
BIT3=1 --常用缺相
BIT2=1 --过流
BIT1=1 --常用欠压
施耐德万高(天津)电气设备有限公司
地址:天津市华苑产业区榕苑路16号鑫茂科技园C1座4层A单元
电话:
传真:-826
市场部:-876
售后服务:
网址:
本手册内所有图片仅供参考,如有改动以实物为准
0x0003 遥控投主
0x0005 遥控投备
0x0009 遥控双分
3,6
WTS-D800~5000系列没有遥控双分
59
3B
1
常用欠压阀值
施耐德atsD型控制器用户手册
D型控制器用户手册施耐德万高(天津)电气设备有限公司SchneiderWingoal(Tianjin)ElectricEquipmentCo.,Ltd 尊敬的客户:谢谢您使用本公司生产自动转换开关电器(以下简称开关),为了您的安全和正确使用本产品,敬请您在安装、电路连接、运行、维护检查前,熟读本手册。
本手册仅适用于带D型控制器的开关下面的符号将用于本手册的说明,提醒您注意潜在的危险,或者请您注意那些阐述、简化过程和关键操作。
身安全危险或本开关的不可恢复性损坏。
:关键性操作,提示您使用不当时,可能使控制器工作于非正常状态。
:提供另外的信息或简化的操作方法。
请注意:电气设备应该让有资格的专业人员进行安装、操作、使用、维护。
未按使用手册操作而造成的不良后果,施耐德电气公司将不负任何责任。
控制器功能介绍本控制器工作电压为AC380V,工作频率为50Hz,主要功能是进行电压采集,根据电压的实时值进行故障判断(三相断相、欠压、过压和失压),并控制转换开关进行相应的转换动作。
用户还可根据实际需要选配电流模块实现实时电流、有功功率和有功电能的显示。
另外,控制器提供多组无源节点的输入和输出,包括故障输出、负荷卸载、发电机启动、动作无源输出、远程投备(无源输入)、消防联动(无源输入)以及通讯接口,具体接线参见第节。
控制器安装及接线说明1.1.控制器外形尺寸图1D型控制器外形尺1.2.控制器二次接线1.2.1.控制器端子说明1.2.2.A1-A3备A4-D2,A5-RJ,A6-OUT,A7-D3,A8-D1,A9-NJ,A10-12,主☐动作输出:当机构中电机转动时,常开触点闭合;☐故障输出:当常用或备用电源故障时,常开触点闭合;☐负荷卸载:在电网-发电机模式下,常用电源故障,常开触点闭合;☐发电机启动:在电网-发电机模式下,常用电源正常,常开触点闭合,常用电源故障,常开触点打开;☐RS485:通信用端口,A’B’为通信预留端口;☐IA~IC:电流互感器输入端口I*为输入端,I为输出端;(输入额定电流5A)☐远程投备(无源):短接此两点,机构转到备用位置,开关状态主分备合;(可靠距离10m)☐消防联动(无源):短接此两点,机构转到双分位置,开关状态主分备分;(可靠距离10m,WTS-D800~5000系列不具备该项功能):控制器的发电机启动端子在常用电源正常时常闭触点断开,当常用电源故障时常闭触点闭合以接通发电机启动电路;常开触点与之相反,请用户注意。
- 1、下载文档前请自行甄别文档内容的完整性,平台不提供额外的编辑、内容补充、找答案等附加服务。
- 2、"仅部分预览"的文档,不可在线预览部分如存在完整性等问题,可反馈申请退款(可完整预览的文档不适用该条件!)。
- 3、如文档侵犯您的权益,请联系客服反馈,我们会尽快为您处理(人工客服工作时间:9:00-18:30)。
选型指南
应用
模块
功能 可实现的最高安全等级
遵守的标准
产品认证
电路数量
显示屏
输入电压 安全通道数
辅助通道数 安全解决方案 Preventa 安全控制器 同时监控2个独立安全功能的控制器。
用户从15个组态中选择2个功能,从控制器正面可编程。
p 急停监控 p 开关监控 p 使能开关监控 p 感应地毯或边缘监控 p 光幕监控,继电器输出类型 p 等等 EN ISO 13849-1标准的PL e/4类, EN/IEC 61508和EN/IEC 62061标准的SILCL 3 EN/IEC 60204-1, EN/IEC 60947-1, EN/IEC 60947-5-1 UL, CSA, TÜV 6 NO (3 NO/功能) 向PLC 发送信号的3个固态输出 12个LED c 24 V
通讯 CANopen 总线
– 模块型号
页码 16 Pro bus 总线
Modbus 总线
– – XPS MP
38784/2
可以使用软件组态的控制器,用于多个独立的安全功能:使用在Windows 上运行的组态软件选择安全功能(16或32个输入和8个独立安全输出)
p 急停监控
p 限位开关监控
p 双手控制监控
p 安全光幕监控,带/不带“静音”功能
p 使能开关监控,编码磁开关监控
p 安全地毯监控
p 液压机电磁阀监控
p 偏心压机的上死点的安全停止器监控。
零转速检测 p 液压机监控
p 偏心压机监控
p 脚踏开关监控
p 链轴断裂监控
p 安全工具
p 位置选择器
EN ISO 13849-1标准的PL e/4类,
EN/IEC 61508和EN/IEC 62061标准的SILCL 3
EN/IEC 60204-1,
EN 1760-1/ISO 13856-1,
EN/IEC 61496-1,
EN 574/ISO 13851,
EN/IEC 60947-1,
EN/IEC 60947-5-1
UL, CSA, TÜV
4 NO (2 NO/功能)+ 6固态
1个“静音”信号输出
正面LED 显示屏
c 24 V
通过SUB-D 9芯针型连接器,仅用于XPS MC16ZC 和XPS MC32ZC 通过SUB-D 9芯孔型连接器,仅用于XPS MC16ZP 和XPS MC32ZP 通过RJ45连接器,用于所有控制器XPS MCppZp
XPS MC
38789/2 17。