GPS定位器使用手册
GPS操作规程
GPS操作规程一、引言GPS(全球定位系统)是一种通过卫星信号来确定地理位置的技术。
本操作规程旨在指导用户正确操作GPS设备,确保其正常运行和有效使用。
二、设备准备1. 确保GPS设备已充电并处于正常工作状态。
2. 检查设备是否具有足够的存储空间以记录和保存数据。
3. 确保设备的天线没有被遮挡,以保证接收到卫星信号。
三、基本操作步骤1. 打开GPS设备的电源并等待设备启动。
2. 在设备菜单中选择“定位”或者类似选项,以开始接收卫星信号。
3. 设备将显示当前位置的经度和纬度信息,确保该信息准确。
4. 如果需要记录当前位置,请在设备菜单中选择“记录”或者类似选项。
设备将开始记录位置数据。
5. 如果需要导航到特定目的地,请在设备菜单中选择“导航”或者类似选项。
输入目的地的坐标或者地址,并按照设备的指示进行导航。
6. 在导航过程中,设备将提供转向指示、距离信息等导航辅助功能。
四、数据处理与分析1. 将GPS设备连接到计算机,并将记录的位置数据导入计算机中。
2. 使用专业的GPS数据处理软件,如ArcGIS、Google Earth等,打开导入的数据文件。
3. 分析数据并生成相应的地图、轨迹、路径等可视化结果。
4. 根据需要,进行数据统计、分析和报告撰写。
五、安全注意事项1. 在操作GPS设备时,应注意周围环境,避免发生意外事故。
2. 遵守当地法律法规,不要在禁止使用GPS设备的区域使用。
3. 注意设备的防护和防水措施,避免设备受损或者损失。
4. 定期备份和存储重要的GPS数据,以防止数据丢失或者损坏。
六、故障排除1. 如果GPS设备无法正常启动,请检查电池是否充电,电源是否连接正常。
2. 如果设备无法接收卫星信号,请确保设备的天线没有被遮挡,或者挪移到开阔的地方重新尝试。
3. 如果设备浮现其他故障,请参考设备说明书或者联系售后服务。
七、总结本操作规程详细介绍了GPS设备的操作流程,包括设备准备、基本操作步骤、数据处理与分析、安全注意事项以及故障排除。
车载GPS定位器TK116说明书
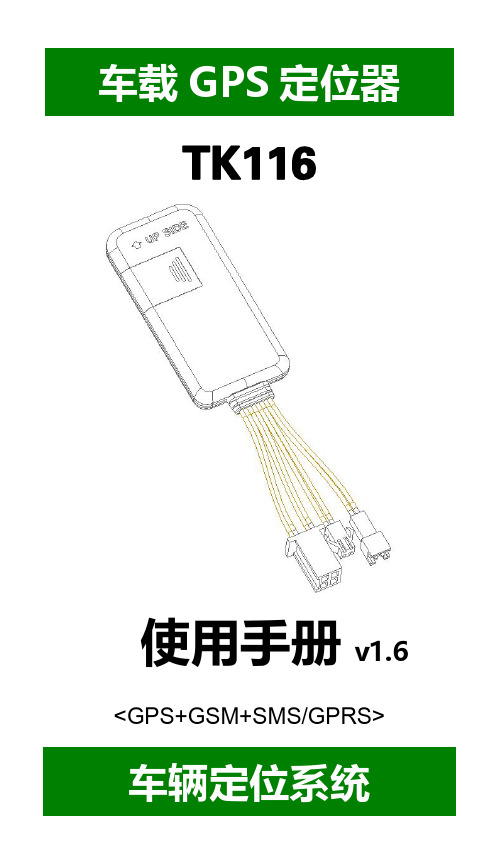
----TK116使用手册v1.6<GPS+GSM+SMS/GPRS>-车辆定位系统--目录一、产品功能、规格 (5)1.1产品功能 (5)1.2产品规格 (6)二、产品结构、配件 (7)2.1产品结构 (7)2.2产品配件 (8)三、安装SIM卡 (9)3.1安装前的准备 (9)3.2SIM卡的安装 (9)3.3取出SIM卡 (10)四、终端安装 (11)4.1安装设备到车辆 (11)4.2终端如何接线 (12)4.3继电器接线 (16)4.4安装麦克风 (16)4.5安装SOS求救按钮 (17)五、开启/关闭终端 (17)5.1开机 (17)5.2状态指示灯 (17)5.3关机 (18)六、查询、监听、切断/恢复油路..186.1短信查询 (18)6.2终端服务平台查询 (18)6.3终端监听 (19)6.4切断/恢复油路 (19)七、终端配置 (20)八、终端报警 (20)8.1振动报警 (20)8.2碰撞/跌落报警 (20)8.3速度报警 (20)8.4位移报警 (20)8.5电子围栏报警 (21)8.6剪线报警 (21)8.7低电报警 (21)8.8SOS报警 (21)九、故障排除 (22)9.1无法连接服务平台 (22)9.2后台显示离线状态 (22)9.3长时间不定位 (23)9.4定位漂移严重 (23)9.5指令接收异常 (23)十、保修细则 (24)10.1特别声明 (24)10.2保修期 (24)10.3售后服务 (24)Warranty Card/保修卡 (25)感谢您选用购买本机器,请您在使用之前认真阅读本说明书,以便得到正确的安装方法及操作指南,以下描述中终端等同于本机器。
产品外观及配色如有改动,请以实物为准,恕不另行通知。
TK116车用定位跟踪产品借助GPS卫星定位系统、GPRS通信和互联网,通过强大的服务平台可以实现对车辆进行实时远程监测和控制作用。
帮助客户实现透明管理、降低成本、保障安全、提高效率的目标。
GPS设备使用手册(执法类)
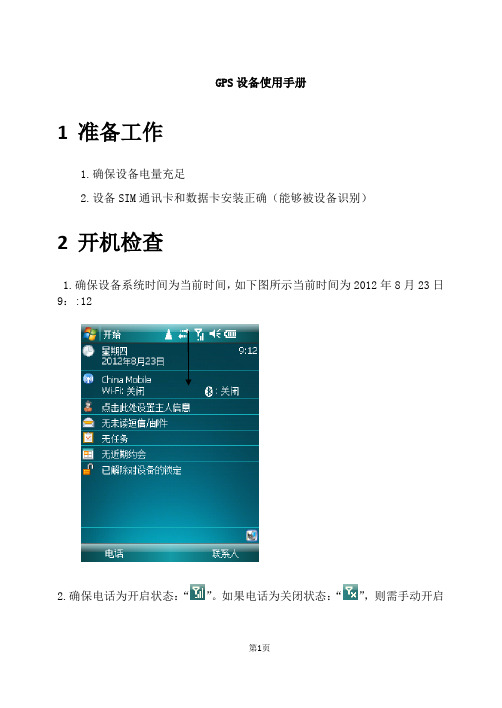
GPS设备使用手册1准备工作1.确保设备电量充足2.设备SIM通讯卡和数据卡安装正确(能够被设备识别)2开机检查1.确保设备系统时间为当前时间,如下图所示当前时间为2012年8月23日9::122.确保电话为开启状态:“”。
如果电话为关闭状态:“”,则需手动开启如下图所示点击“电话已关闭”弹出以下页面点击“电话”,出现如下页面点击“完成”保存当前电话打开模式如下图所示上图为可以正常使用模式。
3启动“国土执法之星”1.点击“开始-------国土执法之星”如下图2.进入程序加载页面,如下图进入程序主页面,如下图1.点击“设置”查看GPS设备搜索到卫星数量,如下图点击“GPS”卫星显示页面,如下图以上页面为设备没有搜索到卫星的页面,将设备放置到空旷没有遮挡的室外,几分钟后,出现以下搜索到卫星信号的页面设备搜索到卫星以后GPS 即可以正常使用,点击“主页”回到主程序页面,搜索到5颗卫星可以使用卫星数量为0GPS 搜索到10颗卫星,有3颗正在使用如下图所示2.点击“GPS导航”功能模块开始例行巡查,出现以下页面红箭头显示当前位置,箭头指向为前进方向通过地图下方的三个按钮,可以对地图进行“平移”、“放大”、“缩小”操作。
到达违法现场后开始采集违法数据,点击“主页”回到主程序如下图所示3.点击“违法用地数据采集”,如下图所示站在违法地块的某一个拐点下,点击“采点”功能,如下图所示设备开始切换到CORS 基站网络,网络切换成功后开始采集点的坐标数据,如下图所示注意采点时“采点”的变化注意切换网络时“采点”的变化GPS 设备正在采点,当GPS弹出以下页面时,当前拐点坐标采集成功点击“ok”完成当前拐点坐标的采集,进入下一个拐点重复以上采点流程,如下图所示直至将地块所有拐点坐标采集完成后点击“功能----完成当前地块”以保存以上每个拐点的坐标数据,如下图所示GPS 采集成功的第一个拐点第二个拐点采集成功正在采集第三个拐点坐标数据坐标数据保存成功后,点击“地块”违法地块的面积,周长及每个拐点的坐标自动保存在”地块”文件下如下图所示通过和进行前后切换,点击则删除当前地块。
GPS操作规程
GPS操作规程一、引言GPS(全球定位系统)是一种基于卫星定位的导航系统,广泛应用于航空、航海、汽车导航等领域。
为了确保GPS设备的正常使用和操作,制定本操作规程,以指导用户正确操作GPS设备。
二、设备准备1. 确保GPS设备处于正常工作状态,电量充足。
2. 根据需要选择合适的GPS天线,并正确连接至设备。
3. 检查GPS设备的固件版本,确保已安装最新的软件更新。
三、开机与初始化1. 将GPS设备放置在开阔地区,确保设备能够接收到卫星信号。
2. 按下电源按钮,等待设备启动。
3. 在设备菜单中选择“初始化”选项,以获取卫星信号并确定当前位置。
四、基本操作1. 导航模式:选择导航模式以获取目的地的导航指引。
输入目的地地址或者坐标,设备将计算最佳路线并提供导航指示。
2. 地图浏览:通过地图浏览模式,可以查看当前位置、周边地图和地理特征。
可以缩放地图、切换地图视图等。
3. 路径记录:在需要记录路径的情况下,选择路径记录功能。
设备将记录行进轨迹,并提供相关统计信息。
4. 坐标标记:通过坐标标记功能,可以标记感兴趣的地点或者位置。
标记的坐标可以用于导航或者导出。
五、导航安全1. 在驾驶过程中,不要长期盯着GPS屏幕,以免分散注意力,应时刻保持注意力集中在道路上。
2. 遵守交通规则,遵循GPS设备提供的导航指引,但不要盲目依赖。
在特殊情况下,应根据实际道路情况进行判断。
3. 在导航过程中,及时注意设备的语音提示,以免错过导航指示。
4. 在使用GPS设备进行户外活动时,应注意天气状况、地形地貌等因素,确保安全。
六、设备维护1. 定期清洁GPS设备的屏幕和外壳,使用柔软的布擦拭,不要使用化学溶剂。
2. 避免将GPS设备长期暴露在高温或者低温环境中,以免影响设备性能。
3. 定期检查设备电池电量,确保充足。
长期不使用时,应将电池取出。
4. 如遇设备故障或者异常,应及时联系售后服务部门进行维修。
七、免责声明1. GPS操作规程仅供参考,用户在使用GPS设备时应自行承担风险。
GPS使用说明
GPS使用说明
功能设定:接口设定
NMEA/NMEA:GPS以国际标准的
NMEA0180、0182、0183(1.5/2.0)等协议输出 卫星定位的有关信息。
RTCM/NONE:接收RTCM SC-104 2.0
的实时差分校正数据,波特率300-9600波特 可任意调节,GPS差分后精度可达1-5米。
GPS定位以后,在到达我们所需要的位置时,按 一下定位键,机器立刻存储刚才按键瞬间所处位 置画面。GPS自动给出存储点的编号及记录的经 纬度,可按输入键确认此编号为存储点名
GPS使用说明
单点定位求平均
➢ 按定位键显示如图 ➢ 用光标键将光标移至“平均?”处,“平均”反白,
按输入键,此时机器开始自动平滑 ➢ “误差”处平滑参考值,数字越小,精度越高。 ➢ 待“误差”处数字固定不变或达到期望值时,将光标
初识GPS
内置天线 导航键 开机键 退出键 电池盖
GPS使用说明
翻页键 定位键 输入键 显示屏
初识GPS
数据通信接口
GPS使用说明
外置天线接口
快速定位
热启动(warm start)
15秒
冷启动(cold start)
45秒
自动定位(auto locate) 1.5分钟
搜索天空(search the sky) 4至5分钟
建立航点:输入经纬度
直接输入经纬度建立航点:
1.连续按翻页键或退出键,直到功能设定画面。 2.按上、下光标键移光标至第2行“航点”,按输入键 ,显示航点画面。 3.按光标键,移光标到“名称”处,按输入键,再用光 标键选择所要的存贮点编号或名称,例如“HC”。然后 按输入键,再按上、下光标键将光标移至经纬度处。
MT200-GPS定位追踪器使用说明书
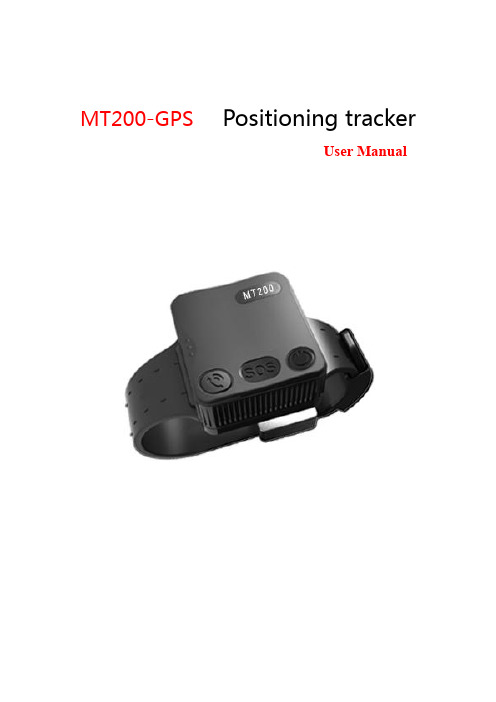
MT200-GPS Positioning trackerUser Manualcontent1.Product Overview and Appearance Introduction 3Product specifications 3button 3Function indicator light 4the belt 4Accessories 52.First use 5How to use the belt 5Charge 7turn on/off 7Parameters set up 83.Instruction and function applications 81. Change password 82. Authorized number 93. Monitoring function 104. Two-way communication 105. SOS emergency calling 116. Real time tracking 117. Tracking regularly by GPRS 118. GPRS data logger 129. Geo-fence 1210. Time zone setting 1311. Low battery alarm and Power on/off automatically 1412. Timing turn on/off tracker 1413. Belt on/off alarm 1414. Leave the home alarm 144.Problems & Diagnostics 161. Product Overview and Appearance IntroductionThe GPS Tracker has the advantages ofwaterproof IP67,low powerconsumption, Long Standby Time(22-24 days) and easy to use. apply to correct the crowd.Product specificationsbuttonMICSpeaker5VTX DXGNDFunction indicator lightRed/yellow– Power indicationThe red light is always on Power chargingThe green light is always on Power charging finishedBlue– GSM indication0.3s on and 0.3s off GSM module is initializing or calling inAlways on GSM network is not registered1s on and 3s off GSM network is registered0.1s on and 3s off GSM network is registered and connected to the server by GPRS Always off GSM in power save modeGreen– GPS indication0.3s on and 0.3s off GPS module is initializing or waiting for the SOS button press toconfirm the calling in number as the authorized numberAlways on Button being pressed1s on and 3s off GPS module is working normally but hasn't fixed position0.1s on and 3s off GPS module is working normally and has fixed positionAlways off GPS module stops workingthe beltAccessoriesScrew driverCharge cablemicro Charge cablePower BankAC adapter2 .First useHow to use the belt——Install the card requirements●Ensure that your tracker has a working SIM card.√● Please make sure SIM card has enough credit.● Please make sure that the SIM is not locked and do not require a passwordto operate.● Please make sure the SIM card is supporting caller ID display.——Install the card steps :❶ ❷1、open the Rubber back cover2、Open the SIM card cover with a screwdriver ❸3、Open the metal cover of the card slot, insert the SD card and SIM card, and fastenthe metal card cover4、Install the SIM card cover and lock the screw——adjust to suitable size and fixed the belt.❶❷1、Select the suitable size point2、Screwdriver fixed lock headNote:When the lock edge must be aligned with the size point,The screw can come into contact with the wrist strap❸❹3、Insert the plug into the lock4、Complete installation——unlock the belt.1、The key is aligned with the locking hole2、press it on firmly.❸3、opens the lockCharge.Power bank charging1、Tracker charging interface2、Rechargeable contacts areconnected to the charging interfaceof the tracker and The mobilepower supply is mounted on thetracker.turn on/off1、power onWhen you pull the switch that is after the SIM metal card cover, the machine can be powered on2、soft switch button to turn on❶❷1、Press soft key for 3 seconds2、Turn on or off after vibrationNote:The tracker can be turned off when the wrist strap is disconnected Parameters set upTracker supports APP setup software by smart phone or by sending command via SMS or by pc. After setup, please turn the tracker on and positioning in an open environment, please do it every time after turn the tracker on.3.Instruction and function applications1. Change passwordDescription: change user’s passwordSMS Command:$SMS,******;W001,######;!SMS Command explain:$SMS,default password;W001,new password;! Explain:******: user password, the range of 6 digits, default password is 000000######: new password, the range of 6 digits.Note:please switch to the English input method when you input a command by smart phone;tracker will only accept commands from a user with the correct password. Command will be ignored if with wrong password.Example:$SMS,000000;W001,123456;!Read password:$SMS,000000;R001;!Clear password:$SMS,000000;C001;!2. Authorized numberSet the authorized number by SMSDescription: Set authorized phone number and its related functionsSMS Command:$SMS,000000;W010,NO.,Phone Number,ABC;!Explain:NO. authorized number’s serial number range of: 1~3Phone Number authorized number range of: 0~19 charactersA when the parameter ‘A’ is 0, it means disable Geo-fence alarm,otherwise it means enable Geo-fence alarm. Default is 0range of: 0~1B when the parameter ‘B’ is 0, it means disable monitoringfunction, otherwise it means enable monitoring function. Defaultis 0range of: 0~1C when the parameter ‘C’ is 0, it means disable SOS emergencycalling function, otherwise it means enable SOS emergencycalling function. Default is 0range of: 0~1For example:Set the 1st authorized number is 138******** and enable monitoring function.$SMS,000000;W010,1,138****0000,010;!Read authorized No.1 and it’s related authority:$SMS,000000;R010,1;!Clear authorized No.1 and it’s related authority:$SMS,000000;C010,1;!Read all authorized number:$SMS,000000;R010;!Clear all authorized number:$SMS,000000;C010;!Easy authorized phone no. setup by callingTracker only supports three authorized numbers; we can set the authorized number by phone call if there are not set authorized number fully (this function only supports to set the authorized number, not included its related functions). Set as follows:1、Any non-authorized number calls to the tracker over than 10 seconds, thetracker will hang up the line automatically and the yellow light will blink for30 seconds.2、During these 30 seconds, press SOS button less than 3 seconds, and thensuccessfully set this call-in number as a new authorized number and send an SMS to this number to inform the setting is OK.3. Monitoring functionIf enable monitoring function, when the authorized number call to the tracker, it will answer the call automatically and shut down the speaker and the background voice of the tracker will be listened.Note:Please make sure the SIM card installed supports displaying caller ID when you want to enable this function.4. Two-way communicationThe first method:If you turn the monitoring function off when set authorized number, use this authorized number call to tracker, bell will ring, at this time, press the CALLbutton (less than 3s) to answer the phone call, so you can speak each other. The Second methods:If the authorization number was set with the CALL function, Press SOS button for 3 seconds or longer, the device will make a call to authorized numbers one by one and it will stop to make a call if call is answered.5. SOS emergency callingPress SOS button for 3 seconds or longer, tracker will send SOS alarm SMS to all authorized numbers.6. Real time trackingThe tracker will reply a location SMS if there is any authorized number makes a phone call to it.7. Tracking regularly by GPRSDescription: Enable this functionSMS Command:$SMS,000000;W002,APN,Username,Password;W003,IP,Port;W005,X;W009,Y;!Explain:Access point name ofrange of: 0~29 charactersAPN:networkUsername:accesses port’ user name range of: 0~29 charactersPassword:Accesses port’s password range of: 0~29 charactersIP:server’ IP address range of: 0~29 charactersPort:server’s port range of: 0~65535range of: 0~65535, default is 0, unit is 30 X:GPRS upload intervalsecondsExample: if X is 2, and 2*30s=60s, so it means the GPRS upload interval is 60 seconds.Y:GPRS upload mode range of: 0~20:means disable GPRS function,1:means upload by TCP,2:means upload by UDPdefault is 0Example:$SMS,000000;W002, cmnet,;W003,192.168.1.1,8088;W005,1;W009,1;!Read tracking regulary by GPRS:$SMS,000000;R002;R003;R005;R009;!Clear tracking regulary by GPRS:$SMS,000000;C002;C003;C005;C009;!8. GPRS data loggerTracker has build in 8M bytes memory for GPRS data save.1、When GPRS interval tracking can not upload to server, data will be automatically stored in the memory2、After that, once the GPRS reconnected, tracker will send the data to server again.Note: real time data will be sent first, the priority of the stored data is low.9. Geo-fenceDescription:Two ways to set the Geo-fence:1、When you know the exact latitude and longitude , the longitude and latitude can be filled in command directly.2、tracker will get the newest position automatically to be fence center if there is no available GPS position.After set the Geo-fence:when the tracker moves in/out the preset geo-fence, it will send a SMS alarm to the authorized phone number (enable the Geo-fence function when you set the authorized number), and if GPRS is connected, tracker will send this alarm data to server via GPRS.SMS Command:$SMS,000000;W018,NO.,name,lat,lng,radius;!explain:NO. serial number of geo-fence, range of: 1 to 5name name of geo-fence, range of: 0-9 characterslat center’s latitude, range of: -90.00000000~90.00000000, unit: degreeslng center’s longitude, range of:-180.00000000~180.00000000, unit: degrees radius geo-fence’s radius, range of: 0.0~1.79E+308, unit: metersNote: The geo-fence is a perfect circle based on the preset radius and centre. Example:$SMS,000000;W018,1,school,22.12345,114.12345,10.50;!$SMS,000000;W018,1,home,,,10.50;!1、Read Geo-fence:$SMS,000000;R018,1;!2、Clear Geo-fence:$SMS,000000;C018,1;!3、Clear all Geo-fence:$SMS,000000;C018;!10. Time zone settingSMS Command:$SMS,000000;W020,X;!Description: Set the SMS time zoneExplain:X: time zone’s value, range of:-720~780, default: 0, unit: minutesFor example:$SMS,000000;W020,480;!1 hour is equal to 60 minutes, and Beijing is GMT+8, 60*8=480(parameter), so this command means 480 is the time zone in Beijing.Read time zone:$SMS,000000;R020;!Clear time zone:$SMS,000000;C020;!11. Low battery alarm and Power on/off automatically1、When the battery level is lower than 15%, it will send SMS to all authorized numbers or send alarm data to server.2、Tracker will be off automatically if the battery level is 0%.3、during charging,tracker will automatically switch on when battery level is higher than 15%, and send a warning SMS to all authorized number.12. Timing turn on/off trackerDescription:set the time of turn on/offSMS Command:$SMS,000000;W038,on time,off time;!explain:Example:$SMS,000000;W038,08:00,20:00;! Turn on time:08:00,turn off time:20:00。
沃多仕 车辆GPS定位器 用户手册说明书
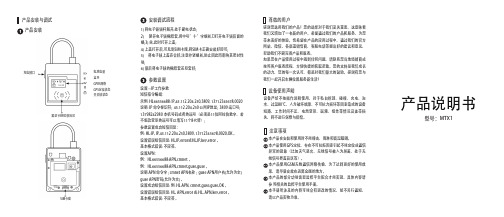
产品说明书产品安装与调试产品安装安装调试流程感谢您选用我们的产品!您的选择对于我们至关重要,这意味着我们又增加了一名新的用户。
希望通过我们的产品和服务,为您带来美好的体验。
也希望在产品的应用过程中,通过我们的官方网站,微信,各渠道销售商,客服电话等提出好的建议和意见,帮助我们不断完善产品和服务。
如果您在产品使用过程中遇到任何问题,请联系您当地经销商或按照客户服务流程,方便快捷的获取帮助。
您的支持是我们成长的动力,您的每一次认可,都是对我们最大的鼓励。
感谢有您与我们一起开启车辆位置服务新生活!注意事项设备使用声明尊敬的用户本产品在安装和使用时不能撞击、雨淋和高温曝晒。
本产品使用GPS定位,存在不可抗拒因素引起不能定位或通信异常的现象(比如天气恶劣、无线信号被人为屏蔽、处于无线信号覆盖盲区等)。
本产品使用GSM无线通信网络传输,为了达到更好的使用效果,请尽量安放在远离金属的地方。
本产品的部分功能需要监控平台配合才能实现,具体内容请参 照相关的监控平台使用手册。
本手册所涉及的内容可能会有更改的情况,恕不另行通知,请以产品实物为准。
设备严禁不按操作说明使用,对于私自拆卸、碰撞、充电、泡水、过温80℃、人为破坏故障、不可抗力损坏等因素造成的设备短路、工作时间不足、电池变形、漏液、爆炸等情况及连带损失,将不进行保修与赔偿。
参数设置电池电量蓝牙GPRS网络GPS定位状态开关锁状态充电接口解封卡RFID感应区1) 将电子锁锁杆解开,处于断电状态;2)掰开电子锁橡胶套,用中号”十”字螺丝刀打开电子锁后面的螺;3) 丝,此时打开上盖;4) 上盖打开后,可见到SIM卡座,将SIM卡正确安装好即可;5) 将电子锁上盖壳合好,注意拧紧螺丝,防止因此而影响其密封性能;6) 最后将电子锁的橡胶套还原套好;设置---IP工作参数短信指令编辑:示例:HL66556688:IP,45.112.204.250,3809,137****5678,0020说明: IP 命令标识符; 45.112.204.250 公网IP地址; 3809 端口号;137****2980本机号码或者终端号(必须是11位阿拉伯数字,若不想改变原终端号可以填写11个8代替);参数设置成功短信回复:例:HL:IP,IP,45.112.204.250,3809,137****5678,0020,OK。
GPS定位器 说明书
GPS定位器使用说明书1安装说明1.1连接线说明DC+ 电源正极ACC 点火线GND 地线pOff 断油/断电控制线1.2安装前检测:1、检查配件主机、4Pin连接线、油路控制器、说明书2、SIM卡购买SIM手机卡(支持GSM/3G网络),如果开通GPRS功能,可以实现网上查车,如果开通来电显示功能,能进行电话远程监听。
设备没有SIM卡,不能正常工作。
1.3安装调试步骤1) 检测电源按接线图安装完成后,通电,LED指示灯会闪,如果不亮,表示设备供电不正常或损坏。
2) LED光灯状态指示检查◆亮1秒灭1秒表示GSM注册成功,约三十秒左右。
◆亮0.1秒灭2.9秒表示GPS定位,约四十五秒左右。
◆如果绿灯快闪(亮0.1秒,灭0.1秒) 超过三分钟后,可能SIM卡未插好,或设备损坏。
◆常亮表示GSM注册网络成功,并且GPS定位。
3) 拨打电话在LED灯常亮后,拨打设备的SIM号码,如果能通,即工作正常,可以进行短信操作或网络设置。
1.4安装注意事项●GPS天线与GSM天线内置,注意安装位置,否则会定不到位.●主机不防水,工作温度-40~60℃,注意固定位置。
●油路控制器分为12V和24V,安装时,注意与汽车供电电压是否一致。
2短信操作说明短信命令格式为:A******,功能序号,参数其中A表示命令开始,******为设备操作密码,初始化密码为000000,参数视具体的功能序号而定。
将短信发送到设备中的手机卡上,设备会自动回复应相的短信。
短信全部采用半角,如果密码错误、格式错误,设备将不会回复短信。
2.1位置请求(000)短信格式:A******, 000例如:A000000, 000设备收到短信后,回复位置信息,格式如下:Longitude E114.04577 Latitude N22.32405 08-10-20 17:38:30,如果没有定位,则经纬度时间都是0,为无效值,时间为格林威治时间,如北京为东8区,小时加8才能与本地时间一致。
- 1、下载文档前请自行甄别文档内容的完整性,平台不提供额外的编辑、内容补充、找答案等附加服务。
- 2、"仅部分预览"的文档,不可在线预览部分如存在完整性等问题,可反馈申请退款(可完整预览的文档不适用该条件!)。
- 3、如文档侵犯您的权益,请联系客服反馈,我们会尽快为您处理(人工客服工作时间:9:00-18:30)。
1、第一步:打来手簿,开启管理软件点击配置选项→手簿端口配置→配置搜索→搜索到蓝牙****(移动站PIN号)→绑定→退出→确定。
2、基准站、移动站信号灯及按键的名称和作用
红色按键(开关机键)红色指示灯(电源指示灯)蓝色指示灯(卫星接收指示灯)绿色指示灯(接收基准站信号指示灯,1S/1次)黄色指示灯(数据指示灯)
3.、启动→点击测量(点击图标)→启动移动站接收器
4.、文件→新建任务→输入任务名称
5.、配置→坐标系管理→点管理器→查看中央子午线(每个地方不一样)和投影高(一般是甲方提供或默认为0)。
6.、成果桩导入手簿方法:用xls表格制作好原始坐标数据更改为(X、Y、Z)格式,保存时选择CSV格式,保存好后重命名后缀调为dat格式。
拷贝dat文件到手簿。
将手簿和计算机连接,找到移动设备,将dat文件拷贝到Built—in→RTKCE文件包内。
拷贝完后再手簿上操作将文件导入。
点击文件→导入→当地点(类型选择为call files)确定。
完成后导入成功。
7.当基准站关机后再开启时,要进行点的校对。
在控制点处点击手簿(测量→测量点→确定),(点击文件→元素管理器→点管理→选择测量点→点击详细→替换测量点位控制点)完成后对当前控制点进行点放样)。