图像处理参数翻译
图像处理单词
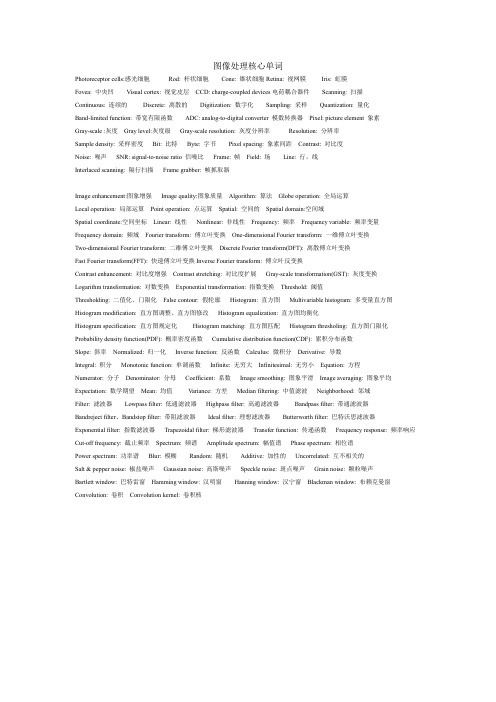
图像处理核心单词Photoreceptor cells:感光细胞Rod: 杆状细胞Cone: 锥状细胞Retina: 视网膜Iris: 虹膜Fovea: 中央凹Visual cortex: 视觉皮层CCD: charge-coupled devices电荷耦合器件Scanning: 扫描Continuous: 连续的Discrete: 离散的Digitization: 数字化Sampling: 采样Quantization: 量化Band-limited function: 带宽有限函数ADC: analog-to-digital converter 模数转换器Pixel: picture element 象素Gray-scale :灰度Gray level:灰度级Gray-scale resolution: 灰度分辨率Resolution: 分辨率Sample density: 采样密度Bit: 比特Byte: 字节Pixel spacing: 象素间距Contrast: 对比度Noise: 噪声SNR: signal-to-noise ratio 信噪比Frame: 帧Field: 场Line: 行,线Interlaced scanning: 隔行扫描Frame grabber: 帧抓取器Image enhancement:图象增强Image quality:图象质量Algorithm: 算法Globe operation: 全局运算Local operation: 局部运算Point operation: 点运算Spatial: 空间的Spatial domain:空间域Spatial coordinate:空间坐标Linear: 线性Nonlinear: 非线性Frequency: 频率Frequency variable: 频率变量Frequency domain: 频域Fourier transform: 傅立叶变换One-dimensional Fourier transform: 一维傅立叶变换Two-dimensional Fourier transform: 二维傅立叶变换Discrete Fourier transform(DFT): 离散傅立叶变换Fast Fourier transform(FFT): 快速傅立叶变换Inverse Fourier transform: 傅立叶反变换Contrast enhancement: 对比度增强Contrast stretching: 对比度扩展Gray-scale transformation(GST): 灰度变换Logarithm transformation: 对数变换Exponential transformation: 指数变换Threshold: 阈值Thresholding: 二值化、门限化False contour: 假轮廓Histogram: 直方图Multivariable histogram: 多变量直方图Histogram modification: 直方图调整、直方图修改Histogram equalization: 直方图均衡化Histogram specification: 直方图规定化Histogram matching: 直方图匹配Histogram thresholing: 直方图门限化Probability density function(PDF): 概率密度函数Cumulative distribution function(CDF): 累积分布函数Slope: 斜率Normalized: 归一化Inverse function: 反函数Calculus: 微积分Derivative: 导数Integral: 积分Monotonic function: 单调函数Infinite: 无穷大Infinitesimal: 无穷小Equation: 方程Numerator: 分子Denominator: 分母Coefficient: 系数Image smoothing: 图象平滑Image averaging: 图象平均Expectation: 数学期望Mean: 均值Variance: 方差Median filtering: 中值滤波Neighborhood: 邻域Filter: 滤波器Lowpass filter: 低通滤波器Highpass filter: 高通滤波器Bandpass filter: 带通滤波器Bandreject filter、Bandstop filter: 带阻滤波器Ideal filter: 理想滤波器Butterworth filter: 巴特沃思滤波器Exponential filter: 指数滤波器Trapezoidal filter: 梯形滤波器Transfer function: 传递函数Frequency response: 频率响应Cut-off frequency: 截止频率Spectrum: 频谱Amplitude spectrum: 幅值谱Phase spectrum: 相位谱Power spectrum: 功率谱Blur: 模糊Random: 随机Additive: 加性的Uncorrelated: 互不相关的Salt & pepper noise: 椒盐噪声Gaussian noise: 高斯噪声Speckle noise: 斑点噪声Grain noise: 颗粒噪声Bartlett window: 巴特雷窗Hamming window: 汉明窗Hanning window: 汉宁窗Blackman window: 布赖克曼窗Convolution: 卷积Convolution kernel: 卷积核。
Photoshop 词汇中英文对照

Photoshop词汇中英文对照Accented Edges 11强化的边缘Actual Pixels] | 实际象素Add Layer Clipping Path 11添加图层剪切路径Add Layer Mask 11添加图层蒙板Add Noise 11力U入杂色Add To Workflow] |添加到工作流程Add Vector Mask 11添加矢最遮罩Adjustments1 |调整Adjust] |调整Adobe Online 11 Adobe 在线Again 11 再次All Layers1 |所有图层All 11全选Angled Stroke1|成角的线条Annotations1 |注释Anti-Alias Crisp11消除锯齿明晰Anti-Alias None11 消除锯齿无Anti-Alias Smooth] |消除锯齿平滑Anti-Alias Strong1 | 消除锯齿强Apply Image11应用图像Arbitrary] |任意角度Arrange Icons11 排列图标Arrange Linked 11对齐链接图层Arrange1 |排列Artistic 11艺术效果Assign Profile1 |制定配置文件Assing Profile1 |制定配置文件Auto Color 11自动色彩Auto Contrast 11自动对比度Auto Laves 11自动色阶Automate) | 自动Background From Layer11 背景图层Bas Relief”基底凸现Batch ||批处理Bevel and Emboss11 斜面和浮雕Bitmap11位图Bits/Channel| | 位通道Blending Options 11 混合选项Blur More| |进一步模糊Blur ||模糊Border] |扩边Bottom Edges] |底边Brightness/Contrast| | 亮度/对比度Bring Forward] |前移一层Bring to Front 11 置为顶层Browse 11 浏览Brush Strokes 11 画笔描边CCW||逆时针度CMYK Color | |CMYK 颜色CW 11顺时针度Calculations! |ifM Calculations] |运算Cancel Check Out 11 取消登出Canvas Size 11画布大小Cascade1 |层叠Chalk/Charcoal 11 粉笔和炭笔Change Layer Content] | 更改图层内容Channel Mixer 11通道混合器Charcoal11 炭笔Check In 11 登记Check Out|| 登出Check Spelling1 |检查拼写Chromel |铭黄Clear Guides] |清除参考线Clear Layer Effects1 |清除图层样式Clear Slices 11 清除切片Clear 11 清除Clipboard] |剪贴板Close All 11关闭全部Close11 关闭Clouds |「云,彩Color Balance1|色彩平衡Color Halftone] | 彩色半调Color Overlay 11 颜色叠加Color Range11色彩范围Color Settings 11 颜色设置Color Table 11 颜色表Colored Pencil 11 彩色铅笔Conditional Mode Change11 条件模式更改Contact Sheet H11 联系表IIContact Sheet] |联系表Conte Crayon 11 Conte 蜡笔Conte Crayon 11 彩色粉笔Contract1|收缩Convert to ProfHe| |转换为配置文件Convert to Shape || 转变为形状Copy Layer Effects] |拷贝图层样式Copy Merged 11合并拷贝Copy 11拷贝Covert To Paragraph Text 11 转换为段落文字Craquelure 11 龟裂缝Create Droplet 11创建快捷批处理。
reshade滤镜调整翻译
"Reshade滤镜调整"的正确翻译可能是:"Reshade Filter Adjustment"。
- "Reshade"是一个英文单词,可以表示重新调整或改变。
- "滤镜"翻译为"Filter",在图像处理中用于改变图像的外观和色彩。
- "调整"翻译为"Adjustment",表示对某物进行微小的改变或调整。
因此,"Reshade滤镜调整"可以理解为使用Reshade滤镜来进行图像调整或改变。
请注意,这只是直译的翻译方式,具体情况可能要根据上下文和具体语境来决定最合适的翻译方式。
当涉及到图像处理和滤镜调整时,Reshade是一个非常流行的工具。
它是一个开源的图像后处理工具,主要用于电脑游戏和视频的图像增强和改进。
Reshade的特点之一是它支持大量的滤镜效果和图像处理技术。
用户可以根据自己的需求选择并叠加不同的滤镜,从而达到对图像的个性化调整。
一些常见的滤镜效果包括色彩增强、锐化、模糊、景深效果等。
通过调整这些滤镜的参数,用户可以实现对图像的细致控制,让图像看起来更加鲜艳、清晰或者柔和。
使用Reshade的过程相对简单,通常只需将Reshade工具安装到目标游戏或视频软件中,并在启动时加载所需的滤镜效果文件。
一旦设置完成,Reshade会在后台运行,并自动应用选定的滤镜效果。
除了提供预设的滤镜效果,Reshade还支持用户自定义滤镜。
这意味着有经验的用户可以根据自己的需求编写自己的滤镜脚本,进一步扩展Reshade的功能,实现更加个性化的图像处理。
总的来说,Reshade是一个功能强大且灵活的图像处理工具,为用户提供了许多自定义选项,帮助他们改善游戏和视频的图像质量,提升视觉体验。
由于其开源性质,Reshade也受到了广大社区的支持和持续的更新,为用户提供不断改进的滤镜效果和功能。
图像处理常见词汇
RGB(三种基本色的波长分别为R:700 nm,G:546.1 nm,B: 435.8 nm)
HSI(Hue色调、 Saturation饱和度:指一个颜色的鲜明程度,饱和度越高,颜色越深。 Intensity亮度:亮度是指光波作用于感受器所发生的效应,其大小由物体反射系数来决定。面向彩色处理的最常用模型ixel)
点(Dot)
样点(Sample)
屏幕分辨率每英寸点数(ppi)
dpi(dot per inch每英寸点数)
TIF (Tag Image File Format标记图像文件格式)
PCX(各种扫描仪扫描得到的图像,支持256种颜色,不如TARGA或TIF等格式功能强,但结构较简单,存取速度快,压缩比适中,图像颜色的位数可以是 1、 4、8 或 24)
VGA(Video Graphics Array即视频图形阵列)
JPEG(Joint Photographer’s Experts Group,即联合图像专家组,)
HTML(Hypertext Markup Language,即文本标记语言)
BMP(全称Bitmap,位映射存储格式,除了图像深度可选以外,不采用其他任何压缩,数据存放是从下到上,从左到右的。)
contrast(对比度= 最大亮度/ 最小亮度)
CMYK(减色合成法Subtractive Color Synthesis,青色(Cyan)、品红色(Magenta)、黄色(Yellow)和黑色(Black)占用的磁盘空间和内存大,这种模式一般在印刷时使用。 )
photoshop中英文对照
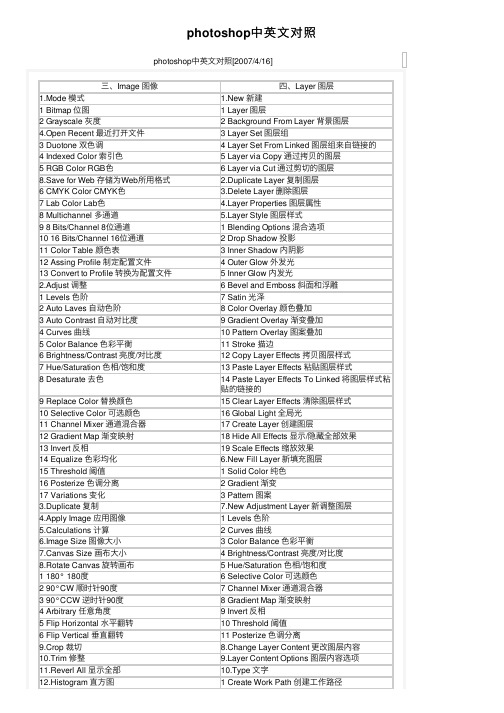
photoshop中英⽂对照photoshop中英⽂对照[2007/4/16]三、Image 图像四、Layer 图层1.Mode 模式 1.New 新建1 Bitmap 位图 1 Layer 图层2 Grayscale 灰度 2 Background From Layer 背景图层4.Open Recent 最近打开⽂件 3 Layer Set 图层组3 Duotone 双⾊调4 Layer Set From Linked 图层组来⾃链接的4 Indexed Color 索引⾊5 Layer via Copy 通过拷贝的图层5 RGB Color RGB⾊6 Layer via Cut 通过剪切的图层8.Save for Web 存储为Web所⽤格式 2.Duplicate Layer 复制图层6 CMYK Color CMYK⾊ 3.Delete Layer 删除图层7 Lab Color Lab⾊ yer Properties 图层属性8 Multichannel 多通道 yer Style 图层样式9 8 Bits/Channel 8位通道 1 Blending Options 混合选项10 16 Bits/Channel 16位通道 2 Drop Shadow 投影11 Color Table 颜⾊表 3 Inner Shadow 内阴影12 Assing Profile 制定配置⽂件 4 Outer Glow 外发光13 Convert to Profile 转换为配置⽂件 5 Inner Glow 内发光2.Adjust 调整 6 Bevel and Emboss 斜⾯和浮雕1 Levels ⾊阶7 Satin 光泽2 Auto Laves ⾃动⾊阶8 Color Overlay 颜⾊叠加3 Auto Contrast ⾃动对⽐度9 Gradient Overlay 渐变叠加4 Curves 曲线10 Pattern Overlay 图案叠加5 Color Balance ⾊彩平衡11 Stroke 描边6 Brightness/Contrast 亮度/对⽐度12 Copy Layer Effects 拷贝图层样式7 Hue/Saturation ⾊相/饱和度13 Paste Layer Effects 粘贴图层样式8 Desaturate 去⾊14 Paste Layer Effects To Linked 将图层样式粘贴的链接的9 Replace Color 替换颜⾊15 Clear Layer Effects 清除图层样式10 Selective Color 可选颜⾊16 Global Light 全局光11 Channel Mixer 通道混合器17 Create Layer 创建图层12 Gradient Map 渐变映射18 Hide All Effects 显⽰/隐藏全部效果13 Invert 反相19 Scale Effects 缩放效果14 Equalize ⾊彩均化 6.New Fill Layer 新填充图层15 Threshold 阈值 1 Solid Color 纯⾊16 Posterize ⾊调分离 2 Gradient 渐变17 Variations 变化 3 Pattern 图案3.Duplicate 复制7.New Adjustment Layer 新调整图层4.Apply Image 应⽤图像 1 Levels ⾊阶5.Calculations 计算 2 Curves 曲线6.Image Size 图像⼤⼩ 3 Color Balance ⾊彩平衡7.Canvas Size 画布⼤⼩ 4 Brightness/Contrast 亮度/对⽐度8.Rotate Canvas 旋转画布 5 Hue/Saturation ⾊相/饱和度1 180° 180度 6 Selective Color 可选颜⾊2 90°CW 顺时针90度7 Channel Mixer 通道混合器3 90°CCW 逆时针90度8 Gradient Map 渐变映射4 Arbitrary 任意⾓度9 Invert 反相5 Flip Horizontal ⽔平翻转10 Threshold 阈值6 Flip Vertical 垂直翻转11 Posterize ⾊调分离9.Crop 裁切8.Change Layer Content 更改图层内容10.Trim 修整yer Content Options 图层内容选项11.Reverl All 显⽰全部10.Type ⽂字12.Histogram 直⽅图 1 Create Work Path 创建⼯作路径13.Trap 陷印 2 Convert to Shape 转变为形状14.Extract 抽出 3 Horizontal ⽔平15.Liquify 液化 4 Vertical 垂直5 Anti-Alias None 消除锯齿⽆五、Selection 选择 6 Anti-Alias Crisp 消除锯齿明晰1.All 全部7 Anti-Alias Strong 消除锯齿强2.Deselect 取消选择8 Anti-Alias Smooth 消除锯齿平滑3.Reselect 重新选择9 Covert To Paragraph Text 转换为段落⽂字4.Inverse 反选10 Warp Text ⽂字变形5.Color Range ⾊彩范围11 Update All Text Layers 更新所有⽂本图层6.Feather ⽻化12 Replace All Missing Fonts 替换所以缺⽋⽂字7.Modify 修改11.Rasterize 栅格化1 Border 扩边 1 Type ⽂字2 Smooth 平滑 2 Shape 形状3 Expand 扩展 3 Fill Content 填充内容4 Contract 收缩 4 Layer Clipping Path 图层剪贴路径8.Grow 扩⼤选区 5 Layer 图层9.Similar 选区相似 6 Linked Layers 链接图层10.Transform Selection 变换选区7 All Layers 所以图层11.Load Selection 载⼊选区12.New Layer Based Slice 基于图层的切⽚12.Save Selection 存储选区13.Add Layer Mask 添加图层蒙板1 Reveal All 显⽰全部六、Filter 滤镜 2 Hide All 隐藏全部st Filter 上次滤镜操作 3 Reveal Selection 显⽰选区2.Artistic 艺术效果 4 Hide Selection 隐藏选区1 Colored Pencil 彩⾊铅笔14.Enable Layer Mask 启⽤图层蒙板2 Cutout 剪贴画15.Add Layer Clipping Path 添加图层剪切路径3 Dry Brush ⼲笔画 1 Reveal All 显⽰全部4 Film Grain 胶⽚颗粒 2 Hide All 隐藏全部5 Fresco 壁画 3 Current Path 当前路径6 Neon Glow 霓虹灯光16.Enable Layer Clipping Path 启⽤图层剪切路径7 Paint Daubs 涂抹棒17.Group Linked 于前⼀图层编组8 Palette Knife 调⾊⼑18.UnGroup 取消编组9 Plastic Wrap 塑料包装19.Arrange 排列10 Poster Edges 海报边缘 1 Bring to Front 置为顶层11 Rough Pastels 粗糙彩笔 2 Bring Forward 前移⼀层12 Smudge Stick 绘画涂抹 3 Send Backward 后移⼀层13 Sponge 海绵 4 Send to Back 置为底层14 Underpainting 底纹效果20.Arrange Linked 对齐链接图层15 Watercolor ⽔彩 1 Top Edges 顶边3.Blur 模糊 2 Vertical Center 垂直居中1 Blur 模糊 3 Bottom Edges 底边2 Blur More 进⼀步模糊 4 Left Edges 左边3 Gaussian Blur ⾼斯模糊 5 Horizontal Center ⽔平居中4 Motion Blur 动态模糊 6 Right Edges 右边5 Radial Blur 径向模糊21.Distribute Linked 分布链接的6 Smart Blur 特殊模糊 1 Top Edges 顶边4.Brush Strokes 画笔描边 2 Vertical Center 垂直居中1 Accented Edges 强化边缘 3 Bottom Edges 底边2 Angled Stroke 成⾓的线条 4 Left Edges 左边3 Crosshatch 阴影线 5 Horizontal Center ⽔平居中4 Dark Strokes 深⾊线条 6 Right Edges 右边5 Ink Outlines 油墨概况22.Lock All Linked Layers 锁定所有链接图层6 Spatter 喷笔23.Merge Linked 合并链接图层7 Sprayed Strokes 喷⾊线条24.Merge Visible 合并可见图层8 Sumi 总量25.Flatten Image 合并图层5.Distort 扭曲26.Matting 修边1 Diffuse Glow 扩散亮光 1 Define 去边2 Displace 置换 2 Remove Black Matte 移去⿊⾊杂边3 Glass 玻璃 3 Remove White Matte 移去⽩⾊杂边4 Ocean Ripple 海洋波纹5 Pinch 挤压七、View 视图6 Polar Coordinates 极坐标 1.New View 新视图7 Ripple 波纹 2.Proof Setup 校样设置8 Shear 切变 1 Custom ⾃定9 Spherize 球⾯化 2 Working CMYK 处理CMYK10 Twirl 旋转扭曲 3 Working Cyan Plate 处理青版11 Wave 波浪 4 Working Magenta Plate 处理洋红版12 Zigzag ⽔波 5 Working Yellow Plate 处理黄版6.Noise 杂⾊ 6 Working Black Plate 处理⿊版1 Add Noise 加⼊杂⾊7 Working CMY Plate 处理CMY版2 Despeckle 去斑8 Macintosh RGB3 Dust & Scratches 蒙尘与划痕9 Windows RGB4 Median 中间值10 Monitor RGB 显⽰器RGB7.Pixelate 像素化11 Simulate Paper White 模拟纸⽩1 Color Halftone 彩⾊半调12 Simulate Ink Black 模拟墨⿊2 Crystallize 晶格化 3.Proof Color 校样颜⾊3 Facet 彩块化 4.Gamut Wiring ⾊域警告4 Fragment 碎⽚ 5.Zoom In 放⼤5 Mezzotint 铜版雕刻 6.Zoom Out 缩⼩6 Mosaic 马赛克7.Fit on Screen 满画布显⽰7 Pointillize 点状化8.Actual Pixels 实际象素8.Render 渲染9.Print Size 打印尺⼨1 3D Transform 3D 变换10.Show Extras 显⽰额外的2 Clouds 云彩11.Show 显⽰3 Difference Clouds 分层云彩 1 Selection Edges 选区边缘4 Lens Flare 镜头光晕 2 Target Path ⽬标路径5 Lighting Effects 光照效果 3 Grid ⽹格6 Texture Fill 纹理填充 4 Guides 参考线9.Sharpen 锐化 5 Slices 切⽚1 Sharpen 锐化 6 Notes 注释2 Sharpen Edges 锐化边缘7 All 全部3 Sharpen More 进⼀步锐化8 None ⽆4 Unsharp Mask USM 锐化9 Show Extras Options 显⽰额外选项10.Sketch 素描12.Show Rulers 显⽰标尺1 Bas Relief 基底凸现13.Snap 对齐2 Chalk & Charcoal 粉笔和炭笔14.Snap To 对齐到3 Charcoal 1 Guides 参考线4 Chrome 铬黄 2 Grid ⽹格5 Conte Crayon 彩⾊粉笔 3 Slices 切⽚6 Graphic Pen 绘图笔 4 Document Bounds ⽂档边界7 Halftone Pattern 半⾊调图案 5 All 全部8 Note Paper 便条纸 6 None ⽆9 Photocopy 副本15.Show Guides 锁定参考线10 Plaster 塑料效果16.Clear Guides 清除参考线11 Reticulation ⽹状17.New Guides 新参考线12 Stamp 图章18.Lock Slices 锁定切⽚13 Torn Edges 撕边19.Clear Slices 清除切⽚14 Water Paper ⽔彩纸11.Stylize 风格化⼋、Windows 窗⼝1 Diffuse 扩散 1.Cascade 层叠2 Emboss 浮雕 2.Tile 拼贴3 Extrude 突出 3.Arrange Icons 排列图标4 Find Edges 查找边缘 4.Close All 关闭全部5 Glowing Edges 照亮边缘 5.Show/Hide Tools 显⽰/隐藏⼯具6 Solarize 曝光过度 6.Show/Hide Options 显⽰/隐藏选项7 Tiles 拼贴7.Show/Hide Navigator 显⽰/隐藏导航8 Trace Contour 等⾼线8.Show/Hide Info 显⽰/隐藏信息9 Wind 风9.Show/Hide Color 显⽰/隐藏颜⾊12.Texture 纹理10.Show/Hide Swatches 显⽰/隐藏⾊板1 Craquelure 龟裂缝11.Show/Hide Styles 显⽰/隐藏样式2 Grain 颗粒12.Show/Hide History 显⽰/隐藏历史记录3 Mosained Tiles 马赛克拼贴13.Show/Hide Actions 显⽰/隐藏动作4 Patchwork 拼缀图14.Show/Hide Layers 显⽰/隐藏图层5 Stained Glass 染⾊玻璃15.Show/Hide Channels 显⽰/隐藏通道6 Texturixer 纹理化16.Show/Hide Paths 显⽰/隐藏路径13.Video 视频17.Show/Hide Character 显⽰/隐藏字符1 De Interlace 逐⾏18.Show/Hide Paragraph 显⽰/隐藏段落2 NTSC Colors NTSC⾊彩19.Show/Hide Status Bar 显⽰/隐藏状态栏14.Other 其它20.Reset Palette Locations1 Custom ⾃定义2 High Pass ⾼反差保留3 Maximum 最⼤值4 Minimum 最⼩值5 Offset 位移15.Digimarc1 Embed Watermark 嵌⼊⽔印2 Read Watermark 读取⽔印。
图像处理外文翻译
英文资料翻译Image processing is not a one step process.We are able to distinguish between several steps which must be performed one after the other until we can extract the data of interest from the observed scene.In this way a hierarchical processing scheme is built up as sketched in Fig.The figure gives an overview of the different phases of image processing.Image processing begins with the capture of an image with a suitable,not necessarily optical,acquisition system.In a technical or scientific application,we may choose to select an appropriate imaging system.Furthermore,we can set up the illumination system,choose the best wavelength range,and select other options to capture the object feature of interest in the best way in an image.Once the image is sensed,it must be brought into a form that can be treated with digital computers.This process is called digitization.With the problems of traffic are more and more serious. Thus Intelligent Transport System (ITS) comes out. The subject of the automatic recognition of license plate is one of the most significant subjects that are improved from the connection of computer vision and pattern recognition. The image imputed to the computer is disposed and analyzed in order to localization the position and recognition the characters on the license plate express these characters in text string form The license plate recognition system (LPSR) has important application in ITS. In LPSR, the first step is for locating the license plate in the captured image which is very important for character recognition. The recognition correction rate of license plate is governed by accurate degree of license plate location. In this paper, several of methods in image manipulation are compared and analyzed, then come out the resolutions for localization of the car plate. The experiences show that the good result has been got with these methods. The methods based on edge map and frequency analysis is used in the process of the localization of the license plate, that is to say, extracting the characteristics of the license plate in the car images after being checked up for the edge, and then analyzing and processing until the probably area of license plate is extracted.The automated license plate location is a part of the image processing ,it’s also an important part in the intelligent traffic system.It is the key step in the Vehicle License Plate Recognition(LPR).A method for the recognition of images of different backgrounds and different illuminations is proposed in the paper.the upper and lower borders are determined through the gray variation regulation of the character distribution.The left and right borders are determined through the black-white variation of the pixels in every row.The first steps of digital processing may include a number of different operations and are known as image processing.If the sensor has nonlinear characteristics, these need to be corrected.Likewise,brightness and contrast of the image may require improvement.Commonly,too,coordinate transformations are needed torestore geometrical distortions introduced during image formation.Radiometric and geometric corrections are elementary pixel processing operations.It may be necessary to correct known disturbances in the image,for instance caused by a defocused optics,motion blur,errors in the sensor,or errors in the transmission of image signals.We also deal with reconstruction techniques which are required with many indirect imaging techniques such as tomography that deliver no direct image.A whole chain of processing steps is necessary to analyze and identify objects.First,adequate filtering procedures must be applied in order to distinguish the objects of interest from other objects and the background.Essentially,from an image (or several images),one or more feature images are extracted.The basic tools for this task are averaging and edge detection and the analysis of simple neighborhoods and complex patterns known as texture in image processing.An important feature of an object is also its motion.Techniques to detect and determine motion are necessary.Then the object has to be separated from the background.This means that regions of constant features and discontinuities must be identified.This process leads to a label image.Now that we know the exact geometrical shape of the object,we can extract further information such as the mean gray value,the area,perimeter,and other parameters for the form of the object[3].These parameters can be used to classify objects.This is an important step in many applications of image processing,as the following examples show:In a satellite image showing an agricultural area,we would like to distinguish fields with different fruits and obtain parameters to estimate their ripeness or to detect damage by parasites.There are many medical applications where the essential problem is to detect pathologi-al changes.A classic example is the analysis of aberrations in chromosomes.Character recognition in printed and handwritten text is another example which has been studied since image processing began and still poses significant difficulties.You hopefully do more,namely try to understand the meaning of what you are reading.This is also the final step of image processing,where one aims to understand the observed scene.We perform this task more or less unconsciously whenever we use our visual system.We recognize people,we can easily distinguish between the image of a scientific lab and that of a living room,and we watch the traffic to cross a street safely.We all do this without knowing how the visual system works.For some times now,image processing and computer-graphics have been treated as two different areas.Knowledge in both areas has increased considerably and more complex problems can now be treated.Computer graphics is striving to achieve photorealistic computer-generated images of three-dimensional scenes,while image processing is trying to reconstruct one from an image actually taken with a camera.In this sense,image processing performs the inverse procedure to that of computer graphics.We start with knowledge of the shape and features of an object—at the bottom of Fig. and work upwards until we get a two-dimensional image.To handle image processing or computer graphics,we basically have to work from the sameknowledge.We need to know the interaction between illumination and objects,how a three-dimensional scene is projected onto an image plane,etc.There are still quite a few differences between an image processing and a graphics workstation.But we can envisage that,when the similarities and interrelations between computergraphics and image processing are better understood and the proper hardware is developed,we will see some kind of general-purpose workstation in the future which can handle computer graphics as well as image processing tasks[5].The advent of multimedia,i. e. ,the integration of text,images,sound,and movies,will further accelerate the unification of computer graphics and image processing.In January 1980 Scientific American published a remarkable image called Plume2,the second of eight volcanic eruptions detected on the Jovian moon by the spacecraft V oyager 1 on 5 March 1979.The picture was a landmark image in interplanetary exploration—the first time an erupting volcano had been seen in space.It was also a triumph for image processing.Satellite imagery and images from interplanetary explorers have until fairly recently been the major users of image processing techniques,where a computer image is numerically manipulated to produce some desired effect-such as making a particular aspect or feature in the image more visible.Image processing has its roots in photo reconnaissance in the Second World War where processing operations were optical and interpretation operations were performed by humans who undertook such tasks as quantifying the effect of bombing raids.With the advent of satellite imagery in the late 1960s,much computer-based work began and the color composite satellite images,sometimes startlingly beautiful, have become part of our visual culture and the perception of our planet.Like computer graphics,it was until recently confined to research laboratories which could afford the expensive image processing computers that could cope with the substantial processing overheads required to process large numbers of high-resolution images.With the advent of cheap powerful computers and image collection devices like digital cameras and scanners,we have seen a migration of image processing techniques into the public domain.Classical image processing techniques are routinely employed by graphic designers to manipulate photographic and generated imagery,either to correct defects,change color and so on or creatively to transform the entire look of an image by subjecting it to some operation such as edge enhancement.A recent mainstream application of image processing is the compression of images—either for transmission across the Internet or the compression of moving video images in video telephony and video conferencing.Video telephony is one of the current crossover areas that employ both computer graphics and classical image processing techniques to try to achieve very high compression rates.All this is part of an inexorable trend towards the digital representation of images.Indeed that most powerful image form of the twentieth century—the TV image—is also about to be taken into the digital domain.Image processing is characterized by a large number of algorithms that are specific solutions to specific problems.Some are mathematical or context-independent operations that are applied to each and every pixel.For example,we can use Fourier transforms to perform image filtering operations.Others are“algorithmic”—we may use a complicated recursive strategy to find those pixels that constitute the edges in an image.Image processing operations often form part of a computer vision system.The input image may be filtered to highlight or reveal edges prior to a shape detection usually known as low-level operations.In computer graphics filtering operations are used extensively to avoid abasing or sampling artifacts.中文翻译图像处理不是一步就能完成的过程。
图像处理必备英文词汇
Algebraic operation 代数运算一种图像处理运算,包括两幅图像对应像素的和、差、积、商。
Aliasing 走样〔混叠〕当图像象素间距和图像细节相比太大时产生的一种人工痕迹。
Arc 弧〔l〕图的一部分〔2〕表示一段相连曲线的像素集合。
Binary image 二值图像只有两级灰度的数字图像〔通常为0和1,黑和白〕。
Blur 模糊由于散焦、低通滤波、摄像机运动等引起的图像清晰度的下降。
Border 边框一幅图像的首、未行或列。
Boundary chain code 边界链码定义一个物体边界的方向序列。
Boundary pixel 边界像素至少和一个背景象素相邻接的内部像素〔比较:外部像素、内部像素〕。
Boundary tracking边界跟踪一种图像分割技术,通过沿弧从一个像素顺序探索到下一个像素的方法将弧检测出来。
Brightness 亮度和图像一个点相关的值,表示从该点的物体发射或反射的光的量。
Change detection 变化检测通过相减等操作将两幅匹准图像的像素加以比较从而检测出其中物体差异的技术。
Class 类见模或类。
Closed curve 封闭曲线一条首尾接于一点的曲线。
Cluster 聚类,集群在空间〔如在特征空间〕中位置接近的点的集合。
Cluster analysis 聚类分析在空间中对聚类的检测、度量和描述。
Concave 凹的如果说某个物体是“凹的”是指至少存在两个物体内部的点,其连线不能完全包含在物体内部〔反义词为凸的〕。
Connected 连通的。
Contour encoding 轮廓编码对具有均匀灰度的区域,只将其边界进行编码的一种图像压缩技术。
Contrast 比照度物体平均亮度〔或灰度〕与其周围背景的差异程度。
Contrast stretch 比照度扩展一种线性的灰度变换。
Convex 凸的指连接物体内部任意两点的直线均落在物体内部。
Convolution 卷积一种将两个函数组合生成第三个函数的运算,卷积刻画了线性移不变系统的运算。
Photoshop英汉翻译
一、菜单(一)File:文件1、New:新建2、Open:打开文件3、Open as:打开为4、Close:关闭5、Save:存储6、Save As:存储为7、Save a copy:存储为拷贝文件8、Revert:恢复9、Place:置入10、Import:输入11、Export:输出12、Automate:自动操作1)Batch:批处理2)Conditional Mode change:模式转换3)Contact sheet:视图索引4)Fit Image:适合图像5)Multi-page PDF to PSD:将PDF文件转换为PSD文件13、File Info:文件信息14、Page setup:页面设置15、Print:打印16、Preference:预置1)General:常规2)Saving Files:文件存储3)Transparency Gamut:透明区域与色域4)Units Rulers:单位与标尺5)Guides Grid:参考线与网格6)Plug-Ins Scratch Disks:增效工具与暂存盘7)Memory Image Cache:缓存级别与内存使用率17、Color Settings:色彩设置18、Adobe on line:连接Adobe网站(二)、Edit 编辑1、Undo:恢复一步2、Cut:剪切3、Copy:拷贝4、Copy Merged:拷贝合并5、Paste:粘贴6、Paste into:粘贴入7、Clear: 清楚8、Fill:填充9、Strobe:描边10、free transform:自由变换11、transform:变换1)again:重复上一次变换2)scale:比例3)rotate:旋转4)skew:推斜5)distort:变形6)perspective:透视7)numeric:数字8)rotate 180º:旋转180º9)Rotate 90ºCW:顺时针旋转90º10)Rotate 90º CCW:逆时针旋转90º11)Flip Hovizontol:水平镜像12)Flip vertical 垂直镜像12、Refine pattem 定义图安13、Purge 清理1)vndo 重作2)clip band 剪贴板3)pattern 图案4)Histovies 历史5)All 全部(三) Image 图象菜单1、Mode 模式1)Bitmap (位图,模式)2)Grayscale (灰度模式)3)Duotone 双色调模式4)Indexed color 索引色模式5)RGB6)CMYK7)Lab8)Multichannel 多通道模式9)8 Bit/channel 8位/通道10)16 Bit/charnel 16位/通道11)color Table 索引色表12)profile to profile 色彩模式转换2、Adjust调整1)levels 色阶2)Auto levels 自动色阶3)Curves 曲线4)Color Balance 色彩平衡5)Brightness/contrast 亮度/对比度6)Hun/saturation 色相/饱和度7)Desaturate 去色8)Replace color 替换颜色9)Selective color 所选颜色10)Channel mixer 通道混合器11)Invert 反相12)Equalize 色调3均化13)Threshold 阈值14)Posterize 色调分离15)Variations 变化3 、Duplicate 复制4、Apply Image 应用图像5、Calculations 运算6、Image size图像大小7、Canvas size 通布大小8、Crop 裁切9、Rotate Canvas 旋转通布1)150º度2)90ºcw 顺时针90º3)90ºccw 逆时针90º4)variations5)Flip Horizontal水平镜像6)Flip vertical垂直镜像10、Histogram 直立图11、Trap 陷印四、Layer 层1、new 新建1)Layer 层2)Adjustment Layer 调节层3)Back ground 背景层4)Layer via copy 在层中将所选区域复制5)Layervia via cut 在层中将所选区域剪切2、Duplicate Layer 复制层3、Delete Layer 删除层4、Layer Options 层选项5、Adjustment Options 调节层选项6、Effects 效果层1)Drop shadow 阴影2)Inner shadow 内部阴影3)Outer Glow 外发光4)Inner Glow 内发光5)Bevel and emboss 斜角与浮雕6)Copy Effects 拷贝效果7)Paste Effects 粘贴效果8)Paste Effects to linked 粘贴效果至链接层9)Clear 清除效果层10)Global Angle 斜角角度11)Create Layers 分离效果层12)Hide All Effects 隐藏/显示所有效果层7、Type 类型1)Render Layer 渲染图层2)Vertical 垂直镜像3)Horizontal 水平镜像8、Add Layer Mask 添加层蒙版1)显示所有2)隐藏所有3)显示所选取区域4)隐藏所选区域9、Enable Layer Mask 启用/停用层蒙版10、Group with previons 与上一层编组11、Ungroup 解组12、Arrange 排列1)Bring to Front 放于最上面2)Bring Forward 向前一层3)Send Backward 向后一层4)Send to Back 放于最下面13、Align Linked 对齐链接层1)Top 顶部2)Vertical Center 垂直居中3)Bottom 底部4)Left 左部5)Horizontal Center 水平居中6)Right 右对齐14、Distribute Linked 分部链接层15、Merge down 向下合并 Merge linked 合并链接层16、Merge visible 合并可见层17、Flatten Image 合并所有图层18、Matting 修边1)Defringe 用纯色替换边缘像素颜色2)Remove Black Matte 移除黑边3)Remove White Matte 移除白边五、Select 选择菜单1、All 全选2、Deselect 取消选取择3、Reselect 重新选取择4、Inverse 反选5、Color Range 色彩范围6、Feather 羽化7、Modify 修边1)Border 边框2)Smooth 平滑3)Expand 扩边4)Contact 缩边8、Grow 生长9、Similar 相似10、Transform selection 变换选区11、Load selection 载入选区12、Save selection 存储选区六、Filter 滤镜1、Last Filter 重复上一次滤镜操作2、Fade 淡化效果滤镜3、Artistic 艺术化笔刷1)colored pencil 彩色铅笔2)Cutout 剪贴画3)Dry Brush 干画笔4)Film Groin 胶片颗粒5)Fresco 壁画6)Neon Glow 荧光7)Paint daubs 颜料涂抹8)Palette knife 调色板刀9)Plastic wrap 塑料覆膜10)Poster edges 招贴画11)Rough pastels 粗蜡笔12)Smudge Stick 涂抹棒13)Sponge 海绵14)Underpainting15)Watercolor 水彩画4、Blur 模糊1)Blur More 更加模糊2)Gaussion Blur 高斯模糊3)Motion Blur 动态模糊4)Redial Blur 幅射模糊5)Smart Blur 强化模糊5、Brush stroks 画笔勾画1)Accented Edges 边缘强调2)Angled strokes 角度线条3)Crosshatch 十字交叉线4)Dark strokes 模糊线条5)Ink out lines 墨线图6)Spatter 飞溅效果7)Sprayed strokes 喷雾线条8)Sumi-e 水墨画效果6、Distort 扭曲变形1)Diffuse Glow 发散辉光2)Displace 置换3)Glass 玻璃4)Ocean Ripple 海涟漪5)Pinch 挤压变形6)Polar Coordinates 极坐标7)Ripple 水波纹8)Shear 切变扭曲9)Spherize 球面化10)Twirl 旋涡11)Wave 波形效果12)Zigzag 扭曲效果7、Noise 杂色1)Add Noise 加杂色2)Despeckle 去斑点3)Dust Scratches 去散乱噪声4)Median 中值8、Pixelate 像素化1)Color Halftone 彩色半调网频2)Crystallize 结晶效果3)Facet 多面体效果4)Fragment 碎片效果5)Mezzotint 网版效果6)Mosaic 马塞克7)Pointillize 点彩画9、Render 渲染1)3D Transform 3D变换2)Clouds 云彩3)Difference Clouds 分层云彩4)Lens Flare 镜头光晕5)Lighting Effects 光照效果6)Texture Fill 纹理填充10、Sharpen 锐化2)Sharpen More 进一步锐化3)Unsharp Mask 模糊蒙版锐化效果11、Sketch 素描绘画效果1)Bas kelief 浮雕效果2)Chalk charcoal 碳粉画效果3)Charcoal 碳笔效果4)Chrome 金属铬画5)Conte Crayon 蜡笔6)Graphic pen 钢笔7)Halftone pattern 半色调图案8)Note paper 粗糙纸9)Photocopy 照片复印10)Plaster 石膏版画11)Reticulation 网状效果12)Stamp 印章效果14)Water paper 浸水纸12、Stylize 风格化1)Diffuse 散乱化2)Emboss 浮雕3)Extrude 突出分离4)Find edges 获取边缘5)Glowing edges 辉光边缘6)Solarize 中途曝光7)Files 瓷砖8)Trace contour 轮廓描绘9)Wind 风13、Texture 纹理1)Craquelure 裂纹2)Grain 颗粒效果3)Mosaic Tiles 马塞克4)Patchwork 拼图效果5)Stained Glass 彩色玻璃6)Texturizer 纹理化14、Video 视频1)De-Interlace 逐行2)NTSC colors NTSC 颜色15、Other 其它1)Custom 自定义2)High Pass 高通滤波器3)Maximum 最大化4)Minimum 最小化5)Offset 偏移16、Digimarc 水印1)Embed watermark 加水印标记2)Read watermark 读取水印标记七、View 视图1、New view 新视图2、Preview 预览1)Cyan 青2)Magenta 品红3)Yellow 黄4)Black 黑3、Gamut warning 色域警告4、Zoom In 放大5、Zoom out 缩小6、Fit on Screen 满画布显示7、Actual pixels 实际像素8、Print size 打印尺寸9、Hide Edges 隐藏边界10、Hide path 隐藏路径11、Show Rules 显示/隐藏标尺12、Hide Guides 显示/隐藏辅助线13、Snap to Guides 贴齐辅助线14、Lock Guides 锁定辅助线15、Clear Guides 清除辅助线16、Show Grid 显示/隐藏网格17、Snap to Grid 贴齐网格八、Window 窗口菜单1、Cascade 层叠2、Tile 平铺3、Auange Icens 排列4、Close All 关闭所有窗口5、Hide Tools 显示/隐藏工具栏6、Hide Navigator 显示/隐藏导航栏7、Show Info 显示/隐藏信息面板8、Show Options 显示/隐藏选项面板9、Hide color 显示/隐藏颜色面板10、Show Suatches 显示/隐藏调色板11、Show Brushes 显示/隐藏笔刷面板12、Hide Layers 层面板13、Show channels 显示/隐藏通道面板14、Show Path 显示/隐藏路径面板15、Hide History 显示/隐藏历史面板16、Show Actions 显示/隐藏动作面板17、Hide status Bar 显示/隐藏状态栏九、Help 帮助菜单。
- 1、下载文档前请自行甄别文档内容的完整性,平台不提供额外的编辑、内容补充、找答案等附加服务。
- 2、"仅部分预览"的文档,不可在线预览部分如存在完整性等问题,可反馈申请退款(可完整预览的文档不适用该条件!)。
- 3、如文档侵犯您的权益,请联系客服反馈,我们会尽快为您处理(人工客服工作时间:9:00-18:30)。
校准后,参数列表文件可以存储在matab Calib_Results通过单击Save。
变量列表中可以分为两类:内在参数和外部参数。
内在参数(相机模型):
内部所使用的相机模型非常类似于Heikkil�和Silven大学在芬兰的奥卢。
访问在线校准页
面,发布页面。
我们特别推荐CVPR的97年的论文:一个四个步骤的相机标定过程与隐式图像校正。
内部参数的列表:
Focal length焦距:焦距像素存储在2 x1向量fc。
Principal point:主要观点:主点坐标存储在2 x1向量cc。
Skew coefficient倾斜系数:倾斜系数定义之间的角x和y像素存储在标量alpha_c轴。
Distortions:扭曲:图像失真系数(径向和切向畸变)存储在5 x1向量kc。
固有参数的定义:
让P点的空间坐标向量XXc =(Xc、Yc Zc)相机的参考系。
我们项目现在点在图像平面根据内在参数(fc、cc、alpha_c kc)。
让xn规范化(针孔)图像投影:
让r2 = x2 +y2。
包括透镜畸变后,新的规范化点坐标xd定义如下:
在dx切向畸变向量:
因此,5-vector kc包含径向和切向畸变系数(观察到第六阶径向畸变系数来看的第五项向量kc)。
值得注意的是,这种扭曲模型是由布朗在1966年首次引入并称为“铅锤”模式(径向多项式+“薄棱镜”)。
切向畸变是由于“新社会”,或不完美的镜头组件的定心和其他复合透镜制造缺陷。
更多细节,请参阅布朗的原始参考页面中列出的出版物。
一旦应用变形,最终的像素坐标x_pixel =(xp,yp)P在图像平面的投影:
因此,像素坐标矢量x_pixel和规范化(扭曲)坐标向量xd彼此通过相关线性方程:
KK称为摄像机矩阵,定义如下:
在matlab中,这个矩阵存储在变量校准后KK。
观察到fc(1)和fc(2)焦距(mm)的独特价值水平和垂直像素为单位。
这两个组件的向量fc通常是非常相似的。
比fc(2)/ fc(1),通常被称为“纵横比”,不同于1如果CCD阵列的像素不广场。
因此,自然地处理非方块像素的相机模型。
此外,alpha_c编码系数x和y传感器轴之间的角度。
因此,像素甚至允许非矩形。
一些作者引用类型的模型作为“仿射畸变”模型。
除了计算估计的内在参数fc、cc,kc和alpha_c工具箱也回报估计这些参数的不确定性。
matlab 变量包含那些不确定性fc_error cc_error,kc_error alpha_c_error。
信息,这些向量是大约三倍标准差的估计的错误。
下面是一个示例输出优化后的工具箱:
重要的公约:像素坐标定义,(0,0)是左上角的中心像素的图像。
因此,[nx-1;0]是右上角的中心像素,[0;ny-1]是左下角的中心像素和nx-1;ny-1是右下角的中心像素nx和纽约图像的宽度和高度(图片的第一个例子,nx = 640和ny= 480)。
工具箱中提供一个matlab函数计算,直接像素投影地图。
这个函数是project_points2.m。
这个函数接收一组点的三维坐标空间(在全球参考框架或相机参考系)和内在相机参数(fc、cc、kc,alpha_c),并返回点图像的像素预测飞机。
看到信息的功能。
逆映射:
反问题计算归一化图像的像素坐标的投影向量xn x_pixel在大多数机器视觉应用程序非常有用。
然而,由于高度畸变模型,不存在一般代数表达式的逆映射(也称为标准化)。
然而,在工具箱中提供了一个数值逆映射的实现函数的形式:normalize.m。
函数应该调用的方法:xn =正常化(x_pixel、fc、cc、kc alpha_c)。
在这种语法,x_pixel和xn可能包含不止一个点坐标。
调用的示例,请参见compute_extrinsic_init.m matlab函数。
减少相机模型:
目前生产的相机并不总是证明这非常一般的光学模型。
例如,现在习惯假设矩形像素,因此假设零斜(alpha_c = 0)。
它实际上是默认设置的工具箱(倾斜系数不是估计)。
此外,通用(第六阶径向+切线)畸变模型通常是不完全考虑。
标准的视图(非广角相机)、通常是没有必要的(不推荐),推动第四订单以外的径向畸变模型的组件(即保持kc(5)= 0)。
这也是一个工具箱的默认设置。
此外,失真往往被丢弃的切向分量(合理的事实大多数镜头目前生产没有缺陷在定心)。
第四阶对称径向畸变无切向分量(kc的三个组件设置为0)实际上是使用的畸变模型。
另一个非常常见的畸变模型良好的光学系统或狭窄的视野镜头是二阶对称径向畸变模型。
在这种模型
中,只有第一个组件的向量kc估计,而其他四个设置为0。
这个模型也是常用的几个图像时用于校准(太少的数据来估计一个更复杂的模型)。
除了扭曲和扭曲,降低其他模型是可能的。
例如,当只有少数图像用于校准(如一个、两个或三个图像)主点cc往往很难估计准确。
它被认为是最困难的部分之一本机透视投影模型来估计(忽略透镜扭曲)。
如果是这种情况,有时更好(推荐)设置主点的中心形象(cc =[(nx-1)/ 2;(ny-1)/ 2]),而不是进一步估计它。
最后,在一些罕见的情况下,它可能是必要的拒绝长宽比fc(2)/ fc(1)评估。
模型降阶虽然这最后一步是可能的工具箱,一般不推荐的长宽比通常是简单的估计非常可靠。
有关如何执行模型的更多信息选择工具箱,访问该页面描述第一次校准的例子。
符合Heikkil�的符号:
在原始Heikkil�的纸,内部参数出现在名称上略有不同。
下表给出了对应两个符号之间的计
划:
一些评论Heikkil�的模型:
斜不是估计(alpha_c = 0)。
它可能不是一个问题,因为大多数相机目前没有定心制造缺陷。
径向畸变模型的组件只是第四订单。
在大多数情况下这就足够了。
四个变量(f,Du,Dv,su)取代2 x1焦向量fc分别一般无法估计。
只是可能如果两个已知的变量(例如度量焦值比例系数f和规模因素su)。
看到Heikkil�的纸的更多信息。
符合注册威尔逊的符号:
在他最初的蔡相机标定算法的实现,Reg威尔逊对相机参数使用不同的符号。
下表给出了对应两个符号之间的计划:
威尔逊使用一阶径向畸变模型(一个额外的常数kappa1)没有一个简单的封闭corespondence 与畸变模型(kc编码的系数(1),…,kc(5))。
然而,我们叫做willson_convert的工具箱中包含一个函数,将整个组威尔逊的参数转换成我们的参数(包括变形)。
这个函数被调用另一个函数willson_read直接加载在校准结果文件由威尔逊的代码生成和计算参数(内在和外在)后我们的符号(使用该函数,首先设置matlab变量calib_file原始威尔逊校准文件的名称)。
一些额外的评论威尔逊的模型:
类似于Heikkil�的模型中,斜不包括在模型(alpha_c = 0)。
类似于Heikkil�的模型,四个变量(f,sx,dpx dpy)取代2 x1焦向量fc分别一般无法估计。
只是
可能如果两个已知的变量(例如度量焦值比例系数f和sx)。
外在的参数:
Rotations旋转:一组n_ima 3 x3的旋转矩阵Rc_1,Rc_2,. .,Rc_20(假设n_ima = 20)。
Translations平移:一组n_ima 3 x1向量Tc_1 Tc_2,. .,Tc_20(假设n_ima = 20)。
非本征参数的定义:
考虑校准网格第#i个校准(附图片),和专注于相机参考系attahed网格。
没有损失的共性,i= 1。
下面的图显示了参考系(O,X,Y,Z)附加到校准gid。
让P点的空间坐标向量XX =[X,Y,Z]在网格参考系(参考帧显示在前面的图)。
让XX c = [X c;Y c;Z c]是P的坐标向量在相机参考系。
然后XX XXc互为相关通过严格的运动方程如下:
XX c = Rc_1 * XX + Tc_1
特别是translation 向量的坐标向量是Tc_1网格图形的起源(O)相机参考系,和第三列的矩阵Rc_1表面法向量包含平面的平面网格的相机参考系。
相同的关系持有剩余的外在参数(Rc_2 Tc_2)、(Rc_3 Tc_3)……(Rc_20 Tc_20)。
一旦一个点的坐标表示的相机参考系,也许像平面上投影使用内在的相机参数。
向量omc_1 omc_1,……,omc_20s是旋转矩阵Rc_1,Rc_1,……,Rc_20相关的旋转矢量。
这两个相关罗德里格斯公式。
例如, Rc_1 = rodrigues(omc_1)。
类似于内在参数,外在的估计的不确定性参数omc_i Tc_i(i= 1,…,n_ima)也计算工具箱。
这些不确定性都存储在向量omc_error_1,……,Tc_error_1 omc_error_20……,Tc_error_20(假设n_ima = 20)和代表大约三倍标准差的估计的错误。
