网络摄像头产品使用说明书
网络摄像头指南书说明书

Quick Start GuideO8VB1WelcomeThank you for purchasing this network camera!This owner's manual is designed to be a reference tool for your system.Please read this manual carefully before operating the unit and retain it for future reference. Should you require any technical assistance, contact Speco Technologies Tech Support at1-800-645-5516Important Safeguards and Warning1. Electrical safetyAll installation and operation here should conform to local electrical safety codes.Use a certified/listed 12VDC Class 2 power supply only.Please note: Do not connect two power supplying sources to the device at the same time; it may result in device damage! The product must be grounded to reduce the risk of electric shock.Improper handling and/or installation could run the risk of fire or electrical shock.2. EnvironmentHeavy stress, violent vibration or exposure to water is not allowed during transportation, storage and installation.This product should be installed in a cool, dry place away from direct sunlight and heat sources.Do not install the product in extreme temperature conditions.Do not expose the camera to electromagnetic radiation. Otherwise it may result in CMOS sensor failure.Do not block any ventilation openings.Do not allow water and liquid intrusion into the camera.3. Operation and Daily MaintenancePlease shut down the device and then unplug the power cable before you begin any maintenance work.Do not touch the CMOS sensor optic component. You can use a blower to clean the dust on the lens surface.Always use the dry soft cloth to clean the device. If there is too much dust, use a clothWarningStatement This camera should be installed by qualified personnel only.All the examination and repair work should be done by qualified personnel.Any unauthorized changes or modifications could void the warranty..This guide is for reference only.Product, manuals and specifications may be modified without prior notice. Speco Technologies reserves the right to modify these without notice and without incurring any obligation.Speco Technologies is not liable for any loss caused by improper operation.Note:Before installation, check the package and make sure that all components are included.Contact your rep or Speco customer service department immediately if something is broken or missing in the package .dampened with a small quantity of neutral detergent. Finally use the dry cloth to clean the device.Please use a professional optical cleaning method to clean the enclosure. Improper enclosure cleaning (such as using cloth) may result in poor IR functionality and/or IR reflection. The grounding holes of the product are recommended to be grounded to further enhance the reliability of the camera.Dome cover is an optical device, please don't touch or wipe cover surface directly during installation and use, please refer to the following methods if dirt is found:Stained with dirt: Use oil-free soft brush or hair dryer to remove it gently.Stained with grease or fingerprint: Use oil-free cotton cloth or paper soaked with alcohol or detergent to wipe from the lens center outward. Change the cloth and wipe severaltimes if it is not clean enough.7213456* 1 It is recommended to install the security cap for outdoor installations .* 2 DC 12V power supply is not required if a PoE switch or injector is used to power the camera.► Connecting Network Cable① Loosen the nut from the main element.② Run the network cable (without RJ 45 connector) through both elements. Then crimp the cable with RJ 45 connector .③ Connect the cable to the hermetic connector . Then tighten the nut and the main cover .1* Before you start, please make sure that the wall or ceiling is strong enough to withstand three times the weight of the camera.① Open the mounting base and the upper cover of the junction box.② Install junction box onto the wall by using the screws provided.③Fasten the camera onto the mounting base.Mounting BaseUpper Cover④nstall the camera onto the junctionConnect the cables and then ibox as shown below.⑤ Bracket Adjustment-Loosen the fixed ring to adjust the view angle of the camera. After you get the optimum angle of view, tighten the fixed ring to complete the installation.Fixed Ring°③ In the device list, you can view the IP address, model number, and MAC address of each device. Select the applicable device and double click to open up the web viewer. You can also manually enter the IPaddress in the address bar of the web browser (it will only work with ● OperationIP Scanner can search for the device on the local network.① Make sure that the camera and the PC are connected to the same local network. The camera is set to DHCP by default.②Install IP Scanner from the CD and run it after installation.Microsoft Internet Explorer 8 and above).The login interface is shown above. Default user name is admin andpassword is 1234. After logging in, follow directions to installapplicable plugins.。
Hikvision DS-2CDx1xxG0-xxx 网络摄像头快速使用指南说明书

DS-2CDx1xxG0-xxx Network Dome CameraQuick Start Guide© 2020 Hangzhou Hikvision Digital Technology Co., Ltd. All rights reserved.This Manual is the property of Hangzhou Hikvision Digital Technology Co., Ltd. or its affiliates (hereinafter referred to as “Hikvision”), and it cannot be reproduced, changed, translated, or distributed, partially or wholly, by any means, without the prior written permission of Hikvision. Unless otherwise expressly stated herein, Hikvision does not make any warranties, guarantees or representations, express or implied, regarding to the Manual, any information contained herein.About this ManualThe Manual includes instructions for using and managing the Product. Pictures, charts, images, and all other information hereinafter are for description and explanation only. The information contained in the Manual is subject to change, without notice, due to firmware updates or other reasons. Please find the latest version of this Manual at the Hikvision Website (/en/).Please use this Manual with guidance and assistance of professionals trained in supporting the Product. Trademarks Acknowledgementand other Hikvision trademarks and logos are the properties of Hikvision in various jurisdictions. Other trademarks and logos mentioned below are the properties of their respective owners. LEGAL DISCLAIMERTO THE MAXIMUM EXTENT PERMITTED BY APPLICABLE LAW, THIS MANUAL AND THE PRODUCT DESCRIBED, WITH ITS HARDWARE, SOFTWARE AND FIRMWARE, ARE PROVIDED “AS IS” AND “WITH ALL FAULTS AND ERRORS.” HIKVISION MAKES NO WARRANTIES, EXPRESS OR IMPLIED, INCLUDING WITHOUT LIMITATION, MERCHANTABILITY, SATISFACTORY QUALITY, OR FITNESS FOR A PARTICULAR PURPOSE. THE USE OF THE PRODUCT BY YOU IS AT YOUR OWN RISK. IN NO EVENT WILL HIKVISION BE LIABLE TO YOU FOR ANY SPECIAL, CONSEQUENTIAL, INCIDENTAL, OR INDIRECT DAMAGES, INCLUDING, AMONG OTHERS, DAMAGES FOR LOSS OF BUSINESS PROFITS, BUSINESS INTERRUPTION, OR LOSS OF DATA, CORRUPTION OF SYSTEMS, OR LOSS OF DOCUMENTATION, WHETHER BASED ON BREACH OF CONTRACT, TORT (INCLUDING NEGLIGENCE), PRODUCT LIABILITY, OR OTHERWISE, IN CONNECTION WITH THE USE OF THE PRODUCT, EVEN IF HIKVISION HAS BEEN ADVISED OF THE POSSIBILITY OF SUCH DAMAGES OR LOSS.YOU ACKNOWLEDGE THAT THE NATURE OF INTERNET PROVIDES FOR INHERENT SECURITY RISKS, AND HIKVISION SHALL NOT TAKE ANY RESPONSIBILITIES FOR ABNORMAL OPERATION, PRIVACY LEAKAGE OR OTHER DAMAGES RESULTING FROM CYBER-ATTACK, HACKER ATTACK, VIRUS INSPECTION, OR OTHER INTERNET SECURITY RISKS; HOWEVER, HIKVISION WILL PROVIDE TIMELY TECHNICAL SUPPORT IF REQUIRED.YOU AGREE TO USE THIS PRODUCT IN COMPLIANCE WITH ALL APPLICABLE LAWS, AND YOU ARE SOLELY RESPONSIBLE FOR ENSURING THAT YOUR USE CONFORMS TO THE APPLICABLE LAW. ESPECIALLY, YOU ARE RESPONSIBLE, FOR USING THIS PRODUCT IN A MANNER THAT DOES NOT INFRINGE ON THE RIGHTS OF THIRD PARTIES, INCLUDING WITHOUT LIMITATION, RIGHTS OF PUBLICITY, INTELLECTUAL PROPERTY RIGHTS, OR DATA PROTECTION AND OTHER PRIVACY RIGHTS. YOU SHALL NOT USE THIS PRODUCT FOR ANY PROHIBITED END USES, INCLUDING THE DEVELOPMENT OR PRODUCTION OF WEAPONS OF MASS DESTRUCTION, THE DEVELOPMENT OR PRODUCTION OF CHEMICAL OR BIOLOGICAL WEAPONS, ANY ACTIVITIES IN THE CONTEXT RELATED TO ANY NUCLEAR EXPLOSIVE OR UNSAFE NUCLEAR FUEL-CYCLE, OR IN SUPPORT OF HUMAN RIGHTS ABUSES.IN THE EVENT OF ANY CONFLICTS BETWEEN THIS MANUAL AND THE APPLICABLE LAW, THE LATTER PREVAILS.Regulatory Information FCC InformationPlease take attention that changes or modification not expressly approved by the party responsible for compliance could void the user’s authority to operate the equipment.FCC Compliance: This equipment has been tested and found to comply with the limits for a Class B digital device, pursuant to part 15 of the FCC Rules. These limits are designed to provide reasonable protection against harmful interference in a residential installation. This equipment generates, uses, and can radiate radio frequency energy and, if not installed and used in accordance with the instructions, may cause harmful interference to radio communications. However, there is no guarantee that interference will not occur in a particular installation. If this equipment does cause harmful interference to radio or television reception, which can be determined by turning the equipment off and on, the user is encouraged to try to correct the interference by one or more of the following measures:•Reorient or relocate the receiving antenna.•Increase the separation between the equipment and receiver.•Connect the equipment into an outlet on a circuit different from that to which the receiver is connected.•Consult the dealer or an experienced radio/TV technician for helpFCC ConditionsThis device complies with part 15 of the FCC Rules. Operation is subject to the following two conditions:•This device may not cause harmful i nterference.•This device must accept any interference received, including interference that may cause undesired operation.EU Conformity StatementThis product and, if applicable, the supplied accessories too are marked with “CE” and complytherefore with the applicable harmonized European standards listed under the EMC Directive2014/30/EU, the RoHS Directive 2011/65/EU.2012/19/EU (WEEE Directive): Products marked with this symbol cannot be disposed of asunsorted municipal waste in the European Union. For proper recycling, return this product to yourlocal supplier upon the purchase of equivalent new equipment, or dispose of it at designatedcollection points. For more information see: 2006/66/EC and its amendment 2013/56/EU (battery directive): This product contains a battery thatcannot be disposed of as unsorted municipal waste in the European Union. See the productdocumentation for specific battery information. The battery is marked with this symbol, which mayinclude lettering to indicate cadmium (Cd), lead (Pb), or mercury (Hg). For proper recycling,return the battery to your supplier or to a designated collection point. For more information see:www. .Industry Canada ICES-003 Compliance. This device meets the CAN ICES-3 (B)/NMB-3(B)standards r equirements.These instructions are intended to ensure that the user can use the product correctly to avoiddanger or property loss.Laws and RegulationsThe device should be used in compliance with local laws, electrical safety regulations, and fire prevention regulations.TransportationKeep the device in original or similar packaging while transporting it.Power SupplyThe input voltage should conform to IEC60950-1 standard: SELV (Safety Extra Low Voltage) and the LPS (Limited Power Source). Refer to the appropriate documentation for detailed information.DO NOT connect multiple devices to one power adapter, to avoid over-heating or fire hazards caused by overload.Make sure the plug is properly connected to the power socket.System SecurityThe installer and user are responsible for password and security configuration and its settings. BatteryImproper use or replacement of the battery may result in explosion hazard. Replace with the same or equivalent type only. Dispose of used batteries in conformance with the local codes. MaintenanceIf the product does not work properly, please contact your dealer or the nearest service center. We shall not assume any responsibility for problems caused by unauthorized repair or maintenance.A few device components (e.g., electrolytic capacitor) require regular replacement. The average lifespan varies, so periodic checking is recommended. Contact your dealer for details.CleaningPlease use a soft and dry cloth when clean inside andoutside surfaces of the product cover. Do not use alkaline detergents.Usage EnvironmentWhen any laser equipment is in use, make sure that the device lens is not exposed to the laser beam, or itmay burn out.Do not expose the device to high electromagnetic radiation or dusty environments.For an indoor-only device, place it in a dry and well-ventilated environment.Do not aim the lens at the sun or any other bright light.Make sure the running environment meets the requirement of the device. The operating temperature shall be -30° to 60° C (-22° to 140° F) or -40° to 60° C (-40° to 140° F), and the operating humidity shall be 95% or less (non-condensing).Do not place the camera in extremely hot, cold, dusty, or damp locations, and do not expose it to high electromagnetic radiation.EmergencyIf smoke, odor, or noise arises from the device, immediately turn off the power, unplug the power cable, and contact the service center.Time SynchronizationSet up camera time manually for the first time access if the local time is not synchronized with that of the network. Visit the camera via Web browser/client software and go to the time settings interface. InstallationMake sure the device is firmly secured to any wall or ceiling mountings.Be sure that there is enough space to install the camera and accessories.Make sure that the device in the package is in good condition and all the assembly parts are included. Make sure that the wall is strong enough to withstand at least foour times the weight of the camera and the mount.The standard power supply is 12 VDC, please make sure your power supply matches with your camera. Make sure that the power has been disconnected before you wire, install, or disassemble the device. Make sure that no reflective surface is too close to the camera lens. The IR light from the camera may reflect back into the lens causing reflection.For a device with this sticker, this device is intended for installation in a restrictedaccess location, access can only be gained by service persons or by users who havebeen instructed about the reasons for the restrictions applied to the location andabout any precautions that shall be taken.Symbols and MarksPackage ContentsInstallation 1.11.2*2.1A.2A.4B.22.23.13.23.4Camera Terminal Block WiringRS-485CVBSAlarm Output with Power from CameraAlarm Output with External PowerAlarm Input12 VDC OutputActivate and Access Network CameraScan the QR code to get Activate and Access Camera.NOTE: Mobile data charges may apply if Wi-Fi is unavailable.OperationReset and Restore CameraPress the Reset button for approximately 10s when the camera is powering on or rebooting to restore the default settings, including the user name, password, IP address, port no., etc.For the position of the reset button, refer to the figure in the interface introduction page.。
网络摄像头操作手册说明书

网络摄像机快速指南前言本节内容的目的是确保用户通过本手册能够正确使用产品,以避免操作中的危险或财产损失。
在使用此产品之前,请认真阅读产品手册并妥善保存以备日后参考。
使用前说明●访问本公司官网()获取说明书、应用工具和开发资料。
●使用前请先对设备进行校时,校时的具体配置方法请参见《网络摄像机操作手册》。
符号约定对于文档中出现的符号,说明如下所示。
安全使用注意事项●产品安装使用过程中,必须严格遵守国家和使用地区的各项电气安全规定。
●请使用正规厂家提供的电源适配器,电源适配器具体要求参见产品参数表,建议为每台设备配备独立的适配器。
●根据国家相关标准,对弱电设备供电时,要求供电电流不超过8A并且功率不超过100W,防止发生安全事故。
●为减少火灾或电击危险,请勿让产品受到雨淋或受潮。
●应该在建筑物安装配线中组入易于使用的断电设备。
●在设备安装时,请确保产品固定牢固。
●如果产品工作不正常,请联系购买产品的商店或最近的服务中心,不要以任何方式拆卸或修改产品。
(对未经认可的修改或维修导致的问题,本公司不承担任何责任)。
●避免将产品安装到振动或冲击环境,并使产品远离电磁干扰的地点。
(忽视此项可能会损坏产品)。
●请勿直接触碰产品散热部件,以免烫伤。
●室内产品请勿安装在可能淋到水或其他液体的环境。
●请勿在极热、极冷、多尘、有腐蚀性、高盐碱或者高湿度的环境下使用产品,具体温、湿度要求参见产品的参数表。
●设备需存放于干燥无腐蚀性气体环境,避免阳光直射。
●避免将镜头对准强光(如灯光照明、太阳光或激光束等),否则会损坏图像传感器。
●避免热量积蓄,保持产品周边通风流畅。
●请勿直接触碰到图像传感器,若有必要清洁,请将柔软的干净布用酒精稍微湿润,轻轻拭去尘污;当产品不使用时,请将防尘盖加上,以保护图像传感器。
●设备接入互联网可能面临网络安全问题,请您加强个人信息及数据安全的保护。
当您发现设备可能存在网络安全隐患时,请及时与我们联系。
AXIS P1367-E网络摄像头用户手册说明书

AXIS P1367-E Network Camera 用户手册目录解决方案概述 (4)产品概述 (5)安装 (7) (7)在网络上查找设备 (8)打开设备的网页 (8)安全密码 (8)配置设备 (9)需要更多帮助? (9)更换镜头 (9)使用隐私遮罩隐藏图像的某些部分 (9)在低照度条件下降低噪声 (9)选择曝光模式 (10)尽可能增加图像细节 (10)监控窄长区域 (10)验证像素分辨率 (11)视点区域 (11)处理具有强背光的场景 (12)当设备侦测到物体时,显示视频流中的文本叠加 (12)比特率控制 (13)视频压缩格式 (15)降低带宽和存储 (15)设置网络存储 (16)向录像添加音频 (16)录制并观看视频 (16)设置事件规则 (17)触发操作 (17)当摄像机侦测到物体时录制视频 (17)应用程序 (17)故障排查 (19)检查当前固件版本 (19)升级固件 (19)重置为出厂默认设置 (19)技术问题、线索和解决方案 (20)性能考虑 (21)设备界面 (22) (22) (22)状态 (22)视频 (22)音频 (30)录制内容 (31)应用 (32)系统 (32)维护 (46)规格 (47)目录LED指示灯 (47)对焦助手的LED状态指示灯情况 (47)SD卡插槽 (47)按钮 (48)连接器 (48)工作条件 (50)功耗 (50)解决方案概述解决方案概述产品概述产品概述1耐候保护罩2顶盖3窗片4入侵报警磁铁5安全线6扎线带固定点7IK10工具8入侵报警传感器9电缆盖板10带弹簧的拇指螺丝(4颗)11光学单元12变焦拉杆13调焦环的锁定螺丝14调焦环请勿使用电缆盖板提起该产品。
产品概述15LED状态指示灯16LED网络指示灯17LED电源指示灯18microSD卡插槽19I/O连接器20RS485/422连接器21控制按钮22网络连接器(PoE)23音频输出24音频输入25电缆垫片M20(2个)26光圈连接器安装安装要观看此视频,请转到本文档的网页版本。
W100网络摄像头用户手册说明书
W100Webcam 網路攝影機网络摄像头User Manual 使用說明手冊使用说明手册w100 WebcamAbout this GuideThe content in this document is for information purpose and is subject to change without prior notice. We have made every effort to ensure that this User Guide is accurate and complete. However, no liability is assumed for any errors or omissions that may have occurred.The manufacturer reserves the right to change the technical specifications without prior notice. Regulatory noticesThis document provides country- and region-specific non-wireless and wireless regulatory notices and compliance information for your product. Some of these notices may not apply to your product.CE Regulatory NoticeThe product herewith complies with the requirements of the EMC Directive 2014/30/EU, and the RoHS Directive 2011/65/EU.WEEE NoticeDisposal of Waste Electrical and ElectronicEquipment and/or Battery by users in privatehouseholds in the European UnionThis symbol on the product or on thepackaging indicates that this cannot bedisposed of as a household waste. You mustdispose of your waste equipment and/orbattery by handling it over to the applicabletake-back scheme for the recycling ofelectrical and electronic equipment and/orbattery. For more information aboutrecycling of this equipment and/or battery,please contact your city office, the shopwhere you purchased the equipment oryour household waste disposal service. Therecycling of materials will help to conservenatural resources and ensure that it isrecycled in a manner that protects humanhealth and environment.FCC StatementThis equipment has been tested and found to comply with the limits for a Class B digital device, pursuant to Part 15 of the FCC Rules. These limits are designed to provide reasonable protection against harmful interference in a residential installation. This equipment generates, uses and can radiate radio frequency energy and, if not installed and used in accordance with the instructions,may cause harmful interference to radio communications. However, there is no guarantee that interference will not occur in a particular installation. If this equipment does cause harmful interference to radio or television reception, which can be determined by turning the equipment off and on, the user is encouraged to try to correct the interference by one or more of the following measures:• Reorient or relocate the receiving antenna.• Increase the separation between the equipment and receiver.• Connect the equipment into an outlet on a circuit different from that to which the receiver is connected. • Consult the dealer or an experienced radio/TV technician for help.This device complies with Part 15 of the FCC Rules. Operation is subject to the following two conditions: (1) This device may not cause harmful interference, and (2) this device must accept any interference received, including interference that may cause undesired operation.FCC Caution: Any changes or modifications not expressly approved by the party responsible for compliance could void the user's authority to operate this equipment.1.IntroductionThank you for purchasing this webcam. Thisproduct is designed for various video chatstreaming application via USB interface. 2.Package Contentswebcam User manual3.Product Overview1 Lens 5 USB connector2 Adjustable focus 6 Microphone connector3 Tripod hole 7 Microphone4 Clip base4.Setting up your webcam4.1Place your webcamDesigned for the way you like to make a video call, place the webcam where you want it—on the monitor or the desktop.4.1.1 Grasp the webcam as shownand open clip base with your otherhand. Mount the webcam, makingsure the foot on the clip base isflush with the back of yourmonitor.4.1.3Plug USB connector into USB port, and microphoneconnector into MIC hole (red / )of yourcomputer. Wait for about 1 minute, webcam willinstall automatically..4.2Getting start with video callingTo take advantage of video calling, both you and the person you call must install video-calling application such as SkypeTM, Yahoo! @Messenger, Windows Live@ Messenger or Gmail. As well as a USB camera and video calling application, bothcallers need:• A computer with speaker (or a headset).• A broadband internet connection (e.g., DSL, T1, or cable) Please check your preferred video callingapplication requirements. (Requirements may vary between different applications but usually a minimum of 2Mbps upload speed is required).5.SpecificationsItem DescriptionSensor 0.3MP CMOS sensorCapture Image Size 160x120,176x144, 320x240,352x288, 640x480Frame Rate Max. 30 fps Output Format MJPG, YUY2View Angle D: 50.6°Focus Manually Adjustable Focusing Range 20mm to infinityMicrophone External (connected with computer)Compatibility Windows 10 or higher MAC OS X 10.6 or higherInterface USB2.0, A/VStill Image format BMP/ JPG WorkingTemperature0~40°CPower Consumption <0.5W Dimension 67.5 x 32.5 x 51mm Weight 88gw100網路攝影機有關本手冊本手冊之內容只供參考,並得以隨時變更不需要事先通知。
三星 SNB-6004P 网络摄像头 说明书

1/2.8 CMOS 2 Megapixel Full HD IP Col/B&W Camera• High frame rate of 60 frames per second at Full HD resolution (1080p)• Embedded analytics: face detection, audio detection, advanced motion, tampering • Simple focus by motorized image sensor • Offers local video and image storage on SD card• Advanced video processing: Super light Enhancer (SSLE), extreme backlight WDR, Enhanced DIS stabiliser and Defog• Multi-Crop Streaming with user management• Up to 70% less bandwidth utilization, with improved Samsung processingSummaryThe WiseNetIII Camera Series from Samsung Techwin WiseNetIII network ranges which feature the most advanced functions from Samsung with 1.3 to 3 megapixel of high definition images.These exceptional cameras have the latest technology in terms of low light, extreme back light compensation, easy of use and friendly user interface, as well as powerful image analysis algorithms.With enhanced features and newtechnologies which combat the challenges of though environmentalconditions, the WiseNetIII Series will meet the market need which requires professional security.Technical SpecificationsImage Sensor1/2.8" Progressive Scan Exmor™ 2.38 Megapixel CMOS Digital Signal Processor (DSP)WiseNet IIIScanning System ProgressiveCol/B&W On/Off/Auto, IR-cut filter removable (ICR)Sens Up Off ~ x60, autoMax. Framerate H.26450/60fps @ all resolutionsMax. Framerate MJPEG 30fps@320 x 180 to 800 x 600, 15fps@1024 x 768 to 1920 x 1080Sensitivity Colour0.1Lux(50IRE)@F1.2,***********(50IRE) Sensitivity B************(50IRE),************(50IRE) S/N Ratio50 dBLens Mount C/CS mountLens Drive Type Manual / DC auto iris, P-irisFocus Adjustment Manual, Simple focus, Day&NightNumber of Privacy Zones32Intelligent Video Analytics Scene change detection, masking of the camera lens, Tampering, Virtual line, Enter/Exit, Appear / Disappear,Audio detection, Face detectionPixels - Total1384(H) x 1076(V), 1.49M pixelsPixels - Effective1329(H) x 1049(V), 1.39M pixelsDigital Noise Reduction (DNR)On/off 2D/3D Noise Filter (SSNRIII)High Speed Shutter Minimum / Maximum / Anti flicker (2-1/12.000sec) BLC Back Light On/OffWDR>100dB, 100dBCamera ID45 character Off/OnOperating System Embedded LinuxVideo Outputs1x CVBS (1Vpp), BNCAlarm Inputs1Alarm Outputs1Video Player RTP/RTSP Streaming Quicktime, VLC playerTechnical SpecificationsRS-485 Protocols Samsung-T/E, Pelco-P/D, SungjinClient OS Windows® XP; Windows® VISTA; Windows® 7; Mac OS® XWeb Browser MS Internet Explorer 6.0 (or higher), Firefox, Google Chrome, SafariVideo Management Software SmartViewer 4.0Video Compression H.264 or MPEG4 & MJPEG, Dual Encoding Audio Compression G.711 u-law, Bi-DirectionalNetwork Streaming TCP, UDP (Unicast, Multicast)Frame Rate SXGA: 22fps, HD / SVGA / VGA / QVGA: 30fpsNetwork Protocol IPv4: TCP/IP, UDP/IP, RTP(UDP), RTP(TCP), RTSP, NTP, HTTP, HTTPS, SSL, DHCP, FTP, SMTP, ICMP, IGMP, SAP SNMPv1/v2c(MIB-2), ARP, ONVIFMaximum User Access Multicast max. 20 UsersUnicast max. 10 Users Network Interface1x 10/100 Base T/TX (RJ-45)DDNS Supporting Samsung DDNS and Public DDNS servers PoE Specification IEEE-802.3afIP Installer IP Address Installation Function (Win XP, VISTA & 2000 support)Login Access Level Guest, Administrator, UserSecurity HTTPS(SSL) Login Authentication Digest Login Authentication, IP Address FilteringAlarm Event File upload via FTP, E-Mail / Notification via E-Mail, TCP / Local storage (SD card) recording at network disconnected /External outputTime Setting Setting by NTP Server local or internetSD memory Micro SD/SDHC/SDXCMotion images recorded in the SDXC/SDHC/SD memory card can be downloadedInput/Output sockets Video Out(BNC), Power(2-Pin Term), RJ-45, SD CardSlot,Terminal 5Pin(Alarm In 1Pin, Alarm Out 1Pin, Alarm COM, GND), Audio Out, Audio InONVIF compliant Profile SMaterial Aluminium, PlasticOperating Temperature-10°C ~ +55°CHumidity less than 90%, non condensingTechnical SpecificationsLED Indicator YesSupply Voltage12 VDC / 24 VAC / PoE, 12 Vdc / 24 Vac / 802.3 af PoE Dimensions ( W x H x D)73.1 x 66.6 x 147.8 mm - 2.88 x 2.62 x 5.82 InPower Consumption (W)12Weight0.395 kg - 0.87 lbsAccessories1/3 Vario Megapixel Lens P-Iris IRDimensions。
爱达玛克720P无线网络监控摄像头说明说明书

The Edimax IC-3116W 720p wireless network camera is a versatile monitoring device ideal for monitoring your home, shop or factory during the daytime or at night. With Edimax Plug-n-View technology, no complicated setup is required and you can easily connect the camera to the cloud and monitor remotely from a smartphone, tablet or laptop. Motion-triggered snapshots and recording to email ensure that you capture every criminal event. The IC-3116W comes with a wireless interface making installation easy for any home/store/factory monitoring applications.720p Wireless H.264 Day & Night Network CameraIC-3116WPlug-n-View for 24/7 Easy Remote Monitoring Edimax Plug-n-View technology makes it easy for you to keep your yard, garage, shop, factory or other assets wherever you go. With Plug-n-View technology, you can connect your network camera to the cloud in a few simple steps and access it remotely with a smartphone, tablet, or computer no matter where you are.Night VisionWith a light sensor, image sensor, and IR LEDs, the IC-3116W can satisfy all security and indoorsurveillance needs even in dimly lit environments. And with automatic ICR (IR Cut Filter Removal), infrared light is filtered out during the day time and allowed to pass during the night time,ensuring video color quality in comparison with other IP cameras.4 IR LEDsImage Sensor & ICRLight SensorSOFTWARE FEATURES•Easy remote monitoring via iPhone, iPad, Android, PC & Mac •High-speed H.264 & MJPEG video compression•Motion detection•Sends motion-detected snapshots to email and FTP•Pre- & post-recording upon detected motion•Viewer software to access 16 network cameras simultaneously •Manual/scheduled/cycle recording IC-3116WMotion-Triggered Snapshots & RecordingThe powerful motion detection system built into this network camera ensures that you have evidence of a criminal event. You can pre-define an area in the monitored range for motion detection; and when motion is detected in the specified area, the network camera will produce snapshots or video footage of the event immediately.High Quality VideosThe Edimax IC-3116W is built with a wide 2.2mm lens that covers a diagonal viewing angle of 69 degrees, making it suitable for capturing video footage of a wide area with a single network camera. With a megapixel CMOS sensor, this network camera is able to capture 720p (1280 x 720) videos at 24 frames per second.Functions Management InterfaceEasy remote monitoring via iPhone, iPad, Android, PC & Mac 69 degree diagonal viewing angle Supports dynamic DNS service IR filer embedded EdiView Finder (Windows/Mac) 16-channel viewer Web management interface Firmware upgradable iPhone & iPad viewer appAndroid viewer appEthernet (RJ-45) port Power jackReset/WPS button Internal antennaLED indicators: Internet, LAN/Wi-Fi LNK/ACT, Power Video Video Settings Supported ProtocolsHigh-speed H.264 & MJPEG video compression 1280 x 720 at up to 24 fps 640 x 480 at up to 30 fps 320 x 240 at up to 30 fps Resolution: HD (1280 x 720), VGA (640 x480), QVGA (320 x 240) Frame rate: 5, 10, 15, 20, 24 or 30 fps IPv4, HTTP, TCP, ICMP, RTSP, RTP, UDP, RTCP, SMTP, SNTP, FTP, DHCP, ARP, DNS, PPPoEStandards RF Output Power IR LEDsFast Ethernet IEEE 802.3/802.3u Wireless IEEE 802.11b/g/n 11b: 16dBm –18dBm 11g: 14dBm –16dBm11n: 11dBm –13dBmIR LEDs for night illumination up to 15 feetMemory Operating Conditions Power8MB flash 64MB SDRAM 0–60°C Humidity: 20–80% RH (non-condensing) Power: 12VDC x 1ADimensions Weight Certifications 65 x 110 x 27.2 mm 100g FCC,CEIC-3116WTECHNICAL SPECIFICATIONS APPLICATION DIAGRAMHARDWARE INTERFACEEthernet Port 12V DC Port WPS/ResetButton4 IR LEDsImage Sensor & ICRLight SensorLED Indicators。
网络摄像头用户手册说明书
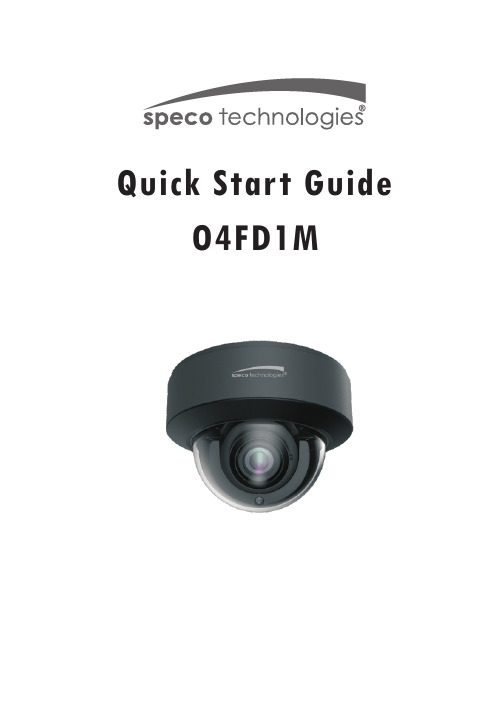
Quick Start GuideO4FD1MWelcomeThank you for purchasing this network camera!This owner's manual is designed to be a reference tool for your system.Please read this manual carefully before operating the unit and retain it for future reference. Should you require any technical assistance, contact Speco Technologies Tech Support at1-800-645-5516Important Safeguards and Warning1. Electrical safetyAll installation and operation here should conform to local electrical safety codes.Use a certified/listed 12VDC Class 2 power supply only.Please note: Do not connect two power supplying sources to the device at the same time; it may result in device damage! The product must be grounded to reduce the risk of electric shock.Improper handling and/or installation could run the risk of fire or electrical shock.2. EnvironmentHeavy stress, violent vibration or exposure to water is not allowed during transportation, storage and installation.This product should be installed in a cool, dry place away from direct sunlight and heat sources.Do not install the product in extreme temperature conditions.Do not expose the camera to electromagnetic radiation. Otherwise it may result in CMOS sensor failure.Do not block any ventilation openings.Do not allow water and liquid intrusion into the camera.3. Operation and Daily MaintenancePlease shut down the device and then unplug the power cable before you begin any maintenance work.Do not touch the CMOS sensor optic component. You can use a blower to clean the dust on the lens surface.Always use the dry soft cloth to clean the device. If there is too much dust, use a clothWarningStatementThis camera should be installed by qualified personnel only.All the examination and repair work should be done by qualified personnel.Any unauthorized changes or modifications could void the warranty..This guide is for reference only.Product, manuals and specifications may be modified without prior notice. Speco Technologies reserves the right to modify these without notice and without incurring any obligation.Speco Technologies is not liable for any loss caused by improper operation.Note:Before installation, check the package and make sure that all components are included.Contact your rep or Speco customer service department immediately if something is broken or missing in the package .dampened with a small quantity of neutral detergent. Finally use the dry cloth to clean the device.Please use a professional optical cleaning method to clean the enclosure. Improper enclosure cleaning (such as using cloth) may result in poor IR functionality and/or IR reflection. The grounding holes of the product are recommended to be grounded to further enhance the reliability of the camera.Dome cover is an optical device, please don't touch or wipe cover surface directly during installation and use, please refer to the following methods if dirt is found:Stained with dirt: Use oil-free soft brush or hair dryer to remove it gently.Stained with grease or fingerprint: Use oil-free cotton cloth or paper soaked with alcohol or detergent to wipe from the lens center outward. Change the cloth and wipe severaltimes if it is not clean enough.1 Ethernet Connector2 Audio Input (MIC)3 Audio Output (HP)4 CVBS Video Output5 Alarm Input/Output6 Power Connector7 Zoom-8 Zoom+9 Micro SD Card Slot 10 Reset 11 DC IN & CVBS Interface12 Microphone134562* 1 It is recommended to install the water-proof connector for outdoor installations .* 2 DC 12V/AC24V power supply is not required if a PoE switch or injector is used to power the camera.► Connecting Network Cable① Loosen the nut from the main element.② Run the network cable (without RJ 45 connector) through both elements. Then crimp the cable with RJ 45 connector .③ Connect the cable to the water-proof connector . Then tighten the nut and the main cover .1* Before you start, please make sure that the wall or ceiling is strong enough to withstand three times the weight of the camera.① nstall the junction box onto the wall by using the screws provided.I Then ② Rotate the trim ring anticlockwise to remove it from the camera.loosen the screws to open the lower dome.Trim Ring Lower Dome③ Connect the cables.Then install the camera onto the junction box.Turn Rubber Plug④ Three-axis adjustment. Before adjustment, preview the image of the camera on a monitor and then adjust the camera according to the figure below to get an optimum angle.Rotation 0°~345°Tilt 0°~77°Pan 0°~345°● OperationIP Scanner can search for the device on the local network.① Make sure that the camera and the PC are connected to the same local network. The camera is set to DHCP by default.② Install IP Scanner from the CD and run it after installation.Or download from https:///ip-scanner/⑤⑥ Put the trim ring onto the lower dome and then rotate it clockwise until it is locked. Finally, remove the protection film softly.Install the lower dome back to the camera and fasten it with screws.5C:F2:07:24:68:9A③ In the device list, you can view the IP address, model number, and MAC address of each device. Select the applicable device and double click to open up the web viewer. You can also manually enter the IPaddress in the address bar of the web browser.The login interface is shown above. Default user name is admin andpassword is 1234. After logging in, follow directions to installapplicable plugins if prompted.。
- 1、下载文档前请自行甄别文档内容的完整性,平台不提供额外的编辑、内容补充、找答案等附加服务。
- 2、"仅部分预览"的文档,不可在线预览部分如存在完整性等问题,可反馈申请退款(可完整预览的文档不适用该条件!)。
- 3、如文档侵犯您的权益,请联系客服反馈,我们会尽快为您处理(人工客服工作时间:9:00-18:30)。
正常情况 光圈太暗
聚焦不正常 变焦
3.4 恢复出厂设置 由于某种原因需要恢复到出厂设置时,可以按以下步骤恢复摄像头的出厂设置。 u 先将摄像头上的电源插头拔下来 u 按下恢复出厂设置按键 u 同时将电源插头插入到摄像头上的电源插口 u 观察状态灯,当状态灯闪亮-〉亮灯时,说明摄像头已经恢复到出厂设置了
33 使用方法............................................................................................................ 8
3.1 摄像头正常工作.................................................................................................................8 3.2 观看图像 ............................................................................................................................8 3.3 调节镜头 ............................................................................................................................8 3.4 恢复出厂设置.....................................................................................................................9 3.5 USB 的使用........................................................................................................................9
状态灯
3.2 观看图像 在确认摄像头处于正常工作状态时,使用手机可以观看摄像头的图像。手机的使用方法请 参照手机使用手册。 以下是手机观看到的图像实际例子:
3.3 调节镜头 当第一次使用摄像头时,需要调节镜头的光圈,变焦和聚焦。调节不当时,会造成图像不 清晰,会影响观看效果。
聚焦锁定
光圈
变焦锁定
镜头 聚焦 变焦 调节变焦可以达到通常说的放大和缩小的目的,聚焦可以调节清晰度。光圈可以调节明暗, 一般情况下,调到最亮即可。调节完成以后,可以使用锁定来防止变动。 光圈,变焦和聚焦的效果如下:
USB POW
LAN
电源插口
Status LED
Default Key
状态灯 恢复出厂设置按键
注:插入电源插头以后,在状态灯没有常亮灯以前,不要松开按下的恢复出厂设置按键
3.5 USB 的使用 摄像头支持本地录像,只有将 U 盘或外接硬盘插入 USB 口时,该功能才有效。可以支持 4G 以上 U 盘。外接硬盘时,硬盘需要外接电源。 一般情况下,1G 的存储容量可以存放 24 小时的图像(QVGA,100K 传输率,12.5 帧)。保 存在 U 盘或外接硬盘中的图像,可以使用手机或者 PC 来观看。 摄像头同时可以支持手机监控和实时录像或回放。
9
4 常见问题
在使用中可能会遇到很多如同下表的常见问题,除了这些问题以外,用户还可以查看公司的网 站,在网站上还有最新的技术信息。
问题
原因和解决方法
状态灯不亮
l 摄像头可能没有供电
插入电源后
未接网线 接上网线
DHCP 设定(出厂设定) IP 地址获取中 IP 地址取得 IP 地址获取不到
摄像头服务器注册 服务器注册中
服务器注册完成
服务器注册不成功
固定 IP 设定(手工设 服务器注册中
定)时的摄像头服务 服务器注册完成
器注册
服务器注册不成功
网口指示灯灭灯 0.3 秒间隔绿色闪亮→灭灯→重复该过程 左面网口指示灯绿色亮灯,右面网口指示灯 桔黄色闪亮 状态灯 0.3 秒间隔绿色闪亮→灭灯 状态灯灭灯 状态灯 2 秒亮灯后灭灯 状态灯 0.3 秒间隔绿色闪亮→灭灯→重复 该过程 状态灯 1 秒间隔闪亮 状态灯亮灯(常亮) 状态灯 1 秒间隔闪亮 状态灯 1 秒间隔闪亮 状态灯亮灯(常亮) 状态灯 1 秒间隔闪亮
4
1.4 产品外形 u 摄像头前端
u 摄像头后端
外壳
镜头安装口
USB 插口
USB POW
LAN
电源插口
网口
Status LED
Default Key
网口指示灯(左) 网口指示灯(右)
状态灯 恢复出厂设置按键
u 摄像头参数 - 传输率可以为 8Kbps-6Mbps - 帧率可以设为每秒 25 帧,12.5 帧,5 帧,1 帧 - 分辨率为,D1,VGA,CIF,QVGA,QCIF - 可以支持 6 台手机同时观看 - 电源 12V 直流,1000mA
网口
注:请使用配套提供的专用 AC 电源,不得使用其他电源,以免造成火灾。
7
3 使用方法
3.1 摄像头正常工作 摄像头正常工作时,其后盖上的状态灯是绿色亮灯。如果发现该状态灯并非处于绿色亮灯 时,需要检查是否有供电,网线是否插上等,具体可见故障检查。
USB POW
LAN
Status LED
Default Key
44 常见问题.......................................................................................................... 10 55 保修和客户服务 .............................................................................................. 11
2
目录
11 使用之前............................................................................................................ 4
1.1 安全上的注意事项.............................................................................................................4 1.2 摄像头和附属品.................................................................................................................4 1.3 使用条件 ............................................................................................................................4 1.4 产品外形 ......................................................................................................................... 将镜头上的两个盖子取下后,将有螺纹端按向右方向旋转到摄像头的镜头安装口上。
向右旋转
2.2 连接网线和电源 首先将网线插入到摄像头网口,然后将网线的另一端插入到路由器的网口。当完成连接以 后,将 AC 电源一端插入到摄像头的电源插口,另一端插入到电源插座上。
网口
网线
路由器
3
1 使用之前
1.1 安全上的注意事项 AC 电源要正确插入电源插座。不要让门窗等挤压电源线,以防止漏电。不要拆解 AC 电源 和摄像头,以防止损坏电源和摄像头。本产品供室内环境使用,AC 电源和摄像头是不防水 的,在使用时需要注意远离有水的地方。
1.2 摄像头和附属品 在安装摄像头以前,请确认以下摄像头,电源等是否齐全。
22 安装 ................................................................................................................... 7
2.1 安装镜头 ............................................................................................................................7 2.2 连接网线和电源.................................................................................................................7
网络摄像头产品使用说明书 型号 XM-IPC100
本手册含有保证书和客服联系方法 u 在使用以前请阅读本说明手册 u 有疑问时可以询问销售店,客服网站或者客服电话 u 需要上门安装服务的,请与销售店联系
1
前言
产品特长 使用带宽小图像质量高
使用图像压缩技术,占用比较小的带宽,却具有很好的图像质量和连贯性。在移动网络比 较好的情况下,使用 3G 手机观看 QVGA(320*240)的图像时的延时在 1 秒左右。 图像保存和回放 视频图像可以保存在网络摄像头的 USB 内存中或外接硬盘中,也可以保存在家庭服务器 (本公司的其他配套产品)中。使用手机可以观看被保存的图像。 即插即用 网络摄像头的安装简单,在使用 DHCP 自动获取 IP 地址的情况下,通常不用对摄像头和路 由器等作任何设定,插上电源和网线马上就可以使用。 支持手机 网络摄像头可以是支持多种手机观看,如 Windows Mobile 3G 手机,Symbian S60 3G 手 机等。有关支持手机的具体信息可上公司网站查询。网址: 多台同时观看图像 网络摄像头可以同时支持 6 人同时观看图像。 功耗小 整机的功耗小和发热小,功耗在 3 瓦左右。 使用场景 手机可以随时随地不受时间和地点的限制观看图像,其使用场合非常多,比如以下场合: 家庭安全监控,老人儿童看护,幼儿园学校远程观看,企业,商场,停车场,饭店厨房,收银 等监控,居家病人看护,医院病人看护 有关本说明书 本说明书对网络摄像头的操作,设定,功能,故障等在使用中所遇到的问题作了相应的说 明。本说明书的最新内容可以参照本公司的相关网页。 术语 DHCP-DHCP 是 Dynamic Host Configuration Protocol(动态主机配置协议)缩写