Struts框架和Hibernate框架的整合完整版介绍
谈Struts+Hibernate+Spring的整合方法全面
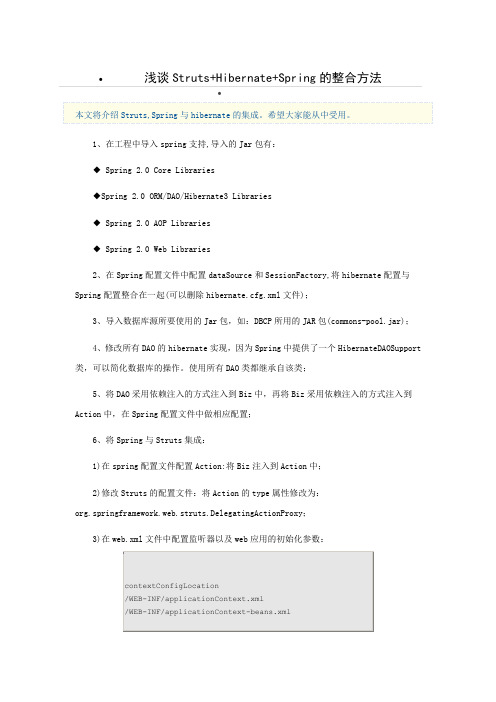
∙浅谈Struts+Hibernate+Spring的整合方法∙本文将介绍Struts,Spring与hibernate的集成。
希望大家能从中受用。
1、在工程中导入spring支持,导入的Jar包有:◆ Spring 2.0 Core Libraries◆Spring 2.0 ORM/DAO/Hibernate3 Libraries◆ Spring 2.0 AOP Libraries◆ Spring 2.0 Web Libraries2、在Spring配置文件中配置dataSource和SessionFactory,将hibernate配置与Spring配置整合在一起(可以删除hibernate.cfg.xml文件);3、导入数据库源所要使用的Jar包,如:DBCP所用的JAR包(commons-pool.jar);4、修改所有DAO的hibernate实现,因为Spring中提供了一个HibernateDAOSupport 类,可以简化数据库的操作。
使用所有DAO类都继承自该类;5、将DAO采用依赖注入的方式注入到Biz中,再将Biz采用依赖注入的方式注入到Action中,在Spring配置文件中做相应配置;6、将Spring与Struts集成:1)在spring配置文件配置Action:将Biz注入到Action中;2)修改Struts的配置文件:将Action的type属性修改为:org.springframework.web.struts.DelegatingActionProxy;3)在web.xml文件中配置监听器以及web应用的初始化参数:contextConfigLocation/WEB-INF/applicationContext.xml/WEB-INF/applicationContext-beans.xml7、为了解决应用中的中文乱码问题,我们可以不用自己开发过滤器类,Spring为我们提供了一个,只需要配置一下即可:8、为了解决hibernate延迟加载的问题,使用Spring中提供的过滤器来解决,它能够让Session在请求解释完成之后再关闭,配置方式如下:9、因为OpenSessionInViewFilter在getSession的时候,会把获取回来的session的flush mode 设为FlushMode.NEVER。
Struts2、spring2、hibernate_的整合
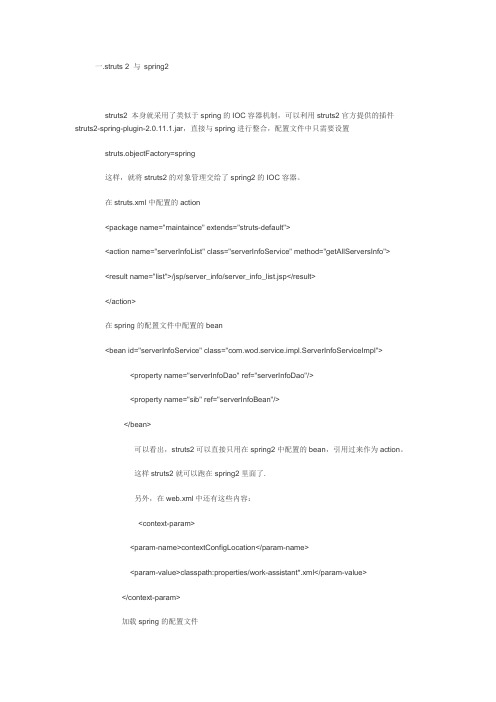
一.struts 2 与spring2struts2 本身就采用了类似于spring的IOC容器机制,可以利用struts2官方提供的插件struts2-spring-plugin-2.0.11.1.jar,直接与spring进行整合,配置文件中只需要设置struts.objectFactory=spring这样,就将struts2的对象管理交给了spring2的IOC容器。
在struts.xml中配置的action<package name="maintaince" extends="struts-default"><action name="serverInfoList" class="serverInfoService" method="getAllServersInfo"><result name="list">/jsp/server_info/server_info_list.jsp</result></action>在spring的配置文件中配置的bean<bean id="serverInfoService" class="com.wod.service.impl.ServerInfoServiceImpl"><property name="serverInfoDao" ref="serverInfoDao"/><property name="sib" ref="serverInfoBean"/></bean>可以看出,struts2可以直接只用在spring2中配置的bean,引用过来作为action。
第14章 Hibernate框架与Struts1框架的整合
14.2 如何Hibernate框架和Struts1框架
添加Struts1框架的支持
添加Hibernate框架的支持
整合两个框架
举例
本章结束
本章总结
整合Hibernate框架和Struts1框架的方法
上机习题
第14章
Hibernate框架与Struts1框架的架和Struts1 框架
14.2 如何Hibernate框架和Struts1框架
14.1 为什么整合Hibernate框架和Struts1框架
Struts1框架是对MVC设计模式的一个具体实现,但 是并没有对Model(模型层)进行具体的实现。 Hibernate是一个对象关系映射的框架,可以应用在 任何使用JDBC的场合。它对JDBC进行了非常轻量 级的封装,将对关系数据库的操作转换为对象的操 作,使程序员从对数据库的操作解放出来。因此, 为了在Web应用项目的开发中充分发挥MVC设计模 式的优势,将Hibernate框架和Struts1框架进行整 合,以提高系统的可维护性及可扩展性。
Struts2+spring2+hibernate3整合方案

Struts2+spring2+hibernate3整合方案最近闲来无事可做,于是开始学习struts2。
Struts2和struts1、webwork2有什么区别我也不说了,网上有很多这方面的资料。
以前在项目中从未使用过struts,一直使用spring+hibernate,现在既然学习了Struts,也不能浪费,于是乎开始琢磨着怎么整合这3个框架。
整合原理以spring为容器,管理hibernate的DAO和Struts2的Action。
一、准备工作Struts2.06+spring2.5+hibernate3.2+jdk6.0+myeclipse6.0+tomcat5.5+mysql 5.0以上是整合的原料。
下面以一个注册登陆的例子来开始我们的整合过程。
这个例子很简单,下面是它的sql脚本内容:CREATE TABLE `user` (`userid` int(11) NOT NULL AUTO_INCREMENT,`username` varchar(20) NOT NULL,`password` varchar(16) NOT NULL,`email` varchar(30) NOT NULL,PRIMARY KEY (`userid`)) ENGINE=InnoDB DEFAULT CHARSET=utf-8;二、开始行动包结构可以参考下图1) Struts部分:建立struts.xml和struts.propertiesStruts.xml内容如下:<?xml version="1.0" encoding="UTF-8"?><!DOCTYPE struts PUBLIC "-//Apache Software Foundation//DTD Struts Configur ation 2.0//EN" "/dtds/struts-2.0.dtd" ><struts><package name="user_curd" extends="struts-default"><global-results><!-- 下面定义的结果对所有的Action都有效 --><result name="exception">/error.jsp</result></global-results><global-exception-mappings><!-- 指Action抛出Exception异常时,转入名为exception的结果。
Struts框架和Hibernate框架的整合完整版介绍

Struts框架和Hibernate框架的整合1、首先写一个student的实体类,命名为:StudentEntity.java package com.liu.student.entity;/*** 数据库表的映射实体类文件* @author Calasin*/public class StudentEntity {private String s_id;// 学号private String s_name;// 姓名private int s_age;// 年龄public String getS_id() {return s_id;}public void setS_id(String s_id) {this.s_id = s_id;}public String getS_name() {return s_name;}public void setS_name(String s_name) {this.s_name = s_name;}public int getS_age() {return s_age;}public void setS_age(int s_age) {this.s_age = s_age;}public String toString() {return"StudentEntity [s_id="+ s_id+ ", s_name="+ s_name + ", s_age=" + s_age + "]";}}2、接着写student实体类StudentEntity的配置文件:StudentEntity.hbm.xml<?xml version="1.0"?><!DOCTYPE hibernate-mapping PUBLIC"-//Hibernate/Hibernate Mapping DTD 3.0//EN"" :///hibernate-mapping-3.0.dtd "><hibernate-mapping><!-- name属性:对应实体类的地址,table属性:对应数据库的表名称(对应数据库表是什么名字,这里就是写什么名字) --><class name="com.liu.student.entity.StudentEntity" table="student"><!-- name对应的是java,column对应的是数据库,但是一般两个都写成一样,这样可以防止出错name属性:主键id,对应的是java中的类中的属性,column属性:对应数据库中的主键id --><id name="s_id"column="s_id"><!-- 主键生成策略:uuid 32位随机的字符串 --><generator class="uuid"></generator></id><!-- name属性:对应java中的实体类属性,column属性:对应的数据库中的字段名称,type属性:表示java中的数据类型,默认可以不添加 --> <property name="s_name"column="s_name" type="ng.String"></property><property name="s_age"column="s_age"></property> </class></hibernate-mapping>3、接下来写实体类的Action:StudentActionpackage com.liu.student.action;import java.util.List;import com.liu.student.entity.StudentEntity;import com.liu.student.service.StudentService;import com.liu.student.service.StudentServiceImpl;import com.opensymphony.xwork2.ActionSupport;/*** 与jsp页面交互,完成数据传递* @author Calasin*/public class StudentAction extends ActionSupport { private List studentList;//创立一个List类型的学生列表private StudentService studentService= new StudentServiceImpl();private StudentEntity studentEntity;/*** 查询学生表的列表信息** @return*/public String studentList() {studentList = studentService.getStudentList();return"studentList";}public String updPage() {studentEntity = studentService.getStudentEntity(studentEntity.getS_id());return"updPage";}public String upd() {studentService.update(studentEntity);return"upd";}public List getStudentList() {return studentList;}public void setStudentList(List studentList) {this.studentList = studentList;}public StudentEntity getStudentEntity() {return studentEntity;}public void setStudentEntity(StudentEntity studentEntity) { this.studentEntity = studentEntity;}}4、接下来写提供数据库的接口interface: Dao.javapackage com.liu.dao;import java.util.List;/*** 提供数据库接口* @author Calasin*1.总体设计:设计Student对象及相关实体配置文件,工具类〔得到一个Session对象〕,* StudentDao接口〔实现此接口即以操作数据库〕,下面代码用"Dao"代替,编写主配置文件,编写测试类。
原创Struts+Spring+hibernate框架整合步骤(多图)

Struts框架应用步骤第1步:向web应用程序添加struts框架的功能注意:必须要选中项目的根节点第2步:创建一个普通的类,一般都归放在web层的包中。
第3步:在类中定义前台页用户输入的数据项,并为这些数据项提供get/set方法第4步:再定义一个处理业务请求的方法,该方法返回String类型第5步:将这个定义了数据项和业务处理方法的类,在struts.xml中注册第6步:编写前台JSP页面,并导入Struts标签库,并且把form的action属性填写上面配置的action的name值Spring框架应用步骤第1步:选中根节点,选spring框架,如下图第2步:在web.xml文件中加上以下代码<listener><listener-class>org.springframework.web.context.ContextLoaderL istener</listener-class></listener>第3步:在spring的配置文件applicationContext.xml中注册各层的对象注意:每层的对象注册时,如果该对象还有属性依赖别的对象,应该为这个属性生成get/set 方法第4步:在struts配置文件加上以下代码,用以交出对象的控制权<constant name="struts.objectFactory"v alue="spring"></constant><include file="struts-default.xml"></include>第5步:修改struts的action的class属性,使之与spring中的对象id属性值对应第6步:将applicationContext.xml复制到WEB-INF目录下,就可以部署启动了。
Struts2,Spring,Hibernate整合步骤及一个简单实例

Struts2,Spring,Hibernate整合步骤(自己笔记)配步骤的例子一个:请参看:Struts2,Spring,Hibernate整合例子一个1.建立web项目2.在web.xml 配置 struts2,和 spring ,<!-- 配置Struts2 --><filter><filter-name>struts2</filter-name><filter-class>org.apache.struts2.dispatcher.FilterDispatcher(struts的过滤器)</filter-class></filter><filter-mapping>(加载struts2)<filter-name>struts2</filter-name><url-pattern>/*</url-pattern></filter-mapping><!-- 配置Spring --><listener><listener-class>org.springframework.web.context.ContextLoaderListener(spring监听器)</listener-class></listener><!-- 查找spring配置文件 --><context-param>(程序从此处开始加载.xml 文件,并执行)<param-name>contextConfigLocation</param-name><param-value>classpath*:*.xml</param-value></context-param>3.在src根目录下创建struts.xml文件<include file="struts-default.xml"/>固定格式,用到此包4.在src根目录创建hibernate.cfg.xml文件<?xml version='1.0' encoding='UTF-8'?><!DOCTYPE hibernate-configuration PUBLIC"-//Hibernate/Hibernate Configuration DTD 3.0//EN" "/hibernate-configura tion-3.0.dtd"><hibernate-configuration><session-factory><!-- 基本配置 --><property name="dialect">org.hibernate.dialect.Oracle9Dialect</property><property name="show_sql">false</property><property name="format_sql">true</property><propertyname="e_reflection_optimizer">true</property><property name="max_fetch_depth">2</property><property name="default_batch_fetch_size">8</property><property name="jdbc.batch_size">20</property></session-factory></hibernate-configuration>系统给的文件只需要拷贝,都是一些数据库库的基本配置5.在src根目录拷贝struts.properties文件struts.objectFactory = spring 该项是告诉系统用spring来控制hibernate和Actionstruts.action.extension=action 告诉系统访问时以什么结尾。
Struts和hibernate融合
有时候让人很郁闷,看了一大篇的文字说明,结果弄个整合还是没成功,还不如言简意赅的舒服,下面就简单学习下Struts2+Hibernate的整合。
其实就七个步骤:第一步:添加所需的jar包。
第二步:创建实体类以及对应的映射文件。
第三步:配置hibernate.cfg.xml配置文件。
第四步:配置struts.xml配置文件。
第五步:创建相应的action。
第六步:在web.xml中配置启动Struts2框架的过滤器。
第七步:编写JSP显示页面。
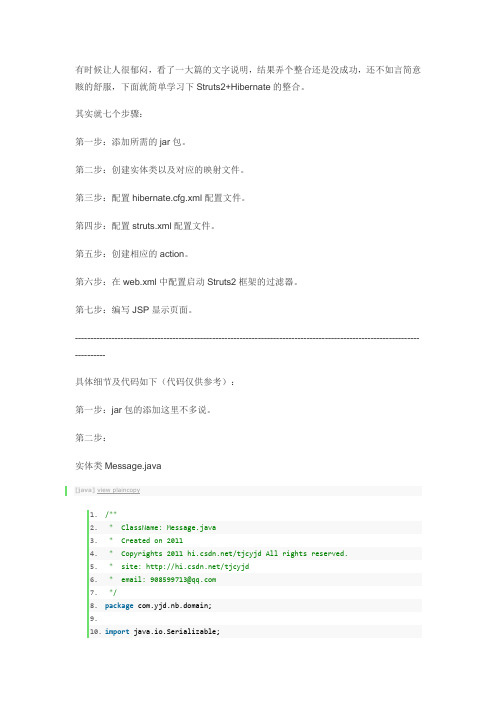
---------------------------------------------------------------------------------------------------------------------------具体细节及代码如下(代码仅供参考):第一步:jar包的添加这里不多说。
第二步:实体类Message.java1./**2. * ClassName: Message.java3. * Created on 20114. * Copyrights 2011 /tjcyjd All rights reserved.5. * site: /tjcyjd6. * email: 908599713@7. */8.package com.yjd.nb.domain;9.10.import java.io.Serializable;11.import java.util.Date;12.13./**14. * 留言实体类15. *16. * @author yjd17. */18.public class Message implements Serializable {19.20.private static final long serialVersionUID = 6617253915349620625L;21.private Integer id; // OID22.private String nickname; // 昵称23.private boolean gender; // 性别24.private String header_img; // 头像25.private String qq; // qq26.private String email; // 邮箱号27.private String content; // 留言内容28.private String ip; // 发布者的IP地址29.private Date pubTime; // 留言时间30.private String reply;// 管理员回复内容31.private Date replyTime; // 回复时间32.33.public Integer getId() {34.return id;35. }36.37.public void setId(Integer id) {38.this.id = id;39. }40.41.public String getNickname() {42.return nickname;43. }44.45.public void setNickname(String nickname) {46.this.nickname = nickname;47. }48.49.public boolean isGender() {50.return gender;51. }52.53.public void setGender(boolean gender) {54.this.gender = gender;56.57.public String getHeader_img() {58.return header_img;59. }60.61.public void setHeader_img(String headerImg) {62. header_img = headerImg;63. }64.65.public String getQq() {66.return qq;67. }68.69.public void setQq(String qq) {70.this.qq = qq;71. }72.73.public String getEmail() {74.return email;75. }76.77.public void setEmail(String email) {78.this.email = email;79. }80.81.public String getContent() {82.return content;83. }84.85.public void setContent(String content) {86.this.content = content;87. }88.89.public String getIp() {90.return ip;91. }92.93.public void setIp(String ip) {94.this.ip = ip;95. }96.97.public Date getPubTime() {98.return pubTime;100.101.public void setPubTime(Date pubTime) {102.this.pubTime = pubTime;103. }104.105.public String getReply() {106.return reply;107. }108.109.public void setReply(String reply) {110.this.reply = reply;111. }112.113.public Date getReplyTime() {114.return replyTime;115. }116.117.public void setReplyTime(Date replyTime) {118.this.replyTime = replyTime;119. }120.121.@Override122.public String toString() {123.return"Message [content=" + content + ", email=" + email + ", gend er="124. + gender + ", header_img=" + header_img + ", id=" + id 125. + ", ip=" + ip + ", nickname=" + nickname + ", pubTime="126. + pubTime + ", qq=" + qq + "]";127. }128.129.}实体类映射文件Message.hbm.xml.[html]view plaincopy1.<!DOCTYPE hibernate-mapping PUBLIC2. "-//Hibernate/Hibernate Mapping DTD3.0//EN"3. "/dtd/hibernate-mapping-3.0.dtd">4.5.<hibernate-mapping>6.<class name="com.yjd.nb.domain.Message"table="msg">7.<id name="id"column="id">8.<generator class="native"/>9.</id>10.11.<property name="nickname"/>12.<property name="gender"/>13.<property name="header_img"/>14.<property name="qq"/>15.<property name="email"/>16.<property name="ip"/>17.<property name="content"/>18.<property name="pubTime"column="pub_time"/>19.<property name="reply"/>20.<property name="replyTime"column="reply_time"/>21.</class>22.</hibernate-mapping>第三步:Hibernate配置文件hibernate.cfg.xml.[html]view plaincopy1.<!DOCTYPE hibernate-configuration PUBLIC2. "-//Hibernate/Hibernate Configuration DTD3.0//EN"3. "/dtd/hibernate-configuration-3.0.dtd">4.5.<hibernate-configuration>6.<session-factory>7.<!-- 数据库的连接参数配置 -->8.<property name="hibernate.connection.driver_class">9. com.mysql.jdbc.Driver10.</property>11.<property name="hibernate.connection.url">12. jdbc:mysql:///s2h-model13.</property>14.<property name="ername">root</property>15.<property name="hibernate.connection.password">root</property>16.17.<!-- 数据库方言 -->18.<property name="hibernate.dialect">19. org.hibernate.dialect.MySQLDialect20.</property>21.22.<!-- c3p0连接池的配置 -->23.<property name="connection.provider_class">24. org.hibernate.connection.C3P0ConnectionProvider25.</property>26.<property name="hibernate.c3p0.min_size">5</property>27.<property name="hibernate.c3p0.max_size">30</property>28.<property name="hibernate.c3p0.timeout">1800</property>29.<property name="hibernate.c3p0.max_statements">50</property>30.31.<!-- 其它配置 -->32.<property name="hbm2ddl.auto">update</property>33.<property name="show_sql">true</property>34.<!-- <property name="format_sql">true</property> -->35.36.<!-- 注册映射文件 -->37.<mapping resource="com/yjd/nb/domain/Message.hbm.xml"/>38.39.</session-factory>40.</hibernate-configuration>第四步:Struts2配置文件struts.xml.1.<?xml version="1.0"encoding="UTF-8"?>2.<!DOCTYPE struts PUBLIC3. "-//Apache Software Foundation//DTD Struts Configuration 2.1//EN"4. "/dtds/struts-2.1.dtd">5.<struts>6. <!--7.在struts.xml文件中可以使用<constant>标记来对default.properties中的常量属性做覆盖性配置,最常更改的几个常量属性是:8. 1.struts.i18n.encoding=UTF-8:请求消息的编码方式9. 2.struts.action.extension=action:指定被struts2处理的请求后缀类型。
- 1、下载文档前请自行甄别文档内容的完整性,平台不提供额外的编辑、内容补充、找答案等附加服务。
- 2、"仅部分预览"的文档,不可在线预览部分如存在完整性等问题,可反馈申请退款(可完整预览的文档不适用该条件!)。
- 3、如文档侵犯您的权益,请联系客服反馈,我们会尽快为您处理(人工客服工作时间:9:00-18:30)。
Struts框架和Hibernate框架的整合1、首先写一个student的实体类,命名为:StudentEntity.java package com.liu.student.entity;/*** 数据库表的映射实体类文件* @author Calasin*/public class StudentEntity {private String s_id;// 学号private String s_name;// 姓名private int s_age;// 年龄public String getS_id() {return s_id;}public void setS_id(String s_id) {this.s_id = s_id;}public String getS_name() {return s_name;}public void setS_name(String s_name) {this.s_name = s_name;}public int getS_age() {return s_age;}public void setS_age(int s_age) {this.s_age = s_age;}public String toString() {return"StudentEntity [s_id="+ s_id+ ", s_name="+ s_name + ", s_age=" + s_age + "]";}}2、接着写student实体类StudentEntity的配置文件:StudentEntity.hbm.xml<?xml version="1.0"?><!DOCTYPE hibernate-mapping PUBLIC"-//Hibernate/Hibernate Mapping DTD 3.0//EN""/hibernate-mapping-3.0.dtd "><hibernate-mapping><!-- name属性:对应实体类的地址,table属性:对应数据库的表名称(对应数据库表是什么名字,这里就是写什么名字) --><class name="com.liu.student.entity.StudentEntity" table="student"><!-- name对应的是java,column对应的是数据库,但是一般两个都写成一样,这样可以避免出错name属性:主键id,对应的是java中的类中的属性,column属性:对应数据库中的主键id --><id name="s_id"column="s_id"><!-- 主键生成策略:uuid 32位随机的字符串 --><generator class="uuid"></generator></id><!-- name属性:对应java中的实体类属性,column属性:对应的数据库中的字段名称,type属性:表示java中的数据类型,默认可以不添加 --> <property name="s_name"column="s_name" type="ng.String"></property><property name="s_age"column="s_age"></property> </class></hibernate-mapping>3、接下来写实体类的Action:StudentActionpackage com.liu.student.action;import java.util.List;import com.liu.student.entity.StudentEntity;import com.liu.student.service.StudentService;import com.liu.student.service.StudentServiceImpl;import com.opensymphony.xwork2.ActionSupport;/*** 与jsp页面交互,完成数据传递* @author Calasin*/public class StudentAction extends ActionSupport { private List studentList;//创建一个List类型的学生列表private StudentService studentService= new StudentServiceImpl();private StudentEntity studentEntity;/*** 查询学生表的列表信息** @return*/public String studentList() {studentList = studentService.getStudentList();return"studentList";}public String updPage() {studentEntity = studentService.getStudentEntity(studentEntity.getS_id());return"updPage";}public String upd() {studentService.update(studentEntity);return"upd";}public List getStudentList() {return studentList;}public void setStudentList(List studentList) {this.studentList = studentList;}public StudentEntity getStudentEntity() {return studentEntity;}public void setStudentEntity(StudentEntity studentEntity) { this.studentEntity = studentEntity;}}4、接下来写提供数据库的接口interface: Dao.javapackage com.liu.dao;import java.util.List;/*** 提供数据库接口* @author Calasin*1.总体设计:设计Student对象及相关实体配置文件,工具类(得到一个Session对象),* StudentDao接口(实现此接口即以操作数据库),下面代码用"Dao"代替,编写主配置文件,编写测试类。
*2.StudentDao的设计,最初打算设计成通用Object的操作,* 后来发现它的Session对象操作都要传递一个对象,就设计成如下形式。
内容如下:*/public interface Dao {public List getList(String hql);//查看学生的列表信息public void add(Object obj);//增加public void update(Object obj);//修改public void delete(Object obj);//删除public Object getObj(Class cls, String id);//获取单一实体类对象}5、接下来写接口实现类的具体操作方法DaoImpl,实现Dao接口package com.liu.dao;import java.util.List;import org.hibernate.Query;import org.hibernate.Session;import org.hibernate.SessionFactory;import org.hibernate.cfg.Configuration;/*** Dao接口实现类,具体的操作,主要工作由Hibernate来完成* 以下几点需要注意:导包:Hibernate包,数据库包;改写配置文件;查询方法的设计;注意事务,特别是“增删改”要注意事务。
* @author Calasin*/public class DaoImpl implements Dao {private Session session;public DaoImpl() {// 提供一个空参构造// 首先构建一个Configuration对象,可以调用configure()方法Configuration cfg = new Configuration().configure();// 再用这个对象构建一个SessionFactory对象,才是真正意义上可操控的实例对象SessionFactory sessionFactory = cfg.buildSessionFactory();// 然后在用这个对象来构建一个SessionFactory对象session = sessionFactory.openSession();}// 增加public void add(Object obj) {// TODO Auto-generated method stub}// 删除public void delete(Object obj) {// TODO Auto-generated method stub}/*** 查询列表方法(通用查询)*/public List getList(String hql) {// TODO Auto-generated method stubtry {session.beginTransaction();// 开启事务Query query = session.createQuery(hql);List list = query.list();session.getTransaction().commit();// 提交return list;} catch (Exception e) {// TODO: handle exceptionreturn null;} finally {session.close();}}/*** 获取单一实体类对象*/public Object getObj(Class cls, String id) { try {session.beginTransaction();Object object = session.get(cls, id);session.getTransaction().commit();return object;} catch (Exception e) {// TODO: handle exceptionreturn null;} finally {session.close();}}/*** 修改单一实体类对象*/public void update(Object obj) {// TODO Auto-generated method stubtry {session.beginTransaction();session.update(obj);session.getTransaction().commit();} catch (Exception e) {// TODO: handle exception} finally {session.close();}}}6、接下来写service层:StudentServicepackage com.liu.student.service;import java.util.List;import com.liu.student.entity.StudentEntity;public interface StudentService {public List getStudentList();//查public void add (StudentEntity studentEntity);//增public void update(StudentEntity studentEntity);//改public void delete(StudentEntity studentEntity);//删public StudentEntity getStudentEntity(String s_id);}7、接下来写service层:StudentServiceImplpackage com.liu.student.service;import java.util.List;import com.liu.dao.Dao;import com.liu.dao.DaoImpl;import com.liu.student.entity.StudentEntity;/*** 针对数据库中student表的操作** @author Calasin**/public class StudentServiceImpl implements StudentService { private Dao dao = new DaoImpl();public void add(StudentEntity studentEntity) {// TODO Auto-generated method stub}public void delete(StudentEntity studentEntity) {// TODO Auto-generated method stub}public StudentEntity getStudentEntity(String s_id) { // TODO Auto-generated method stubStudentEntity studentEntity = (StudentEntity) dao.getObj( StudentEntity.class, s_id);return studentEntity;}public List getStudentList() {// TODO Auto-generated method stubString hql = "from StudentEntity";List list = dao.getList(hql);return list;}public void update(StudentEntity studentEntity) {// TODO Auto-generated method stubdao.update(studentEntity);}}8、配置文件config介绍(hibernate.cfg.xml和struts.xml)Hibernate.cfg.xml介绍如下:<!DOCTYPE hibernate-configuration PUBLIC"-//Hibernate/Hibernate Configuration DTD 3.0//EN""/hibernate-configuration-3 .0.dtd"><hibernate-configuration><session-factory><propertyname="hibernate.connection.url">jdbc:mysql://localhost:3306/te st?characterEncoding=utf-8</property><propertyname="hibernate.connection.driver_class">com.mysql.jdbc.Driver</property><propertyname="ername">root</property><propertyname="hibernate.connection.password">123456</property><!-- 数据库方言 --><propertyname="hibernate.dialect">org.hibernate.dialect.MySQLDialect</p roperty><property name="hibernate.show_sql">true</property><mappingresource="com/liu/student/entity/StudentEntity.hbm.xml"/> </session-factory></hibernate-configuration>Struts.xml介绍如下:<?xml version="1.0"encoding="UTF-8"?><!DOCTYPE struts PUBLIC"-//Apache Software Foundation//DTD Struts Configuration 2.0//EN""/dtds/struts-2.0.dtd"><struts><constant name="struts.devMode"value="true"/><constant name="struts.enable.DynamicMethodInvocation" value="true"/><package name="stu"extends="struts-default"><action name="stu" class="com.liu.student.action.StudentAction"><resultname="studentList">/jsp/student/list.jsp</result><result name="updPage">/jsp/student/upd.jsp</result><result name="upd" type="redirect">stu!studentList.action</result></action></package></struts>。