多功能电饭煲使用手册
飞利浦多功能电饭煲用户手册说明书

用户手册属于您的多功能电饭煲感谢您的惠顾,欢迎光临飞利浦!为了您能充分享受飞利浦提供的支持,请在/welcome 上注册您的产品。
重要信息使用产品前,请仔细阅读本说明书,并妥善保管以备日后参考。
危险保留备用出版日期:2020-01-06©2020 Koninklijke Philips N.V.All rights reserved.HD4514_UM_China_v5.0HD4514本表格依据SJ/T11364的规定编制。
表示该有害物质在该部件所有均质材料中的含量均在GB/T26572规定的限量要求以下。
表示该有害物质至少在该部件的某一均质材料中的含量超出GB/T26572规定的限量要求。
除表格中部件外,磁条、发热盘、硅胶件、塑料件、五金件、包装及其他件均质材料中的含量均在GB/T26572规定的限量要求以下。
部件名称铅(Pb)汞(Hg)镉(Cd)六价铬(Gr(VI))多溴联苯 (PBB)多溴二苯醚(PBDE)有害物质电路板组件电源线主温控器组件温度传感器组件固定螺丝×○×××○○○○○×××○○○○○○○○○○○○*该表格中所显示的“有害物质”在产品正常使用情况下不会对人身和环境产生任何伤害。
*该表格中所显示的“有害物质”及其存在的部件向消费者和回收处理从业者提供相关物质的存在信息,有助于产品废弃时的妥善处理。
煮粥/煲汤1 将需要烹调的食材放入内锅。
2 完成“煮饭”中的步骤 6 和 7。
3 轻触功能选择键()来选择煮粥或煲汤功能。
»选定的功能指示灯开始闪烁。
4 按开始烹调按钮()启动烹饪程序。
»选定的功能指示灯保持常亮。
»屏幕上以倒计时方式显示剩余烹饪时间。
5 完成烹调时,您将会听到 4 下滴声。
电饭煲将会自动切换至保温模式。
»保温/取消指示灯亮起。
注意•请勿超出内锅标注的最高水位线,否则可能令电饭煲内的食材溢出。
海尔 HRC-F5094B 双控温防溢电饭煲 使用说明书
灾、触电或短路; 6.产品不使用时,请关闭电源并拔下电源插头;长时间不使用产品时,应将插
头从插座上拔出,并置于通风干燥处收藏。 7.请用软布和清水清洁内锅,勿用锅刷、钢丝球、粗硬洗碗布擦洗。
2
使用方法
备注: ①.当功能选定后,选择“预约”,预约灯亮起,预约时间设置完成后,按
“开始/再加热”进入预约工作。如按下“预约”键后无任何操作,约20 秒蜂鸣器响10 次提示,2分钟后返回待机状态。
②.煲仔饭、蛋糕、再加热没有预约功能 。
5、功能选择 在待机状态下,按“功能”键,可选择功能(柴火饭、快速饭、杂粮饭、 煲汤、煮粥、煲仔饭、蒸煮、蛋糕),选定功能的指示灯常亮。 功能选择完成后,按“开始/再加热”键进入工作状态,若是不按“开始/ 再加热”键且没有其他任何操作,约20秒蜂鸣器响10次提示,2分钟后 返回待机状态。 备注:机器刚通电时,全部功能指示灯亮,然后默认功能“柴火饭”指 示灯常亮。选定功能后按“开始/再加热”键进行烹饪,则只有烹饪这个 功能的指示灯亮,其余功能指示灯不亮 。如上电后无进行下一步操作, 则只有“柴火饭”指示灯常亮,电饭煲进入待机状态。
8、定时 定时功能显示时间为烹饪开始时间。 按“功能”键,选择“柴火饭”,同时连续按2次“预约”键,“定时” 指示灯亮,按“时”或“分”进行调节时间,按“开始/再加热”键即进 入定时功能。煲仔饭、蛋糕、保温功能无法进行定时。
3
使用方法
使用前的准备工作
1、保持发热盘干净 ● 发热盘上如有水或其他污渍,请用抹布擦干净。
产品特点
多功能智能电饭煲的使用说明书
多功能智能电饭煲的使用说明书使用说明书1. 产品概述多功能智能电饭煲是一款现代化的厨房电器,它结合了多种功能,可以方便、快捷地烹饪各种美食。
本说明书将详细介绍如何正确操作和使用本产品,以确保您能充分利用其多功能特性并获得最佳的烹饪体验。
2. 外观和配件多功能智能电饭煲外观时尚简约,采用高品质的不锈钢材料制造,耐用且易于清洁。
配件包括:- 不粘涂层内胆- 蒸盖- 烹饪蒸篮- 量杯- 锅铲- 使用说明书3. 使用前的准备在您开始使用多功能智能电饭煲之前,请确保执行以下准备工作:- 清洗内胆:将内胆取下,用温水和中性洗涤剂彻底清洁,然后用清水冲洗干净并擦干。
- 连接电源:将电饭煲连接到稳定的电源插座,确保电源电压与产品标贴上的要求相符。
- 充分插紧插头:确保插头牢固连接,避免接触不良导致电流不稳定。
- 放置稳定:将电饭煲放置在平稳的水平台面上,以免在烹饪过程中倾斜或翻倒。
4. 操作步骤本电饭煲具备多种烹饪模式和预设程序,可适应不同食材的烹饪需求。
下面将详细介绍几个常用功能的操作步骤以供参考:4.1 蒸煮功能- 将清洗干净的内胆置于电饭煲中- 将准备好的食材放入不锈钢蒸篮中- 将蒸篮放置在内胆上方- 关闭电饭煲盖子并插上电源- 按下蒸煮功能按钮,并根据个人口味设置时间和温度- 等待烹饪完成后,断电并将食材取出享用4.2 烹饪饭菜- 插好内胆,并清洗好内胆- 根据个人需求,将米饭和适量的清水放入内胆中- 关闭电饭煲盖子并插上电源- 按下烹饪功能按钮,并选择合适的煮饭模式和时间- 等待烹饪完成,并保持温热功能以保持饭菜口感- 断电后待饭菜稍微冷却后即可享用4.3 保温功能- 插好内胆,并清洗好内胆- 根据个人需求,将烹饪好的饭菜放入内胆中- 关闭电饭煲盖子并插上电源- 按下保温功能按钮,电饭煲将自动调节温度保持食物温热状态 - 饭菜将持续保温至下一次使用或手动关闭5. 清洁与维护如您长时间不使用电饭煲,建议按照以下步骤进行清洁与维护: - 断电并等待电饭煲完全冷却- 清洁外壳:使用柔软的湿布擦拭外壳表面,避免水分进入内部 - 清洁内胆:将内胆取下,用温水和中性洗涤剂彻底清洁,最后用清水冲洗干净并擦干- 定期检查:定期检查电源线和插头,如有损坏或松动应及时更换或修复- 储存方法:将内胆和配件放置在干燥通风的地方,避免湿气或灰尘的侵入6. 安全提示- 请勿让未成年人单独操作本产品- 请勿将电饭煲与水源直接接触- 请在烹饪过程中避免触碰电饭煲表面和热盖- 请勿将电源线与其他电器设备放置在一起,避免过度拉拽电源线 - 请勿在未清洗干净的状态下开始烹饪- 如遇到故障或异常情况,请立即断电并咨询售后服务感谢您阅读本使用说明书。
商品说明书智能电饭煲的功能介绍与操作指南
商品说明书智能电饭煲的功能介绍与操作指南智能电饭煲商品说明书一、功能介绍智能电饭煲是一种现代化厨房电器,集合了多种功能,旨在为用户提供便利、高效的烹饪体验。
下面将为大家介绍智能电饭煲的主要功能。
1. 智能烹饪模式智能电饭煲具备多种预设的烹饪模式,例如煮饭、煲汤、蒸煮、煎炒等。
用户只需选择相应的模式,电饭煲会自动调整温度和时间,确保食物能够达到最佳口感和营养价值。
2. 保温功能智能电饭煲内置保温设备,可以在烹饪完毕后自动切换至保温模式。
这意味着即使您不能立即享用烹饪好的食物,智能电饭煲也能保持食物的温热,以确保食物的口感和美味。
3. 预约烹饪智能电饭煲还提供了预约烹饪的功能。
您可以事先设置好烹饪时间,让智能电饭煲自动开始烹饪。
这样,您可以轻松控制烹饪的时间,让饭菜在您期望的时间准时上桌。
4. 多功能调控智能电饭煲拥有丰富的调控功能。
您可以根据个人口味选择不同的烹饪程度,以达到最佳效果。
此外,还有供您选择的保温时间设定、延时烹饪以及烹饪时间显示等实用功能。
二、操作指南接下来,我们将为您提供关于智能电饭煲操作的指南,确保您能够充分利用它的功能。
1. 准备工作在使用智能电饭煲之前,请确保已经彻底清洗内胆和附件,并将内胆安装回电饭煲内。
此外,还需在电饭煲底部连接电源并确保电源正常运行。
2. 加水和米饭根据您的需求,确定所需的水量并加入内胆中。
然后,加入相应的米饭。
建议使用专用米杯进行测量,以确保水米比例的准确性。
3. 设置烹饪模式根据食谱或个人口味,选择适合的烹饪模式。
您可以使用控制面板上的按钮或旋钮进行选择。
确保选择后,相应的指示灯亮起。
4. 预约烹饪如果您需要预约烹饪,请按照您期望的烹饪时间进行设置。
确保在设置后,预约指示灯亮起。
5. 开始烹饪按下启动按钮或旋钮,开始烹饪。
智能电饭煲将根据您所选的模式和设置,自动开始烹饪过程。
您可以通过控制面板上的相关显示器来了解当前的烹饪状态。
6. 保温设置当烹饪完毕后,智能电饭煲会自动切换至保温模式。
松下多功能电饭煲使用说明书
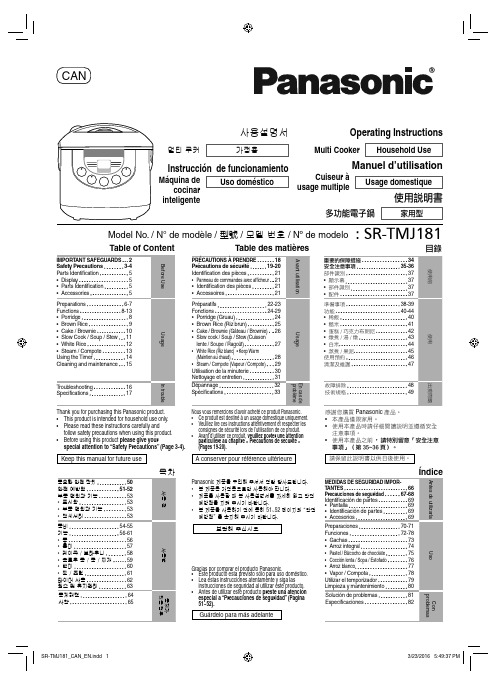
Table des matièresCANOperating InstructionsHousehold UseMulti Cooker 使用說明書家用型多功能電子鍋Manuel d’utilisationUsage domestiqueCuiseur à usage multipleModel No. / N° de modèle / 型號 / 모델 번호 / Nº de modeloThank you for purchasing this Panasonic product.• This product is intended for household use only.• Please read these instructions carefully and follow safety precautions when using this product.• Before using this product please give yourspecial attention to “Safety Precautions” (Page 3-4).Keep this manual for future use感謝您購買 Panasonic 產品。
•本產品僅限家用。
•使用本產品時請仔細閱讀說明並遵循安全注意事項。
•使用本產品之前,請特別留意「安全注意事項」(第 35~36 頁)。
請保留此說明書以供日後使用。
Nous vous remercions d’avoir acheté ce produit Panasonic.• Ce produit est destiné à un usage domestique uniquement.• Veuillez lire ces instructions attentivement et respecter les consignes de sécurité lors de l’utilisation de ce produit.• Avant d’utiliser ce produit, veuillez porter une attention particulière au chapitre « Précautions de sécurité » (Pages 19-20).À conserver pour référence ultérieure:SR-TMJ181Gracias por comprar el producto Panasonic.• Este producto esta previsto sólo para uso doméstico.• Lea estas instrucciones atentamente y siga las instrucciones de seguridad al utilizar este producto.• Antes de utilizar este producto preste una atención especial a “Precauciones de seguridad” (Página 51~52).Guárdelo para más adelanteInstrucción de funcionamientoUso domésticoMáquina decocinar inteligente사용설명서가정용멀티 쿠커Panasonic 제품을 구입해 주셔서 정말 감사드립니다.• 본 제품은 가정용으로만 사용해야 합니다.• 제품을 사용할 때 본 사용설명서를 자세히 읽고 안전 예방책을 지켜 주시기 바랍니다.• 본 제품을 사용하기 전에 특히 51~52 페이지의 “안전 예방책” 을 숙지해 주시기 바랍니다.보관해 주십시오When using electrical appliances, basic safety precautions should always be followed, including the following:1. Read all instructions.2. Do not touch hot surfaces. Use handles or knobs.3. To protect against electrical shock, do not immerse cord, plugs, or appliance in water or other liquid.4. Close supervision is necessary when any appliance is used by or near children.5. Unplug from outlet when not in use and before cleaning. Allow to cool before putting on or taking offparts.6. Do not operate any appliance with a damaged cord or plug or after the appliance malfunctions orhas been damaged in any manner.Return appliance to the nearest authorized service facility for examination, repair, or adjustment. 7. The use of accessory attachments not recommended by the appliance manufacturer may causeinjuries.8. Do not use outdoors.9. Do not let cord hang over edge of table or counter, or touch hot surfaces.10. Do not place on or near a hot gas or electric burner, or in a heated oven.11. Extreme caution must be used when moving an appliance containing hot oil or other hot liquids.12. Always attach plug to appliance fi rst, then plug cord into the wall outlet. To disconnect, turn anycontrol to “off”, then remove plug from wall outlet.13. Do not use appliance for other than intended use.14. This product is intended for household use only.15. SAVE THESE INSTRUCTIONS.CAUTION :a. A short power-supply cord (or detachable power-supply cord) is provided to reduce the riskresulting from becoming entangled in or tripping over a longer cord.b. The cord should be arranged so that it will not drape over the countertop or tabletop where it can bepulled on by children or tripped over unintentionally.c. The use of extension cords is not recommended.This appliance has a polarized plug (one blade is wider than the other). To reduce the risk of electric shock, this plug is intended to fi t into a polarized outlet only one way. If the plug does not fi t fully intothe outlet, reverse the plug. If it still does not fi t, contact a qualifi ed electrician. Do not attempt to modify the plug in any way.23WARNINGIn order to prevent accidents or injuries to the users, other people and damage to property, please follow the instructions below.The following charts indicate the degree of damage caused by wrong operation.CAUTIONPrecaution for UsePlease put in correct amountof rice and water and selectfunctions correctly according tothe operating instructions.(So as to avoid overfl ow of rice water,half-cooked rice or scorched rice.)Before using the appliance, theanti-tarnish paper between theinner pan and the cast heatershould be removed.(So as to avoid poor cooking or fi re.)Do not put ingredients to becooked directly into the appliancein which no inner pan is placed.Do not cook without inner pan.(So as to prevent any impurities fromcausing failure.)Do not cover the outer lid withcloth or other objects when theappliance is in use.(So as to avoid deformation, colorchange of the outer lid or failure.)Avoid using the appliance underdirect sunlight.(So as to avoid color change.)Do not scoop out rice with anymetal object.(So as to avoid scratching the innerpan coating and causing peeling of thecoating.)When there is any overfl owof rice water from thesteam vent, pull out thepower plug immediatelyto disconnect the powersupply. Do not resume theuse until the rice water onthe power plug and theinstrument plug is cleanedwith a dry cloth.The appliance is forhousehold use only. Do notuse it for any commercial orindustrial purposes or anypurposes other than cooking.When power failure occursduring the operation of theappliance, the cooking resultmay be affected.Do not let water spill on thepower plug of the power cord set.(This may result in electric shock.)45DisplayPress this button to:1. Cancel the previous operation orenter Keep Warm function. 2. Preset timer.3. Select cooking menu.4. Select cooking timer.5. Start cooking.Parts Identifi cation61Measure rice with the measuring cup provided.• The volume of the measuring cup is about 180 mL.• For the maximum quantity of rice to be cooked at once, refer to specifi cations in Page 17.Wash the rice till the water turns relatively clear.1Wash the rice quickly with plenty of water and stirring the rice lightly to wash itwhile changing water.2→pour out water), till the water turnsrelatively clear.2ATTENTION• In order to avoid scratching the non-stick coating on the pan surface, do not wash rice in the pan.• Wash the rice thoroughly. Otherwise, rice crust may appear and the residual ricebran may affect the taste of the rice.Add the washed rice or other ingredients into the pan.• Use water line on the pan to measure cooking quantity as follows.31*2 By following water level mark “L” inside the pan.• Wipe the surface of the pan before use. If it is wet, it may cause noise while cooking. Any foreign matters between the pan and the cast heater may damage the unit.• The water level data indicated in above table is only approximation. If rice is too hard or too soft, please adjust water amount according to your personal taste.<LEVEL INDICA TOR> MAXIMUM LEVELDo not cook with more than this levelSR-TMJ1817Put the inner pan into the body and close the outer lid.1In order to closely attach the bottom of inner pan to thecast heater, please rotate the inner pan along the directionindicated by the arrow 2 or 3 times. Please check whether the steam cap is correctly positioned (Page 15).2Close the outer lid until it clicks.4Connect the plugs.1Please insert the instrument plug into the body fi rst.2Connect the power plug. Make sure that both plugsare tightly connected.58Operations(Cooking with the Porridge function.)1Press button.• remaining time reaches 5 minutes.2The cooking is over• Keep Warm function • Keep Warm function as it may become too thick and dry. Pressthe button to exit the Keep Warm function and unplug the power plug.9Operations1• remaining time reaches 13 minutes.2The cooking is overStir and loosen the rice.• • Keep Warm function as it may become affect the taste. Pressthe button to exit the Keep Warm function and unplug the power plug.(Cooking with the Brown Rice function.)10Preparations• Prepare the cake mixture by following your recipe.• Coat the inner pan with butter or margarine to facilitate removing the cake from inner pan.•Pour the cake mixture into the inner pan and level it.Operations(Cooking with the Cake / Brownie function.)Press Menu button to select Cake / Brownie function.40min (40 minutes) will appear on LCD display (as the default baking time for Cake function).1Press button to set the cooking time as your desire.• Y ou can set the cooking time for:Cake function : from 20 to 65 minutes (5 minutes increment).Brownie function : from 1 to 20 minutes (1 minute increment) and 20 to 65 minutes (5 minutes increment).• Keeping the button pressed will make setting faster.2Press button.•3The cooking is over•the Keep Warmlights up automatically).• Keep Warm function as it mayaffect the taste. Press the button to exit the Keep Warm function andunplug the power plug.• Bring out the pan and leave it cool for 2-3 minutes. Then put the pan upsidedown onto a tray or grill.• Decorate the cake surface as your desire.Hand glovePreparations• Place all ingredients into the pan. •Close the lid.Operations(Cooking with the Slow Cook / Soup / Stew function.)PressMenubutton to select Slow Cook / Soup / Stew function.1h (1 hour 0 minute) will appear on LCD display (as the default cookingtime for Slow Cook / Soup / Stew function).1Pressbutton to set the cooking time as your desire.• Y ou can set the cooking time from 1 to 12 hours (30 minutes increment). • Keeping the button pressed will make setting faster.2Press button.• reduce to 1 minute decrement when cooking time is less than 1 hour.3The cooking is over• • Keep Warm function as it may affect the taste. Press the button to exit the Keep Warm function and unplug the power plug.Operations1• The remaining time counter will appear on the LCD display when the remaining time reaches 9 minutes.2The cooking is overStir and loosen the rice.• Keep Warm(Cooking with the White Rice function.)Preparations• Add the required amount of water.• Place foods to be steamed into the steam basket.• Close the outer lid.Operations(Cooking with the Steam / Compote function.)PressMenubutton to select Steam / Compote function.10min (10 minutes) will appear on LCD display (as the default steamingtime for Steam / Compote function).1Pressbutton to set the cooking time as your desire.• Y ou can set the cooking time from 1 to 60 minutes (1 minute increment). • Keeping the button pressed will make setting faster.2Press button.• 3The cooking is over• • Keep Warm function as it may affect the taste. Press the button to exit the Keep Warm function and unplug the power plug.Correspondence between the amount of water andtime of steaming as below serves as a guideline to achieve a satisfactory cooking performance.The presetting time is a countdown timer.• Time can be preset 13 hours in advance.ExampleIf the timer is set for 4H 30min pressed.OperationsPressMenubutton to select function.•1Press button to set the timer as your desire.• The fi• • Keeping the button pressed will make setting faster.23Press button.• •Rice CookingDetailsCooking problems Keep Warm problems No powerStrange sound occursT oo hardUndercookedT oo softWater overfl owBurnt rice at bottomof inner panColor changeBad smellT oo dryWrong rice and water proportion.●●●●●●Pull out plug and check the socket.Sound occurs because of water that has stuck to inner pan.Inadequate washing of rice.●●●●Foreign matters between inner pan and cast heater.●●●●Cooking with a lot of oil.●●●●●The rice has been warmed more than 12 hours.●●●The outer lid is not securely closed.●●●●●The inner pan is not adequately washed.●●The power cord is not connected to the socket securely.●●Cake BakingDetailsBaking Cake problemsNo powerStrange sound occursUndone CakeUndercooked CakeWet CakeThe Cake sticks to the base of panBottom of the Cake burntNot fl uffedCrumblyToo much dough.●●Pull out plug and check the socket.Sound occurs because of water that has stuckto pan.Not enough mixing before baking.●●●Used with incompatible cake mix.●●●●Used with cake mix that contains too much chocolate, sugar or fruit ingredients.●●●●Outer lid not close while cooking.●●●Foreign matters between pan and cast heater.●●●●●Not enough butter or cooking oil applied to the bottom of the pan.●Cake left in the pan too long.●●Inadequate mixing or mixed too long.●●Wrong ingredient quantity.●●●●Model No.SR-TMJ181Power Source 120 V60 HzPowerConsumptionIn the Cooking Function 670 W In the Keep Warm Function 108 W CapacityWhite Rice 3 - 10 cups Sticky Rice 3 - 6 cups Mixed Rice3 - 8 cups Brown Rice 3 - 7 cups Porridge1 -2 cups Slow Cook / Soup / Stew 1,1 - 3,2 L Cake / Brownie1,660 g Dimensions (Width x Length x Height) (approx.)274 x 275 x 276 mmWeight (approx.)3,1 k g Keep Warm12 hours• For power cord replacement and product repair, please contact Panasonic authorized service center.Lors de I’utilisation de tout appareil électrique, il est toujours recommandé de prendre certaines précautions, dont les suivantes:1. Lire toutes les instructions.2. Éviter de toucher aux surfaces chaudes. Toujours utiliser les poignées ou les anses.3. Afi n de prévenir tout risque de choc électrique, ne pas immerger le cordon, les fi chesd’alimentation ou l’appareil dans l’eau ou tout autre liquide.4. Ne jamais laisser des enfants utiliser I’appareil sans surveillance.5. Après usage et avant le nettoyage, toujours débrancher I’appareil. Laisser refroidir avantde retirer des pièces ou de les remettre en place.6. Ne jamais utiliser I’appareil si sa fi che ou son cordon est endommagé ou après avoirconstaté une défectuosité ou des dommages. Le cas échéant, l’appareil doit être retournéau centre de service le plus près pour vérifi cation, réparation ou ajustement.7. L’utilisation d’accessoires non recommandés par le fabricant peut représenter un risquede blessures.8. Ne pas utiliser I’appareil à I’extérieur.9. Ne pas laisser le cordon pendre d’une table ou d’un comptoir, ni le mettre en contact avecune surface chaude.10. Ne pas placer I’appareil sur le dessus ou à proximité d’un brûleur à gaz ou électrique, nidans un four chaud.11. Être extrêmement prudent lors du déplacement d’un appareil contenant de I’huile chaudeou tout autre liquide chaud.12. Toujours brancher le cordon d’alimentation à I’appareil avant d’en brancher la fi che dansune prise secteur. Avant de débrancher, couper le contact, puis retirer la fi che de la prise secteur.13. N’utiliser I’appareil qu’aux fi ns recommandées.14. Cet appareil est conçu seulement pour l’utilisation domestique.15. CONSERVER CE MANUEL.ATTENTION :a. Le cordon d’alimentation (ou le cordon amovible) fourni est court, de manière à prévenirles risques d’emmêlement et d’accidents.b. Le cordon ne doit pas pendre du comptoir ou de la table, afi n d’éviterque des enfants tirent dessus ou trébuchent accidentellement.c. L’utilisation d’un cordon prolongateur n’est pas recommandée.Cet appareil est équipé d’une fi che polarisée (une des broches est plus large que les autres). Afi n de réduire le risque de choc électrique, cette fi che doit être enfi chée dans une prise polarisée dans un seul sens. Si elle ne s’enfi che pas complètement dans la prise, l’inverser.Si elle ne s’enfi che toujours pas, contacter un électricien qualifi é. Ne pas tenter de modifi er la fi che de quelque façon que ce soit.AVERTISSEMENTAfi n d’éviter les accidents ou blessures aux utilisateurs, à d’autres personnes et des dégradations matérielles, veuillez suivre les instructions ci-dessous.Les tableaux suivants indiquent la gravité des dommages provoqués par des mauvaises manoeuvres.A TTENTIONPrécautions d’utilisationVeuillez mettre la bonne quantitéd’eau et de riz et sélectionnerles fonctions correctement etconformément aux instructionsd’utilisation.(Pour éviter un débordement de l’eaudu riz, le riz à moitié cuit ou le riz brûlé.)Avant d’utiliser l’appareil, lepapier anti-ternissure placé entrele panier de cuisson et la plaquechauffante doit être retiré.(Pour éviter une mauvaise cuissonou un incendie.)Ne mettez pas d’ingrédients àcuire directement dans l’appareilsi aucun panier de cuisson nes’y trouve. Ne cuisinez pas sanspanier de cuisson.(Pour empêcher toute impureté deprovoquer une panne.)Ne couvrez pas le couvercle extérieuravec un linge ou d’autres objets lorsquel’appareil est en cours d’utilisation.(Pour éviter la déformation,le changement de couleur ducouvercle extérieur ou une panne.)Évitez d’utiliser l’appareil sous lalumière directe du soleil.(Pour éviter tout changement de couleur.)Ne servez pas le riz avec unobjet en métal.(Pour éviter de rayer lerevêtement du panier de cuissonet de provoquer l’écaillage durevêtement.)En cas de débordement d’eaudu riz par l’évent à vapeur,retirez la fi che d’alimentationimmédiatement pour couperl’alimentation électrique.Ne reprenez pas l’utilisationavant que l’eau du riz sur lafi che d’alimentation et la fi checôté appareil ne soit retiréeavec un chiffon sec.L’appareil est réservé à un usagedomestique. Ne l’utilisez pas à dequelconques fi ns commercialesou industrielles ou à des fi nsautres que la cuisson.Si une panne d’alimentationsurvient pendant le fonctionnementde l’appareil, le résultat de lacuisson peut être affecté.Ne laissez pas de l’eau déverser sur laprise d’alimentation de l’ensemble ducordon d’alimentation.Ceci peut entraîner un choc électrique.Panneau de commandes avec affi cheurIdentification des piècesAppuyez sur ce bouton pour:1. Annuler l’opération précédente oupour activer la fonction Maintien au chaud.2. Prérégler la minuterie.3. Sélectionner le menu de cuisson.4. Régler la minuterie de cuisson.5. Lancer la cuisson.1Mesurez le riz avec le verre mesureur fourni.• Le volume du verre mesureur est d’environ 180 mL.• Référez-vous aux spécifi cations à la page 33 pour connaître la quantité de riz qu’il est possible de cuire en une fois.Rincez le riz jusqu’à ce que l’eau devienne assez claire.1Rincez le riz rapidement à grande eau, en l’agitant légèrement pour le rincertout en changeant l’eau.2→déversez l’eau), jusqu’à ce que l’eau devienne assez claire.2ATTENTION• Pour éviter de rayer le revêtement anti-adhésif de la surface du panier de cuisson,ne rincez pas le riz dans le panier de cuisson.•Rincez le riz avec soin. Sinon, de la croûte de riz risque d’apparaître et le son de riz résiduel peut affecter le goût du riz.Ajoutez le riz rincé ou autres ingrédients dans le panier de cuisson.• Utilisez le repère de niveau d’eau du panier de cuisson pour mesurer la quantité d’eau comme suit.3*1 En respectant la graduation de niveau d’eau “CUP” située à l’intérieur du panier de cuisson.*2 En respectant la graduation de niveau d’eau “L” située à l’intérieur du panier de cuisson.• Séchez la surface extérieure du panier de cuisson avant l’utilisation. Si elle est mouillée, du bruit pourra être généré pendant la cuisson. T out corps étranger entre le panier et la plaque chauffante peut endommager l’appareil.• Les données de niveau d’eau indiquées dans le tableau ci-dessus sont seulement des approximations. Si le riz est trop dur ou trop mou, ajustez la quantité d’eau en fonction de vos goûts personnels.<INDICA TEUR DE NIVEAU>NIVEAU MAXIMUMSR-TMJ181extérieur.1Pour que le fond du panier de cuisson soit bien en contact avec la plaque chauffante, veuillez le faire pivoter dans le sens indiqué par la fl èche 2 ou 3 fois. Veillez à ce que le capuchon d’échappement de la vapeur soit bien positionné ( p. 31).2Fermez le couvercle extérieur jusqu’à ce qu’il s’enclique.4Branchez les fi ches.1Veuillez insérer d’abord la fi che côté appareil dans le boîtier.2Branchez la fi che d’alimentation. Veillez à ce que les deux fi ches soient bien connectées.5OpérationsAppuyez sur le boutonMenupour sélectionner la fonction Porridge (Gruau).• Le 1.• Le • cheur ACL lorsque le temps restant atteint 5 minutes.2La cuisson est terminée• à la fonction Keep Warm (Maintien au chaud)automatiquement).• T Keep Warm (Maintien au chaud) car le riz pourrait Keep Warm (Maintien au chaud) et débranchez la fi che d’alimentation.(Cuisson avec la fonction Porridge (Gruau))Opérations(Cuisson avec la fonction Brown Rice (Riz Brun))Appuyez sur le boutonMenupour sélectionner la fonction Brown Rice (Riz brun).• Le 1.• Le • Un compte à rebours apparaît à l’affi cheur ACL lorsque le temps restant atteint 13 minutes.2La cuisson est terminéeMélangez et aérez le riz.• à la fonction Keep Warm (Maintien au chaud)automatiquement).• T Keep Warm (Maintien au chaud) car elle pourrait Keep Warm (Maintien au chaud) etdébranchez la fi che d’alimentation.Préparatifs• Préparez le mélange à gâteau en suivant les indications de votre recette.• Enduisez le panier de cuisson de beurre ou de margarine pour faciliter le démoulage du gâteau.• Versez le mélange à gâteau dans le panier de cuisson, puis égalisez-en la surface.Operations(Cuisson avec la fonction Cake / Brownie (Gâteau / Brownie))Appuyez sur le bouton Menu pour sélectionner la fonction Cake / Brownie (Gâteau / Brownie).• Le 40min (40 minutes) s’affi che sur l’affi cheur ACL (il s’agit du temps de cuisson par défaut pour la fonction Cake (Gâteau).1Appuyez sur le bouton pour régler le temps de cuisson de votre choix.• Vous pouvez sélectionner le temps de cuisson :Fonction gâteau : de 20 à 65 minutes (par incrément de 5 minutes).Fonction brownie : de 1 à 20 minutes (par incrément d’une minute) et de 20 à 65 minutes (par incrément de 5 minutes).• Maintenez le bouton enfoncé pour faire défi ler les chiffres plus rapidement.2.• Le• L’affi cheur ACL indique le temps restant par incrément d’une minute.3La cuisson est terminée• Lorsque la cuisson est terminée, le cuiseur à usage multiple émet des bips etKeep Warm (Maintien au chaud). (Le•chaud)la fonction Keep Warm (Maintien au chaud) et débranchez la fi• Sortez le panier de cuisson de l’appareil, puis laissez-le refroidir pendant 2 à3 minutes. Retournez ensuite le panier de cuisson sur un plateau ou sur une grille.• Décorez la surface du gâteau selon vos préférences.Gant isolantPréparatifs•Placez tous les ingrédients dans le panier de cuisson.• Fermez le couvercle extérieur.Opérations(Cuisson avec la fonction Slow cook / Soup / Stew (Cuisson lente / Soupe / Ragoût))Appuyez sur le bouton Menupour sélectionner la fonction Slow cook / Soup / Stew (Cuisson lente / Soupe / Ragoût).• Le 1h (1 heure 0 minute) s’affi che sur l’affi cheur ACL (il s’agit dutemps de cuisson par défaut pour la fonction Slow cook / Soup / Stew (Cuisson lente / Soupe / Ragoût).1Appuyez sur le boutonpour régler le temps de cuisson de votre choix.• Vous pouvez régler le temps de cuisson de 1 à 12 heures (par incrément de 30 minutes).• Maintenez la pression sur le bouton pour un défi lement plus rapide.2.• Le • L ’affi cheur ACL affi che le temps restant par incrément de 30 minutes puis par incrément d’une minute lorsque le temps de cuisson est inférieur à 1 heure.3La cuisson est terminée• à la fonction Keep Warm (Maintien au chaud)automatiquement).• T Keep Warm (Maintien au chaud) car elle pourrait Keep Warm (Maintien au chaud) etdébranchez la fi che d’alimentation.Opérations(Cuisson avec la fonction White Rice (Riz blanc))Appuyez sur le boutonMenupour sélectionner la fonction White Rice (Riz blanc).• Le 1.• Le • cheur ACL lorsque le temps restant atteint 9 minutes.2La cuisson est terminéeMélangez et aérez le riz.• à la fonction Keep Warm (Maintien au chaud)automatiquement).Maintien au chaudPréparatifs• Ajoutez la quantité d’eau nécessaire.• Placez les aliments à étuver dans le panier d’étuvage ajustable.• Fermez le couvercle extérieur.EauOpérations(Cuisson avec la fonction Steam / Compote (Vapeur / Compote))Appuyez sur le boutonMenupour sélectionner la fonction Steam / Compote (Vapeur / Compote).• Le 10min (10 minutes) s’affi che sur l’affi cheur ACL (il s’agit dutemps de cuisson par défaut pour la fonction Steam / Compote (Vapeur / Compote).1Appuyez sur le boutonpour régler le temps de cuisson de votre choix.• Vous pouvez régler le temps de cuisson de 1 à 60 minutes (par incrément d’une minute).• Maintenez la pression sur le bouton pour un défi lement plus rapide.2.• Le • Après ébullition de l’eau, l’affi cheur ACL affi che le temps restant par incrément d’une minute.3La cuisson est terminéePanier d’étuvage ajustable Correspondance entre la quantité d’eau et le tempsd’étuvage comme ci-dessous sert de guide pour réaliser une performance de cuisson satisfaisante.• à la fonction Keep Warm (Maintien au chaud)automatiquement).• T Keep Warm (Maintien au chaud) car elle pourrait Keep Warm (Maintien au chaud) etdébranchez la fi che d’alimentation.。
飞利浦+HD3072+电饭煲+用户手册说明书
HD3072用户手册注意• 长按选择/取消触控区可取消正在进行的烹饪功能。
• 内锅的水位标记只是一个参考。
您始终可以根据谷物的品种及个人喜好调整水位。
• 除了以下水位指示,还可以在煮饭时按 1:(1.3-1.6) 的比例添加大米和水。
• 为了防止米饭结块影响口感,请在30分钟内将米饭翻松。
• 请勿超过标注的量或最高水位标示,否则可能导致产品发生溢漏。
粥和汤1 将原料放入内锅。
2 请遵循“烹饪前准备”中的步骤。
3 轻触选择/取消触控区可选择粥或汤。
»所选的烹饪功能指示灯闪烁,屏幕上将显示默认烹饪时间。
4 轻触开始触控区以所选模式开始烹饪过程。
5 烹饪完成后,您会听到 4 声哔声,选定的烹饪功能指示灯将熄灭。
6 电饭煲将自动进入保温模式。
»保温指示灯会亮起。
蛋糕1 搅拌好蛋糕原料。
2 用少许黄油涂抹内锅,然后将预先搅拌好的蛋糕原料倒入其中。
3 请遵循“烹饪前准备”中的步骤。
4 轻触选择/取消触控区可选择蛋糕功能。
5 轻触开始触控区开始烹饪。
6 烹饪完成后,您会听到 4 声哔声,选定的烹饪功能指示灯将熄灭。
»保温指示灯会亮起。
7 打开锅盖,小心地取出内锅以进行冷却。
8 待内锅冷却后,将盘子或蛋糕架放在锅上,然后翻转过来即可取出蛋糕。
酸奶1 将原料放入内锅。
2 请遵循“烹饪前准备”中的步骤。
3 轻触选择/取消触控区可选择酸奶。
»所选的烹饪功能指示灯闪烁,屏幕上显示默认烹饪时间。
4 轻触开始触控区以所选模式开始烹饪过程。
5 烹饪完成后,您会听到 4 声哔声,选定的烹饪功能指示灯熄灭。
6 电饭煲自动进入待机模式。
内部上盖及煲身内侧:• 用湿布擦拭。
• 确保清理掉黏在电饭煲上的所有食物残渣。
加热元件:• 用湿布擦拭。
• 用湿布去除食物残渣。
外部上盖表面和煲身外侧:• 用蘸有肥皂水的布进行擦拭。
• 只能使用柔软的干布擦拭控制面板。
• 确保清理掉所有食物残渣。
附件饭勺和内锅:• 浸泡到热水中并用海绵清洁。
cuckoo-福库电饭煲说明书中文

cuckoo-福库电饭煲说明书中文福库电饭煲使用说明书一、产品概述欢迎您使用 cuckoo福库电饭煲!这是一款精心设计,旨在为您提供美味、便捷烹饪体验的优质电器。
它融合了先进的技术和人性化的设计,能够满足您多样化的烹饪需求。
二、产品特点1、多种烹饪功能具备煮饭、煮粥、煲汤、蒸煮等多种功能,满足您不同的饮食需求。
精准的温度和时间控制,确保每一道菜肴都烹饪得恰到好处。
2、高压烹饪技术采用高压烹饪方式,能够快速煮熟食物,同时保留食物的营养成分和原汁原味。
3、智能控制系统配备智能控制面板,操作简单直观,轻松选择您所需的烹饪模式和功能。
4、优质内胆采用高品质的不粘锅内胆,导热均匀,耐用易清洁。
5、安全保护装置具备多重安全保护功能,如过热保护、压力过载保护等,使用更加放心。
三、部件说明1、上盖可轻松拆卸,方便清洗。
2、内胆注意不要使用尖锐物品刮擦内胆。
3、控制面板包含各种功能按键和显示屏。
4、蒸汽排放口烹饪过程中会有蒸汽排出,使用时请勿遮挡。
四、使用前准备1、检查产品打开包装后,检查电饭煲是否有损坏或部件缺失。
2、清洁内胆用清水冲洗内胆,去除可能存在的灰尘和异味。
3、放置位置将电饭煲放置在平稳、干燥、通风良好的台面上,远离易燃物品和水源。
五、基本操作步骤1、接通电源将电源线插头插入电源插座。
2、选择功能按下控制面板上的相应功能按键,如煮饭、煮粥等。
3、设定时间(如有需要)某些功能可能需要您设定烹饪时间,通过“+”和“”按键进行调整。
4、放入食材将准备好的食材和适量的水放入内胆。
5、开始烹饪按下“开始/确认”按键,电饭煲开始工作。
六、煮饭功能1、米量和水量的比例根据米的种类和个人口感,一般来说,白米的米水比例为 1:12 1:15。
2、选择煮饭模式可以选择标准煮饭、快速煮饭或其他特殊煮饭模式。
3、烹饪时间标准煮饭时间约为 30 40 分钟,快速煮饭时间相对较短。
七、煮粥功能1、食材准备可以选择大米、小米、豆类等食材。
电饭煲说明书详细介绍不同的烹饪模式和使用注意事项
电饭煲说明书详细介绍不同的烹饪模式和使用注意事项电饭煲说明书尊敬的用户:感谢您选择我们的电饭煲产品。
为了让您更好地了解如何使用和操作本产品,我们特别为您提供了这份详细的电饭煲说明书。
请您仔细阅读本说明书,并按照操作指导使用电饭煲,以便于您能够充分发挥其功能和效果,享受到便捷的烹饪体验。
一、基本介绍1. 产品外观:本电饭煲采用优质材料制造,外观精美,设计简洁大方。
具备合理的容量大小,方便用户根据需求选择合适大小的电饭煲。
2. 产品特点:本电饭煲具备多种烹饪模式和功能,能够满足您不同的烹饪需求。
接下来,我们将详细介绍电饭煲的各个烹饪模式和使用注意事项。
二、烹饪模式介绍1. 白饭模式:该模式适用于烹饪普通的白米饭。
操作简单,只需按下相应按钮,电饭煲将会自动完成加热、蒸煮过程,待饭煮熟后会自动保温。
2. 快煮模式:该模式适用于快速烹饪一些需要食材软烂的菜肴,如煲汤或煮粥。
选择快煮模式后,根据菜谱要求添加适量的食材和水,电饭煲将智能控制时间和温度,快速完成烹饪过程。
3. 煲汤模式:该模式适用于慢炖汤品,将食材、水和调料放入电饭煲内,选择煲汤模式,煲汤时间较长,能够将食材的营养和口感充分释放出来。
4. 蒸煮模式:该模式适用于蒸煮食材,如蒸鱼、蒸蔬菜等。
首先将食材放入蒸屉,然后将蒸屉放入内胆,选择蒸煮模式,并根据食材种类和口感需求,设置适当的时间。
5. 煲粥模式:该模式适用于烹饪稠度较高的粥类食物。
在煲粥模式下,电饭煲将会自动搅拌食材,在充分煮熟的同时,也会使粥的口感更加细腻。
6. 煲饭模式:该模式适用于烹饪多种米饭,如糙米饭、五谷饭等。
选择煲饭模式后,电饭煲会根据不同种类的米饭和口感需求,自动调整烹饪时间和温度。
三、使用注意事项1. 使用前:请确保电饭煲处于平稳的位置,与其他电器设备保持一定距离,确保通风良好。
检查电源插头和电源线是否完好,插头与插座连接牢固。
2. 加水操作:请根据要煮的米饭或食材种类,按照电饭煲内胆上的刻度线,适量添加清水。
- 1、下载文档前请自行甄别文档内容的完整性,平台不提供额外的编辑、内容补充、找答案等附加服务。
- 2、"仅部分预览"的文档,不可在线预览部分如存在完整性等问题,可反馈申请退款(可完整预览的文档不适用该条件!)。
- 3、如文档侵犯您的权益,请联系客服反馈,我们会尽快为您处理(人工客服工作时间:9:00-18:30)。
重要事项
危险
,也不能在自来水龙不可将电饭锅主体浸入水中头下冲洗。
电饭煲正在工作时,不要盖住其蒸汽孔和调压器。
警告
在将产品连接电源之前,请先检查产品所标电压与当地的供电电压是否相符。
产品必须插入有接地的插座,且务必确保其已稳固插入。
如果插头、电源线、内胆或煲身已经损坏,请勿再使用本产品。
本产品不打算由肢体不健全、感觉或精神上有障碍或缺乏相关经验和知识的人(包括儿童)使用,除非有负责他们安全的人对他们使用本产品进行监督或指导。
应照看好儿童,确保他们不玩耍该产品。
不要让儿童接触到电源线。
切勿将电源线悬挂在放置本产品的桌子或工作台的边上。
将插头接入插座之前,应确保加热元件、温度传感器和内胆外侧是洁净、干燥的。
.如果密封圈损坏,请勿在使用产品。
请勿用浸湿的手插接产品插头或控制面板上的任何按钮。
切勿将本产品连接至外部定时器,以免发身危险。
电饭煲正在工作时,切勿将脸或手靠近调压器或蒸汽孔。
米饭煮沸时,切勿打开锅盖。
煮饭过程结束后,切勿立即打开锅盖,而要等到电饭煲内的蒸汽完全释放再打开。
定期检查蒸汽孔,确保其不会被堵塞。
有关任何涉及心脏起搏器或其它植入装置的问题,请在使用本产品之前咨询医生。
注意
仅使用附送的饭勺,不要使用尖锐的器具。
切勿将电饭煲暴露在高温之下也不要将电饭煲放在正在工作或仍在发热的炉具或炊
具上。
将插头接入插座和打开电饭煲之前,一定要先放入内胆。
如果很长时间不用,请务必拔下电饭煲的电源插头。
一定要先让电饭煲冷却,才能进行清洁或移动。
不要将内胆直接放在火上煮饭。
.
如果本产品使用不当、用于专业或专业用途或未按本用户手册中的说明进行操作,则本产品的保修将会失效,并且对于因此而造成的损失,厂家拒接承担任何责任。
将电饭煲放在稳固、平整且水平的表面上。
产品工作时,可接触到表面会发热。
只能触摸控制面板。
小心煮饭期间从蒸汽孔和调压器排出的热蒸汽或再打开盖子时从电饭煲中冒出的热蒸汽。
煮饭期间,切勿提起及移动电饭煲。
切勿将产品直接暴晒于阳关下。
切勿将金属物体或异物插入蒸汽孔和调压器。
请勿烹饪粘性食物或会产生大量气泡的食物,例如咖喱粉或大麦茶。
确保在开启电饭煲之前,锅盖锁杠处于锁定位置。
请勿将带磁性的物体放在锅盖上。
请勿在带磁性的物体附近使用本产品。
如果内胆已变形,请勿使用。
请不要超出内胆中标明的最高水位标示,以免调压器中溢水。
切勿在烹饪时将饭勺放在锅中。
每次使用后应清洁产品。
.
首次使用前注意
1.首次使用本产品之前,请彻底清洁电饭煲的所有部件。
使用本产品之前,确保所有部件都已完全干燥。
2. 保在烹饪前已经正确地安装好内盖
功能默认时间可调时间
45
01-155煮01-155
00
酸0001-155
0100-155蒸
01-145肉55
01-1bb
保55
01-15500
快55110-35
40
蛋55
1-100.
油炸0:30 00:10--10:55 0:30 0:30
--23预约:30
开/关
此键用于启动烹调,烹调模式选定后(和时间选定后)按此键开始烹调。
保温,快煮,粥/汤,蒸煮,蛋糕设有一键操作。
菜单
此键用于选择不同的烹调模式。
“+”
在选定烹调模式设定下,此键用于设定烹调时间,每按一次增加1分钟,长按不放每次增加10分钟,当到达10小时55分后停止不循环。
“-”
此键用于设定烹调时间,每按一次减1分钟,长按不放每次减10分钟,当到达10分钟后停止
预约
按此键进入到预约时间设定
“+”
在预约时间设定下,此键用于设定预约时间,每按一次增加30分钟,当到达23小时30分钟后停(数码显示版)止不前。
.在预约时间设定下,此键用于预约时间,每按一次移动一个指示灯位(2-4小时),当到达10小时后停止不前(LED版)“-”
在预约时间设定下,此键用于设定预约时间,每按一次减少30分钟,当到达30分钟后停止。
在预约时间设定下,此键用于预约时间,每按一次移动一个指示灯位(2-3小时),当到达2小时后停止不前(LED版)
开/关
按此键来取消操作或停止烹调。
P.S.
烹调时间的设定范围为10分钟到10小时55分钟。
预约时间的设定范围为30分钟到23
小时30分钟。
产品使用
烹调示例
煮饭
1.使用附带的量米杯,每杯大约相当于煮熟后的杯米1碗米饭。
不要超过内胆的指定的量。
2.
大约为180毫升(约160克)。
4L内胆最
大容量为8杯,5L内胆最大容量为10杯。
为避免损伤内胆的不黏涂层,2.应使用另外的容器淘米。
将淘好的米倒入内胆。
3.
按所倒入白米数杯,4.依照刻在内胆上的相应水位标记加入适量的水,然后将米抚平。
将内胆放入电饭煲。
检查内胆是否已经正确接5.
触发热板。
请确保发热板和内胆的外表是洁净且干燥的。
关上电饭煲的盖子,将插头插入插座。
6.
用“菜单”键选择“米饭”模式,相应的指示7.灯会亮起闪动。
按“开8./关”键开始烹调,时间开始倒数。
相应的指示灯长亮不闪动。
烹调完毕后电饭煲会自动进入到保温模式9.(保温指示灯“bb”亮起),你可以按“开/关”键取消保温。
烹调时间
如果你想设定烹调时间,可按以下操作
1.按“菜单”键选择烹调模式。
“-”键进入设定。
按“+”2.
3.按“开/关”键开始烹调。
4.模式工作状态时显示屏第一位数码在跑的,(表示在加热),
预约
假设:你需要设定2小时30分钟后电饭煲开始煮汤并同时设定烹调时间为1小时10
分钟。
首先按“菜单”键选择“营养汤”模式,按“+”键进入设置,按一次有效键递增1分钟。
长按“+”每次递增10分钟。
直到显示屏显示“01:10”。
然后按“预约”进行预约,按“+”键,按一次有效为30分钟直到显示屏显示“02:30”,最后按“开/关”键。
“营养汤”指示灯会闪动。
显示屏的中间两个点也会闪动。
故障种类和处理方法Problem Description
CauSolution
se
指示灯发热板不工1.电源1.检查电源不亮作线没线连接
有接发热板工作2.请将本产品送往当好。
.
本
1标2商。