微软官方教程《OFFICE2010宝典》PowerPoint教程
Office2010应用基础最全课件完整版ppt整套教学教程(最新)

用户可以根据自己的需要调整工具栏按钮,自定义设置工具选项卡、快 速访问栏等。
(9)自动保存“未保存的文件”
在 Office 2010 中,即使用户点击了“不保存”按钮,Office 依然会为 用户提供一个自动备份的文档,避免用户由于误操作、误点击而造成的损失。
(10)保护用户信息
在与其他人共享文档之前,用户可以使用文档检查器检查文档中的隐藏 元数据、个人信息或文档中可能存储的内容。
2.2 制作“保密协议书”文档
6.左移或右移整个列表 单击列表中的项目符号或编号以突出显示列表。 将列表拖动到新位置。整个列表将在拖动时相应移动,编号级别不会更改
7.将单级列表转换为多级列表 通过更改列表项的分层级别,可将现有列表转换为多级列表。 单击要移到其他级别的任何项目。 在“开始”选项卡上的“段落”组中,单击“项目符号”或“编号”旁边的 箭头,单击“更改列表级别”,然后单击所需的级别
5.均匀分布列表项 清除相应的复选框即可增大所有列表中各行之间的间距。 在“开始”选项卡的“样式”组中,单击“样式”库旁边的下拉箭头(如图 2—2—61所示),然后右键单击“列出段落”样式。 单击“修改”。在“修改样式”对话框中,单击“格式”,然后单击“段落”。 在“段落”对话框的“缩进和间距”标签下,清除“在相同样式的段落间不 添加空格”复选框。
1)新增和改进的艺术效果 2)更好地压缩和裁剪功能
3)新增的 SmartArt 图形布局 (15)屏幕快照
快速截取屏幕快照,并将其添加到工作簿中,然后使用“图片工具”选项 卡上的工具编辑和改进屏幕快照。 (16)图片修正
可以微调图片的颜色强度(饱和度)、色调(色温),或者调整其亮度、对
1.3 Office 2010与Office 2003的对比
Office 2010电脑办公基础教程ch11-Power Point 2010基础操作
11.3.3 删除幻灯片
• 在Power Point大纲区中,右 键单击准备删除的幻灯片缩略 图,在弹出的快捷菜单中选择 【删除幻灯片】菜单项。 • 选择的幻灯片已经被删除,这 样即可删除幻灯片。
快速访问工具栏 标题栏
功能区
工作区 大纲区
备注区 状态栏
11.2 演示文稿的基本操作
• 11.2.1 Power Point 2010文稿格式简介 • 11.2.2 创建空演示文稿 • 11.2.3 根据模板创建演示文稿
11.2.1 Power Point 2010文稿格式简介
• 由于Power Point 2010引入了一种基于XML的文件格式, 这种格式称为Microsoft Office Open XML Formats,因 此Power Point 2010文件将以XML格式保存,其扩展名为 “.pptx”或“.pptm”,“.pptx”表示不含宏的XML文件, “.pptm”则表示含有宏的XML文件 • 11.3.2 新建幻灯片 • 11.3.3 删除幻灯片
11.3.1 选择幻灯片
• 打开Power Point演示文稿, 选择幻灯片选项卡,选择准备 使用的幻灯片缩略图选项。 • 准备使用的幻灯片已经被选中, 这样即可选择幻灯片。
11.3.2 新建幻灯片
11.4 编排演示文稿格式
• 11.4.1 认识占位符 • 11.4.2 在演示文稿中添加文本
11.4.1 认识占位符
• 占位符,顾名思义,就是先占住版 面中一个固定的位置,供用户向其 中添加内容。在Power Point 2010 中,占位符显示为一个带有虚线边 框的方框,所有的幻灯片版式中都 包含有占位符,在这些方框内可以 放置标题及正文,或者放置Smart Art图形、表格和图片之类的对象。
☆Microsoft Office Professional Powerpoint 2010教程
Part 4Microsoft PowerPoint 201013 Work with Slides (371)14 Work with Slide Text (389)15 Format Slides . . . . . . . . . . . . . . . . . . . . . . . . . . . . . . . .42316 Add Simple Visual Enhancements (447)17 Review and Deliver Presentations (485)369Chapter at a GlanceAdd and delete slides, page 371Divide presentations into sections, page 380Add slides with ready-made content,page 374Rearrange slides and sections, page 384371 13 Work with Slides In this chapter, you will learn how to✔ Add and delete slides.✔ Add slides with ready-made content.✔ Divide presentations into sections.✔ Rearrange slides and sections.For each slide to accomplish its purpose, it needs to present its content in the most effective way. The layout of individual slides and the order of slides in the presentation contribute significantly to the logical development of your message.In this chapter, you’ll add slides with different layouts, delete slides, and change the layout of a slide. You’ll also divide a presentation into sections and collapse and expand sections. Finally, you’ll rearrange slides and sections in a presentation.Practice Files Before you can complete the exercises in this chapter, you need to copy the book’s practice files to your computer. The practice files you’ll use to complete the exercises in this chapter are in the Chapter13 practice file folder. A complete list of practice files is provided in “Using the Practice Files” at the beginning of this book.Adding and Deleting SlidesWhen you create a presentation, you add a slide by clicking the New Slide button in the Slides group on the Home tab. By default in a new presentation, a slide added after the title slide has the Title And Content layout. Thereafter, each added slide has the layout of the preceding slide. If you want to add a slide with a different layout, you can select the layout you want from the New Slide gallery.If you change your mind about including a slide, you can easily delete it by selecting it either on the Slides tab of the Overview pane or in Slide Sorter view and then pressing the Delete key. You can also right-click the slide in either the pane or the view and then click Delete Slide. To select a series of slides, click the first slide in the series and hold down the Shift key while you click the last slide. To select noncontiguous slides, click the first one and hold down the Ctrl key as you click additional slides.372 Chapter 13 Work with SlidesIf you change your mind about the layout of a slide, you don’t have to delete it and thenadd a new one with the layout you want. Instead, you can change the layout of an exist-ing slide by selecting the new layout from the Layout gallery.In this exercise, you’ll add a slide with the default layout and add slides with other lay-outs. You’ll delete first a single slide and then a series of slides. Then you’ll change thelayout of a slide.SET UP You need the ServiceA_start presentation located in your Chapter13 practicefile folder to complete this exercise. Open the ServiceA_start presentation, and save itas ServiceA. Then follow the steps.1. With slide 1 displayed, on the Home tab, in the Slides group, click the New Slidebutton (not its arrow).Keyboard Shortcut Press Ctrl+M to add a slide to the presentation.PowerPoint adds slide 2 to the presentation with the default Title And Contentlayout.This layout accommodates a title and either text or graphic content—a table, chart, diagram,picture, clip art image, or media clip.Adding and Deleting Slides 373Troubleshooting The appearance of buttons and groups on the ribbon changesdepending on the width of the program window. For information about changing the appearance of the ribbon to match our screen images, see “Modifying the Display of the Ribbon” at the beginning of this book.2. In the Slides group, click the New Slide arrow.The New Slide gallery appears.The World In Hand design template has nine predefined slide layouts.3. In the gallery, click Two Content.PowerPoint adds slide 3, which has a placeholder for a title and two placeholders for text or graphic content.4. In the Slides group, click the New Slide button.PowerPoint adds another slide with the Two Content layout.Tip You can also add new slides by pressing keyboard shortcuts while you’re entering text on the Outline tab. For more information, see “Entering Text in Placeholders” in Chapter 14, “Work with Slide Text.”374 Chapter 13 Work with Slides5. Continue adding slides from the IO gallery, selecting a different layout each time sothat you can see what each one looks like.When you finish, the presentation contains 10 slides.6. In the Overview pane, scroll to the top of the Slides tab. Then right-click slide 3,and click Delete Slide.PowerPoint removes the slide from the presentation and renumbers all the sub-sequent slides.7. On the Slides tab, click slide 5. Then scroll to the bottom of the tab, hold downthe Shift key, and click slide 9.8. With slides 5 through 9 selected, right-click the selection, and click Delete Slide.The presentation now has four slides.9. With slide 4 selected, on the Home tab, in the Slides group, click the Layoutbutton.The Layout gallery appears. This gallery is the same as the New Slide gallery, but itapplies the layout you choose to an existing slide instead of adding a new one.10. In the gallery, click the Title and Content thumbnail.CLEAN UP Save the ServiceA presentation, and then close it withoutexiting PowerPoint.Adding Slides with Ready-Made ContentIf your presentation will contain information that already exists in a document created inMicrosoft Word or another word processing program, you can edit that information intooutline format and then import the outline into a PowerPoint presentation. The outlinecan be a Word document (.doc or .docx) or a Rich Text Format (RTF) file (.rtf).For the importing process to work as smoothly as possible, the document must beformatted with heading styles. PowerPoint translates Heading 1 styles into slide titles,Heading 2 styles into bullet points, and Heading 3 styles into second-level bullet points,called subpoints.Adding Slides with Ready-Made Content 375 If you often include a slide that provides the same basic information in your presenta-tions, you don’t have to re-create the slide for each presentation. For example, if you create a slide that shows your company’s product development cycle for a new product presentation, you might want to use variations of that same slide in all new product presentations. You can easily tell PowerPoint to reuse a slide from one presentation in a different presentation. The slide assumes the formatting of its new presentation.See Also For information about using a slide library to store slides for reuse, see the sidebar “Working with Slide Libraries” following this topic.Within a presentation, you can duplicate an existing slide to reuse it as the basis for a new slide. You can then customize the duplicated slide instead of having to create it from scratch.In this exercise, you’ll add slides by importing a Word outline. Then you’ll reuse a slide from an existing presentation. Finally, you’ll duplicate an existing slide.SET UP You need the ServiceB_start and Projects presentations and the Service-Orientation document located in your Chapter13 practice file folder to complete this exercise. Open the ServiceB_start presentation, and save it as ServiceB. Then follow the steps.1. On the Home tab, in the Slides group, click the New Slide arrow, and then belowthe gallery, click Slides from Outline.The Insert Outline dialog box opens. This dialog box resembles the Opendialog box.2. Navigate to your Chapter13 practice file folder, and then double-click theServiceOrientation file.PowerPoint converts the outline into 12 slides.3. In the Overview pane, click the Outline tab.On the Outline tab, each Heading 1 style from the ServiceOrientation document is now a slide title, each Heading 2 style is a bullet point, and each Heading 3 style is a subpoint.376 Chapter 13 Work with SlidesThe text from the outline, shown on the Outline tab.Tip You can start a new presentation from a Word outline. Click the File tab to displaythe Backstage view, and then click Open. In the Open dialog box, click All PowerPointPresentations, and in the list of file types, click All Files. Then locate and double-clickthe outline document you want to use.4. In the Overview pane, click the Slides tab, and then click the empty slide 1.5. On the Home tab, in the Slides group, click the New Slide arrow, and then belowthe gallery, click Reuse Slides.The Reuse Slides task pane opens on the right side of the window.6. In the Reuse Slides task pane, click Browse, and then in the list, click Browse File.PowerPoint displays the Browse dialog box, which resembles the Open dialog box.7. If the contents of your Chapter13 practice file folder are not displayed, navigate tothat folder now. Then double-click the Projects presentation.Thumbnails of all the slides in the presentation appear in the Reuse Slides task pane.Adding Slides with Ready-Made Content 377This presentation includes a series of diagrams related to a project workflow.8. Scroll to the bottom of the task pane to see all the available slides, and then pointto the last thumbnail.The thumbnail expands so that you can see the slide details, making it easier to select the slide you want.9. Scroll back to the top of the task pane, and then click the first thumbnail.PowerPoint inserts the selected slide from the Projects presentation as slide 2 in the ServiceB presentation. The slide takes on the design of the presentation in which it is inserted.378 Chapter 13 Work with SlidesThe presentation now contains a diagram from the Projects presentation.Tip If you want the slide to retain the formatting from the Projects presentationinstead of taking on the formatting of the ServiceB presentation, select the Keep SourceFormatting check box at the bottom of the Reuse Slides task pane.10. Click the task pane’s Close button.11. With slide 2 selected on the Slides tab, in the Slides group of the Home tab, clickthe New Slide arrow. Then click Duplicate Selected Slide.Tip You can also right-click the selected slide and then click Duplicate Slide.PowerPoint inserts a new slide 3 identical to slide 2. You could now modifythe existing slide content instead of creating it from scratch.CLEAN UP Save the ServiceB presentation, and then close it.。
PowerPoint 2010中文教程
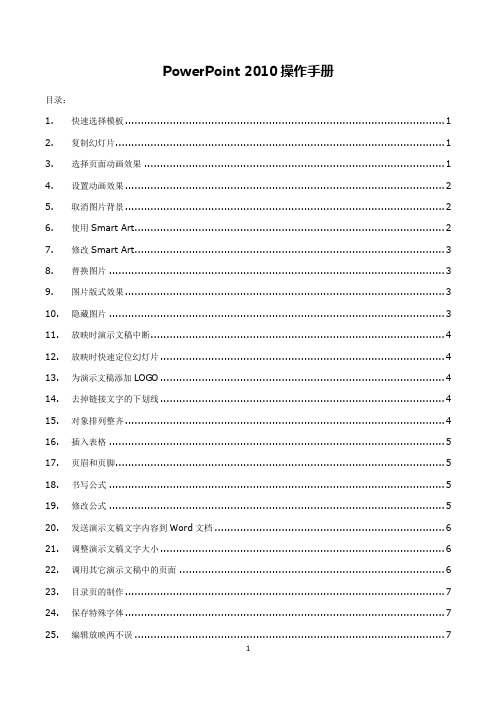
PowerPoint 2010操作手册目录:1.快速选择模板 (1)2.复制幻灯片 (1)3.选择页面动画效果 (1)4.设置动画效果 (2)5.取消图片背景 (2)6.使用Smart Art (2)7.修改Smart Art (3)8.替换图片 (3)9.图片版式效果 (3)10.隐藏图片 (3)11.放映时演示文稿中断 (4)12.放映时快速定位幻灯片 (4)13.为演示文稿添加LOGO (4)14.去掉链接文字的下划线 (4)15.对象排列整齐 (4)16.插入表格 (5)17.页眉和页脚 (5)18.书写公式 (5)19.修改公式 (5)20.发送演示文稿文字内容到Word文档 (6)21.调整演示文稿文字大小 (6)22.调用其它演示文稿中的页面 (6)23.目录页的制作 (7)24.保存特殊字体 (7)25.编辑放映两不误 (7)26.巧用键盘铺助定位对象 (7)27.PPT防止被修改 (8)28.灵活设置背景 (8)29.PPT2010中轻松实现PPT自动循环播放 (8)30.转存视频法 (9)1.快速选择模板在设计选项卡中,可以看到很多演示文稿模板,点击就可以应用。
2.复制幻灯片要复制演示文稿中的幻灯片,请先在幻灯片视图中,选择要复制的幻灯片。
如果希望按顺序选取多张幻灯片,请在单击时按Shift键;若不按顺序选取幻灯片,请在单击时按Ctrl键。
然后直接按下“Ctrl+shift+D”组合键,则选中的幻灯片将直接以插入方式复制到选定的幻灯片之后。
3.选择页面动画效果在切换选项卡中,可以设置播放 PowerPoint 的页面动画效果。
4.设置动画效果在动画选项卡中,点选对应动画效果,就设置PowerPoint中文字和或图片的动画效果。
5.取消图片背景插入一幅图片,选中图片在菜单上方就会出现图片工具选项卡,选择删除背景,就可以非常容易的去掉图片背景。
6.使用Smart ArtPPT2010设计了很多图示模板,插入选项卡里的 SmartArt功能可以选择这些模板。
Office_2010教程-幻灯片基本操作

项目三PowerPoint之幻灯片基本操作
本项目旨在帮助我们掌握PowerPoint的基本
操作,为我们制作一个满足生活和工作需要的演
示文稿打下基础。
概 述
2
项目三PowerPoint之幻灯片基本操作
课堂任务一 掌握幻灯片的基本操作
操作一 幻灯片的基本操作
操作二 插入各种对象
51
当我们完成了一个演示文稿的制作后,需要通过投影仪或 者电脑进行放映。 放映方法:通过【幻灯片放映】选项卡。
52
1、幻灯片放映
1、手动放映: • 从头开始放映幻灯片:F5
• 从当前页开始放映幻灯片:Shift+F5
• 常用放映控制快捷键
要执行此操作 执行下一个动画或前进到下一张幻灯片。 执行上一个动画或返回到上一张幻灯片。 直接回到第一张幻灯片 快捷键 N、Enter、Page Down、向右键、向下键或空格键 P、Page Up、向左键、向上键或空格键 Home End Esc 或连字符 Ctrl+P E Ctrl+A Ctrl+E Ctrl+M
4
课堂任务一 掌握幻灯片的基本操作
操作一 幻灯片的基本操作
操作二 插入各种对象
本 节 内 容
5
PowerPoint是制作和演示幻灯片的软件,能够制作出集文 字、图形、图像、声音以及视频剪辑等多媒体元素于一体的演 示文稿,把自己所要表达的信息组织在一组图文并茂的画面中, 用于介绍公司的产品、展示自己的学术成果。
6
1、幻灯片的基本操作
1、基本概念 演示文稿:在PowerPoint 2010中,一个完整的演示文件 被称之为演示文稿。 幻灯片:幻灯片是演示文稿的核心部分,一个小的演示文 稿由几张幻灯片组成,而一个大的演示文稿由几百张甚至更多 的幻灯片组成。
Office-2010培训教程PPT课件

10
2.3 备注页视图
用户如果需要以整页格式查看和使用备注,可以使用备注 页视图,在这种视图下,一页幻灯片将被分成两部分,其 中上半部分用于展示幻灯片的内容,下半部分则是用于建 立备注。
11
2.4 阅读视图
阅读视图可以将演示文稿作为适应窗口大小的幻灯片放映 查看,在页面上单击,即可翻到下一页。
12
在PowerPoint 2010中,创建的幻灯片都 保存在演示文稿中,因此,用户首先应该 了解和熟悉演示文稿的基本操作。包括演 示文稿的新建、保存、打开和关闭等。
13
3.1 新建演示文稿
1.插入剪辑管理中的声音 2.插入文件中的声音 3.录制声音 32
插入视频:
在演示文稿中可以插入影片,让演示文稿更具 吸引力。影片主要分为剪辑管理器中的影片和计算 机中电影片文件。 1.插入剪辑管理器中的影片 2.插入影片文件
返回
33
幻灯片的设计与制作
幻灯片的内容编辑完成后,为让其更 加赏心悦目,可对其进行相应的美化 操作,如设置背景、应用主题样式等。
24
5.2 插入表格及图表
打开需要插入表格的演示文稿,选中要插入 表格的幻灯片后切换到 “插入”选项卡,单击 “表格”选项组中的“表格”按钮,在弹出的菜 单中选择“插入表格”命令,将弹出“插入表格” 对话框,在其中设置表格的行和列,单击“确定” 按钮,即可在幻灯片中插入一个表格。 对表格的大小和位置进行调整,然后在其中输入 内容并设置格式。
在制作演示文稿之前,首先需要创建一个新的演示文稿。新建 演示文稿主要有以下几种方式。
MicrosoftPowrePoint10培训教程PPT

19
3.6 動畫技巧
添加動畫
進入效果 強調效果 退出效果 自訂路徑
動畫效果的設計
效果的編排 時間控制
使用動畫刷 使用觸發器 幻燈片的超連結
–添20 加超連結
3.7 Flash 動畫在PPT應用
21
3.8 幻燈片的切換和播放
幻燈片切換的效果 設置投影片放映 自定義投影片放映 隱藏幻燈片 排練計時 錄製幻燈片演示
22
3.9 繪圖筆的使用
使用繪圖筆
放映幻燈片時,右擊屏幕空白處,選擇指針選項 快速調用畫圖筆:Ctrl+P 清除筆跡: E
鍵位與組合
功能
單擊、空格、N、右和下箭頭、Enter、PD 換下一張
退格、P、左和下箭頭、PU 鍵入編號按Enter 按B和“。” 按W和“,” ALT+TAB
23
換上一張 直接切換到該幻燈片 黑屏/還原 白屏/還原 在不同程序間切換
增加說服力
幫助記憶、 幫助理解
6
1.3整頁PPPPTT常全是出文字現的弊端 同一頁PPT中顏色種類太多
文字字號太多
7
同一頁PPT中圖片太多
第二篇
PPT的設計邏輯
PPT的設計邏輯
篇章邏輯 頁面邏輯 文句邏輯
9
2.1 篇章逻辑
篇章邏輯就是整個PPT的邏輯,也 就是寫PPT的主線,那應該怎樣組 織一片PPT的邏輯呢:
MicrosoftPowrePoint 10培训教程PPT
培訓教程內容
1 •PPT的認識 2 •PPT的設計邏輯 3 •PPT的製作技巧
2
第一篇
PPT的認識
PPT的認識
PPT的分類 PPT的用途 PPT常出現的弊端
2010教程课件

插入图片和形状
插入图片
设置图片和形状格式
点击“插入”菜单,选择“图片”, 然后选择要插入的图片,调整图片大 小和位置。
可以对图片和形状的填充、线条、阴 影、三维效果等进行设置,以增强视 觉效果。
插入形状
点击“插入”菜单,选择“形状”, 然后选择所需的形状,在幻灯片上拖 动鼠标绘制。
插入表格和图表
图片和形状的美化
图片裁剪
可以对图片进行裁剪,只 保留需要的部分,使图片 更加简洁。
图片效果
可以为图片添加阴影、发 光、倒影等效果,增强图 片的视觉冲击力。
形状美化
可以自定义形状的颜色、 线条粗细和填充效果,使 形状更加符合主题。
幻灯片切换和动画效果
幻灯片切换
可以在不同幻灯片之间添加切换效果,使演示更加生动有趣。
插入表格
点击“插入”菜单,选择“表格”,然后选择所需的行数和列数 ,在幻灯片上拖动鼠标绘制表格。
插入图表
点击“插入”菜单,选择“图表”,然后选择所需的图表类型,在 幻灯片上拖动鼠标绘制图表。
设置表格和图表格式
可以对表格和图表的样式、颜色、数据等进行设置,以增强视觉效 果和信息表达。
插入声音和视频
插入声音
幻灯片的基本操作
添加幻灯片
删除幻灯片
选择“插入”菜单中的“幻灯片”选项, 或使用快捷键Ctrl+M,即可在当前位置插 入一张新的幻灯片。
选择要删除的幻灯片,按键盘上的Delete 键或右键点击选择“删除幻灯片”,即可 删除不需要的幻灯片。
移动幻灯片
复制幻灯片
选中要移动的幻灯片,拖动鼠标即可将其 移动到其他位置。
发布演示文稿
可以将演示文稿发布到多种平台,如本地文件夹、网络共享位置、电子邮件等。发布时可 以选择不同的文件格式,如PDF、视频等,以满足不同的需求。
- 1、下载文档前请自行甄别文档内容的完整性,平台不提供额外的编辑、内容补充、找答案等附加服务。
- 2、"仅部分预览"的文档,不可在线预览部分如存在完整性等问题,可反馈申请退款(可完整预览的文档不适用该条件!)。
- 3、如文档侵犯您的权益,请联系客服反馈,我们会尽快为您处理(人工客服工作时间:9:00-18:30)。
微软官方教程《OFFICE2010宝典》PowerPoint教程
动画效果也可以刷出来:对第一幅图,动画-飞入-效果选项-自左侧飞入,点原动画,点上方的动画刷,再点第二幅图,OK
梦幻无穷的幻灯片转换效果:转换-选中一张幻灯片,点“擦除”右侧的下拉箭头,选一种特效,如涟渏,效果选项-方向,OK。
再选一张幻灯片,选蜂巢特效,闪耀,选完后还可选择方向,效果无穷……
快速去除图片背景:新建一张幻灯片,插入一张花的图片,直接点击左上角的“删除背景”,背景区域将被紫色罩住,然后点击“保留更改”,就只会留着花了。
如果有些误选,可点击“标记要保留的区域”,画一下就行。
强大的图像效果处理功能:新建幻灯片,插入图片,第一个操作是剪裁,点头部菜单右侧的剪裁按钮即可。
如果要剪裁成圆的,“剪裁为形状”即可。
此外还有更正、颜色、艺术效果等。
替换演示文稿中的图片:如果效果都做好了,但想更换图片。
新建幻灯片,添加图片,改变大小,设置图片效果,再加一个柔光,此时想换图片了,可点“颜色”旁边的“更改图片”的按钮,或右键-“更改图片”。
在演示文稿中控制视频播放效果:插入一张幻灯片,插入-视频,拖动它将它缩小,视频效果-倒影效果,再改变视频形状,如改成圆角矩形。
在非放映状态下控制它的播放:点下视频会出现视频进度条,点一下播放,单击视频线,可看到视频被定位到鼠标点击的地方,此
时可向前、向后移动,还可调整音量。
在放映状态下,在播放状态中,可调整进度和声音大小。
为影片剪辑添加封面说明:可为插入到幻灯片的影片增加一封面,可以是我们事先做的图片,也可以是影频的一个。
插入视频-点击标题框架,选图片文件。
如果想让剪辑中的一个帧的时候,点标题框架-重置,将鼠标定位到这一帧,然后,标题框架-当前框架,此时该帧该作为该视频的封面。
为影片剪辑添加播放标记:想在每次播放时都要跳到该精彩片断。
添加幻灯片,插入视频-拖到想中转的位置,点“播放”选项卡-添加书签,同理,可添加多个书签。
只要用鼠标单击书签,就会从书签处进行播放。
从书签头部放和到尾部只要按ALT+HOME,ALT+END即可到书签的结束位置
在PPT中剪辑影片播放长度:插入视频,选中此视频,点播放选项卡,点“剪辑视频”按钮,设定从第五秒开始,将结束时间设为当前的第10秒,OK
为同事广播幻灯片:可将PPT共享到互联网和局域网的任何位置,只要通过浏览器即可观看。
点幻灯片放映-广播幻灯片-更改广播服务-POWERPOINT广播服务(需要LIVE ID)-启动广播,输入LIVE ID,稍等一会,得到网址发送给同事,即可
精彩的SMARTART图形:选中文字-右键-转换为SMARTART,或点上面的功能区,之后可更改颜色,再选样式,还可选择其他的布局样式,从而达到具专业水准的插图设计
将PPT转换为梦幻剧场:将PPT转换为视频,再配上旁白和彩排时间。
幻灯片放映-“录制幻灯片演示”(或排练计时等)。
文件-共享-(文件类型)创建视频,此处可录制计时和旁白,再设置每张幻灯片放映的秒数,(如已经设置计时,此项可不选)——(编者按:那为什么我看到教材编写者在使用camtasia studio 6呢?)
将演示文稿分节:“开始”选项卡-节-可看到该幻灯片被分为5个节,可方便地对节进行移动(编者按:这不就是WORD中的导航窗格吗?)合并节:右键-删除节,这样12小节就合并了。
文件-打印-设置-选择你要打印的节。
建节:节-全部展开,鼠标定位在第三在幻灯片后,节-新增节-重命名节的标题,即可。
如不要节了,节-删除所有节,所有幻灯片就会进行合并。
制作自己的多媒体个性相册:打开PPT-相册-新建相册-选一堆图片插入相册中,可调整方向,亮度对比度,顺序,还可删除图片,点新建文本框,建完相册后可输入文字(会新建一张幻灯片供输入文字)。
接着选“图片版式”,并为相册选一个主题,点击创建,成功后,在第一张插入-音乐-播放-开始-跨幻灯片播放,选中“放映时隐藏,循环播放直到停止”这2个效果,然后选切换效果,一个带有背景音乐的电子相册就做好了
根据不同场景自定义幻灯片放映:幻灯片放映-自定义放映-新建-自定义放映-设置当前放映名称-添加我需要放映的幻灯片-在右侧视图进行相应调整-如果还需要放给其他对象看的话,再设置一个自定义的放映。
然后点击自定义放映下拉框中自定义的2个标题进行放映了(编者按:这个真是见人说人话,见鬼说鬼话呀)
将PPT打包成可自动播放的CD:文件-共享-将演示文稿打包成CD-命名CD-选择要添加的其他文件(此处可改变顺序)-再点选项,一看便知。
这个包一旦打好,即使没有PPT 软件,也能播放。
快速重用之前文档中的幻灯片:打开PPT,新建幻灯片-下拉箭头-重用幻灯片-浏览文件-选中打开-点击需要的幻灯片即可,如果要用原格式,下面有个勾“保留原格式”,另存为,OK
为PPT减肥:文件-信息-在右侧可看到大小,按一下“压缩媒体”-自己选个质量,要发邮件就选低质量,如对结果不满意,按同一个按钮,可看到撤消压缩的选项。
进PPT-选中图片双击-压缩图片即可,最后将文件另存为。
如何快速删除所有幻灯片中的备注:如要把PPT发给客户又不想让他见到备注,文件-信息-检查问题-可以检查的东西很多,注意:如果选择删除,该操作不可撤消。
打印幻灯片讲义:视图-讲义母版-可选择幻灯片方向和讲义方向-可选日期和页码,还可拖动,完成后可关闭母版视图。
打印-从“整页幻灯片”里选择每页打印3张幻灯片,点打印即可。
轻松选择幻灯片中的对象元素:选中图片-选择窗格-点击小眼睛可隐藏一张图片。
也可以在右侧选中在底层不可见的PICTURE1,向右按几下方向键,它就会出来。
此外还有全部显示与全部隐藏。
这就是PPT专业的图片选择工具。
如何在演讲中自己看到备注信息:幻灯片放映-使用演示者视图-在多显示器中选择“扩展这些显示”,同时修改“显示位置”,将其设为第2个显示器,放映即可
使用主题功能统一文档风格:设计-所有主题即OK,还可通过颜色、字体、效果进行修改,还可按主题-其他(下拉箭头)-保存当前主题。
还可去EXCEL-页面布局-主题,找到刚刚的主题应用到当前的工作表中。
同理,该主题也可应用于WORD。
动态展现内容信息:可用POWERPOINT为公司制作宣传片(演示一个类似FLASH的文件),选中一个足球图片,动画-其他(打开动画库)-选择“飞入”效果,效果选项-自左上部,高级动画-添加动画,继续为该足球图片添加其他效果,还可添加动作路径,甚至绘制自定义路径。
对路径不满意时,鼠标右键-编辑顶点-编辑路径,还可通过动画窗格来管理动画效果。
还可把“单击鼠标后”发生的动画改掉,“开始、持续时间、延迟……”三个按钮。
要更换其他对象,可通过动画选项卡,对不同的对象设置相应的动画即可。
实现随心所欲的演示流程:先设置完文本的动画效果,然后点击高级动画效果中的“触发”下拉列表中,选触发的对象,这样就实现了点击图片才出现文字的效果
图表技术与演示文稿的完美融合:通常在EXCEL做好图表贴进PPT,但这样是没法再编辑这些数据了,其实我们可以在PPT中直接调用这些图表。
在EXCEL中复制要用的图表,回到PPT,右键-通过不同的粘贴选项来决定用什么方式来粘贴,前两种可以对图表进行编辑。
用后两种粘贴后,在EXCEL中更改了图表,PPT中也会相应更改。
让幻灯片的视频全屏播放:在编辑状态下选中该视频,播放-视频选项-全屏播放
小小指针的大用途:从第三张跳到第九张。
插入-形状-动作按钮-此例中选择“动作按钮-影片”,释放左键,弹出一动作设置,超链接“幻灯片”,到“第九张”单击确定。
图片版式效果让人耳目一新:插入4张图片后,格式-图片版式,即实现快速排版。
这样排出来的图文是一个整体,后期只须通过SMARTART-设计对其进行编辑即可。
流程展现一目了然:先以文本形式输入流程,然后选择整个文本框,开始-段落-转换为SMARTART图形-还可选择“其他SMARTART图形”,后期:SMARTART工具-设计-样式,更改颜色等,也可拖动边框来修改其大小
不可不知的放映快捷键:按F5进行放映,如需要说明,按CTRL+P,可调出激光笔进行涂鸦,按W键会出现白屏,按B键进入黑屏,可进行绘画。
如果想擦除涂鸦,按E键。
如果要退出激光笔,按ESC键即可。
如果忘了快捷键,就按F1,会出现快捷键表。
(这就比较闹太套了!)
对企业的幻灯片资源进行统一管理:将一些PPT保存到SHAREPOINT中,这样别人就能重用。
这样的好处在于,信息会自动同步(微软牛逼啊……)。
让图表动起来:在PPT中插入图表后,选中图表,动画-其他-擦除,效果选项-按系列(这个有点眩了),动画窗格-展开,这时可自由设置动画效果,如选中背景,在动画库中选别的动画效果,也可全选所有动画效果后,在计时中选“上一动画之后”,这样一旦触发,整个动画会自动播放
让幻灯片自动循环播放:视图-幻灯片浏览-CTRL+A,全选,转换-计时-勾选“自动换片时间”,在后面设置一个时间,假设设为2秒:就是00:02:00,然后幻灯片放映-设置幻灯片放映-在展台浏览(全屏幕)-确定(编者按:这个貌似搞得太复杂了啊)
让公司徽标出现在所有幻灯片上:将已插入PPT的LOGO剪切出来,视图-幻灯片母版-选择版式-CTRL+V,适当调整下它的位置,关闭母版视图-关闭母版(这个貌似我早就知道了啊,作者有骗钱之嫌……)。