二维码的生成与实现(matlab)
二维码(带有图片)的生成
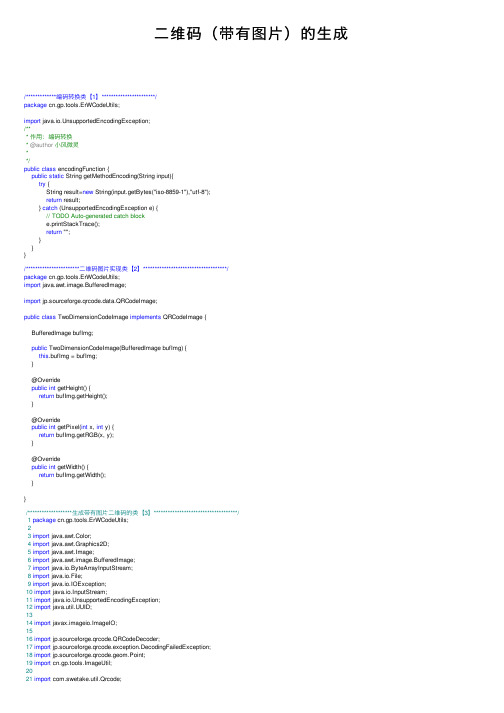
⼆维码(带有图⽚)的⽣成/*************编码转换类【1】***********************/package cn.gp.tools.ErWCodeUtils;import java.io.UnsupportedEncodingException;/*** 作⽤:编码转换* @author⼩风微灵**/public class encodingFunction {public static String getMethodEncoding(String input){try {String result=new String(input.getBytes("iso-8859-1"),"utf-8");return result;} catch (UnsupportedEncodingException e) {// TODO Auto-generated catch blocke.printStackTrace();return "";}}}/***********************⼆维码图⽚实现类【2】************************************/package cn.gp.tools.ErWCodeUtils;import java.awt.image.BufferedImage;import jp.sourceforge.qrcode.data.QRCodeImage;public class TwoDimensionCodeImage implements QRCodeImage {BufferedImage bufImg;public TwoDimensionCodeImage(BufferedImage bufImg) {this.bufImg = bufImg;}@Overridepublic int getHeight() {return bufImg.getHeight();}@Overridepublic int getPixel(int x, int y) {return bufImg.getRGB(x, y);}@Overridepublic int getWidth() {return bufImg.getWidth();}}/*******************⽣成带有图⽚⼆维码的类【3】************************************/1package cn.gp.tools.ErWCodeUtils;23import java.awt.Color;4import java.awt.Graphics2D;5import java.awt.Image;6import java.awt.image.BufferedImage;7import java.io.ByteArrayInputStream;8import java.io.File;9import java.io.IOException;10import java.io.InputStream;11import java.io.UnsupportedEncodingException;12import java.util.UUID;1314import javax.imageio.ImageIO;1516import jp.sourceforge.qrcode.QRCodeDecoder;17import jp.sourceforge.qrcode.exception.DecodingFailedException;18import jp.sourceforge.qrcode.geom.Point;19import cn.gp.tools.ImageUtil;2021import com.swetake.util.Qrcode;2223public class QRCodeAction {2425262728/***************************成员变量-属性****************************************/29private static int DEFAULT_WIDTH;30private static int UNIT_WIDTH = 12;31//输⼊流32private ByteArrayInputStream inputStream;33public ByteArrayInputStream getInputStream() {34return inputStream;35 }36public void setInputStream(ByteArrayInputStream inputStream) {37this.inputStream = inputStream;38 }3940/***************************重写⽗类⽅法****************************************/414243/***************************⽅法****************************************/44/**45 * ⽣成⼆维码(QRCode)图⽚的公共⽅法46 * @param content 存储内容47 * @param imgType 图⽚类型48 * @param size ⼆维码尺⼨49 * @return50*/51public static BufferedImage qRCodeCommon(String content, String imgType, int size) {5253 BufferedImage bufImg = null;5455try {56//⼆维码⽣成类57 Qrcode qrcodeHandler = new Qrcode();58// 设置⼆维码排错率,可选L(7%)、M(15%)、Q(25%)、H(30%),排错率越⾼可存储的信息越少,但对⼆维码清晰度的要求越⼩59 qrcodeHandler.setQrcodeErrorCorrect('M');60 qrcodeHandler.setQrcodeEncodeMode('B');//AlphaNumeric(0.2),Numeric(0/1/2),Byte(中英⽂)6162// 设置设置⼆维码尺⼨,取值范围1-40,值越⼤尺⼨越⼤,可存储的信息越⼤63 qrcodeHandler.setQrcodeVersion(size);64// 获得内容的字节数组,设置编码格式65byte[] contentBytes = content.getBytes("utf-8");66boolean[][] bRect = qrcodeHandler.calQrcode(contentBytes);67// 图⽚尺⼨68 DEFAULT_WIDTH = (int) (bRect.length * UNIT_WIDTH+8*Math.sqrt(2));69//图⽚的w,h70 bufImg = new BufferedImage(DEFAULT_WIDTH, DEFAULT_WIDTH,71 BufferedImage.TYPE_INT_RGB);7273//画笔⼯具74 Graphics2D gs = bufImg.createGraphics();7576// 设置背景颜⾊77 gs.setBackground(Color.white);78 gs.clearRect(0, 0,DEFAULT_WIDTH+10,DEFAULT_WIDTH+10);79//背景区域的图⽚80// Image image=ImageUtil.getImageIcon("aaa.jpg").getImage();81// gs.drawImage(image, 0, 0, null);82// 设定图像颜⾊:前景⾊83 gs.setColor(Color.black);84// 设置偏移量,不设置可能导致解析出错85int pixoff = 4;86// 输出内容> ⼆维码87if (contentBytes.length > 0 && contentBytes.length < 1800) {88for (int i = 0; i < bRect.length; i++) {89for (int j = 0; j < bRect.length; j++) {90if (bRect[j][i]) {91 gs.fillRect(j * UNIT_WIDTH + pixoff,92 i * UNIT_WIDTH+ pixoff,93 12, 12);94// gs.drawRect(j * UNIT_WIDTH + pixoff,95// i * UNIT_WIDTH+ pixoff,96// 6, 6);97 }98 }99 }100//中⼼区域的图⽚101 Image image2=ImageUtil.getImageIcon("123.jpg").getImage();102//外边框103 gs.setColor(Color.white);104 gs.fillRect(DEFAULT_WIDTH/8*3-3, DEFAULT_WIDTH/8*3-3,105 (int)(DEFAULT_WIDTH/4+3*Math.sqrt(3)),106 (int)(DEFAULT_WIDTH/4+3*Math.sqrt(3))+4);107//内部背景区域108 gs.setColor(Color.white);109 gs.fillRect(DEFAULT_WIDTH/8*3, DEFAULT_WIDTH/8*3,110 DEFAULT_WIDTH/4,DEFAULT_WIDTH/4+4);111//画出中⼼图⽚112 gs.drawImage(image2,113 DEFAULT_WIDTH/8*3+3, DEFAULT_WIDTH/8*3+5,114 DEFAULT_WIDTH/4-6,DEFAULT_WIDTH/4-6,115null);116117 } else {118throw new Exception("QRCode content bytes length = " + contentBytes.length + " not in [0, 1800]."); 119120 }121 gs.dispose();122 bufImg.flush();123 } catch (UnsupportedEncodingException e) {124 e.printStackTrace();125 } catch (Exception e) {126// TODO Auto-generated catch block127 e.printStackTrace();128 }129return bufImg;130 }131132133134/**135 * 解析⼆维码(QRCode)136 * @param imgPath 图⽚路径137 * @return138*/139public static String decoderQRCode(String imgPath) {140// QRCode ⼆维码图⽚的⽂件141 File imageFile = new File(imgPath);142 BufferedImage bufImg = null;143 String content = null;144try {145 bufImg = ImageIO.read(imageFile);146 QRCodeDecoder decoder = new QRCodeDecoder();147 content = new String(decoder.decode(new TwoDimensionCodeImage(bufImg)), "utf-8");148 } catch (IOException e) {149 System.out.println("Error: " + e.getMessage());150 e.printStackTrace();151 } catch (DecodingFailedException dfe) {152 System.out.println("Error: " + dfe.getMessage());153 dfe.printStackTrace();154 }155return content;156 }157158/**159 * 解析⼆维码(QRCode)160 * @param input 输⼊流161 * @return162*/163public static String decoderQRCode(InputStream input) {164 BufferedImage bufImg = null;165 String content = null;166try {167 bufImg = ImageIO.read(input);168 QRCodeDecoder decoder = new QRCodeDecoder();169 content = new String(decoder.decode(new TwoDimensionCodeImage(bufImg)), "utf-8");170 } catch (IOException e) {171 System.out.println("Error: " + e.getMessage());172 e.printStackTrace();173 } catch (DecodingFailedException dfe) {174 System.out.println("Error: " + dfe.getMessage());175 dfe.printStackTrace();176 }177return content;178 }179180/**181 * 产⽣⼆维码图⽚:182 * @param infos ⼆维码信息183 * @return返回产⽣的图⽚路径184*/185public static String getErWCode(String infos){186 String imagePath="";187try {188 BufferedImage image = qRCodeCommon(infos, "JPEG",5);189 String path=QRCodeAction.getProgramPath();190 imagePath=path+UUID.randomUUID()+".jpg";191 File file = new File(imagePath);192 ImageIO.write(image, "jpg", file);193if(file.exists()){194 System.err.println("新产⽣⼀张⼆维码图⽚");195 }196 } catch (IOException e) {197 e.printStackTrace();198 }199return imagePath;200 }201public static Image getErWCodeImage(String infos){202203204 BufferedImage image = qRCodeCommon(infos, "JPEG",10);205 String path=QRCodeAction.getProgramPath();206207 Image image2=(Image)image;208209return null;210 }211/**212 * 获取项⽬运⾏根路径213 * @return214*/215public static String getProgramPath(){216//获得项⽬运⾏路径下的图⽚⽂件夹217 String path=QRCodeAction.class.getClassLoader().getResource("./images/ErWCodes/").getPath(); 218return path;219 }220/**221 * 程序测试⼊⼝222 * @param args223*/224public static void main(String[] args) {225226//⽣成⼆维码227// StringBuffer msg=new StringBuffer();228// msg.append("int[] arr=new int[]{8,2,1,0,3};\r\n");229// msg.append("int[] index=new int[]{2,0,3,2,4,0,1,3,2,3,3};\r\n");230// msg.append("String tel=\"\";\r\n");231// msg.append("for (int i : index) {\r\n");232// msg.append("tel+=arr[i];\r\n");233// msg.append("}\r\n");234// msg.append("System.out.println(\"联系⽅式:\"+tel);\r\n");235// System.err.println(msg.toString());236 QRCodeAction d=new QRCodeAction();237 String path=d.getErWCode("我不是体育系的要不要我这系啊带你们呦!");238//解读⼆维码239// String infos= d.decoderQRCode(path);240//System.err.println("解析⼆维码信息:"+infos);241 }242243 }。
MATLAB和二维码可视化技术在电路分析教学中的应用
·技术在线 - 44 -2018年1月下 第02期(总第428期)10.3969/j.issn.1671-489X.2018.02.044MATLAB和二维码可视化技术在电路分析教学中的应用◆谭艳春 樊海红摘 要 以戴维宁定理为例,将高性能仿真软件MATLAB 和时下非常流行的二维码可视化技术应用到电路分析理论教学中,既能使抽象、枯燥、难懂的理论知识变得形象生动、便于理解,又方便学生课后复习延伸,巩固课堂知识点。
关键词 电路分析;MATLAB;二维码中图分类号:G642 文献标识码:B 文章编号:1671-489X(2018)02-0044-03Application of MATLAB and 2-dimension Code Visualization Technology in Circuit Analysis Teaching //TAN Yanchun, FAN HaihongAbstract In this paper, both high-performance MATLAB and 2-di -mension code visualization technology which is very popular nowa -days are used in Circuit Analysis with the example of Davidson’s theorem. Not only the abstract, boring and diffi cult to understand theories will become more vivid and easy to understand, but also it is convenient for students to review and extend the knowledge points after class.Key words circuit analysis; MATLAB; 2-dimension code1 引言电路分析是高等院校工科类、电类等相关专业必修的一门专业基础课,是模拟电路、信号系统等多门专业课的先修课程,主要任务是在给定电路模型的情况下,计算电路中各部分的电流或电压等物理量。
(完整版)二维码的生成细节和原理
二维码的生成细节和原理2013-10-29 09:46 陈皓酷壳网字号:T | T二维码又称QR Code,QR全称Quick Response,是一个近几年来移动设备上超流行的一种编码方式,它比传统的Bar Code条形码能存更多的信息,也能表示更多的数据类型AD:51CTO学院:IT精品课程在线看!二维码又称QR Code,QR全称Quick Response,是一个近几年来移动设备上超流行的一种编码方式,它比传统的Bar Code条形码能存更多的信息,也能表示更多的数据类型:比如:字符,数字,日文,中文等等。
这两天学习了一下二维码图片生成的相关细节,觉得这个玩意就是一个密码算法,在此写一这篇文章,揭露一下。
供好学的人一同学习之。
关于QR Code Specification,可参看这个PDF:/files/datasheets/misc/qr_code.pdf基础知识首先,我们先说一下二维码一共有40个尺寸。
官方叫版本Version。
Version 1是21 x 21的矩阵,Version 2是25 x 25的矩阵,Version 3是29的尺寸,每增加一个version,就会增加4的尺寸,公式是:(V-1)*4 + 21(V是版本号)最高Version 40,(40-1)*4+21 = 177,所以最高是177 x 177 的正方形。
下面我们看看一个二维码的样例:定位图案•Position Detection Pattern是定位图案,用于标记二维码的矩形大小。
这三个定位图案有白边叫Separators for Postion Detection Patterns。
之所以三个而不是四个意思就是三个就可以标识一个矩形了。
•Timing Patterns也是用于定位的。
原因是二维码有40种尺寸,尺寸过大了后需要有根标准线,不然扫描的时候可能会扫歪了。
•Alignment Patterns 只有Version 2以上(包括Version2)的二维码需要这个东东,同样是为了定位用的。
python qrcode用法(一)

python qrcode用法(一)python qrcode介绍python qrcode是一个Python库,用于生成二维码。
它是一个功能强大且易于使用的工具,可用于创建包含各种信息的二维码图像。
安装使用pip命令可以很方便地安装python qrcode库:pip install qrcode生成基本二维码要生成一个基本的二维码图像,只需简单的几行代码:import qrcodedata = "Hello, World!"img = (data)("")这将生成一个包含”Hello, World!“文本的二维码,并将其保存为文件。
自定义二维码样式python qrcode允许您以多种方式自定义生成的二维码图像的外观。
颜色要更改二维码的颜色,可以使用fill参数指定前景色和背景色:img = (data, fill_color="black", back_color="white")这样就会生成一个黑色的二维码,背景色为白色。
尺寸可以使用box_size参数来指定二维码的每个像素的尺寸:img = (data, box_size=10)这将生成一个每个像素为10个单位大小的二维码。
边距可以使用border参数来指定二维码图像的边距大小:img = (data, border=2)这将在二维码周围创建一个2单元大小的边距。
图片中插入二维码python qrcode还允许将生成的二维码插入到其他图像中。
要将二维码插入到现有图像中,可以使用PIL库的功能。
下面是一个简单的示例:from PIL import Image# 打开一个图像image = ("")# 生成二维码图像qr_code = (data)# 调整二维码大小qr_code = qr_((100, 100))# 计算二维码的位置x = ( - qr_) // 2y = ( - qr_) // 2# 将二维码粘贴到图像中(qr_code, (x, y))# 保存图像("image_with_")要将二维码插入到PDF文件中,可以使用reportlab库来创建和编辑PDF文件。
基于MATLAB的QR二维码解码技术的程序

function varargout = QRMain(varargin)% QRMAIN MATLAB code for QRMain.fig% QRMAIN, by itself, creates a new QRMAIN or raises the existing% singleton*.%% H = QRMAIN returns the handle to a new QRMAIN or the handle to% the existing singleton*.%% QRMAIN('CALLBACK',hObject,eventData,handles,...) calls the local% function named CALLBACK in QRMAIN.M with the given input arguments. %% QRMAIN('Property','Value',...) creates a new QRMAIN or raises the% existing singleton*. Starting from the left, property value pairs are% applied to the GUI before QRMain_OpeningFcn gets called. An% unrecognized property name or invalid value makes property application% stop. All inputs are passed to QRMain_OpeningFcn via varargin.%% *See GUI Options on GUIDE's Tools menu. Choose "GUI allows only one % instance to run (singleton)".%% See also: GUIDE, GUIDATA, GUIHANDLES% Edit the above text to modify the response to help QRMain% Last Modified by GUIDE v2.5 11-Apr-2017 20:19:20% Begin initialization code - DO NOT EDITgui_Singleton = 1;gui_State = struct('gui_Name', mfilename, ...'gui_Singleton', gui_Singleton, ...'gui_OpeningFcn', @QRMain_OpeningFcn, ...'gui_OutputFcn', @QRMain_OutputFcn, ...'gui_LayoutFcn', [] , ...'gui_Callback', []);if nargin && ischar(varargin{1})gui_State.gui_Callback = str2func(varargin{1});endif nargout[varargout{1:nargout}] = gui_mainfcn(gui_State, varargin{:});elsegui_mainfcn(gui_State, varargin{:});end% End initialization code - DO NOT EDIT% --- Executes just before QRMain is made visible.function QRMain_OpeningFcn(hObject, eventdata, handles, varargin)% This function has no output args, see OutputFcn.% hObject handle to figure% eventdata reserved - to be defined in a future version of MATLAB% handles structure with handles and user data (see GUIDATA)% varargin command line arguments to QRMain (see V ARARGIN)% Choose default command line output for QRMainhandles.output = hObject;% Update handles structureguidata(hObject, handles);% UIWAIT makes QRMain wait for user response (see UIRESUME)% uiwait(handles.figure1);% --- Outputs from this function are returned to the command line.function varargout = QRMain_OutputFcn(hObject, eventdata, handles)% varargout cell array for returning output args (see V ARARGOUT);% hObject handle to figure% eventdata reserved - to be defined in a future version of MATLAB% handles structure with handles and user data (see GUIDATA)% Get default command line output from handles structurevarargout{1} = handles.output;% --- Executes on button press in OpenQRPic.function OpenQRPic_Callback(hObject, eventdata,handles) %%%%%%%%打开图像global im;[filename,pathname]=uigetfile({'*.*';'*.bmp';'*.jpg';'*.tif';'*.jpg'},'选择图像');if isequal(filename,0)||isequal(pathname,0)errordlg('您还没有选取图片!!','温馨提示');%如果没有输入,则创建错误对话框return;elseimage=[pathname,filename];%合成路径+文件名im=imread(image);%读取图像figureimshow(im);%在坐标axes1显示原图像title('原始QR图像');end% hObject handle to OpenQRPic (see GCBO)% eventdata reserved - to be defined in a future version of MATLAB % handles structure with handles and user data (see GUIDATA) % --- Executes on button press in pushbutton2.function pushbutton2_Callback(hObject, eventdata, handles)% hObject handle to pushbutton2 (see GCBO)% eventdata reserved - to be defined in a future version of MATLAB % handles structure with handles and user data (see GUIDATA) % --- Executes on button press in DecodeQR.function DecodeQR_Callback(hObject, eventdata, handles)%%%%%%%%%%%%%%%%%%% QR解码global I_otsu; %global 定义全局变量global im;global KL;global Ijibian;I_jiema=Ijibian;I_jiema=I_otsu; %二值I_jiema=KL;I_jiema=im;%str=zxing_decode(I_jiema) %解码%set(handles.edit1,'string',[get(handles.edit1,'string') str]);%set(handles.text,'string',[get(handles.text,'string') str]);set(handles.edit1,'String',str); %显示字符% --- Executes on button press in GrayGen.function GrayGen_Callback(hObject, eventdata,handles) %%%%%%%%%%%%%%%%%%% 灰度化处理global im;global II;I=im;[w,h,l]=size(I); %图像大小II=[];for i=1:hfor j=1:wII(j,i)=0.3*I(j,i,1)+0.59*I(j,i,2)+0.11*I(j,i,3); %灰度化处理公式endendfigure,imshow(II,[]) %显示图像title('QR二维码灰度化处理');% --- Executes on button press in SmoothGen.function SmoothGen_Callback(hObject, eventdata, handles)%%%%%%%%%%%%%%%%%%% 平滑处理global II;global I3;III=uint8(II); %图像转换0-255Ix=imnoise(III,'salt & pepper',0.02); %对灰度化图像人为加噪声I3=medfilt2(Ix,[3,3]); %平滑处理figureimshow(Ix)title('QR二维码加噪处理');figureimshow(I3)title('QR二维码平滑处理');% --- Executes on button press in Binaryzation.function Binaryzation_Callback(hObject, eventdata, handles)%%%%%%%%%%%%%%%%%%% 二值化处理global I3;global I_otsu;I_otsu=otsut(I3); %二值化处理figureimshow(I_otsu,[])title('QR二维码二值化处理');% function edit1_Callback(hObject, eventdata, handles)% % hObject handle to edit1 (see GCBO)% % eventdata reserved - to be defined in a future version of MATLAB% % handles structure with handles and user data (see GUIDATA)%% % Hints: get(hObject,'String') returns contents of edit1 as text% % str2double(get(hObject,'String')) returns contents of edit1 as a double% --- Executes during object creation, after setting all properties.function edit1_CreateFcn(hObject, eventdata, handles)% hObject handle to edit1 (see GCBO)% eventdata reserved - to be defined in a future version of MATLAB% handles empty - handles not created until after all CreateFcns called% Hint: edit controls usually have a white background on Windows.% See ISPC and COMPUTER.if ispc && isequal(get(hObject,'BackgroundColor'),get(0,'defaultUicontrolBackgroundColor'))set(hObject,'BackgroundColor','white');end% --- Executes on button press in ImageRotate.function ImageRotate_Callback(hObject, eventdata, handles) %%%% 旋转校正 4.bmpglobal im;%倾斜校正:二值化,取边缘,Hough变换得到角度,旋转I=im;bw=rgb2gray(I); %rgb转换为灰度图bw=im2bw(I,graythresh(bw)); %二值化过程bw=double(bw);BW=edge(bw,'canny'); %canny边缘处理BW1=BW;figureimshow(BW1);title('边缘处理图像'); %显示图像[H,T,R]=hough(BW);figure,imshow(H,[],'XData',T,'YData',R,'InitialMagnification','fit');xlabel('\theta'),ylabel('\rho');axis on, axis normal,hold on;P=houghpeaks(H,4,'threshold',ceil(0.3*max(H(:)))); %hough变化峰值检测x=T(P(:,2)); y = R(P(:,1));plot(x,y,'s','color','white');lines=houghlines(BW,T,R,P,'FillGap',50,'MinLength',7); %hough检测线段figure,imshow(BW),title('直线标识图像');max_len = 0;hold on;for k=1:length(lines) %主要把线条和点显示出来xy=[lines(k).point1;lines(k).point2];% 标出线段plot(xy(:,1),xy(:,2),'LineWidth',2,'Color','green');% 标出线段的起始和终端点plot(xy(1,1),xy(1,2),'x','LineWidth',2,'Color','yellow');plot(xy(2,1),xy(2,2),'x','LineWidth',2,'Color','red');len=norm(lines(k).point1-lines(k).point2);Len(k)=len;if (len>max_len)max_len=len;xy_long=xy;endend% 强调最长的部分plot(xy_long(:,1),xy_long(:,2),'LineWidth',2,'Color','blue');[L1 Index1]=max(Len(:));% 最长线段的起始和终止点x1=[lines(Index1).point1(1) lines(Index1).point2(1)];y1=[lines(Index1).point1(2) lines(Index1).point2(2)];% 求得线段的斜率K1=-(lines(Index1).point1(2)-lines(Index1).point2(2))/...(lines(Index1).point1(1)-lines(Index1).point2(1))angle=atan(K1)*180/pi %显示角度A = imrotate(I,-angle,'bilinear');% imrate 是逆时针的所以取一个负号figure,imshow(A);%imwrite(A,'4qingxie_jiaozheng')% --- Executes on button press in AberrationAdj.function AberrationAdj_Callback(hObject, eventdata, handles) %%%% 畸变校正11.bmpglobal im;global Ijibian;syms a1a2a3a4b1b2b3b4real;I=im;x=[1:256];y=[1:256];control_outpoint=[14 64 %原图像顶点26 221206 38246 196];control_inputpoint=[1 1 %几何畸变图像顶点1 255255 1255 255];x1=control_inputpoint(:,1); %原图像第一列y1=control_inputpoint(:,2); %原图像第二列A=[control_outpoint(1,1) control_outpoint(1,2)control_outpoint(1,1)*control_outpoint(1,2) 1control_outpoint(2,1) control_outpoint(2,2)control_outpoint(2,1)*control_outpoint(2,2) 1control_outpoint(3,1) control_outpoint(3,2)control_outpoint(3,1)*control_outpoint(3,2) 1control_outpoint(4,1) control_outpoint(4,2)control_outpoint(4,1)*control_outpoint(4,2) 1];a=linsolve(A,x1); %等价于a=sym(A)/sym(x1) b=linsolve(A,y1); %等价于a=sym(A)/sym(y1)f1=@(x,y) a(1)*x+a(2)*y+a(3)*x*y+a(4); %定义变换函数f2=@(x,y) b(1)*x+b(2)*y+b(3)*x*y+b(4);for i=1:256for j=1:256x1(i,j)=f1(i,j);y1(i,j)=f2(i,j);I1(i,j)=interp2(x,y,I,x1(i,j),y1(i,j),'bilinear'); %双线性插值%I1(i,j)=interp2(x1(i,j),y1(i,j),I,x,y,'bilinear');endendIjibian=I1;figureimshow(I1);function edit3_Callback(hObject, eventdata, handles)% hObject handle to edit3 (see GCBO)% eventdata reserved - to be defined in a future version of MATLAB% handles structure with handles and user data (see GUIDATA)% Hints: get(hObject,'String') returns contents of edit3 as text% str2double(get(hObject,'String')) returns contents of edit3 as a double% --- Executes during object creation, after setting all properties.function edit3_CreateFcn(hObject, eventdata, handles)% hObject handle to edit3 (see GCBO)% eventdata reserved - to be defined in a future version of MATLAB% handles empty - handles not created until after all CreateFcns called% Hint: edit controls usually have a white background on Windows.% See ISPC and COMPUTER.if ispc && isequal(get(hObject,'BackgroundColor'),get(0,'defaultUicontrolBackgroundColor'))set(hObject,'BackgroundColor','white');end% --- Executes on button press in QRGen.function QRGen_Callback(hObject, eventdata, handles) %%%% 自制QR (用英文)global KL;str3=get(handles.edit3,'string') %得到string数据KL=qrgen(str3,300,300); %生成相应QR二维码figureimshow(KL,[])imwrite(KL,'KL.png')% --- Executes on button press in QRgenDecode.function QRgenDecode_Callback(hObject, eventdata,handles) %%%%%%%%自制QR解码显示global KL;I_jiema=imread('KL.bmp');str2=zxing_decode(I_jiema) %解码过程set(handles.edit1,'String',str2);% --- Executes on key press with focus on QRgenDecode and none of its controls. function QRgenDecode_KeyPressFcn(hObject, eventdata, handles)% hObject handle to QRgenDecode (see GCBO)% eventdata structure with the following fields (see UICONTROL)% Key: name of the key that was pressed, in lower case% Character: character interpretation of the key(s) that was pressed% Modifier: name(s) of the modifier key(s) (i.e., control, shift) pressed% handles structure with handles and user data (see GUIDATA)% --- Executes on button press in pushbutton11.function pushbutton11_Callback(hObject, eventdata, handles)% hObject handle to pushbutton11 (see GCBO)% eventdata reserved - to be defined in a future version of MATLAB% handles structure with handles and user data (see GUIDATA) AllFigureHandle=get(0,'Children'); % Contain Figure and GUIflag=rem(AllFigureHandle,1);%OnlyPictureHandle=AllFigureHandle(find(flag==0)); % Exclude GUI,because GUI'handle is decimalclose(OnlyPictureHandle);% --- If Enable == 'on', executes on mouse press in 5 pixel border.% --- Otherwise, executes on mouse press in 5 pixel border or over DecodeQR. function DecodeQR_ButtonDownFcn(hObject, eventdata, handles)% hObject handle to DecodeQR (see GCBO)% eventdata reserved - to be defined in a future version of MATLAB% handles structure with handles and user data (see GUIDATA)。
(完整版)二维码的生成与实现(matlab)
课程设计报告课题名称:二维码的生成与识别项目完成人(班级、学号、姓名):项目完成时间: 2017/6/15一、引言1、编写目的本学期学习《数字图像处理》,包含很多知识点,像:图像编码与压缩、图像相关变换、图像增强技术、图像复原技术,这些知识点的应用在实际编程中都非常重要。
纸上得来终觉浅,绝知此事要躬行。
所以,这次课程设计的目的主要就是巩固所学的数字图像处理的相关知识。
最终是我们通过该教学环节,把该课程以及相关知识融会贯通。
2、背景由于受信息的容量限制,一维条码仅仅是对“物品”的标识,而不是对“物品”的描述,故一维条码的使用不得不依赖数据库存在。
在使用上受到了极大的限制,效率很低。
二维码正是为了解决一维条码无法解决的问题而产生的。
二维码具有高密度、高可靠性等特点,可以用来表示数据文件、图像等,实现信息获取、网站跳转、广告推送、手机电商、优惠促销、会员管理等功能,具有很强的研究意义。
3、参考资料《数字图像处理》第三版胡学龙二、设计方案1、图像采集图像主要来自网上在线生成的二维码图像和该程序生成的二维码图像。
2、算法分析预处理过程灰度化-----平滑处理------二值化1.灰度化:一般都是为了减小图像原始数据量,便于后续处理时计算量更少,因为图像处理不一定需要对彩色图像的RGB三个分量都进行处理2.平滑处理:图像平滑是指用于突出图像的宽大区域、低频成分、主干部分或抑制图像噪声和干扰高频成分,使图像亮度平缓渐变,减小突变梯度,改善图像质量的图像处理方法。
图像平滑的方法包括:插值方法,线性平滑方法,卷积法等等。
这样的处理方法根据图像噪声的不同进行平滑,比如椒盐噪声,就采用线性平滑方法!3.二值化:图像二值化就是将图像上的像素点的灰度值设置为0或255,也就是将整个图像呈现出明显的黑白效果。
二维码解码二维码解码主要使用的是ZXing库,ZXing是个很经典的条码/二维码识别的开源类库3、代码实现打开图像function pushbutton1_Callback(hObject, eventdata, handles) global im;[filename,pathname]=uigetfile({'*.*';'*.bmp';'*.jpg';'*.tif';'*.jpg'} ,'选择图像');if isequal(filename,0)||isequal(pathname,0)errordlg('您还没有选取图片!!','温馨提示');%如果没有输入,则创建错误对话框return;elsedisp(['User selected',fullfile(pathname,filename)]);fprintf('fffffff%s\n',filename);im=imread(filename);%读取图像figureimshow(im);%在坐标axes1显示原图像title('原始图像');End灰度化处理function pushbutton4_Callback(hObject, eventdata, handles)global im;global II;I=im;[w,h,l]=size(I); %图像大小II=[];for i=1:hfor j=1:wII(j,i)=0.3*I(j,i,1)+0.59*I(j,i,2)+0.11*I(j,i,3); %灰度化处理公式endendfigure,imshow(II,[]) %显示图像title('二维码灰度化处理');平滑处理function pushbutton5_Callback(hObject, eventdata, handles)global II;global I3;III=uint8(II); %图像转换0-255Ix=imnoise(III,'salt & pepper',0.02); %对灰度化图像人为加噪声I3=medfilt2(Ix,[3,3]); %平滑处理figureimshow(Ix)title('二维码加噪处理');figureimshow(I3)title('二维码平滑处理');二值化处理function pushbutton6_Callback(hObject, eventdata, handles)global I3;global I_otsu;I_otsu=otsut(I3); %二值化处理figureimshow(I_otsu,[])title('二维码二值化处理');旋转校正function pushbutton7_Callback(hObject, eventdata, handles) global im;%倾斜校正:二值化,取边缘,Hough变换得到角度,旋转I=im;bw=rgb2gray(I); %rgb转换为灰度图bw=im2bw(I,graythresh(bw)); %二值化过程bw=double(bw);BW=edge(bw,'canny'); %canny边缘处理BW1=BW;figureimshow(BW1);title('canny 边界图像'); %显示图像[H,T,R]=hough(BW);figure,imshow(H,[],'XData',T,'YData',R,'InitialMagnification','fit'); xlabel('\theta'),ylabel('\rho');axis on, axis normal,hold on;P=houghpeaks(H,4,'threshold',ceil(0.3*max(H(:)))); %hough变化峰值检测x=T(P(:,2)); y = R(P(:,1));plot(x,y,'s','color','white');lines=houghlines(BW,T,R,P,'FillGap',50,'MinLength',7); %hough检测线段figure,imshow(BW),title('直线标识图像');max_len = 0;hold on;for k=1:length(lines) %主要把线条和点显示出来xy=[lines(k).point1;lines(k).point2];% 标出线段plot(xy(:,1),xy(:,2),'LineWidth',2,'Color','green');% 标出线段的起始和终端点plot(xy(1,1),xy(1,2),'x','LineWidth',2,'Color','yellow');plot(xy(2,1),xy(2,2),'x','LineWidth',2,'Color','red');len=norm(lines(k).point1-lines(k).point2);Len(k)=len;if (len>max_len)max_len=len;xy_long=xy;endend% 强调最长的部分plot(xy_long(:,1),xy_long(:,2),'LineWidth',2,'Color','blue');[L1 Index1]=max(Len(:));% 最长线段的起始和终止点x1=[lines(Index1).point1(1) lines(Index1).point2(1)];y1=[lines(Index1).point1(2) lines(Index1).point2(2)];% 求得线段的斜率K1=-(lines(Index1).point1(2)-lines(Index1).point2(2))/...(lines(Index1).point1(1)-lines(Index1).point2(1))angle=atan(K1)*180/pi %显示角度A = imrotate(I,-angle,'bilinear');% imrate 是逆时针的所以取一个负号figure,imshow(A);解码function pushbutton3_Callback(hObject, eventdata, handles)global I_otsu; %global 定义全局变量global im;global KL;global Ijibian;I_jiema=Ijibian;I_jiema=I_otsu; %二值I_jiema=KL;I_jiema=im;str=zxing_decode(I_jiema) %解码set(handles.edit1,'String',str); %显示字符三、出错处理1、出错信息2、出错处理方法及补救措施主要是由于导入的jar包文件的路径错误而导致的,所以修改好对应的路径即可。
利用MATLAB 绘制二维图形

利用MATLAB 绘制二维图形
1. 显函数的图形绘制
MATLAB 中二维显函数的调用格式为: (1)plot (x,y,s) x为自变量,y为函数,两者均为同长度的向量,分别表示点的横坐标 和纵坐标. (2)plot (x1,y1,s1,x2,y2,s2 , ,xn,yn,sn) s1,s2 , ,sn是颜色、标记点和线型参数, 可叠加使用. 若不设置参数s ,则默认画实线.常用参数见表8-5所示 .
例2
解
x linspace0 ,2 pi ,50; %设置自变量的范围 y1 sin x; y2 cos x;
plot(x ,y1,k ,x,y2 ,m ) %取不同参数画两条曲线 运行结果如图8-5所示 .
图8-5
利用MATLAB 绘制二维图形
2. 隐函数的图形绘制
MATLAB中二维隐函数的调用格式为 : (1)ezplot(fun,[a ,b]) fun为隐函数表达式,需用单引号界定 . [a ,b]用来指定自变
利用MATLAB 绘制二维图形
表8-5
利用MATLAB 绘制二维图形
例1
解
x 2 :0 . 01:2 ; %定义数组变量x ,从 2开始到2为止 ,步长 0.01 y x.2 1; %计算对应的函数值 plot (x ,y) 运行结果如图8-4所示 .
图8-4
利用MATLAB 绘制二维图形
量的取值范围,默认范围为2π ,2π .
(2)ezplot(funx ,funy,[a ,b])funx ,funy是用单引号界定的x(t)和y(t)的表达
式 ,[a ,b]为参数的取值范围,默认范围为0 ,2π .
利用MATLAB 绘制二维图形
例3
MATLAB和二维码可视化技术在电路分析教学中的应用
MATLAB和二维码可视化技术在电路分析教学中的应用谭艳春;樊海红【摘要】以戴维宁定理为例,将高性能仿真软件MATLAB和时下非常流行的二维码可视化技术应用到电路分析理论教学中,既能使抽象、枯燥、难懂的理论知识变得形象生动、便于理解,又方便学生课后复习延伸,巩固课堂知识点.【期刊名称】《中国教育技术装备》【年(卷),期】2018(000)002【总页数】3页(P44-46)【关键词】电路分析;MATLAB;二维码【作者】谭艳春;樊海红【作者单位】广东海洋大学电子与信息工程学院,524088;广东海洋大学电子与信息工程学院,524088【正文语种】中文【中图分类】G6421 引言电路分析是高等院校工科类、电类等相关专业必修的一门专业基础课,是模拟电路、信号系统等多门专业课的先修课程,主要任务是在给定电路模型的情况下,计算电路中各部分的电流或电压等物理量。
该课程具有概念抽象难懂、理论性强以及计算复杂的特点[1]。
传统的教学模式一般采用理论和实践相结合的方式,即先通过PPT和板书对知识点进行理论讲解,课程后期再配合适当的实验巩固所学的知识。
这种教学模式存在两个弊端:其一是由于学时的限制,导致实验课时较少,因此不可能把课堂上的每个关键知识点都通过实验进行验证;其二是由于教学计划安排和实验室资源有限等多种主客观因素,导致实验课一般都滞后于相应的理论课数周的时间,往往达不到教学期望的效果。
MATLAB是matrix&laboratory两个词的组合,意为矩阵实验室,是由美国MathWorks公司发布的主要面向科学计算、可视化以及交互式程序设计的高科技计算环境。
它是一款功能非常强大的高性能软件,目前已被广泛应用于信号处理、数据分析与可视化和仿真等众多领域[2-6]。
利用MATLAB软件编程仿真,可以随堂对所讲的理论知识点进行验证,以图形、数据或声音等多种形式来展示仿真结果,可以克服理论与实验不同步所带来的诸多问题。
- 1、下载文档前请自行甄别文档内容的完整性,平台不提供额外的编辑、内容补充、找答案等附加服务。
- 2、"仅部分预览"的文档,不可在线预览部分如存在完整性等问题,可反馈申请退款(可完整预览的文档不适用该条件!)。
- 3、如文档侵犯您的权益,请联系客服反馈,我们会尽快为您处理(人工客服工作时间:9:00-18:30)。
课程设计报告课题名称:二维码的生成与识别项目完成人(班级、学号、姓名):项目完成时间: 2017/6/15一、引言1、编写目的本学期学习《数字图像处理》,包含很多知识点,像:图像编码与压缩、图像相关变换、图像增强技术、图像复原技术,这些知识点的应用在实际编程中都非常重要。
纸上得来终觉浅,绝知此事要躬行。
所以,这次课程设计的目的主要就是巩固所学的数字图像处理的相关知识。
最终是我们通过该教学环节,把该课程以及相关知识融会贯通。
2、背景由于受信息的容量限制,一维条码仅仅是对“物品”的标识,而不是对“物品”的描述,故一维条码的使用不得不依赖数据库存在。
在使用上受到了极大的限制,效率很低。
二维码正是为了解决一维条码无法解决的问题而产生的。
二维码具有高密度、高可靠性等特点,可以用来表示数据文件、图像等,实现信息获取、网站跳转、广告推送、手机电商、优惠促销、会员管理等功能,具有很强的研究意义。
3、参考资料《数字图像处理》第三版胡学龙二、设计方案1、图像采集图像主要来自网上在线生成的二维码图像和该程序生成的二维码图像。
2、算法分析预处理过程灰度化-----平滑处理------二值化1.灰度化:一般都是为了减小图像原始数据量,便于后续处理时计算量更少,因为图像处理不一定需要对彩色图像的RGB三个分量都进行处理2.平滑处理:图像平滑是指用于突出图像的宽大区域、低频成分、主干部分或抑制图像噪声和干扰高频成分,使图像亮度平缓渐变,减小突变梯度,改善图像质量的图像处理方法。
图像平滑的方法包括:插值方法,线性平滑方法,卷积法等等。
这样的处理方法根据图像噪声的不同进行平滑,比如椒盐噪声,就采用线性平滑方法!3.二值化:图像二值化就是将图像上的像素点的灰度值设置为0或255,也就是将整个图像呈现出明显的黑白效果。
二维码解码二维码解码主要使用的是ZXing库,ZXing是个很经典的条码/二维码识别的开源类库3、代码实现打开图像function pushbutton1_Callback(hObject, eventdata, handles) global im;[filename,pathname]=uigetfile({'*.*';'*.bmp';'*.jpg';'*.tif';'*.jpg'} ,'选择图像');if isequal(filename,0)||isequal(pathname,0)errordlg('您还没有选取图片!!','温馨提示');%如果没有输入,则创建错误对话框return;elsedisp(['User selected',fullfile(pathname,filename)]);fprintf('fffffff%s\n',filename);im=imread(filename);%读取图像figureimshow(im);%在坐标axes1显示原图像title('原始图像');End灰度化处理function pushbutton4_Callback(hObject, eventdata, handles)global im;global II;I=im;[w,h,l]=size(I); %图像大小II=[];for i=1:hfor j=1:wII(j,i)=0.3*I(j,i,1)+0.59*I(j,i,2)+0.11*I(j,i,3); %灰度化处理公式endendfigure,imshow(II,[]) %显示图像title('二维码灰度化处理');平滑处理function pushbutton5_Callback(hObject, eventdata, handles)global II;global I3;III=uint8(II); %图像转换0-255Ix=imnoise(III,'salt & pepper',0.02); %对灰度化图像人为加噪声I3=medfilt2(Ix,[3,3]); %平滑处理figureimshow(Ix)title('二维码加噪处理');figureimshow(I3)title('二维码平滑处理');二值化处理function pushbutton6_Callback(hObject, eventdata, handles)global I3;global I_otsu;I_otsu=otsut(I3); %二值化处理figureimshow(I_otsu,[])title('二维码二值化处理');旋转校正function pushbutton7_Callback(hObject, eventdata, handles) global im;%倾斜校正:二值化,取边缘,Hough变换得到角度,旋转I=im;bw=rgb2gray(I); %rgb转换为灰度图bw=im2bw(I,graythresh(bw)); %二值化过程bw=double(bw);BW=edge(bw,'canny'); %canny边缘处理BW1=BW;figureimshow(BW1);title('canny 边界图像'); %显示图像[H,T,R]=hough(BW);figure,imshow(H,[],'XData',T,'YData',R,'InitialMagnification','fit'); xlabel('\theta'),ylabel('\rho');axis on, axis normal,hold on;P=houghpeaks(H,4,'threshold',ceil(0.3*max(H(:)))); %hough变化峰值检测x=T(P(:,2)); y = R(P(:,1));plot(x,y,'s','color','white');lines=houghlines(BW,T,R,P,'FillGap',50,'MinLength',7); %hough检测线段figure,imshow(BW),title('直线标识图像');max_len = 0;hold on;for k=1:length(lines) %主要把线条和点显示出来xy=[lines(k).point1;lines(k).point2];% 标出线段plot(xy(:,1),xy(:,2),'LineWidth',2,'Color','green');% 标出线段的起始和终端点plot(xy(1,1),xy(1,2),'x','LineWidth',2,'Color','yellow');plot(xy(2,1),xy(2,2),'x','LineWidth',2,'Color','red');len=norm(lines(k).point1-lines(k).point2);Len(k)=len;if (len>max_len)max_len=len;xy_long=xy;endend% 强调最长的部分plot(xy_long(:,1),xy_long(:,2),'LineWidth',2,'Color','blue');[L1 Index1]=max(Len(:));% 最长线段的起始和终止点x1=[lines(Index1).point1(1) lines(Index1).point2(1)];y1=[lines(Index1).point1(2) lines(Index1).point2(2)];% 求得线段的斜率K1=-(lines(Index1).point1(2)-lines(Index1).point2(2))/...(lines(Index1).point1(1)-lines(Index1).point2(1))angle=atan(K1)*180/pi %显示角度A = imrotate(I,-angle,'bilinear');% imrate 是逆时针的所以取一个负号figure,imshow(A);解码function pushbutton3_Callback(hObject, eventdata, handles)global I_otsu; %global 定义全局变量global im;global KL;global Ijibian;I_jiema=Ijibian;I_jiema=I_otsu; %二值I_jiema=KL;I_jiema=im;str=zxing_decode(I_jiema) %解码set(handles.edit1,'String',str); %显示字符三、出错处理1、出错信息2、出错处理方法及补救措施主要是由于导入的jar包文件的路径错误而导致的,所以修改好对应的路径即可。
四、总结总体感觉对相关数字图像的处理有了更深的理解。
但是仍然感觉到自己还有不足,因为一些图像变换还不是太熟悉,以后自己一定会补上这一块。
