JRP-2RA微型热敏打印机芯规格书v1.1
微型打印机说明书

微
型
热
敏
打
印
机
说 明 书
(VER 1.00)
1
ห้องสมุดไป่ตู้
目录
目录 ..................................................................................................................................................2 简介 ..................................................................................................................................................3 第一章 特征与性能指标 ...........................................................................................................3 1.1 主要特征............................................................................................................................3 1.2 性能指标............................................................................................................................4 第二章 安装说明..........
FTP-631MCL351 352 煤化纤维热敏打印机参考手册说明书

FTP-631MCL351/352sOVERVIEWThis thermal printer (driven by VDC 24) and cutter provide high speed printing for 3- inch wide paper (85 mm). This printer is small in size, light weight, and has low power consumption. The print head is desined with open construction for easy maintenance.This printer is suitable for the variety of applications, such as POS terminals, ticket machines, label printers, measuring devices and medical equipment.In addition to the interface board, a driving LSI (MCU + Gate Array) is also available.s HIGHLIGHTS•Ultra high speed printingIt can print at 100 mm/s (800 dotlines/s) by using Fujitsu Components' unique head drive control system.•Auto cutterFull or partial cutting are available by normal or reverse rotation of the motor (command set).•Low power consumptionThe peak current for head driving is approximately 2.6 A (at 50mm/s printing speed, 50% printing ratio).•Easy head accessHead-open construction makes head maintenance easy,especially for head cleaning.•Paper auto loading functionThe thermal paper can be loaded without head-up lever operation.•High resolution8 dots/mm head provides clear print output.•Selectable paper pathsFront or rear insertion types are available.24V DRIVE, ULTRA HIGH SPEED LINE THERMAL PRINTER 3” MECHANISM, WITH AVAILABLE CUTTER FTP-631MCL351/352 shown after assembly with FTP-631CT001cutterFTP-621DCL013FTP-621CU102, FTP-633GA101s DESIGNATIONPart number Front paper insertion typeRear paper insertion typeFTP-631MCL351FTP-631MCL352FTP-631CT001FTP-621DCL013FTP-621CU102FTP-633GA101ItemPrinter mechanismMicro Controller UnitGate ArrayLSIInterface boardCutterPrinting method Thermal-sensitive line dot method Dot structure 576 dots/lineDot pitch (Horizontal)0.125 mm (8 dots/mm)—Dot density Dot pitch (Vertical)0.125 mm (8 dots/mm)—Line feed pitch Effective printing area 72 mmNumber of columns 48 columns/line (maximum)—Alphanumeric KANA Maximum printing speed 800 dot lines/s (100 mm/s) maximum JIS ANK :128International characters :130Character typesSemi-graphic :63ASCII small characters :31Download :38424 × 12 dots, (3.0 × 1.5 mm), 48 columns 32 × 16 dots, (4.0 × 2.0 mm), 36 columns 24 × 24 dots, (3.0 × 3.0 mm), 24 columns 32 × 32 dots, (4.0 × 4.0 mm), 18 columns Interface1) Centronics standard 2) Bus interface*1Cutting method Guillotine methodCutting typeFull-cut or partial cut (command set)Minimum cut length 20 mm Paper thickness65 to 150 µms GENERAL SPECIFICATIONSSpecificationsItemCharacter composition, dimensions (H ×W),Number of columns (standard)(Continued)Cutter24 VDC ± 5%, average:*20.55 (0.56) A (at 25 mm/s printing speed, 25% printing ratio)For head0.84 (1.11) A (at 50 mm/s printing speed, 25% printing ratio)3.23 (4.29) A (at 50 mm/s printing speed, 100% printing ratio)(): PeakFor motor 24 VDC ± 5%, 1.0 A maximum For logic5 VDC ± 5%, 0.5 A maximumWeight Mechanism with cutter: approx. 540 g. Interface board: approx. 100 gMechanism + cutter 132 (W) × 60 (D) × 71.0 (H) mm (Excluding connector)Interface board 140 (W) × 89 (D) × 24.0 (H) mmPulse durability :5 × 10⁷ pulse/dot (usingFujitsu Takamisawa's standarddriving method)Wear resistance :50 km (at 12.5% printing ratio)CutterCutting life: 3 × 10⁵ times Operating temperature +5 to +40°C*3Operating humidity 20 to 85% RH (no condensation)Storage temperature –20 to +60°C (excluding paper)Storage humidity 5 to 95% RH (no condensation)Head temperatureBy thermistor (applied energy control, abnormal temperature detection)DetectionPaper out/Mark detect By photointerrupter (command set)Head-upBy microswitch Paper width85 mm 1 ply paper in roll:FTP-030P0020SpecificationsItem(Continued)Power supplyDimensionThermal headLifeEnvironmental condition+0–1Recommended thermal sensitive paper*4*1:The data to be printed is automatically read out by the printer driver equipment memory (host system framememory). The communication is parameter transfer.*2:At 25°C, maximum applied voltage, minimum head resistance, specified paper, stable printing ratio.*3:Temperature range for guaranteed printing density. It can operate at 0 to +40°C.*4:Please contact us for other thermal papers.s DIMENSIONSInterface boards INTERFACE, COMMAND, OPTIONSPlease refer to the FTP-621DCL003/013 DATA SHEET for Interface, Command, and Options.© 2001 Fujitsu Components America, Inc. All company and product names are trademarks or registered trademarks of their respective owners. Rev. 09/2001JapanFujitsu Component Limited Gotanda-Chuo Building3-5, Higashigotanda 2-chome, Shinagawa-ku Tokyo 141, Japan Tel: (81-3) 5449-7010Fax: (81-3) 5449-2626Email:************** Web: North and South AmericaFujitsu Components America, Inc.250 E. Caribbean DriveSunnyvale, CA 94089 U.S.A.Tel: (1-408) 745-4900Fax: (1-408) 745-4970Email:*******************.com Web: EuropeFujitsu Components Europe B.V.Diamantlaan 252132 WV Hoofddorp NetherlandsTel: (31-23) 5560910Fax: (31-23) 5560950Email:***************************.com Web: Asia PacificFujitsu Components Asia Ltd.102E Pasir Panjang Road#04-01 Citilink Warehouse Complex Singapore 118529Tel: (65) 375-8560Fax: (65) 273-3021Email:*****************.com Fujitsu Components International Headquarter Offices。
上海盒马科技有限公司打印机开发者文档说明书

修改:整理理faq
修改:整理理faq
修改:更更新资源链接和介绍
增加:标签功能介绍
增加:AIDL接口口文文件更更新
增加:faq新增打印特殊符号的说明; 修改:标签功能仅用用于V2pro机型;
撰写人人 徐赟庭 徐赟庭
徐赟庭
徐赟庭
徐赟庭 徐赟庭 徐赟庭 徐赟庭 徐赟庭 Darren Darren Darren Darren 田田昆⻰龙 田田昆⻰龙 田田昆⻰龙 田田昆⻰龙 田田昆⻰龙 田田昆⻰龙 田田昆⻰龙
-1-
上海海商米米科技有限公司打印机开发者文文档 -2-
上海海商米米科技有限公司打印机开发者文文档
目目录
文文档更更新说明 ............................................................................................1
组件版本
更更新内容
原始版本
增加:打印图片片的规格说明 增加:有无无打印机硬件查询接口口说明
增加:aidl切刀刀接口口 增加:aidl 开钱柜接口口 增加:aidl 获取切刀刀次数接口口 增加:aidl 获取钱柜打开次数接口口
增加:aidl带反馈的事物打印接口口 增加:callback 事物打印结果反馈 修改:条码格式说明
文档更新说明
上海海商米米科技有限公司打印机开发者文文档
更更新日日期
2017/03/01
2017/03/15
2017/03/22
2017/03/29 2017/06/15 2017/07/26 2017/08/02 2017/08/03 2018/05/23 2018/06/01 2018/06/12 2018/06/29 2018/09/12 2019/02/25 2019/10/08 2019/11/12 2019/12/11 2020/08/18 2020/09/09
YAEN 2寸便携式热敏票据打印机 用户手册说明书

2寸便携式热敏票据打印机用户手册声明此产品为A类产品,在生活环境中,该产品可能造成无线电干扰。
在这种情况下,可能需要用户对其干扰采取切实可行的措施。
注意事项在使用打印机之前,请仔细阅读本章内容!安全注意事项本打印机只能使用本公司提供的专用电池和电源适配器,否则可能引起产品损坏,电池漏液、起火甚至爆炸。
不要将电池投入火中,不要将电池短路、拆散或加热,否则可能导致电池漏液、起火甚至爆炸。
电池中的液体具有腐蚀性,如果操作不慎导致电池漏液并将液体粘到皮肤或衣物上,请立即用清水洗掉,如不慎进入眼睛内,请立即用大量清水彻底冲洗眼睛并就医。
打印时或打印刚结束时请不要立即开启纸仓盖,用手或身体的任何部位接触打印机芯,以免过高的温度导致烫伤。
打印机操作失灵时,请不要再继续使用打印机。
这会导致火灾或者触电。
请关机并拔下打印机插头后联系经销商。
使用注意事项打印机不可浸入水中,也不要将其长时间暴露在雨中,否则可能导致打印机损坏。
打印过程中不得打开纸仓盖,否则可能导致打印机工作不正常。
虽然打印机可以在-10℃到50℃稳定工作,但过高的环境温度(45℃)或过低的环境温度(5℃)都可能导致打印质量降低。
过高的环境湿度(85%相对湿度以上)或过低的环境湿度(20%相对湿度以下)都可能导致打印质量降低。
使用劣质的打印纸或存放时间过长的打印纸可能造成打印质量降低,甚至损坏打印机。
存放注意事项打印机需存放于温度在-20℃到70℃、相对湿度在5%到95%的环境中。
如果长时间存放打印机,请务必取出打印机中的电池单独存放,否则可能导致电池失效、甚至漏液,进而损坏打印机。
普通热敏打印纸的存放时间较短,如果要打印需长期保存的单据,请选用长效热敏打印纸。
打印纸不要放在高温或阳光直射的地方储存,如果已经拆封,请放在避光的地方保存。
■ 电池安全注意事项在使用产品前务必仔细阅读用户手册。
忽视以下说明可能会导致电池过热、燃烧、爆炸、损坏或性能及产品寿命降低。
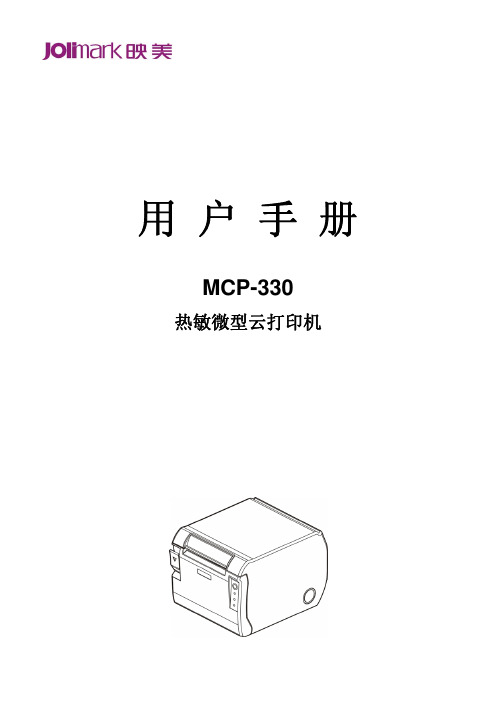
映美 MCP-330 热敏微型云打印机 用户手册
用 户 手 册MCP-330热敏微型云打印机声明关于商标各公司名称、产品名称是各个公司的注册商标或者商品名称。
Jolimark、映美是新会江裕信息产业有限公司的注册商标。
EPSON、ESC/POS是Seiko Epson Corporation的注册商标。
Star是日本Star精密株式会社之注册商标。
Windows是Microsoft Corporation的注册商标。
产品中有毒有害物质或元素的名称及含量有毒有害物质或元素部件名称铅 (Pb ) 汞 (Hg ) 镉 (Cd ) 六价铬 (Cr (VI ))多溴联苯(PBB )多溴二苯醚(PBDE )塑料部件 ○ ○ ○ ○ ○ ○ 金属部件 × ○ ○ ○ ○ ○ 电路板组件×○○○○○○:表示该有毒有害物质在该部件所有均质材料中的含量均在 SJ/T 11363-2006标准规定的限量要求以下。
×:表示该有毒有害物质至少在该部件的某一均质材料中的含量超出 SJ/T 11363-2006标准规定的限量要求。
×的技术原因:以下情况之一,电子元器件含铅,或者快削钢中含有0.35wt%以下的铅,或者铜合金中含有4wt%以下的铅,或者铝中含有0.4wt%以下的铅。
电子信息产品污染控制标志:在中华人民共和国境内销售的电子信息产品必须标识电子信息产品污染控制标志,标志内的数字表示在正常使用条件下电子信息产品的环保使用期限。
本用户手册的说明标记使打印机正常工作所需的注意事项和限制等。
为了避免错误操作,请务必阅读。
使用打印机时可带来方便和具有参考价值的事项。
警示操作时的重要事项,忽视时可能会导致生命危险或重大人身事故。
提示操作时的注意事项,忽视时可能会导致受伤。
安全指引请在使用本产品前仔细阅读本手册,不要执行本手册中没有明确说明的操作。
未经授权的操作会导致错误或意外。
制造商对因错误操作而导致打印机出现的任何问题均不负责。
请严格遵守标示在打印机上的所有警告和指导。
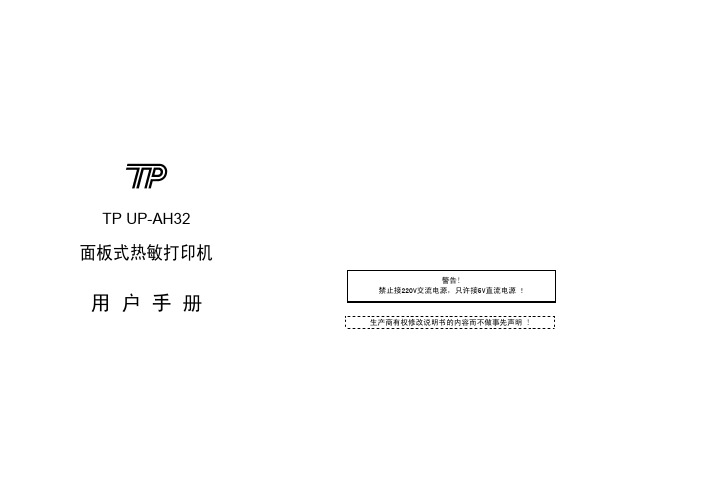
TP UP-AH32面板式热敏打印机 说明书
1
2
第一章 性能与特点
1.1 打印性能
• 打印方法
: 行式直接热敏打印
• 打印纸宽
: 57.5±0.5mm
• 点密度
: 8点/mm
• 有效打印宽度 : 384点/行
• 打印速度
: 20mm/s(使用DC5V,3A电源适配器)
1.2 打印纸
• 热敏纸卷,纸宽57.5±0.5毫米 • 内装纸卷外径小于Φ50毫米,内径大于Φ10毫米 • 纸厚 0.065mm,纸质53~64克/米2
厂时K1--K6均处在OFF位置。
波特率(BPS) ON ■ ■ OFF □ □
12 ON □ ■ OFF ■ □
12
1200 2400
奇偶校验 ON ■ □ □ OFF □ ■ ■
456 ON □ ■ □ OFF ■ □ ■
456
8位奇校验 8位偶校验
10
ON ■ □ OFF □ ■
12
ON □ □ OFF ■ ■
字符,随后打印出接口形式和国标一、二级汉字库字样。 自检测的方法是按住【走纸】键并接通电源,再松开【走纸】键,打印机将打印
出自检清样。
12
第三章 控制打印命令
3.1 命令概述 TP UP-AH32行式热敏打印机提供与ESC/POS兼容的打印命令、FS汉字打印命令。 各个命令的描述形式如下:
控制码
格式:
安装孔及固定孔尺寸如下图所示:
图2-1 TP UP-AH32外形结构图
图2-2 TP UP-AH32外形尺寸
7
图2-3 安装孔及固定孔尺寸
2.2 电源连接
TP UP-AH32热敏打印机使用单一DC5V电源,电源电压的容许范围为5V±0.25V,电 源容量≥3A。
YJX-C58A-微型热敏打印机芯规格书v1.3

V V 驱动输出部
分,参考值
3.7 、时序特性(25±10℃)
参数
代号
表7
速度
单位
最小 典型 最大
时钟频率
-- -fCLK
-- --
时钟宽度
twCLK 30 --
数据建立时间 testup DI 30 --
数据保持时间 thold DI 30 --
8 MHz
5 MHz -- ns -- ns -- ns
组成,使传动噪声极低。
-3-
2、 规格参数
项目 打印方法 有效打印宽度(毫米) 点密度(点/毫米) 打印点数 纸张宽度(毫米) 点间距(毫米) 点大小 最大打印速度 走纸精度 打印头温度侦测 缺纸侦测 打印头工作电压(DCV) 逻辑工作电压(DCV) 电机工作电压(DCV) 工作温度 工作湿度 储藏温度 储藏湿度 机械噪音 胶辊开合次数 对热敏纸牵引力 对热敏纸抓握制动力
步距角
9º(1-2 相激励)
步进距离
0.0625 毫米
相电阻
10 Ω±7%
20℃
相电流
0.357 A
驱动方式
双极,双相驱动(或 1~2 相)
4.2、步进电机相位
CA58 的步进电机采用 1-2 相驱动方 式,有 4 个位置。如下表所示:
表 10
位置
A B
A
STEP1
+ -
-
STEP2
-
-
STEP3
-
25℃
热敏电阻的温度曲线图
图1
表 5 热敏电阻温度表:
温度 (℃) -20
阻值 KΩ) 269
温度 (℃)
10
阻值 (KΩ)
60
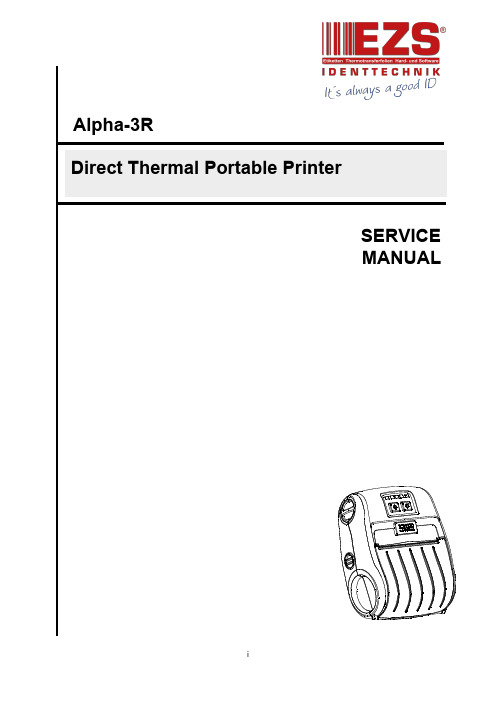
Alpha-3R 便携式热敏打印机维修手册说明书
SERVICE MANUALAlpha-3R Direct Thermal Portable PrinterContents1.FUNDAMENTAL OF THE SYSTEM (2)1.1Overview (2)2.ELECTRONICS (3)2.1Summary of Board Connectors (3)3.MECHANISM (7)3.1Replacing the Platen Roller (Including media cover) (7)3.2Replacing the Keys Control Board (9)3.3Replacing the Bluetooth Module (Option) (10)3.4Replacing the Media Holder Assembly (11)3.5Replacing the Main Board Assembly (13)3.6Replacing the Print Head Assembly (14)3.7Replacing the Stepping Motor (15)3.8Replacing the black mark sensor assembly (16)3.9Replacing the Wi-Fi Module (Option) (17)3.10 Replacing the Open Sensor (18)4.TROUBLESHOOTING (22)4.1Common Problems (22)5.Maintenance (24)Revise History (25)1. FUNDAMENTAL OF THE SYSTEM1.1 OverviewFront View1234561. LED indicator2. Feed button3. Power on/off button4. Media cover release button5. Media holder adjustment knob6. Media cover1. Tear edge2. Print head3. Media holder4. Platen5. Black mark sensor 214351. Li-ion battery2. Battery open clasp3. USB interface4. Power jack5. Interface cover324 152. ELECTRONICS2.1 Summary of Board ConnectorsMain board top1235 46789Connector Description1 LED & KEY board2 WiFi or Bluetooth module connectorPin Description1 3.3V2 BT/WiFi Reset3 BT RXD4 BT RTS5 BT TXD6 BT CTS7 WiFi wake up8 WiFi TCP9 BT/WiFi Switch10 GND3 Stepping motorPin Description1 OUT12 OUT23 OUT14 OUT24 Download F/W connectorPin Description1 3.3V2 GND3 RESET4 BMS5 NPCS06 MOSI7 MISO8 SPCK5 Head open sensorPin Description1 HEAD2 GND6 USB & RS 232 connector7 12V DC IN8 TPH connector9 Paper sensorPin Description1 3.3V2 BM_E3 BM_R4 3.3VMain board bottom1Connector Description1 Battery connector3. MECHANISM3.1 Replacing the Platen Roller (Including media cover)1. Remove two screws from the back of the printer and two screws from the front ofthe printer.2. Take the printer top cover off.3. Use a tool to remove the shaft. Remove/Replace the media cover. (including theplaten roller ass’y)4. Reassemble the parts in the reverse procedures.3.2 Replacing the Keys Control Board1. Refer to section 3.1 to remove the printer top cover.2. Remove two screws on the keys control board.3. Loosen the connector lock then disconnect the flat cable from the keys control board.Remove/Replace the keys control board.4. Reassemble the parts in the reverse procedures.3.3 Replacing the Bluetooth Module (Option)1. Refer to section 3.2 to remove the keys control board.2. Remove two screws on the Bluetooth control board.3. Disconnect the connector on the board.4. Reassemble the parts in the reverse procedures.3.4 Replacing the Media Holder Assembly1. Remove two screws and media holder adjustment knob.2. Take the interior mechanism from the printer bottom cover.3. Plug the media holder adjustment knob to rotate the media holder to the closest positionand remove a screw on the other side..4. Take the media holder assembly from the mechanism.5. Reassemble the parts in the reverse procedures.1. Refer to section 3.2 to section 3.4 to remove key control board, Bluetooth control board(option), and the media holder assembly.2. Remove two screws from the back of interior mechanism and disconnect all theconnectors on the main board assembly.3. Reassemble the parts in the reverse procedures.1. Refer to section 3.2 to section 3.5 to remove key control board, Bluetooth control board(option), the media holder assembly, and main board assembly.2. Use the long-nose pliers to remove two spring torsions on each side.3. Take the gear holder and the gear, and push the print head holder on the each side toremove the print head assembly.4. Reassemble the parts in the reverse procedures.Gear holder Gear3.7 Replacing the Stepping Motor1. Refer to section 3.4 and section 3.5 to remove media holder assembly and main boardassembly.2. Remove the gear holder and two gears.3. Remove two screws.4. Reassemble the parts in the reverse procedures.Gear holder Gears3.8 Replacing the black mark sensor assembly1. Refer to section 3.2 to section 3.5 to remove key control board, Bluetooth control board(option), the media holder assembly, and main board assembly.2. Remove a screw and replace the black mark sensor.3. Reassemble the parts in the reverse procedures. Black mark sensor assembly3.9 Replacing the Wi-Fi Module (Option)1. Refer to section 3.1 take the printer top cover off. Disconnect the Wi-Fi antennaconnector carefully.Wi-Fi antenna connector2. Refer to section3.2 to remove the keys control board.3. Remove one screw on the Wi-Fi control board. Please refer to above picture.4. Replace the WiFi control board.5. Reassemble the parts in the reverse procedures.Note:▪This is the new Wi-Fi module’s replacing instruction. It should work with the main board that is -30LF version. (or later version)▪If you replace the main board, please check the Wi-Fi signal band on configuration page for your using region. If any questions, please contact the Customer Service Department of yourpurchased reseller or distributor for assistance.US EUR3.10 Replacing the Open Sensor1. Please refer to section 3.1 take the printer top cover off and replace a new one withplaten roller.※Old media cover※New media cover(If the media cover is already the new one, it doesn’t need to replace the open sensor)2. Remove the screw on the open sensor.3. Unplug the old open sensor connector.4. Then, insert the new open sensor connector.5. Install the elastic panel on the open sensor.Note: the direction of elastic panel must be the same as illustrated6. Place the open sensor on the side of media cover switch.7. Lock the screw on the side of media cover switch.8. Fix the wire on the slot.9. Reassemble the parts in the reverse procedures.4. TROUBLESHOOTING4.1 Common ProblemsThe following guide lists the most common problems that may be encountered when operating this bar code printer. If the printer still does not function after all suggested solutions have been invoked, please contact the Customer Service Department of your purchased reseller or distributor for assistance.Problem Possible Cause Recovery ProcedurePower indicator does not illuminate * The battery is not properlyinstalled.* The battery is dead.* Reinstall the battery.* Switch the printer on.* Charge the battery.- The printer status fromDiagTool shows “HeadOpen”.* The printer carriage is open. * Please close the print carriage.- The printer status from DiagTool shows “Out of Paper”.. * Running out of media roll.* The media is installedincorrectly.* Black mark sensor is notcalibrated.* Supply a new media roll.* Please refer to the steps on section 3.4 toreinstall the media roll.* Calibrate the black mark sensor.- The printer status from DiagTool shows “Paper Jam”. * Black mark sensor is not setproperly.* Make sure media size is setproperly.* Media may be stuck insidethe printer mechanism.* Calibrate the black mark sensor.* Set media size correctly.Memory full ( FLASH / DRAM )* The space of FLASH/DRAMis full.* Delete unused files in the FLASH/DRAM.* The max. numbers of DRAM is 256 files.* The max. user addressable memoryspace of DRAM is 256KB.* The max. numbers of file of FLASH is 256files.* The max. user addressable memoryspace of FLASH is 2560KB.Poor Print Quality * Media is loaded incorrectly* Dust or adhesiveaccumulation on the printhead.* Print density is not setproperly.* Printhead element isdamaged.* Reload the supply.* Clean the print head.* Clean the platen roller.* Adjust the print density and print speed.* Run printer self-test and check the printhead test pattern if there is dot missing inthe pattern.* Change proper media roll.Missing printing on the left orright side of label* Wrong label size setup. * Set the correct label size.Gray line on the blank label * The print head is dirty.* The platen roller is dirty.* Clean the print head.* Clean the platen roller.Irregular printing * The printer is in Hex Dumpmode.* The RS-232 setting isincorrect.* Turn off and on the printer to skip thedump mode.* Re-set the Rs-232 setting.5. MaintenanceThis session presents the clean tools and methods to maintain your printer.1. Please use one of following material to clean the printer.⏹Cotton swab⏹Lint-free cloth⏹Vacuum / Blower brush⏹100% ethanol2. The cleaning process is described as following,Printer Part Method IntervalPrint Head 1. Always turn off the printer beforecleaning the print head.2. Allow the print head to cool for aminimum of one minute.3. Use a cotton swab and 100%ethanol to clean the print headsurface.Clean the print head when changing anew label rollPlaten Roller 1. Turn the power off.2. Rotate the platen roller and wipe itthoroughly with 100% ethanol anda cotton swab, or lint-free cloth.Clean the platen roller when changing anew label rollTear Bar/Peel Bar Use the lint-free cloth with 100%ethanol to wipe it.As neededSensor Compressed air or vacuum MonthlyExterior Wipe it with water-dampened cloth As neededInterior Brush or vacuum As neededNote:●Do not touch printer head by hand. If you touch it careless, please use ethanol to clean it.●Please use 100% Ethenol. DO NOT use medical alcohol, which may damage the printer head.●Regularly clean the print head and supply sensors once change a new ribbon to keep printerperformance and extend printer life.Revise HistoryDate Content Editor 2013/11/4 Modify some pictures for label model Camille2016/2/5Modify section 3.9 (replacing the Wi-Fi module) Camille2016/6/27 Add chapter 3.10 Replacing the Open Sensor KateCorporate Headquarters Li Ze Plant9F., No.95, Minquan Rd., Xindian Dist., No.35, Sec. 2, Ligong 1st Rd., Wujie Township,New Taipei City 23141, Taiwan (R.O.C.) Yilan County 26841, Taiwan (R.O.C.)TEL: +886-2-2218-6789 TEL: +886-3-990-6677FAX: +886-2-2218-5678 FAX: +886-3-990-5577Web site: E-mail:*****************************TSC Auto ID Technology Co., Ltd.****************************。
- 1、下载文档前请自行甄别文档内容的完整性,平台不提供额外的编辑、内容补充、找答案等附加服务。
- 2、"仅部分预览"的文档,不可在线预览部分如存在完整性等问题,可反馈申请退款(可完整预览的文档不适用该条件!)。
- 3、如文档侵犯您的权益,请联系客服反馈,我们会尽快为您处理(人工客服工作时间:9:00-18:30)。
热敏电阻的温度曲线图
图1
表 5 热敏电阻温度表:
温度 (℃) -20 -15
-10 -5 0 5
阻值 KΩ) 269 208 178 124 100
78
温度 (℃)
10 15 20 25 30 35
阻值 (KΩ)
60 47.1 37.5 30.0 24.2 19.6
温度 (℃)
40 45 50 55 60 65
0.16mJ/dot(0.67ms) 0.13mJ/dot(0.54ms) 0.11mJ/dot(0.46ms)
64 点同时加热
消耗电流
I。
2.4A
3.4、计算公式
加热能量可由以下公式计算:
P0
=
I02
×
Rav
=
(Rcom ×
N
VH 2 × Rav + Rav + Ric
+
Rlead )2
∵Ton = E0
130 ns -- ns -- ns -- ns
-- ns
30 µs
条件 3≦Vdd≦
5.525 2.7≦Vdd<3 查询时间表
3≦Vdd≦ 5.525
2.7≦Vdd<3
5V(Vdd)
- 10 -
JRP
-- --
JRP-2RA 系列机芯规格书 V1.1
36 µs 2.7V(Vdd)
- 11 -
JRP
RX
= R25 × EXP[B × ( 1 TX
− 1 )] (注:T:绝对温度)
T 25
其中:
B 常数 3950K±2%
R25 电阻值 30KΩ±5%(在 25℃)
Tx 工作温度-20℃-+80℃
T251 冲宽度的工作温度 25℃
JRP-2RA 系列机芯规格书 V1.1
-7-
JRP
JRP-2RA 系列机芯规格书 V1.1
54
mA fDI=fclk/2
输入电压(高) VIH 0.8Vdd --
Vdd
V
STB,DI,
-8-
JRP
输入电压(低) 锁存输入电流
(高) 加热输入电流
(高) 时钟输入电流
(高) 数据输入电流
(高) 锁存输入电流
(低) 加热输入电流
(低) 时钟输入电流
(低) 数据输入电流
(低) 数据输出电压
(高) 数据输出电压
组成,使传动噪声极低。 ◆ 适 用 性 : JRP-2RA 在 安 装 结 构 及 电 气 插 口 与 日 本 富 士 通 公 司 的
FTP-628MCL101 机芯相兼容,适用于微型热敏票据打印机以及热敏票据打印 电子收款机等.
1.3、 说明
本手册描述 JRP 2RA 机芯的电气特性和机械特性以及质量保证和维修,即该机的构成 机理、基本参数、适应范围、以及外围接口的定义和结构尺寸以及使用中的注意事项和维修 细节;本公司保留对本手册的修正和改进的权利。如果你需要本手册的最新版本,可直接与
-数据延时时间 tdDO
--
锁存脉冲宽度 twLAT 100
testupLA
锁存建立时间
100
T
锁存保持时间 tholdLAT 50
testupST
加热建立时间
300
B
输出延时
tdo
--
速度 典型
--
-----
--
-----
--
--
单位 最大
8 MHz
5 MHz -- ns -- ns -- ns
90 ns
加热点数
384 点/行
点距
0.125mm
点大小
0.125mm×0.12mm
可打印宽度
48mm
总宽度
54mm
平均电阻
176Ω±4%
工作电压
3.15-8.5DCV
脉冲寿命
108 个脉冲
机械抗磨寿命
50km
寿命测试条条件
25℃
加热时间比例不大于
12.5%.
3.2、最大允许参数(环境温度:25℃)
表3
参数
代号
说明 热敏 48 8 384 点/行
58 0.125 0.125mmx0.12mm 80mm/s(电机驱动电压为 DC8.5V) 0.0625mm(一个步进距离) 热敏电阻 反射光感应器 3.15-8.5 2.7-5.25 4.2-8.5 +0℃-50℃(不许有凝露) 20%-85%RH(不许有凝露) -20℃-60℃(不许有凝露) 5%-95%RH(不许有凝露) 小于 60dB(A 计权有效值) 大于 5000 次(胶辊离开加复位为一次) ≥50g
◆易装纸 ◆体积小,重量轻 ◆一体金属基架、金属齿轮轴,稳定、可靠、高寿命,散热性能优良 ◆打印速度快:最高可达 80mm/s(电机驱动电压为 DC 8.5V) ◆工作电源宽(3.5-8.5 DC V) ◆打印精度高(8dots/mm) ◆机械耐磨寿命长(大于 50km) ◆噪声低:无刷磁激励步进电机驱动;高耐磨、耐高低温特殊工程塑料齿轮
最大额定值
条件
循环打印
S.L.T
1.25
Tsub=25℃
-5-
JRP
JRP-2RA 系列机芯规格书 V1.1
加热能量
E0
加热电压
VH
逻辑电压
Vdd
0.20mJ/dot 8.5V 7V
S.L.T=1.25msec 正常电压 7.2V,VH
的峰值<9.5V 包括最高电压
逻辑输入电压
Vin
支撑板温度
Ta
阻值 (KΩ) 15.9 13.1 10.8 8.91 7.41
6.2
3.6、电气参数(25±10℃)
温度 (℃)
70
75
阻值 (KΩ) 5.21
4.4
表6
ቤተ መጻሕፍቲ ባይዱ
项目
代号 最小 典型 最大 单位
条件
打印电压
VH 3.13 7.2 8.5
V
逻辑电压
Vdd 2.7 5.0 5.25
V
*1
逻辑电流
Idd
--
--
4、步进电机
步进电机每前进一步,纸张前进 0.0625mm.
4.1、步进电机参数
表9
项目
规格
条件
额定电压
4.2-8.5DCV
相位
2相
步距角
9º(1-2 相激励)
步进距离
0.0625 毫米
相电阻
10Ω±7%
20℃
相电流
0.357A
驱动方式
4.2、步进电机相位
双极,双相驱动(或 1-2 相)
JRP-2RA 系列机芯规格书 V1.1
图2
表8
选通(STB)编号
点编号
1
1 到 64
2
65 到 128
3
129 到 192
4
193 到 256
5
257 到 320
6
321 到 384
加 热头3 84号点
打印数据输入方向
点/脚 64 64 64 64 64 64
加 热头1号点
纸运行 方向
加热头面
FFC/FPC 至整机连接单元
更改者 彭世奎
-1-
JRP
JRP-2RA 系列机芯规格书 V1.1
目录
目录.………………………………………………………………………… 1 1.简介.………………………………………………………………………… 2
1.1 JRP-2RA 微型热敏打印机芯……………………………………………2 1.2 特性 ………………………………………………………………… 2 1.3 说明 ………………………………………………………………… 2 2.规格参数 ……………………………………………………………………3 3.打印头参数 …………………………………………………………………4 3.1 额定参数…………………………………………………………… 4 3.2 最大允许参数……………………………………………………… 4 3.3 推荐参数…………………………………………………………… 5 3.4 计算公式…………………………………………………………… 5 3.5 热敏电阻…………………………………………………………… 6 3.6 电气参数…………………………………………………………… 7 3.7 时序特性…………………………………………………………… 8 3.8 注意事项………………………………………………………… 10 4.步进电机…………………………………………………………………… 11 4.1 步进电机参数…………………………………………………… 11 4.2 步进电机相位…………………………………………………… 11 4.3 步进电机驱动…………………………………………………… 12 5.缺纸侦测 …………………………………………………………………14 5.1 缺纸侦测 ………………………………………………………… 14 6.接口定义.……………………………………………………………………16 7.机械设计参考 ………………………………………………………………17 7.1 易装纸机构支点设计 ………………………………………………17 7.2 纸筒位置结构设计 …………………………………………………18 7.3 机芯外形与装配尺寸 ………………………………………………19 8.机芯应用注意事项 ……………………………………………………… …17
--
V
开的状
态,Vdd=4.5V
--
--
0.5
V
-9-
JRP
输出电压