datagridview控件使用方法
datagridveiw getfirstrow的用法

datagridveiw getfirstrow的用法DataGridView.GetFirstRow() 方法用于获取DataGridView 控件中的第一行。
在本文中,我们将逐步回答与该方法相关的问题,以帮助读者更好地理解其用法和功能。
1. DataGridView 控件简介在介绍DataGridView.GetFirstRow() 方法之前,我们首先了解一下DataGridView 控件。
DataGridView 控件是Windows 窗体应用程序中最常用的数据显示控件之一。
它提供了一个灵活和强大的界面来展示和编辑数据表格。
2. DataGridView.GetFirstRow() 方法简介DataGridView.GetFirstRow() 方法是一个实例方法,用于获取DataGridView 控件中的第一行。
它返回一个DataGridViewRow 对象,该对象表示控件中的第一行。
3. 获取第一行的用途和场景在开发应用程序时,经常需要对DataGridView 控件中的数据进行操作。
获取第一行可以帮助我们实现以下功能:- 快速访问表格数据的第一行,以便进行某些特定处理,如删除或编辑。
- 将第一行作为默认选中的行,以提供更好的用户体验。
- 根据第一行的内容设置其他控件的属性或状态,以便与数据的首条记录相关联。
4. 使用DataGridView.GetFirstRow() 方法下面我们将逐步演示如何在代码中使用DataGridView.GetFirstRow() 方法。
# 4.1 准备工作首先,我们需要在Windows 窗体应用程序中添加一个DataGridView 控件,并将其与数据源绑定。
可以通过设计器或者在代码中动态创建DataGridView 控件。
# 4.2 在按钮点击事件中使用GetFirstRow 方法假设我们有一个按钮,点击按钮时将对第一行进行一些特殊处理。
我们可以在按钮的点击事件中使用GetFirstRow 方法来获取第一行,并对其进行处理。
datagridview用法

DataGridView用法1.概述D a ta Gr id Vi ew是Wi n do ws Fo rm s中一种常用的控件,用于展示和编辑表格数据。
本文将介绍Da ta Gr id Vi ew的基本用法和常用功能。
2.基本用法2.1创建D a t a G r i d V i e w要使用D at aG ri dVi e w,首先需要在窗体上进行控件的创建和初始化。
可以通过拖拽控件到窗体上或者在代码中动态创建控件。
2.2数据绑定在D at aG ri dV ie w中展示数据通常需要进行数据绑定。
可以通过设置D a ta So ur ce属性来实现数据绑定,可以绑定Da ta Ta bl e、B i nd in gS ou rc e等数据源。
2.3列定义可以通过列定义来指定D at aG ri dV ie w中的列数、列名、列类型等属性。
可以使用Da ta Gr i dV ie w的Co lu mns集合来对列进行操作。
2.4行操作可以通过Da ta Gr idV i ew的R ow s集合对行进行操作,如添加、删除、插入等操作。
可以根据行索引或行对象进行操作。
3.常用功能3.1样式设置可以通过设置Da ta Gr i dV ie w的Ce ll Sty l e、C o lu mn He ad er De fau l tC el lS ty le、R ow H ea de rs De fa ul tCe l lS ty le等属性来设置样式,如背景色、字体、对齐方式等。
3.2单元格编辑D a ta Gr id Vi ew可以方便地对单元格进行编辑,可以根据需要设置单元格的可编辑性,只读属性等。
可以通过事件处理程序来实现特定单元格的编辑操作。
3.3排序和筛选D a ta Gr id Vi ew提供了对数据进行排序和筛选的功能。
可以通过设置A l lo wS or ti ng属性来启用排序功能,通过设置A l lo wU se rT oF il ter C ol um ns属性来启用筛选功能。
C#DataGridView控件选中行获取其值

C#DataGridView控件选中⾏获取其值DataGridView的⼏个基本操作:1、获得某个(指定的)单元格的值:dataGridView1.Row[i].Cells[j].Value;2、获得选中的总⾏数:dataGridView1.SelectedRows.Count;3、获得当前选中⾏的索引:dataGridView1.CurrentRow.Index;4、获得当前选中单元格的值:dataGridView1.CurrentCell.Value;5、取选中⾏的数据string[] str = new string[dataGridView.Rows.Count];for(int i;i<dataGridView1.Rows.Count;i++){if(dataGridView1.Rows[i].Selected == true){str[i] = dataGridView1.Rows[i].Cells[1].Value.ToString();}}7、获取选中⾏的某个数据int a = dataGridView1.SelectedRows.Index;dataGridView1.Rows[a].Cells[“你想要的某⼀列的索引,想要⼏就写⼏”].Value;获得某个(指定的)单元格的值: dataGridView1.Row[i].Cells[j].Value; Row[i] 应该是Rows[i]int a=dataGridView1.CurrentRow.Index;string str=dataGridView1.Row[a].Cells[“strName”].Value.Tostring();selectedRows[0]当前选中的⾏.cell[列索引].values 就是当前选中⾏的某个单元格的值DataGridView1.SelectedCells(0).Value.ToString 取当前选择单元内容DataGridView1.Rows(e.RowIndex).Cells(2).Value.ToString 当前选择单元第N列内容————————————————版权声明:本⽂为CSDN博主「Mrchai521」的原创⽂章,遵循CC 4.0 BY-SA版权协议,转载请附上原⽂出处链接及本声明。
c#WinForm开发DataGridView控件的各种操作总结(单元格操作,属性设置)
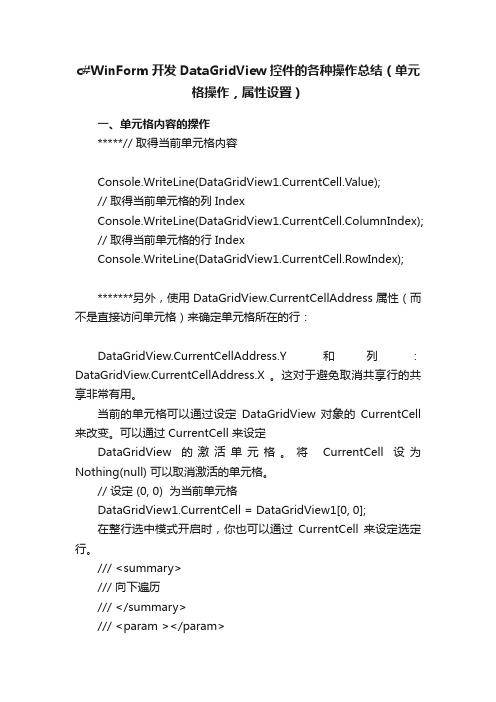
c#WinForm开发DataGridView控件的各种操作总结(单元格操作,属性设置)一、单元格内容的操作*****// 取得当前单元格内容Console.WriteLine(DataGridView1.CurrentCell.Value);// 取得当前单元格的列 IndexConsole.WriteLine(DataGridView1.CurrentCell.ColumnIndex);// 取得当前单元格的行 IndexConsole.WriteLine(DataGridView1.CurrentCell.RowIndex);*******另外,使用 DataGridView.CurrentCellAddress 属性(而不是直接访问单元格)来确定单元格所在的行:DataGridView.CurrentCellAddress.Y 和列:DataGridView.CurrentCellAddress.X 。
这对于避免取消共享行的共享非常有用。
当前的单元格可以通过设定DataGridView 对象的CurrentCell 来改变。
可以通过 CurrentCell 来设定DataGridView 的激活单元格。
将CurrentCell 设为Nothing(null) 可以取消激活的单元格。
// 设定 (0, 0) 为当前单元格DataGridView1.CurrentCell = DataGridView1[0, 0];在整行选中模式开启时,你也可以通过CurrentCell 来设定选定行。
/// <summary>/// 向下遍历/// </summary>/// <param ></param>/// <param ></param>private void button4_Click(object sender, EventArgs e)...{int row = this.dataGridView1.CurrentRow.Index + 1;if (row > this.dataGridView1.RowCount - 1)row = 0;this.dataGridView1.CurrentCell = this.dataGridView1[0, row];}/// <summary>/// 向上遍历/// </summary>/// <param ></param>/// <param ></param>private void button5_Click(object sender, EventArgs e)...{int row = this.dataGridView1.CurrentRow.Index - 1;if (row < 0)row = this.dataGridView1.RowCount - 1;this.dataGridView1.CurrentCell = this.dataGridView1[0, row];}* 注意: this.dataGridView 的索引器的参数是: columnIndex, rowIndex 或是 columnName, rowIndex这与习惯不同。
DATAGRIDVIEW属性及方法

DATAGRIDVIEW属性及方法属性:1. AllowUserToAddRows:获取或设置一个值,指示是否允许用户添加新行。
2. AllowUserToDeleteRows:获取或设置一个值,指示是否允许用户删除行。
3. AllowUserToResizeColumns:获取或设置一个值,指示是否允许用户调整列的大小。
4. AllowUserToResizeRows:获取或设置一个值,指示是否允许用户调整行的大小。
5. AutoSizeColumnsMode:获取或设置值,指示列宽度的调整模式。
6. DataSource:获取或设置与该DataGridView关联的数据源。
7. RowHeadersVisible:获取或设置一个值,指示是否显示行标题。
8. ColumnHeadersVisible:获取或设置一个值,指示是否显示列标题。
9. ReadOnly:获取或设置一个值,指示是否只读。
10. MultiSelect:获取或设置一个值,指示是否可以同时选择多个单元格。
方法:1. ClearSelection(:取消选择所有选定的单元格。
2. Refresh(:重新绘制DataGridView控件。
3. Sort(DataGridViewColumn, ListSortDirection):按指定的列和排序顺序对表格进行排序。
4. SelectAll(:选择所有单元格。
5. Clear(:清除掉DataGridView控件中的所有数据。
7. ClearSelection(:清除当前选定的单元格的选择。
除了上述属性和方法外,DataGridView还有一些事件,可以让我们在特定的情况下作出响应。
例如,CellClick事件在单击单元格时触发,可以用来获取当前选中的单元格的值。
另外,DataGridView还有许多其他的属性和方法,用于设置和操作表格的样式、行高、列宽等。
总结起来,DataGridView是Windows Forms中非常常用的表格控件,具有丰富的属性和方法,用于设置和操作表格的外观和行为。
datagridviewdoubleinputcolumn 小数位数

datagridviewdoubleinputcolumn 小数位数DataGridViewDoubleInputColumn是Windows Forms中的一个控件,它用于在DataGridView控件中显示和编辑带有双精度浮点数(小数)类型数据的列。
本文将详细介绍DataGridViewDoubleInputColumn控件的小数位数设置方法及其使用。
1. DataGridViewDoubleInputColumn控件概述DataGridViewDoubleInputColumn控件是一个数据列控件,用于在DataGridView控件中显示和编辑Double类型的数据。
它提供了一种简便的方法来显示和编辑带有小数位数的Double类型数据。
通过设置小数位数,可以控制数据的显示和编辑格式,使得用户可以更加直观地操作和理解数据。
2. 小数位数的设置设置DataGridViewDoubleInputColumn控件的小数位数可以通过以下步骤进行:步骤一:在项目中添加一个DataGridView控件。
在Visual Studio中,我们可以通过在窗体界面上拖放DataGridView控件的方式来添加一个DataGridView控件。
步骤二:在DataGridView控件中添加一个DataGridViewDoubleInputColumn列。
在设计时,选择DataGridView控件,右键点击选择“编辑列”,然后点击“添加”按钮,选择“DataGridViewDoubleInputColumn”,点击确定按钮,即可在DataGridView控件中添加一个DataGridViewDoubleInputColumn列。
步骤三:设置小数位数在代码中对DataGridViewDoubleInputColumn列进行设置。
可以使用小数位数的设置属性“DecimalPlaces”来指定控件列中的小数位数。
例如,设置小数位数为两位,可以使用以下代码:csharpDataGridViewDoubleInputColumn doubleColumn = (DataGridViewDoubleInputColumn)dataGridView1.Columns[0]; doubleColumn.DecimalPlaces = 2;通过这样的设置,DataGridViewDoubleInputColumn列的数据将以两位小数的格式进行显示和编辑。
vb6 datagridview控件用法
一、VB6简介Visual Basic 6.0(VB6)是微软公司于1998年推出的一款集成开发环境(IDE),是一种基于事件驱动的第三代事件驱动语言。
它允许开发者以快速、简单的方式创建Windows应用程序。
VB6具有可视化编程的特点,允许开发者以拖拽控件的方式构建界面,极大地提高了开发效率。
二、DataGridView控件概述DataGridView控件是VB6中用于显示和编辑数据的控件,它提供了功能强大的数据表格展示能力,可以实现类似Excel表格的功能。
它是VB6中用于数据展示的重要控件之一,具有灵活性高、界面友好等特点。
三、DataGridView控件的基本用法使用DataGridView控件展示数据一般需要以下步骤:1. 在VB6的工具箱中找到DataGridView控件,将其拖拽到窗体中。
2. 设置数据源:可以通过ADODB连接数据库,或者手动添加数据到DataGridView中。
3. 配置列:可以设置每一列的名称、宽度、颜色等属性。
4. 对DataGridView进行一些基本的样式调整,比如添加边框、更换背景颜色等。
四、DataGridView控件的高级用法除了基本的展示功能外,DataGridView控件还支持一些高级用法,比如:1. 数据编辑:可以在DataGridView中实现对数据的增删改操作,通过单元格的编辑功能实现数据的实时更新。
2. 数据筛选:可以根据条件对数据进行筛选,实现灵活的数据展示。
3. 数据导出:可以将DataGridView中的数据导出为Excel表格或者其他格式的文件。
4. 事件处理:可以通过DataGridView的事件来监听用户的操作,比如单元格的点击、双击等操作。
五、DataGridView控件的注意事项在使用DataGridView控件时需要注意一些问题,比如:1. 对数据源的操作需要小心,避免出现数据同步问题。
2. 对于大量数据的展示,需要注意性能优化,避免出现卡顿现象。
DataGridView控件操作大全(内容居中显示,右键绑定菜单)

DataGridView控件操作⼤全(内容居中显⽰,右键绑定菜单)DataGridView1.ColumnHeadersDefaultCellStyle.Alignment = DataGridViewContentAlignment.MiddleCenter '标题居中DataGridView1.RowsDefaultCellStyle.Alignment = DataGridViewContentAlignment.MiddleCenter '内容居中this.dataGridView1.AutoGenerateColumns = false; //让它不⾃⼰产⽣多余的列// this.dataGridView1.AutoSizeColumnsModel = Fill //列名占满容器this.dataGridView1.AutoSizeColumnsModel = AllCells //列名占满容器#region [DataGridView控件单元格点击事件,绑定右键菜单]private void dataGridView_Score_CellClick(object sender, DataGridViewCellEventArgs e){if (e.RowIndex > -1){//绑定右键菜单dataGridView_Score.SelectedRows[0].ContextMenuStrip = this.contextMenuStrip1;}}#endregionDataGridView单元格内容显⽰格式化:代⼊Dictionary<string,string>⽅法private void dataGridView_Score_CellFormatting(object sender, DataGridViewCellFormattingEventArgs e){Dictionary<string,string> scoreStatus = GetScoreStatus();if (e.ColumnIndex == 7){e.Value = scoreStatus[e.Value.ToString()];e.FormattingApplied = true;}}#region [设定ComboBox数据源]private Dictionary<string, string> GetScoreStatus(){Dictionary<string, string> dic = new Dictionary<string, string>{{"2", "全部"},{"1", "成功"},{"0", "失败"}};return dic;}#endregion获取DataGridView选中数据, 返回对象:#region[获取DataGridView的选中⾏数据]/// <summary>/// 获取当前选中⾏的数据/// </summary>/// <returns>当前选中⾏数据</returns>private JudgeSetting GetSelectRowInfo(){DataGridViewRow selectRows = dataGridView_Judge.SelectedRows[0];JudgeSetting setting = new JudgeSetting();if (selectRows != null){// 项⽬代码setting.Ksxmdm = Convert.ToInt32(selectRows.Cells["项⽬代码"].Value);// 项⽬名称setting.Gakfmc = Convert.ToString(selectRows.Cells["项⽬名称"].Value);}return setting;}#endregion替换DataGridView头部显⽰,#region[替换DataTable头]/// <summary>/// 替换DataTable头/// </summary>/// <param name="dt">查询出的DataTable</param>/// <returns></returns>private DataTable ReplaceDataTableHead(DataTable dt){dt.Columns[0].ColumnName = "项⽬代码";dt.Columns[1].ColumnName = "项⽬名称";dt.Columns[2].ColumnName = "扣分项⽬";return dt;}#endregion#region[DataTable样式调整]/// <summary>/// DataTable样式调整/// </summary>private void ChangeDataTableStyle(){// KEY列隐藏this.dataGridView_Judge.Columns[10].Visible = false;this.dataGridView_Judge.Columns[9].Visible = false;//this.dataGridView_Judge.Columns[0].Width = 80;//this.dataGridView_Judge.Columns[1].Width = 100;this.dataGridView_Judge.Columns[0].AutoSizeMode = DataGridViewAutoSizeColumnMode.AllCells; }#endregion绑定dataTable到DataGridView#region[绑定dataTable到DataGridView]/// <summary>/// 绑定dataTable到DataGridView/// </summary>/// <param name="dt">源DataTable</param>private void BindDataTble(DataTable dt){if (toolStripComboBox1.Text != "全部"){DataRow[] rows = dt.Select(string.Format("GAKFMC = '{0}'", toolStripComboBox1.Text));DataTable table = dt.Clone();foreach(DataRow row in rows){table.Rows.Add(row.ItemArray);}dt = table;}// 修改DataTable头部dt = ReplaceDataTableHead(dt);// 绑定数据this.dataGridView_Judge.DataSource = dt;// 修改DataTable样式ChangeDataTableStyle();// 刷新读取的条数this.toolStripLabel4.Text = dt.Rows.Count.ToString();}#endregion刷新DataGridView的绑定#region[刷新DataGridView的绑定]/// <summary>/// 刷新DataGridView的绑定/// </summary>/// <param name="sqlEnum">查询语句</param>private void RefreshBindTable(SqlStatusEnum sqlEnum){try{DataTable dt = QueryData(sqlEnum, null);if (dt != null && dt.Rows.Count > 0){BindDataTble(dt);}elseMessageBox.Show("查询错误,或未查询到相关数据!");}catch (Exception ex){LogHelper.Error(ex);}}#endregionDataGridView控件绑定List<string> List<Student> strList = new List<Student>(){new Student(){StuId = 1, StuName = "张三"},new Student(){StuId = 2, StuName = "李四"},new Student(){StuId = 3, StuName = "王五"}};//查找出ID,并显⽰姓名,List<{m}>绑定到datagridview,可以把m去掉,.Select(m => new { m.StuName })这样展⽰就是StuName的列名 var students = strList.Where(s =>s.StuId == 2).Select(m => new { m = m.StuName }).ToList();dataGridView1.DataSource = students; //显⽰出以m为列名的数据,可以⼿动修改列名将dataGridView选定的⾏转换为实体对象ContactModel model = dataGridView1.CurrentRow.DataBoundItem as ContactModel;。
- 1、下载文档前请自行甄别文档内容的完整性,平台不提供额外的编辑、内容补充、找答案等附加服务。
- 2、"仅部分预览"的文档,不可在线预览部分如存在完整性等问题,可反馈申请退款(可完整预览的文档不适用该条件!)。
- 3、如文档侵犯您的权益,请联系客服反馈,我们会尽快为您处理(人工客服工作时间:9:00-18:30)。
DataGridView动态添加新行:DataGridView控件在实际应用中非常实用,特别需要表格显示数据时。
可以静态绑定数据源,这样就自动为DataGridView控件添加相应的行。
假如需要动态为DataGridView控件添加新行,方法有很多种,下面简单介绍如何为DataGridView控件动态添加新行的两种方法:方法一:int index=this.dataGridView1.Rows.Add();this.dataGridView1.Rows[index].Cells[0].Value = "1";this.dataGridView1.Rows[index].Cells[1].Value = "2";this.dataGridView1.Rows[index].Cells[2].Value = "监听";利用dataGridView1.Rows.Add()事件为DataGridView控件增加新的行,该函数返回添加新行的索引号,即新行的行号,然后可以通过该索引号操作该行的各个单元格,如dataGridView1.Rows[index].Cells[0].Value = "1"。
这是很常用也是很简单的方法。
方法二:DataGridViewRow row = new DataGridViewRow();DataGridViewTextBoxCell textboxcell = new DataGridViewTextBoxCell();textboxcell.Value = "aaa";row.Cells.Add(textboxcell);DataGridViewComboBoxCell comboxcell = new DataGridViewComboBoxCell();row.Cells.Add(comboxcell);dataGridView1.Rows.Add(row);方法二比方法一要复杂一些,但是在一些特殊场合非常实用,例如,要在新行中的某些单元格添加下拉框、按钮之类的控件时,该方法很有帮助。
DataGridViewRow row = new DataGridViewRow();是创建DataGridView的行对象,DataGridViewTextBoxCell是单元格的内容是个TextBox,DataGridViewComboBoxCell是单元格的内容是下拉列表框,同理可知,DataGridViewButtonCell是单元格的内容是个按钮,等等。
textboxcell是新创建的单元格的对象,可以为该对象添加其属性。
然后通过row.Cells.Add(textboxcell)为row对象添加textboxcell单元格。
要添加其他的单元格,用同样的方法即可。
最后通过dataGridView1.Rows.Add(row)为dataGridView1控件添加新的行row。
DataGridView取得或者修改当前单元格的内容:当前单元格指的是DataGridView 焦点所在的单元格,它可以通过DataGridView 对象的CurrentCell 属性取得。
如果当前单元格不存在的时候,返回Nothing(C#是null)// 取得当前单元格内容Console.WriteLine(DataGridView1.CurrentCell.Value);// 取得当前单元格的列IndexConsole.WriteLine(DataGridView1.CurrentCell.ColumnIndex);// 取得当前单元格的行IndexConsole.WriteLine(DataGridView1.CurrentCell.RowIndex);另外,使用DataGridView.CurrentCellAddress 属性(而不是直接访问单元格)来确定单元格所在的行:DataGridView.CurrentCellAddress.Y列:DataGridView.CurrentCellAddress.X 。
这对于避免取消共享行的共享非常有用。
当前的单元格可以通过设定DataGridView 对象的CurrentCell 来改变。
可以通过CurrentCell 来设定DataGridView 的激活单元格。
将CurrentCell 设为Nothing(null) 可以取消激活的单元格。
// 设定(0, 0) 为当前单元格DataGridView1.CurrentCell = DataGridView1[0, 0];在整行选中模式开启时,你也可以通过CurrentCell 来设定选定行。
/// 向下遍历private void button4_Click(object sender, EventArgs e)...{int row = this.dataGridView1.CurrentRow.Index + 1;if (row > this.dataGridView1.RowCount - 1)row = 0;this.dataGridView1.CurrentCell = this.dataGridView1[0, row];}/// 向上遍历private void button5_Click(object sender, EventArgs e)...{int row = this.dataGridView1.CurrentRow.Index - 1;if (row < 0)row = this.dataGridView1.RowCount - 1;this.dataGridView1.CurrentCell = this.dataGridView1[0, row];}* 注意: this.dataGridView 的索引器的参数是: columnIndex, rowIndex 或是columnName, rowIndex这与习惯不同。
DataGridView设定单元格只读:1)使用ReadOnly 属性如果希望,DataGridView 内所有单元格都不可编辑,那么只要:// 设置DataGridView1 为只读DataGridView1.ReadOnly = true;此时,用户的新增行操作和删除行操作也被屏蔽了。
如果希望,DataGridView 内某个单元格不可编辑,那么只要:// 设置DataGridView1 的第2列整列单元格为只读DataGridView1.Columns[1].ReadOnly = true;// 设置DataGridView1 的第3行整行单元格为只读DataGridView1.Rows[2].ReadOnly = true;// 设置DataGridView1 的[0,0]单元格为只读DataGridView1[0, 0].ReadOnly = true;2)使用EditMode 属性DataGridView.EditMode 属性被设置为DataGridViewEditMode.EditProgrammatically 时,用户就不能手动编辑单元格的内容了。
但是可以通过程序,调用DataGridView.BeginEdit 方法,使单元格进入编辑模式进行编辑。
DataGridView1.EditMode = DataGridViewEditMode.EditProgrammatically;3)根据条件设定单元格的不可编辑状态当一个一个的通过单元格坐标设定单元格ReadOnly 属性的方法太麻烦的时候,你可以通过CellBeginEdit 事件来取消单元格的编辑。
// CellBeginEdit 事件处理方法private void DataGridView1_CellBeginEdit(object sender, DataGridViewCellCancelEventArgs e){DataGridView dgv = (DataGridView)sender;//是否可以进行编辑的条件检查if (dgv.Columns[e.ColumnIndex].Name == "Column1" && !(bool)dgv["Column2",e.RowIndex].Value){// 取消编辑e.Cancel = true;}}DataGridView不显示最下面的新行:通常DataGridView 的最下面一行是用户新追加的行(行头显示* )。
如果不想让用户新追加行即不想显示该新行,可以将DataGridView 对象的AllowUserToAddRows 属性设置为False。
// 设置用户不能手动给DataGridView1 添加新行DataGridView1.AllowUserToAddRows = false;但是,可以通过程序:DataGridViewRowCollection.Add 为DataGridView 追加新行。
补足:如果DataGridView 的DataSource 绑定的是DataView, 还可以通过设置DataView.AllowAdd属性为False 来达到同样的效果。
DataGridView判断新增行:DataGridView 的AllowUserToAddRows属性为True时也就是允许用户追加新行的场合下,DataGridView的最后一行就是新追加的行(*行)。
使用DataGridViewRow.IsNewRow 属性可以判断哪一行是新追加的行。
另外,通过DataGridView.NewRowIndex 可以获取新行的行序列号.在没有新行的时候,NewRowIndex = -1。
DataGridView行的用户删除操作的自定义:1)无条件的限制行删除操作。
默认时,DataGridView 是允许用户进行行的删除操作的。
如果设置DataGridView对象的AllowUserToDeleteRows属性为False 时,用户的行删除操作就被禁止了。
// 禁止DataGridView1的行删除操作。
DataGridView1.AllowUserToDeleteRows = false;但是,通过DataGridViewRowCollection.Remove 还是可以进行行的删除。
补足:如果DataGridView 绑定的是DataView 的话,通过DataView.AllowDelete 也可以控制行的删除。