jQuery alertify插件使用攻略
简述jquery的常用操作及用法
简述jquery的常用操作及用法jQuery是一种流行的JavaScript库,它极大地简化了JavaScript编程,并提供了一些强大的工具和功能,使得开发者可以更容易地处理HTML文档、处理事件、创建动画效果、处理Ajax请求等。
下面将简述jQuery的常用操作及用法。
2. 事件处理(Event Handling):jQuery可以轻松地添加和处理各种事件,如点击事件、鼠标移动事件、键盘事件等。
通过使用on(方法,可以为元素添加事件处理程序,例如:$("button").on("click",function( { alert("Clicked!") })为所有button元素添加点击事件处理程序。
3. 动画效果(Animation Effects):jQuery提供了丰富的动画效果,可以创建各种效果,如淡入淡出、滑动、展开、收缩等。
通过使用animate(方法,可以改变元素的CSS属性,从而实现动画效果,例如:$("div").animate({width: "300px"}, 1000)将div元素的宽度动画过渡到300px,持续时间为1秒。
4. Ajax请求(Ajax Requests):jQuery封装了对Ajax请求的处理,使得发送和接收数据变得简单和直观。
通过使用ajax(方法,可以发送HTTP请求并处理响应,例如:$.ajax({ url: "data.php", success: function(data) { console.log(data); } })发送一个GET请求到data.php,并在成功时打印响应数据。
5. DOM操作(DOM Manipulation):jQuery提供了许多方法来操作HTML文档的DOM元素,如添加、修改、删除元素等。
通过使用append(、html(、remove(等方法,可以方便地操作DOM元素,例如:$("ul").append("<li>New item</li>")将一个新的li元素添加到ul列表中。
jquery使用流程

jquery使用流程jQuery使用概述•jQuery是一个快速、简洁的JavaScript库•它简化了HTML的文档遍历、事件处理、动画效果等操作•本文将介绍jQuery的基本使用流程下载与引入1.打开jQuery官方网站2.在下载页面选择需要的版本,通常选择最新版本3.点击下载按钮,保存下载的jQuery文件(一般为)4.在HTML文件中引入jQuery<script src=""></script>基本语法•使用$()函数来选取一个或多个元素•可以通过id、类、元素类型等选择器来选取元素•对选取的元素进行各种操作和事件绑定•示例代码:$(document).ready(function(){ // 在这里编写jQuery代码 });常用操作•修改元素的属性与样式$("selector").attr("attribute", "value"); // 修改属性 $("selector").css("property", "value"); // 修改样式•添加、移除和切换类$("selector").addClass("class1 class2"); // 添加类 $("selector").removeClass("class1 class2"); // 移除类 $("selector").toggleClass("class1 class2");// 切换类•修改元素的内容$("selector").html("new content"); // 修改HTML内容$("selector").text("new text"); // 修改纯文本内容•隐藏与显示元素$("selector").hide(); // 隐藏元素 $("selector").show(); // 显示元素•添加事件处理函数$("selector").click(function(){ // 在这里编写事件处理逻辑 });动画效果•实现元素的淡入淡出$("selector").fadeIn(speed); // 淡入$("selector").fadeOut(speed); // 淡出•实现元素的滑动效果$("selector").slideDown(speed); // 向下滑动$("selector").slideUp(speed); // 向上滑动•实现元素的自定义动画$("selector").animate({property: value}, speed);// 自定义动画总结•jQuery是一个强大且易用的JavaScript库•通过选择器选取元素,并使用各种操作和事件绑定,可以方便地操作网页中的元素•jQuery还提供了丰富的动画效果,可以通过简单的代码实现复杂的动效以上便是jQuery的基本使用流程,希望本文对你了解和使用jQuery有所帮助。
jquery confirm的用法

jQuery Confirm 是一个基于 jQuery 的插件,它提供了一种简单而有效的方式来创建和显示确认对话框。
下面是 jQuery Confirm 的基本用法:1. 引入 jQuery 和 jQuery Confirm 插件的 JavaScript 文件:html复制代码<script src="jquery.js"></script><script src="jquery.confirm.js"></script>2. 在需要使用确认对话框的地方,调用 confirm() 方法,传入提示消息和确认按钮的文本:javascript复制代码if (!confirm('确定要删除该文件吗?')) {return false;}3. 可以使用一些可选参数来自定义确认对话框的样式和行为:javascript复制代码$.confirm({title: '提示', // 标题message: '确定要删除该文件吗?', // 提示消息buttons: {确定: {text: '确定', // 按钮文本key: 'enter', // 按下回车键触发确认按钮点击事件className: 'btn-primary', // 按钮样式类名callback: function () {// 点击确定按钮后的回调函数// 执行删除文件的操作}},取消: {text: '取消', // 按钮文本key: 'esc', // 按下Esc键触发取消按钮点击事件className: 'btn-default'// 按钮样式类名}}});以上是 jQuery Confirm 的基本用法,可以结合自己的需求进行定制化使用。
jq trigger方法
jq trigger方法jq trigger方法是什么?jq trigger方法是一种JavaScript库,用于在页面上处理DOM事件。
它允许您在页面上轻松地添加事件监听器,也可以通过触发事件来触发代码,以便在用户执行操作时执行相应的操作。
为什么要使用jq trigger方法?使用jq trigger方法可以帮助您优化和简化代码,使代码更易于维护和管理。
它还可以提高网站的性能和响应速度,因为它可以绕过浏览器默认的事件处理程序。
如何使用jq trigger方法?要使用jq trigger方法,您需要在页面上包含jQuery库,然后可以使用以下语法:$(selector).trigger(event, [data]);其中,selector是您要添加事件监听器的元素的选择器,event是您要触发的事件名称,data是您要传递给事件处理程序的可选数据。
例如,要在单击按钮时触发自定义事件,您可以使用以下代码:$("#myBtn").on("click", function() {$(this).trigger("myEvent", [1, "foo"]);});然后,您可以使用以下代码来处理此事件:$("#myBtn").on("myEvent", function(event, num, str) {alert("Number: " + num + ", String: " + str);});结论jq trigger方法是一个方便的工具,它可以帮助您更轻松地处理DOM 事件,并使您的代码更易于维护和管理。
在使用jq trigger方法时,请确保仔细阅读文档,并小心使用该方法,以避免出现意外的结果。
jquery仿alert提示框、confirm确认对话框、prompt带输入的提示框插件[。。。
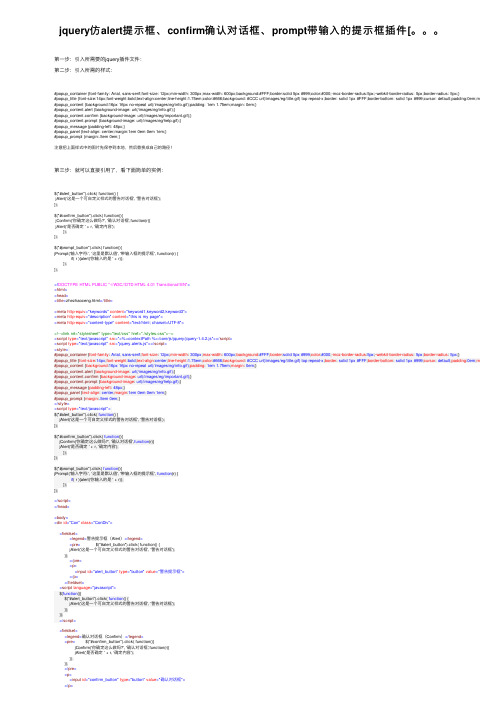
jquery仿alert提⽰框、confirm确认对话框、prompt带输⼊的提⽰框插件[。
第⼀步:引⼊所需要的jquery插件⽂件:第⼆步:引⼊所需的样式:#popup_container {font-family: Arial, sans-serif;font-size: 12px;min-width: 300px;max-width: 600px;background:#FFF;border:solid 5px #999;color:#000;-moz-border-radius:5px;-webkit-border-radius: 5px;border-radius: 5px;}#popup_title {font-size:14px;font-weight:bold;text-align:center;line-height:1.75em;color:#666;background: #CCC url(/images/eg/title.gif) top repeat-x;border: solid 1px #FFF;border-bottom: solid 1px #999;cursor: default;padding:0em;margin:0em aut #popup_content {background:16px 16px no-repeat url(/images/eg/info.gif);padding: 1em 1.75em;margin: 0em;}#popup_content.alert {background-image: url(/images/eg/info.gif);}#popup_content.confirm {background-image: url(/images/eg/important.gif);}#popup_content.prompt {background-image: url(/images/eg/help.gif);}#popup_message {padding-left: 48px;}#popup_panel {text-align: center;margin:1em 0em 0em 1em;}#popup_prompt {margin:.5em 0em;}注意把上⾯样式中的图⽚先保存到本地,然后替换成⾃⼰的路径!第三步:就可以直接引⽤了,看下⾯简单的实例:$("#alert_button").click( function() {jAlert('这是⼀个可⾃定义样式的警告对话框', '警告对话框');});$("#confirm_button").click( function(){jConfirm('你确定这么做吗?', '确认对话框',function(r){jAlert('是否确定 ' + r, '确定内容');});});$("#prompt_button").click( function(){jPrompt('输⼊字符:', '这⾥是默认值', '带输⼊框的提⽰框', function(r) {if( r ){alert('你输⼊的是 ' + r)};});});<!DOCTYPE HTML PUBLIC "-//W3C//DTD HTML 4.01 Transitional//EN"><html><head><title>zhezhaoceng.html</title><meta http-equiv="keywords" content="keyword1,keyword2,keyword3"><meta http-equiv="description" content="this is my page"><meta http-equiv="content-type" content="text/html; charset=UTF-8"><!--<link rel="stylesheet" type="text/css" href="./styles.css">--><script type="text/javascript" src="<%=contextPath %>/core/js/jquery/jquery-1.4.2.js"></script><script type="text/javascript" src="jquery.alerts.js"></script><style>#popup_container {font-family: Arial, sans-serif;font-size: 12px;min-width: 300px;max-width: 600px;background:#FFF;border:solid 5px #999;color:#000;-moz-border-radius:5px;-webkit-border-radius: 5px;border-radius: 5px;}#popup_title {font-size:14px;font-weight:bold;text-align:center;line-height:1.75em;color:#666;background: #CCC url(/images/eg/title.gif) top repeat-x;border: solid 1px #FFF;border-bottom: solid 1px #999;cursor: default;padding:0em;margin#popup_content {background:16px 16px no-repeat url(/images/eg/info.gif);padding: 1em 1.75em;margin: 0em;}#popup_content.alert {background-image: url(/images/eg/info.gif);}#popup_content.confirm {background-image: url(/images/eg/important.gif);}#popup_content.prompt {background-image: url(/images/eg/help.gif);}#popup_message {padding-left: 48px;}#popup_panel {text-align: center;margin:1em 0em 0em 1em;}#popup_prompt {margin:.5em 0em;}</style><script type="text/javascript">$("#alert_button").click( function() {jAlert('这是⼀个可⾃定义样式的警告对话框', '警告对话框');});$("#confirm_button").click( function(){jConfirm('你确定这么做吗?', '确认对话框',function(r){jAlert('是否确定 ' + r, '确定内容');});});$("#prompt_button").click( function(){jPrompt('输⼊字符:', '这⾥是默认值', '带输⼊框的提⽰框', function(r) {if( r ){alert('你输⼊的是 ' + r)};});});</script></head><body><div id="Con" class="ConDiv"><fieldset><legend>警告提⽰框(Alert)</legend><pre> $("#alert_button").click( function() {jAlert('这是⼀个可⾃定义样式的警告对话框', '警告对话框');});</pre><p><input id="alert_button" type="button" value="警告提⽰框"></p></fieldset><script language="javascript">$(function(){$("#alert_button").click( function() {jAlert('这是⼀个可⾃定义样式的警告对话框', '警告对话框');});});</script><fieldset><legend>确认对话框(Confirm)</legend><pre> $("#confirm_button").click( function(){jConfirm('你确定这么做吗?', '确认对话框',function(r){jAlert('是否确定 ' + r, '确定内容');});});</pre><p><input id="confirm_button" type="button" value="确认对话框"></p></fieldset><script language="javascript">$(function(){$("#confirm_button").click( function(){jConfirm('你确定这么做吗?', '确认对话框',function(r){jAlert('是否确定 ' + r, '确定内容');});});});</script><fieldset><legend>带输⼊的提⽰框(Prompt)</legend><pre> jPrompt('输⼊字符:', '这⾥是默认值', '带输⼊框的提⽰框', function(r) {if( r ) alert('你输⼊的是 ' + r);});</pre><p><input id="prompt_button" type="button" value="带输⼊框的提⽰框"></p></fieldset><script language="javascript">$(function(){$("#prompt_button").click( function(){jPrompt('输⼊字符:', '这⾥是默认值', '带输⼊框的提⽰框', function(r) {if( r ){alert('你输⼊的是 ' + r)};});});});</script><fieldset><legend>带HTML输出效果的对话框</legend><pre> jAlert('你可以使⽤HTML标签,⽐如<strong>加粗</strong>, <em>斜体</em>,和<u>下划线</u>!');</pre><p><input id="alert_button_with_html" type="button" value="显⽰带有HTML标签效果的弹出框"></p></fieldset><script language="javascript">$(function(){$("#alert_button_with_html").click( function(){jAlert('你可以使⽤HTML标签,⽐如 <strong>加粗</strong>, <em>斜体</em>,和 <u>下划线</u>!');});});</script></div></body></html>。
jquery中alert用法

jquery中alert用法在前端开发中,经常会用到jquery来进行DOM操作和事件处理。
其中,alert是一个常用的方法,用来弹出提示框来告知用户一些信息。
今天,我将来探讨一下jquery中alert的用法。
1. 简介在jquery中,alert是一个简单的方法,用来在页面上弹出一个提示框,显示一段文本信息。
它的用法非常简单,可以通过一行代码来实现。
2. 基本用法在jquery中,使用alert方法非常简单,只需要以下几行代码即可:```javascript$(document).ready(function(){alert("这是一个提示信息");});```以上代码中,$(document).ready()是jquery中用来在DOM加载完成后执行的方法,它确保了alert方法会在页面完全加载后执行。
而alert("这是一个提示信息")则是弹出一个提示框,显示文本"这是一个提示信息"。
3. 自定义样式除了基本的用法外,我们还可以通过一些技巧来自定义alert提示框的样式,使其更符合我们的页面风格。
可以通过CSS和一些jquery插件来实现。
4. 插件丰富性在jquery中,有很多第三方插件可以用来替代默认的alert提示框,这些插件通常具有更丰富的功能和更灵活的样式定制。
可以使用SweetAlert插件来实现更漂亮的提示框,或者使用Bootstrap框架的Modal组件来实现类似的效果。
5. 个人观点jquery中的alert方法是一个简单而实用的工具,可以帮助我们在页面上显示提示信息,提示用户一些重要的内容。
虽然它的默认样式比较简单,但通过一些技巧和插件,我们可以实现更丰富的效果,提升用户体验。
在本篇文章中,我简要介绍了jquery中alert的基本用法以及一些扩展技巧,希望能帮助大家更好地使用这个方法来提升页面功能和用户体验。
25个超棒的jQuery消息提醒插件
25个超棒的jQuery消息提醒插件jQuery的通知插件帮助您创建各种通知信息,如错误,警告和简单的通知消息。
我们选择25个最好的jQuery通知插件,使您能够为您的网站和Web应用创建各种通知消息和警报,并为访客提供更好的用户体验。
1. jQuery Toastmessagejquery-toastmessage-plugin is a JQuery plugin which provides android-like notification messages. The toasted messages arriving on the screen in a seamless and natural way.2. jQuery Notification MenuA jQuery plugin to add notification bubbles and a notification list to any menu.3. Notynoty is a jQuery plugin that makes it easy to create alert, success, error and confirmation messages as an alternative the standard alert dialog. The notifications can be positioned at the top, topCenter (like GMail), bottom, centre, top left or top right. There are lots of other options in the API to customise the text, animation, speed, buttons and much more.4. NotifyNotify! is a jQuery Notification Plugin which adds simple notifications bars that you can use on your website and application to assist users while they fill in forms, navigatethrough pages or interact with interface.5. AlertifyAlertify is an unobtrusive customizable JavaScript notification system.6. Toastrtoastr is a Javascript library for non-blocking notifications. jQuery is required. The goal is to create a simple core library that can be customized and extended.7. PnotifyPNotify is a JavaScript notification plugin, developed by SciActive. Formerly known as Pines Notify. It is designed to provide an unparalleled level of flexibility, while still being very easy to implement and use. PNotify provides desktop notifications based on the Web Notifications Draft. If desktop notifications are not available or not allowed, PNotify will fall back to displaying the notice as a regular, in-browser notice. 8. Jui_alertjui_alert is a jQuery plugin, provides simple notification with timeout and close button. jQuery UI themes compatible and with localization support.9. AmaranjsAmaran JS is a jQuery plugin to create beautiful and stylish notifications with animations.10. jBarjBar is a simple and lightweight jQuery notification bar that’s been revi sited and rewritten (18.11.2012) as an official plugin, which serves up loads of easy customisable options. The jBar allows you to create a simple call to action and bring it forward for the user to see at the top of your website.11. NotifitnotifIt is a jQuery plugin to show notifications of everything you want and when you want, simply and quickly. Easy to learn and use. Customize with your favorite colors, define the size you want, set the opacity, make a sticky one and much more!12. FreeowFreeow! is a plugin for making Growl-like alerts or message boxes on your website. You can customize the look and animation of Freeow! each time a message box appears, and you can alter other options such as whether or not to have the message box hide itself automatically.13. jNotifyjNotify is a jQuery plugin for displaying animated notifications easily and only with a single line of code. There are 3 built-in notification types: information, success and failure where each of them can be skinned via CSS14. StickySticky is a simple notification system that allows you to send such messages with ease, and class. Quickly notify a user of software updates, process completions, or annoy them with registration reminders.15. ClassyNottyjQuery ClassyNotty is a plugin that enables your application to display unobtrusive, beautiful and elegant notifications. 16. Bootstrap GrowlPretty simple jQuery plugin that turns standard Bootstrap alerts into hovering “Growl-like” notifications. It has number of features such as it uses standard Twitter Bootstrap alerts which provides ‘info’, ‘error’, and ‘success’ styles, and multiple growls called consecutively are stacked up one after another in a list.17. Notify BetterNotify Better is a jQuery plugin that let you change your favicon, browser’s title and more to reflect new notifications. 18. TitleNotifier.jsTitleNotifier.js is a lightweight, dependency-free javascript library to dynamically show the number of unread notifications in your webpage title.19. GritterGritter is a jQuery plugin for creating Growl-like notifications with ease. The notification bubbles created looks very similar to the ones in Mac OS X & they can be styled easily if wanted. 20. Notify.jsNotify.js is a jQuery plugin to provide simple yet fully customisable notifications.21. NotifymenotifyMe is a simple plugin created for fun and learning for fixed notifications in pages. He works when a button is clicked, errors, validations, info and everything you want.22. Notific 8Notific8 is a notification plug-in inspired by the notifications introduced in Windows 8 with some web ready restyling and customizations. Notific8 has built in themes and is easy to create new themes for. The plug-in was born from a want for a simply designed yet modern and stylish notification system. The plug-in is also designed to scale based on the page’s font-size setting (it was designed for the default of 100%/16px as the default). 23. KiNoticeKiNotice is a simple jquery plugin for creating beautiful notifciations for your web applications.24. iosOverlay.jsiosOverlay.js is iOS-style overlays/notifications for the web. It has been tested on IE7+, Google Chrome, Firefox, Opera, Desktop Safari, Mobile Safari — iPhone & iPad. To prevent icon flickers as they load, you have to preload image resources. Spin.js is required if you want to use a spinner object. And jQuery is required for a fallback CSS animation support.25. Sweet AlertSweet Alert is a beautiful replacement for JavaScript Alert. SweetAlert automatically centers itself on the page and looks great no matter if you’re using a desktop computer, mobile or tablet. It’s even highly customizeable.via jqueryhouse。
jq调用iframe中的某个方法
jq调用iframe中的某个方法在使用jQuery (jq)调用iframe中的方法时,可以采取以下步骤:步骤1:获取到iframe元素首先,通过jQuery选择器获取到你想要调用方法的iframe元素。
可以使用id、class或其他属性选择器来定位到iframe。
```javascriptvar iframeElement = $('#myIframe');```步骤2:获取到iframe的内容通过获取iframe的内容,可以访问到其内部的JavaScript方法。
使用contentWindow属性来获取iframe的window对象,然后使用该对象的contentDocument属性来获取iframe中的文档对象。
```javascriptvar iframeContent = iframeElement[0].contentWindow.contentDocument;```步骤3:调用iframe中的方法一旦你获取了iframe的文档对象,就可以通过普通的JavaScript语法来调用其中的方法。
```javascriptiframeContent.getElementById('myButton').click(); // 假设调用了按钮的点击事件```在上面的例子中,我们假设iframe中包含一个id为"myButton"的按钮,并使用click()方法来模拟用户点击该按钮。
需要注意的是,由于同源策略的限制,当iframe和主页面不在同一个域名下时,将无法直接调用iframe中的方法。
如果存在跨域问题,你需要在iframe和主页面之间通过postMessage方法进行通信。
完成以上步骤后,你就成功地使用jQuery调用了iframe中的特定方法。
记得根据你的实际情况修改选择器和方法名,以适应你的项目需求。
jq插件使用方法
jq插件使用方法jq是一个轻量级的命令行JSON处理工具,它可以用来处理和转换JSON数据。
jq提供了丰富的功能,使得在JSON数据中查找、过滤、修改和转换等操作变得更加简单。
安装jq插件在使用jq之前,首先需要在操作系统中安装jq。
jq可以在多个操作系统上使用,包括Linux、Mac和Windows。
在Linux上安装jq,可以使用以下命令:sudo apt-get install jq在Mac上安装jq,可以使用以下命令:brew install jqjq的基本使用jq的基本用法非常简单。
以下是一些常用的jq命令:1.选择JSON对象的属性:jq '.属性名' 文件名例如,假设有一个名为data.json的文件,其中包含以下JSON数据:"name": "Alice","age": 25,要选择name属性,可以使用以下命令:jq '.name' data.json运行上述命令后,jq会输出"name"属性的值:"Alice"。
2.过滤JSON数组:jq '.数组名[]' 文件名例如,假设有一个名为data.json的文件,其中包含以下JSON数据:"users":"name": "Alice","age": 25,},"name": "Bob","age": 30,}要选择users数组中的所有元素,可以使用以下命令:jq '.users[]' data.json运行上述命令后,jq会输出users数组中的所有元素。
3.过滤JSON对象:jq '.对象名, .属性名' 文件名例如,假设有一个名为data.json的文件,其中包含以下JSON数据:"person":"name": "Alice","age": 25,}要选择person对象的name属性,可以使用以下命令:jq '.person , .name' data.json运行上述命令后,jq会输出person对象的name属性的值:"Alice"。
JQuery的Alert消息框插件使用介绍
JQuery的Alert消息框插件使⽤介绍下载JS⽂件引⽤到page中,如下代码:复制代码代码如下:<!-- Dependencies --><script src="/path/to/jquery.js" type="text/javascript"></script><script src="/path/to/jquery.ui.draggable.js" type="text/javascript"></script><!-- Core files --><script src="/path/to/jquery.alerts.js" type="text/javascript"></script><link href="/path/to/jquery.alerts.css" rel="stylesheet" type="text/css" media="screen" />注意其中draggable是⽤来实现拖拉的,如不需要这个功能不就不⽤引⽤。
在⽬前最近的Jquery1.42下应⽤引⽤:复制代码代码如下:<script src="Scripts/jquery-1.4.2.min.js" type="text/javascript"></script><script src="Scripts/jquery-ui-1.8.5.custom.min.js" type="text/javascript"></script><script src="Scripts/jquery.alerts.js" type="text/javascript"></script><link href="Content/Style/jquery.alerts.css" rel="stylesheet" type="text/css" />主要⽅法有:jAlert(message, [title, callback]) 创建⼀个alertjConfirm(message, [title, callback]) 创建⼀个确认allert,⽀持callbackjPrompt(message, [value, title, callback]) 创建⼀个提⽰框让⽤户输⼊值,⽀持callback如果你有提供可以参下⾯的⽰例Code:复制代码代码如下:<%@ Page Language="C#" AutoEventWireup="true" CodeBehind="Defualt.aspx.cs" Inherits="WebApplication6.Defualt" %><!DOCTYPE html PUBLIC "-//W3C//DTD XHTML 1.0 Transitional//EN" "/TR/xhtml1/DTD/xhtml1-transitional.dtd"><html xmlns="/1999/xhtml"><head id="Head1" runat="server"><title></title><script src="Scripts/jquery-1.4.2.min.js" type="text/javascript"></script><script src="Scripts/jquery-ui-1.8.5.custom.min.js" type="text/javascript"></script><script src="Scripts/jquery.alerts.js" type="text/javascript"></script><link href="Content/Style/jquery.alerts.css" rel="stylesheet" type="text/css" /><script type="text/javascript">$(document).ready(function () {$("#btnAlert").click(function (){ jAlert('Pushed the alert button', 'Alert Dialog'); });$("#btnPrompt").click(function () {jPrompt('Type some value:', '', 'Prompt Dialog', function (typedValue) {if (typedValue) {jAlert('You typed the following ' + typedValue);}});});});</script></head><body><form id="form1" runat="server"><div><input type="button" value="Alert Me" id="btnAlert" /><input type="button" value="Prompt Me" id="btnPrompt" /></div></form></body></html>最后alert效果图:打包下载地址https:///jiaoben/32367.html。
- 1、下载文档前请自行甄别文档内容的完整性,平台不提供额外的编辑、内容补充、找答案等附加服务。
- 2、"仅部分预览"的文档,不可在线预览部分如存在完整性等问题,可反馈申请退款(可完整预览的文档不适用该条件!)。
- 3、如文档侵犯您的权益,请联系客服反馈,我们会尽快为您处理(人工客服工作时间:9:00-18:30)。
jQuery alertify插件使用攻略
1.alertify插件功能
主要实现提示功能,用于代替js中的alert,confirm,prompt,显示友好的提示框
2.alertify官方地址
http://fabien-d.github.io/alertify.js/
官方已经对alertify进行了详细的说明,也提供了在线显示
3.alertify使用方法
1.使用的文件
主要使用三个文件,两个css(alertify.core.css,alertify.default.css),用于设置提示框的样式。
一个js(alertify.min.js或alertify.js),用于实现提示框的功能。
2.实现提示框代码
alertify使用非常简单,主要步骤为:初始化(初始化alertify)-》绑定(绑定事件)
如实现简单的提示框、确认框和提示框
var
$ = function (id) {
return document.getElementById(id);
},
//初始化操作
reset = function () {
alertify.set({
labels : {
ok : "确认",
cancel : "取消"
},
delay : 5000,
buttonReverse : false,
buttonFocus : "ok"
});
};
//绑定
$("alert").onclick = function () {
reset();
alertify.alert("提示框");
return false;
};
//绑定
$("confirm").onclick = function () {
reset();
alertify.confirm("确认框", function (e) {
if (e) {
alertify.success("点击确认");
} else {
alertify.error("点击取消");
}
});
return false;
};
//绑定
$("prompt").onclick = function () {
reset();
alertify.prompt("提示输入框", function (e, str) {
if (e) {
alertify.success("点击确认,输入内容为: " + str);
} else {
alertify.error("点击取消");
}
}, "默认值");
return false;
};
显示结果(输入提示框):
4.alertify修改样式
主要是修改两个css文件(alertify.core.css,alertify.default.css),也可以覆盖使用。
如在页面中加入
.alertify{
width:350px;
margin-left: -205px;
border:2px solid#4ba9e6;
background:#f3faff;
border-radius:0;
}
修改后显示结果:
alertify使用说明
alertify是由html5+css3开发的插件,所以完美的支持html5+css3的浏览器。
在测试过程过,alertify在chrome与火狐浏览器中显示效果是完美的,但是在ie8一下,显示效果有所不同,如圆角框、阴影、动画特效等不会显示。
演示地址:/wp-content/uploads/2013/09/alertify.html。