MY DAQ产品
MYD-Y6ULX产品数据手册说明书

MYD-Y6ULX 产品数据手册版本V1.02017.10.20版本记录版本号说明时间V1.0初始版本2017.10.20目录目录 (3)第1章概述 (5)第2章硬件参数 (8)2.1核心板硬件资源 (8)2.2底板硬件资源 (8)第3章接口说明 (11)3.1核心板接口说明 (11)3.1底板接口说明 (11)第4章硬件设计 (14)4.1核心板硬件电路设计 (14)4.2底板硬件电路设计 (14)4.2.1电源 (14)4.2.2启动位配置开关 (15)4.2.3以太网 (16)4.2.4USB (17)4.2.5LTE模块 (19)4.2.6Audio (20)4.2.7WIFI (21)4.2.8Camera (22)4.2.9LCD (23)4.2.10UART (24)4.2.11CAN (25)4.2.12RTC备份电池 (26)4.2.13Micro SD (27)4.2.14Key and LED (27)4.2.15扩展接口 (28)第5章电气参数 (30)5.1工作温度 (30)5.2GPIO直流特性 (30)5.3电源直流特性 (30)第6章机械参数 (32)附录一联系方式 (34)附录二售后服务与技术支持 (35)第1章概述MYD-Y6ULX是米尔科技推出的基于NXP公司i.MX6UL/6ULL系列处理器的嵌入式开发板。
i.MX6UL是一个高功效、高性价比的应用处理器系列,采用单个ARM Cortex-A7内核,运行速度高达696MHz。
i.MX6ULL在i.MX6UL的基础上精简了安全加密部分,但主频最高可达900MHz,更具性价比。
i.MX6UL/6ULL系列的处理器提供多种存储器接口,其中包括16位LPDDR2、DDR3、DDR3L、NAND Flash、NOR Flash、eMMC、Quad SPI 和各种其他接口,用于连接外围设备。
MYD-Y6ULX开发板集成了4G模块接口,WIFI模块,LCD接口,摄像头接口,双网口等众多外设接口,为工业/物联网网关(IOT Gateway)、DTU、HMI人机接口等应用提供了完善的开发资源。
PCI-1713使用手册

PCI-1713快速安装使用手册PCI-1713快速安装使用手册 (1)第一章 产品介绍 (2)1.1 概述 (2)1.1.1灵活的输入类型及范围 (2)1.1.2 高速数据采集 (2)1.1.3 支持软件,内部定时器及外部定时器触发 (2)1.1.4 满足隔离保护的要求 (2)1.2 特点 (2)1.3 规格 (3)1.4 一般特性 (3)第二章 安装与测试 (4)2.1 初始检查 (4)2.2 Windows2K/XP/9X下板卡的安装 (4)2.2.1 软件的安装: (4)2.2.2 硬件的安装: (6)2.3 测试 (11)2.3.1 模拟输入功能测试 (11)第三章 信号连接 (12)3.1 模拟信号输入连接: (13)3.1.1 单端模拟输入连接 (13)3.1.2 差分式模拟输入连接 (14)3.2 外部触发源连接 (15)第四章 例程使用详解 (15)4.1板卡支持例程列表4.2 常用例子使用说明 (16)4.2.1 ADSOFT/ADTRIG(软件触发方式例程) (16)4.2.2 ADint(中断方式进行数据采集的例程) (17)4.2.3 MADint(多通道中断采集例程) (18)4.2.4 AIEXP(使用扩展板进行模拟量输入的例程): (20)第五章 遇到问题,如何解决? (18)第一章产品介绍1.1 概述PCI-1713是一款PCI总线的隔离高速模拟量输入卡。
它提供了32个模拟量输入通道,采样频率可达100KS/s、12位分辨率及2500V(DC)的直流隔离保护。
1.1.1灵活的输入类型及范围PCI-1713有一个自动通道/增益扫描电路。
在采样时,这个电路可以自己完成对多路选通开关的控制。
卡上的SRAM存储了每个通道不同的增益值及配置。
这种设计能让您对不同通道使用不同的增益,并采用单端和差分输入的不同组合方式来完成多通道采样。
1.1.2 高速数据采集PCI-1713的采样速率可达100KS/s。
MyClaims Manager 产品说明书

Using the Claims Detail PageThis flyer explains the available details when viewing each of your claims.1This section provides high-level information for the claim you have selected.2The “Explanation of Benefits” link providesa detailed explanation of how a claim wasprocessed based on your health care benefits.3The “Manage Claim” section provides features to help you track and manage your claim. Youcan identify claims to watch or follow-up on,mark claims already paid and add personalizednotes.4The “At a Glance” section provides visual information to help you understand how theclaim was processed, how much your plan paidand how much you owe. By selecting the link,“View Account Balances,” you can easily view the status of your deductible, out-of-pocketinformation and financial accounts (if applicable). 5Use this color key as a guide to the information displayed in the pie chart.6The “Y our Responsibility” section helps you understand the amount you may owe yourprovider, taking into consideration any financialaccount deductions (if applicable) as well asany payments you have made via this website.Please note this section may vary depending onyour plan type. You will only see “Paid Online” ifpayments have been made from this website or theUnitedHealthcare Health4Me TM mobile app.7The “Make Payment” button allows subscribers to pay their health care provider online for anyclaim that has an out-of-pocket responsibility.You will be redirected to a website hosted byInstaMed® to enter your payment informationsecurely and confidentially. This feature is notavailable for all plans.Continued12356478The “Detailed Costs” table provides additional information about the claim, identifying health care services received along with information to help you understand how the claim was processed, such as amount billed and plan discounts. 9Click the question marks ?to view additionalhelpful information.10 The “Show More Detail” link will displaya longer description of the health care service along with claim processing notes. Clicking again collapses it back to the short description.11 This section shows payments made to eithera health care provider or to you by your plan. Subscribers can also choose to make payments to their health care providers here using the “Make Payment” button. Please note this section may vary depending on your plan type. You will onlysee “Paid Online” if payments have been made from this website or the Health4Me mobile app.12 The “Claim History” section shows the datesand status of activities related to processing your claim.13 The “Claim Notes” section shows additionalinformation to explain how your claim was processed.14 The “Paid Online” section will showinformation about payments you have made through this website or the UnitedHealthcare Health4Me mobile app. Click on the “Details” link to view the details of the payment you made. This will redirect you to the InstaMed payment site where your information is securely and confidentially maintained. You will only see the “Paid Online” information if payments have been made from this website or the Health4Me mobile app.Insurance coverage provided by or through UnitedHealthcare Insurance Company or its affiliates. Administrative services provided by United HealthCareServices, Inc. or their affiliates. 4/13 © 2013 United HealthCare Services, Inc. All trademarks are the property of their respective owners.141213891011Claims Detail overview continued。
daq6510英文手册

daq6510英文手册
英文手册:DAQ6510用户手册
即将介绍的是DAQ6510的英文用户手册。
由于篇幅原因,以下只是手册的简要概述。
具体的内容和细节请参阅DAQ6510用户手册。
一、简介
1.1 DAQ6510产品概述
1.2 DAQ6510的特性和优势
1.3 DAQ6510的规格
二、入门指南
2.1 快速设置:第一次使用DAQ6510
2.2 DAQ6510的前面板和连接器
2.3 DAQ6510的后面板和连接器
2.4 DAQ6510的操作界面和按键说明
2.5 DAQ6510的电源和通信接口
三、使用说明
3.1 仪器的操作模式
3.2 仪器的基本设置和配置
3.3 仪器的测量功能和参数设置
3.4 仪器的数据存储和导出
3.5 仪器的自动化控制和编程
3.6 仪器的校准和维护
四、高级功能
4.1 通道扫描和测量配置
4.2 仪器的远程控制和通信设置
4.3 仪器的扩展模块和接口
4.4 仪器的报警和事件处理
4.5 仪器的数据分析和处理
五、故障排除和常见问题解答
5.1 常见故障排除方法和技巧
5.2 常见问题解答
六、附录
6.1 附录A:DAQ6510的规格和性能指标
6.2 附录B:DAQ6510的快速参考指南
6.3 附录C:DAQ6510的错误代码和解决方案
6.4 附录D:DAQ6510的常用术语和定义
以上是DAQ6510英文用户手册的简要概述。
希望本手册对您使用和了解DAQ6510有所帮助。
如需详细内容,请参阅DAQ6510英文用户手册。
达芬奇DAQNavi SDK软件开发包说明书
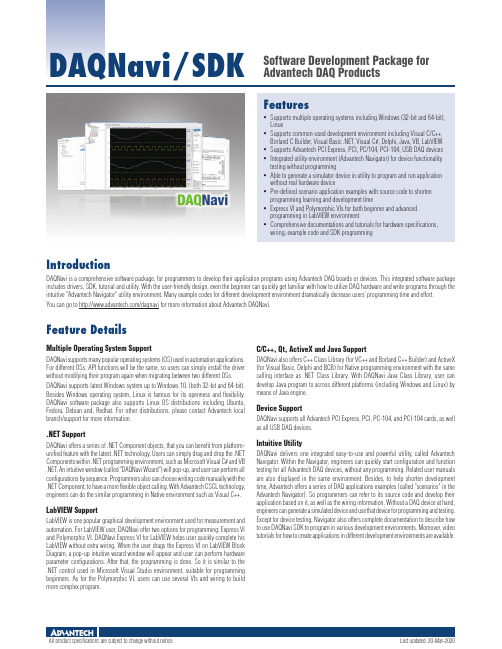
FeaturesDAQNavi/SDKSoftware Development Package for Advantech DAQ Products IntroductionDAQNavi is a comprehensive software package, for programmers to develop their application programs using Advantech DAQ boards or devices. This integrated software package includes drivers, SDK, tutorial and utility. With the user-friendly design, even the beginner can quickly get familiar with how to utilize DAQ hardware and write programs through the intuitive "Advantech Navigator" utility environment. Many example codes for different development environment dramatically decrease users’ programming time and effort. You can go to /daqnavi for more information about Advantech DAQNavi.Feature DetailsMultiple Operating System SupportDAQNavi supports many popular operating systems (OS) used in automation applications. For different OSs, API functions will be the same, so users can simply install the driver without modifying their program again when migrating between two different OSs. DAQNavi supports latest Windows system up to Windows 10. (both 32-bit and 64-bit). Besides Windows operating system, Linux is famous for its openness and flexibility. DAQNavi software package also supports Linux OS distributions including Ubuntu, Fedora, Debian and, Redhat. For other distributions, please contact Advantech local branch/support for more information..NET SupportDAQNavi offers a series of .NET Component objects, that you can benefit from platform-unified feature with the latest .NET technology. Users can simply drag and drop the .NET Components within .NET programming environment, such as Microsoft Visual C# and VB .NET. An intuitive window (called "DAQNavi Wizard") will pop-up, and user can perform all configurations by sequence. Programmers also can choose writing code manually with the .NET Component, to have a more flexible object calling. With Advantech CSCL technology, engineers can do the similar programming in Native environment such as Visual C++.LabVIEW SupportLabVIEW is one popular graphical development environment used for measurement and automation. For LabVIEW user, DAQNavi offer two options for programming: Express VI and Polymorphic VI. DAQNavi Express VI for LabVIEW helps user quickly complete his LabVIEW without extra wiring. When the user drags the Express VI on LabVIEW Block Diagram, a pop-up intuitive wizard window will appear and user can perform hardware parameter configurations. After that, the programming is done. So it is similar to the .NET control used in Microsoft Visual Studio environment, suitable for programming beginners. As for the Polymorphic VI, users can use several VIs and wiring to build more complex program.C/C++, Qt, ActiveX and Java SupportDAQNavi also offers C++ Class Library (for VC++ and Borland C++ Builder) and ActiveX (for Visual Basic, Delphi and BCB) for Native programming environment with the same calling interface as .NET Class Library. With DAQNavi Java Class Library, user can develop Java program to across different platforms (including Windows and Linux) by means of Java engine.Device SupportDAQNavi supports all Advantech PCI Express, PCI, PC-104, and PCI-104 cards, as well as all USB DAQ devices.Intuitive UtilityDAQNavi delivers one integrated easy-to-use and powerful utility, called Advantech Navigator. Within the Navigator, engineers can quickly start configuration and function testing for all Advantech DAQ devices, without any programming. Related user manuals are also displayed in the same environment. Besides, to help shorten development time, Advantech offers a series of DAQ applications examples (called "scenarios" in the Advantech Navigator). So programmers can refer to its source code and develop their application based on it, as well as the wiring information. Without a DAQ device at hand, engineers can generate a simulated device and use that device for programming and testing. Except for device testing, Navigator also offers complete documentation to describe how to use DAQNavi SDK to program in various development environments. Moreover, video tutorials for how to create applications in different development environments are available.Supports multiple operating systems including Windows (32-bit and 64-bit), LinuxSupports common-used development environment including Visual C/C++, Borland C Builder, Visual Basic .NET, Visual C#, Delphi, Java, VB, LabVIEW Supports Advantech PCI Express, PCI, PC/104, PCI-104, USB DAQ devices Integrated utility environment (Advantech Navigator) for device functionality testing without programmingAble to generate a simulator device in utility to program and run application without real hardware devicePre-defined scenario application examples with source code to shorten programming learning and development timeExpress VI and Polymorphic VIs for both beginner and advanced programming in LabVIEW environmentComprehensive documentations and tutorials for hardware specifications,wiring, example code and SDK programmingAll product specifications are subject to change without st updated: 20-Mar-2020。
MAXQDA 2022 入门指南 (简体中文)说明书

入门指南Free Guide简体中文 Chinese SimplifiedMAXQDA 2022 入门指南简体中文技术支持与销售:VERBI软件. 德国(柏林)社会研究咨询有限责任公司./china版权所有·侵权必究MAXQDA is a registered trademark of VERBI Software. Consult. Sozialforschung. GmbH,Berlin/Germany; Mac is a registered trademark of Apple Computer, Inc. in the United States and/or other countries; Microsoft Windows, Word, Excel, and PowerPoint are registered trademarks of Microsoft Corporation in the United States and/or other countries; SPSS is a registered trademark of IBM Corporation in the United States and/or other countries; Stata is a registered trademark of Stata Corp LLC. in the United States and/or other countries.All other trademarks or registered trademarks are the property of their respective owners, and may be registered in the United States and/or other jurisdictions.© VERBI软件. 德国(柏林)社会研究咨询有限责任公司. 2022目录 5目录目录 (5)引言 (7)MAXQDA概述 (8)项目启动 (8)用户界面 (9)有关数据存储和保存的几条说明 (11)重要概念 (12)数据输入和探索 (13)数据输入 (13)数据探索 (14)数据搜索 (17)颜色编码和备忘录 (18)数据编码 (20)数据片段编码 (20)数据分析 (23)文件激活 (23)检索使用相同代码编码的文件片段 (24)可视化的使用 (25)6混合方法分析的实施 (26)定义文件变量 (26)变量值的输入 (27)将代码频率转化为变量 (28)文件变量在分析中的使用 (29)推荐文献 (30)结束语 (31)引言7引言欢迎使用MAXQDA入门指南!鉴于当下几乎无人喜欢阅读冗长的介绍性文本或使用手册,我们努力为您提供一份尽可能精短的指南。
MyDAQ简易使用说明
目录目录 (1)一、模拟I/O (2)1.1使用DAQ助手实现模拟数据采集 (2)1.2使用NI-DAQmx API进行模拟数据采集 (6)1.3 使用DAQmx API进行单点模拟量输出 (8)二、数字I/O (9)2.1 数字输出 (9)2.2 数字输入 (10)三、计数器计数 (11)3.1使用DAQ助手进行计数 (11)3.2 使用NI-DAQmx API进行计数 (13)NI myDAQ是NI针对高校教学的多功能虚拟仪器实验平台,其功能中包含了数据采集。
对于数据采集相关的功能而言(模拟信号输入、模拟信号生成、数字信号输入与输出、计数器相关的输入与输出),其开发方式与其他NI数据采集设备完全相同。
一、模拟I/O模拟量的I/O操作有两种方式:DAQ助手或者NI-DAQmx API。
其中DAQ 助手使用简单,而NI-DAQmx API则更加灵活,在实际使用中,需要同学们自己取舍,选择最有利的数据操作方式。
1.1使用DAQ助手实现模拟数据采集硬件连线:AI0+接对象的模量输出,AI0-接对象的GND。
1. 打开LabVIEW, 新建一个VI。
2. 在函数选板中找到“DAQ助手”并将其放置在程序框图中。
随后将自动弹出“新建Express 任务…”窗口:点击采集信号→模拟输入→电压,然后点击Dev1左侧的“+”标志,选择通道ai0,然后点击“完成”。
(注: 如需选择多条通道同时进行采集,只需按住键盘的Shift键再选择通道即可) 。
3. 在弹出的“DAQ助手”配置相关参数,其中接线端配置选择为差分,采集模式为连续采样,待读取采样为100,采样率为1K。
4. 点击“运行”按钮,你将在对话框的波形窗口中查看到相应的正弦波波形,如下图所示:5. 点击“停止”,然后点击“确定”关闭窗口,返回到LabVIEW程序框图中。
LabVIEW自动创建用于测量任务的代码。
在弹出对话框中点击Yes,自动创建While循环。
浙江美达科技有限公司 产品说明书
Step 28. Select Latch Type SubmenuPress d to display flashing DSBL / ENBL .If flashing DSBL is displayed, press a , if ENBL is displayed, press b until DSBL is displayed, then press d to store and go to the next menu item.Step 29. Select the Above Type of Active Submenu Press d . If flashing ABoV Above is displayed, press a ,otherwise press b until ABoV is displayed. Press d to store and advance to next menu item.Step 30. Select the Deadband Value Submenu Press d . The display will show 020.0, otherwisepress b or c.Press d to store and advance to next menu item.Step 31. Enter the Alarm 2 MenuThe display will show ALR2the top menu for Alarm 2.Repeat steps from 29 and 30 to set for Alarm 2 the same conditions as for Alarm 1.Step 32. Configuration of Display Color Selection Press a until the COLR Display Color Selection Menu appears on the Display. Configure COLR as N.CLR / GRN (green), 1.CLR / RED (red), 2.CLR / AMBR (amber). Please refer to the operator’s manual if needed.Step 33. Run a TestPress a until reset the controller and return to RUN Mode to display 075.0(Ambient Temperature). Now you are ready to observe temperature as it rises 10°F higher than displayed. Touch the tip of the Thermocouple to raise the temperature above the Alarm 2 value 082.0, and AL2 will turn on, and Display Color will change from Green toAmber. Continue touching the tip to raise the temperature above the Alarm 1 value 087.0and Display Color will change from Amber to Red.USAStep 10. Enter to the Thermocouple Input Submenu Press d to store Thermocouple Input. The display will stop flashing and show the top menu for Thermocouple types. If you press a controller will step to next menu item (Skip to Step 14).Step 11. Enter to the Thermocouple Type Input Submenu Press d to display flashing, previously selected Thermocouple type.Step 12. Scroll through available selection of TC types Press b to sequence thru flashing Thermocouple types,(select k -for type "K" CHROMEGA ®/ALOMEGA ®)J K T E N DIN J R S B C - TC types J k t E N dN J R S b C - DisplayStep 13. Store TC typeAfter you have selected the Thermocouple type press d to store your selection, the instrument automatically advances to the next menu item.Step 14. Enter to Reading Configuration MenuThe display shows RDG Reading Configuration, which is the top menu for 4 submenus: Decimal Point, Degree Units,Filter Constant and Input/Reading Submenus.Step 15. Enter to Decimal Point Submenu Press d to show DEC Decimal Point.Step 16. Display the Decimal Point positionPress d again to display the flashing Decimal Point position.Step 17. Select the Decimal Point position Press b to select FFF.F Decimal Point position.Step 18. Store selected Decimal Point positionBy pressing d momentarily the Decimal Point position will be stored and the instrument will go to the next menu item.Step 19. Enter to Temperature Unit Submenu Display shows TEMP Temperature Unit.Step 20. Display available Temperature Units Press d to display the flashing Degree °F or °C .Step 21. Scroll through Temperature Units selection Press b to select °F Degree.Step 22. Store the Temperature UnitPress d to display momentarily that the Degree Unit has been stored and the instrument will go automatically to the next menu item.Step 23. Enter the Filter Constant Submenu Display shows FLTR Filter Constant Submenu.Step 24. Display the Filter Constant Value Submenu Press d to display the flashing, previously selected Filter Constant.Step 25. Scroll through available Filter Constants Press b to sequence thru Filter Constants 0001, 0002,0004, 0008, 0016, 0032, 0064and 0128.Step 26. Store the Filter ConstantPress d momentarily to store 0004Filter Constant and the instrument will automatically go to the next menu item.Step 27. Enter Alarm 1 MenuPress a until the ALR1Alarm 1 Menu appears on the Display. In the following steps we are going to Disable Latch, Active Above, Deadband 020.0, and above Setpoint 1 Value will activate Alarm 1.SPECIFICATIONAccuracy:+0.5°C temp;0.03% rdg. process typical Resolution:1°/0.1°; 10 µV process Temperature Stability:0.04°C/°C RTD;0.05°C/°C TC @ 25°C (77°F); 50 ppm/°C process Display:4-digits, 9-segments LED,10.2 mm (0.40") with red, green and amber programmable colors Input Types:Thermocouple, RTD, Analog Voltage and Current TC:(ITS90)J, K, T, E, R, S, B, C, N, L RTD:(ITS68)100/500/1000 ohm Pt sensor 2-wire, 3-wire, or 4-wire; 0.00385 or 0.00392 curve Voltage:0 to 100 mV, 0 to 1 V, 0 to 10 Vdc Current:0 to 20 mA (4 to 20 mA)Output 1†:Relay 250 Vac @ 3 A Resistive Load,SSR, Pulse, Analog Voltage and Current Output 2†:Relay 250 Vac @ 3 A Resistive Load,SSR, Pulse †Only for AlarmsOptions:Communication:RS-232 / RS-422 / RS-485 or Excitation:24 Vdc @ 25 mAExc. not available for Low Power OptionLine Voltage/Power:90 - 240 Vac ±10%,50 - 400 Hz*, or 110 - 375 Vdc, 4 W* No CE compliance above 60 HzLow Voltage Power Option:12 - 36 Vdc, 3 W****Units can be powered safely with 24 Vac but No Certification for CE/UL are claimed.Dimensions:25.4 H x 48 W x 126.3 D mm (1.0 x 1.89 x 5")Weight:127 g (0.28 lb)Approvals:CE per EN 61010-1:2001MQS3847/0905It is the policy of OMEGA to comply with all worldwide safety and EMC/EMI regulations that apply.OEMGA is constantly pursuing certification of its products to the European New Approach Directives.OMEGA will add the CE mark to every appropriate device upon certification.The information contained in this document is believed to be correct, but OMEGA Engineering,Inc.accepts no liability for any errors it contains, and reserves the right to alter specifications without notice.TRADEMARK NOTICE:®,®,, and®are Trademarks ofOMEGA ENGINEERING, INC.®This Quick Start Reference provides informationon setting up your instrument for basic operation.The latest complete Communication and OperationalManual as well as free Software and ActiveX Controlsare available at /specs/iseries or onthe CD-ROM enclosed with your shipment. SAFETY CONSIDERATIONThe instrument is a panel mount device protected in accordance with EN 61010-1:2001, electrical safety requirements for electrical equipment for measurement, control and laboratory. Remember that the unit has no power-on switch. Building installation should include a switch or circuit-breaker that must be compliant to IEC 947-1 and 947-3. SAFETY:•Do not exceed voltage rating on the label located onthe top of the instrument housing.•Always disconnect power before changing signal andpower connections.•Do not use this instrument on a work bench withoutits case for safety reasons.•Do not operate this instrument in flammable orexplosive atmospheres.•Do not expose this instrument to rain or moisture. EMC:•Whenever EMC is an issue, always use shielded cables.•Never run signal and power wires in the same conduit.•Use signal wire connections with twisted-pair cables.•Install Ferrite Bead(s) on signal wire close to theinstrument if EMC problems persist.Panel Mounting Instruction:ing the dimensions from the panel cutout diagramshown above, cut an opening in the panel.2.Insert the unit into the opening from the front of thepanel, so the gasket seals between the bezel and thefront of the panel.3.Slide the retainer over the rear of the case and tightenagainst the backside of the mounting panel.。
ICP DAS I-7045D 16 Ch DO DAQ Module 快速入门指南说明书
I-7045D16 Channel Digital Output Data AcquisitionModuleQuick Start GuideProduct Website:https:///i_7045_d.html/dcon_utility_pro.html1. IntroductionI-7045D is intelligently designed to provide signal conditioning system monitoring and safe value settings. I-7045 is a cost-effective solution for a wide range of valuable industrial control signals and systems. The DCON utility can help users to configure and test I-7045 16-Channel Isolated Digital Output modules. Plenty of library functions and demo programs are provided to let users develop programs easily under Windows, Linux and DOS operating systems. Users may mount the modules on a DIN rail, panel or wall. Modules have a screw-terminal block to connect to the signals.2. Terminal AssignmentI-7045D 16 Ch DO DAQ Module- QuickStart (May/2017)3. Block/ Wiring DiagramI-7045D 16 Ch DO DAQ Module- QuickStart (May/2017)4. Default SettingsDefault settings for the I-7045D DIO modules are as follows:。
论如何开展虚拟仪器技术的课程教学
论如何开展虚拟仪器技术的课程教学发布时间:2023-01-11T02:43:36.425Z 来源:《教学与研究》2022年16期9月作者:于广艳[导读] 虚拟仪器技术的概念由美国NI(National Instru‐ments)公司所独创,于广艳哈尔滨石油学院信息工程学院黑龙江省哈尔滨市 150027摘要:虚拟仪器技术的概念由美国NI(National Instru‐ments)公司所独创,明确提出了“软件就是仪器”的设计理念,并在1986年推出了一款图形化编程软件LabVIEW。
NI开放的图形化软件和模块化硬件,帮助工程师革命性地改变了整个产品的设计周期中的工作方式。
随着LabVIEW的日益发达,其使用范畴也早已经涵盖了工业自动化、监测计量、图像处理、嵌入式应用、运动控制技术、计算机模拟仿真等领域,并已经成为众多院校、企业和研究所科学研发的重要手段。
关键词:虚拟仪器;课程;教学1 虚拟仪器课程的定位虚拟仪器是仪器类专业必修的专业拓展课,其是电工电子测量技术发展的重要趋势,在传统仪器的基础上,将传统仪器硬件与最新计算机软件技术充分结合,在智能化程度、处理能力、性能价格比、可操作性等方面具有明显的技术优势。
在虚拟仪器课程开设时的课程最初定位是通过本课程的学习,使得学生初步建立虚拟仪器的概念,学习并掌握图形编程开发环境LabVIEW,基于虚拟仪器技术的仪器系统开发设计方法。
通过上机编程,使学生掌握以LabVIEW为平台的测试、测量及实验系统的开发方法和编程技巧。
但是这种课程定位以软件使用以及软件编程为重点,对于数据采集系统的概念以及搭建方式强调不足,会造成虚拟仪器课程以LabVIEW软件应用为主题,以软件界面设计为关键,对于工科学生的软硬件协同创新关注不足。
因此建议虚拟课程定位应以市场需求以及市场应用为导向,如波音公司开发噪声测量与定位系统,使用定相的麦克风阵列分布在飞机跑道上用来测试机身飞过时的噪声源定位,DELTA公司基于NI PXI台,实现了风力涡轮机的噪声测量系统,Microsoft借助NI LabVIEW和PXI模块化仪器,开发针对Xbox 360控制器的生产测试系统,目前虚拟仪器的应用已经广泛涉及消费电子、航空航天、汽车、通讯、半导体、医药等领域。
- 1、下载文档前请自行甄别文档内容的完整性,平台不提供额外的编辑、内容补充、找答案等附加服务。
- 2、"仅部分预览"的文档,不可在线预览部分如存在完整性等问题,可反馈申请退款(可完整预览的文档不适用该条件!)。
- 3、如文档侵犯您的权益,请联系客服反馈,我们会尽快为您处理(人工客服工作时间:9:00-18:30)。
0
–0.2
200
180
160
140
120
100
80
60
40
䟽ṭ⦽(kHz)
输入 FIFO 容量 ............................................ 4095 个采样,供所有通道使用
模拟输入的最大工作电压 (信号 + 共模)............................................. ±10.5 V,对 AGND
产品规范
NI myDAQ
模拟输入
通道数量........................................................2 个差分输入或 1 个立体声音频输入 ADC 精度 ......................................................16 位 最大采样率 ....................................................200 kS/s 定时精度........................................................100 ppm,采样率 定时分辨率 ....................................................10 ns
最大值 (18 ~ 28 °C) (mV) 42.8 8.8
转换速率 ....................................................... 4 V/μs 定时精度 ....................................................... 100 ppm,采样率 定时分辨率 ................................................... 10 ns 过驱保护 ....................................................... ±16 V,对 AGND 最大上电电压1 .............................................. ±110 mV 输出 FIFO 容量 ............................................ 8191 个采样,供所有通道使用
数字 I/O
数字通道数量 ............................................... 8; DIO <0..7> 方向控制 ....................................................... 各通道可通过编程任意配置为输入或输出 更新模式 ....................................................... 软件定时 下拉电阻 ....................................................... 75 kΩ 逻辑电平 ....................................................... 5 V 兼容 LVTTL 输入; 3.3 V LVTTL 输出 VIH 最小值 .................................................... 2.0 V VIL 最大值 .................................................... 0.8 V 通道最大输出电流2 ...................................... 4 mA
1 电源、模拟输出和数字输出的总功率限制为 500 mW (常规值) /100 mW (最小值)。关于计算系统组件总功 耗的详细信息,见计算功耗。
NI myDAQ 产品规范 | © National Instruments | 3
绝对精度
额定量程
正全量程 10
负全量程 -10
2
-2
23 °C 时常规值 (mV) 19.6 5.4
注意 请勿使用设备测量属于 Measurement Categories II、III 或 IV 的信号或 电路。关于 Measurement Categories 的详细信息,见安全电压。
设备关闭 AI+ 或 AI- 至 AGND.....................5 kΩ AI+ 至 AI- ......................................10 kΩ
抗混叠滤波器 ................................................ 无 过压保护 AI+ 或 AI- 对 AGND....................±16 V 过压保护 (音频左 / 右输入)..................... 无
CTR 0 SOURCE ....................................PFI 0 经由 DIO 0 CTR 0 GATE .........................................PFI 1 经由 DIO 1 CTR 0 AUX ...........................................PFI 2 经由 DIO 2 CTR 0 OUT ...........................................PFI 3 经由 DIO 3 FREQ OUT ............................................PFI 4 经由 DIO 4 数据传输........................................................ 编程 I/O 更新模式........................................................ 软件定时
绝对精度
额定量程
正全量程 负全量程
10
-10
2
-2
23 °C 时常规值 (mV) 22.8 4.9
最大值 (18 ~ 28 °C) (mV) 38.9 8.6
图 1. 稳定时间 (10 V 量程) vs. 差分源阻抗
どᇐ䈥ᐤ(%)
4
3.75
2 kΩ
3.5
5 kΩ
3.25
10 kΩ
3 2.75
2.5 2.25
数字万用表
功能1 ..............................................................DC 电压、 AC 电压、 DC 电流、 AC 电流、 电阻、二极管和连续性
隔离电平........................................................60 VDC/20 Vrms, Measurement Category I
通用计数器 / 定时器
计数器 / 定时器数量..................................... 1 分辨率........................................................... 32 位 内部时基时钟 ............................................... 100 MHz 时基精度 ....................................................... 100 ppm
2 | | NI myDAQ 产品规范
共模抑制比 (DC ~ 60 Hz)........................70 dB 输入阻抗
设备开启 AI+ 或 AI- 至 AGND.....................>10 GΩ || 100 pF AI+ 至 AI- ......................................>10 GΩ || 100 pF
量程 模拟输入 ................................................±10 V, ±2 V, DC 耦合 音频输入 ................................................±2 V, AC 耦合
通带 (-3 dB) 模拟输入 ................................................DC ~ 400 kHz 音频输入 ................................................1.5 Hz ~ 400 kHz
连接器类型 模拟输入 ................................................ 螺栓端子 音频输入 ................................................3.5 mm 立体声插头
输入类型 (音频输入)................................. 数据线或麦克风 麦克风激励 (音频输入).............................5.25 V (经由 10 kΩ)
模拟输出 ................................................±10 V, ±2 V, DC 耦合 音频输出 ................................................±2 V, AC 耦合 最大输出电流 (模拟输出)1.................................................2 mA 输出阻抗 模拟输出 ................................................1 Ω 音频输出 ................................................120 Ω 最小负载阻抗 (音频输出)..................................................8 Ω 连接器类型 模拟输出 ................................................ 螺栓端子 音频输出 ................................................3.5 mm 立体声插头 AC 耦合高通频率 (带 32 Ω 负载的音频输出).........................48 Hz